-
使用jmeter压测nginx支持的最大长连接数
1.准备工作
本次nginx服务器均使用阿里云ecs c6规格族服务器

1.1 服务器准备
- nginx服务器*1 (使用阿里云ecs,根据需求升级)
- 长连接后端服务*1(根据需要增加数量)
- 压测服务器*1(根据需要增加数量)
1.2 长连接后端服务器
使用支持长连接的服务,支持长连接即可,本次选用.net服务,用于长连接测试,服务可以自己写一个demo,支持建立长连接就好
1.3 nginx服务的搭建和配置以及参数配置
1.3.1 nginx服务的搭建
# 下载依赖 yum -y install gcc pcre-devel zlib-devel openssl openssl-devel # 创建相关目录src为下载nginx安装包目录,soft为nginx安装目录 mkdir -p /data/{src,soft} # 进入下载目录 cd /data/src/ # 下载nginx安装包 wget http://nginx.org/download/nginx-1.21.0.tar.gz # 解压 tar fx nginx-1.21.0.tar.gz # 配置nginx编译环境 ./configure --prefix=/data/soft/nginx --with-http_stub_status_module # 编译安装 make && make install- 1
- 2
- 3
- 4
- 5
- 6
- 7
- 8
- 9
- 10
- 11
- 12
- 13
- 14
- 15
1.3.2 nginx的配置文件
vim /data/soft/nginx/conf/nginx.conf- 1
user root; # 根据cpu核数进行修改该参数,如2核参数写2,8核参数写8 worker_processes 8; # 同时连接的数量受限于系统上可用的文件描述符的数量,与ulimit -n的参数一致 worker_rlimit_nofile 655350; # 根据cpu核数编写,2核 01 10,四核,0001 0010 0100 1000,八核如下 worker_cpu_affinity 00000001 00000010 00000100 00001000 00010000 00100000 01000000 10000000; events { # 使用epoll模型 use epoll; # 尽可能多的接受连接 multi_accept on; # 单个worker进程最大打开的连接数 worker_connections 150000; } http { include mime.types; default_type application/octet-stream; sendfile on; keepalive_timeout 65; server { listen 80; server_name localhost; location / { root html; index index.html index.htm; } error_page 500 502 503 504 /50x.html; location = /50x.html { root html; } } map $http_upgrade $connection_upgrade { default upgrade; '' close; } upstream backend { server 172.16.0.226:7000 weight=1 max_fails=2 fail_timeout=30s; server 172.16.0.226:7001 weight=1 max_fails=2 fail_timeout=30s; server 172.16.0.72:7000 weight=1 max_fails=2 fail_timeout=30s; server 172.16.0.72:7001 weight=1 max_fails=2 fail_timeout=30s; server 172.16.0.72:7002 weight=1 max_fails=2 fail_timeout=30s; server 172.16.0.72:7003 weight=1 max_fails=2 fail_timeout=30s; server 172.16.0.72:7004 weight=1 max_fails=2 fail_timeout=30s; server 172.16.0.72:7005 weight=1 max_fails=2 fail_timeout=30s; server 172.16.0.73:7000 weight=1 max_fails=2 fail_timeout=30s; server 172.16.0.73:7001 weight=1 max_fails=2 fail_timeout=30s; server 172.16.0.73:7002 weight=1 max_fails=2 fail_timeout=30s; server 172.16.0.73:7003 weight=1 max_fails=2 fail_timeout=30s; server 172.16.0.73:7004 weight=1 max_fails=2 fail_timeout=30s; server 172.16.0.73:7005 weight=1 max_fails=2 fail_timeout=30s; keepalive 3000; } server { listen 8088; location / { proxy_pass http://backend; proxy_http_version 1.1; proxy_redirect off; proxy_set_header Host $host; proxy_set_header X-Real-IP $remote_addr; proxy_read_timeout 3600s; proxy_set_header X-Forwarded-For $proxy_add_x_forwarded_for; proxy_set_header Upgrade $http_upgrade; proxy_set_header Connection $connection_upgrade; } } }- 1
- 2
- 3
- 4
- 5
- 6
- 7
- 8
- 9
- 10
- 11
- 12
- 13
- 14
- 15
- 16
- 17
- 18
- 19
- 20
- 21
- 22
- 23
- 24
- 25
- 26
- 27
- 28
- 29
- 30
- 31
- 32
- 33
- 34
- 35
- 36
- 37
- 38
- 39
- 40
- 41
- 42
- 43
- 44
- 45
- 46
- 47
- 48
- 49
- 50
- 51
- 52
- 53
- 54
- 55
- 56
- 57
- 58
- 59
- 60
- 61
- 62
- 63
- 64
- 65
- 66
- 67
- 68
- 69
- 70
- 71
1.3.3 nginx服务器的参数修改
# 修改可打开文件数 vim /etc/security/limits.conf- 1
- 2
修改前
root soft nofile 65535 root hard nofile 65535 * soft nofile 65535 * hard nofile 65535- 1
- 2
- 3
- 4
修改后
root soft nofile 655350 root hard nofile 655350 * soft nofile 655350 * hard nofile 655350- 1
- 2
- 3
- 4
centos7修改可打开文件数
# 修改系统可打开文件数 vim /etc/systemd/system.conf- 1
- 2
修改后
# 修改参数 DefaultLimitNOFILE=10240000 DefaultLimitNPROC=10240000- 1
- 2
- 3
重启生效 reboot
内核参数修改
vim /etc/sysctl.conf- 1
表示可排队数量,本次压测只测长连接,所以长连接数满了后,排队也没用
net.core.somaxconn = 262144
net.core.netdev_max_backlog = 2621441.4 jmeter的配置和执行
1.4.1 jmeter安装
访问:http://jmeter.apache.org/
点击download release

解压即可使用,需要jdk,这里不表了1.4.2 在本机安装websocket插件并配置jmx脚本
- 先下载插件管理插件,链接:https://jmeter-plugins.org/install/Install/ ,下载后放置在jmeter的lib/ext目录下
- 重启后,即可看到插件管理的菜单。
- 打开jmeter->Options->Plugins Manager 然后搜索 WebSocket Samplers by Peter Doornbosch
WebSocket Sampler by Maciej Zaleski

- 安装后,就可以发送websocket请求了,先添加线程组,并改名为nginx

- 添加查看结果树

- 创建websocket open connection 创建长连接模板

- 修改请求方式,ip地址,端口号,path路径,其他保持默认即可,本次只创建长连接,所以无需进行任何请求

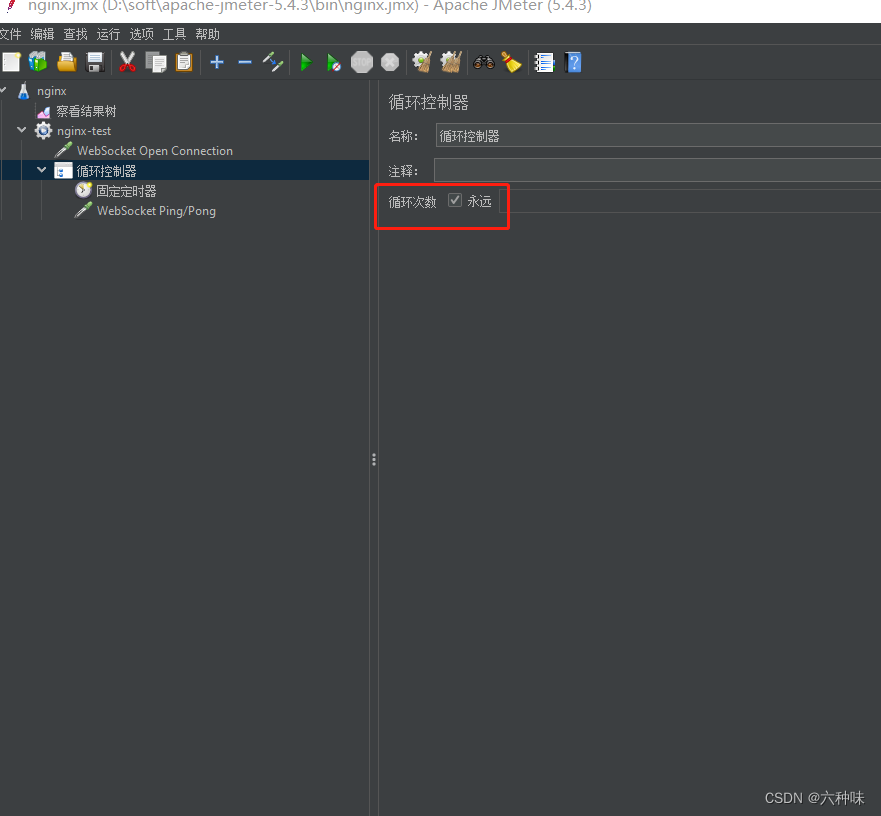
- 创建一个循环控制器,为了保持长连接,循环访问心跳接口,为了保持连接,循环次数设置为永远

- 添加一个固定定时器,就是为了确定多久循环一次

本次保持10000ms 也就是10s循环请求一次

- 再循环控制器中创建websocket ping/Pong 心跳接口请求,默认即可,这样可以保证长连接持续连接,方便我们后续添加连接数,也方便计算

- 生成jmx文件
点击保存,默认存在jmeter文件的bin目录中,本次存的名字是nginx.jmx


1.4.3 将已经装好插件和生成jmx脚本的jmeter包打包放入linux系统
直接仍到linux系统中就好
1.4.4 jmeter启动参数的优化
因为jmeter启动过程中 默认使用启动参数是-Xms1g -Xmx1g
因为我们使用的是4核8G的压测服务器,所以修改linux系统中jmeter启动参数为4Gvim bin/jmeter +166- 1
-
修改前
-
“${HEAP:=”-Xms1g -Xmx1g -XX:MaxMetaspaceSize=256m"}"
修改后 - “${HEAP:=”-Xms4g -Xmx4g -XX:MaxMetaspaceSize=256m"}"
这样我们的准备工作就完成了
2. 压测
2.1 执行jmeter压测命令
cd apache-jmeter-5.4.3/bin/ # -n 命令行执行 -t 指定执行脚本 ./jmeter -n -t nginx.jmx- 1
- 2
- 3
2.2 查看nginx服务器中连接数的命令
# 查看nginx服务器中连接8088端口的连接数 netstat-n | grep 8088 | wc- l- 1
- 2
2.3 压测的规格和结果展示

到最后也没压出来nginx具体可以建立多少个长连接,和服务器规格有关吧,哈哈,一次测试,看看对你有啥帮助没,看看你们领导有这个需求不!!!
-
相关阅读:
云贝教育 |【PostgreSQL】Vacuum详解:深入理解与实践
1.2、因特网概述
力扣刷题日记——哈希
软件设计师软考题目解析12 --每日五题
[hive] 窗口函数 ROW_NUMBER()
(C语言)printf打印的字符串太长了,我想分两行!
用Java实现贪吃蛇小游戏
智能座舱架构与芯片- (10) 音频篇 下
初识Cpp之 六、内存分配
FFmpeg入门详解之55:把控FFmpeg骨架:“八大金刚”核心开发库
- 原文地址:https://blog.csdn.net/weixin_47402482/article/details/127606317
