-
SpringBoot入门
一、Spring Boot简介
springboot是什么
Spring Boot它本身并不提供Spring框架的核心特性以及扩展功能,只是用于快速、敏捷地开发新一代基于Spring框架的应用程序。
也就是说,它并不是用来替代Spring的解决方案,而是和Spring框架紧密结合用于提升Spring开发者体验的工具同时它集成了大量常用的第三方库配置(例如Jackson, JDBC, Mongo, Redis, Mail等等),
Spring Boot应用中这些第三方库几乎可以零配置的开箱即用(out-of-the-box),大部分的Spring Boot应用都
只需要非常少量的配置代码,开发者能够更加专注于业务逻辑注1:敏捷式开发
注2:spring boot其实不是什么新的框架,它默认配置了很多框架的使用方式,
就像maven整合了所有的jar包,spring boot整合了所有的框架注3:基于Spring框架的一站式解决方案
二、入门
创建项目
首先打开ider,选择创建项目,选中SpringBoot
换源地址http://start.aliyun.com
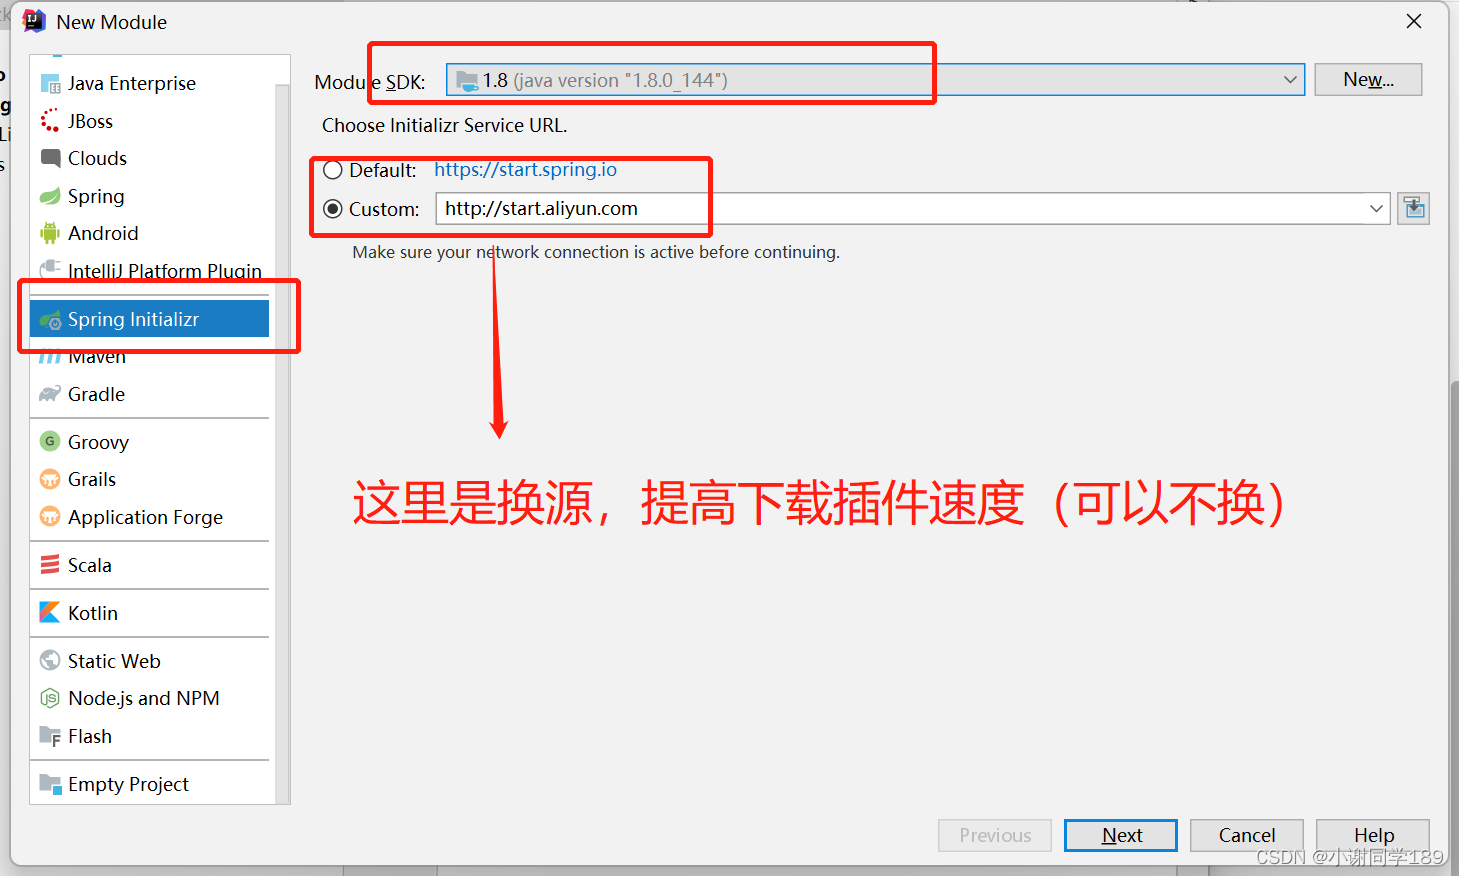
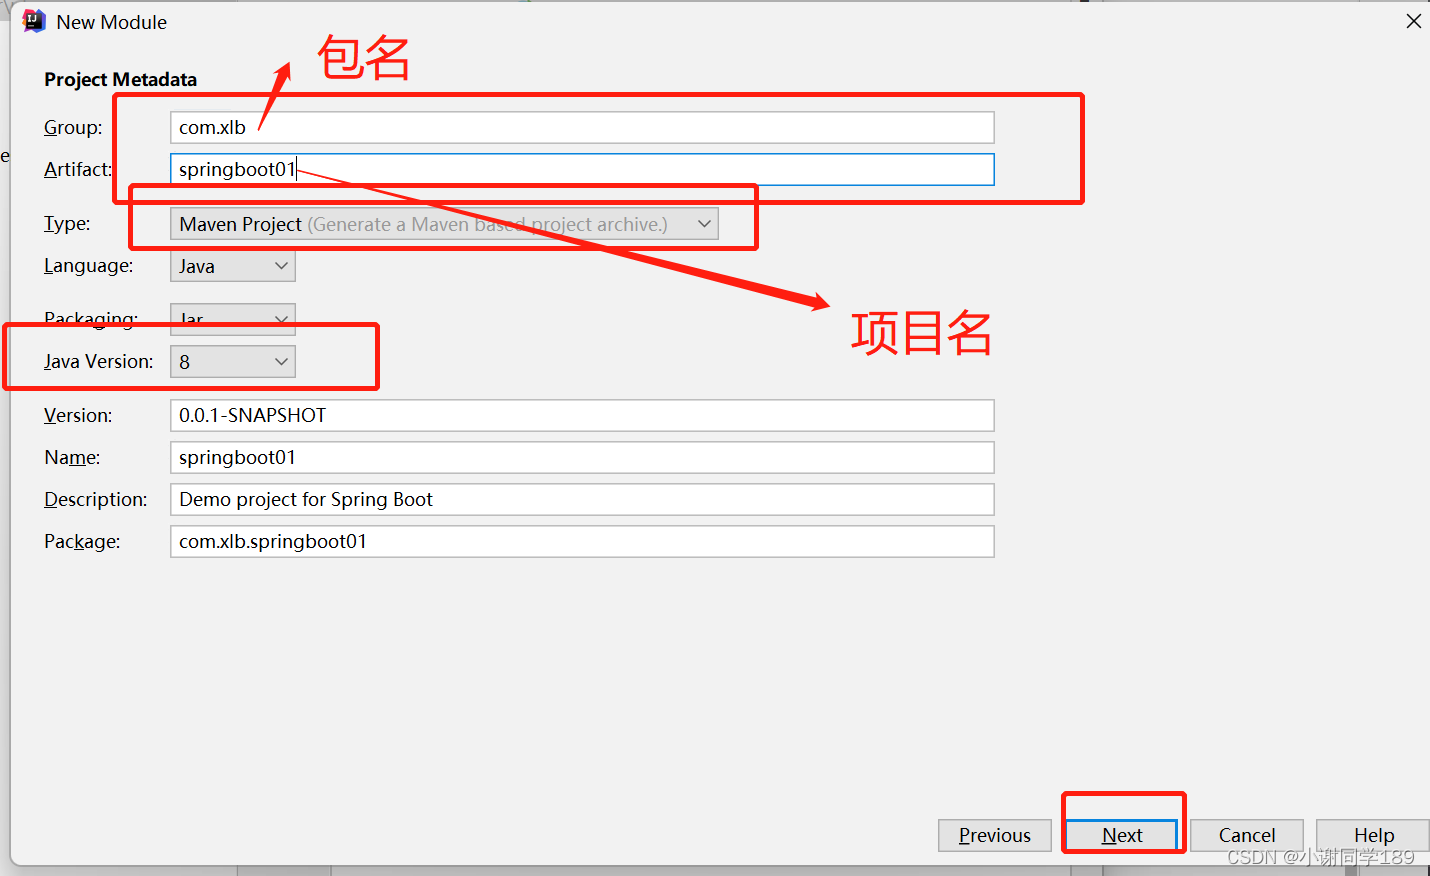
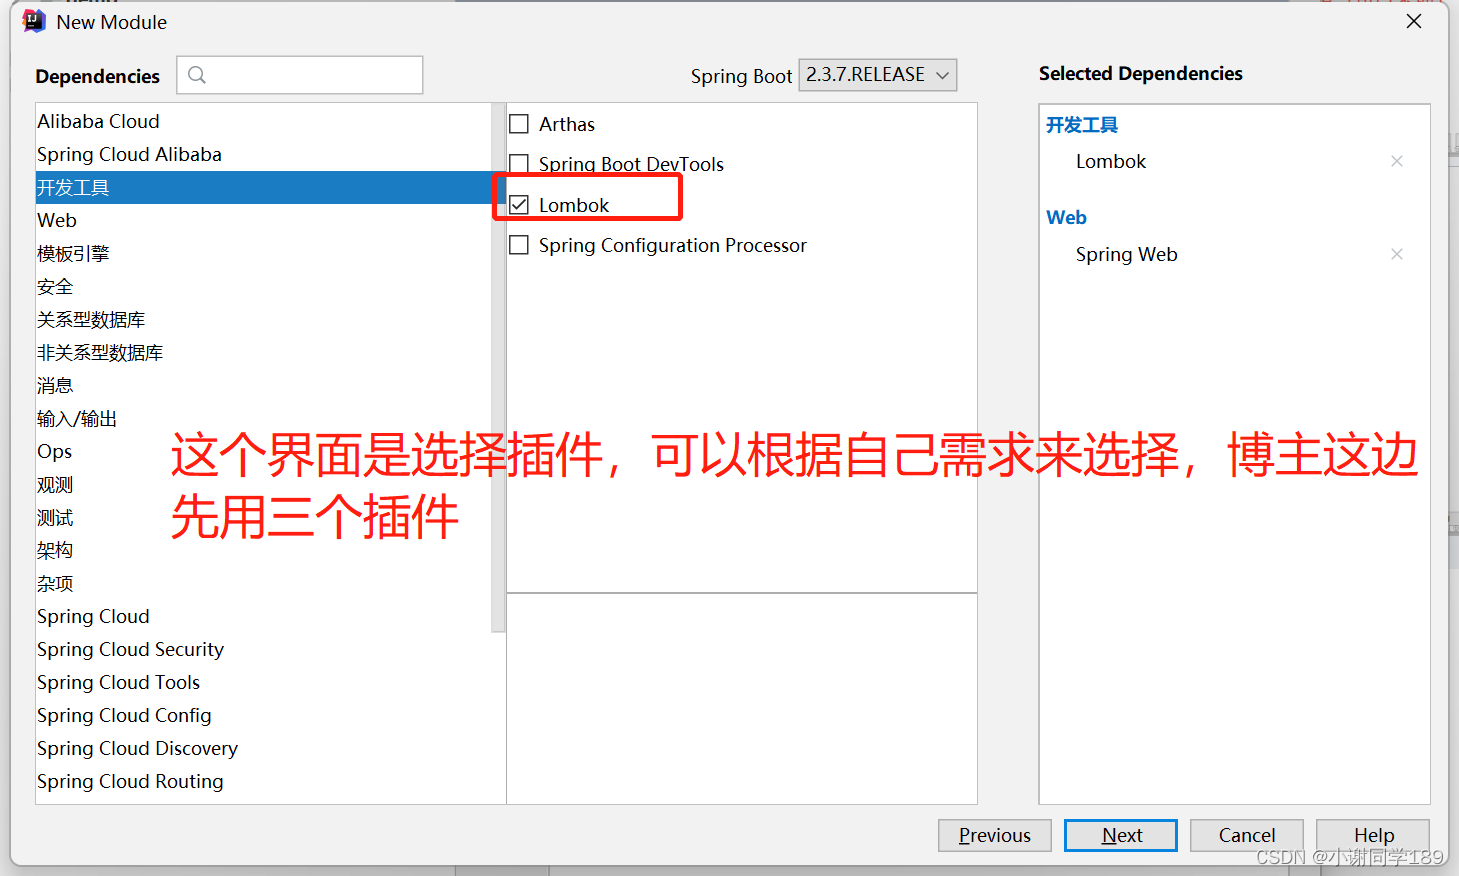
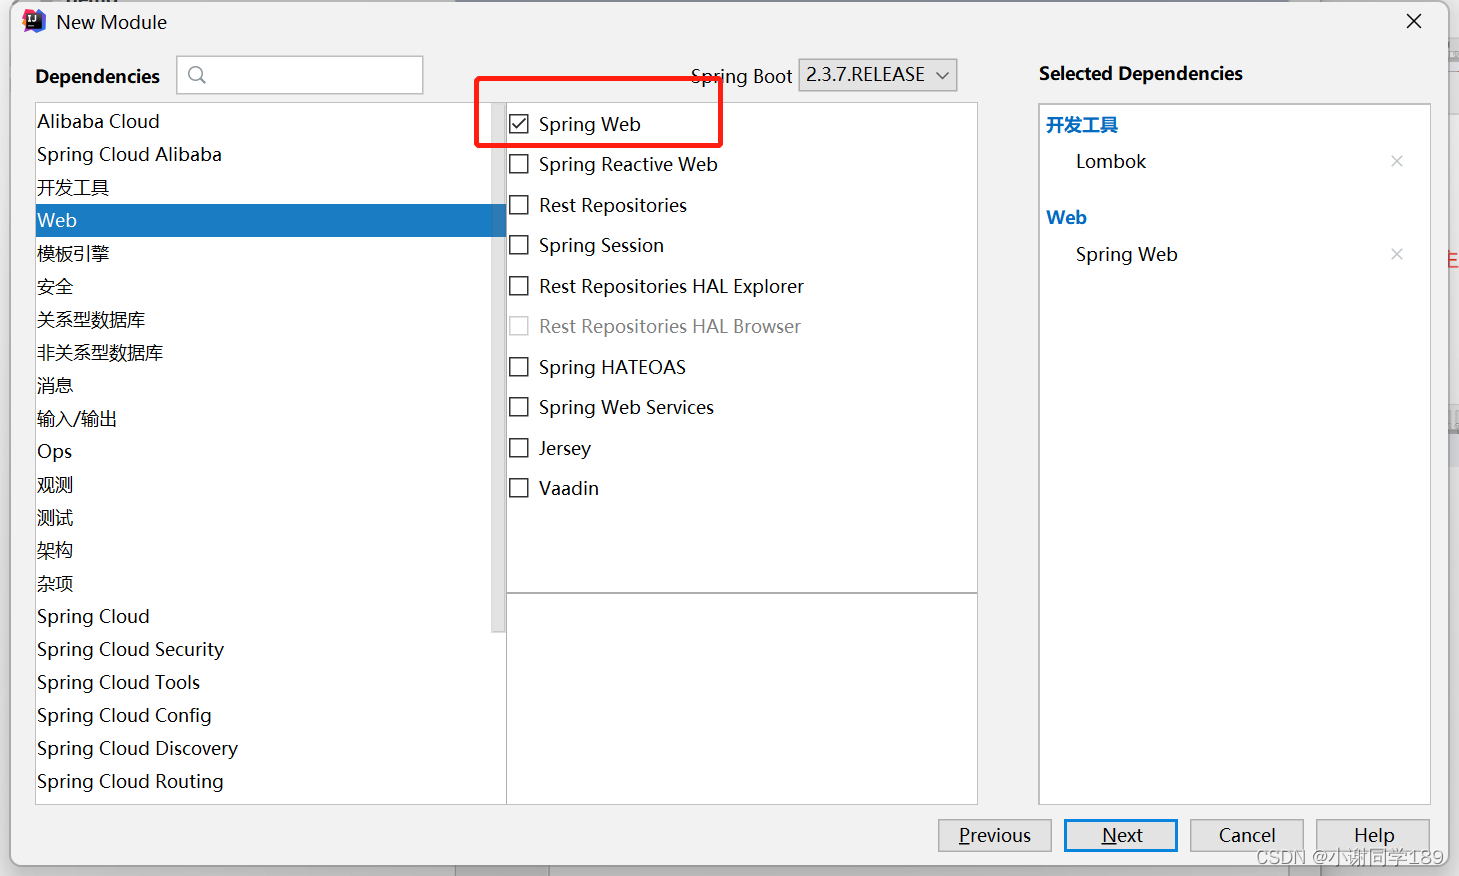
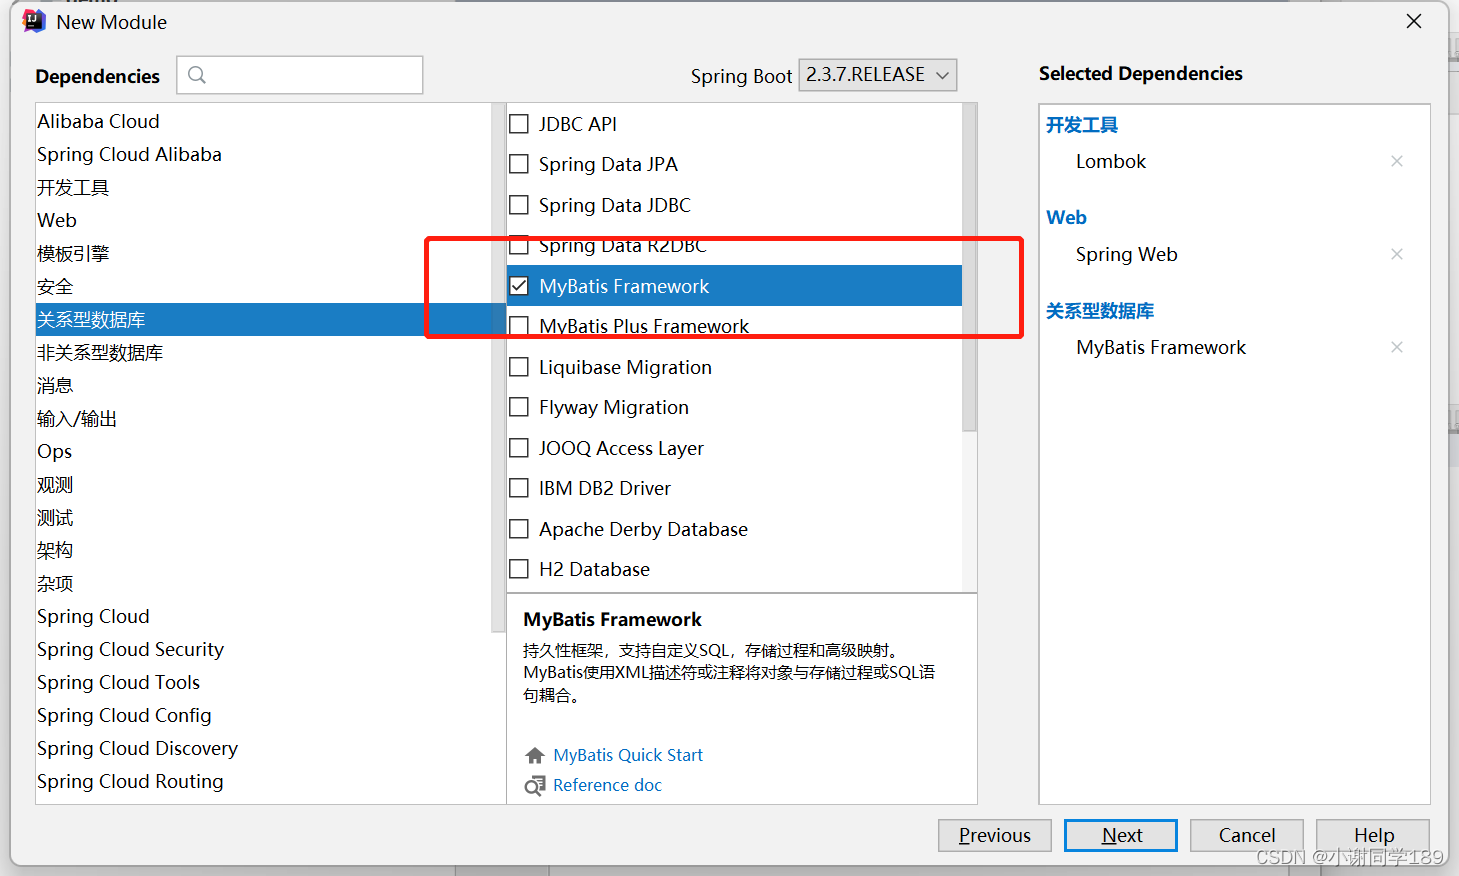
注意:插件之间可能存在配置关系,比如第三个Mybatis Framework,这个插件就是需要自己配置数据库,如果不配置,那么启动项目是会报错的
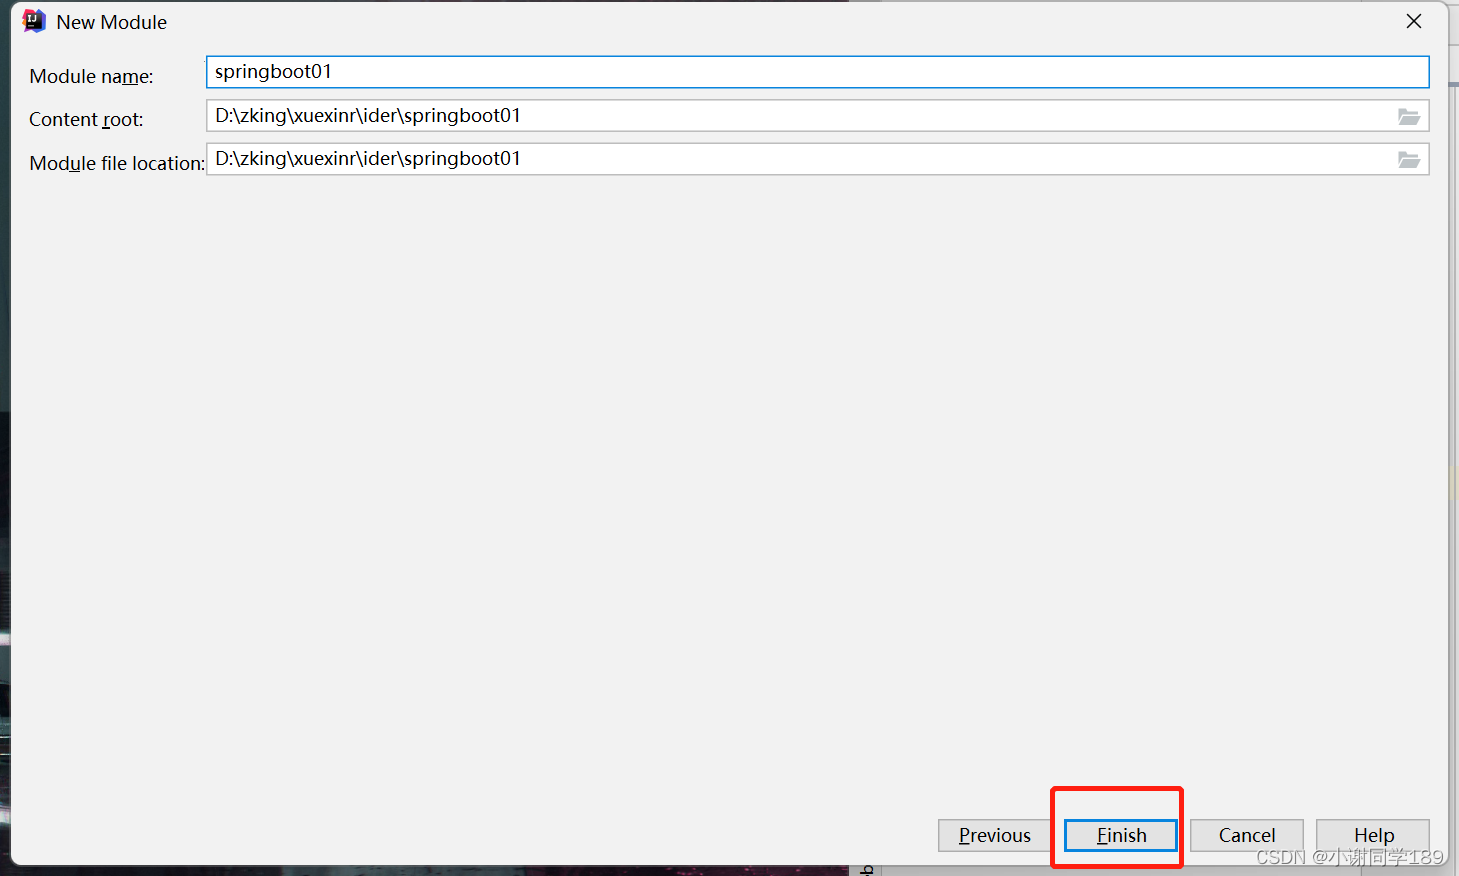
创建测试类测试

package com.xlb.springboot01.web; import org.springframework.web.bind.annotation.RequestMapping; import org.springframework.web.bind.annotation.RestController; // 等价于@responseBody + @controller @RestController public class IndexController { @RequestMapping("/") public String index() { System.out.println("come in"); //返回是index字符串 return "index"; } }- 1
- 2
- 3
- 4
- 5
- 6
- 7
- 8
- 9
- 10
- 11
- 12
- 13
- 14
- 15
- 16
- 17
进入到Springboot01Application运行项目

可以发现启动项目报错,因为我们前面勾选的Mybatis Framework的插件需要单独的配置

解决错误
解决方案①
添加数据库配置(博主先一篇博客有提到)
解决方案②
不添加数据库配置,加入注解直接让其排除自动配置类
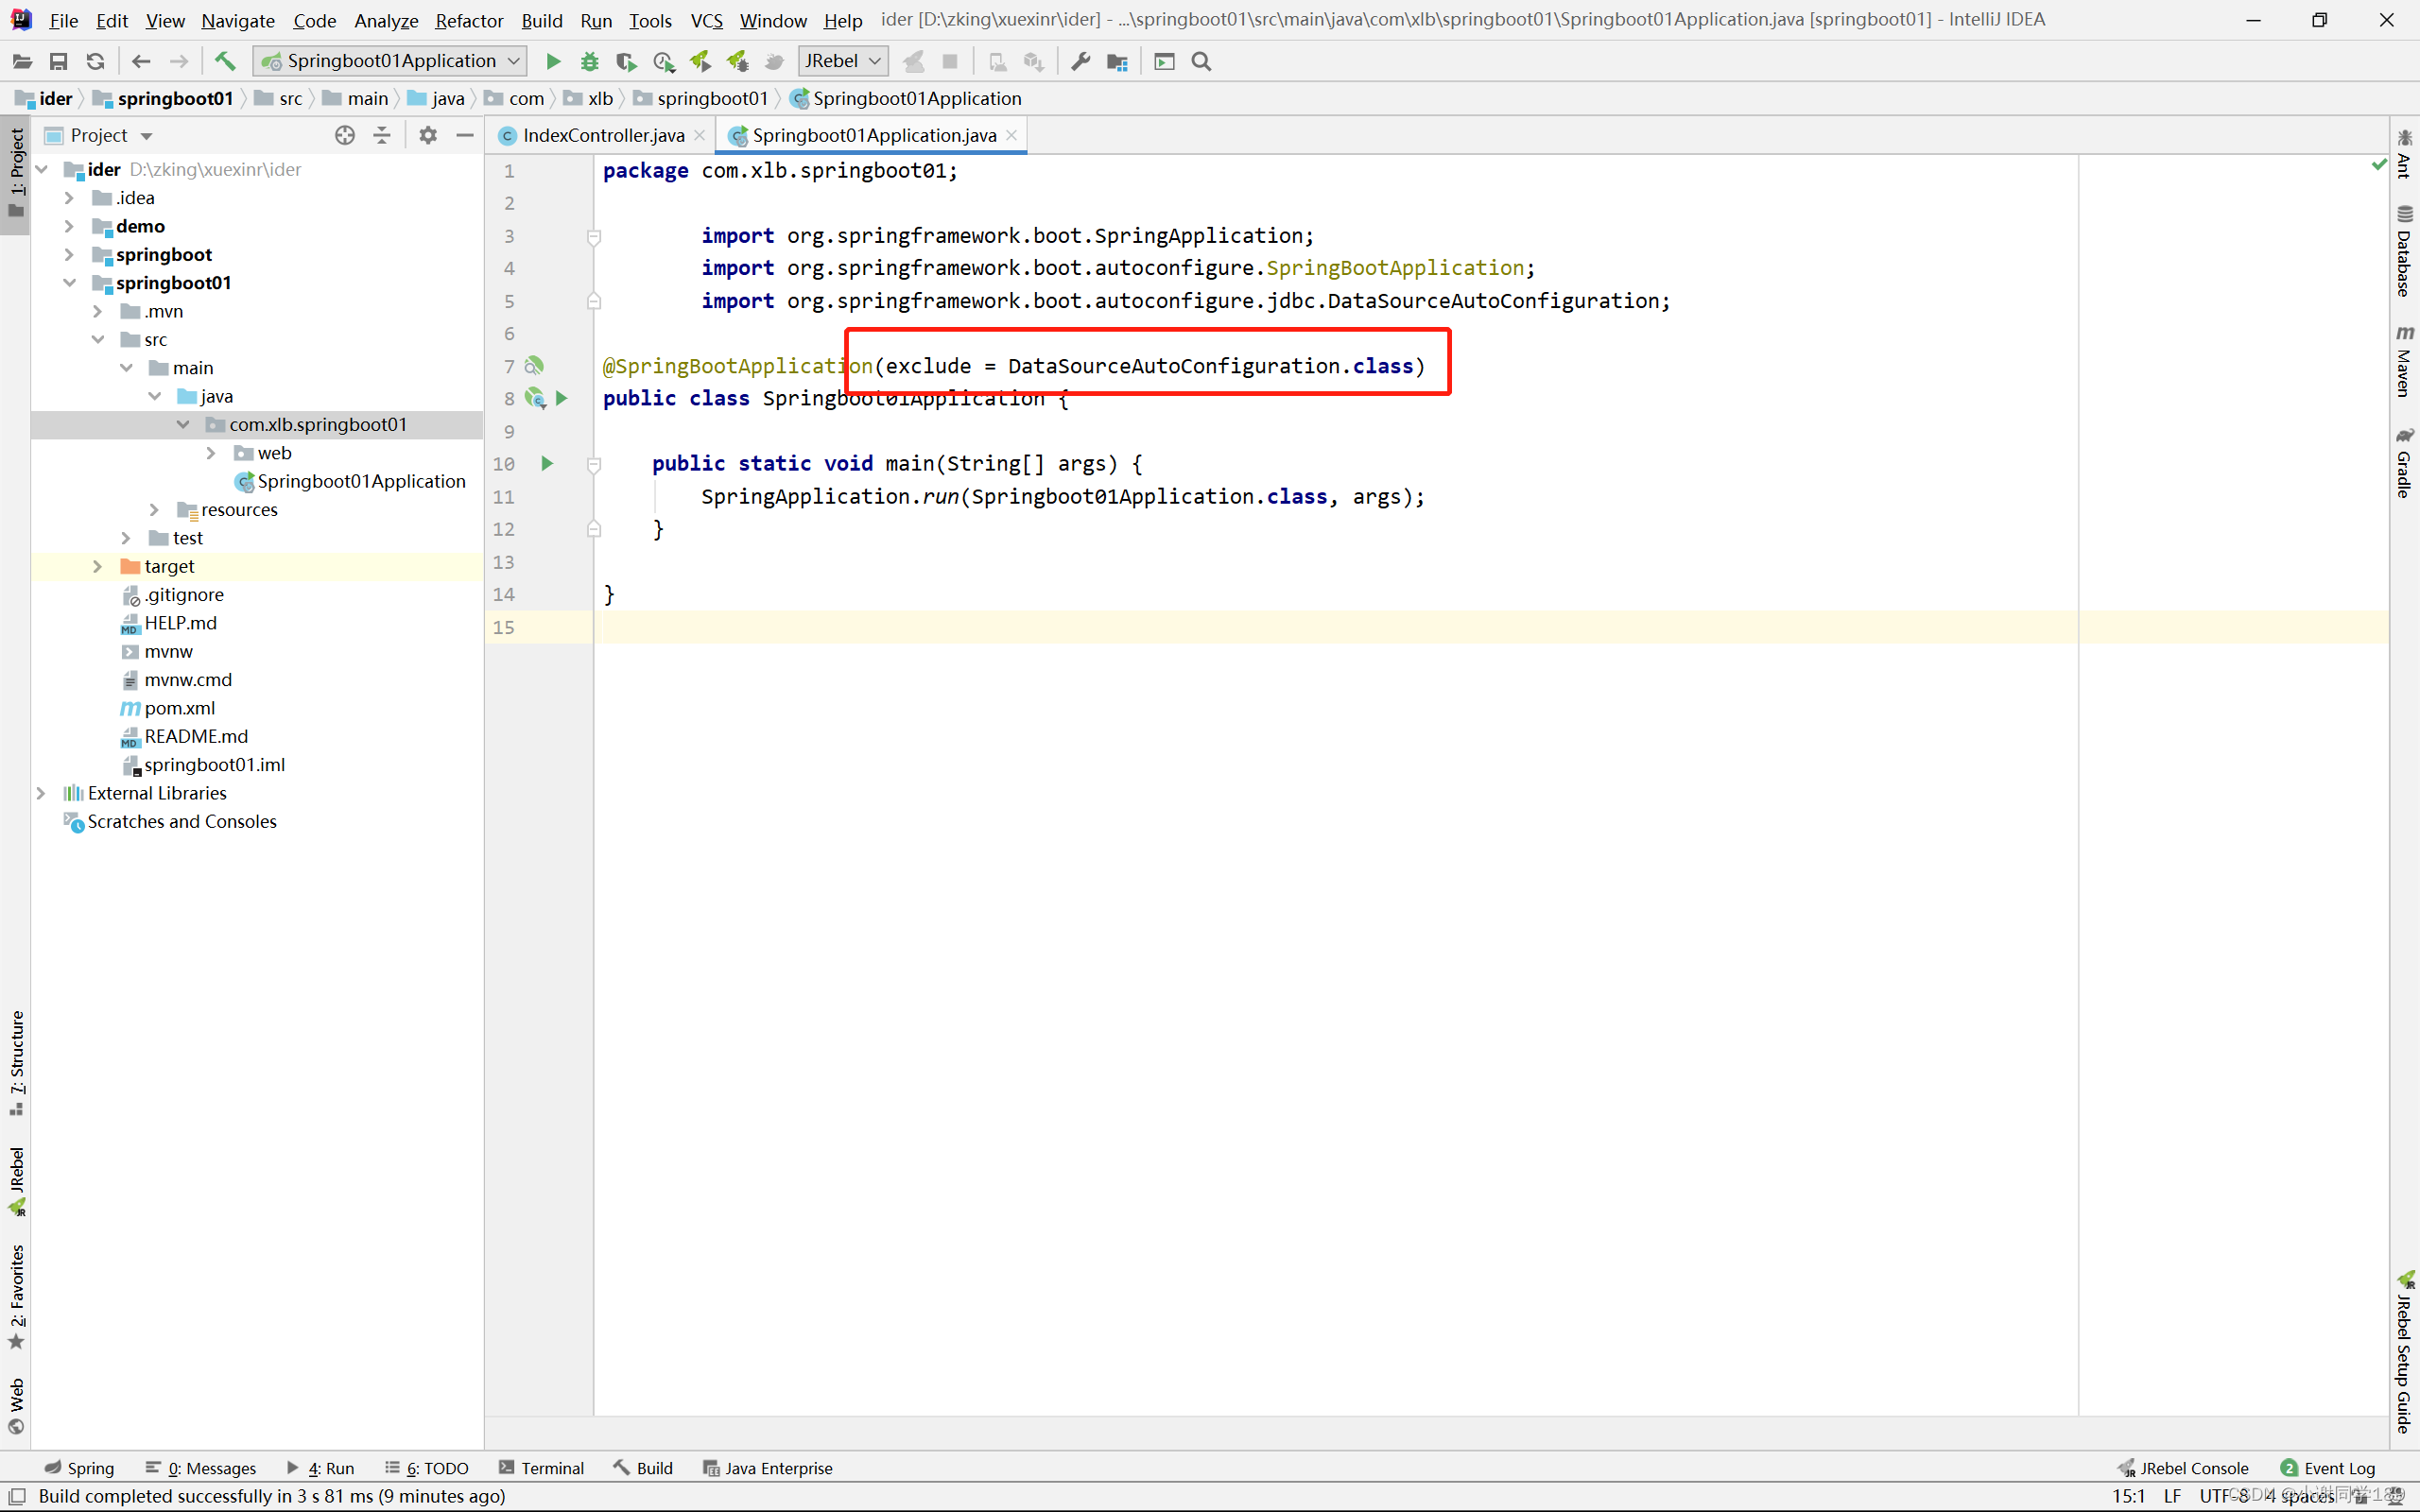
@SpringBootApplication(exclude = DataSourceAutoConfiguration.class)- 1
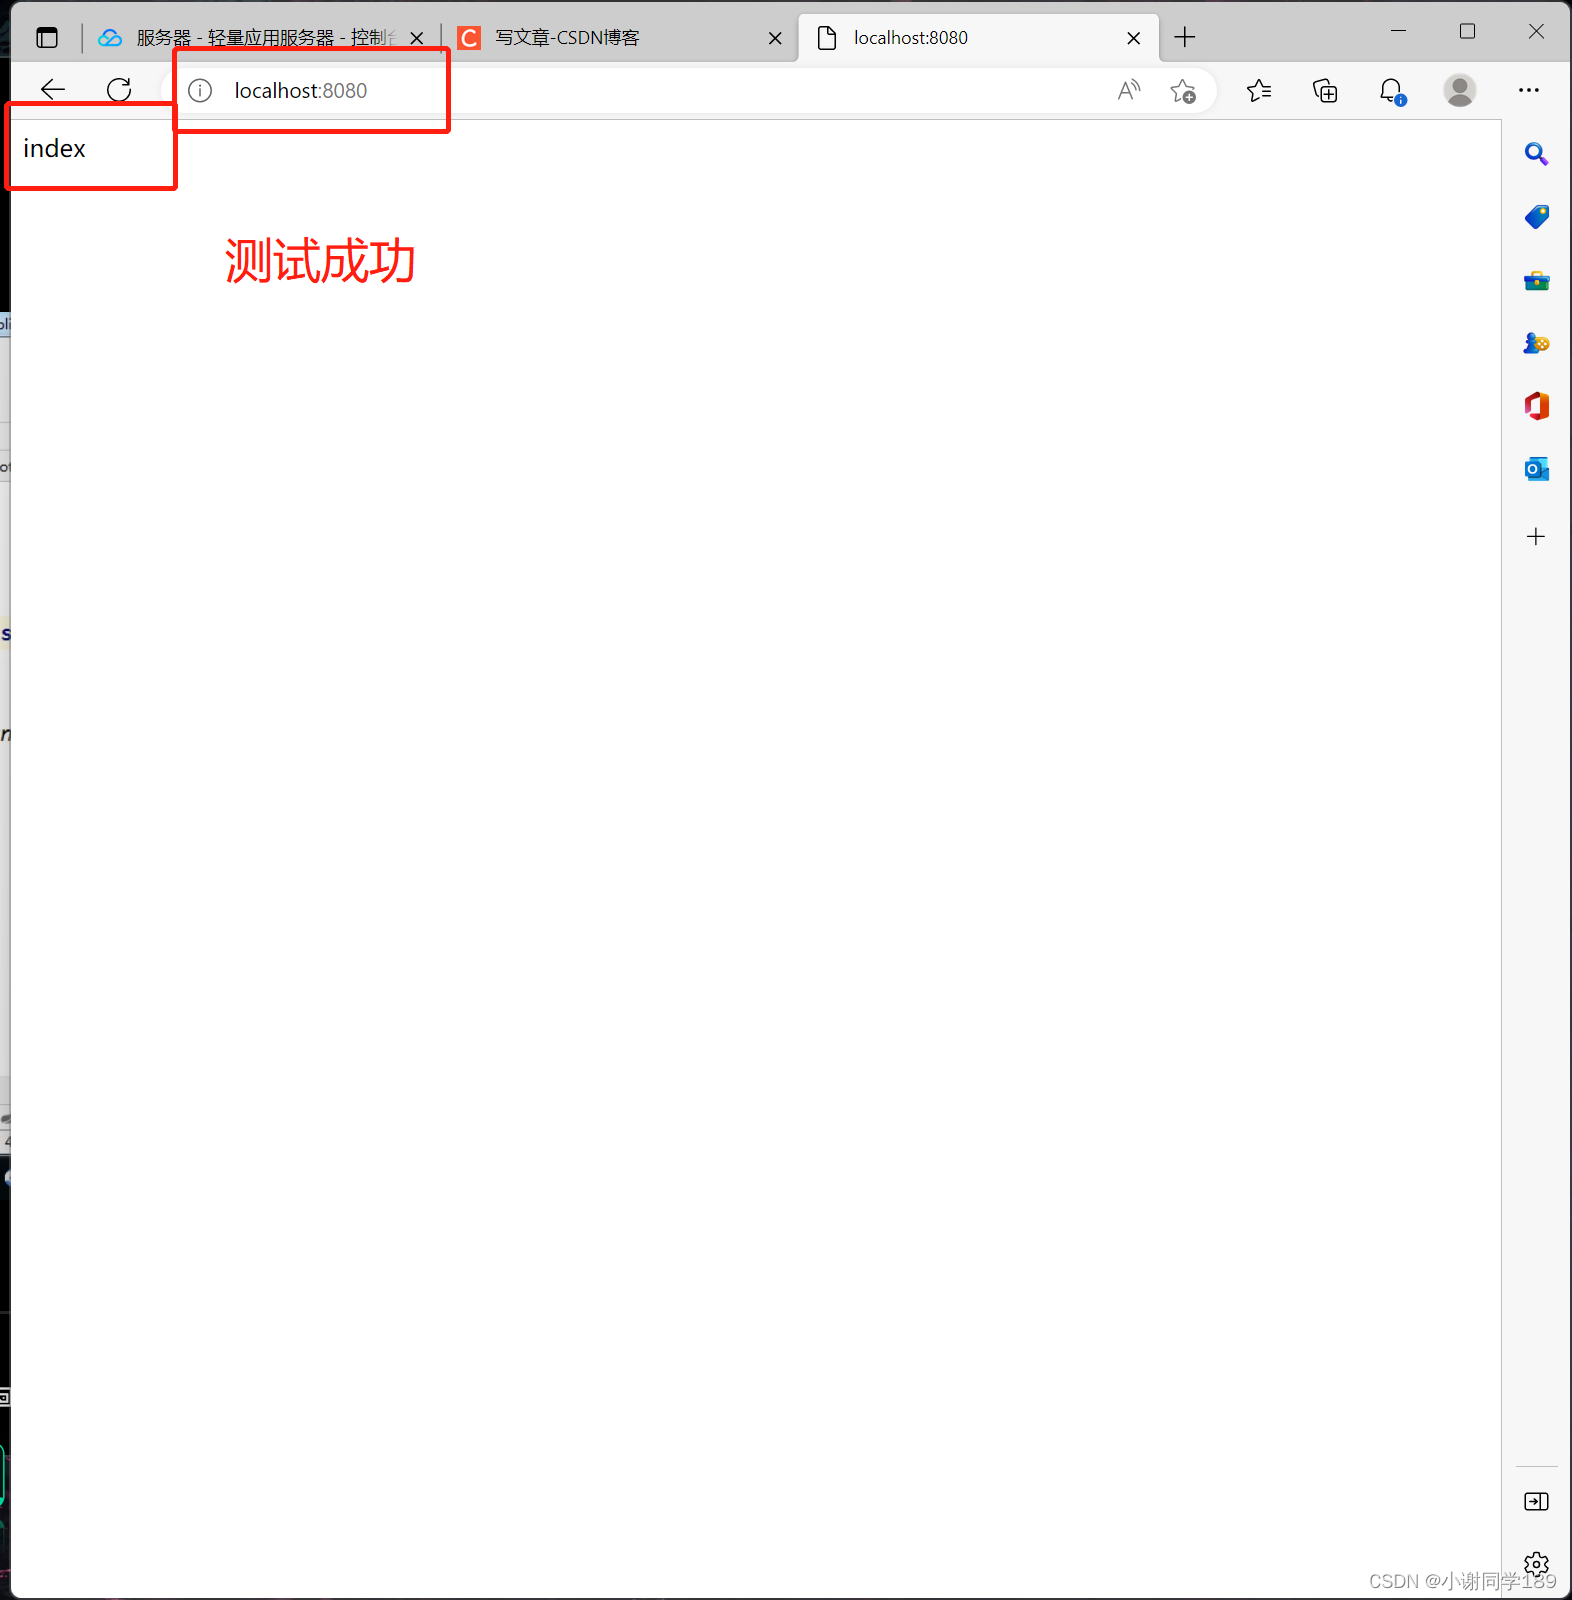
再次运行

三、SpringBoot目录结构
src>main>java>resource>
static:用来放静态资源
template
1,模板引擎,相当于maven项目中的webapp
2.springboot默认不支持jsp的
application.propertis:SpringBoot中唯二的配置文件
text:用来放测试类
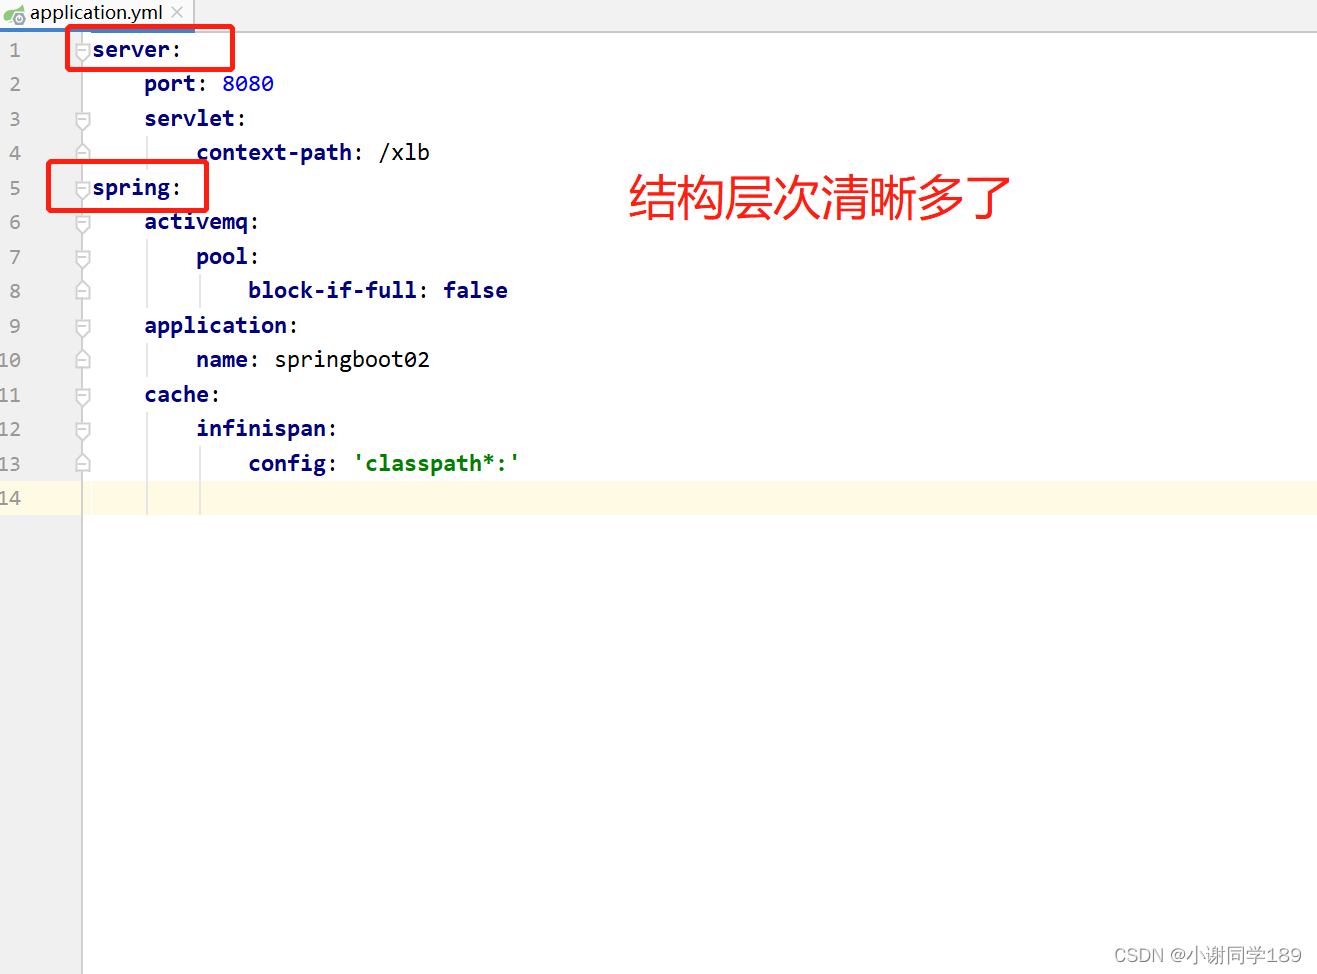
Convert YAML and Propetties File插件使用
现在插件
在Plugins中搜索properties
下载完插件后重启


四、相应封装类配置
Book.class
package com.xlb.springboot.demo; import lombok.AllArgsConstructor; import lombok.Data; /** * @author javaxlb * @site www.xlb.com * @create 2022-10-30 11:09 */ @AllArgsConstructor @Data public class Book { private int id; private String name; }- 1
- 2
- 3
- 4
- 5
- 6
- 7
- 8
- 9
- 10
- 11
- 12
- 13
- 14
- 15
- 16
- 17
- 18
原始的增删改查
BookController
package com.xlb.springboot.demo; import org.springframework.web.bind.annotation.RequestMapping; import org.springframework.web.bind.annotation.RestController; import java.util.Arrays; import java.util.HashMap; import java.util.List; import java.util.Map; /** * @author javaxlb * @site www.xlb.com * @create 2022-10-30 10:58 */ @RestController @RequestMapping("/book") public class BookController { @RequestMapping("/list") public Map list(){ //查询数据库(造的假数据) List<Book> books = Arrays.asList(new com.xlb.springboot.demo.Book(1, "西游记"), new com.xlb.springboot.demo.Book(2, "三国演义"), new com.xlb.springboot.demo.Book(3, "红楼梦")); Map map = new HashMap(); map.put("date",books); map.put("total",1222); map.put("msg","查询成功"); map.put("code",200); return map; } @RequestMapping("/add") public Map add(){ //查询数据库(造的假数据) Map map = new HashMap(); map.put("msg","增加成功"); map.put("code",200); return map; } @RequestMapping("/edit") public Map edit(){ //查询数据库(造的假数据) Map map = new HashMap(); map.put("msg","修改成功"); map.put("code",200); return map; } @RequestMapping("/del") public Map del(){ //查询数据库(造的假数据) Map map = new HashMap(); map.put("msg","删除成功"); map.put("code",200); return map; } /** * 查询单个 * @return */ @RequestMapping("/load") public Map load(){ //查询数据库(造的假数据) Map map = new HashMap(); map.put("date",new com.xlb.springboot.demo.Book(1,"西游记")); map.put("msg","查询成功成功"); map.put("code",200); return map; } }- 1
- 2
- 3
- 4
- 5
- 6
- 7
- 8
- 9
- 10
- 11
- 12
- 13
- 14
- 15
- 16
- 17
- 18
- 19
- 20
- 21
- 22
- 23
- 24
- 25
- 26
- 27
- 28
- 29
- 30
- 31
- 32
- 33
- 34
- 35
- 36
- 37
- 38
- 39
- 40
- 41
- 42
- 43
- 44
- 45
- 46
- 47
- 48
- 49
- 50
- 51
- 52
- 53
- 54
- 55
- 56
- 57
- 58
- 59
- 60
- 61
- 62
- 63
- 64
- 65
- 66
- 67
- 68
- 69
- 70
- 71
- 72
- 73
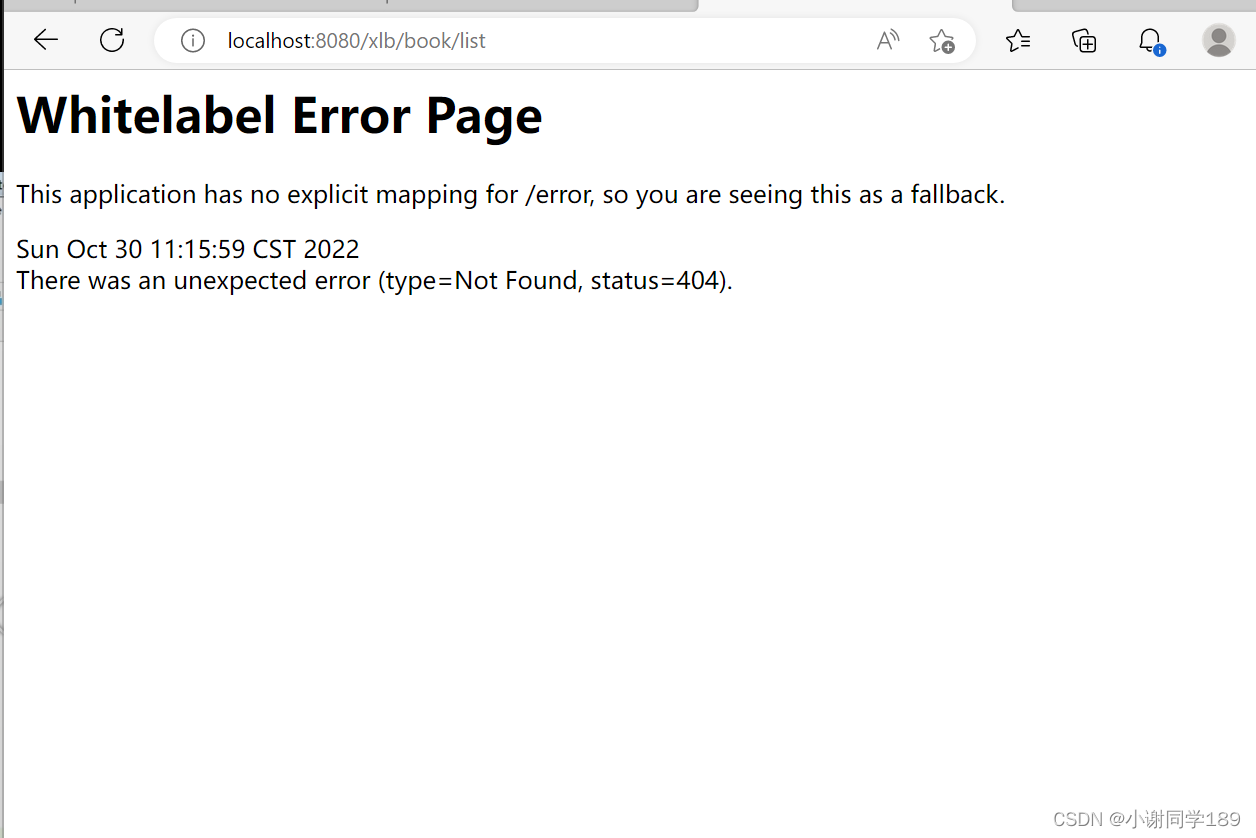
运行项目访问发现访问不了
测试工具
可以发现浏览器是测试不了的,但是我们可以通过测试工具来进行测试
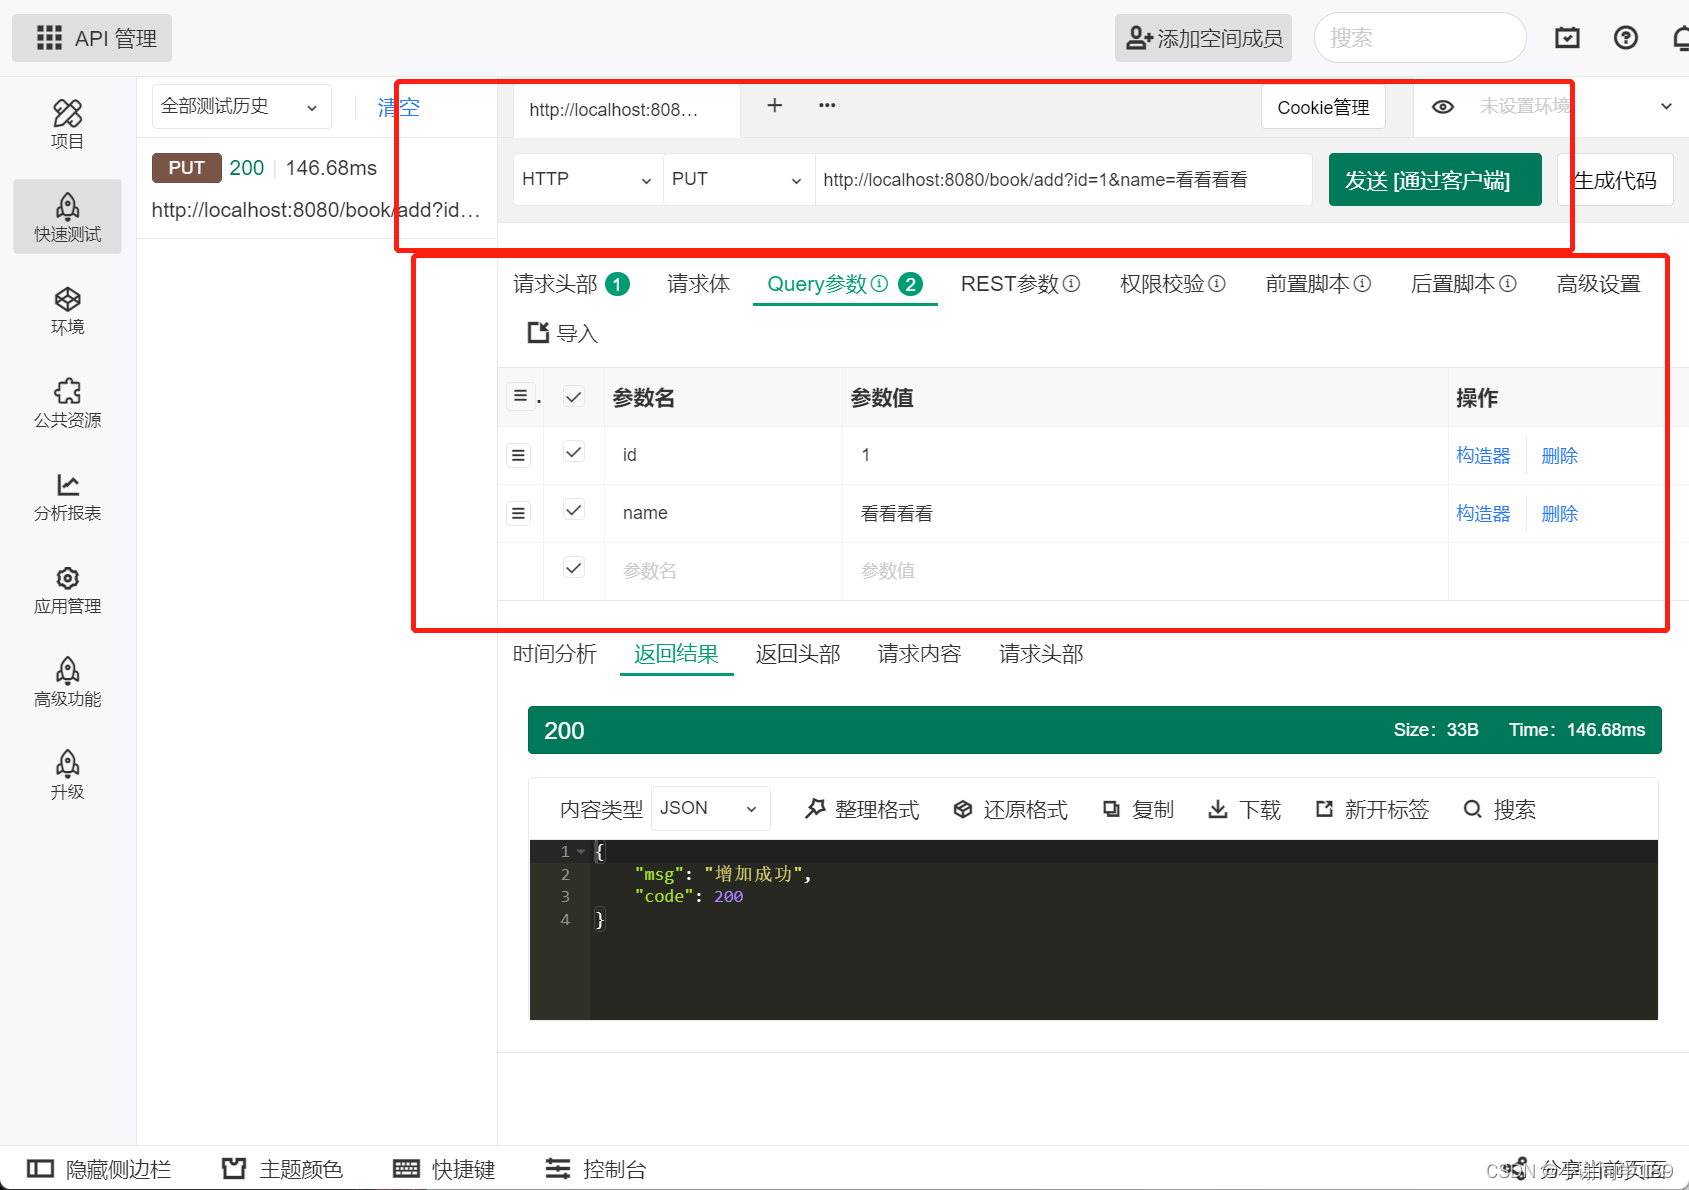
这里博主用的测试工具是Eolink,这个软件百度搜索官网可以下载,不过博主也会把安装包共享到资源中

测试工具传参
这里博主给增加方法添加一个参数,删除添加一个参数package com.xlb.springboot.demo; import org.springframework.web.bind.annotation.*; import java.util.Arrays; import java.util.HashMap; import java.util.List; import java.util.Map; /** * @author javaxlb * @site www.xlb.com * @create 2022-10-30 10:58 */ @RestController @RequestMapping("/book") public class BookController { @GetMapping("/list") public Map list(){ //查询数据库(造的假数据) List<Book> books = Arrays.asList(new com.xlb.springboot.demo.Book(1, "西游记"), new com.xlb.springboot.demo.Book(2, "三国演义"), new com.xlb.springboot.demo.Book(3, "红楼梦")); Map map = new HashMap(); map.put("date",books); map.put("total",1222); map.put("msg","查询成功"); map.put("code",200); return map; } @PutMapping("/add") public Map add(Book book){ System.out.println(book); //查询数据库(造的假数据) Map map = new HashMap(); map.put("msg","增加成功"); map.put("code",200); return map; } @PostMapping("/edit") public Map edit(){ //查询数据库(造的假数据) Map map = new HashMap(); map.put("msg","修改成功"); map.put("code",200); return map; } @DeleteMapping("/del") public Map del(int bid){ System.out.println(bid); //查询数据库(造的假数据) Map map = new HashMap(); map.put("msg","删除成功"); map.put("code",200); return map; } /** * 查询单个 * @return */ @GetMapping("/load") public Map load(){ //查询数据库(造的假数据) Map map = new HashMap(); map.put("date",new com.xlb.springboot.demo.Book(1,"西游记")); map.put("msg","查询成功成功"); map.put("code",200); return map; } }- 1
- 2
- 3
- 4
- 5
- 6
- 7
- 8
- 9
- 10
- 11
- 12
- 13
- 14
- 15
- 16
- 17
- 18
- 19
- 20
- 21
- 22
- 23
- 24
- 25
- 26
- 27
- 28
- 29
- 30
- 31
- 32
- 33
- 34
- 35
- 36
- 37
- 38
- 39
- 40
- 41
- 42
- 43
- 44
- 45
- 46
- 47
- 48
- 49
- 50
- 51
- 52
- 53
- 54
- 55
- 56
- 57
- 58
- 59
- 60
- 61
- 62
- 63
- 64
- 65
- 66
- 67
- 68
- 69
- 70
- 71
- 72
- 73
- 74
- 75
利用工具类测试
测试增加

测试删除


可以看到都可以获取到
响应封装类
Result.java
package com.zking.testspringboot02.result; public class Result<T> { private int code; private String msg; //因为返回的数据不知道是什么类型,所以定义一个泛型 private T data; private long total; //异常处理 private CodeMsg codemsg; public long getTotal() { return total; } public void setTotal(long total) { this.total = total; } /** * 成功的时候调用 */ public static <T> Result<T> ok(T data) { return new Result<T>(data); } public static <T> Result<T> ok(int code,String msg) { return new Result<>(code,msg); } public static <T> Result<T> ok(int code,String msg,T data) { Result<T> success = ok(data); success.setCode(code); success.setMsg(msg); return success; } public static <T> Result<T> ok(int code,String msg,T data,long total) { Result<T> success = ok(code,msg,data); success.setTotal(total); return success; } /** * 失败的时候调用 */ public static <T> Result<T> error(CodeMsg codeMsg) { return new Result<T>(codeMsg); } private Result(T data) { this.data = data; } private Result(int code, String msg) { this.code = code; this.msg = msg; } private Result(CodeMsg codeMsg) { if (codeMsg != null) { this.code = codeMsg.getCode(); this.msg = codeMsg.getMsg(); } } public int getCode() { return code; } public void setCode(int code) { this.code = code; } public String getMsg() { return msg; } public void setMsg(String msg) { this.msg = msg; } public T getData() { return data; } public void setData(T data) { this.data = data; } }- 1
- 2
- 3
- 4
- 5
- 6
- 7
- 8
- 9
- 10
- 11
- 12
- 13
- 14
- 15
- 16
- 17
- 18
- 19
- 20
- 21
- 22
- 23
- 24
- 25
- 26
- 27
- 28
- 29
- 30
- 31
- 32
- 33
- 34
- 35
- 36
- 37
- 38
- 39
- 40
- 41
- 42
- 43
- 44
- 45
- 46
- 47
- 48
- 49
- 50
- 51
- 52
- 53
- 54
- 55
- 56
- 57
- 58
- 59
- 60
- 61
- 62
- 63
- 64
- 65
- 66
- 67
- 68
- 69
- 70
- 71
- 72
- 73
- 74
- 75
- 76
- 77
- 78
- 79
- 80
- 81
- 82
- 83
- 84
- 85
- 86
- 87
CodeMsg.java
package com.zking.testspringboot02.result; public class CodeMsg { private int code; private String msg; //通用的错误码 public static CodeMsg SUCCESS = new CodeMsg(200, "success"); public static CodeMsg SERVER_ERROR = new CodeMsg(500, "服务端异常"); public static CodeMsg BIND_ERROR = new CodeMsg(500101, "参数校验异常:%s"); public static CodeMsg REQUEST_ILLEGAL = new CodeMsg(500102, "请求非法"); public static CodeMsg ACCESS_LIMIT_REACHED = new CodeMsg(500104, "访问太频繁!"); //登录模块5002XX public static CodeMsg SESSION_ERROR = new CodeMsg(500210, "Session不存在或者已经失效"); public static CodeMsg PASSWORD_EMPTY = new CodeMsg(500211, "登录密码不能为空"); public static CodeMsg MOBILE_EMPTY = new CodeMsg(500212, "手机号不能为空"); public static CodeMsg MOBILE_ERROR = new CodeMsg(500213, "手机号格式错误"); public static CodeMsg MOBILE_NOT_EXIST = new CodeMsg(500214, "手机号不存在"); public static CodeMsg PASSWORD_ERROR = new CodeMsg(500215, "密码错误"); //商品模块5003XX //订单模块5004XX public static CodeMsg ORDER_NOT_EXIST = new CodeMsg(500400, "订单不存在"); //秒杀模块5005XX public static CodeMsg MIAO_SHA_OVER = new CodeMsg(500500, "商品已经秒杀完毕"); public static CodeMsg REPEATE_MIAOSHA = new CodeMsg(500501, "不能重复秒杀"); public static CodeMsg MIAOSHA_FAIL = new CodeMsg(500502, "秒杀失败"); private CodeMsg() { } private CodeMsg(int code, String msg) { this.code = code; this.msg = msg; } public int getCode() { return code; } public void setCode(int code) { this.code = code; } public String getMsg() { return msg; } public void setMsg(String msg) { this.msg = msg; } public CodeMsg fillArgs(Object... args) { int code = this.code; String message = String.format(this.msg, args); return new CodeMsg(code, message); } @Override public String toString() { return "CodeMsg [code=" + code + ", msg=" + msg + "]"; } }- 1
- 2
- 3
- 4
- 5
- 6
- 7
- 8
- 9
- 10
- 11
- 12
- 13
- 14
- 15
- 16
- 17
- 18
- 19
- 20
- 21
- 22
- 23
- 24
- 25
- 26
- 27
- 28
- 29
- 30
- 31
- 32
- 33
- 34
- 35
- 36
- 37
- 38
- 39
- 40
- 41
- 42
- 43
- 44
- 45
- 46
- 47
- 48
- 49
- 50
- 51
- 52
- 53
- 54
- 55
- 56
- 57
- 58
- 59
- 60
- 61
- 62
- 63
- 64
- 65
- 66
使用响应封装类之后BookController
package com.xlb.springboot.demo; import com.xlb.springboot.Result.CodeMsg; import com.xlb.springboot.Result.Result; import org.springframework.web.bind.annotation.*; import java.util.Arrays; import java.util.List; /** * @author javaxlb * @site www.xlb.com * @create 2022-10-30 10:58 */ @RestController @RequestMapping("/book") public class BookController { @GetMapping("/list") public Result list(){ //查询数据库(造的假数据) List<Book> books = Arrays.asList(new com.xlb.springboot.demo.Book(1, "西游记"), new com.xlb.springboot.demo.Book(2, "三国演义"), new com.xlb.springboot.demo.Book(3, "红楼梦")); return Result.ok(200,"查询成功",books,231); } @PutMapping("/add") public Result add(Book book){ System.out.println(book); return Result.ok(200,"新增成功"); } @PostMapping("/edit") public Result edit(){ //查询数据库(造的假数据) return Result.ok(200,"修改成功"); } @DeleteMapping("/del") public Result del(int bid){ System.out.println(bid); //查询数据库(造的假数据) return Result.ok(200,"删除成功"); } /** * 查询单个 * @return */ @GetMapping("/load") public Result load(){ //查询数据库(造的假数据) return Result.ok(200,"查询成功",new Book(1,"西游记")); } }- 1
- 2
- 3
- 4
- 5
- 6
- 7
- 8
- 9
- 10
- 11
- 12
- 13
- 14
- 15
- 16
- 17
- 18
- 19
- 20
- 21
- 22
- 23
- 24
- 25
- 26
- 27
- 28
- 29
- 30
- 31
- 32
- 33
- 34
- 35
- 36
- 37
- 38
- 39
- 40
- 41
- 42
- 43
- 44
- 45
- 46
- 47
- 48
- 49
- 50
- 51
- 52
- 53
- 54
- 55
- 56
- 57
- 58
- 59
一般写代码都会在Result类中加入CodeMsg,用来解决各种异常的提升判断,而CodeMsg类中可以定义各种异常,这就利于编写代码时异常提示的集中管理
演示增加报错提示
@PutMapping("/add") public Result add(Book book){ System.out.println(book); int id = book.getId(); if(id==0){ return Result.error(CodeMsg.BIND_ERROR.fillArgs("id未传递")); } return Result.ok(200,"新增成功"); }- 1
- 2
- 3
- 4
- 5
- 6
- 7
- 8
- 9
- 10
- 11
利用测试工具测试

统一的响应封装类以及错误编码类,这个是一个良好的编码习惯
-
相关阅读:
【kubernetes篇】通过描述信息,理解Pod生命周期
jQuery元素的筛选
leetcode 1488
为什么需要工业物联网 (IIoT)?如何实施?
WPF依赖属性和附加属性快速理解
2023-09-09 LeetCode每日一题(课程表)
Codeforces Round #529 (Div. 3) F. Make It Connected(最小生成树)
Gradle基础知识-Wrapper,Daeman;Groovy闭包语法
vscode插件推荐
网站都变成灰色了,它是怎么实现的?
- 原文地址:https://blog.csdn.net/qq_63531917/article/details/127595950
