-
Selenium4.0 + Python手撸自动化框架系列之 Web截图 与 封装
前言
在做Web自动化时,网页截图是常用的操作。像一般的自动化框架与工具都会有截图机制,比如:
1、元素等待失败触发截图 2、元素操作失败触发截图 3、检查点失败触发截图 4、主动要求的触发截图
四种场景,均可触发网页截图操作,将截图保存到对应某个路径下面。
那么Web网页截图怎么编写、上面几种场景如何封装、看完本文就懂了。一、WEB截图使用讲解
1、文件路径
新建一个screenshotDemo目录,在其下新建一个保存文件的的目录screenpics

也添加上谷歌驱动chromedriver.exe与demo.py代码文件
在demo.py里编写代码,找出目录import os # 拼接screenpics目录的绝对路径 base_path = os.path.dirname(__file__) pics_path = os.path.join(base_path, 'screenpics') print(pics_path)- 1
- 2
- 3
- 4
- 5
- 6
运行代码打印截图文件目录
目录拼接成这样:E:/HunWei/demo/screenshotDemo\screenpics
无需管斜杠与反斜杠同时存在一个路径字符串,它能保存图片就是硬道理
2、访问网站截图
打开http://schotest.hunwei.top/登录页面,截图
截图方法webdriver.get_screenshot_as_file(path)
import os from datetime import datetime from selenium import webdriver # 拼接screenpics目录的绝对路径 base_path = os.path.dirname(__file__) pics_path = os.path.join(base_path, 'screenpics') # 打开浏览器进入网站 webdr = webdriver.Chrome() #Chrome没有带路径参数需要将chromedriver.exe跟本文件放在同一个目录下面 webdr.get(url='http://schotest.hunwei.top/') # 获取时间戳与.png合成图片文件名 file_name = str(int(datetime.now().timestamp()*1000)) + '.png' # 拼路径与文件名称 pic_path = os.path.join(pics_path, file_name) # 截图并保存文件 webdr.get_screenshot_as_file(pic_path)- 1
- 2
- 3
- 4
- 5
- 6
- 7
- 8
- 9
- 10
- 11
- 12
- 13
- 14
- 15
- 16
详细内容请见注释
运行,自动化打开浏览器,进入网站登录页面,自动保存图片
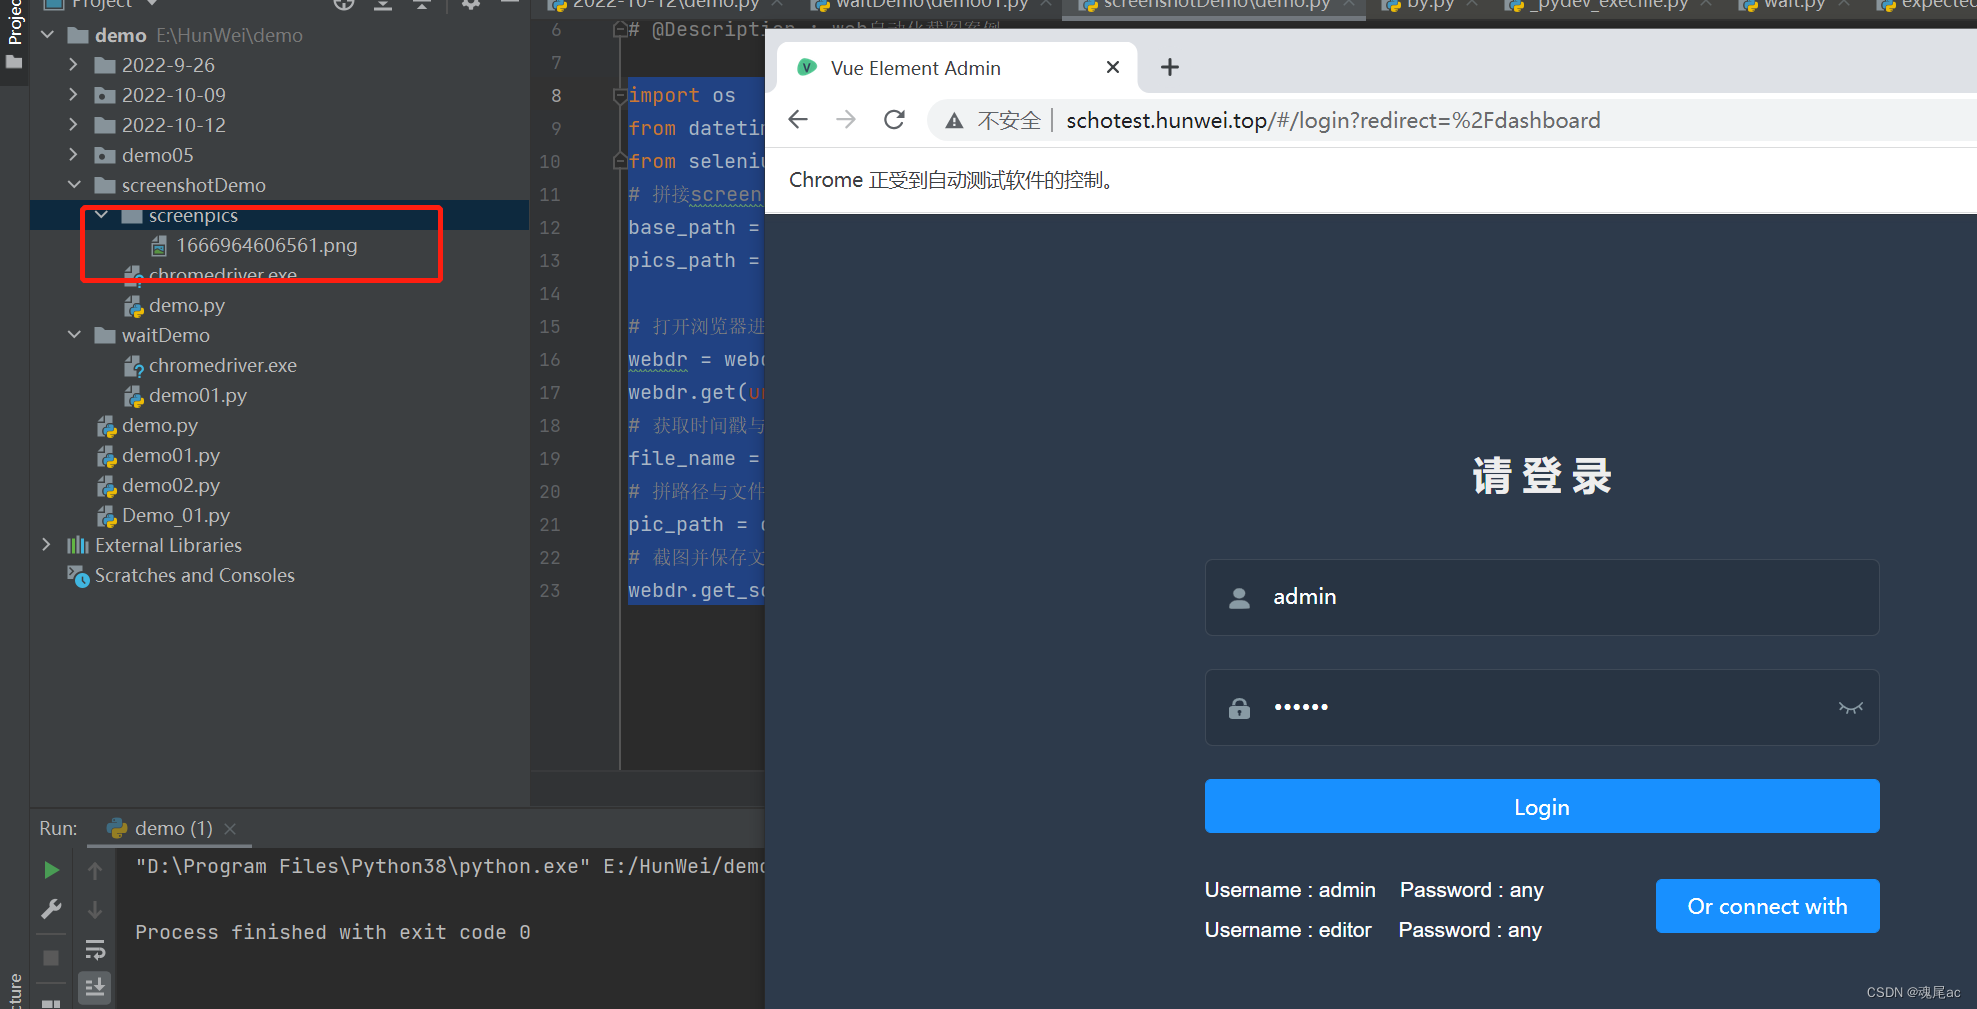
双击可查看图片

二、WEB截图代码封装
1、参数设计
浏览器对象 opr:接收webdriver.Chrome对象,必填
2、函数编写
web截图在自动化框架会有N多地方使用,所以它是必须封装的代码之一
封装的内容有路径生成 截图保存 返回截图路径信息
代码如下
import os from datetime import datetime from selenium import webdriver base_path = os.path.dirname(__file__) pics_path = os.path.join(base_path, 'screenpics') def creenpics_write(opr:webdriver.Chrome): ''' 截图保存并返回保存信息 :param driver: 谷歌浏览器对象 :return str: 截图描述 ''' time_stamp = str(int(datetime.now().timestamp()*1000)) picfile_path = os.path.join(pics_path, time_stamp + '.png') opr.get_screenshot_as_file(picfile_path) return '截图保存路径:[{}]'.format(picfile_path)- 1
- 2
- 3
- 4
- 5
- 6
- 7
- 8
- 9
- 10
- 11
- 12
- 13
- 14
- 15
- 16
- 17
- 18
- 19
3、调用函数运行
webdr = webdriver.Chrome() #Chrome没有带路径参数需要将chromedriver.exe跟本文件放在同一个目录下面 webdr.get(url='http://schotest.hunwei.top/') # 调用函数运行 creenpics_write(webdr)- 1
- 2
- 3
- 4
运行后,截图保存如下

3、自动化框架中截图触发时机
触发时机:
1、元素等待失败触发截图 2、元素操作失败触发截图 3、检查点失败触发截图 4、主动要求的触发截图
框架如何初步封装可以看这两篇文章
https://blog.csdn.net/weixin_40331132/article/details/124637868
https://blog.csdn.net/weixin_40331132/article/details/127398064这里封装等待失败,操作失败的截图,检查点与主动触发,天马行空、旁类触通,自行去做
在每一个操作失败的 try … except…里面添加截图操作,打印出截图内容
在screenshotDemo目录下新增demo01.py
封装代码如下,可细细品读其中逻辑与意义import os import time from datetime import datetime from selenium import webdriver from selenium.webdriver.common.by import By from selenium.webdriver.support import expected_conditions as EC from selenium.webdriver.support.wait import WebDriverWait from selenium.common.exceptions import TimeoutException from selenium.webdriver.remote.webelement import WebElement base_path = os.path.dirname(__file__) pics_path = os.path.join(base_path, 'screenpics') ''' 定位类型字典设计 手撸框架可以节省很多if...else...代码 ''' LOCATION_TYPE = { 'id': By.ID, 'name': By.NAME, 'class': By.CLASS_NAME, 'tag': By.TAG_NAME, 'link': By.LINK_TEXT, 'plink': By.PARTIAL_LINK_TEXT, 'xpath': By.XPATH, 'css': By.CSS_SELECTOR } def creenpics_write(opr:webdriver.Chrome): ''' 截图保存并返回保存信息 :param driver: 谷歌浏览器对象 :return str: 截图描述 ''' time_stamp = str(int(datetime.now().timestamp()*1000)) picfile_path = os.path.join(pics_path, time_stamp + '.png') opr.get_screenshot_as_file(picfile_path) return '截图保存路径:[{}]'.format(picfile_path) def open_url(url): ''' 打开浏览顺访问url,并返回浏器操作句柄 :param url: 要测试的网站url :return: webdriver对像 ''' opr = webdriver.Chrome() opr.get(url) return opr def get_element(opr:webdriver.Chrome, type, locatuion, index): ''' 获取元素并返回 :param opr: 浏览器句柄 :param type: 定位器类型 :param locatuion: 定位器 :param index: 下标 :return: 元素对象 ''' try: return opr.find_elements(LOCATION_TYPE[str.lower(type)], locatuion)[index] except Exception as e: result = creenpics_write(opr) return '获取元素[{}]=[{}]失败,原因:[{}],截图信息:[{}]'.format(type, locatuion, str(type), result) def element_opr(el:webdriver.Chrome.find_element, operation, value): ''' 元素操作 :param el: 元素对象 :param operation: 操作类型 :param value: 值 :return: 成功(True)or失败(False) ''' if operation == '点击': el.click() return True elif operation == '输入': el.send_keys(value) return True def waiting_for_element(wait_type, secs=3, type=None, location=None, opr:webdriver.Chrome=None): if wait_type == '等待': time.sleep(secs) return True, '【等待】成功' elif wait_type == '隐性等待': opr.implicitly_wait(secs) return True, '【隐性等待】成功' elif wait_type == '显性等待': if type is None or location is None or opr is None: return False, '【显性等待】请填写所有参数' try: WebDriverWait(opr, secs, 0.5).until(EC.visibility_of_element_located((LOCATION_TYPE[str.lower(type)],location))) except TimeoutException as e: result = creenpics_write(opr) return False, '【显性等待】{}秒超时,元素[{}]=[{}]没有出现,请看截图信息[{}]'.format(str(secs), type, location, result) except Exception as e: return False, '【显性等待】传参有误,请检查参数' def web_autotest_opr(opr:webdriver.Chrome ,operation, type, locatuion, index=0, value=''): ''' 元素操作统一入口 :param opr: 浏览器句柄 :param operation: 操作类型 :param type: 定位器类型 :param locatuion: 定位器 :param index: 下标 :param value: 值 :return: 成功(True)or失败(False) ''' if str.lower(type) != 'js': el = get_element(opr, type, locatuion, index) if isinstance(el, WebElement): # 判断返回el是不是元素,如果不是,便打印出结果,如果是,便执行操作 result = element_opr(el, operation, value) print(result) else: result = el print(result) else: result = opr.execute_script(locatuion) return result ''' 执行代码段 ''' webdr = webdriver.Chrome() #Chrome没有带路径参数需要将chromedriver.exe跟本文件放在同一个目录下面 webdr.get(url='http://schotest.hunwei.top/') web_autotest_opr(webdr, '输入', 'name', 'username') web_autotest_opr(webdr, '输入', 'name', 'psw') #这个故意不存在,触发失败,所以得执行截图- 1
- 2
- 3
- 4
- 5
- 6
- 7
- 8
- 9
- 10
- 11
- 12
- 13
- 14
- 15
- 16
- 17
- 18
- 19
- 20
- 21
- 22
- 23
- 24
- 25
- 26
- 27
- 28
- 29
- 30
- 31
- 32
- 33
- 34
- 35
- 36
- 37
- 38
- 39
- 40
- 41
- 42
- 43
- 44
- 45
- 46
- 47
- 48
- 49
- 50
- 51
- 52
- 53
- 54
- 55
- 56
- 57
- 58
- 59
- 60
- 61
- 62
- 63
- 64
- 65
- 66
- 67
- 68
- 69
- 70
- 71
- 72
- 73
- 74
- 75
- 76
- 77
- 78
- 79
- 80
- 81
- 82
- 83
- 84
- 85
- 86
- 87
- 88
- 89
- 90
- 91
- 92
- 93
- 94
- 95
- 96
- 97
- 98
- 99
- 100
- 101
- 102
- 103
- 104
- 105
- 106
- 107
- 108
- 109
- 110
- 111
- 112
- 113
- 114
- 115
- 116
- 117
- 118
- 119
- 120
- 121
- 122
- 123
- 124
- 125
- 126
- 127
- 128
- 129
- 130
- 131
- 132
- 133
- 134
- 135
- 136
运行结果

案例代码下载链接 https://download.csdn.net/download/weixin_40331132/86880575
本文结束,Web自动化中截图保证结果有图有真相,快速定位问题所在。希望大家多多点赞与关注
-
相关阅读:
宁德时代定增450亿:高瓴认购30亿 曾毓群仍控制23%股权
拦截|篡改|伪造.NET类库中不限于public的类和方法
DDD/ABP 洋葱架构aka整洁架构
搭建DNS服务器和selinux
CMMI认证多少钱?
函数式编程
Docker部署ActiveMq
Winform DataGridView 跳转到指定数据行
java计算机毕业设计化妆品销售网站源码+mysql数据库+系统+lw文档+部署
【Node.js】 第三章 http模块
- 原文地址:https://blog.csdn.net/weixin_40331132/article/details/127542584