-
8、Spring 源码学习 ~ 自定义标签的解析
自定义标签的解析
前面的章节,我们已经学习过 Spring 默认标签(bean、alias、import 和 beans)的解析,接下来我们来学习自定义标签的解析。
入口:
protected void parseBeanDefinitions(Element root, BeanDefinitionParserDelegate delegate) { if (delegate.isDefaultNamespace(root)) { NodeList nl = root.getChildNodes(); for (int i = 0; i < nl.getLength(); i++) { Node node = nl.item(i); if (node instanceof Element) { Element ele = (Element) node; if (delegate.isDefaultNamespace(ele)) { parseDefaultElement(ele, delegate); } else { delegate.parseCustomElement(ele); } } } } else { delegate.parseCustomElement(root); } }- 1
- 2
- 3
- 4
- 5
- 6
- 7
- 8
- 9
- 10
- 11
- 12
- 13
- 14
- 15
- 16
- 17
- 18
- 19
- 20
所有功能都围绕一句代码
delegate.parseCustomElement(root);展开。上面的函数可以看出,Spring 拿到一个元素时,首先是根据命名空间进行解析,如果是默认的命名空间,则使用 parseDefaultElement 方法进行解析,否则使用 parseCustomElement 方法解析。我们先来看下自定义标签的使用。一、自定义标签的使用
1、创建用来接收配置文件的 POJO
package com.luo.spring.guides.helloworld.customtag; import lombok.Data; /** * @author : archer * @date : Created in 2022/10/25 20:46 * @description : */ @Data @ToString public class User { private String userName; private String email; }- 1
- 2
- 3
- 4
- 5
- 6
- 7
- 8
- 9
- 10
- 11
- 12
- 13
- 14
- 15
- 16
2、定义一个 XSD 文件描述组件内容
<schema xmlns="http://www.lexueba.com/schema/user" targetNamespace="http://www.lexueba.com/schema/user" xmlns:tns="http://www.lexueba.com/schema/user" elementFormDefault="qualified"> <element name="user"> <complexType> <attribute name="id" type="string"/> <attribute name="userName" type="string"/> <attribute name="email" type="string"/> complexType> element> schema>- 1
- 2
- 3
- 4
- 5
- 6
- 7
- 8
- 9
- 10
- 11
- 12
- 13
- 14
XML Schema 语法可以参考:菜鸟教程 ~ XML Schema 教程 或其他资料
3、实现 BeanDefinitionParser 接口
- 用来解析 XSD 文件中的定义和组件定义
package com.luo.spring.guides.helloworld.customtag; import org.springframework.beans.factory.support.BeanDefinitionBuilder; import org.springframework.beans.factory.xml.AbstractSingleBeanDefinitionParser; import org.springframework.util.StringUtils; import org.w3c.dom.Element; /** * @author : archer * @date : Created in 2022/10/26 16:42 * @description : */ public class UserBeanDefinitionParser extends AbstractSingleBeanDefinitionParser { public static final String USER_NAME = "userName"; public static final String EMAIL = "email"; @Override protected Class<?> getBeanClass(Element element) { return User.class; } @Override protected void doParse(Element element, BeanDefinitionBuilder beam) { String userName = element.getAttribute(USER_NAME); String email = element.getAttribute(EMAIL); if (StringUtils.hasText(userName)) { beam.addPropertyValue(USER_NAME, userName); } if (StringUtils.hasText(email)) { beam.addPropertyValue(EMAIL, email); } } }- 1
- 2
- 3
- 4
- 5
- 6
- 7
- 8
- 9
- 10
- 11
- 12
- 13
- 14
- 15
- 16
- 17
- 18
- 19
- 20
- 21
- 22
- 23
- 24
- 25
- 26
- 27
- 28
- 29
- 30
- 31
- 32
- 33
- 34
4、创建 Handler,继承 NamespaceHandlerSupport
- 目的是将组件注册到 Spring 容器
package com.luo.spring.guides.helloworld.customtag; import org.springframework.beans.factory.xml.NamespaceHandlerSupport; /** * @author : archer * @date : Created in 2022/10/26 16:55 * @description : */ public class MyNamespaceHandler extends NamespaceHandlerSupport { public static final String USER = "user"; @Override public void init() { registerBeanDefinitionParser(USER, new UserBeanDefinitionParser()); } }- 1
- 2
- 3
- 4
- 5
- 6
- 7
- 8
- 9
- 10
- 11
- 12
- 13
- 14
- 15
- 16
- 17
- 18
说明:当遇到自定义标签
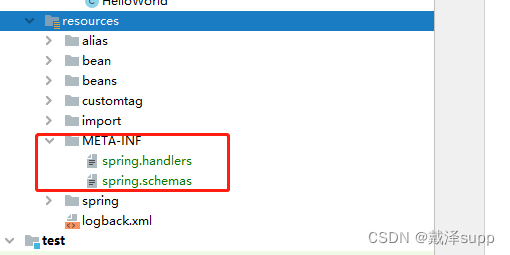
5、编写 Spring.handlers 和 Spring.schemas 文件
- 默认位置在工程的
/META-INF/文件夹下:可通过 Spring 的扩张或修改源码的方式改变路径
spring.handlers
http\://www.xiaoluoluo.com/schema/user=com.luo.spring.guides.helloworld.customtag.MyNamespaceHandler- 1
spring.schemas
http\://www.lexueba.com/schema/user.xsd=META-INF/user.xsd- 1
6、测试
引入自定义 xsd 文件
<beans xmlns="http://www.springframework.org/schema/beans" xmlns:xsi="http://www.w3.org/2001/XMLSchema-instance" xmlns:myname="http://www.xiaoluoluo.com/schema/user" xsi:schemaLocation="http://www.springframework.org/schema/beans http://www.springframework.org/schema/beans/spring-beans.xsd http://www.xiaoluoluo.com/schema/user http://www.xiaoluoluo.com/schema/user.xsd"> <myname:user id="1" userName="aaa" email="nnn"/> beans>- 1
- 2
- 3
- 4
- 5
- 6
- 7
- 8
- 9
- 10
- 11
Main.java
package com.luo.spring.guides.helloworld.customtag; import com.luo.spring.guides.helloworld.common.TestBean; import org.springframework.context.ApplicationContext; import org.springframework.context.support.ClassPathXmlApplicationContext; /** * @author : archer * @date : Created in 2022/10/26 17:16 * @description : */ public class Main { public static void main(String[] args) { ApplicationContext bf = new ClassPathXmlApplicationContext("customtag/customtag.xml"); User user = (User) bf.getBean("userbean"); System.out.println(user); } }- 1
- 2
- 3
- 4
- 5
- 6
- 7
- 8
- 9
- 10
- 11
- 12
- 13
- 14
- 15
- 16
- 17
- 18
- 19
输出:

7、总结
- 1、遇到自定义标签就去 Spring.handlers 和 Spring.schemas 中找对应的 handler 和 XSD,默认位置是 /META-INF/ 下
- 2、找到对应的 handler 和解析元素的 Parser,来完成整个自定义元素的解析。如我们熟知的事务标签
tx(tx:annotation-driven)。
二、自定义标签解析
了解了自定义标签使用后,我们来学习下自定义标签的解析过程,入口是函数 BeanDefinitionParserDelegate#parseCustomElement,代码如下:
@Nullable public BeanDefinition parseCustomElement(Element ele) { return parseCustomElement(ele, null); } //containingBd 是父类 bean,对顶层元素的解析应设置为null @Nullable public BeanDefinition parseCustomElement(Element ele, @Nullable BeanDefinition containingBd) { //获取对应的命名空间 String namespaceUri = getNamespaceURI(ele); if (namespaceUri == null) { return null; } //根据命名空间找到对应的 NamespaceHandler NamespaceHandler handler = this.readerContext.getNamespaceHandlerResolver().resolve(namespaceUri); if (handler == null) { error("Unable to locate Spring NamespaceHandler for XML schema namespace [" + namespaceUri + "]", ele); return null; } //调用自定义的 NamespaceHandler 进行解析 return handler.parse(ele, new ParserContext(this.readerContext, this, containingBd)); }- 1
- 2
- 3
- 4
- 5
- 6
- 7
- 8
- 9
- 10
- 11
- 12
- 13
- 14
- 15
- 16
- 17
- 18
- 19
- 20
- 21
- 22
我们分步来看下每步是怎么实现的
1、获取标签的命名空间
根据标签锁提供的命名空间,我们可以区分标签是 Spring 中的默认标签还是自定义标签,也可以区分自定义标签中不同标签的处理器。那该如何提取对应元素的命名空间呢?在 org.w3c.dom.Node 中,已经提供了 getNamespaceURI 方法来获取,如下:
@Nullable public String getNamespaceURI(Node node) { return node.getNamespaceURI(); }- 1
- 2
- 3
- 4
2、提取自定义标签处理器
根据上面的 parseCustomElement 函数,我们知道提取自定义标签处理器的代码如下:
NamespaceHandler handler = this.readerContext.getNamespaceHandlerResolver().resolve(namespaceUri);
即 DefaultNamespaceHandlerResolver#resolve
@Override @Nullable public NamespaceHandler resolve(String namespaceUri) { //获取所有已配置的 handler 映射 Map<String, Object> handlerMappings = getHandlerMappings(); //根据命名空间找到对应的信息 Object handlerOrClassName = handlerMappings.get(namespaceUri); if (handlerOrClassName == null) { return null; } else if (handlerOrClassName instanceof NamespaceHandler) { //已经做过解析的情况,直接从缓存获取返回 return (NamespaceHandler) handlerOrClassName; } else { //未做过解析的情况,则返回类路径 String className = (String) handlerOrClassName; try { //使用反射将类路径转化为类 Class<?> handlerClass = ClassUtils.forName(className, this.classLoader); // 判断 handlerClass 的类型是否是 NamespaceHandler 的子类,子接口,本身 if (!NamespaceHandler.class.isAssignableFrom(handlerClass)) { throw new FatalBeanException("Class [" + className + "] for namespace [" + namespaceUri + "] does not implement the [" + NamespaceHandler.class.getName() + "] interface"); } //实例化(instantiate)类 NamespaceHandler namespaceHandler = (NamespaceHandler) BeanUtils.instantiateClass(handlerClass); //调用自定义的初始化方法 namespaceHandler.init(); //放入缓存 handlerMappings.put(namespaceUri, namespaceHandler); return namespaceHandler; } catch (ClassNotFoundException ex) { throw new FatalBeanException("Could not find NamespaceHandler class [" + className + "] for namespace [" + namespaceUri + "]", ex); } catch (LinkageError err) { throw new FatalBeanException("Unresolvable class definition for NamespaceHandler class [" + className + "] for namespace [" + namespaceUri + "]", err); } } }- 1
- 2
- 3
- 4
- 5
- 6
- 7
- 8
- 9
- 10
- 11
- 12
- 13
- 14
- 15
- 16
- 17
- 18
- 19
- 20
- 21
- 22
- 23
- 24
- 25
- 26
- 27
- 28
- 29
- 30
- 31
- 32
- 33
- 34
- 35
- 36
- 37
- 38
- 39
- 40
- 41
- 42
- 43
之前我们在 spring.handlers 中就定义了命名空间与命名空间处理器之间的映射缓存,当获取到命名空间处理器后,就可以进行处理器初始化并解析了。
执行 namespaceHandler.init() 时,会进行自定义 BeanDefinitionParser 的注册,当然你可以注册多个标签解析器,上述示例,只注册了
注册后,命名空间处理器就可以根据标签的不同来调用不同的解析器。根据逻辑,我们基本可以推断函数 getHandlerMappings 是读取 spring.handlers 配置文件,并将其存在缓存 map 中。源码如下:
private Map<String, Object> getHandlerMappings() { //如果没有被缓存,则开始缓存 Map<String, Object> handlerMappings = this.handlerMappings; if (handlerMappings == null) { synchronized (this) { handlerMappings = this.handlerMappings; if (handlerMappings == null) { if (logger.isTraceEnabled()) { logger.trace("Loading NamespaceHandler mappings from [" + this.handlerMappingsLocation + "]"); } try { //this.handlerMappingsLocation 在构造函数中已经被初始化为: META-INF/Spring.handlers Properties mappings = PropertiesLoaderUtils.loadAllProperties(this.handlerMappingsLocation, this.classLoader); if (logger.isTraceEnabled()) { logger.trace("Loaded NamespaceHandler mappings: " + mappings); } handlerMappings = new ConcurrentHashMap<>(mappings.size()); //将 Properties 格式的文件合并到 Map 格式的 handlerMappings 中 CollectionUtils.mergePropertiesIntoMap(mappings, handlerMappings); this.handlerMappings = handlerMappings; } catch (IOException ex) { throw new IllegalStateException( "Unable to load NamespaceHandler mappings from location [" + this.handlerMappingsLocation + "]", ex); } } } } return handlerMappings; }- 1
- 2
- 3
- 4
- 5
- 6
- 7
- 8
- 9
- 10
- 11
- 12
- 13
- 14
- 15
- 16
- 17
- 18
- 19
- 20
- 21
- 22
- 23
- 24
- 25
- 26
- 27
- 28
- 29
- 30
- 31
使用了 PropertiesLoaderUtils#loadAllProperties 来进行配置文件的读取。handlerMappingsLocation 在构造函数中已经被初始化为: META-INF/Spring.handlers。
3、标签解析
提取标签处理器后,接下来是解析标签了,即
return handler.parse(ele, new ParserContext(this.readerContext, this, containingBd));
源码如下:
@Override @Nullable public BeanDefinition parse(Element element, ParserContext parserContext) { //寻找解析器 BeanDefinitionParser parser = findParserForElement(element, parserContext); //parser.parse(element, parserContext) 进行解析 return (parser != null ? parser.parse(element, parserContext) : null); } @Nullable private BeanDefinitionParser findParserForElement(Element element, ParserContext parserContext) { //获取元素名称,也就是- 1
- 2
- 3
- 4
- 5
- 6
- 7
- 8
- 9
- 10
- 11
- 12
- 13
- 14
- 15
- 16
- 17
- 18
- 19
- 20
- 21
- 22
而对于 parser.parse(element, parserContext) 方法的处理:
步骤
@Override @Nullable public final BeanDefinition parse(Element element, ParserContext parserContext) { AbstractBeanDefinition definition = parseInternal(element, parserContext); if (definition != null && !parserContext.isNested()) { try { String id = resolveId(element, definition, parserContext); if (!StringUtils.hasText(id)) { parserContext.getReaderContext().error( "Id is required for element '" + parserContext.getDelegate().getLocalName(element) + "' when used as a top-level tag", element); } String[] aliases = null; if (shouldParseNameAsAliases()) { String name = element.getAttribute(NAME_ATTRIBUTE); if (StringUtils.hasLength(name)) { aliases = StringUtils.trimArrayElements(StringUtils.commaDelimitedListToStringArray(name)); } } //将 AbstractBeanDefinition 转化为 BeanDefinitionHolder 并注册 BeanDefinitionHolder holder = new BeanDefinitionHolder(definition, id, aliases); // 注册 BeanDefinition registerBeanDefinition(holder, parserContext.getRegistry()); if (shouldFireEvents()) { //通知监听器进行处理 BeanComponentDefinition componentDefinition = new BeanComponentDefinition(holder); postProcessComponentDefinition(componentDefinition); parserContext.registerComponent(componentDefinition); } } catch (BeanDefinitionStoreException ex) { String msg = ex.getMessage(); parserContext.getReaderContext().error((msg != null ? msg : ex.toString()), element); return null; } } return definition; }- 1
- 2
- 3
- 4
- 5
- 6
- 7
- 8
- 9
- 10
- 11
- 12
- 13
- 14
- 15
- 16
- 17
- 18
- 19
- 20
- 21
- 22
- 23
- 24
- 25
- 26
- 27
- 28
- 29
- 30
- 31
- 32
- 33
- 34
- 35
- 36
- 37
- 38
我们自定义的解析函数的调用在 AbstractSingleBeanDefinitionParser#parseInternal 函数里:
@Override protected final AbstractBeanDefinition parseInternal(Element element, ParserContext parserContext) { BeanDefinitionBuilder builder = BeanDefinitionBuilder.genericBeanDefinition(); String parentName = getParentName(element); if (parentName != null) { builder.getRawBeanDefinition().setParentName(parentName); } //获取自定义标签中的 class,此时会调用自定义解析器,如 UserBeanDefinitionParser 中的 getBeanClass 方法 Class<?> beanClass = getBeanClass(element); if (beanClass != null) { builder.getRawBeanDefinition().setBeanClass(beanClass); } else { //若子类未重写 getBeanClass 方法,则尝试检查子类是否重写 getBeanClassName 方法 String beanClassName = getBeanClassName(element); if (beanClassName != null) { builder.getRawBeanDefinition().setBeanClassName(beanClassName); } } builder.getRawBeanDefinition().setSource(parserContext.extractSource(element)); BeanDefinition containingBd = parserContext.getContainingBeanDefinition(); if (containingBd != null) { // Inner bean definition must receive same scope as containing bean. //内部 bean 定义必须接收与上层包含它的 bean 相同的范围。 //使用父类的 scope 属性 builder.setScope(containingBd.getScope()); } if (parserContext.isDefaultLazyInit()) { // Default-lazy-init applies to custom bean definitions as well. // Default-lazy-init(延迟加载) 也适用于自定义 bean 定义。 builder.setLazyInit(true); } //上面都是做一些数据准备,如 beanClass、scope、lazyInit、source 等属性 //调用 UserBeanDefinitionParser 中的 doParse 方法 doParse(element, parserContext, builder); return builder.getBeanDefinition(); } protected void doParse(Element element, ParserContext parserContext, BeanDefinitionBuilder builder) { doParse(element, builder); } //子类 UserBeanDefinitionParser 重写了此方法 protected void doParse(Element element, BeanDefinitionBuilder builder) { }- 1
- 2
- 3
- 4
- 5
- 6
- 7
- 8
- 9
- 10
- 11
- 12
- 13
- 14
- 15
- 16
- 17
- 18
- 19
- 20
- 21
- 22
- 23
- 24
- 25
- 26
- 27
- 28
- 29
- 30
- 31
- 32
- 33
- 34
- 35
- 36
- 37
- 38
- 39
- 40
- 41
- 42
- 43
- 44
- 45
到此,我们已经学习了 Spring 中将 bean 从配置文件到加载到内存中的全过程,目前内存中的存在形式是以 BeanDefinition 的实例对象方式存在的,也了解到就算是自定义标签,Spring 也帮我们配置了一些默认的属性(如 beanClass、scope、lazyInit、source 等)。
而接下来我们就需要了解 bean 如何来使用,下章将介绍 bean 的加载。
-
相关阅读:
一、springcloud-eureka服务注册与发现
springboot实现在线人数统计
Spring Boot入门(21):使用Spring Boot和Log4j2进行高效日志管理:配置详解
11.Java面向对象进阶(3)
轻松添加背景图片并一键褪色的简单操作
【21天算法学习】折半插入排序
【WPF】实现动态切换语言(国际化)以及动态换肤功能
使用GPT和FastAPI构建智能数据库查询服务器
JUC 并发编程学习笔记(总)
Leetcode.309 买卖股票的最佳时机含冷冻期
- 原文地址:https://blog.csdn.net/lxz352907839/article/details/127549786
