-
Docker上下载安装Nginx——解决多端口访问问题
Docker上下载安装Nginx
- 下载镜像
- 创建容器实例
- 设置配置文件
1.1 下载镜像
下载nginx镜像:
docker pull nginx
查看本地镜像:docker images
1.2 创建容器实例
1.2.1 先创建容器挂载宿主机的文件目录
mkdir -p /home/nginx/{conf,html,log}- 1
1.2.2 第一次启动容器:copy文件到宿主机
- 启动容器
docker run -p 80:80 -d --name nginx nginx- 1
- copy文件
docker cp nginx:/etc/nginx/conf.d /home/nginx/conf/ docker cp nginx:/etc/nginx/nginx.conf /home/nginx/conf/nginx.conf docker cp nginx:/usr/share/nginx/html /home/nginx/- 1
- 2
- 3
- 删除容器
docker rm -f nginx- 1
- 第二次启动容器
docker run -d \ -p 80:80 \ -p 443:443 \ -v /home/nginx/conf/nginx.conf:/etc/nginx/nginx.conf \ -v /home/nginx/conf/cert:/etc/nginx/cert \ -v /home/nginx/conf/conf.d:/etc/nginx/conf.d \ -v /home/nginx/html:/usr/share/nginx/html \ -v /home/nginx/log:/var/log/nginx \ --restart=always \ --name myNginx nginx- 1
- 2
- 3
- 4
- 5
- 6
- 7
- 8
- 9
- 10
-d:表示后台启动nginx
--name:容器名
-p 80:80:将宿主机的80端口和容器的80端口映射(正式一般只开放80端口,然后通过不同域名映射不同项目,若是自己的服务器测试玩,可以使用 --net host替换掉-p 80:80为nginx容器开放全部端口监听。)
-v:宿主机目录与容器目录进行挂载(可以共享)
-v /root/project:/var/www/html是将宿主机/root/project与容器/var/www/html关联,以后所有的项目都建立在/root/project下,因为关联在/var/www/html,所以容器可以访问到外部的项目,方便在nginx.conf反向代理到项目(一般如果是前端项目就可代理到:/var/www/html/项目名/index.html)
-v /home/nginx:/etc/nginx是/root/nginx_conf 放置所有的配置文件,可以在nginx容器根目录下的/etc/nginx共享(容器的配置文件就在/etc/nginx目录下边)

1.3 配置文件
- 移动文件: mv 原地址 目的地址
- 删除空文件 :
rmdir /etc/nginx - 建立软连接:
ln -s /root/nginx_conf /etc/nginx
建立软连接,可以这么理解,我们的nginx虽然安装在docker上面了,但是我们配置想直接在宿主机上修改,那么我们需要一个软连接,就相当于我们本机上创建配置文件,然后在docker的nginx上创建一个快捷方式与我们宿主机连接起来,这样的话我们后序我们只需要修改宿主机上的配置文件就可以了!
-
需要进入docker里面的nginx容器中:
docker exec -it myNginx bash -
把配置文件给它移动到/root/nginx_conf,这样宿主机/home/nginx:/etc/nginx上就会同步配置文件:
mv 原地址 目的地址
把/etc/nginx/* 目录下所有的配置文件移动到/home/nginx_conf/目录下mv /etc/nginx/* /root/nginx_conf/


-
建立软连接: ln -s /root/nginx_conf /etc/nginx
建立软连接后相当于在/etc/nginx中创建了一个/root/nginx_conf的快捷方式。

-
退出容器:
exit -
在宿主机上修改配置文件
-
修改欢迎界面
这个目录没有挂载所以需要去容器中修改
进入容器:docker exec -it myNginx bash
编辑页面:vim /usr/share/nginx/html/index.html
<!DOCTYPE html> <html> <head> <title>Welcome to nginx!</title> <style> html { color-scheme: light dark; } body { width: 35em; margin: 0 auto; font-family: Tahoma, Verdana, Arial, sans-serif; } </style> </head> <body> <h1>Welcome to nginx!,Im guogou</h1> <p>If you see this page, the nginx web server is successfully installed and working. Further configuration is required.</p> <p>For online documentation and support please refer to <a href="http://nginx.org/">nginx.org</a>. <br /> Commercial support is available at <a href="http://nginx.com/">nginx.com</a>.</p> <p> <em>Thank you for using nginx.</em> </p> </body> </html>- 1
- 2
- 3
- 4
- 5
- 6
- 7
- 8
- 9
- 10
- 11
- 12
- 13
- 14
- 15
- 16
- 17
- 18
- 19
- 20
- 21
- 22
- 23
- 24
- 25
- 26
- 重启服务
docker restart myNginx
访问欢迎界面

1.4 在docker中vim报错:bash: vim: command not found
报错信息:
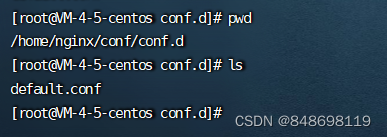
root@4844bd6f7aab:/etc/nginx/conf.d# ls
default.conf
root@4844bd6f7aab:/etc/nginx/conf.d#vim default.conf
bash: vim: command not found
root@4844bd6f7aab:/etc/nginx/conf.d#rpm -qa | grep vim
bash: rpm: command not found
root@4844bd6f7aab:/etc/nginx/conf.d#apt-get install vim
Reading package lists... Done
Building dependency tree... Done
Reading state information... Done
E: Unable to locate package vim
root@4844bd6f7aab:/etc/nginx/conf.d# vim default.conf
bash: vim: command not found
root@4844bd6f7aab:/etc/nginx/conf.d#apt-get update问题解决:
- 先更新
apt-get update - 再下载
apt-get install vim
1.5 用nginx解决多端口访问
修改配置文件
server { listen 80; #nginx对外端口号80 listen [::]:80; server_name localhost; #主机名称 #access_log /var/log/nginx/host.access.log main; #请求中包含hosp,转发到8201 location ~/hosp/{ proxy_pass http://localhost:8201; } #请求中包含cmn,转发到8202 location ~/cmn/{ proxy_pass http://localhost:8202; } location / { root /usr/share/nginx/html; index index.html index.htm; } }- 1
- 2
- 3
- 4
- 5
- 6
- 7
- 8
- 9
- 10
- 11
- 12
- 13
- 14
- 15
- 16
- 17
- 18
- 19
- 20
- 21
1.6 存在问题
这个docker是部署到阿里云服务器上的,本地跑前端程序通过阿里云服务器Nginx转发到本地跑的后端程序,然后后端程序再把响应返回给阿里云服务器上的Nginx转发到本地的前端页面展示数据,这个完整的链路是行不不同的,没有深层次的研究过这个东西,具体原因还需要研究,请教大佬解决办法,,
本地前端,本地后端,本都Nginx服务是可以成功的;
本地前端,本地后端,阿里云部署nginx服务行不通。 -
相关阅读:
【Ajax进阶】跨域和JSONP的学习
基于.NetCore开发博客项目 StarBlog - (20) 图片显示优化
GTS 中testPersistentProcessMemory fail 详解
二分查找法upper版(找大于某个值的最小下标)递归+非递归版
(四)Ansible-其他模块
面试突击36:线程安全问题是怎么产生的?
vue打包耗时显示插件安装、遇到插件版本不兼容问题以及解决方案
爬虫 | 正则、Xpath、BeautifulSoup示例学习
SQL学习笔记1:SQL语句可以分三类
一篇五分生信临床模型预测文章代码复现——Figure 4-6 临床模型构建(四)
- 原文地址:https://blog.csdn.net/qq_45896330/article/details/127177900
