-
Motion Editor (一) UI 搭建
1. 项目配置文件
MotionEditor: 可视化动画编辑工具
1.1 修改 AndroidManifest.xml 文件中样式
android:theme="@style/Theme.AppCompat.NoActionBar"1.2 build.gradle 文件添加引用库
- buildFeatures {
- viewBinding = true
- }
- def nav_version = "2.5.2"
- // Kotlin
- implementation "androidx.navigation:navigation-fragment-ktx:$nav_version"
- implementation "androidx.navigation:navigation-ui-ktx:$nav_version"
2. 添加资源文件
2.1 创建系统矢量图片,根据文件名称,在系统矢量图库中查找添加,如 ic_baseline_looks_one.xml
- <vector xmlns:android="http://schemas.android.com/apk/res/android"
- android:width="24dp"
- android:height="24dp"
- android:tint="#FFFFFF"
- android:viewportWidth="24"
- android:viewportHeight="24">
- <path
- android:fillColor="@android:color/white"
- android:pathData="M19,3L5,3c-1.1,0 -2,0.9 -2,2v14c0,1.1 0.9,2 2,2h14c1.1,0 2,-0.9 2,-2L21,5c0,-1.1 -0.9,-2 -2,-2zM14,17h-2L12,9h-2L10,7h4v10z" />
- vector>
2.2 添加 String.xml 中文字
- <string name="navigation_view_header_text">MotionLayoutDemostring>
- <string name="menu_straight">直线string>
- <string name="menu_curve">曲线string>
- <string name="menu_cycle">周期string>
- <string name="menu_rotation">旋转string>
- <string name="menu_swing">摆荡string>
- <string name="menu_transition">过渡string>
- <string name="menu_complex">复杂string>
- <string name="menu_text">文字string>
- <string name="menu_image">图片string>
- <string name="action_about">关于string>
- <string name="about_motion_user">关于 MotionLayout 的使用string>
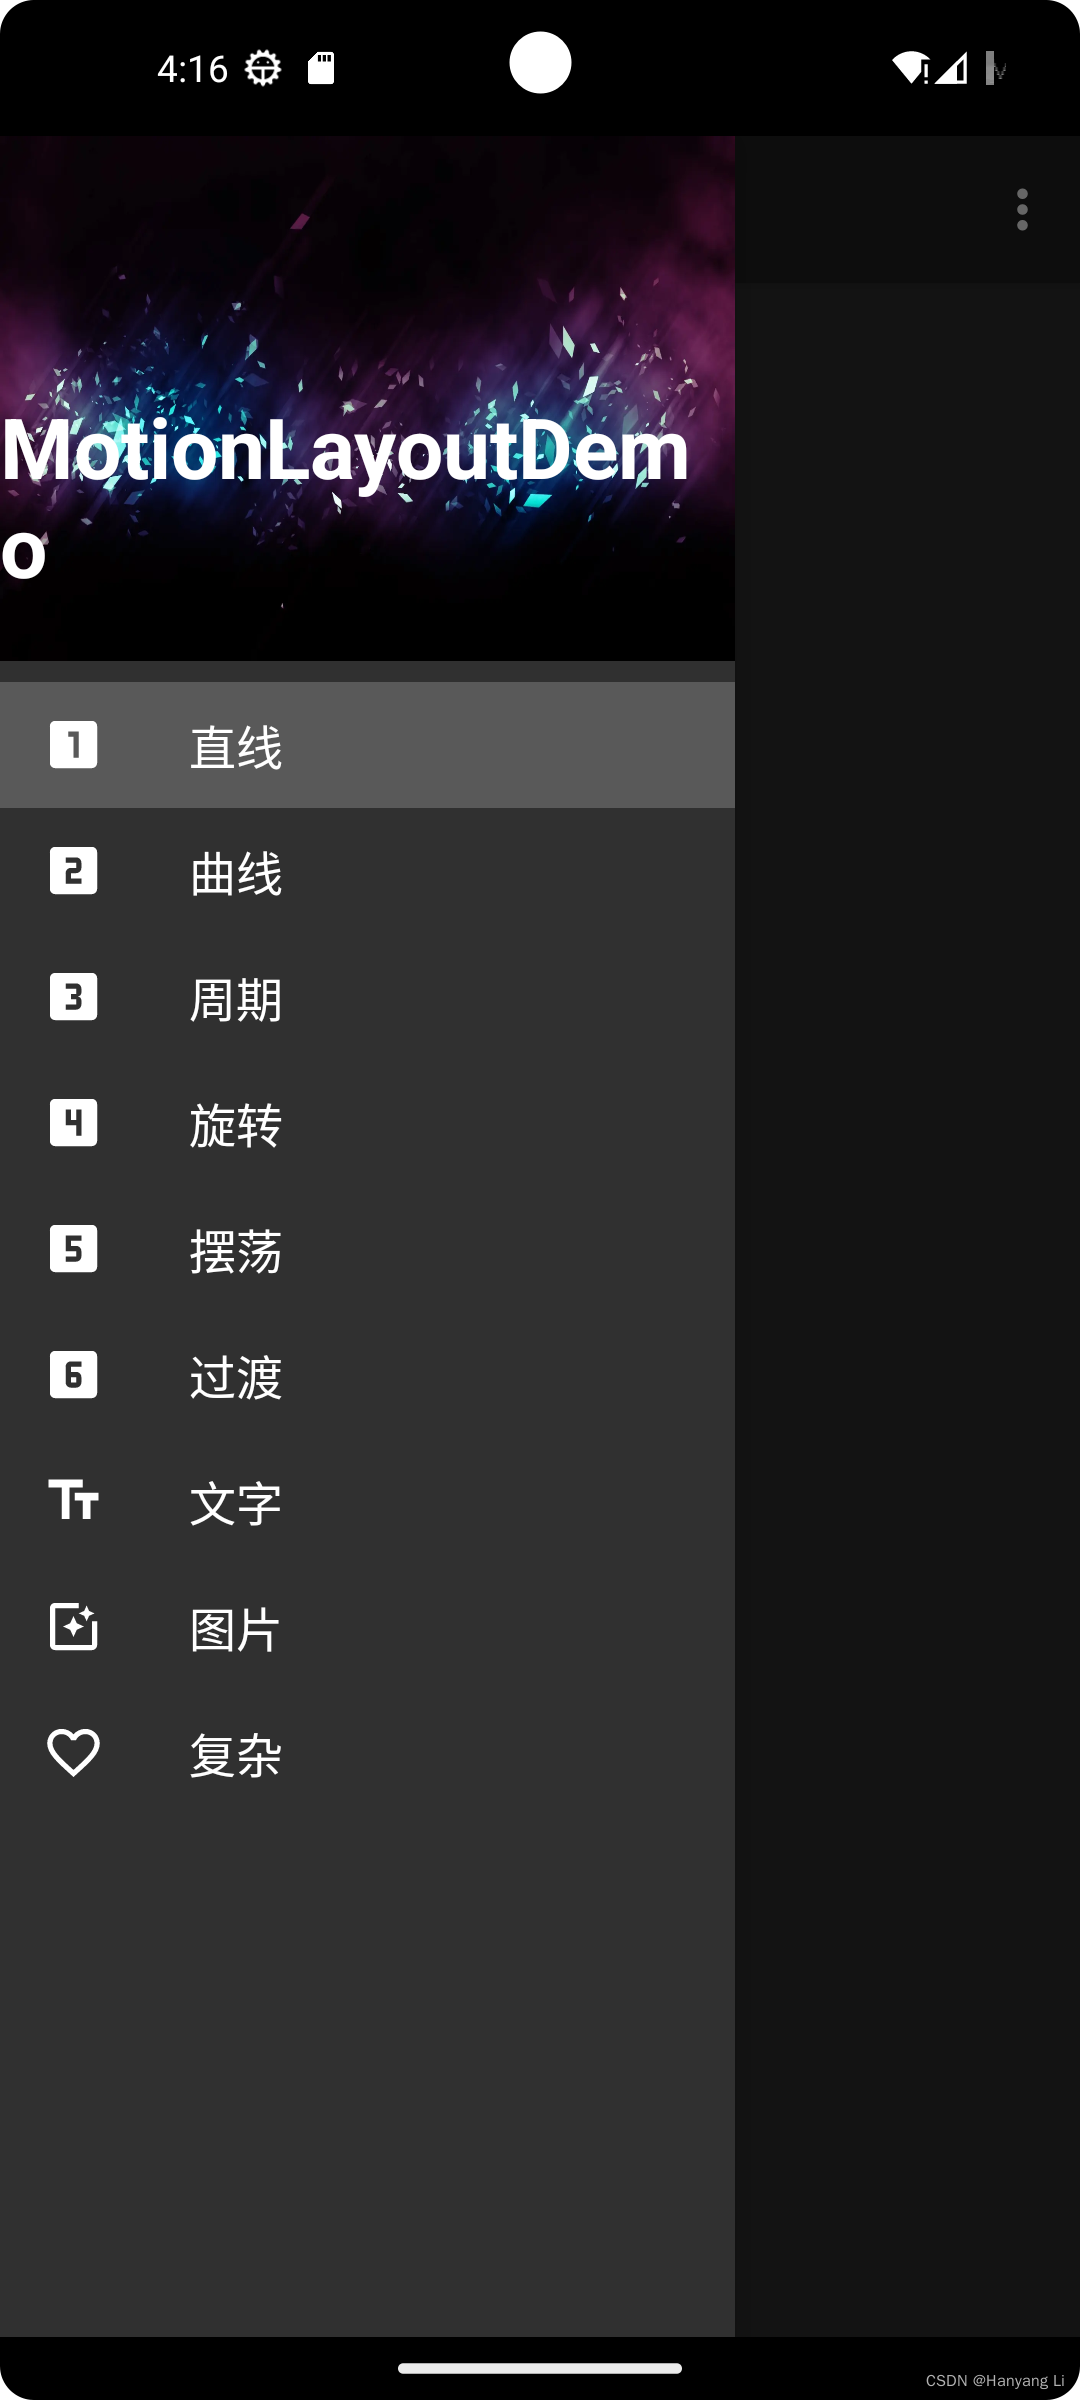
2.3 创建导航菜单布局 menu_main_drawer.xml
- "1.0" encoding="utf-8"?>
- <menu xmlns:android="http://schemas.android.com/apk/res/android">
- <group android:checkableBehavior="single">
- <item
- android:id="@+id/straightFragment"
- android:icon="@drawable/ic_baseline_looks_one"
- android:title="@string/menu_straight" />
- <item
- android:id="@+id/curveFragment"
- android:icon="@drawable/ic_baseline_looks_two"
- android:title="@string/menu_curve" />
- <item
- android:id="@+id/cycleFragment"
- android:icon="@drawable/ic_baseline_looks_three"
- android:title="@string/menu_cycle" />
- <item
- android:id="@+id/rotationFragment"
- android:icon="@drawable/ic_baseline_looks_four"
- android:title="@string/menu_rotation" />
- <item
- android:id="@+id/swingFragment"
- android:icon="@drawable/ic_baseline_looks_five"
- android:title="@string/menu_swing" />
- <item
- android:id="@+id/transitionFragment"
- android:icon="@drawable/ic_baseline_looks_six"
- android:title="@string/menu_transition" />
- <item
- android:id="@+id/textFragment"
- android:icon="@drawable/ic_baseline_text_fields"
- android:title="@string/menu_text" />
- <item
- android:id="@+id/imageFragment"
- android:icon="@drawable/ic_baseline_photo_filter"
- android:title="@string/menu_image" />
- <item
- android:id="@+id/complexFragment"
- android:icon="@drawable/ic_baseline_favorite_border"
- android:title="@string/menu_complex" />
- group>
- menu>
2.4 创建关于菜单布局 menu_main_about.xml
- "1.0" encoding="utf-8"?>
- <menu xmlns:app="http://schemas.android.com/apk/res-auto"
- xmlns:android="http://schemas.android.com/apk/res/android">
- <item
- android:id="@+id/action_settings"
- android:orderInCategory="100"
- android:title="@string/action_about"
- app:showAsAction="collapseActionView" />
- menu>
3. 创建 Fragment 布局
依次创建 StraightFragment,CurveFragment,CycleFragment,RotationFragment,SwingFragment,TransitionFragment,TextFragment,ImageFragment,ComplexFragment 页面
3.1 只需创建空页面,例如创建StraightFragment,StraightFragment.kt
- //直线动画
- class StraightFragment : Fragment() {
- override fun onCreateView(
- inflater: LayoutInflater, container: ViewGroup?, savedInstanceState: Bundle?
- ): View? {
- // Inflate the layout for this fragment
- return inflater.inflate(R.layout.fragment_straight, container, false)
- }
- }
3.2 布局 fragment_straight.xml
- <FrameLayout xmlns:android="http://schemas.android.com/apk/res/android"
- xmlns:tools="http://schemas.android.com/tools"
- android:layout_width="match_parent"
- android:layout_height="match_parent"
- tools:context=".ui.StraightFragment">
- <TextView
- android:layout_width="match_parent"
- android:layout_height="match_parent"
- android:text="@string/hello_blank_fragment" />
- FrameLayout>
4. 根据 Fragment 创建导航 navigation.xml
- "1.0" encoding="utf-8"?>
- <navigation xmlns:android="http://schemas.android.com/apk/res/android"
- xmlns:app="http://schemas.android.com/apk/res-auto"
- xmlns:tools="http://schemas.android.com/tools"
- android:id="@+id/navigation"
- android:label="@string/menu_straight"
- app:startDestination="@id/straightFragment">
- <fragment
- android:id="@+id/straightFragment"
- android:name="com.example.motion.ui.StraightFragment"
- android:label="@string/menu_straight"
- tools:layout="@layout/fragment_straight" />
- <fragment
- android:id="@+id/curveFragment"
- android:name="com.example.motion.ui.CurveFragment"
- android:label="@string/menu_curve"
- tools:layout="@layout/fragment_curve" />
- <fragment
- android:id="@+id/cycleFragment"
- android:name="com.example.motion.ui.CycleFragment"
- android:label="@string/menu_cycle"
- tools:layout="@layout/fragment_cycle" />
- <fragment
- android:id="@+id/rotationFragment"
- android:name="com.example.motion.ui.RotationFragment"
- android:label="fragment_rotation"
- tools:layout="@layout/fragment_rotation" />
- <fragment
- android:id="@+id/swingFragment"
- android:name="com.example.motion.ui.SwingFragment"
- android:label="@string/menu_swing"
- tools:layout="@layout/fragment_swing" />
- <fragment
- android:id="@+id/transitionFragment"
- android:name="com.example.motion.ui.TransitionFragment"
- android:label="@string/menu_transition"
- tools:layout="@layout/fragment_transition" />
- <fragment
- android:id="@+id/textFragment"
- android:name="com.example.motion.ui.TextFragment"
- android:label="@string/menu_text"
- tools:layout="@layout/fragment_text" />
- <fragment
- android:id="@+id/imageFragment"
- android:name="com.example.motion.ui.ImageFragment"
- android:label="@string/menu_image"
- tools:layout="@layout/fragment_image" />
- <fragment
- android:id="@+id/complexFragment"
- android:name="com.example.motion.ui.ComplexFragment"
- android:label="@string/menu_complex"
- tools:layout="@layout/fragment_complex" />
- navigation>
5. Main 主页实现
5.1 子布局 content_main.xml
- "1.0" encoding="utf-8"?>
- <androidx.constraintlayout.widget.ConstraintLayout xmlns:android="http://schemas.android.com/apk/res/android"
- xmlns:app="http://schemas.android.com/apk/res-auto"
- xmlns:tools="http://schemas.android.com/tools"
- android:layout_width="match_parent"
- android:layout_height="match_parent"
- app:layout_behavior="com.google.android.material.appbar.AppBarLayout$ScrollingViewBehavior"
- tools:showIn="@layout/app_bar_main">
- <androidx.fragment.app.FragmentContainerView
- android:id="@+id/fragmentContainerView"
- android:name="androidx.navigation.fragment.NavHostFragment"
- android:layout_width="match_parent"
- android:layout_height="match_parent"
- app:defaultNavHost="true"
- app:navGraph="@navigation/navigation" />
- androidx.constraintlayout.widget.ConstraintLayout>
5.2 子布局 app_bar_main.xml
- "1.0" encoding="utf-8"?>
- <androidx.coordinatorlayout.widget.CoordinatorLayout xmlns:android="http://schemas.android.com/apk/res/android"
- xmlns:app="http://schemas.android.com/apk/res-auto"
- android:layout_width="match_parent"
- android:layout_height="match_parent">
- <com.google.android.material.appbar.AppBarLayout
- android:id="@+id/appbar"
- android:layout_width="match_parent"
- android:layout_height="wrap_content"
- android:theme="@style/AppTheme.AppBarOverlay">
- <androidx.appcompat.widget.Toolbar
- android:id="@+id/toolbar"
- android:layout_width="match_parent"
- android:layout_height="?attr/actionBarSize"
- android:background="?attr/colorPrimary"
- app:popupTheme="@style/AppTheme.PopupOverlay" />
- com.google.android.material.appbar.AppBarLayout>
- <include
- android:id="@+id/include_content"
- layout="@layout/content_main" />
- androidx.coordinatorlayout.widget.CoordinatorLayout>
5.3 navigation 头布局 navigation_view_header_layout.xml
- "1.0" encoding="utf-8"?>
- <androidx.constraintlayout.widget.ConstraintLayout xmlns:android="http://schemas.android.com/apk/res/android"
- xmlns:app="http://schemas.android.com/apk/res-auto"
- android:layout_width="match_parent"
- android:layout_height="200dp"
- android:background="@drawable/bg2">
- <TextView
- android:id="@+id/textView"
- android:layout_width="wrap_content"
- android:layout_height="wrap_content"
- android:text="@string/navigation_view_header_text"
- android:textColor="@color/white"
- android:textSize="32sp"
- android:textStyle="bold"
- app:layout_constraintBottom_toBottomOf="parent"
- app:layout_constraintEnd_toEndOf="parent"
- app:layout_constraintHorizontal_bias="0.123"
- app:layout_constraintStart_toStartOf="parent"
- app:layout_constraintTop_toTopOf="parent"
- app:layout_constraintVertical_bias="0.808" />
- androidx.constraintlayout.widget.ConstraintLayout>
5.4 布局 activity_main.xml
- "1.0" encoding="utf-8"?>
- <androidx.drawerlayout.widget.DrawerLayout xmlns:android="http://schemas.android.com/apk/res/android"
- xmlns:app="http://schemas.android.com/apk/res-auto"
- xmlns:tools="http://schemas.android.com/tools"
- android:id="@+id/drawerLayout"
- android:layout_width="match_parent"
- android:layout_height="match_parent"
- tools:context=".MainActivity"
- tools:openDrawer="start">
- <include
- android:id="@+id/include_app_bar"
- layout="@layout/app_bar_main" />
- <com.google.android.material.navigation.NavigationView
- android:id="@+id/navigationView"
- android:layout_width="wrap_content"
- android:layout_height="match_parent"
- android:layout_gravity="start"
- android:fitsSystemWindows="true"
- app:headerLayout="@layout/navigation_view_header_layout"
- app:itemIconTint="@color/white"
- app:itemTextAppearance="@style/TextAppearance.AppCompat.Medium"
- app:itemTextColor="@color/white"
- app:menu="@menu/menu_main_drawer" />
- androidx.drawerlayout.widget.DrawerLayout>
5.5 创建 MainActivity.kt
- class MainActivity : AppCompatActivity() {
- private lateinit var binding: ActivityMainBinding
- private lateinit var navController: NavController
- private lateinit var appBarConfiguration: AppBarConfiguration
- override fun onCreate(savedInstanceState: Bundle?) {
- super.onCreate(savedInstanceState)
- binding = ActivityMainBinding.inflate(layoutInflater)
- with(binding){
- setContentView(root)
- setSupportActionBar(includeAppBar.toolbar)
- val navHostFragment = includeAppBar.includeContent.fragmentContainerView.getFragment
() - navController = navHostFragment.navController
- val set = setOf(
- R.id.straightFragment,
- R.id.curveFragment,
- R.id.cycleFragment,
- R.id.rotationFragment,
- R.id.swingFragment,
- R.id.transitionFragment,
- R.id.complexFragment,
- R.id.textFragment,
- R.id.imageFragment
- )
- appBarConfiguration = AppBarConfiguration(set,drawerLayout)
- setupActionBarWithNavController(navController, appBarConfiguration)
- navigationView.setupWithNavController(navController)
- }
- }
- override fun onSupportNavigateUp(): Boolean {
- return navController.navigateUp(appBarConfiguration) || super.onSupportNavigateUp()
- }
- override fun onCreateOptionsMenu(menu: Menu?): Boolean {
- menuInflater.inflate(R.menu.menu_main_about, menu)
- return super.onCreateOptionsMenu(menu)
- }
- override fun onOptionsItemSelected(item: MenuItem): Boolean {
- if(item.itemId == R.id.action_settings){
- AlertDialog.Builder(this).setPositiveButton("Ok",null)
- .setMessage(R.string.about_motion_user)
- .create()
- .show()
- }
- return super.onOptionsItemSelected(item)
- }
- }
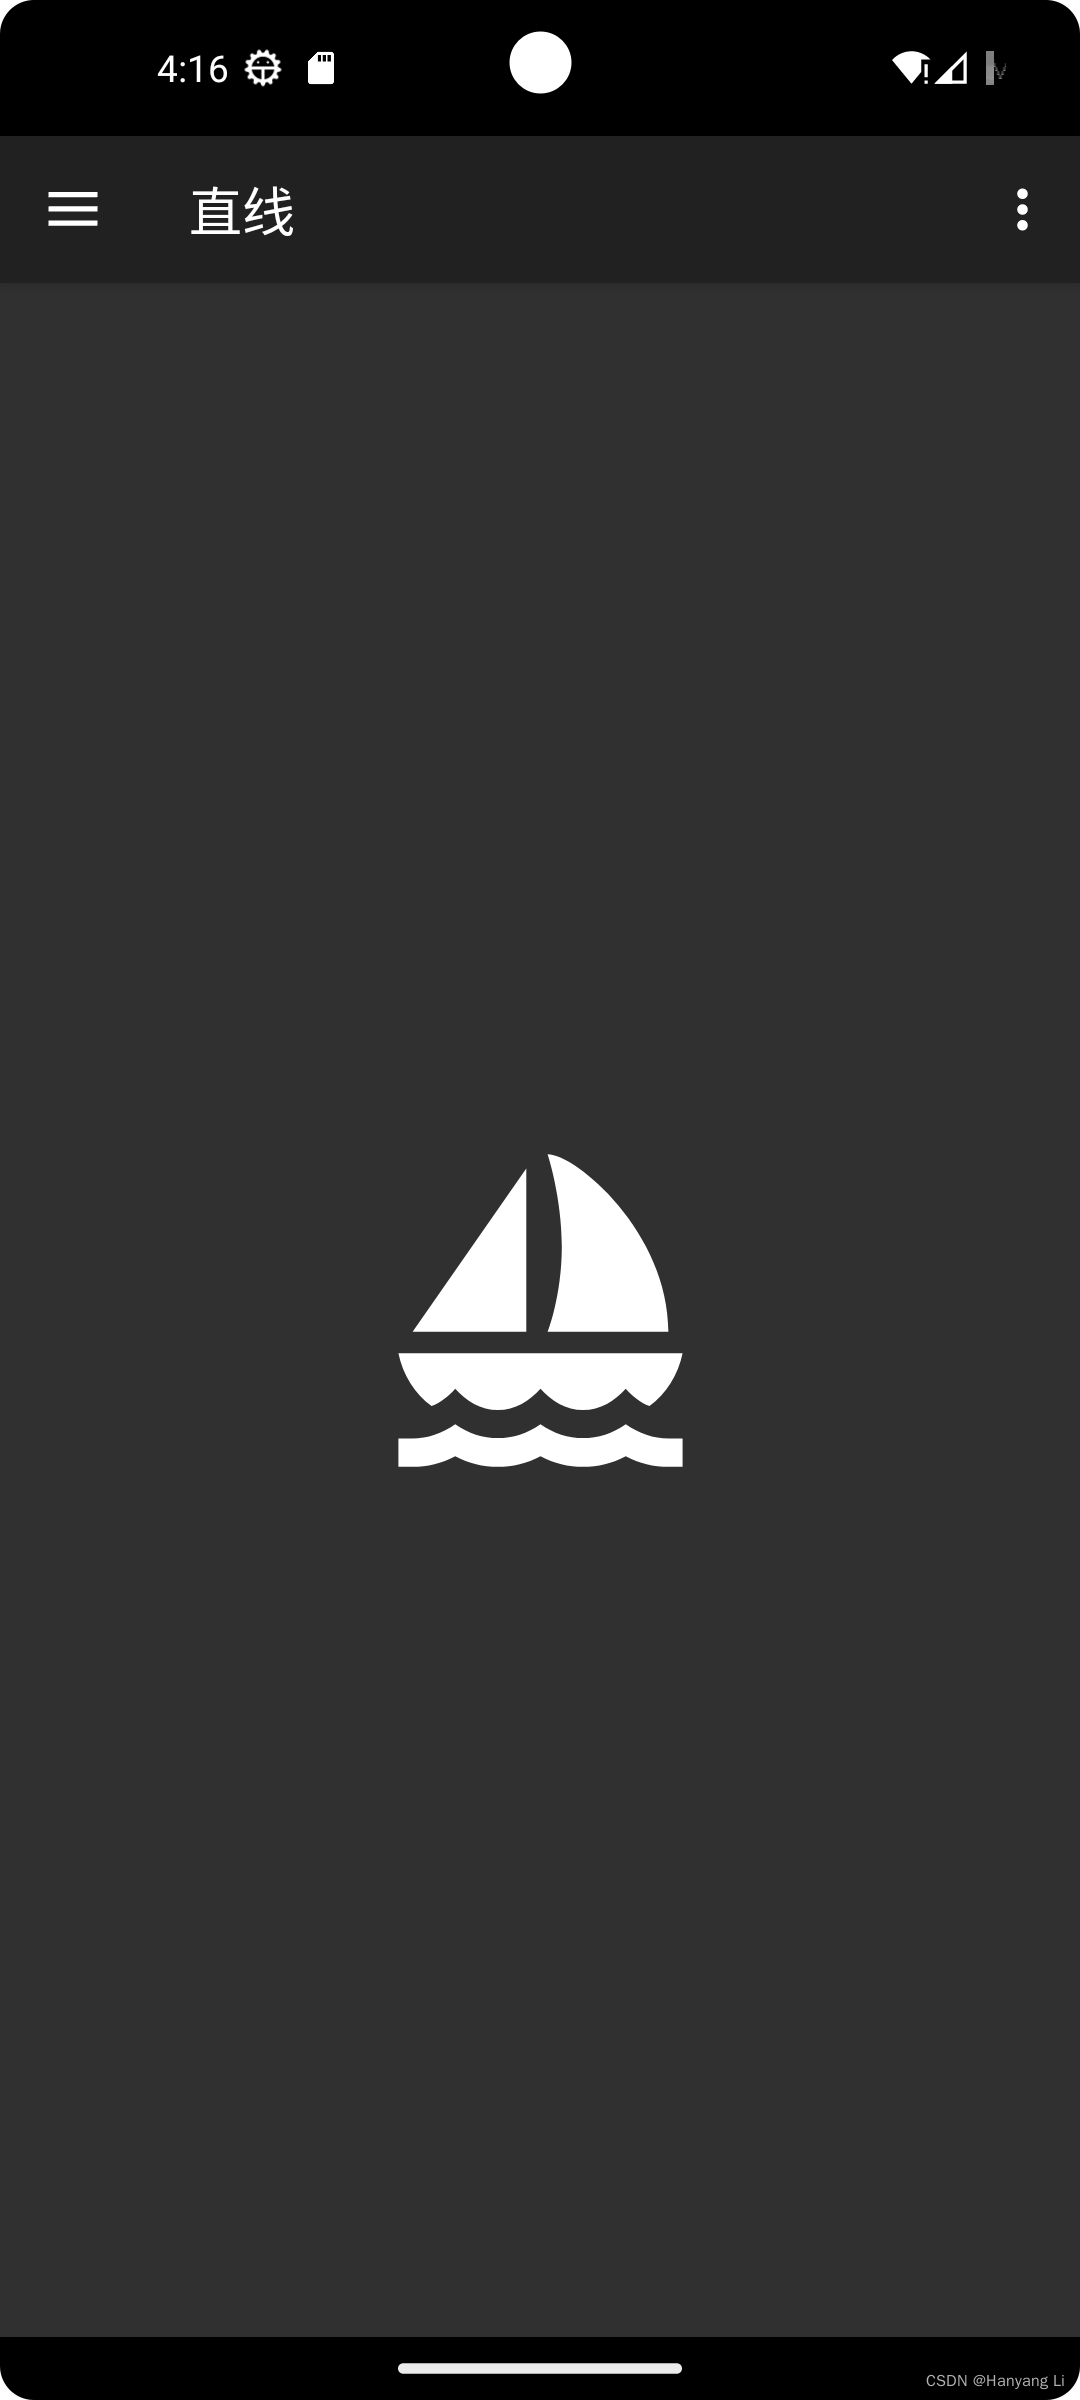
6. 效果图


-
相关阅读:
java计算机毕业设计基于springboo+vue的医院挂号体检预约系统
java计算机毕业设计网上扶贫农产品销售系统源代码+数据库+系统+lw文档
源码编译elfutils
Java基于springboot +vue网上超市购物网站 多商家
ElasticSearch学习笔记-Vector向量搜索记录
浏览器不能访问阿里云ECS
Pandas数据分析20——pandas窗口计算
Libco Hook 机制浅析
springboot+教学工作量管理系统 毕业设计-附源码221541
How AI can revolutionise science AI如何彻底改变科学 | 经济学人20230916版双语精翻
- 原文地址:https://blog.csdn.net/u011193452/article/details/127450361
