-
springboot - 2.7.3版本 - (六)学习如何使用Elasticsearch-8.4.2
上一篇文章介绍了ELK的使用,这里继续学习Elasticsearch的相关内容。
一,ElasticSearch的使用场景:Elasticsearch的使用场景深入详解_狂奔的蜗牛Evan的博客-CSDN博客_elasticsearch使用场景
二,ElasticSearch与关系数据库的对比
Elasticsearch 关系数据库 索引(index) 数据库 类型(type) 表,新版本默认是_doc 映射(mapping) 表结构 属性(field) 字段 文档(document) 一条记录 三,如何向 Elasticsearch 添加一些索引、映射和数据
- 启动 elasticsearch.bat
- 默认地址:http://localhost:9200
1)Restful API 使用方式 - 使用PostMan发送请求
- 索引操作
操作名称 请求方式 请求格式 演示 创建索引 PUT /索引名称 
查询索引 GET /索引名称 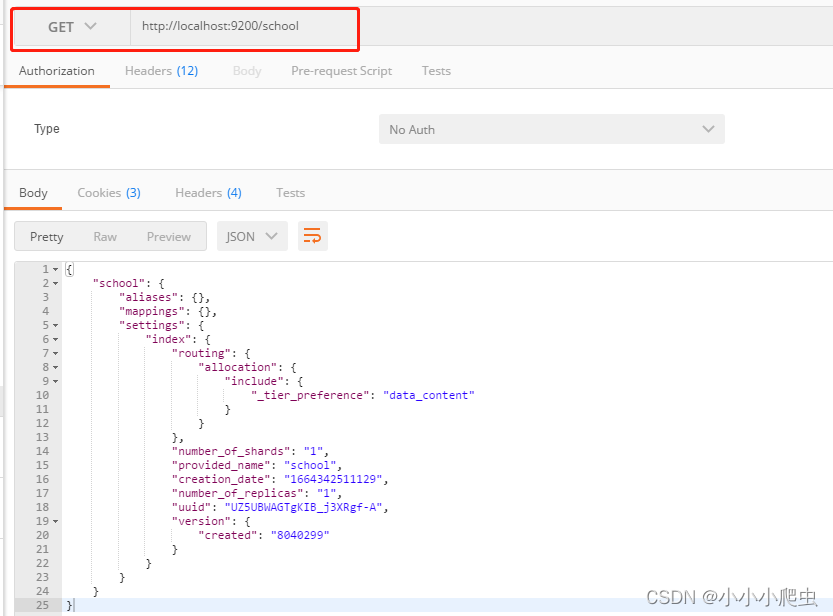
/索引名称1,索引名称2... /索引名称* /索引名称/_all 删除索引 DELETE /索引名称 
关闭索引 POST /索引名称/_close 
打开索引 POST /索引名称/_open 
是否存在 HEAD /索引名称 响应200表示存在,404则不存在 索引设置 GET /索引名称/_settings 
索引统计 GET /_stats 冲洗 POST /索引名称/_flush 
- 映射操作
操作名称 请求方式 请求格式 演示 创建索引和映射 PUT /索引名称
{"mappings": { "properties": {"name": { "type": "text"}, "age": { "type": "integer"}}}}


添加映射 PUT /索引名称/_mapping
{ "properties":{ "name":{ "type":"text" }, "age":{ "type":"integer" }, "gender":{"type":"text"} } }

添加字段 PUT /索引名称/_mapping
{"properties":{ "gender":{"type":"text"}}}

查询映射 GET /索引名称/_mapping 
- 文档操作
操作名称 请求方式 请求格式 演示 添加文档 POST 不指定ID
/索引名称/_doc/

指定ID
/索引名称/_doc/1

查询文档 GET 查询所有
/索引名称/_search

根据ID查询
/索引名称/_doc/1

删除文档 DELETE /索引名称/_doc/1 
搜索文档 POST 表达式搜索
/索引名称/_search
{
    "query" : {
        "match" : {
            "name" : "张三"
        }
    }
}
GET 条件搜索
/索引名称/_search?q=name:张三

2)Kibana 使用方式 - 使用Dev-Tools
- 启动 kibana .bat
- 默认地址:http://localhost:5601

直接在左边控制台输入语句就可以执行成功了。


四,Java API 的使用方式
elasticsearch官方在8.0版本以后,已经舍弃了High level rest clint Api,推荐使用java clint api。
官方文档:Installation | Elasticsearch Java API Client [8.4] | Elastic
1)在项目中的使用
- pom.xml引入依赖包
- <dependency>
- <groupId>co.elastic.clientsgroupId>
- <artifactId>elasticsearch-javaartifactId>
- <version>8.4.2version>
- dependency>
- <dependency>
- <groupId>com.fasterxml.jackson.coregroupId>
- <artifactId>jackson-databindartifactId>
- <version>2.12.3version>
- dependency>
- <dependency>
- <groupId>jakarta.jsongroupId>
- <artifactId>jakarta.json-apiartifactId>
- <version>2.0.1version>
- dependency>
- application.yml 添加配置
- # =========================================================================
- elasticSearch:
- url: 127.0.0.1
- port: 9200
- # ==========================================================================
- 自定义Client配置类
- package com.qi.study.springboot.config;
- import org.apache.http.HttpHost;
- import org.elasticsearch.client.RestClient;
- import org.springframework.beans.factory.annotation.Value;
- import org.springframework.context.annotation.Bean;
- import org.springframework.context.annotation.Configuration;
- import co.elastic.clients.elasticsearch.ElasticsearchClient;
- import co.elastic.clients.json.jackson.JacksonJsonpMapper;
- import co.elastic.clients.transport.ElasticsearchTransport;
- import co.elastic.clients.transport.rest_client.RestClientTransport;
- @Configuration
- public class ElasticSearchConfig {
- @Value("${elasticSearch.url}")
- private String url;
- @Value("${elasticSearch.port}")
- private Integer port;
- @Bean
- public ElasticsearchClient elasticsearchClient() {
- // Create the low-level client
- RestClient restClient = RestClient.builder(new HttpHost(url, port)).build();
- // Create the transport with a Jackson mapper
- ElasticsearchTransport transport = new RestClientTransport(restClient, new JacksonJsonpMapper());
- // And create the API client
- ElasticsearchClient client = new ElasticsearchClient(transport);
- return client;
- }
- }
- 添加测试代码,结构如下:
Controller

studentService
 elasticSearchService
2)启动测试
- 启动elasticSearch.bat
- 启动logstash 【logstash -f ./config/logstash-es.conf】
- 启动springboot
- 通过postman访问测试:

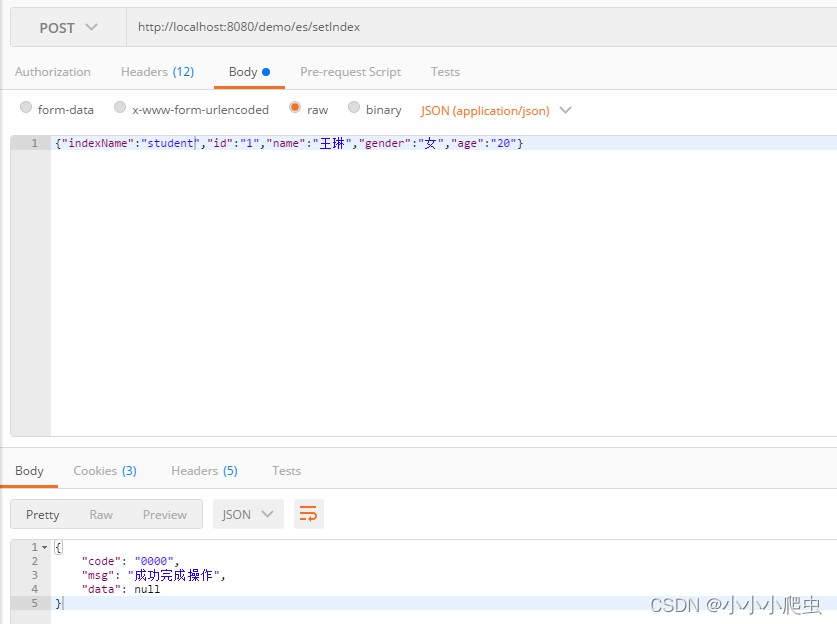


本篇文章主要是了解如何去使用ElasticSearch,有个初步的认知,更多高级搜索方法可以根据需要进一步去学习。
五,源代码下载: https://download.csdn.net/download/MyNoteBlog/86727519
-
相关阅读:
【Unity3D】摇杆
力扣(LeetCode)1732. 找到最高海拔(C++)
Hidl Service - Java Service共享内存
Linux/Ubuntu环境搭建(二):创建添加新磁盘、搭建Samba服务器
猿创征文|零基础python学习之旅(简短又漫长)
002 IOC和DI使用
【前端】CSS定位
Java 集合
AI人脸检测智能分析网关算法模型管理,支持自由组合算法
智慧食堂这个技术,有点秀
- 原文地址:https://blog.csdn.net/MyNoteBlog/article/details/127086636