-
Spring源码级笔记(二)
3 IOC操作Bean管理(FactoryBean)
- spring有两种类型的Bean,一种普通的bean,另一种工厂bean(FactBean)
- 普通bean: 在配置文件中定义bean类型就是返回类型
- 工厂bean: 在配置文件定义bean类型可以和返回类型不一样
- 第一步 创建类,让这个类为工厂bean,实现接口FactoryBean
- 第二步 实现接口里面的方法 在实现的方法中定义返回bean的类型
package com.wjiangquan.spring5.factorybean; import com.wjiangquan.spring5.collectiontype.Course; import org.springframework.beans.factory.FactoryBean; /** * @author weijiangquan * @date 2022/9/25 -18:40 * @Description */ public class MyBean implements FactoryBean<Course> { /** * 定义返回的bean * @return * @throws Exception */ @Override public Course getObject() throws Exception { Course course = new Course(); course.setCname("asda"); return course; } @Override public Class<?> getObjectType() { return null; } @Override public boolean isSingleton() { return false; } }<beans xmlns="http://www.springframework.org/schema/beans" xmlns:xsi="http://www.w3.org/2001/XMLSchema-instance" xmlns:p="http://www.springframework.org/schema/p" xmlns:util="http://www.springframework.org/schema/util" xsi:schemaLocation="http://www.springframework.org/schema/beans http://www.springframework.org/schema/beans/spring-beans.xsd http://www.springframework.org/schema/util http://www.springframework.org/schema/util/spring-util.xsd"> <bean id="myBean" class="com.wjiangquan.spring5.factorybean.MyBean">bean> beans>package com.wjiangquan.spring5.testDemo; import com.wjiangquan.spring5.collectiontype.Course; import com.wjiangquan.spring5.factorybean.MyBean; import org.junit.Test; import org.springframework.context.ApplicationContext; import org.springframework.context.support.ClassPathXmlApplicationContext; /** * @author weijiangquan * @date 2022/9/25 -18:44 * @Description */ public class testBean { @Test public void test(){ ApplicationContext context = new ClassPathXmlApplicationContext("bean.xml"); Course myBean = context.getBean("myBean", Course.class); System.out.println(myBean); } }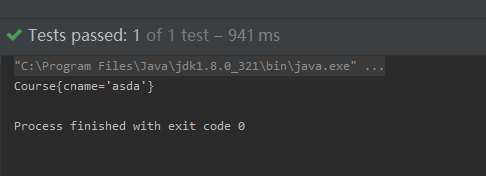
注意,如果这个地方这样写将会发生错误

大概的意思就是类型不匹配
4 bean的作用域
- 在Spring里面,可以设置成是单实例还是多实例,默认是单实例的
可以做一个简单的验证
多次获取
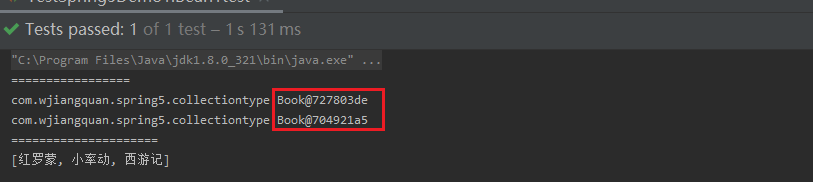
   @Test
    public void Bean1test(){
        ApplicationContext context = new  ClassPathXmlApplicationContext("bean1.xml");
        Book book = context.getBean("book", Book.class);
        Book book1 = context.getBean("book", Book.class);
        System.out.println("=================");
        System.out.println(book);
        System.out.println(book1);
        System.out.println("=====================");
        book.test();
    }
从结果可以看出来每次获取的对象都是一样的(所以默认是单实例的----不过自己可以在配置文件中进行修改)

4.1 设置单实例,多实例
如何设置单实例还是多实例
(1) 在 spring 配置文件 bean 标签里面有属性(scope)用于设置单实例还是多实例
(2)scope 属性值
第一个值 默认值,singleton,表示是单实例对象
第二个值 prototype
在原来的基础上进行修改bean的文件之后

再次测试的时候,发现
创建的对象不一样了,此时是多实例对象了
singleton 和 prototype 区别:
第一 singleton 单实例,prototype 多实例
第二 设置scope值是singleton时候,加载spring配置文件时候就会创建单实例对象
设置scope值是prototype时候,
不是在加载spring配置文件时候创建对象,在调用getBean方法时候创建多实例对象注意初了上面的两种方式之外,还有
request和session两种,两种了解一下就可以了5 bean的声明周期
1.生命周期
从对象的创建到对象的销毁的过程
2.bean的声明周期
(1) 通过构造器创建bean实例(无参构造)
(2) 为bean的属性设置值和对于其它bean的引用(调用set方法)
(3) 调用bean的初始化方法(需要进行配置)
(4) bean可以使用了(对象获取到了)
(5) 当容器关闭的时候,调用bean的销毁的方法
3.演示bean的生命周期
创建一个实例类
Orderspackage com.wjiangquan.spring5.bean; /** * @author weijiangquan * @date 2022/9/25 -21:49 * @Description */ public class Orders { //无参构造 public Orders() { System.out.println("第一步,执行无参构造创建bean的实例"); } private String oname; public void setOname(String oname) { this.oname = oname; System.out.println("第一步调用set方法,设置属性值"); } //创建执行初始的方法 public void initMethod(){ System.out.println("第三步 执行初始化的方法"); } //创建销毁的方法 public void destroyMethod(){ System.out.println("第五步 执行销毁的方法"); } }xml文件的配置
<beans xmlns="http://www.springframework.org/schema/beans"
       xmlns:xsi="http://www.w3.org/2001/XMLSchema-instance"
       xmlns:p="http://www.springframework.org/schema/p"
       xmlns:util="http://www.springframework.org/schema/util"
       xsi:schemaLocation="http://www.springframework.org/schema/beans http://www.springframework.org/schema/beans/spring-beans.xsd
							http://www.springframework.org/schema/util  http://www.springframework.org/schema/util/spring-util.xsd">


	<bean id="orders" class="com.wjiangquan.spring5.bean.Orders" init-method="initMethod" destroy-method="destroyMethod">
		<property name="oname" value="手机">property>
	bean>


beans>
测试代码的书写
    @Test
    public void testBean1(){
        ClassPathXmlApplicationContext context = new ClassPathXmlApplicationContext("bean2.xml");
        Orders orders = context.getBean("orders", Orders.class);
        System.out.println("第四步 获取bean的实例对象");
        System.out.println(orders);

        //手动让bean的实例进行销毁
        context.close();    //close在这个类中ClassPathXmlApplicationContext
    }
}
运行结果的检验,和预期的完全相符

在上面的两步之上还有两步需要处理
5.bean的后置处理器
bean的声明周期添加之后就是7步,没有添加的就是五步


演示添加后置处理器的效果
(1) 创建类,实现接口BeanPostProcessor,创建后置处理器
创建一个类
package com.wjiangquan.spring5.bean;

import org.springframework.beans.BeansException;
import org.springframework.beans.factory.config.BeanPostProcessor;


/**
 * @author weijiangquan
 * @date 2022/9/25 -22:08
 * @Description
 */
public class MyBeanPost implements BeanPostProcessor{

    @Override
    public Object postProcessBeforeInitialization(Object bean, String beanName) throws BeansException {

        System.out.println("在初始化之前执行的方法");
        return bean;
    }


    @Override
     public Object postProcessAfterInitialization(Object bean, String beanName) throws BeansException {
        System.out.println("再初始化之后执行的方法");
        return bean;
    }
}
在配置文件开启后置处理器
<beans xmlns="http://www.springframework.org/schema/beans"
       xmlns:xsi="http://www.w3.org/2001/XMLSchema-instance"
       xmlns:p="http://www.springframework.org/schema/p"
       xmlns:util="http://www.springframework.org/schema/util"
       xsi:schemaLocation="http://www.springframework.org/schema/beans http://www.springframework.org/schema/beans/spring-beans.xsd
							http://www.springframework.org/schema/util  http://www.springframework.org/schema/util/spring-util.xsd">


	<bean id="orders" class="com.wjiangquan.spring5.bean.Orders" init-method="initMethod" destroy-method="destroyMethod">
		<property name="oname" value="手机">property>
	bean>


	<bean id="myBeanPost" class="com.wjiangquan.spring5.bean.MyBeanPost">bean>


beans>
注意:对于上面的写法,将会为所有的bean都加上上后置处理器

6 bean的管理xml方法–自动装配
注意在实际中使用xml注入的方式使用的很少,一般都是使用注解,但是还是有必要进行了解的
-
什么是自动装配
(1) 根据指定装配规则(属性名称或者属性类型),Spring 自动将匹配的属性值进行注入
-
演示自动装配的过程
创建了两个实体类
package com.wjiangquan.spring5.outowire;

/**
 * @author weijiangquan
 * @date 2022/9/25 -22:21
 * @Description
 */
public class Dept {

    @Override
    public String toString() {
        return "Dept{}";
    }
}
package com.wjiangquan.spring5.outowire; /** * @author weijiangquan * @date 2022/9/25 -22:21 * @Description */ //员工 public class Emp { private Dept dept; public void setDept(Dept dept) { this.dept = dept; } @Override public String toString() { return "Emp{" + "dept=" + dept + '}'; } public void test(){ System.out.println(dept); } }配置文件
<beans xmlns="http://www.springframework.org/schema/beans"
       xmlns:xsi="http://www.w3.org/2001/XMLSchema-instance"
       xmlns:p="http://www.springframework.org/schema/p"
       xmlns:util="http://www.springframework.org/schema/util"
       xsi:schemaLocation="http://www.springframework.org/schema/beans http://www.springframework.org/schema/beans/spring-beans.xsd
							http://www.springframework.org/schema/util  http://www.springframework.org/schema/util/spring-util.xsd">


	<bean id="emp" class="com.wjiangquan.spring5.outowire.Emp" autowire="byName">


	bean>


	<bean id="dept" class="com.wjiangquan.spring5.outowire.Dept">

	bean>


beans>
需要的注意的是
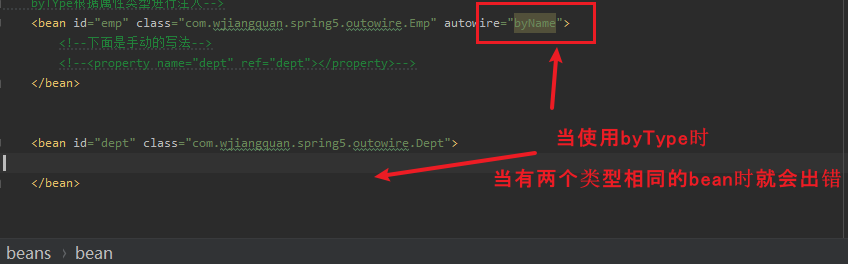
7 引入外部的属性文件
当属性有许多的时候,全部写的就会比较麻烦,本节主要用于处理该问题
1.直接配置数据库的信息
(1) 配置德鲁伊连接池
(2) 引入德鲁伊的jar包

<bean id="dataSource" class="com.alibaba.druid.pool.DruidDataSource"> <property name="driverClassName" value="com.mysql.jdbc.Driver">property> <property name="url" value="jdbc:mysql://localhost:3306/userDb">property> <property name="username" value="root">property> <property name="password" value="123456">property> bean>2、引入外部属性文件配置数据库连接池
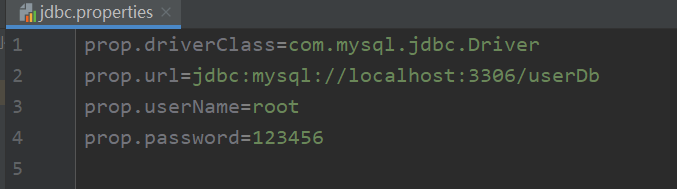
(1)创建外部属性文件,properties 格式文件,写数据库信息
(2)把外部 properties 属性文件引入到 spring 配置文件中
-
引入 context 名称空间
红框部分为新添加的部分
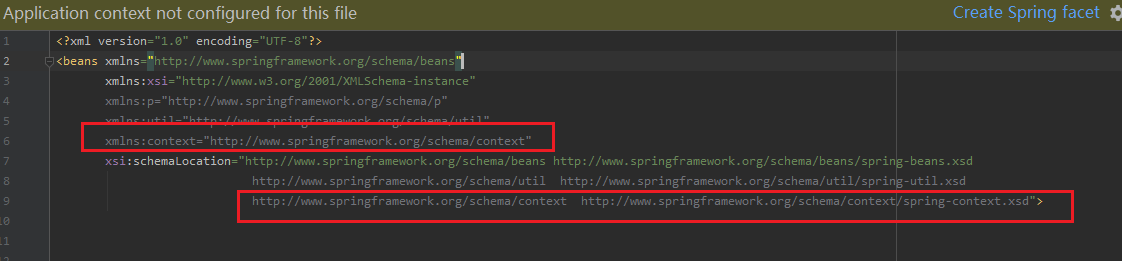
- 在 spring 配置文件使用标签引入外部属性文件
<context:property-placeholder location="classpath*:jdbc.properties"/> <bean id="dataSource" class="com.alibaba.druid.pool.DruidDataSource"> <property name="driverClassName" value="${prop.driverClass}">property> <property name="url" value="${prop.url]">property> <property name="username" value="${prop.userName}">property> <property name="password" value="${prop.password]">property> bean>- 在 spring 配置文件使用标签引入外部属性文件
<context:property-placeholder location="classpath*:jdbc.properties"/> <bean id="dataSource" class="com.alibaba.druid.pool.DruidDataSource"> <property name="driverClassName" value="${prop.driverClass}">property> <property name="url" value="${prop.url]">property> <property name="username" value="${prop.userName}">property> <property name="password" value="${prop.password]">property> bean> -
相关阅读:
配置web&数据库开发环境
26. 图论 - 树
【TS】枚举
C++头文件定义变量
清华操作系统笔记4——虚拟内存技术
3D打印喷嘴大小如何选择0.2-0.5mm喷嘴
WebSocket实战之一
根文件系统
SVN的基本使用
KubeSphere 社区双周报 | OpenFunction v1.2.0 发布 | 2023.09.15-09.28
- 原文地址:https://blog.csdn.net/weixin_47994845/article/details/127045259