-
Android移动应用开发之六种布局
LinearLayout
<LinearLayout xmlns:android="http://schemas.android.com/apk/res/android"
    android:layout_width="match_parent"
    android:layout_height="match_parent"
    android:orientation="vertical"
    android:dividerPadding="200dp"
    >

    <LinearLayout
        android:layout_width="100dp"
        android:layout_height="0dp"
        android:background="#ff0000"
        android:layout_weight="1"
        />
    <View
        android:layout_width="match_parent"
        android:layout_height="1dp"
        android:background="#ff000000"
        />
    <LinearLayout
        android:layout_width="100dp"
        android:layout_height="0dp"
        android:background="#ffff00"
        android:layout_weight="1"
        />

    <LinearLayout
        android:layout_width="200dp"
        android:layout_height="00dp"
        android:layout_weight="1"
        android:background="#00ffff" />

LinearLayout>
orientation设置排列方式
layout_weight设置权重(感觉和弹性盒子差不多)

RelativeLayout
顾名思义,相对元素布局
<RelativeLayout xmlns:android="http://schemas.android.com/apk/res/android"
    android:layout_height="match_parent"
    android:layout_width="match_parent"
    android:padding="10dp"
    >
    <RelativeLayout
        android:id="@+id/rl1"
        android:layout_width="100dp"
        android:layout_height="100dp"
        android:background="#ff0000"
        android:layout_centerInParent="true"
        />
    <RelativeLayout
        android:layout_margin="0dp"
        android:layout_width="100dp"
        android:layout_height="100dp"
        android:background="#00ff00"
        android:layout_toLeftOf="@+id/rl1"
        />

RelativeLayout>
FrameLayout
<FrameLayout
    android:layout_width="match_parent"
    android:layout_height="match_parent"
    xmlns:android="http://schemas.android.com/apk/res/android">

    <FrameLayout
        android:layout_width="400dp"
        android:layout_height="400dp"
        android:background="#ff0000"
        />
    <FrameLayout
        android:layout_width="300dp"
        android:layout_height="300dp"
        android:background="#ffff00"
        android:foreground="@drawable/a"
        />

    <FrameLayout
        android:layout_width="200dp"
        android:layout_height="200dp"
        android:background="#00ff00"/>

FrameLayout>
简单来说,就是可以叠一起的布局TableLayout
<TableLayout
    xmlns:android="http://schemas.android.com/apk/res/android"
    android:collapseColumns=""

    android:layout_width="match_parent"
    android:layout_height="match_parent"
    >
    <Button
        android:layout_width="wrap_content"
        android:layout_height="wrap_content"
        android:text="第1个"
        />
    <TableRow>
        <Button
            android:layout_width="wrap_content"
            android:layout_height="wrap_content"
            android:text="第一个"
            />

        <Button
            android:layout_width="wrap_content"
            android:layout_height="wrap_content"
            android:text="第二个"
            />
    TableRow>

    <TableRow>
        <Button
            android:layout_width="wrap_content"
            android:layout_height="wrap_content"
            android:text="第一个"
            />
    TableRow>

TableLayout>
可以看成类似excel的表格一样的布局
通常结合< TableRow >一起使用GridLayout
<GridLayout
    xmlns:android="http://schemas.android.com/apk/res/android"
    android:layout_width="match_parent"
    android:layout_height="match_parent"
    android:orientation="horizontal"
    android:columnCount="3"
    >
    <Button
        android:layout_width="wrap_content"
        android:layout_height="wrap_content"
        android:layout_row="0"
        android:layout_column="1"
        android:text="第一个"
        />

    <Button
        android:layout_width="wrap_content"
        android:layout_height="wrap_content"
        android:text="第二个"
        />
    <Button
        android:layout_width="wrap_content"
        android:layout_height="wrap_content"
        android:text="第三个"
        android:layout_columnSpan="3"
        />
GridLayout>
可以看成TableLayout升级版?ConstraintLayout
约束布局
这个应该是最强的布局了
创建布局默认的就是这个了。
打开design模式,然后随便拖几个按钮进去
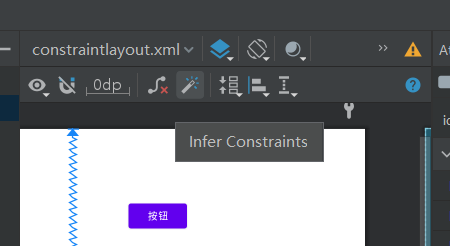
点击魔术棒建立约束。
ok完成布局了。
代码也自动生成好了:
<androidx.constraintlayout.widget.ConstraintLayout xmlns:android="http://schemas.android.com/apk/res/android"
    xmlns:app="http://schemas.android.com/apk/res-auto"
    xmlns:tools="http://schemas.android.com/tools"
    android:layout_width="match_parent"
    android:layout_height="match_parent">


    <Button
        android:id="@+id/button"
        android:layout_width="wrap_content"
        android:layout_height="wrap_content"
        android:layout_marginStart="246dp"
        android:layout_marginTop="107dp"
        android:text="按钮"
        app:layout_constraintStart_toStartOf="parent"
        app:layout_constraintTop_toTopOf="parent" />

    <Button
        android:id="@+id/button3"
        android:layout_width="wrap_content"
        android:layout_height="wrap_content"
        android:layout_marginEnd="172dp"
        android:layout_marginBottom="125dp"
        android:text="Button"
        app:layout_constraintBottom_toBottomOf="parent"
        app:layout_constraintEnd_toEndOf="parent" />

    <Button
        android:id="@+id/button4"
        android:layout_width="wrap_content"
        android:layout_height="wrap_content"
        android:layout_marginStart="115dp"
        android:text="Button"
        app:layout_constraintBottom_toBottomOf="parent"
        app:layout_constraintStart_toStartOf="parent"
        app:layout_constraintTop_toTopOf="parent" />
androidx.constraintlayout.widget.ConstraintLayout>
我们开个虚拟机运行一下:

只能说,差不太多,微调一下差不多就能用了。也能够设置各个组件的属性值颜色字体等等。
这用起来就像是墨刀一样。
参考
-
相关阅读:
刑法~~~
Java语言知识大盘点(期末总复习)一
vr模拟电力场景安全应急培训,电力安全教育培训新方法
软件复杂性的来源与应对
Unity3D下如何实现跨平台低延迟的RTMP、RTSP播放
前端不安装Nginx情况下部署
重编译 microsip 和 pjsip 支持 mp3 录音
【翻译】驯服野兽:Scylla 如何利用控制理论来控制压实
C/C++读取SEGY文件(三)
IDEA 工具安装一个 Mybatis 的插件 Free Mybatis plugin
- 原文地址:https://blog.csdn.net/qq_52785473/article/details/126979334