-
使用 Jetpack Compose 实现一个计算器APP
前言
在上一篇文章中,我们说到打算使用 compose 实现一个计算器 APP,最开始打算做一个经典的 LCD 基础计算器,后来觉得好像没啥特色,最终决定还是改成仿微软计算器。
不过,微软计算器的功能太多了,仿制的工程量不小,所以我打算只仿我认为最核心的两个模式:标准模式和程序员模式。
另外,这篇文章只说 UI 实现,具体的运算逻辑可以自行查看源码。
功能特性
是否支持 功能 ✔ 基础四则运算(标准、程序员) ✔ 无限输入(标准) ✔ % , 1/x , x² , √x 扩展运算(标准) ✔ 运算过程历史记录(标准) ✔ 二进制、八进制、十进制、十六进制随意切换并实时换算(程序员) ✔ 位运算:左移、右移(程序员) ✔ 逻辑运算:AND、OR、NOT、XOR(程序员) ✔ 无限连续计算(标准、程序员) ✔ 支持悬浮窗计算器,可调整位置、大小、透明度(标准) ✔ 符合人体握持习惯的横屏键盘 ✔ 旋转手机自动切换标准和程序员键盘 ✔ 深色模式 ✔ 酷炫的数字动效与振动反馈 注意:
- 标准模式使用 BigDecimal 计算,所以理论支持无限位数数字计算
- 程序员模式因为涉及到二进制计算,所以采用 64 位储存大小,故不支持无限位数计算
- 程序员模式不支持带小数运算,如果运算结果有小数,则会直接抛弃小数部分
截图
浅色 深色 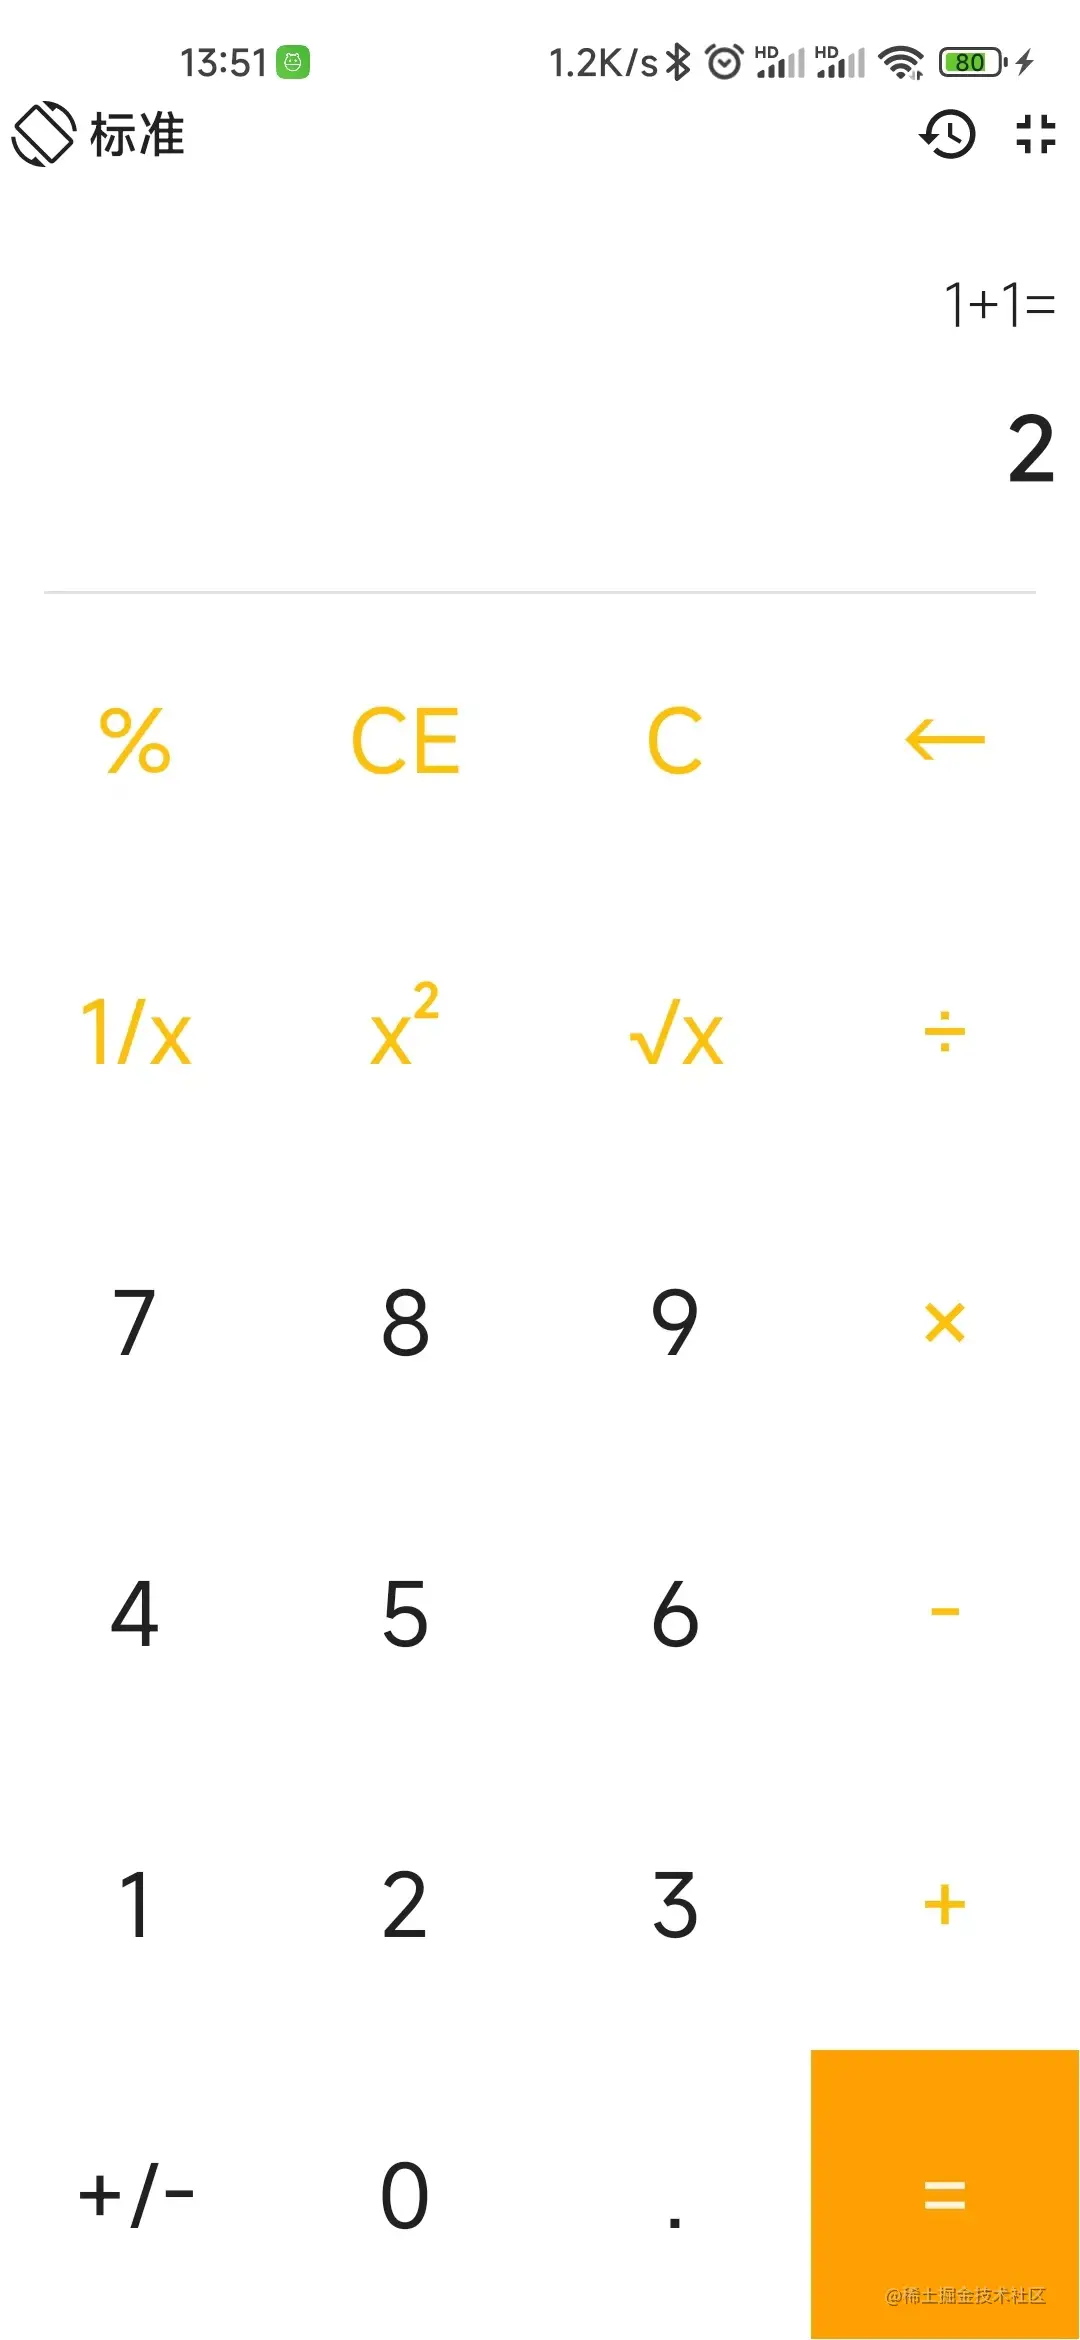
标准模式
标准模式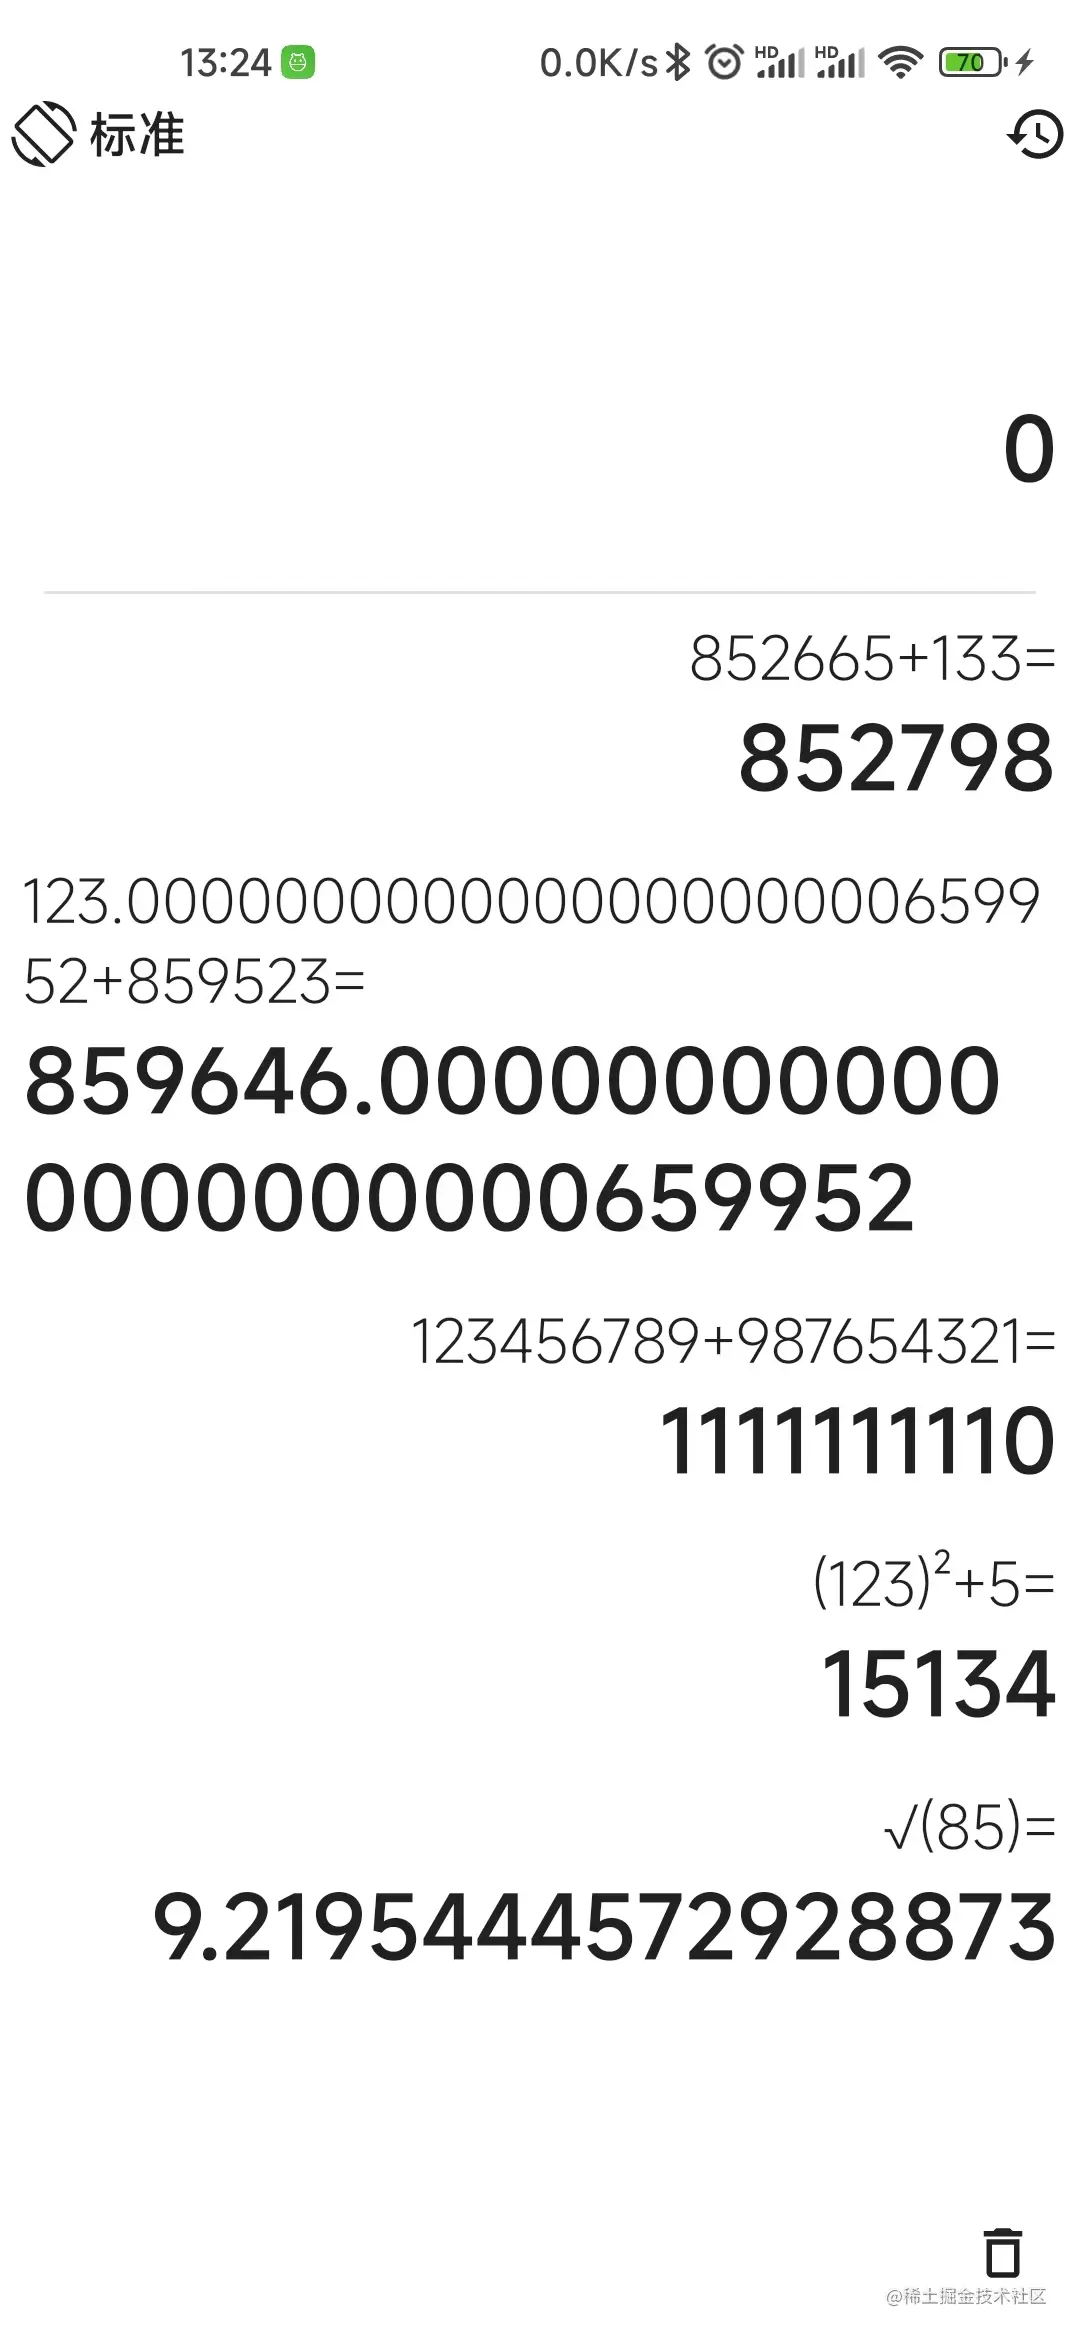
历史记录
历史记录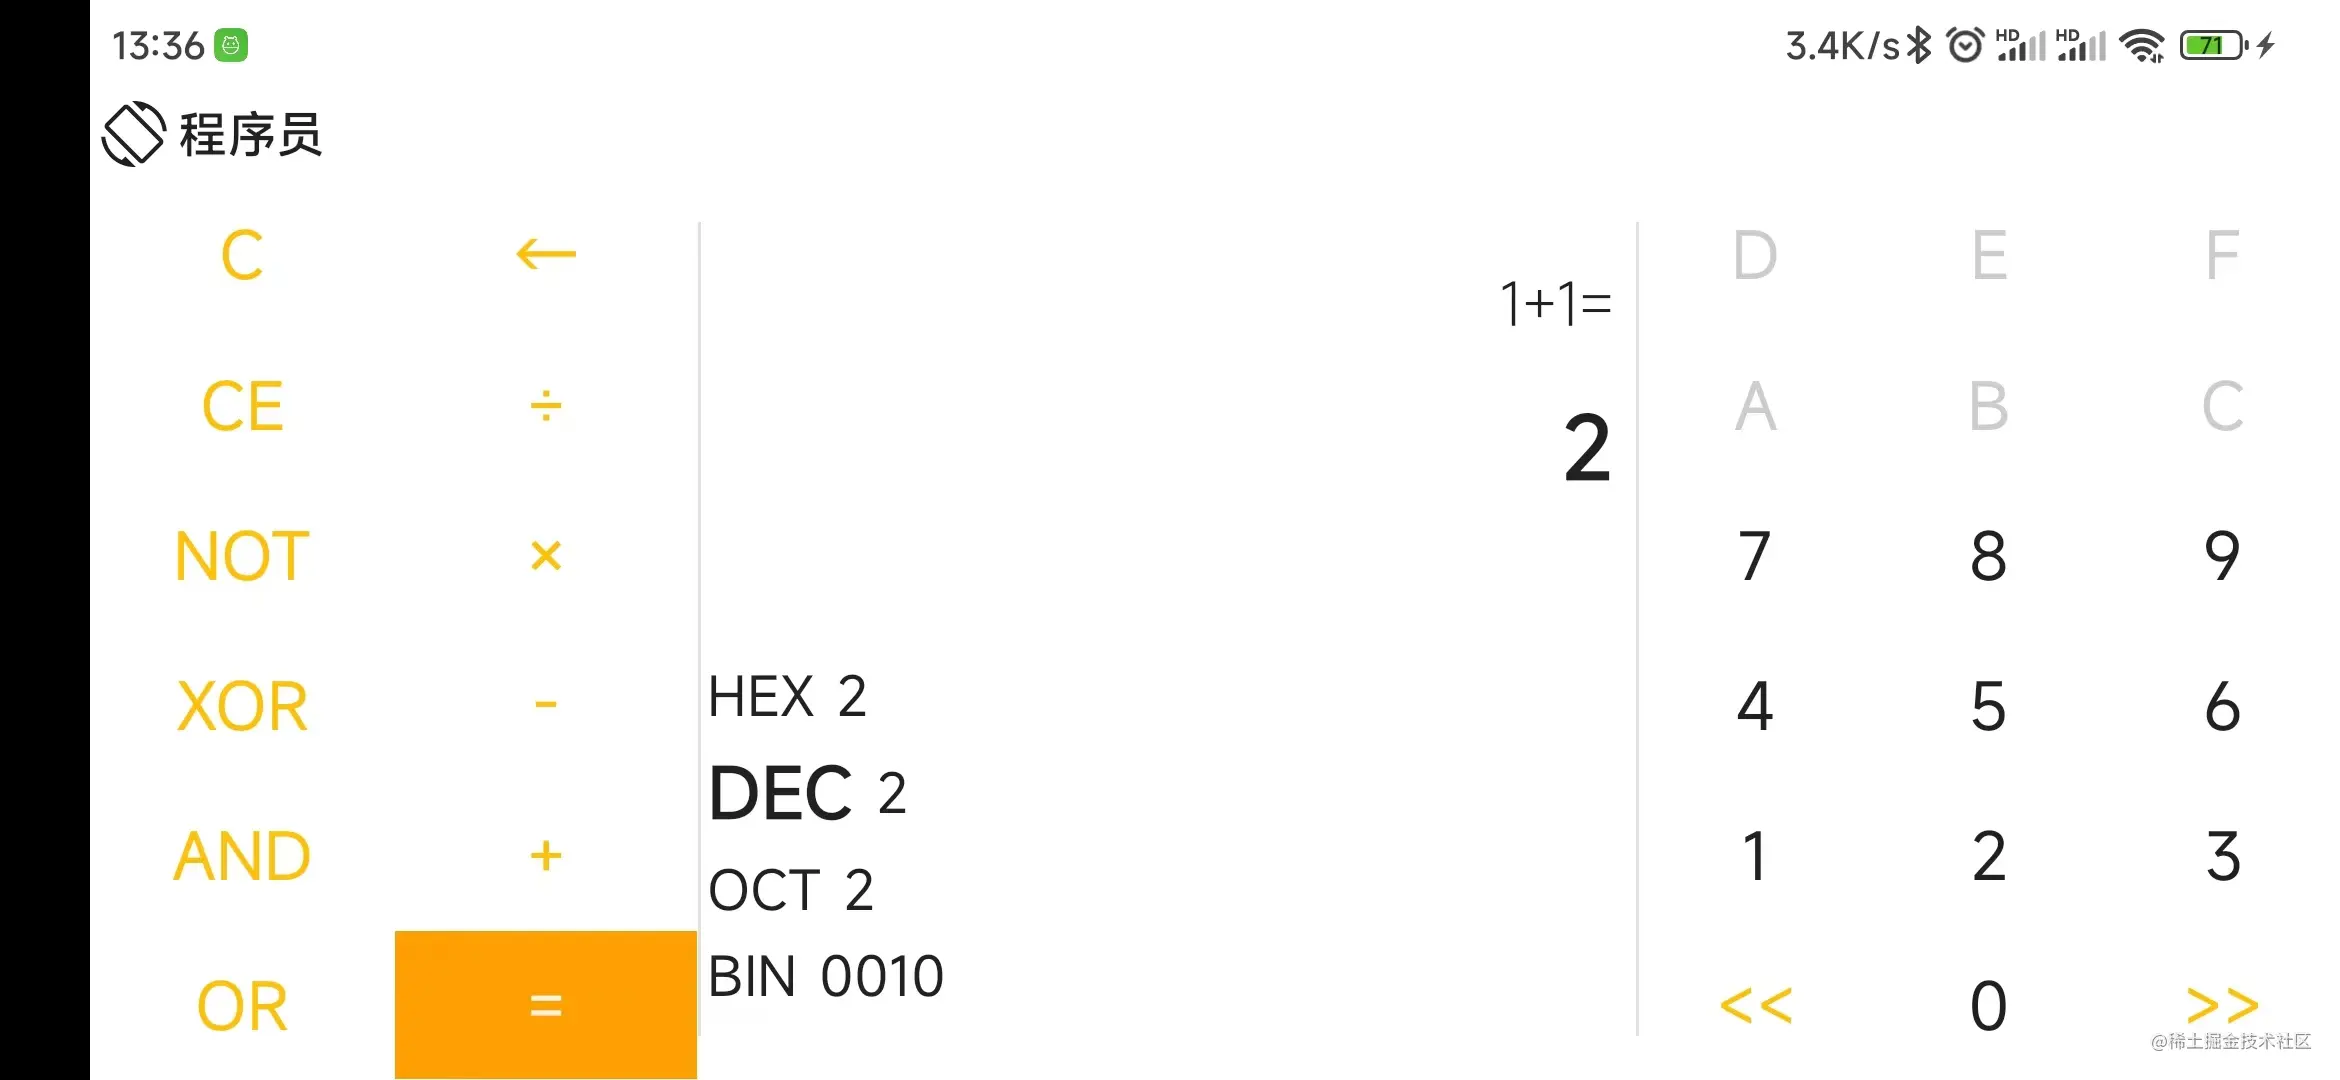
程序员模式
程序员模式
悬浮窗
悬浮窗项目地址
欢迎 star
界面布局
根据计划,我们需要实现的是微软计算器的标准模式和程序员模式。
标准模式界面方案确定
首先,确定一下微软计算器标准模式的界面:

可以看到,它的布局思路为最顶部是菜单,下方紧跟着显示区域,最下面是键盘,键盘又分为功能按键和数字按键,两种按键使用不同的背景颜色作为区分。并且等于按键使用特别的强调颜色。
先看一下我们简单模仿的布局:

看起来不错是吧?我也是这样觉得的,但是当我装到实机上时却发现好像不太对劲。
首先,使用灰色作为背景色,会显得特别晃眼,在观感上十分不理想。
其次,现在手机屏幕大多数不是 16:9 的比例了,所以会显得显示区域特别小,而按键被拉伸的特别长,用我一朋友的话来说就是,搞得跟个老年机似的。
这说明,虽然微软计算器的布局在 PC 上看起来不错,但是却不适合手机。
那么我们不如找一个手机上的计算器进行仿制,于是我将目光放到了手机自带的小米计算器上:
可以看到,小米计算器和微软计算器在布局上大差不差,但是在某些细节上有所区别。
例如,小米计算器所有按钮使用统一的背景颜色,依靠按钮文字区分不同按键类型;
小米计算器的显示区域和按键区域几乎是 1:1 均分,这样不会显得”头重脚轻“。
好,那么我们就按照这个思路来修改,修改后布局如下:

这下看起来顺眼多了,装到手机上一样的好看。
标准模式界面实现
确定了界面方案,下面就是研究怎么实现布局。
简单观察布局,无非就是一堆按钮堆叠在一起,但是如果我们真的一个一个按钮堆上去是不是显得有点傻?哈哈,所以这里我们定义一个列表用来存放按键信息,然后遍历这个列表渲染按键UI。
定义按键信息数据类:
- data class KeyBoardData(
- /**
- * 按键文本
- * */
- val text: String,
- /**
- * 设置按钮颜色,设置范围取决于 [isFilled]
- * */
- val background: Color,
- /**
- * 按键索引
- * */
- val index: Int,
- /**
- * 是否填充该按钮,如果为 true 则 [background] 用于填充该按钮背景;否则,[background] 用于设置该按钮字体颜色
- * */
- val isFilled: Boolean = false,
- /**
- * 是否启用按键
- * */
- val isAvailable: Boolean = true
- )
- 复制代码
定义按键信息列表:
- @Composable
- fun standardKeyBoardBtn(): List
- listOf(
- KeyBoardData("%", functionColor(), KeyIndex_Percentage),
- KeyBoardData("CE", functionColor(), KeyIndex_CE),
- KeyBoardData("C", functionColor(), KeyIndex_Clear),
- KeyBoardData("⇦", functionColor(), KeyIndex_Back),
- ),
- listOf(
- KeyBoardData("1/x", functionColor(), KeyIndex_Reciprocal),
- KeyBoardData("x²", functionColor(), KeyIndex_Pow2),
- KeyBoardData("√x", functionColor(), KeyIndex_Sqrt),
- KeyBoardData(Operator.Divide.showText, functionColor(), KeyIndex_Divide),
- ),
- listOf(
- KeyBoardData("7", numberColor(), KeyIndex_7),
- KeyBoardData("8", numberColor(), KeyIndex_8),
- KeyBoardData("9", numberColor(), KeyIndex_9),
- KeyBoardData(Operator.MULTIPLY.showText, functionColor(), KeyIndex_Multiply),
- ),
- listOf(
- KeyBoardData("4", numberColor(), KeyIndex_4),
- KeyBoardData("5", numberColor(), KeyIndex_5),
- KeyBoardData("6", numberColor(), KeyIndex_6),
- KeyBoardData(Operator.MINUS.showText, functionColor(), KeyIndex_Minus),
- ),
- listOf(
- KeyBoardData("1", numberColor(), KeyIndex_1),
- KeyBoardData("2", numberColor(), KeyIndex_2),
- KeyBoardData("3", numberColor(), KeyIndex_3),
- KeyBoardData(Operator.ADD.showText, functionColor(), KeyIndex_Add),
- ),
- listOf(
- KeyBoardData("+/-", numberColor(), KeyIndex_NegativeNumber),
- KeyBoardData("0", numberColor(), KeyIndex_0),
- KeyBoardData(".", numberColor(), KeyIndex_Point),
- KeyBoardData("=", equalColor(), KeyIndex_Equal, isFilled = true),
- )
- )
- 复制代码
这里之所以把按键信息列表定义为
Composable是因为需要适配深色模式,而深色模式的颜色,只能在Composable中拿。颜色代码定义如下:
- @Composable
- fun numberColor(): Color = Color.Unspecified // MaterialTheme.colors.secondary
- @Composable
- fun functionColor(): Color = MaterialTheme.colors.primary
- @Composable
- fun equalColor(): Color = MaterialTheme.colors.primaryVariant
- 复制代码
完成了按键信息定义,下面开始编写按键布局:
- @Composable
- private fun StandardKeyBoard(viewModel: StandardViewModel) {
- Column(modifier = Modifier.fillMaxSize()) {
- for (btnRow in standardKeyBoardBtn()) {
- Row(modifier = Modifier
- .fillMaxWidth()
- .weight(1f)) {
- for (btn in btnRow) {
- Row(modifier = Modifier.weight(1f)) {
- KeyBoardButton(
- text = btn.text,
- onClick = { viewModel.dispatch(StandardAction.ClickBtn(btn.index)) },
- backGround = btn.background,
- paddingValues = PaddingValues(0.5.dp),
- isFilled = btn.isFilled
- )
- }
- }
- }
- }
- }
- }
- @OptIn(ExperimentalMaterialApi::class)
- @Composable
- private fun KeyBoardButton(
- text: String,
- onClick: () -> Unit,
- backGround: Color = Color.White,
- isFilled: Boolean = false,
- paddingValues: PaddingValues = PaddingValues(0.dp)
- ) {
- Card(
- onClick = { onClick() },
- modifier = Modifier
- .fillMaxSize()
- .padding(paddingValues),
- backgroundColor = if (isFilled) backGround else MaterialTheme.colors.surface,
- shape = MaterialTheme.shapes.large,
- elevation = 0.dp,
- border = BorderStroke(0.dp, Color.Transparent)
- ) {
- Row(Modifier.fillMaxSize(), horizontalArrangement = Arrangement.Center, verticalAlignment = Alignment.CenterVertically) {
- Text(text, fontSize = 32.sp, color = if (isFilled) Color.Unspecified else backGround)
- }
- }
- }
- 复制代码
然后是显示区域布局:
- @OptIn(ExperimentalAnimationApi::class)
- @Composable
- private fun ShowScreen(viewModel: StandardViewModel) {
- val viewState = viewModel.viewStates
- val inputScrollerState = rememberScrollState()
- val showTextScrollerState = rememberScrollState()
- Column(
- Modifier
- .fillMaxWidth()
- .fillMaxHeight(0.4f)
- .noRippleClickable { viewModel.dispatch(StandardAction.ToggleHistory(true)) }
- ,
- horizontalAlignment = Alignment.End,
- verticalArrangement = Arrangement.SpaceAround
- ) {
- // 上一个计算结果
- AnimatedContent(targetState = viewState.lastShowText) { targetState: String ->
- SelectionContainer {
- AutoSizeText(
- text = targetState,
- fontSize = ShowSmallFontSize,
- fontWeight = FontWeight.Light,
- color = if (MaterialTheme.colors.isLight) Color.Unspecified else MaterialTheme.colors.primary,
- modifier = Modifier
- .padding(horizontal = 12.dp)
- .padding(bottom = 16.dp)
- .alpha(0.5f),
- minSize = 10.sp
- )
- }
- }
- Column(horizontalAlignment = Alignment.End) {
- // 计算公式
- AnimatedContent(targetState = viewState.showText) { targetState: String ->
- Row(verticalAlignment = Alignment.CenterVertically, horizontalArrangement = Arrangement.SpaceBetween) {
- if (showTextScrollerState.value != showTextScrollerState.maxValue) {
- Icon(
- imageVector = Icons.Outlined.ArrowLeft,
- contentDescription = "scroll left",
- modifier = Modifier.absoluteOffset(x = scrollToLeftAnimation(-10f).dp)
- )
- }
- Row(
- modifier = Modifier
- .padding(vertical = 8.dp)
- .padding(end = 8.dp)
- .horizontalScroll(showTextScrollerState, reverseScrolling = true)
- ) {
- SelectionContainer {
- Text(
- text = if (targetState.length > 5000) "数字过长" else targetState,
- fontSize = ShowNormalFontSize,
- fontWeight = FontWeight.Light,
- color = if (MaterialTheme.colors.isLight) Color.Unspecified else MaterialTheme.colors.primary
- )
- }
- }
- }
- }
- // 输入值或计算结果
- AnimatedContent(
- targetState = viewState.inputValue,
- transitionSpec = {
- if (targetState.length > initialState.length) {
- slideInVertically { height -> height } + fadeIn() with
- slideOutVertically { height -> -height } + fadeOut()
- } else {
- slideInVertically { height -> -height } + fadeIn() with
- slideOutVertically { height -> height } + fadeOut()
- }.using(
- SizeTransform(clip = false)
- )
- }
- ) { targetState: String ->
- Row(verticalAlignment = Alignment.CenterVertically, horizontalArrangement = Arrangement.SpaceBetween) {
- if (inputScrollerState.value != inputScrollerState.maxValue) {
- Icon(
- imageVector = Icons.Outlined.ArrowLeft,
- contentDescription = "scroll left",
- modifier = Modifier.absoluteOffset(x = scrollToLeftAnimation(-10f).dp)
- )
- }
- Row(modifier = Modifier
- .padding(vertical = 8.dp)
- .padding(end = 8.dp)
- .horizontalScroll(inputScrollerState, reverseScrolling = true)
- ) {
- SelectionContainer {
- Text(
- text = targetState.formatNumber(formatDecimal = viewState.isFinalResult),
- fontSize = InputLargeFontSize,
- fontWeight = FontWeight.Bold,
- color = if (MaterialTheme.colors.isLight) Color.Unspecified else MaterialTheme.colors.primary
- )
- }
- LaunchedEffect(Unit) {
- inputScrollerState.scrollTo(0)
- }
- }
- }
- }
- }
- }
- }
- 复制代码
由于标准模式使用 BigDecimal 进行计算,所以理论上可以输入无限长的数字,因此这里需要处理一下字符溢出。
原先我采用的是自适应缩放输入数字,即当输入文字即将超出屏幕时,自动缩小文字字号,确保文字能够完整显示,小米计算器和微软计算器都是这种处理方案。
但是这样处理的话,不用我上代码,相信各位读者已经发现问题了吧?
既然我说了文字是无限长度的,那么,即使我能一直缩放字体大小,那么到最后,字体也只是缩成一坨完全无法辨认的像素点。
所以这个方案不可行,我们应该换一种方案,那换成可以水平滚动或许要友好一点,
所以我给显示文本的地方增加了
.horizontalScroll(inputScrollerState, reverseScrolling = true),并且在每次重组时将其滚动到最后,确保最新输入的内容始终在屏幕可见区域:- LaunchedEffect(Unit) {
- inputScrollerState.scrollTo(0)
- }
- 复制代码
这里使用
scrollTo(0)是由于我们设置了reverseScrolling = true,而之所以要这么设置是因为我们无法或者说不能方便的拿到这个水平滚动区域的最大值,索性直接反转它,然后滚动到 0 即为滚动到最后。上面代码中还有一段:
- if (inputScrollerState.value != inputScrollerState.maxValue) {
- Icon(
- imageVector = Icons.Outlined.ArrowLeft,
- contentDescription = "scroll left",
- modifier = Modifier.absoluteOffset(x = scrollToLeftAnimation(-10f).dp)
- )
- }
- 复制代码
此处表示的是,当显示文本超出可视区域时且不在最开头,则显示一个指向左边的图标,提示用户此时有未显示完的文字,可以滚动查看。
对了,我还给这个图标加了个简单的位移动画:
- @Composable
- fun scrollToLeftAnimation(targetValue: Float = -5f): Float {
- val infiniteTransition = rememberInfiniteTransition()
- val slipUpYAnimation by infiniteTransition.animateFloat(
- initialValue = 0f,
- targetValue = targetValue,
- animationSpec = infiniteRepeatable(
- animation = tween(2000),
- repeatMode = RepeatMode.Restart
- )
- )
- return slipUpYAnimation
- }
- 复制代码
最终效果如下:

程序员模式界面确定
老规矩,先看微软计算器的程序模式是什么样子的:

可以看到,程序员模式相比于标准模式多了几个数字(A、B、C……)用于表示十六进制,并且由于可以切换进制,还需要禁用某些数字按键,例如在八进制时需要禁用 8 和 9 。
其他就是一些功能按键的不同。
但是微软的程序员模式计算器支持的运算非常多,还支持很多扩展功能,这里我们就不仿这么多了,我们只实现它的多进制支持、位移、位逻辑运算和基础的四则运算即可,同时不再支持小数运算。
并且,为了让计算器显得更加人性化,我们决定把程序员模式做成横屏显示,大致显示效果如下:

从预览来看似乎挺不错的,但是,当装到实机上时出现了和标准计算器一样的问题:由于手机比例各不相同,按键会被拉伸成很奇怪的样子,而且显示区域将无法显示完所有文本。
那么或许程序员模式不适合使用现有的布局模式。
我想了想,想到了两种布局方案:
第一种采用两边放按键,中间放显示屏的布局方式;第二种使用显示区域和按键区域均分屏幕的方案。
最终,考虑到其实如果手机是横屏的话,一般都是双手握持手机的两端,这么一来似乎方案1更加合理,方案2可能会被左手遮挡住按键布局,并且右手在握持时不方便点击比较靠近中间的按键。
但是这里方案1也有一个问题,就是一般人的惯用手都是右手,所以应该把点击频率更高的数字按键放到右边,点击频率相对较低的功能按键放到左手边。
最终成品如下:
程序员模式界面实现
程序员模式实现过程与标准模式大差不差,同样是先定义按键信息列表,这里我们把功能按键和数字按键分开定义:
- @Composable
- fun programmerNumberKeyBoardBtn(): List
- listOf(
- KeyBoardData("D", numberColor(), KeyIndex_D),
- KeyBoardData("E", numberColor(), KeyIndex_E),
- KeyBoardData("F", numberColor(), KeyIndex_F)
- ),
- listOf(
- KeyBoardData("A", numberColor(), KeyIndex_A),
- KeyBoardData("B", numberColor(), KeyIndex_B),
- KeyBoardData("C", numberColor(), KeyIndex_C)
- ),
- listOf(
- KeyBoardData("7", numberColor(), KeyIndex_7),
- KeyBoardData("8", numberColor(), KeyIndex_8),
- KeyBoardData("9", numberColor(), KeyIndex_9)
- ),
- listOf(
- KeyBoardData("4", numberColor(), KeyIndex_4),
- KeyBoardData("5", numberColor(), KeyIndex_5),
- KeyBoardData("6", numberColor(), KeyIndex_6)
- ),
- listOf(
- KeyBoardData("1", numberColor(), KeyIndex_1),
- KeyBoardData("2", numberColor(), KeyIndex_2),
- KeyBoardData("3", numberColor(), KeyIndex_3)
- ),
- listOf(
- KeyBoardData("<<", functionColor(), KeyIndex_Lsh),
- KeyBoardData("0", numberColor(), KeyIndex_0),
- KeyBoardData(">>", functionColor(), KeyIndex_Rsh)
- )
- )
- @Composable
- fun programmerFunctionKeyBoardBtn(): List
- listOf(
- KeyBoardData("C", functionColor(), KeyIndex_Clear),
- KeyBoardData("⇦", functionColor(), KeyIndex_Back)
- ),
- listOf(
- KeyBoardData("CE", functionColor(), KeyIndex_CE),
- KeyBoardData(Operator.Divide.showText, functionColor(), KeyIndex_Divide)
- ),
- listOf(
- KeyBoardData("NOT", functionColor(), KeyIndex_Not),
- KeyBoardData(Operator.MULTIPLY.showText, functionColor(), KeyIndex_Multiply)
- ),
- listOf(
- KeyBoardData("XOR", functionColor(), KeyIndex_XOr),
- KeyBoardData(Operator.MINUS.showText, functionColor(), KeyIndex_Minus)
- ),
- listOf(
- KeyBoardData("AND", functionColor(), KeyIndex_And),
- KeyBoardData(Operator.ADD.showText, functionColor(), KeyIndex_Add)
- ),
- listOf(
- KeyBoardData("OR", functionColor(), KeyIndex_Or),
- KeyBoardData("=", equalColor(), KeyIndex_Equal, isFilled = true)
- )
- )
- 复制代码
然后,在渲染界面时,需要判断一下当前数字按键是否启用,如果不启用则更改颜色,并且禁止点击:
- @Composable
- private fun FunctionKeyBoard(viewModel: ProgrammerViewModel) {
- val viewState = viewModel.viewStates
- Column(modifier = Modifier.fillMaxSize()) {
- for (btnRow in programmerFunctionKeyBoardBtn()) {
- Row(modifier = Modifier
- .fillMaxWidth()
- .weight(1f)) {
- for (btn in btnRow) {
- // 判断该按键是否需要启用
- val isAvailable = if (btn.isAvailable) {
- btn.index !in viewState.inputBase.forbidBtn
- }
- else {
- false
- }
- Row(modifier = Modifier.weight(1f)) {
- KeyBoardButton(
- text = btn.text,
- onClick = { viewModel.dispatch(ProgrammerAction.ClickBtn(btn.index)) },
- isAvailable = isAvailable,
- backGround = btn.background,
- isFilled = btn.isFilled,
- paddingValues = PaddingValues(0.5.dp)
- )
- }
- }
- }
- }
- }
- }
- @OptIn(ExperimentalMaterialApi::class)
- @Composable
- private fun KeyBoardButton(
- text: String,
- onClick: () -> Unit,
- isAvailable: Boolean = true,
- backGround: Color = Color.White,
- isFilled: Boolean = false,
- paddingValues: PaddingValues = PaddingValues(0.dp)
- ) {
- Card(
- onClick = { onClick() },
- modifier = Modifier
- .fillMaxSize()
- .padding(paddingValues),
- backgroundColor = if (isFilled) backGround else MaterialTheme.colors.surface,
- shape = MaterialTheme.shapes.large,
- elevation = 0.dp,
- border = BorderStroke(0.dp, Color.Transparent),
- enabled = isAvailable // 是否可以点击
- ) {
- Row(Modifier.fillMaxSize(), horizontalArrangement = Arrangement.Center, verticalAlignment = Alignment.CenterVertically) {
- Text(
- text,
- fontSize = 24.sp,
- color = if (isAvailable) { // 根据是否启用设置按键文本颜色
- if (isFilled) Color.Unspecified else backGround
- } else {
- if (MaterialTheme.colors.isLight) Color.LightGray else Color.DarkGray
- }
- )
- }
- }
- }
- 复制代码
其中的
inputBase.forbidBtn是我定义的,当前使用进制需要禁用的按键索引:- enum class InputBase(val number: Int, val forbidBtn: List<Int>) {
- HEX(16, listOf()),
- DEC(
- 10, listOf(
- KeyIndex_A,
- KeyIndex_B,
- KeyIndex_C,
- KeyIndex_D,
- KeyIndex_E,
- KeyIndex_F
- )
- )
- // ......
- }
- 复制代码
例如当前使用的是十进制则禁用
A B C D E F按键。最后,说一下我是怎么分配不同组件的占用尺寸的:
- @Composable
- fun ProgrammerScreen(
- viewModel: ProgrammerViewModel = hiltViewModel()
- ) {
- Row(modifier = Modifier.fillMaxWidth(),
- horizontalArrangement = Arrangement.SpaceBetween) {
- // 左侧键盘
- Row(modifier = Modifier.weight(1.3f)) {
- FunctionKeyBoard(viewModel = viewModel)
- }
- Divider(modifier = Modifier
- .fillMaxHeight()
- .width(1.dp)
- .padding(vertical = 16.dp, horizontal = 0.dp))
- // 显示数据
- Row(modifier = Modifier.weight(2f)) {
- CenterScreen(viewModel = viewModel)
- }
- Divider(modifier = Modifier
- .fillMaxHeight()
- .width(1.dp)
- .padding(vertical = 16.dp, horizontal = 0.dp))
- // 右侧键盘
- Row(modifier = Modifier.weight(1.5f)) {
- NumberBoard(viewModel = viewModel)
- }
- }
- }
- 复制代码
通过将三个不同的组件:
FunctionKeyBoard、CenterScreen、NumberBoard包裹在Row中,并设置不同的weight权重来实现三个组件按照比例完全占满屏幕宽度。其他实现细节
自适应填充满屏幕
上面我们提到过,使用 AndroidStudio 预览的尺寸比例是 16:9,但是实际现在很多手机都不是 16:9 的比例了,导致预览时看起来布局很和谐,但是一旦安装到手机上就会被拉伸的很难看。
会出现这种情况是因为我在前期编写布局代码时,使用了硬编码尺寸,例如,标准计算器模式我将显示数字区域高度硬编码为 150 dp,这样虽然在 16:9 的设备上看起来很和谐,但是放到我手机上(比例 21:9)就显得显示区域非常小,而按键因为需要填充满屏幕则会被拉伸的特别大,特别难看。
最终我的解决方案是固定各个组件的占用比例,并且不硬编码他们的尺寸。
例如,对于标准模式的显示区域,我将其包裹在一个
Column中,并设置modifier属性:- Column(
- Modifier
- .fillMaxWidth()
- .fillMaxHeight(0.4f)
- ,
- // ......
- ) {
- // ......
- }
- 复制代码
因为显示区域的上级组件设置了
fillMaxSize,所以此时显示区域会填充满屏幕宽度,并填充全屏幕的 40% 高度,也就是说,不管设备尺寸是多大,现在显示区域都会恒定填充设备的 40% 高度和所有宽度。对了,这里插一句,其实使用 40% 宽度后会显得显示区域特别空旷,但是小米计算器不也是这么个比例吗?为什么它不会显得空旷呢?那是因为小米在显示区域上面加了个实时的历史记录显示,哈哈,所以我也给加上了,大概效果是这样的:
对了X2,这里只用更改显示区域,而按键区域会根据可用空间自适应调整大小,并且能确保所有按键尺寸一致。
因为按键布局在编写时给每一行都设置了权重为 1 ,用时每行中的每个按键也设置了权重为 1 :
.weight(1f)。所以最终所有按键会均分所有可用的尺寸。历史记录遮罩层
微软计算器点击顶部菜单的历史记录图标后会从最底下缓慢上升一个遮罩层显示历史记录列表,并且这个遮罩层只会上升到按键的高度,不会超出按键区域,遮住显示区域。
这个效果其实也非常好实现:
- Box(Modifier.fillMaxSize()) {
- val isShowHistory = viewState.historyList.isEmpty() // 通过当前状态中历史记录列表是否为空来判断是否应该显示历史记录遮罩层
- // 按键组件
- StandardKeyBoard(viewModel)
- AnimatedVisibility(
- visible = isShowHistory,
- enter = slideInVertically(initialOffsetY = { it }) + fadeIn(),
- exit = slideOutVertically(targetOffsetY = { it }) + fadeOut()
- ) {
- // 历史记录组件
- HistoryWidget(
- // ......
- )
- }
- }
- 复制代码
将按键和历史记录包裹在同一个
Box中。其中按键始终可见,历史记录是否显示则却决于
isShowHistory状态,并且将历史记录组件包裹在AnimatedVisibility中。AnimatedVisibility组件会为被它包裹的content添加由enter和exit指定的动画。例如这里就指定显示动画使用垂直滑入加淡入效果,退出则为垂直滑出加淡出效果。
滑入的起始 Y 坐标为最大高度(fullHeight)即屏幕底部,
initialOffsetY这个 lambda 的参数it表示的就是当前的最大高度。滑出的目标 Y 坐标也为最大高度。
这样就能实现微软计算器的滑动效果了:

可滚动布局的一个BUG
在 实现标准模式界面 一节中,我们提到最终采用了可水平滚动来处理文本溢出显示区域。
但是经过我实际测试,当文本长度达到一定的长度时,会直接闪退:
- Process: com.equationl.calculator_compose, PID: 2424
- java.lang.IllegalArgumentException: Can't represent a size of 507896 in Constraints
- at androidx.compose.ui.unit.Constraints$Companion.bitsNeedForSize(Constraints.kt:403)
- at androidx.compose.ui.unit.Constraints$Companion.createConstraints-Zbe2FdA$ui_unit_release(Constraints.kt:366)
- at androidx.compose.ui.unit.ConstraintsKt.Constraints(Constraints.kt:433)
- at androidx.compose.ui.unit.ConstraintsKt.Constraints$default(Constraints.kt:418)
- at androidx.compose.foundation.text.TextDelegate.layoutText-K40F9xA(TextDelegate.kt:198)
- at androidx.compose.foundation.text.TextDelegate.layout-NN6Ew-U(TextDelegate.kt:241)
- at androidx.compose.foundation.text.TextController$measurePolicy$1.measure-3p2s80s(CoreText.kt:314)
- at androidx.compose.ui.node.InnerPlaceable.measure-BRTryo0(InnerPlaceable.kt:44)
- at androidx.compose.ui.graphics.SimpleGraphicsLayerModifier.measure-3p2s80s(GraphicsLayerModifier.kt:405)
- at androidx.compose.ui.node.ModifiedLayoutNode.measure-BRTryo0(ModifiedLayoutNode.kt:53)
- at androidx.compose.ui.node.LayoutNode$performMeasure$1.invoke(LayoutNode.kt:1428)
- at androidx.compose.ui.node.LayoutNode$performMeasure$1.invoke(LayoutNode.kt:1427)
- at androidx.compose.runtime.snapshots.Snapshot$Companion.observe(Snapshot.kt:2116)
- at androidx.compose.runtime.snapshots.SnapshotStateObserver.observeReads(SnapshotStateObserver.kt:110)
- at androidx.compose.ui.node.OwnerSnapshotObserver.observeReads$ui_release(OwnerSnapshotObserver.kt:78)
- at androidx.compose.ui.node.OwnerSnapshotObserver.observeMeasureSnapshotReads$ui_release(OwnerSnapshotObserver.kt:66)
- at androidx.compose.ui.node.LayoutNode.performMeasure-BRTryo0$ui_release(LayoutNode.kt:1427)
- at androidx.compose.ui.node.OuterMeasurablePlaceable.remeasure-BRTryo0(OuterMeasurablePlaceable.kt:94)
- at androidx.compose.ui.node.OuterMeasurablePlaceable.measure-BRTryo0(OuterMeasurablePlaceable.kt:75)
- at androidx.compose.ui.node.LayoutNode.measure-BRTryo0(LayoutNode.kt:1366)
- at androidx.compose.foundation.text.selection.SimpleLayoutKt$SimpleLayout$1.measure-3p2s80s(SimpleLayout.kt:35)
- ......
- 复制代码
通过这个错误堆栈,大致可以猜测出闪退是由于文本太大,导致水平滚动也无法测量尺寸导致闪退。
错误的具体原因目前我还不知道,但是我们可以通过简单的限制最大文本数量避免触发这个问题:
- Text(
- text = if (targetState.length > 5000) "数字过长" else targetState,
- fontSize = ShowNormalFontSize,
- fontWeight = FontWeight.Light,
- color = if (MaterialTheme.colors.isLight) Color.Unspecified else MaterialTheme.colors.primary
- )
- 复制代码
虽然这样就违背了我们设计的可以无限输入数字的特性了。
总结
使用 compose 仿其他 APP 的界面相比较于使用传统 xml 可以说是方便的多了,现在 compose 基本也可以完美使用了,就是总还是会有一些奇奇怪怪的小 BUG 让人很烦,就比如我上面说到的这个尺寸溢出闪退的问题。
-
相关阅读:
编程前置:句子联想游戏
进销存记账软件十大品牌合集,看看哪一款适合你
2023年地理信息系统与遥感专业就业前景与升学高校排名选择
瞅瞅 Opencv:扫描图像
5年开发经验,看完这份37W字Java高性能架构,终于拿到架构师薪资
Mybatis-Plus条件构造器QueryWrapper
SpringBoot SpringBoot 开发实用篇 4 数据层解决方案 4.3 H2数据库
kafka生产者异步发送、同步发送、回调异步发送,是什么情况?
java1.8新特性入门级讲解
R语言使用order函数对dataframe数据进行排序、基于单个字段(变量)进行降序排序(DESCENDING)
- 原文地址:https://blog.csdn.net/sinat_17133389/article/details/126931907


