-
Vuex入门
目录
一、Vuex中的各个js文件的用途
1.vue中各个组件之间的传值
图解:
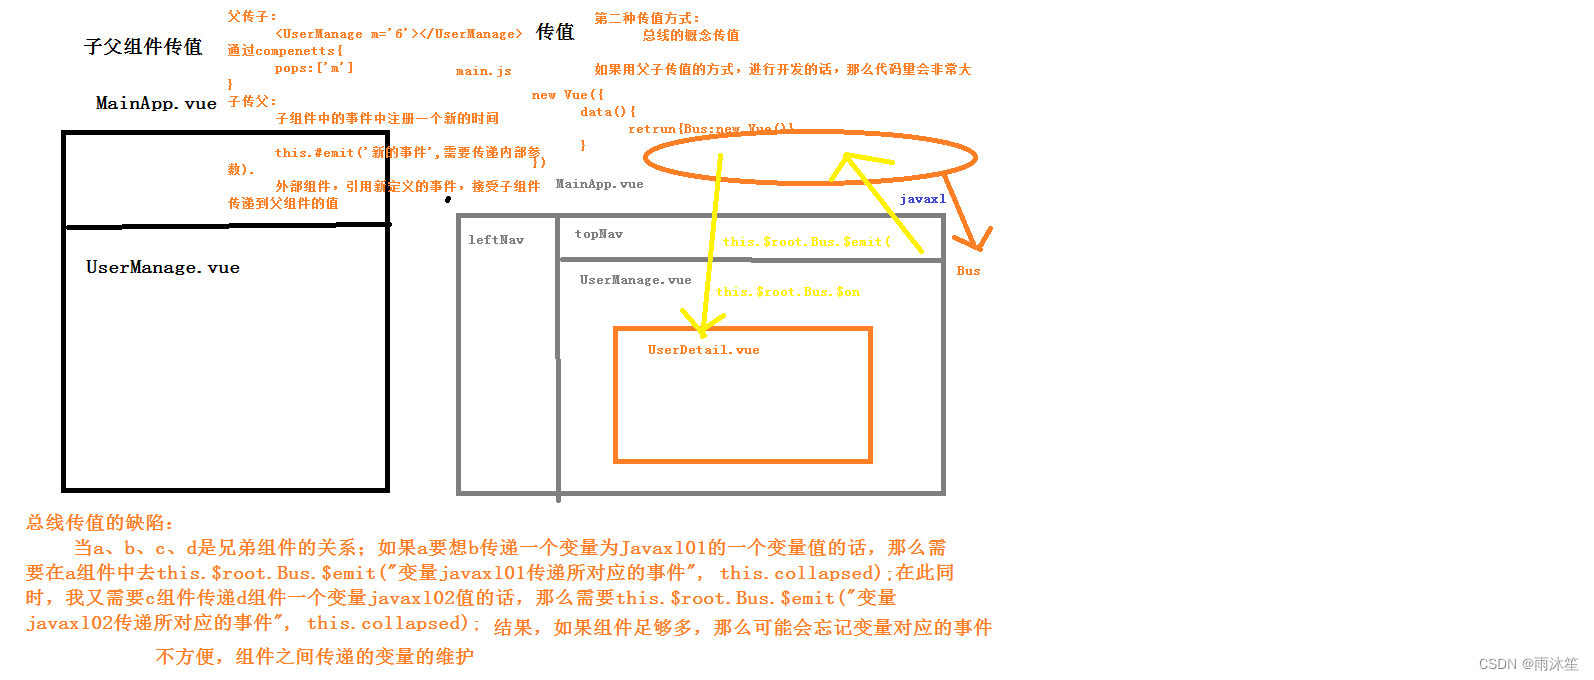
1.父子组件
父组件-->子组件,通过子组件的自定义属性:props
子组件-->父组件,通过自定义事件:this.$emit('事件名',参数1,参数2,...);
2.非父子组件或父子组件
通过数据总数Bus,this.$root.$emit('事件名',参数1,参数2,...)
3.非父子组件或父子组件
更好的方式是在vue中使用vuex
方法1: 用组件之间通讯。这样写很麻烦,并且写着写着,估计自己都不知道这是啥了,很容易写晕。
方法2: 我们定义全局变量。模块a的数据赋值给全局变量x。然后模块b获取x。这样我们就很容易获取到数据
2.Vuex
图解:
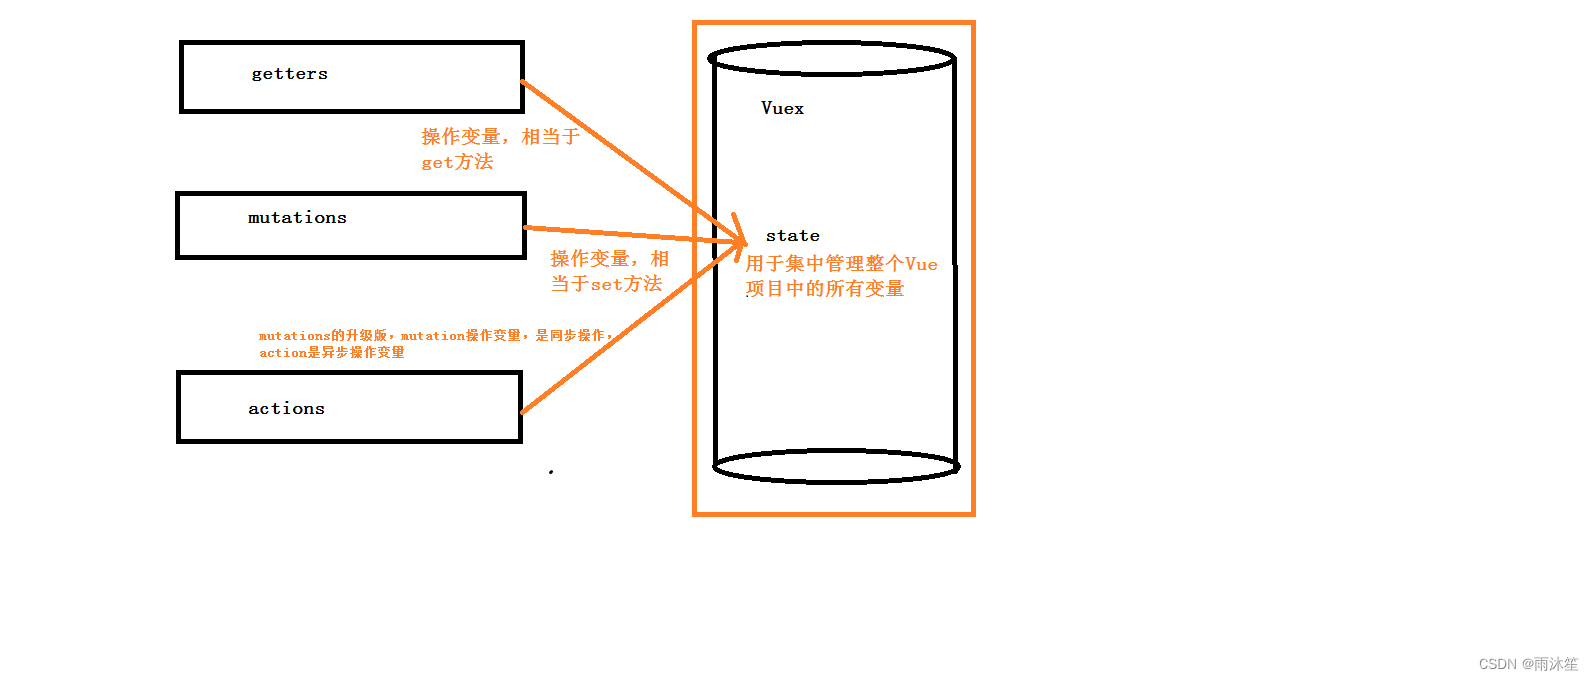
官方解释:Vuex 是一个专为 Vue.js 应用程序开发的状态管理模式。可以想象为一个“前端数据库”(数据仓库),
让其在各个页面上实现数据的共享包括状态,并且可操作
Vuex分成五个部分:
1.State:单一状态树
2.Getters:状态获取
3.Mutations:触发同步事件
4.Actions:提交mutation,可以包含异步操作
5.Module:将vuex进行分模块
3.Vuex使用步骤
①、安装
//安装的是最新版本
npm install vuex -S
// 更改版本
npm i -S vuex@3.6.2
②、创建store模块,分别维护 state/actions/mutations/getters

③、 在store/index.js文件中新建vuex的store实例,并注册上面引入的各大模块
index.js
- import Vue from 'vue'
- import Vuex from 'vuex'
- import state from './state'
- import getters from './getters'
- import actions from './actions'
- import mutations from './mutations'
- Vue.use(Vuex)
- const store = new Vuex.Store({
- state,
- getters,
- actions,
- mutations
- })
- export default store
④、将Vuex对应的index.js 挂载到 main.js中的vue实例中
- import store from './store'
- new Vue({
- el: '#app',
- store,
- router,
- data(){
- return{
- // 在vue根实例中定一个变量,这个变量就是vue实例,它总线
- // props this.$emit
- Bus:new Vue({})
- }
- },
- components: { App },
- template: '
' - })
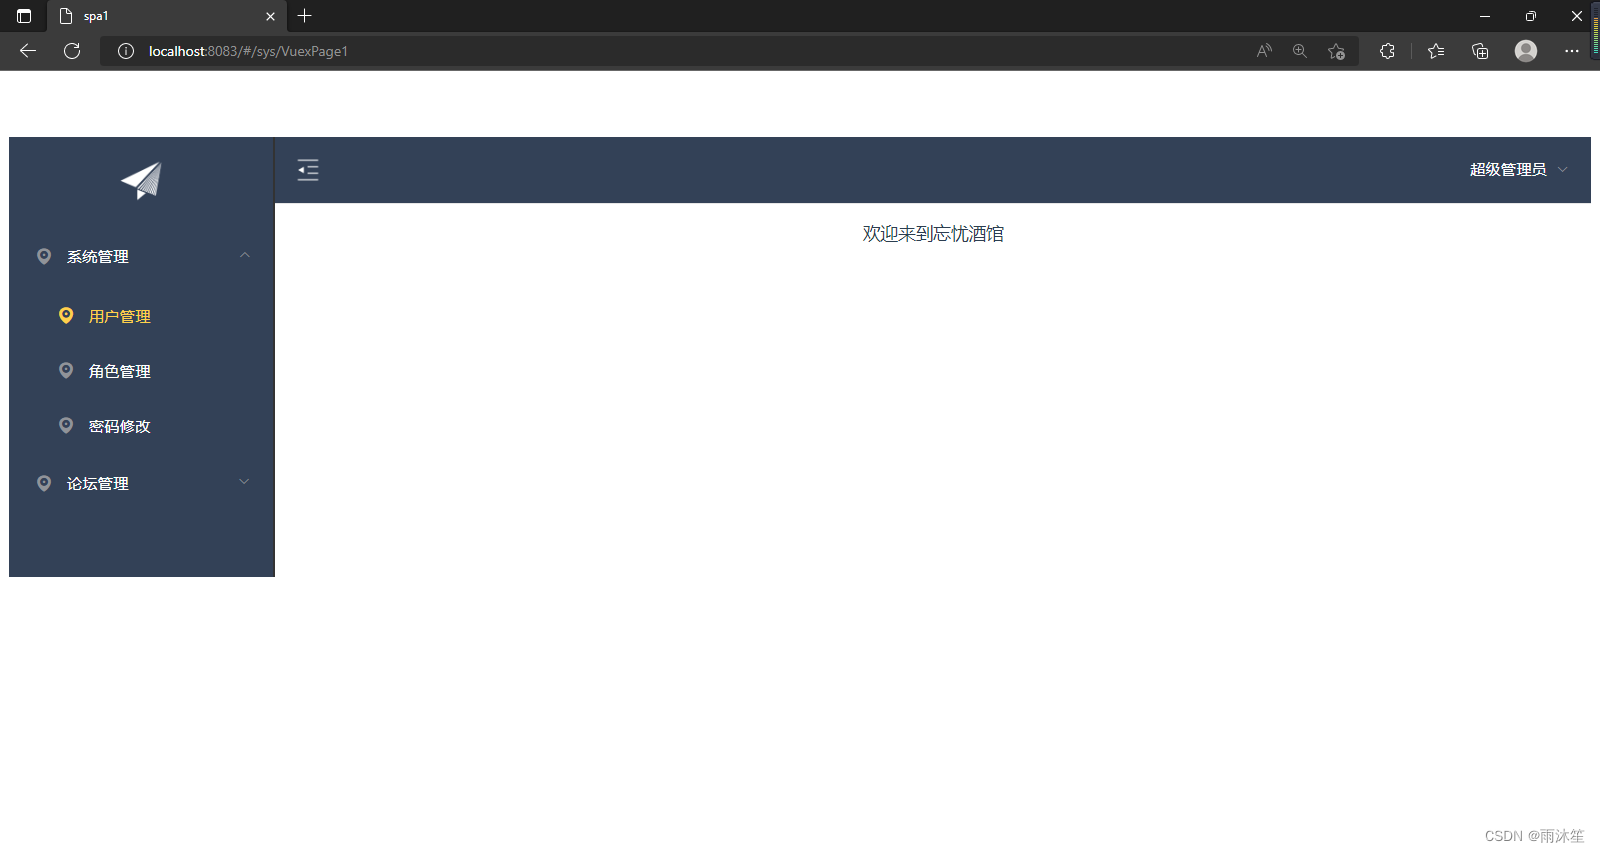
⑤测试
在state.js文件中定义一个变量
- export default{
- resName:'忘忧酒馆'
- }
然后在sys文件夹中建立一个.vue文件
- <template>
- <div>
- <p>欢迎来到{{msg}}p>
- div>
- template>
- <script>
- export default {
- name: 'HelloWorld',
- data () {
- return {
- }
- },
- computed:{
- msg(){
- // 从vuex的state文件中获取值
- return this.$store.state.resName;//不推荐
- // this.&router.pust()..
- // this.$root.Bus.$on()
- }
- }
- }
- script>
- <style>
- style>
然后创建路由
效果:
4.Vuex的核心概念
核心概念:store、state、getters、mutations、actions
store:
每一个Vuex应用的核心就是store(仓库),store基本上就是一个容器,它包含着你的应用中大部分的状态 (state)。
const store = new Vuex.Store({
state, // 共同维护的一个状态,state里面可以是很多个全局状态
getters, // 获取数据并渲染
actions, // 数据的异步操作
mutations // 处理数据的唯一途径,state的改变或赋值只能在这里
})
二、Vuex同步存值和存值
①、编写getters.js和mutations.js
getters.js
- export default{
- getResName:(state)=>{
- return state.resName;
- }
- }
mutations.js
- export default{
- setResName:(state,payload)=>{
- // state对象就对应了state.js中的对象
- // payload载荷 对应的 传递的 json对应参数{name:zs,age:12}
- state.resName=payload.resName;
- }
- }
②、编写VuexPage1.vue和VuexPage2.vue
VuexPage1.vue
- <template>
- <div>
- <p>页面1:欢迎来到{{msg}}p>
- <button @click="buy">盘它button>
- div>
- template>
- <script>
- export default {
- name: 'VuexPage1',
- data () {
- return {
- }
- },
- methods:{
- buy(){
- // 通过conmmit方法 会 调用 mutations.js文件中定义好的方法
- this.$store.commit("setResName",{
- resName:'云中海'
- })
- }
- },
- computed:{
- msg(){
- // 从vuex的state文件中获取值
- // return this.$store.state.resName;//不推荐,不安全
- // 通过 getters.js文件获取 state.js中定义的变量值
- return this.$store.getters.getResName;
- // this.&router.pust()..
- // this.$root.Bus.$on()
- }
- }
- }
- script>
- <style>
- style>
VuexPage2.vue
- <template>
- <div>
- <p>页面2:欢迎来到{{msg}}p>
- div>
- template>
- <script>
- export default {
- name: 'VuexPage2',
- data () {
- return {
- }
- },
- computed:{
- msg(){
- // 从vuex的state文件中获取值
- // return this.$store.state.resName;//不推荐,不安全
- // 通过 getters.js文件获取 state.js中定义的变量值
- return this.$store.getters.getResName;
- // this.&router.pust()..
- // this.$root.Bus.$on()
- }
- }
- }
- script>
- <style>
- style>
然后编写路由
注1:mutations中方法的调用方式
不能直接调用this.$store.mutations.setResturantName('KFC'),必须使用如下方式调用:
this.$store.commit(type,payload);
// 1、把载荷和type分开提交
store.commit('setResturantName',{
resturantName:'KFC'
})
// 2、载荷和type写到一起
store.commit({
type: 'setResturantName',
resturantName: 'KFC'
})
注2:一定要记住,Mutation 必须是同步函数。为什么呢?异步方法,我们不知道什么时候状态会发生改变,所以也就无法追踪了
效果:

三、Vuex的异步加载及后台调用问题
1、异步加载
①、编写actions.js
- export default{
- setResNameAsync:(context,payload)=>{
- // 异步修改值 在异步方法中调用了同步方法
- // context指的是vuex的上下文,相当于 this.$store
- // 此代码6s后执行
- setTimeout(function(){
- context.commit("setResName",payload);
- },6000);
- }
- }
②、给VuexPage1.vue写个异步的方法
- <button @click="buyAsync">最后的酒馆button>
- //方法
- buyAsync() {
- this.$store.dispatch("setResNameAsync", {
- resName: '墨然酒馆'
- })
- }
效果:

2、后台调用
①、将以下代码加入到actions.js
- let _this=payload._this;
- let url = _this.axios.urls.SYSTEM_MENU_TREE;
- _this.axios.post(url,{}).then(r=>{
- console.log(r);
- }).catch(e=>{
- });
②、在VuexPgex1的异步方法中加入以下代码
_this:this效果:

-
相关阅读:
Android 15新特性,强制edge-to-edge全面屏体验
day08-Windows备份与灾难恢复
Ae 效果:CC Page Turn
Windows安装MySQL8.0完整教程
从零学习 InfiniBand-network架构(六)—IB协议链路层QoS如何实现
JVM判断对象是否存活之引用计数法、可达性分析
企业电子招标采购系统源码Spring Boot + Mybatis + Redis + Layui + 前后端分离 构建企业电子招采平台之立项流程图
虚拟机和Docker有什么区别?
ReentrantReadWriteLock(可重入读写锁)
Java学习——泛型通配符
- 原文地址:https://blog.csdn.net/m0_62604616/article/details/126859044
