-
vuex01
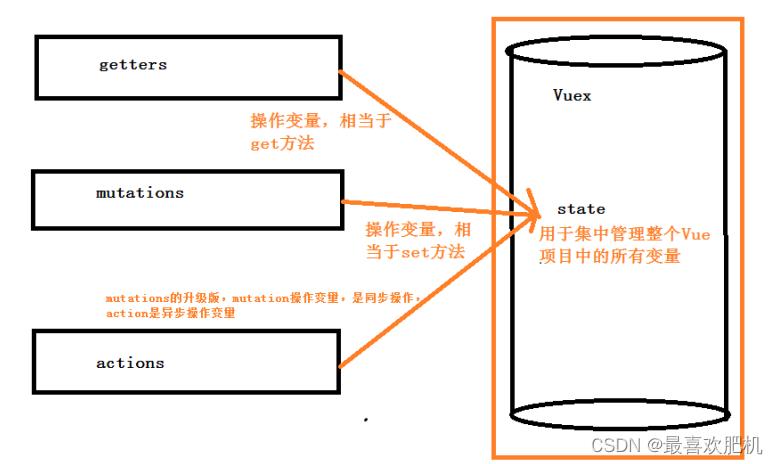
了解vuex中的各个js文件的用途
图解
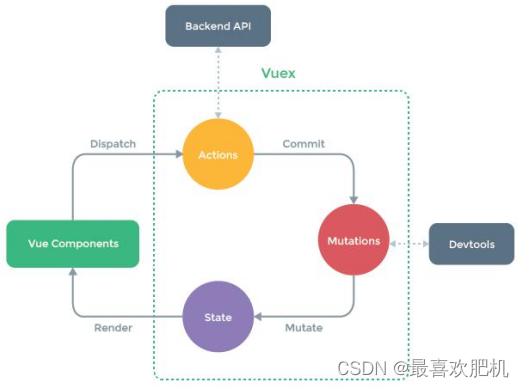
官方图解
1. vue中各个组件之间传值 1.父子组件 父组件-->子组件,通过子组件的自定义属性:props 子组件-->父组件,通过自定义事件:this.$emit('事件名',参数1,参数2,...); 2.非父子组件或父子组件 通过数据总数Bus,this.$root.$emit('事件名',参数1,参数2,...) 3.非父子组件或父子组件 更好的方式是在vue中使用vuex 方法1: 用组件之间通讯。这样写很麻烦,并且写着写着,估计自己都不知道这是啥了,很容易写晕。 方法2: 我们定义全局变量。模块a的数据赋值给全局变量x。然后模块b获取x。这样我们就很容易获取到数据 2. Vuex 官方解释:Vuex 是一个专为 Vue.js 应用程序开发的状态管理模式。可以想象为一个“前端数据库”(数据仓库), 让其在各个页面上实现数据的共享包括状态,并且可操作 Vuex分成五个部分: 1.State:单一状态树 2.Getters:状态获取 3.Mutations:触发同步事件 4.Actions:提交mutation,可以包含异步操作 5.Module:将vuex进行分模块- 1
- 2
- 3
- 4
- 5
- 6
- 7
- 8
- 9
- 10
- 11
- 12
- 13
- 14
- 15
- 16
- 17
- 18
- 19
- 20
- 21
- 22
- 23
- 24
- 25
1.1 如何使用
1.1.1下载依赖
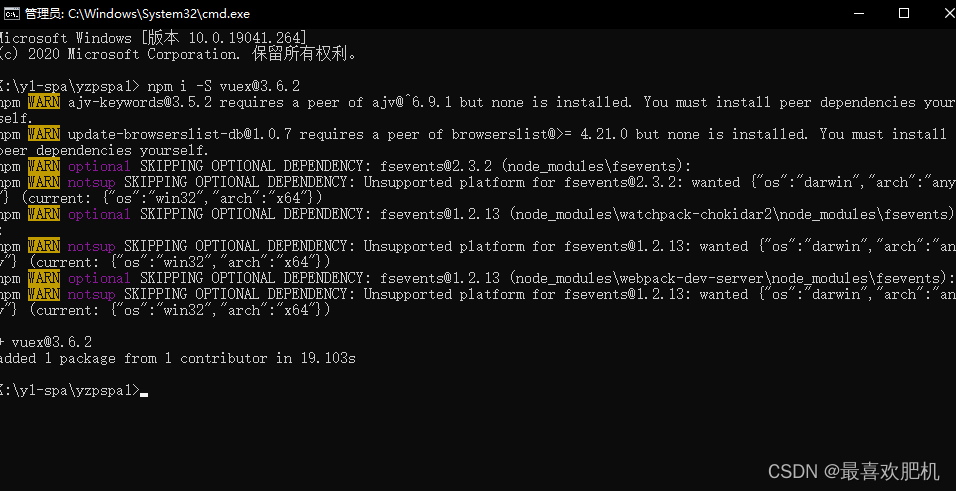
注意vuex存在版本问题,本人使用的是3.6.2
npm i -S vuex@3.6.2- 1
- 2
1.1.2创建store模块
在store里面建以下js文件
index.js
state.js
actions.js
mutations.js
getters.js

1.1.3 在store/index.js文件中新建vuex的store实例,并注册上面引入的各大模块
main.js
// The Vue build version to load with the `import` command // (runtime-only or standalone) has been set in webpack.base.conf with an alias. // import是ES6标准中的模块化解决方案,require是node中遵循CommonJS规范的模块化解决方案 // 后者支持动态引入,也就是require(${path}/xx.js) import Vue from 'vue' // process.env.MOCK && require('@/mock') import ElementUI from 'element-ui' import 'element-ui/lib/theme-chalk/index.css' import App from './App' import router from './router' import axios from '@/api/http' /* vue项目对axios的全局配置 */ import VueAxios from 'vue-axios' import store from './store' Vue.use(ElementUI) Vue.use(VueAxios,axios) Vue.config.productionTip = false /* eslint-disable no-new */ new Vue({ el: '#app', router, store, data(){ return{ // 根据vue根实例中定一个变量,这个变量其实就是vue实例,他就是总线 // props this.$emit bus:new Vue({}) } }, components: { App }, template: '' }) - 1
- 2
- 3
- 4
- 5
- 6
- 7
- 8
- 9
- 10
- 11
- 12
- 13
- 14
- 15
- 16
- 17
- 18
- 19
- 20
- 21
- 22
- 23
- 24
- 25
- 26
- 27
- 28
- 29
- 30
- 31
- 32
- 33
- 34
- 35
- 36
store/index.js
import Vue from 'vue' import Vuex from 'vuex' import state from './state' import getters from './getters' import actions from './actions' import mutations from './mutations' Vue.use(Vuex) const store = new Vuex.Store({ state, getters, actions, mutations }) export default store- 1
- 2
- 3
- 4
- 5
- 6
- 7
- 8
- 9
- 10
- 11
- 12
- 13
- 14
- 15
- 16
1.1.4 在main.js中导入并使用store实例
import store from ‘./store’
1.1.5store
每一个Vuex应用的核心就是store(仓库),store基本上就是一个容器,它包含着你的应用中大部分的状态 (state)。 const store = new Vuex.Store({ state, // 共同维护的一个状态,state里面可以是很多个全局状态 getters, // 获取数据并渲染 actions, // 数据的异步操作 mutations // 处理数据的唯一途径,state的改变或赋值只能在这里 })- 1
- 2
- 3
- 4
- 5
- 6
- 7
二、利用vuex同步存值和利用vuex取值
2.1 Vuex取值
在state里面存好值
export default { csName:'湖南娄底' }- 1
- 2
- 3
- 4
然后然后从里面将值拿出来呢
可以通过:this.$store.state.csName;拿到存的值
定义一个vue:欢迎来到{{msg}}- 1
- 2
- 3
- 4
- 5
- 6
- 7
- 8
- 9
- 10
- 11
- 12
- 13
- 14
- 15
- 16
- 17
- 18
- 19
- 20
- 21
定义路由
import Vue from 'vue' import Router from 'vue-router' import Login from '@/views/Login' import Reg from '@/views/Reg' import AppMain from '@/components/AppMain' import LeftNav from '@/components/LeftNav' import TopNav from '@/components/TopNav' import Articles from '@/views/sys/Articles' import VuexPage1 from '@/views/sys/VuexPage1' Vue.use(Router) export default new Router({ routes: [ { path: '/', name: 'Login', component: Login }, { path: '/Login', name: 'Login', component: Login },{ path: '/Reg', name: 'Reg', component: Reg }, { path: '/AppMain', name: 'AppMain', component: AppMain, children:[ { path: '/LeftNav', name: 'LeftNav', component: LeftNav },{ path: '/TopNav', name: 'TopNav', component: TopNav }, { path: '/sys/Articles', name: 'Articles', component: Articles }, { path: '/sys/VuexPage1', name: 'VuexPage1', component: VuexPage1 } ] } ] })- 1
- 2
- 3
- 4
- 5
- 6
- 7
- 8
- 9
- 10
- 11
- 12
- 13
- 14
- 15
- 16
- 17
- 18
- 19
- 20
- 21
- 22
- 23
- 24
- 25
- 26
- 27
- 28
- 29
- 30
- 31
- 32
- 33
- 34
- 35
- 36
- 37
- 38
- 39
- 40
- 41
- 42
- 43
- 44
- 45
- 46
- 47
- 48
- 49
- 50
- 51
- 52
- 53
- 54
- 55
- 56
- 57
然后我们来看结果:
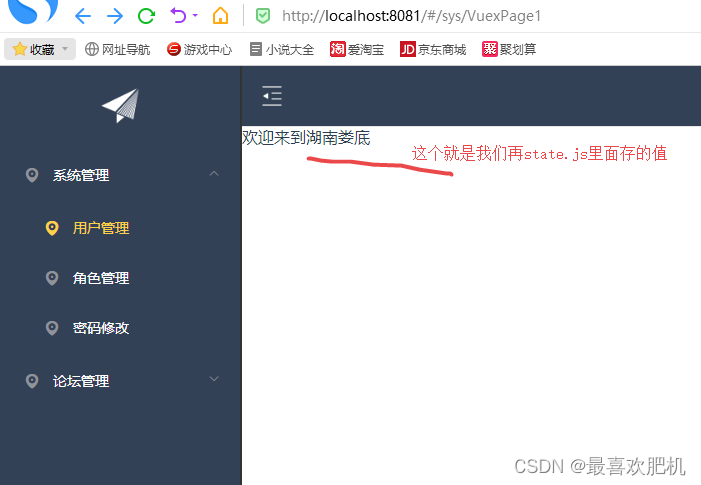
这种方式是不安全的
2.2 Vuex同步存值
处理数据的唯一途径,state的改变或赋值只能在这里
export default { // type(事件类型): 其值为setResturantName // payload:官方给它还取了一个高大上的名字:载荷,其实就是一个保存要传递参数的容器 setResturantName: (state, payload) => { state.resturantName = payload.resturantName; } } 注1:mutations中方法的调用方式 不能直接调用this.$store.mutations.setResturantName('KFC'),必须使用如下方式调用: this.$store.commit(type,payload); // 1、把载荷和type分开提交 store.commit('setResturantName',{ resturantName:'KFC' }) // 2、载荷和type写到一起 store.commit({ type: 'setResturantName', resturantName: 'KFC' }) 注2:一定要记住,Mutation 必须是同步函数。为什么呢?异步方法,我们不知道什么时候状态会发生改变,所以也就无法追踪了 如果我们需要异步操作,Mutations就不能满足我们需求了,这时候我们就需要Actions了 mutations: { someMutation (state) { api.callAsyncMethod(() => { state.count++ }) } }- 1
- 2
- 3
- 4
- 5
- 6
- 7
- 8
- 9
- 10
- 11
- 12
- 13
- 14
- 15
- 16
- 17
- 18
- 19
- 20
- 21
- 22
- 23
- 24
- 25
- 26
- 27
- 28
- 29
- 30
- 31
- 32
代码:
mutations.jsexport default { setcsName: (state, payload) => { // type(事件类型): 其值为setResturantName // payload:官方给它还取了一个高大上的名字:载荷,其实就是一个保存要传递参数的容器 state.csName = payload.csName; } }- 1
- 2
- 3
- 4
- 5
- 6
- 7
- 8
getters.js
export default { getcsName:(state)=>{ return state.csName; } }- 1
- 2
- 3
- 4
- 5
- 6
state.js
export default { csName:'湖南娄底' }- 1
- 2
- 3
- 4
VuexPage1.vue
页面1: 欢迎来到{{msg}}- 1
- 2
- 3
- 4
- 5
- 6
- 7
- 8
- 9
- 10
- 11
- 12
- 13
- 14
- 15
- 16
- 17
- 18
- 19
- 20
- 21
- 22
- 23
- 24
- 25
- 26
- 27
- 28
- 29
- 30
- 31
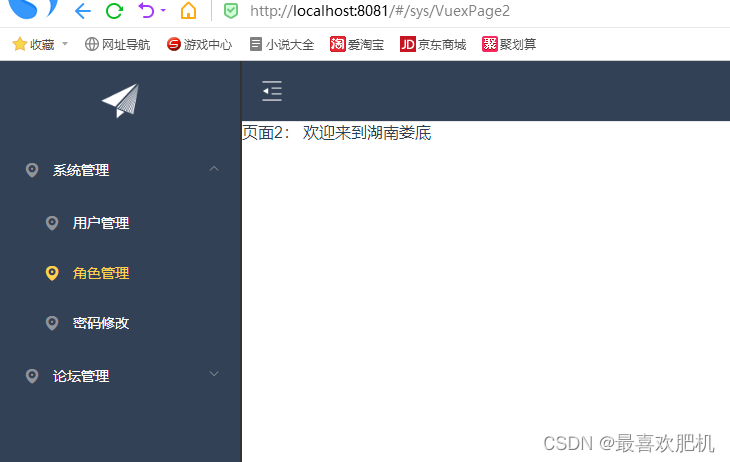
VuexPage2.vue
页面2: 欢迎来到{{msg}}- 1
- 2
- 3
- 4
- 5
- 6
- 7
- 8
- 9
- 10
- 11
- 12
- 13
- 14
- 15
- 16
- 17
- 18
- 19
- 20
- 21
- 22
- 23
- 24
- 25
- 26
- 27
- 28
- 29
- 30
配置路由:
import Vue from 'vue' import Router from 'vue-router' import Login from '@/views/Login' import Reg from '@/views/Reg' import AppMain from '@/components/AppMain' import LeftNav from '@/components/LeftNav' import TopNav from '@/components/TopNav' import Articles from '@/views/sys/Articles' import VuexPage1 from '@/views/sys/VuexPage1' import VuexPage2 from '@/views/sys/VuexPage2' Vue.use(Router) export default new Router({ routes: [ { path: '/', name: 'Login', component: Login }, { path: '/Login', name: 'Login', component: Login },{ path: '/Reg', name: 'Reg', component: Reg }, { path: '/AppMain', name: 'AppMain', component: AppMain, children:[ { path: '/LeftNav', name: 'LeftNav', component: LeftNav },{ path: '/TopNav', name: 'TopNav', component: TopNav }, { path: '/sys/Articles', name: 'Articles', component: Articles }, { path: '/sys/VuexPage1', name: 'VuexPage1', component: VuexPage1 }, { path: '/sys/VuexPage2', name: 'VuexPage2', component: VuexPage2 } ] } ] })- 1
- 2
- 3
- 4
- 5
- 6
- 7
- 8
- 9
- 10
- 11
- 12
- 13
- 14
- 15
- 16
- 17
- 18
- 19
- 20
- 21
- 22
- 23
- 24
- 25
- 26
- 27
- 28
- 29
- 30
- 31
- 32
- 33
- 34
- 35
- 36
- 37
- 38
- 39
- 40
- 41
- 42
- 43
- 44
- 45
- 46
- 47
- 48
- 49
- 50
- 51
- 52
- 53
- 54
- 55
- 56
- 57
- 58
- 59
- 60
- 61
- 62
- 63
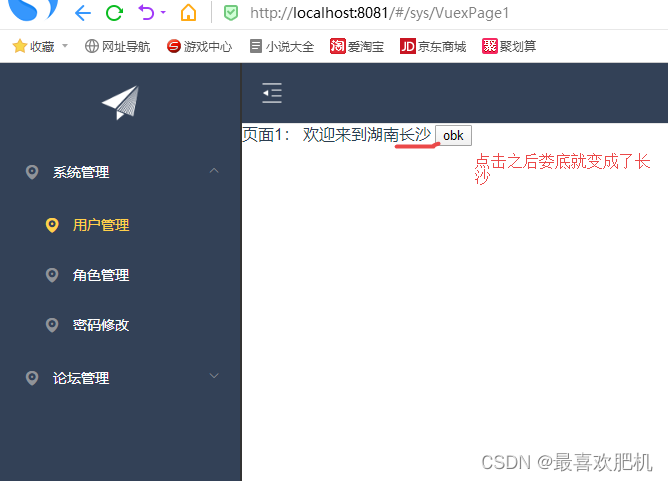
运行结果:
刚开始:

点击之后:

三、Vuex异步加载
Action类似于 mutation,不同在于: 1.Action提交的是mutation,而不是直接变更状态 2.Action可以包含任意异步操作 3.Action的回调函数接收一个 context 上下文参数,注意,这个参数可不一般,它与 store 实例有着相同的方法和属性 但是他们并不是同一个实例,context 包含: 1. state、2. rootState、3. getters、4. mutations、5. actions 五个属性 所以在这里可以使用 context.commit 来提交一个 mutation,或者通过 context.state 和 context.getters 来获取 state 和 getters。 注1:actions中方法的调用方式语法如下: this.$store.dispatch(type,payload); 例如:this.$store.dispatch('setResturantNameByAsync',{resturantName: '啃德鸡2'}); 注2:action中提交mutation context.commit('setResturantName',{resturantName: '啃德鸡2'}); 注3:VUEX 的 actions 中无法获取到 this 对象 如果要在actions 或者 mutations 中使用this对象。可以在调用的时候把this对象传过去 {resturantName: '啃德鸡2',_this:this}//this就是在调用时的vue实例 Vuex中actions的使用场景 场景1:部门管理中添加或删除了新的部门,员工新增/编辑页面的部门列表需要进行变化 场景2:vuex之使用actions和axios异步初始购物车数据- 1
- 2
- 3
- 4
- 5
- 6
- 7
- 8
- 9
- 10
- 11
- 12
- 13
- 14
- 15
- 16
- 17
- 18
- 19
- 20
- 21
- 22
- 23
代码:
// A code block var foo = 'bar';- 1
- 2
action.js里面写一个方法
export default { setcsNameAsync: (context, payload) => { // 异步修改值 // context指的是vuex的上下文,context相当于 this.$store setTimeout(function(){ context.commit("setcsName",payload); },6000) } }- 1
- 2
- 3
- 4
- 5
- 6
- 7
- 8
- 9
- 10
- 11
VuexPage1:
页面1: 欢迎来到{{msg}}- 1
- 2
- 3
- 4
- 5
- 6
- 7
- 8
- 9
- 10
- 11
- 12
- 13
- 14
- 15
- 16
- 17
- 18
- 19
- 20
- 21
- 22
- 23
- 24
- 25
- 26
- 27
- 28
- 29
- 30
- 31
- 32
- 33
- 34
- 35
- 36
- 37
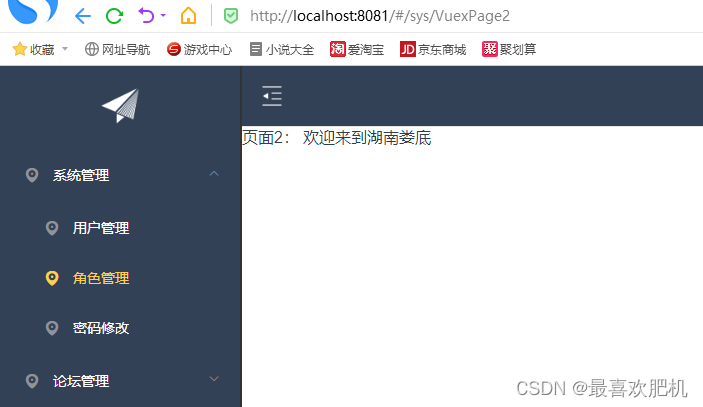
运行结果
刚开始的样子


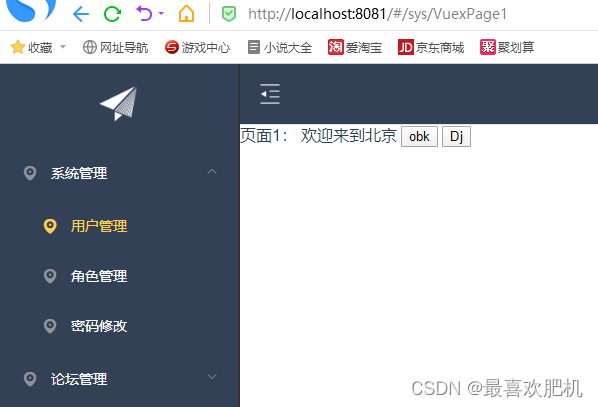
点击时候先是这样子:


6秒之后就是这样子的:
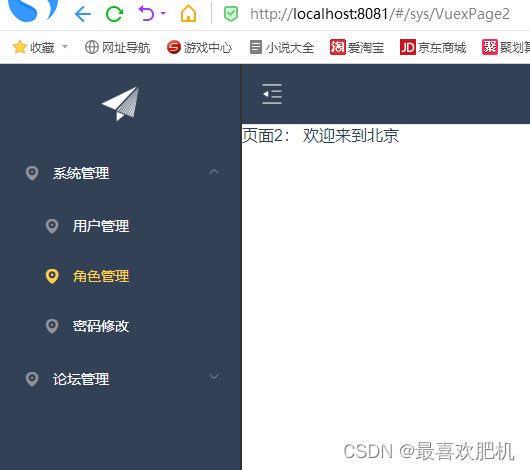
3.1vuex的后台交互
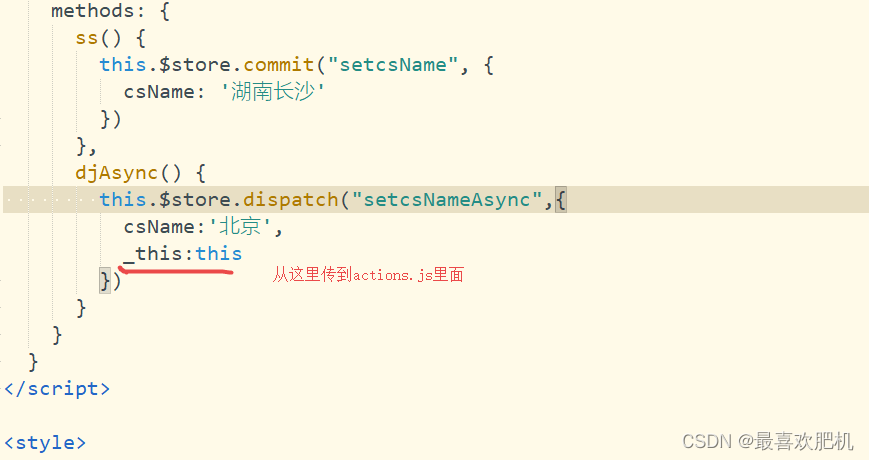
 页面1: 欢迎来到{{msg}}
- 1
- 2
- 3
- 4
- 5
- 6
- 7
- 8
- 9
- 10
- 11
- 12
- 13
- 14
- 15
- 16
- 17
- 18
- 19
- 20
- 21
- 22
- 23
- 24
- 25
- 26
- 27
- 28
- 29
- 30
- 31
- 32
- 33
- 34
- 35
- 36
- 37
- 38
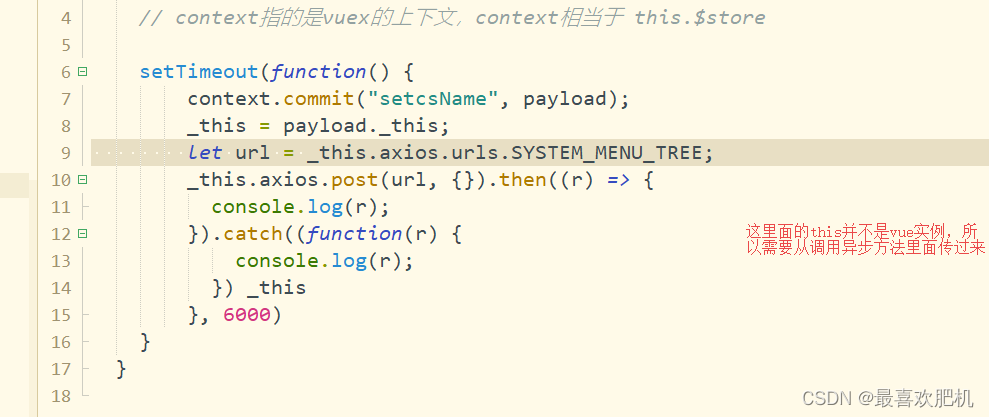
export default { setcsNameAsync: (context, payload) => { // 异步修改值 // context指的是vuex的上下文,context相当于 this.$store setTimeout(function() { context.commit("setcsName", payload); _this = payload._this; let url = _this.axios.urls.SYSTEM_MENU_TREE; _this.axios.post(url, {}).then((r) => { console.log(r); }).catch((function(r) { console.log(r); }) _this }, 6000) } }- 1
- 2
- 3
- 4
- 5
- 6
- 7
- 8
- 9
- 10
- 11
- 12
- 13
- 14
- 15
- 16
- 17
- 18
运行结果:

-
相关阅读:
超详细反编译python打包的exe
C#,基于密度的噪声应用空间聚类算法(DBSCAN Algorithm)源代码
【浅学Java】详解网络层IP协议
“Fatal error compiling: 无效的目标发行版: 11“的解决
通过Redis实现一个异步请求-响应程序
系统高可用需要关注的点
一种基于混合策略的灰狼优化算法-附代码
图神经网络驱动的交通预测技术:探索与挑战
【c++入门(2)】关联容器map
【数据集NO.4】遥感图像数据集汇总
- 原文地址:https://blog.csdn.net/m0_65795902/article/details/126855292
