-
Spring实现注解(编程式事务管理、通过XML或注解的声明式事务管理)
15.3、实现事务
事务管理方式有两种:一种是传统的编程式事务管理(编写代码实现事务,能精确地定义事务的边界),一种是声明式事务管理(以AOP技术实现,无须通过编程的方式管理事务)。
声明式事务管理的优点就是不需要通过编程的方式实现,只需要在配置文件中进行事务的规则声明,就可以将事务应用得到业务逻辑当中,实际上就是将事务切入到业务目标中,它对业务代码没有侵入性,耦合度低,易于维护,所以现在开发基本都使用声明式事务管理。
声明式事事务管理也分为两种:XML文件配置和注解,其中XML文件配置已经很少使用,现在的事务管理都是通过注解:@Transactional来实现的。
15.3.1、编程式事务
实际上就是通过我们自己写程序来实现的,Spring提供的最原始的事务管理方式是基于TransactionDefinition、PlatformTransactionManager、TransactionStatus 编程式事务。而TransactionTemplate的编程式事务管理是使用模板方法设计模式对原始事务管理方式的封装。
我们使用过spring的JdbcTemplate访问数据库,但是他不支持事务,所以spring设置了一个 org.springframework.transaction.support.TransactionTemplate模板,它是提供事务管理器的模板。它的核心方法是 execute,传入的参数有两种选择:TransactionCallback、TransactionCallbackWithoutResult
//简化程序化事务划分和事务异常处理的模板类。 public class TransactionTemplate extends DefaultTransactionDefinition implements TransactionOperations, InitializingBean { .....构造方法等省略..... /** 设置要使用的事务管理策略 */ public void setTransactionManager(@Nullable PlatformTransactionManager transactionManager) { this.transactionManager = transactionManager; } /**返回要使用的事务管理策略。*/ @Nullable public PlatformTransactionManager getTransactionManager() { return this.transactionManager; } /**中心方法 ,支持实现TransactionCallback接口的事务代码。 */ @Override @Nullable public <T> T execute(TransactionCallback<T> action) throws TransactionException { Assert.state(this.transactionManager != null, "No PlatformTransactionManager set"); //使用自定义的事务管理器 if (this.transactionManager instanceof CallbackPreferringPlatformTransactionManager) { return ((CallbackPreferringPlatformTransactionManager) this.transactionManager).execute(this, action); } //系统默认的管理器 else { //获取事务的状态 TransactionStatus status = this.transactionManager.getTransaction(this); T result; try { //回调接口方法 result = action.doInTransaction(status); } catch (RuntimeException | Error ex) { // 事务代码抛出应用程序异常 -> 回滚 rollbackOnException(status, ex); throw ex; } catch (Throwable ex) { // 事务代码抛出异常 ->回滚 rollbackOnException(status, ex); throw new UndeclaredThrowableException(ex, "TransactionCallback threw undeclared checked exception"); } //提交事务 this.transactionManager.commit(status); return result; } } /**执行回滚,正确处理回滚异常。 */ private void rollbackOnException(TransactionStatus status, Throwable ex) throws TransactionException { Assert.state(this.transactionManager != null, "No PlatformTransactionManager set"); logger.debug("Initiating transaction rollback on application exception", ex); try { this.transactionManager.rollback(status); } catch (TransactionSystemException ex2) { logger.error("Application exception overridden by rollback exception", ex); ex2.initApplicationException(ex); throw ex2; } catch (RuntimeException | Error ex2) { logger.error("Application exception overridden by rollback exception", ex); throw ex2; } } }- 1
- 2
- 3
- 4
- 5
- 6
- 7
- 8
- 9
- 10
- 11
- 12
- 13
- 14
- 15
- 16
- 17
- 18
- 19
- 20
- 21
- 22
- 23
- 24
- 25
- 26
- 27
- 28
- 29
- 30
- 31
- 32
- 33
- 34
- 35
- 36
- 37
- 38
- 39
- 40
- 41
- 42
- 43
- 44
- 45
- 46
- 47
- 48
- 49
- 50
- 51
- 52
- 53
- 54
- 55
- 56
- 57
- 58
- 59
- 60
- 61
- 62
- 63
- 64
下面测试一下:
<beans xmlns="http://www.springframework.org/schema/beans" xmlns:xsi="http://www.w3.org/2001/XMLSchema-instance" xmlns:context="http://www.springframework.org/schema/context" xmlns:tx="http://www.springframework.org/schema/tx" xsi:schemaLocation="http://www.springframework.org/schema/beans http://www.springframework.org/schema/beans/spring-beans.xsd http://www.springframework.org/schema/context https://www.springframework.org/schema/context/spring-context.xsd http://www.springframework.org/schema/tx http://www.springframework.org/schema/tx/spring-tx.xsd"> <bean id="transactionManager" class="org.springframework.jdbc.datasource.DataSourceTransactionManager"> <property name="dataSource" ref="dataSource"/> bean> <bean id="transactionTemplate" class="org.springframework.transaction.support.TransactionTemplate"> <property name="transactionManager" ref="transactionManager"/> bean> beans>- 1
- 2
- 3
- 4
- 5
- 6
- 7
- 8
- 9
- 10
- 11
- 12
- 13
- 14
- 15
- 16
- 17
- 18
- 19
- 20
- 21
- 22
- 23
- 24
public class ClassesTest { @Autowired private TransactionTemplate transactionTemplate; @Autowired private JdbcTemplate jdbcTemplate; public List<Classes> getClasses(Integer ... id){ //使用execute方法 操作事务 return transactionTemplate.execute(status -> { String sql = "SELECT * FROM `user` WHERE user_id = ?"; try { List<User> userList = jdbcTemplate.query(sql, new BeanPropertyRowMapper<>(User.class), id); System.out.println("事务操作成功"); return userList; } catch (DataAccessException e) { //出现异常设置事务的回滚,必须要有回滚 System.out.println("操作失败事务回滚"); status.setRollbackOnly(); } return null; }); } }- 1
- 2
- 3
- 4
- 5
- 6
- 7
- 8
- 9
- 10
- 11
- 12
- 13
- 14
- 15
- 16
- 17
- 18
- 19
- 20
- 21
- 22


15.3.2、声明式事务
声明式事务是一种约定性的事务管理,使用事务时,大部分情况是发生异常后,需要回滚,不发生异常时提交事务。基于这点,spring声明式事务规定,业务方法不发生异常时,spring就让事务管理器提交事务,发生异常时,事务管理器回滚事务。
Spring 声明式事务管理是通过 AOP 实现的,其本质是对方法前后进行拦截,然后在目标方法开始之前创建(加入)一个事务,在执行完目标方法后,根据执行情况提交或者回滚事务。声明式事务最大的优点就是对业务代码的侵入性低,可以将业务代码和事务管理代码很好地进行解耦。
1、基于XML
在Spring2.0后,提供了 tx 命名空间来配置事务,通过 tx:advice 元素配置事务的通知,它有两个属性 id(唯一标识)、transaction-manager(指定事务管理器)。有一个子元素 tx:attributes ,通过配置多个 tx:method 来配置事务的细节
tx:method 的属性 描述 name 指定那些方法执行事务(支持通配符) propagation 指定事务的传播行为 isolation 指定事务的隔离级别 read-only 指定事务是否只读 timeout 指定事务的超时时间 rollback-for 指定触发回滚的异常 no-rollback-for 指定不触发回滚的异常 使用XML配置 <bean id="transactionManager" class="org.springframework.jdbc.datasource.DataSourceTransactionManager"> <property name="dataSource" ref="dataSource"/> bean> <tx:advice id="interceptor" transaction-manager="transactionManager"> <tx:attributes> <tx:method name="select*" propagation="REQUIRED" isolation="DEFAULT" read-only="false" timeout="-1" no-rollback-for="" rollback-for=""/> tx:attributes> tx:advice> <aop:config> <aop:pointcut id="pt" expression="execution()"/> <aop:advisor advice-ref="interceptor" pointcut-ref="pt"/> aop:config>- 1
- 2
- 3
- 4
- 5
- 6
- 7
- 8
- 9
- 10
- 11
- 12
- 13
- 14
- 15
- 16
- 17
- 18
- 19
- 20
- 21
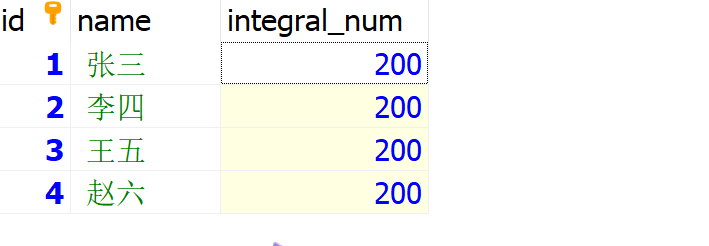
测试一下:有四个用户,让其中一个人赠送积分给另一个人

-
dao操作数据库
public class IntegralTestTransactionalDao { @Autowired private JdbcTemplate jdbcTemplate; /** 获取所有信息*/ public List<Integral> servletIntegral() { String sql = "SELECT id,`name`,integral_num FROM integral"; return jdbcTemplate.query(sql, new BeanPropertyRowMapper<>(Integral.class)); } /** 赠送积分*/ public void givingIntegral(int integralNum,int id){ String sql = "update integral set integral_num = integral_num-? where id=?"; jdbcTemplate.update(sql,integralNum,id); } /** 得到积分*/ public void getIntegral(int integralNum,int id){ String sql = "update integral set integral_num = integral_num+? where id=?"; jdbcTemplate.update(sql,integralNum,id); } /** 根据id获取*/ public Integral servletById(int id) { String sql = "select id,`name`,integral_num FROM integral where id =?"; try { return jdbcTemplate.queryForObject(sql,new BeanPropertyRowMapper<>(Integral.class),id); }catch (EmptyResultDataAccessException e){ return null; } } }- 1
- 2
- 3
- 4
- 5
- 6
- 7
- 8
- 9
- 10
- 11
- 12
- 13
- 14
- 15
- 16
- 17
- 18
- 19
- 20
- 21
- 22
- 23
- 24
- 25
- 26
- 27
- 28
-
service
public class IntegralTransactionalServiceImpl implements IntegralTestTransactionalService { @Autowired private IntegralTestTransactionalDao dao; @Override public List<Integral> servletIntegral() { return dao.servletIntegral(); } @Override public Integral servletById(int id) { return dao.servletById(id); } @Override public void changeIntegral(int integralNum,Integral integral1,Integral integral2) throws Exception { System.out.println(integral1.getName()+"赠送积分:"+integralNum); dao.givingIntegral(integralNum,integral1.getId()); try { int i = 5/0; } catch (Exception e) { throw new RuntimeException(e); } System.out.println(integral2.getName()+"获得积分:"+integralNum); dao.getIntegral(integralNum,integral2.getId()); } }- 1
- 2
- 3
- 4
- 5
- 6
- 7
- 8
- 9
- 10
- 11
- 12
- 13
- 14
- 15
- 16
- 17
- 18
- 19
- 20
- 21
- 22
- 23
- 24
- 25
- 26
- 27
- 28
-
不配置注解,测试一下效果

在不配置事务的情况下,张三积分减少,但是王五的并没有获得积分,现在通过XML配置事务:
<beans xmlns="http://www.springframework.org/schema/beans" xmlns:xsi="http://www.w3.org/2001/XMLSchema-instance" xmlns:context="http://www.springframework.org/schema/context" xmlns:tx="http://www.springframework.org/schema/tx" xmlns:aop="http://www.springframework.org/schema/aop" xsi:schemaLocation="http://www.springframework.org/schema/beans http://www.springframework.org/schema/beans/spring-beans.xsd http://www.springframework.org/schema/context https://www.springframework.org/schema/context/spring-context.xsd http://www.springframework.org/schema/tx http://www.springframework.org/schema/tx/spring-tx.xsd http://www.springframework.org/schema/aop https://www.springframework.org/schema/aop/spring-aop.xsd"> <bean id="transactionManager" class="org.springframework.jdbc.datasource.DataSourceTransactionManager"> <property name="dataSource" ref="dataSource"/> bean> <tx:advice id="interceptor" transaction-manager="transactionManager"> <tx:attributes> <tx:method name="change*" read-only="false"/> tx:attributes> tx:advice> <aop:config> <aop:pointcut id="point" expression="execution(* com.yu.XmlTransactional.IntegralTransactionalServiceImpl.changeIntegral(..))"/> <aop:advisor advice-ref="interceptor" pointcut-ref="point"/> aop:config> beans>- 1
- 2
- 3
- 4
- 5
- 6
- 7
- 8
- 9
- 10
- 11
- 12
- 13
- 14
- 15
- 16
- 17
- 18
- 19
- 20
- 21
- 22
- 23
- 24
- 25
- 26
- 27
- 28
- 29
- 30
- 31
- 32
- 33
- 34
- 35
- 36
在数据库将数据改成初始状态,再进行测试:我们发现事务回滚了,所有人的积分都没有变化
2、基于注解
想要使用注解实现事务,必须开启事务注解的支持,也是有两种方法进行开启
-
在XML文件中开启:tx 命名空间提供了一个 tx:annotation-driven 的元素,用来开启注解事务,简化 Spring 声明式事务的 XML 配置。
<bean id="transactionManager" class="org.springframework.jdbc.datasource.DataSourceTransactionManager"> <property name="dataSource" ref="dataSource1"/> bean> <tx:annotation-driven transaction-manager="transactionManager"/>- 1
- 2
- 3
- 4
- 5
- 6
- 7
-
也可以在 @Configuration 的类上添加注解 @EnableTransactionManagement 开启注解支持
使用注解 @Configuration @ComponentScan @EnableTransactionManagement //开启事务 public class TransactionConfig { ............ }- 1
- 2
- 3
- 4
- 5
- 6
- 7
Spring 声明式事务编程的核心注解是 @Transactional ,该注解既可以在类上使用,也可以在方法上使用。在类上使用,则表示类中的所有方法都支持事务。在方法上使用,则表示当前方法支持事务。
Spring 容器会查找所有使用了 @Transactional 注解的 Bean,并自动为它们添加事务通知,通知的事务属性则是通过 @Transactional 注解的属性来定义的。
事务属性 说明 propagation 指定事务的传播行为。 isolation 指定事务的隔离级别。 read-only 指定是否为只读事务。 timeout 表示超时时间,单位为“秒”;声明的事务在指定的超时时间后,自动回滚,避免事务长时间不提交会回滚导致的数据库资源的占用。 rollback-for 指定事务对于那些类型的异常应当回滚,而不提交。 no-rollback-for 指定事务对于那些异常应当继续运行,而不回滚。 测试,还是使用上面XML的例子:
-
先在XML中开启事务注解的支持
<beans xmlns="http://www.springframework.org/schema/beans" xmlns:xsi="http://www.w3.org/2001/XMLSchema-instance" xmlns:context="http://www.springframework.org/schema/context" xmlns:tx="http://www.springframework.org/schema/tx" xsi:schemaLocation="http://www.springframework.org/schema/beans http://www.springframework.org/schema/beans/spring-beans.xsd http://www.springframework.org/schema/context https://www.springframework.org/schema/context/spring-context.xsd http://www.springframework.org/schema/tx http://www.springframework.org/schema/tx/spring-tx.xsd"> <bean id="transactionManager1" class="org.springframework.jdbc.datasource.DataSourceTransactionManager"> <property name="dataSource" ref="dataSource1"/> bean> <tx:annotation-driven transaction-manager="transactionManager1"/> beans>- 1
- 2
- 3
- 4
- 5
- 6
- 7
- 8
- 9
- 10
- 11
- 12
- 13
- 14
- 15
- 16
- 17
- 18
- 19
- 20
- 21
- 22
- 23
-
dao操作数据
@Repository public class IntegralTestTransactionalDao { ................ }- 1
- 2
- 3
- 4
-
编写service(先不加事务注解)
@Service public class IntegralTransactionalServiceImpl implements IntegralTestTransactionalService{ .............................. @Override public void changeIntegral(int integralNum,Integral integral1,Integral integral2) throws Exception { System.out.println(integral1.getName()+"赠送积分:"+integralNum); dao.givingIntegral(integralNum,integral1.getId()); //出错误 try { int i = 5/0; } catch (Exception e) { throw new RuntimeException(e); } System.out.println(integral2.getName()+"获得积分:"+integralNum); dao.getIntegral(integralNum,integral2.getId()); } }- 1
- 2
- 3
- 4
- 5
- 6
- 7
- 8
- 9
- 10
- 11
- 12
- 13
- 14
- 15
- 16
- 17
- 18
-
测试
@Test public void annotationtransactionTest() throws Exception { List<Integral> list1 = service.servletIntegral(); list1.forEach(i -> System.out.println(i.getName()+"有积分:"+i.getIntegralNum())); Integral user1 = service.servletById(1); Integral user2 = service.servletById(3); if(user1!=null && user2!=null){ service.changeIntegral(100,user1,user2); } List<Integral> list2 = service.servletIntegral(); list2.forEach(i -> System.out.println(i.getName()+"有积分:"+i.getIntegralNum())); }- 1
- 2
- 3
- 4
- 5
- 6
- 7
- 8
- 9
- 10
- 11
- 12

我们发现在没有添加事务的时候,出现错误后,张三的积分减少了,但是王五并没有获得积分。现在对service方法添加 @Transactional
@Override //开启事务 @Transactional(isolation = Isolation.DEFAULT,propagation = Propagation.REQUIRED,timeout = 10,readOnly = false) public void changeIntegral(int integralNum,Integral integral1,Integral integral2) throws Exception { System.out.println(integral1.getName()+"赠送积分:"+integralNum); dao.givingIntegral(integralNum,integral1.getId()); try { int i = 5/0; } catch (Exception e) { throw new RuntimeException(e); } System.out.println(integral2.getName()+"获得积分:"+integralNum); dao.getIntegral(integralNum,integral2.getId()); }- 1
- 2
- 3
- 4
- 5
- 6
- 7
- 8
- 9
- 10
- 11
- 12
- 13
- 14
- 15
此时进行测试,在出现异常后,事务回滚了,2人的积分都没有发生变化

-
相关阅读:
CompletableFuture 异常与事务【无标题】
基于python的km算法新闻文本分类
java计算机毕业设计会员商城管理系统MyBatis+系统+LW文档+源码+调试部署
基于STC12C5A60S2系列1T 8051单片的IIC总线器件模数芯片PCF8591实现模数转换应用
Java SE 13 新增特性
maven的一个应用
算法通过村第八关-树(深度优先)白银笔记|深度和高度问题
FB广告系列花费上限是否有必要设置?
如何配置固定TCP公网地址实现远程访问内网MongoDB数据库
生产者消费者模型设计
- 原文地址:https://blog.csdn.net/yuandfeng/article/details/126853062