-
安卓高级编程之实现类似三星系统的设置界面,并用lucene建立搜索系统
一、美化设置
安卓应用的设置可用 androidx.preference 实现。通过书写xml,扩展Preference类,最后实现的是一个基于 RecyclerView 的界面。但是即便 xml 中 PreferenceScreen、Group层级分明,默认出来的效果还是有亿点杂乱无章,需要自己美化。
美化的原理很简单,csdn也有教程,就是自定义列表项背景,根据item所处位置的不同,分配上、中、下、上下四种带有不同边框的背景,整体组合成一张张卡片的效果。
但是怎么实现呢?我的方式是直接魔改 androidx.preference 库,只需添加一两百行的方法代码,就可以在 PreferenceGroup 具有标题时自动启用这种卡片特效。
为了兼容列表项原来的点击波纹背景,处理的时候用了 LayerDrawable 将原来的背景叠加在卡片背景之上。
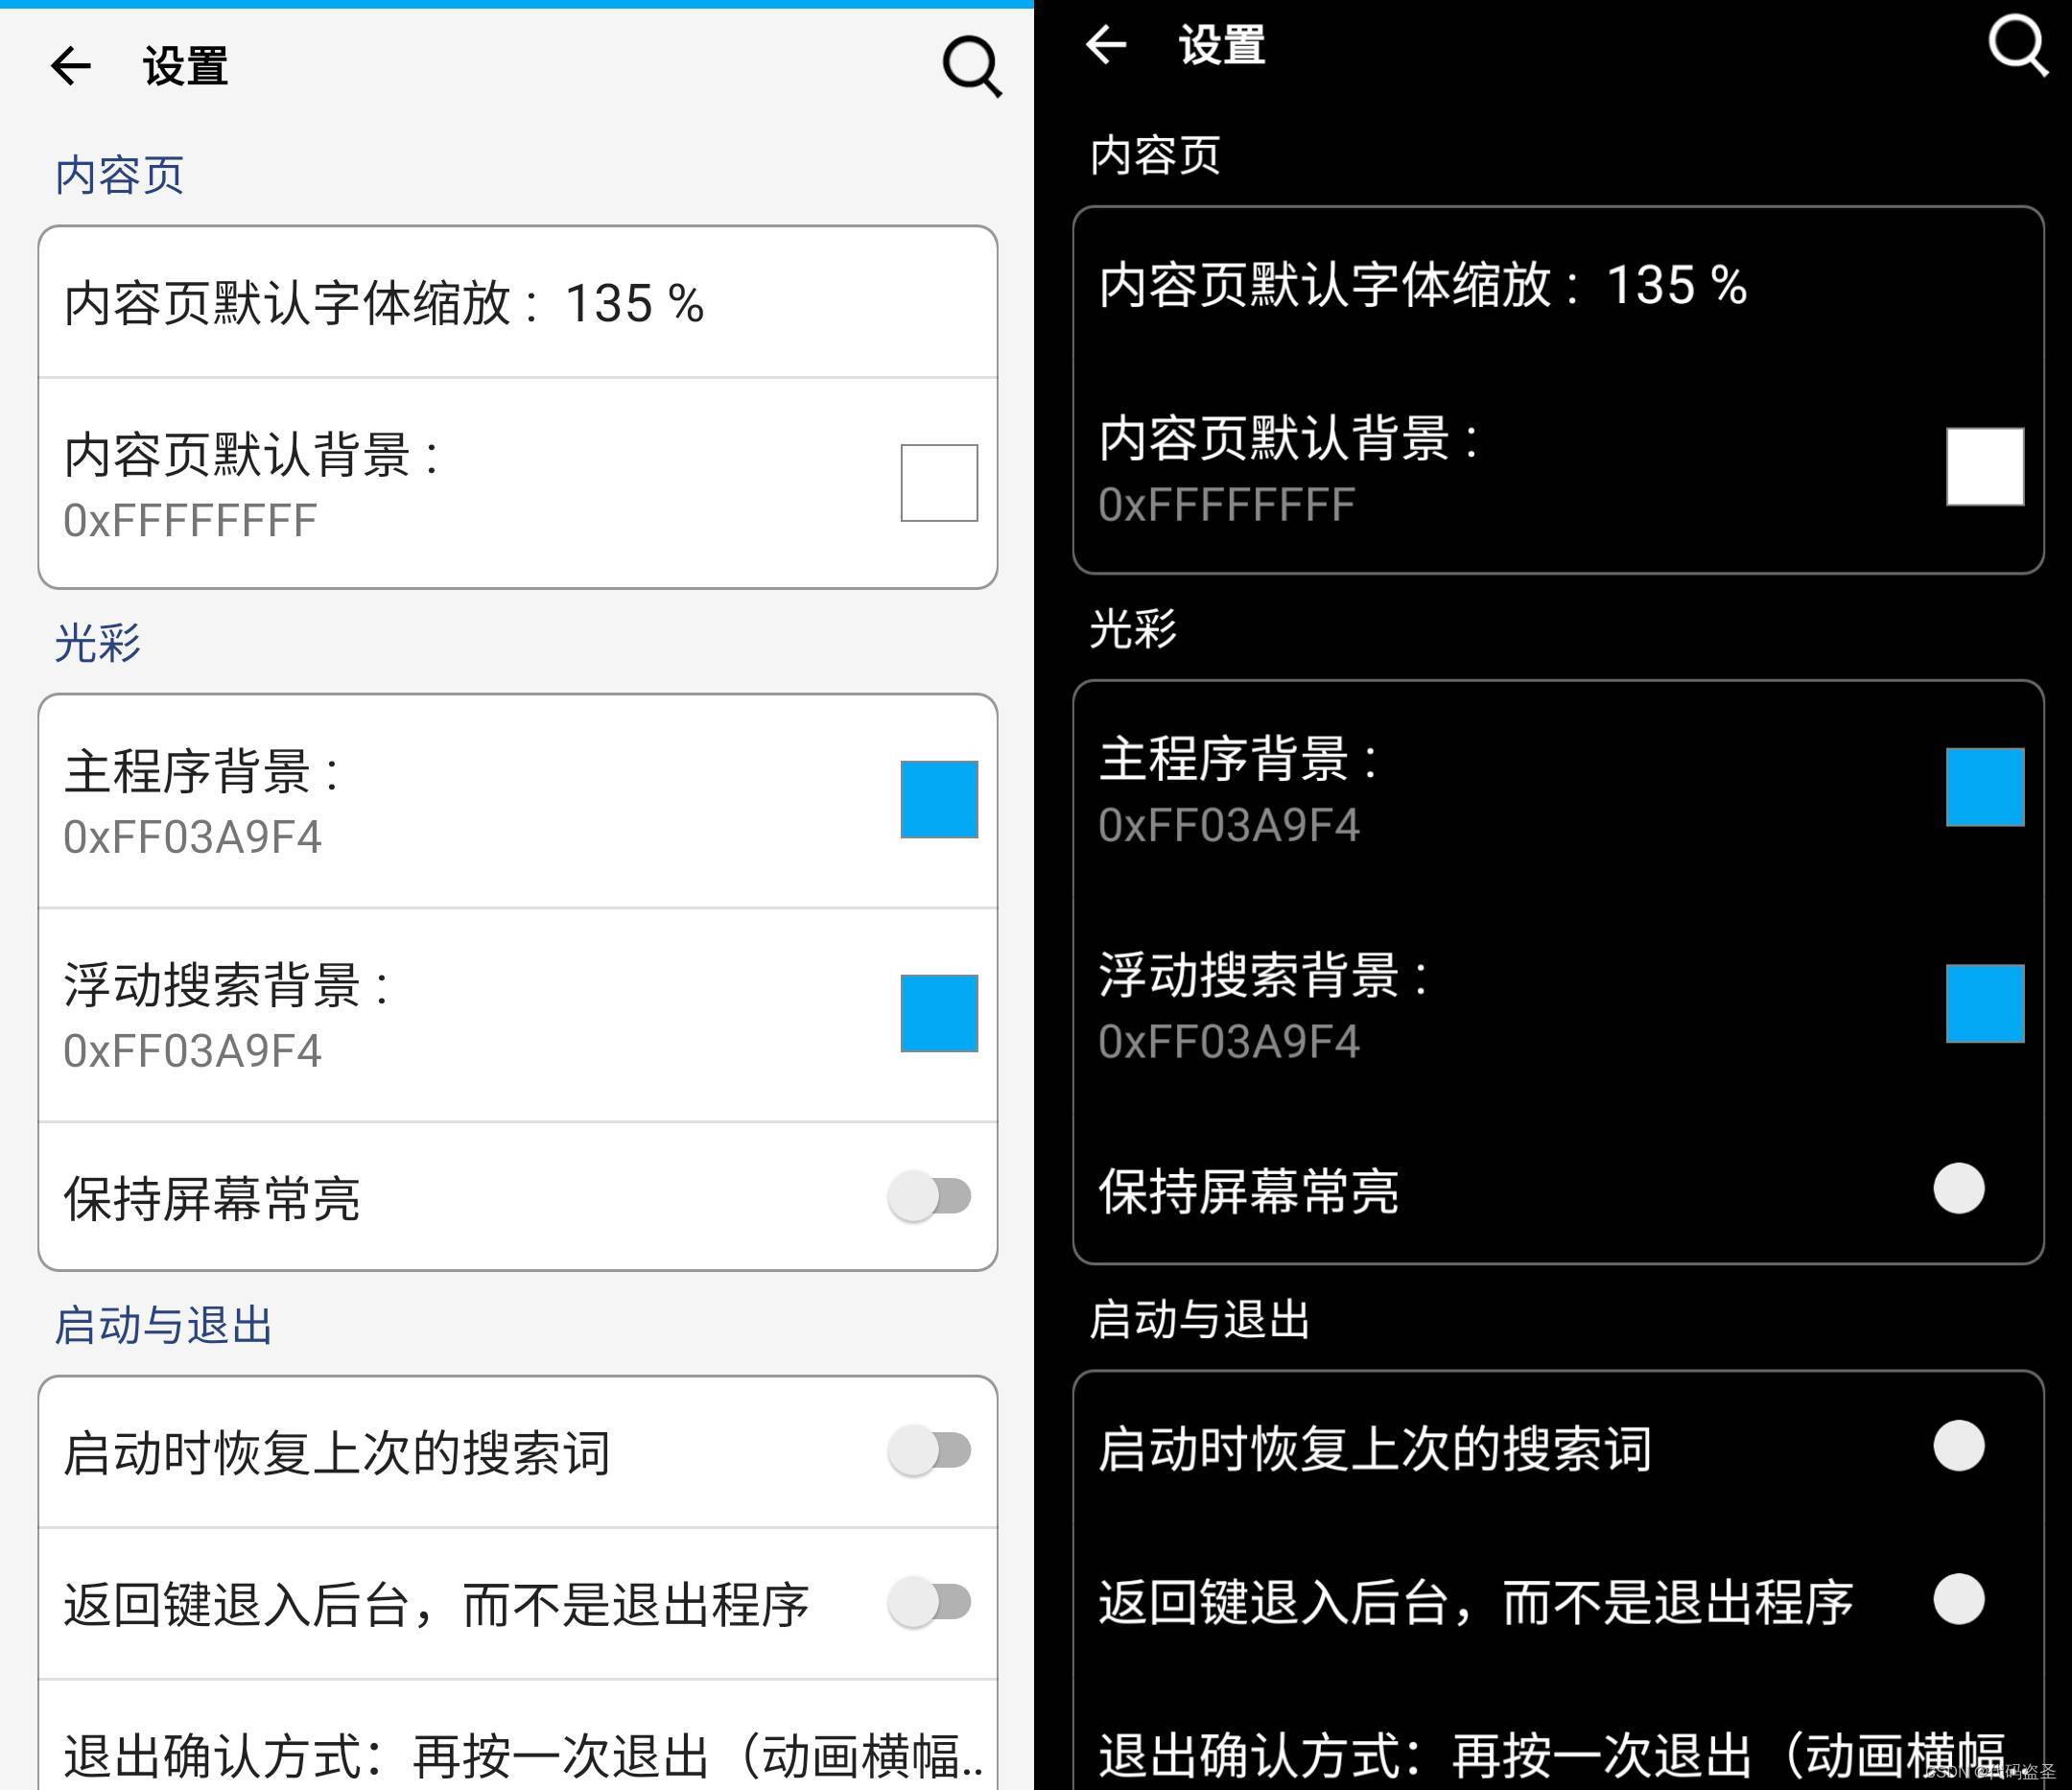
最终效果如下:
二、查找设置
得益于xml的组织形式,实现对于设置的查找变得很容易,即使你的应用有多种界面语言。
查看 androidx.preference 源码得知,我们可以自己new一个 PreferenceManagfer,主动去 infalte 设置的 xml 资源文件,得到一个个 PreferenceScreen,也就是层级化的 Preference 列表。这样,遍历这些列表,就可以为它们建立索引,十分迅速。
那么搜索到条目后,如何实现跳转呢?我用了简单的处理方式,直接根据设置id,启动一个新的设置Activity。
甚至还可以模仿三星的设置搜索系统,在跳转到搜索项目的时候,通过在列表项视图上虚拟两次触摸事件,触发其波纹背景,使其醒目。
if (child!=null) { MotionEvent evt = MotionEvent.obtain(0, 0, MotionEvent.ACTION_DOWN, -100, -100, 0); child.dispatchTouchEvent(evt); evt.recycle(); mList.postDelayed(() -> ViewUtils.preventDefaultTouchEvent(child, -100, -100), 800); } .... public static void preventDefaultTouchEvent(View view, int x, int y) { MotionEvent evt = MotionEvent.obtain(0, 0, MotionEvent.ACTION_CANCEL, x, y, 0); if (view!=null) view.dispatchTouchEvent(evt); evt.setSource(100); evt.recycle(); }- 1
- 2
- 3
- 4
- 5
- 6
- 7
- 8
- 9
- 10
- 11
- 12
- 13
- 14
- 15

三、源代码
魔改 androidx 库,Preference.java:
public void onBindViewHolder(PreferenceViewHolder holder) { PreferenceGroup p = getParent(); if (p != null) { p.setBackground(itemView, this); } ……- 1
- 2
- 3
- 4
- 5
- 6
PreferenceGroup.java:
public void setBackground(View view, Preference preference) { Drawable bg = view.getBackground(); boolean b1 = bg instanceof LayerDrawable; Drawable bgg = b1?((LayerDrawable) bg).findDrawableByLayerId(android.R.id.background):null; if (cardGroupView) { boolean isFirst = false, isLast = false; Preference probe; for (int i = 0; i < mPreferences.size(); i++) { probe = mPreferences.get(i); if (probe == preference) { isFirst = true; break; } if (probe.isVisible()) { break; } } for (int i = mPreferences.size()-1; i >= 0; i--) { probe = mPreferences.get(i); if (probe == preference) { isLast = true; break; } if (probe.isVisible()) { break; } } int res = R.drawable.frame_middle; if (isFirst && isLast) { res = R.drawable.frame_topbot; preference.setDrawDividers(false, false); } else if (isFirst) { res = R.drawable.frame_top; preference.setDrawDividers(false, true); } else if (isLast) { res = R.drawable.frame_bot; preference.setDrawDividers(true, false); } else { preference.setDrawDividers(true, true); } if(bgg == null) bgg = bg; LayerDrawable ld = (LayerDrawable) view.getContext().getResources().getDrawable(res); if (GlobalOptions.isDark) { ld.setColorFilter(GlobalOptions.NEGATIVE); } LayerDrawable ldd = new LayerDrawable(new Drawable[]{ld, bgg}); ldd.setId(1, android.R.id.background); view.setBackground(ldd); view.setPadding((int) (10* GlobalOptions.density), 0 , 0, 0); } else if(b1) { if(bgg!=null) { view.setBackground(bgg); } } }- 1
- 2
- 3
- 4
- 5
- 6
- 7
- 8
- 9
- 10
- 11
- 12
- 13
- 14
- 15
- 16
- 17
- 18
- 19
- 20
- 21
- 22
- 23
- 24
- 25
- 26
- 27
- 28
- 29
- 30
- 31
- 32
- 33
- 34
- 35
- 36
- 37
- 38
- 39
- 40
- 41
- 42
- 43
- 44
- 45
- 46
- 47
- 48
- 49
- 50
- 51
- 52
- 53
- 54
- 55
- 56
- 57
- 58
背景Drawable:
frame_middle.xml 上下无边框。(左右都有边框)
<layer-list xmlns:android="http://schemas.android.com/apk/res/android"> <item> <shape> <solid android:color="#fff" /> <stroke android:width="1dp" android:color="#999" android:dashGap="2dp" /> shape> item> <item android:left="1dp" android:right="1dp" > <shape> <solid android:color="#FFFFFFFF" /> shape> item> layer-list>- 1
- 2
- 3
- 4
- 5
- 6
- 7
- 8
- 9
- 10
- 11
- 12
- 13
- 14
- 15
- 16
- 17
- 18
- 19
frame_top.xml(上边框)
<layer-list xmlns:android="http://schemas.android.com/apk/res/android"> <item> <shape> <solid android:color="#fff" /> <stroke android:width="1dp" android:color="#999" android:dashGap="2dp" /> <corners android:radius="8dp" android:topRightRadius="8dp" android:topLeftRadius="8dp" android:bottomLeftRadius="0dp" android:bottomRightRadius="0dp" /> shape> item> <item android:left="1dp" android:right="1dp" android:top="2dp" > <shape> <solid android:color="#FFFFFFFF" /> <corners android:radius="8dp" android:topRightRadius="8dp" android:topLeftRadius="8dp" android:bottomLeftRadius="0dp" android:bottomRightRadius="0dp" /> shape> item> layer-list>- 1
- 2
- 3
- 4
- 5
- 6
- 7
- 8
- 9
- 10
- 11
- 12
- 13
- 14
- 15
- 16
- 17
- 18
- 19
- 20
- 21
- 22
- 23
- 24
- 25
- 26
- 27
- 28
- 29
- 30
- 31
- 32
- 33
部分边框的实现原理是:在 LayerDrawable 中,用上一层遮住下一层的四边边框,可以修改上层颜色为半透明查看遮盖效果。
frame_topbot.xml (上下边框)、frame_bot.xml (下边框) 依此类推。魔改过的 androidx.preference 最终也会开源,但是现在没开始整理,而是全面赶制词典搜索APP。
APP本体源代码:
技术交流 @ dodo
设置搜索相关的搜索 SettingsSearcher 文件即可,包含了建立索引、进行查找、显示对话框的全过程。
-
相关阅读:
产品解读 | 数据服务平台:KDP
Redis(三)——配置文件详解、发布和订阅、新数据类型
c++中如何利用VA_LIST 和单体模式,构建自己的log小系统
JUC并发编程系列详解篇十六(java中的其他锁)
题目1444:蓝桥杯201 4年第五届真题斐波那契
中国这么多 Java 开发者,应该诞生出生态级应用开发框架
生产者-消费者问题
[网络工程师]-传输层协议-TCP协议
谈谈Python中的正则表达式及其用法。
关于内存泄漏的经典面试题
- 原文地址:https://blog.csdn.net/sinat_27171121/article/details/126849499
