-
基于Python的卷积神经网络的猫狗图像识别系统
目录
基与卷积神经网络模型的猫狗图像识别 1
一、 摘要 2
二、 动机 2
三、 理论和算法理解 2
I.卷积神经网络 2- 定义 3
- 结构 3
- 应用 5
II.算法实现 5
Part 1 - Data Preprocessing 5
Preprocessing the Test set 6
Part 2 - Building the CNN 6
Initialising the CNN 6
Step 1 - Convolution 6
Step 2 - Pooling 6
Adding a second convolutional layer 6
Step 3 - Flattening 7
Step 4 - Full Connection 7
Step 5 - Output Layer 7
Part 3 - Training the CNN 7
Compiling the CNN 7
Training the CNN on the Training set and evaluating it on the Test set 7
Part 4 - Making a single prediction 7
四、 实验数据分析与总结 8
五、 心得体会 11
一、摘要
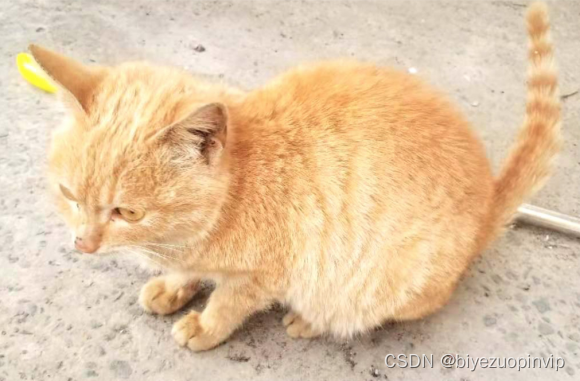
猫和狗在外观上的差异通过肉眼很容易识别,本文运用猫狗数据集训练出卷积神经网络模型,并使猫狗识别的准确率达到90%以上。本文同时包括卷积神经神经网络的理论理解,算法实现以及实验数据分析。
二、动机
在日常生活中,猫和狗在外观上的差异是比较明显的,无论是体型,四肢,脸孔和毛发等等,通过人们的肉眼就能识别出来。那么如何让机器来识别猫和狗呢?本文将运用Tensorflow搭建一个卷积神经网络模型,用自家的狗和猫来进行最后的测试。这是深度学习的典型案例。三、理论和算法理解
I.卷积神经网络
卷积神经网络(Convolutional Neural Network,CNN)是一种前馈神经网络,它的人工神经元可以响应一部分覆盖范围内的周围单元,对大型图像处理有出色表现。卷积神经网络由一个或多个卷积层和顶端的全连通层(对应经典的神经网络)组成,同时也包括关联权重和池化层(pooling layer)。这一结构使得卷积神经网络能够利用输入数据的二维结构。与其他深度学习结构相比,卷积神经网络在图像和语音识别方面能够给出更好的结果。这一模型也可以使用反向传播算法进行训练。本文转载自http://www.biyezuopin.vip/onews.asp?id=15282相比较其他深度、前馈神经网络,卷积神经网络需要考量的参数更少,使之成为一种颇具吸引力的深度学习结构。1.定义
“卷积神经网络”表示网络采用称为卷积的数学运算。卷积是一种特殊的线性操作。卷积网络是一种特殊的神经网络,它们在至少一个层中使用卷积代替一般矩阵乘法。2.结构
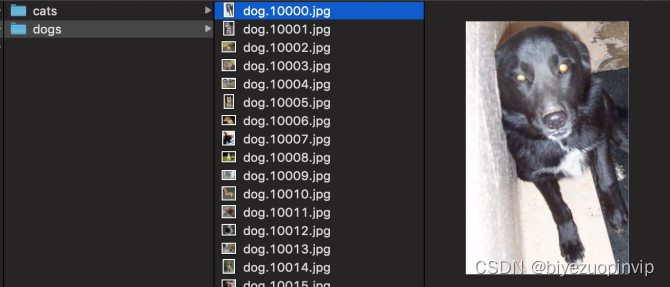
(一)卷积层
卷积层是一组平行的特征图(feature map),它通过在输入图像上滑动不同的卷积核并运行一定的运算而组成。此外,在每一个滑动的位置上,卷积核与输入图像之间会运行一个元素对应乘积并求和的运算以将感受野内的信息投影到特征图中的一个元素。这一滑动的过程可称为步幅 Z_s,步幅 Z_s 是控制输出特征图尺寸的一个因素。卷积核的尺寸要比输入图像小得多,且重叠或平行地作用于输入图像中,一张特征图中的所有元素都是通过一个卷积核计算得出的,也即一张特征图共享了相同的权重和偏置项。# Convolutional Neural Network # Importing the libraries import tensorflow as tf from keras.preprocessing.image import ImageDataGenerator tf.__version__ # Part 1 - Data Preprocessing # Preprocessing the Training set train_datagen = ImageDataGenerator(rescale = 1./255, shear_range = 0.2, zoom_range = 0.2, horizontal_flip = True) training_set = train_datagen.flow_from_directory('dataset/training_set', target_size = (64, 64), batch_size = 32, class_mode = 'binary') # Preprocessing the Test set test_datagen = ImageDataGenerator(rescale = 1./255) test_set = test_datagen.flow_from_directory('dataset/test_set', target_size = (64, 64), batch_size = 32, class_mode = 'binary') # Part 2 - Building the CNN # Initialising the CNN cnn = tf.keras.models.Sequential() # Step 1 - Convolution cnn.add(tf.keras.layers.Conv2D(filters=32, kernel_size=3, activation='relu', input_shape=[64, 64, 3])) # Step 2 - Pooling cnn.add(tf.keras.layers.MaxPool2D(pool_size=2, strides=2)) # Adding a second convolutional layer cnn.add(tf.keras.layers.Conv2D(filters=32, kernel_size=3, activation='relu')) cnn.add(tf.keras.layers.MaxPool2D(pool_size=2, strides=2)) # Step 3 - Flattening cnn.add(tf.keras.layers.Flatten()) # Step 4 - Full Connection cnn.add(tf.keras.layers.Dense(units=128, activation='relu')) # Step 5 - Output Layer cnn.add(tf.keras.layers.Dense(units=1, activation='sigmoid')) # Part 3 - Training the CNN # Compiling the CNN cnn.compile(optimizer = 'adam', loss = 'binary_crossentropy', metrics = ['accuracy']) # Training the CNN on the Training set and evaluating it on the Test set cnn.fit(x = training_set, validation_data = test_set, epochs = 25) # Part 4 - Making a single prediction import numpy as np from keras.preprocessing import image import glob as glob import os test_images = glob.glob('dataset/single_prediction/*.jpg') for image_src in test_images: test_image = image.load_img(image_src, target_size = (64, 64)) test_image = image.img_to_array(test_image) test_image = np.expand_dims(test_image, axis = 0) result = cnn.predict(test_image) training_set.class_indices if result[0][0] == 1: prediction = 'dog' else: prediction = 'cat' img_dir,img_fn = os.path.split(image_src) print(img_fn + ":" + prediction)- 1
- 2
- 3
- 4
- 5
- 6
- 7
- 8
- 9
- 10
- 11
- 12
- 13
- 14
- 15
- 16
- 17
- 18
- 19
- 20
- 21
- 22
- 23
- 24
- 25
- 26
- 27
- 28
- 29
- 30
- 31
- 32
- 33
- 34
- 35
- 36
- 37
- 38
- 39
- 40
- 41
- 42
- 43
- 44
- 45
- 46
- 47
- 48
- 49
- 50
- 51
- 52
- 53
- 54
- 55
- 56
- 57
- 58
- 59
- 60
- 61
- 62
- 63
- 64
- 65
- 66
- 67
- 68
- 69
- 70
- 71
- 72
- 73
- 74
- 75
- 76
- 77
- 78


-
相关阅读:
nisshinbo日清纺NJW4750-T1四通道组合稳压器应用方案
加载报错 Unsupported version (not an attribute), or file does not exist
【优化算法】最小均值 (LMF) 和最小均方 (LMS) 算法【含Matlab源码 2134期】
R语言如何连接 SQL Server 2016之前的数据库并使用此连接?
Python统计学05——假设检验
后台开发核心技术与应用实践看书笔记(二):面向对象的C++
详解蓝牙模块的分类
1.Qt5.15及其以上的下载
彻底搞懂Spring的循环依赖
C++:模板初阶
- 原文地址:https://blog.csdn.net/newlw/article/details/126720723
