-
pytest 运行方式、常用参数、前后置条件
视频教程传送门 -> 2022最新pytest接口自动化测试框架,三天带你精通pytest,带你写出最好的代码!(已更新2022新版)_哔哩哔哩_bilibili
目录
1.setup/teardown,setup_class/teardown_class
3.conftest.py和@pytest.fixture()结合使用
一、pytest单元测试框架
单元测试框架主要做什么
1.发现用例:从多个py文件收集并加载测试用例。
2.执行用例:按照一定的顺序执行并生成结果。
3.判断结果:通过断言判断预期结果和实际结果是否一致。
4.生成报告:统计测试进度、耗时通过率等。二、pytest简介
1.pytest是一个非常成熟的python单元测试框架,比unittest更灵活,容易上手。
2.pytest可以和自动化测试工具或框架selenium,requests,appium等实现web自动化、接口自动化、app自动化。
3.pytest可以和allure生成美观的报告。
4.pytest可以和jenkins实现持续集成。
5.pytest有很多的强大的插件
pytest-html 生成html格式的自动化测试报告
pytest-xdist 测试用例分布式执行(多线程)
pytest-orderding 控制测试用例的执行顺序
pytest-rerunfailures 失败用例重跑
pytest-base-url 基础路径的配置
allure-pytest 生成allure报告pytest安装命令:
pip install pytest查看安装是否成功/查看版本
pytest --version- [root@k8s-node2 testcase]# pytest --version
- pytest 7.1.2
- [root@k8s-node2 testcase]#
批量插件安装命令:
(将上述待安装组件写入文件requirements.txt)- [root@k8s-node2 pytest]# cat requirements.txt
- pytest-html
- pytest-xdist
- pytest-ordering
- pytest-rerunfailures
- pytest-base-url
- allure-pytest
- [root@k8s-node2 pytest]#
pip install -r requirements.txt
三、使用pytest,默认的测试用例的规则以及基础应用
1.模块名必须以test_开头或_test结尾
2.测试类必须以Test开头,并且不能有init方法
3.测试方法必须以test开头四、pytest测试用例的运行方式
主函数模式
命令行模式
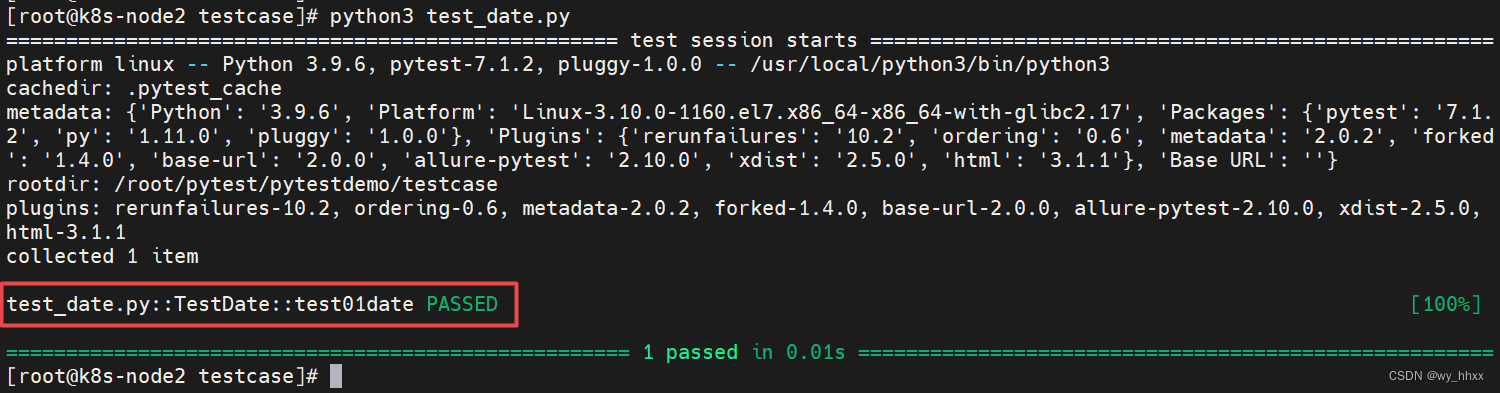
通过读取pytest.ini配置文件运行【例】test_date.py内容如下
- # -*- coding:utf-8 -*-
- import pytest
- class TestLogin:
- def test01date(self):
- print("Today is Sep 2st.")
- if __name__ == '__main__':
- pytest.main()
目录结构(需要安装tree,yum install tree)
- [root@k8s-node2 pytest]# tree pytestdemo/
- pytestdemo/
- └── testcase
- ├── __init__.py
- └── test_date.py
- 1 directory, 2 files
- [root@k8s-node2 pytest]#
执行结果(主函数模式和命令行模式)

1.主函数的运行方式
(1)运行所有 pytest.main()
(2)指定模块 pytest.main(['-vs','test_date.py'])
(3)指定目录 pytest.main(['-vs','./interface_tc'])
(4)通过nodeid指定用例运行:nodeid由模块名、分隔符、类名、方法名、函数名组成
pytest.main(['-vs','./interface_tc/test_interface.py::test_04_func'])
pytest.main(['-vs','./interface_tc/test_interface.py::RestInterface::test_03_func'])参数-v,-s说明
if __name__ == '__main__':
pytest.main(['-v'])输出结果中可以看到模块、类、方法的信息
if __name__ == '__main__':
pytest.main(['-s'])输出结果中打印了函数中print的信息

if __name__ == '__main__':
pytest.main(['-vs'])
【例】执行全部用例
- 1) 目录结构
- [root@k8s-node2 pytest]# tree pytestdemo/
- pytestdemo/
- └── testcase
- ├── all.py
- ├── __init__.py
- ├── test_date.py
- └── test_plan.py
- 1 directory, 4 files
- [root@k8s-node2 pytest]#
- ----------------------------------------------
- 2) all.py内容
- # -*- coding:utf-8 -*-
- import pytest
- if __name__ == '__main__':
- pytest.main(['-vs'])
- ----------------------------------------------
- 3) test_date.py内容
- # -*- coding:utf-8 -*-
- import pytest
- class TestDate:
- def test01date(self):
- print("Today is Sep 2st.")
- def test02day(self):
- print("Today is Friday.")
- ----------------------------------------------
- 4) test_plan.py
- # -*- coding:utf-8 -*-
- import pytest
- class TestPlan:
- def test01plan(self):
- print("Learn pytest.")
执行 python3 all.py

运行指定模块
【例】仅执行test_date.py
修改all.py
- if __name__ == '__main__':
- pytest.main(['-vs','test_date.py'])
执行 python3 all.py

运行指定目录下的用例
【例】执行pytestdemo/interface_tc下的用例
- 1) 目录结构
- [root@k8s-node2 pytest]# tree pytestdemo/
- pytestdemo/
- ├── all.py
- ├── interface_tc
- │ ├── __init__.py
- │ └── test_api.py
- └── testcase
- ├── __init__.py
- ├── test_date.py
- └── test_plan.py
- 2 directories, 6 files
- [root@k8s-node2 pytest]#
- ----------------------------------------------
- 2) all.py内容
- # -*- coding:utf-8 -*-
- import pytest
- if __name__ == '__main__':
- pytest.main(['-vs','./interface_tc'])
- ----------------------------------------------
- 3) test_api.py内容
- # -*- coding:utf-8 -*-
- import pytest
- class TestAPI:
- def test01get(self):
- print("Test get function.")
- def test02set(self):
- print("Test set function.")
执行 python3 all.py

通过nodeid指定用例运行
【例】执行pytestdemo/interface_tc/test_api.py 中,类TestAPI的test01get
修改 all.py
- if __name__ == '__main__':
- pytest.main(['-vs','./interface_tc/test_api.py::TestAPI::test01get'])
执行 python3 all.py

2.命令行运行方式
(1)运行所有 pytest
(2)指定模块 pytest -vs test_date.py
(3)指定目录 pytest -vs ./interface_tc
(4)通过nodeid指定用例运行
pytest -vs ./interface_tc/test_api.py::test_04_func【例】运行所有用例

【例】运行指定模块下的用例

常用参数
-v 输出更详细的信息
-s 输出调试信息,包括print打印的信息
-vs 上述两个参数一起用
-n 多线程,例如:pytest -vs test_login.py -n 2
--reruns num 失败用例重跑
-x 表示只要有一个用例报错,测试就停止
--maxfail=2 出现两个用例失败就停止
-k 根据测试用例的部分字符串指定测试用例,例如:pytest -vs ./testcases -k "alarm"
--html 生成html测试报告多线程运行
给 pytestdemo/interface_tc/test_api.py 的用例加上2s的sleep
- import pytest
- import time
- class TestAPI:
- def test01get(self):
- print("Test get function.")
- time.sleep(2)
- def test02set(self):
- print("Test set function.")
- time.sleep(2)
pytest -v ./interface_tc/ -n 1 执行结果

pytest -v ./interface_tc/ -n 2 执行结果

说明:主函数模式这样写
if __name__ == '__main__':
pytest.main(['-v','./interface_tc','-n=2'])失败用例重跑
修改 pytestdemo/interface_tc/test_api.py 内容
- import pytest
- class TestAPI:
- def test01get(self):
- print("Test get function.")
- assert 1==2
- def test02set(self):
- print("Test set function.")
【例】失败重跑2次, pytest -vs --reruns 2
有一个用例报错,测试停止
pytest -vs -x

据测试用例的部分字符串指定测试用例
pytest -vs -k "da"

生成html报告
pytest -vs --maxfail=2 --html 1.html

内容如下

3.通过读取pytest.ini配置文件运行
(1)位置:一般是放在项目的根目录
(2)编码:必须是ANSI(可以使用Notepad++改变编码格式)
(3)作用:改变pytest默认的行为
(4)运行的规则:不管是命令行方式还是主函数的方式都会自动的读取这个配置文件pytest.ini
[pytest]
#命令行参数,用空格分隔
addopts = -vs
#配置测试用例的路径
testpaths = ./testcases
#配置测试搜索的模块
python_files = test_*.py
#配置测试搜索的类名
python_classes = Test*
#配置测试搜索的方法名
python_functions = test
#配置接口测试的基础路径
base_url = http://127.0.0.1/创建文件 pytest.ini

内容如下
- [pytest]
- addopts = -vs
- testpaths = interface_tc
- python_files = test_*.py
- python_classes = Test*
- python_functions = test
执行 pytest

修改pytest.ini内容 和 test_date.py的文件名、内容


执行pytest 结果如下

五、pytest执行测试用例的顺序
unittest 按ASCII的大小执行
pytest 默认从上到下执行,使用mark标记改变默认的执行顺序
@pytest.mark.run(order=2)
def test_03_func:
pass
@pytest.mark.run(order=1)
def test_06_func:
pass
六、跳过测试用例
在用例上面加上:
@pytest.mark.skip(reason="不适用")
@pytest.mark.skipif(age<=10,reason="年龄太小")【例】跳过 test02day
- # -*- coding:utf-8 -*-
- import pytest
- class TestDate:
- a=5
- @pytest.mark.run(order=3)
- def test01date(self):
- print("Today is Sep 2st.")
- @pytest.mark.skipif(a==5,reason="休息")
- @pytest.mark.run(order=2)
- def test02day(self):
- print("Today is Friday.")
- [root@k8s-node2 testcase]#
执行 pytest -vs结果

七、如何分组执行(冒烟、分模块执行)
pytest.ini文件内容
- [pytest]
- addopts = -vs --html ./report/report.html
- testpaths = ./testcases
- python_files = test_*.py
- python_classes = Test*
- python_functions = test
- markers =
- smoke:冒烟用例
- usermanage:用户管理模块
- productmanage:商品管理模块
smoke: 冒烟用例,分布在各个模块里面
在用例上面加上:
@pytest.mark.smoke
@pytest.mark.usermanage在执行时需要使用 -m <分组名> or <分组名> ...
pytest -vs -m "smoke"
pytest -vs -m "smoke or usermanage or productmanage"【例】分组执行
修改 test_date.py内容
- # -*- coding:utf-8 -*-
- import pytest
- class TestDate:
- def test01date(self):
- print("Today is Sep 3rd.")
- @pytest.mark.smoke
- def test02day(self):
- print("Today is Saturday.")
- @pytest.mark.usermanage
- def test03user(self):
- print("User num: xxx")
- @pytest.mark.smoke
- @pytest.mark.productmanage
- def test04item(self):
- print("Product num: xxx")
执行 pytest -vs -m "smoke"

执行 pytest -vs -m "usermanage or productmanage"
八、pytest前后置条件
在所有类,所有用例之前或之后
1.setup/teardown,setup_class/teardown_class
def setup_class(self):
print("在类之前的操作")def teardown_class(self):
print("在类之后的操作")def setup(self):
print("在所有用例之前的前置操作")def teardown(self):
print("在所有用例之后的后置操作")新建文件 test_page.py
- [root@k8s-node2 testcase]# cat test_page.py
- # -*- coding:utf-8 -*-
- import pytest
- class TestDate:
- def test01homepage(self):
- print("Home page.")
- def test02itempage(self):
- print("Item page.")
- def test03orderpage(self):
- print("Order page.")
- def setup_class(self):
- print("\n在每个类执行前的初始化工作,例如:创建日志对象、创建数据库连接、创建接口的请求对象")
- def teardown_class(self):
- print("\n在每个类执行后的扫尾工作,例如:销毁日志对象、销毁数据库连接、销毁接口的请求对象")
- def setup(self):
- print("\n在用例之前的前置操作:打开浏览器、加载网页")
- def teardown(self):
- print("\n在用例之后的后置操作:关闭浏览器")
- [root@k8s-node2 testcase]#
执行 pytest -k "page" 的结果
2.fixture装饰器
希望在部分用例之前或之后执行,使用Fixture装饰器
@pytest.fixture(scope="作用域",autouser="自动执行",params="数据驱动",ids="参数别名",name="fixture别名")
说明:
1)scope:标记fixture的作用域
function 函数级别(可以手动,也可以自动)
class 类级别(一般是自动)
module 模块级别(一般是自动)
package/session 会话级别(一般是自动)2)autouser=True 自动执行
3)params数据驱动
4)ids参数别名
5)name表示fixture的别名
注意:当使用了name起别名之后,那么原来的fixture的名称就失效了。autouse=True 自动执行
执行pytest -k "page"

scope标记fixture的作用域
(1)作用域function
执行 pytest -k "page"

(2)作用域class

(3)作用域module
- [root@k8s-node2 testcase]# cat test_page.py
- # -*- coding:utf-8 -*-
- import pytest
- @pytest.fixture(scope="module",autouse=True)
- def my_fixture():
- print("\n这是前置方法")
- yield
- print("\n这是后置方法")
- class TestPage:
- def test01homepage(self):
- print("Home page.")
- def test02itempage(self):
- print("Item page.")
- def test03orderpage(self,my_fixture):
- print("Order page.")
- class TestData:
- def test04userdata(self):
- print("User data [].")
- def test05orderdata(self):
- print("Order data [].")
执行 pytest -k "page" 结果

params数据驱动
@pytest.fixture(scope="function",autouse=False,params=["May","Jun"])
def my_fixture(request):
print("\n这是前置方法")
yield
print("\n这是后置方法")
return request.param也可以写成
@pytest.fixture(scope="function",autouse=False,params=["May","Jun"])
def my_fixture(request):
print("\n这是前置方法")
yield request.param
print("\n这是后置方法")区别:return之后不能有代码,yield之后可以有代码
3.conftest.py和@pytest.fixture()结合使用
例如:项目的全局登录、模块的全局处理
1.conftest.py文件是单独存放的一个夹具配置文件,名称不能更改
2.可以在不同的py文件中使用同一个fixture函数
3.原则上conftest.py需要和运行的用例放到同一层,并且不需要任何的导入操作- 1)目录结构
- [root@k8s-node2 pytest]# tree pytestdemo/
- pytestdemo/
- ├── all.py
- ├── conftest.py
- ├── interface_tc
- │ ├── __init__.py
- │ └── test_api.py
- ├── pytest.ini
- └── testcase
- ├── conftest.py
- ├── __init__.py
- ├── test_date.py
- ├── test_page.py
- └── test_plan.py
- 2 directories, 10 files
- [root@k8s-node2 pytest]#
- 2)/root/pytest/pytestdemo/pytest.ini内容
- [pytest]
- addopts = -vs
- testpaths = ./testcase
- python_files = test_*.py
- python_classes = Test*
- python_functions = test
- markers =
- smoke:冒烟用例
- usermanage:用户管理模块
- productmanage:商品管理模块
- 3)/root/pytest/pytestdemo/conftest.py内容
- # -*- coding:utf-8 -*-
- import pytest
- @pytest.fixture(scope="function")
- def all_fixture():
- print("\n这是全局前置方法")
- yield
- print("\n这是全局后置方法")
- 4)/root/pytest/pytestdemo/testcase/conftest.py内容
- # -*- coding:utf-8 -*-
- import pytest
- @pytest.fixture(scope="function")
- def my_fixture():
- print("\n这是前置方法")
- yield
- print("\n这是后置方法")
- 5)/root/pytest/pytestdemo/testcase/test_page.py内容
- # -*- coding:utf-8 -*-
- import pytest
- class TestPage:
- def test01homepage(self):
- print("Home page.")
- def test02itempage(self,all_fixture):
- print("Item page.")
- def test03orderpage(self,all_fixture,my_fixture):
- print("Order page.")
- 6)运行结果
- ……
- collected 8 items
- testcase/test_plan.py::TestPlan::test01plan Learn pytest.
- PASSED
- testcase/test_date.py::TestDate::test01date Today is Sep 3rd.
- PASSED
- testcase/test_date.py::TestDate::test02day Today is Saturday.
- PASSED
- testcase/test_date.py::TestDate::test03user User num: xxx
- PASSED
- testcase/test_date.py::TestDate::test04item Product num: xxx
- PASSED
- testcase/test_page.py::TestPage::test01homepage Home page.
- PASSED
- testcase/test_page.py::TestPage::test02itempage
- 这是全局前置方法
- Item page.
- PASSED
- 这是全局后置方法
- testcase/test_page.py::TestPage::test03orderpage
- 这是全局前置方法
- 这是前置方法
- Order page.
- PASSED
- 这是后置方法
- 这是全局后置方法
- ================================================= 8 passed in 0.02s ==================================================
- [root@k8s-node2 pytestdemo]#
总结:
setup/teardown,setup_class/teardown_class 作用于所有用例或者所有类
@pytest.fixture() 作用于部分或全局前后置
conftest.py和@pytest.fixture()结合使用,用于全局的前后置 -
相关阅读:
Windows 7 联合 eNSP模拟器 配置Snmp
618快到了送上自制前端小项目(html css js)
shell实现日期加减
基于JAVA物料追溯系统计算机毕业设计源码+数据库+lw文档+系统+部署
芯片方案应用于终端产品时需要哪些技术支持和保障?
可缩放矢量图形svg
20220701 Barbalat引理证明
制作一个简单HTML个人网页网页(HTML+CSS)大话西游之大圣娶亲电影网页设计
2022-08-29 第五组 张明敏 学习笔记
再看const成员函数
- 原文地址:https://blog.csdn.net/wy_hhxx/article/details/126576341
