-
Vue+element 商品参数业务实现
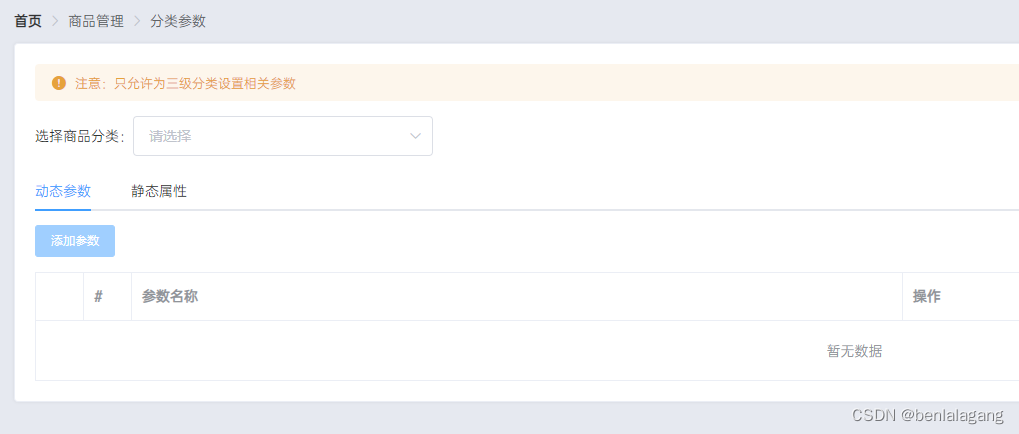
一开始提示用户只能为三级分类 设置相关参数
让用户选择分类 使用:级联选择器
一开始获取全部的分类:
- created() {
- this.getAllCate()
- },
- // 获取全部的分类
- async getAllCate(){
- const {data:res} = await this.$http.get('categories')
- if (res.meta.status !==200) return this.$Msg.error('获取商品分类列表失败!')
- this.cateLists = res.data
- }
级联选择器使用请求回来的数据 并且绑定回调

CSet:{
  expandTrigger: 'hover',
  children:'children',
  label:'cat_name',
  value:'cat_id',
},
当触发选择器的回调时
- 首先会进行判断 是否选中的是三级分类。级联选择器返回的是一个数组 里面的值就是设置的value ==> cat_id 长度不是3 就没有选中三级分类 就清空数据
- 选中了三级分类 开始请求数据 用计算属性 this.CurrId 取得第三级的ID、商品参数分 动态参数(many)和静态参数(only) 默认是动态参数(many)
- 服务器返回的是有规律的字符串、我们需要把 attr_vals再转化成数组 在为每一项增加以后要控制的属性 最后看标签页是 many 还是 only 来添加对应的数据
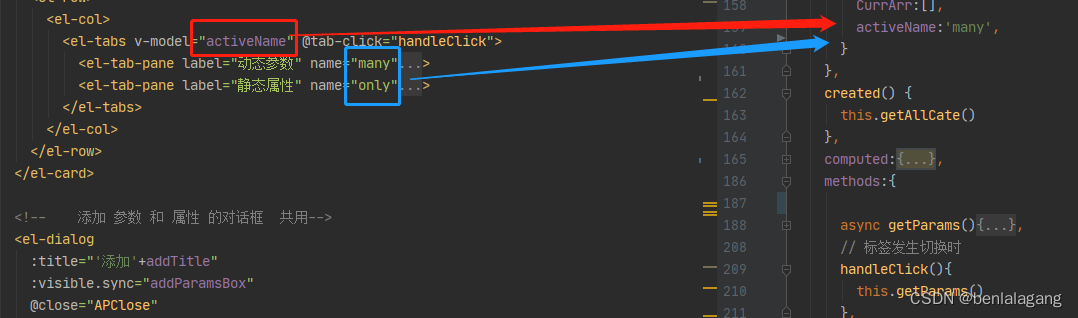
标签页动态绑定值到 activeName 点击标签时 name属性会自动替换掉 activeName 在意最新的数据发送请求 请求参数

当我们选择成功三级分类后 添加按钮就可以点击了 通过计算属性 判断返回布尔值给 添加按钮的 disabled
添加属性 然后就是表格里 每一列的值
第一列:展开行
展开后包含、已有标签、新增标签的按钮
用标签组件 v-for 循环渲染出刚刚我们处理请求数据的那个数组
请求过来数据 设置每一项 inputVisible 是false 所以显示新增按钮
- <el-table-column type="expand">
- <template slot-scope="scope">
- <el-tag v-for="(list,i) in scope.row.attr_vals" :key="i" closable @close="handleClose(i,scope.row)">
- {{list}}
- el-tag>
- <el-input
- class="input-new-tag"
- v-if="scope.row.inputVisible"
- style="width: 200px"
- v-model="scope.row.inputValue"
- ref="saveTagInput"
- size="small"
- @keyup.enter.native="handleInputConfirm(scope.row)"
- @blur="handleInputConfirm(scope.row)"
- >
- el-input>
- <el-button v-else class="button-new-tag" size="small" @click="showInput(scope.row)">+ 添加新标签el-button>
- template>
- el-table-column>
点击按钮时显示输入框:
- // 点击按钮时显示输入框
- showInput(row){
- row.inputVisible = true
- // 输入框自动获得焦点 $nextTick 当页面上的元素发生刷新(重新渲染)时的回调函数
- this.$nextTick(_ => {
- this.$refs.saveTagInput.$refs.input.focus();
- });
- },
输入框触发 回车 或者失去焦点时:触发回调 并且点击删除时 触发的回调
- // 添加标签的输入框 回车或者 失去焦点时触发
- handleInputConfirm(row){
- // 判断是否输入了内容 没有输入就默认切换 有内容就发起请求
- if (row.inputValue.trim().length === 0){
- row.inputValue = ''
- row.inputVisible = false
- }else {
- // 输入的时有效内容 之后 先在前端push
- row.attr_vals.push(row.inputValue.trim())
- row.inputValue = ''
- row.inputVisible = false
- // 然后再向服务器更新数据 请求回来
- this.upTagData(row)
- }
- },
- // 编辑提交参数标签的请求方法
- async upTagData(row){
- const {data:res} = await this.$http.put(`categories/${this.CurrId}/attributes/${row.attr_id}`,
- {
- attr_name:row.attr_name,
- attr_sel:this.activeName,
- attr_vals:row.attr_vals.join(' ')
- })
- if (res.meta.status !== 200) return this.$Msg.error('更新参数标签失败!')
- this.$Msg.success('更新参数标签成功!')
- },
- // 点击小叉号 删除对应标签
- handleClose(i,row){
- row.attr_vals = row.attr_vals.splice(i,1)
- this.upTagData(row)
- }
剩下的列就比较简单了 index值 参数名称 操作按钮
- <el-table-column type="index" label="#">el-table-column>
- <el-table-column label="参数名称" prop="attr_name">el-table-column>
- <el-table-column label="操作">
- <template slot-scope="scope">
- <el-button type="primary" size="small" icon="el-icon-edit" @click="editParams(scope.row.attr_id)">编辑el-button>
- <el-button type="danger" size="small" icon="el-icon-delete" @click="deleteParams(scope.row.attr_id)">删除el-button>
- template>
- el-table-column>
编辑或者删除按钮 传入相应的id 进行回调

- <el-dialog
- title="编辑相关参数"
- :visible.sync="editParamsBox"
- @close="EPClose"
- width="45%">
- <el-form ref="editParamsFormRef"
- :model="editParamsInfo"
- class="demo-ruleForm"
- :rules="FormDataRules"
- label-width="110px">
- <el-form-item label="编辑参数" prop="attr_name">
- <el-input v-model="editParamsInfo.attr_name">el-input>
- el-form-item>
- el-form>
- <span slot="footer" class="dialog-footer">
- <el-button type="primary" @click="ToEditParams">确 定el-button>
- <el-button @click="editParamsBox = false">取 消el-button>
- span>
- el-dialog>
- <script>
- async editParams(id){
- const {data:res} = await this.$http.get(`categories/${this.CurrId}/attributes/${id}`)
- if (res.meta.status !== 200) return this.$Msg.error('获取编辑内容失败')
- this.editParamsInfo = res.data
- this.editParamsBox = true
- },
- async ToEditParams(){
- this.$refs.editParamsFormRef.validate(async valid =>{
- if (!valid) return
- const {data : res} = await this.$http.put(`categories/${this.CurrId}/attributes/${this.editParamsInfo.attr_id}`,
- {
- attr_name:this.editParamsInfo.attr_name,
- attr_sel:this.activeName,
- })
- if (res.meta.status !== 200) return this.$Msg.error('编辑分类内容失败!')
- this.$Msg.success('编辑分类内容成功!')
- await this.getParams()
- this.editParamsBox = false
- })
- },
- EPClose(){
- this.$refs.editParamsFormRef.resetFields()
- this.editParamsInfo={}
- },
- // 删除参数的相关操作
- deleteParams(id){
- this.$queding('此操作将永久删除该参数, 是否继续?', '提示', {
- confirmButtonText: '确定',
- cancelButtonText: '取消',
- type: 'warning'
- }).then(() => {
- this.$http.delete(`categories/${this.CurrId}/attributes/${id}`).then(() =>{
- this.$Msg({
- type: 'success',
- message: '删除参数成功!'
- });
- this.getParams()
- }).catch(() => {
- this.$Msg.error('删除参数失败!')
- })
- }).catch(() => {
- this.$Msg({
- type: 'info',
- message: '已取消删除'
- });
- });
- },
- script>
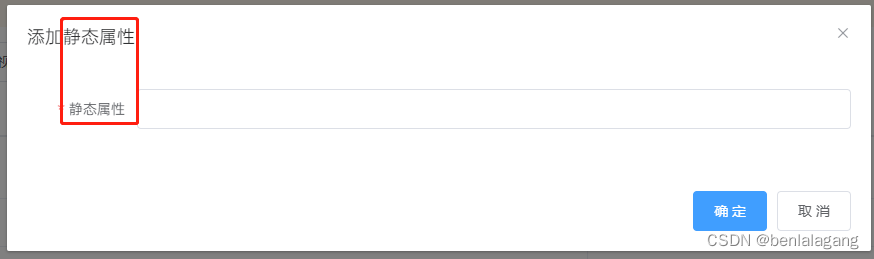
点击添加属性的操作

- <el-dialog
- :title="'添加'+addTitle"
- :visible.sync="addParamsBox"
- @close="APClose"
- width="45%">
- <el-form ref="addParamsFormRef"
- :model="addParamsInfo"
- class="demo-ruleForm"
- :rules="FormDataRules"
- label-width="110px">
- <el-form-item :label="addTitle" prop="attr_name">
- <el-input v-model="addParamsInfo.attr_name">el-input>
- el-form-item>
- el-form>
- <span slot="footer" class="dialog-footer">
- <el-button type="primary" @click="ToAddParams">确 定el-button>
- <el-button @click="addParamsBox = false">取 消el-button>
- span>
- el-dialog>
- <script>
- // 计算属性 判断 对话框的标题
- addTitle(){
- if (this.activeName ==='many'){
- return '动态参数'
- }else {
- return '静态属性'
- }
- },
- // 添加属性/参数 相关操作
- APClose(){
- this.$refs.addParamsFormRef.resetFields()
- },
- // 发起添加参数的请求
- ToAddParams(){
- this.$refs.addParamsFormRef.validate(async valid =>{
- if (!valid) return
- const {data : res} = await this.$http.post(`categories/${this.CurrId}/attributes`,
- {
- attr_name:this.addParamsInfo.attr_name,
- attr_sel:this.activeName,
- })
- if (res.meta.status !== 201) return this.$Msg.error('添加分类失败!')
- this.$Msg.success('添加分类成功!')
- await this.getParams()
- this.addParamsBox = false
- })
- },
- script>
-
相关阅读:
分布式一致性算法Raft-理论篇
java-使用jacob遍历outlook文件夹
视频 | 生信分析Linux教程 - Linux系统简介和目录理解2
计算机网络-防火墙简单配置实验
创建自定义异常类及封装web返回对象
MQTT,JSON,VSCODE(C语言编程环境)心得
【股票价格走势预测】数据挖掘实验一
程序员脱单
走访喜开路 | 共建全民大健康元宇宙服务体系预立项
【 java 面向对象】抽象类与抽象方法
- 原文地址:https://blog.csdn.net/benlalagang/article/details/126597473
