-
Spark基础【两个小案例、Yarn模式下任务执行源码】
一 需求二
Top10热门品类中每个品类的Top10活跃Session统计
Session:会话(通信状态)
在Web端一般是:浏览器 => 服务器
如张三和李四打电话,打通了,称为会话,是一个通信状态
活跃Session:通话的时间长,意味着对商品的需求比较急切
在需求一的基础上,增加每个品类用户session的点击统计
1 Application
object HotCategoryTop10SessionApplication extends App with TApplication { execute(appName = "HotCategoryTop10Session") { //将用户请求传递给Controller层 val controller = new HotCategoryTop10SessionController //获取从Controller层传回的结果 controller.dispatch() } }- 1
- 2
- 3
- 4
- 5
- 6
- 7
- 8
- 9
2 样例类
case class UserVisitAction( date: String,//用户点击行为的日期 user_id: Long,//用户的ID session_id: String,//Session的ID page_id: Long,//某个页面的ID action_time: String,//动作的时间点 search_keyword: String,//用户搜索的关键词 click_category_id: Long,//某一个商品品类的ID click_product_id: Long,//某一个商品的ID order_category_ids: String,//一次订单中所有品类的ID集合 order_product_ids: String,//一次订单中所有商品的ID集合 pay_category_ids: String,//一次支付中所有品类的ID集合 pay_product_ids: String,//一次支付中所有商品的ID集合 city_id: Long //城市id )- 1
- 2
- 3
- 4
- 5
- 6
- 7
- 8
- 9
- 10
- 11
- 12
- 13
- 14
- 15
3 Controller
class HotCategoryTop10SessionController extends TController{ private val hotCategoryTop10Service = new HotCategoryTop10Service //获取需求一的结果 private val hotCategoryTop10SessionService = new HotCategoryTop10SessionService //获取需求二的结果 override def dispatch(): Unit = { //需求一的结果 val top10: Array[(String, (Int, Int, Int))] = hotCategoryTop10Service.analysis() //将需求一的结果传给需求二的service val result: Array[(Long, List[(String, Int)])] = hotCategoryTop10SessionService.analysis(top10.map(_._1)) result.foreach(println) } }- 1
- 2
- 3
- 4
- 5
- 6
- 7
- 8
- 9
- 10
- 11
- 12
- 13
- 14
3 Service
class HotCategoryTop10SessionService extends TService{ private val hotCategoryTop10SessionDao = new HotCategoryTop10SessionDao override def analysis( data : Any) = { // 获取前10ID val topIds: Array[String] = data.asInstanceOf[Array[String]] val fileDatas: RDD[String] = hotCategoryTop10SessionDao.readFileBySpark("data/user_visit_action.txt") // 为使用方便,将数据转换成样例类 val actionDatas: RDD[UserVisitAction] = fileDatas.map( data => { val datas: Array[String] = data.split("_") UserVisitAction( datas(0), datas(1).toLong, datas(2), datas(3).toLong, datas(4), datas(5), datas(6).toLong, datas(7).toLong, datas(8), datas(9), datas(10), datas(11), datas(12).toLong, ) } ) val clickDatas: RDD[UserVisitAction] = actionDatas.filter( data => { if (data.click_category_id != -1) { topIds.contains(data.click_category_id.toString) } else { false } } ) val reduceDatas: RDD[((Long, String), Int)] = clickDatas.map( data => { ((data.click_category_id, data.session_id), 1) } ).reduceByKey(_+_) val groupDatas: RDD[(Long, Iterable[(String, Int)])] = reduceDatas.map { case ((ccid, sid), cnt) => { (ccid, (sid, cnt)) } }.groupByKey() groupDatas.mapValues( iter => { iter.toList.sortBy(_._2)(Ordering.Int.reverse).take(10) } ).collect() } }- 1
- 2
- 3
- 4
- 5
- 6
- 7
- 8
- 9
- 10
- 11
- 12
- 13
- 14
- 15
- 16
- 17
- 18
- 19
- 20
- 21
- 22
- 23
- 24
- 25
- 26
- 27
- 28
- 29
- 30
- 31
- 32
- 33
- 34
- 35
- 36
- 37
- 38
- 39
- 40
- 41
- 42
- 43
- 44
- 45
- 46
- 47
- 48
- 49
- 50
- 51
- 52
- 53
- 54
- 55
- 56
- 57
- 58
- 59
- 60
- 61
4 Dao
class HotCategoryTop10SessionDao extends TDao{ }- 1
- 2
- 3
二 需求三
1 需求说明
(1)页面单跳转化率
计算页面单跳转化率,什么是页面单跳转换率,比如一个用户在一次 Session 过程中访问的页面路径 3,5,7,9,10,21,那么页面 3 跳到页面 5 叫一次单跳,7-9 也叫一次单跳,那么单跳转化率就是要统计页面点击的概率。
比如:计算 3-5 的单跳转化率,先获取符合条件的 Session 对于页面 3 的访问次数(PV)为 A,然后获取符合条件的 Session 中访问了页面 3 又紧接着访问了页面 5 的次数为 B,那么 B/A 就是 3-5 的页面单跳转化率。
[外链图片转存失败,源站可能有防盗链机制,建议将图片保存下来直接上传(img-LvvuzHAC-1661340373118)(22.png)]
(2)统计页面单跳转化率意义
产品经理和运营总监,可以根据这个指标,去尝试分析,整个网站,产品,各个页面的表现怎么样,是不是需要去优化产品的布局;吸引用户最终可以进入最后的支付页面。
数据分析师,可以此数据做更深一步的计算和分析。
企业管理层,可以看到整个公司的网站,各个页面的之间的跳转的表现如何,可以适当调整公司的经营战略或策略。
2 功能实现
流程分析
- 计算分母
- 计算分子
- 统计单跳转换率
object Spark03_Req_PageFlow { def main(args: Array[String]): Unit = { val conf = new SparkConf().setMaster("local").setAppName("PageFlow") val sc = new SparkContext(conf) val fileDatas: RDD[String] = sc.textFile("data/user_visit_action.txt") // 为使用方便,将数据转换成样例类 val actionDatas: RDD[UserVisitAction] = fileDatas.map( data => { val datas: Array[String] = data.split("_") UserVisitAction( datas(0), datas(1).toLong, datas(2), datas(3).toLong, datas(4), datas(5), datas(6).toLong, datas(7).toLong, datas(8), datas(9), datas(10), datas(11), datas(12).toLong, ) } ) // 数据会重复使用,先缓存起来 actionDatas.cache() // TODO 计算分母 val result: Map[Long, Int] = actionDatas.map( action => { (action.page_id, 1) } ).reduceByKey(_ + _).collect().toMap // TODO 计算分子 // 将数据按照session进行分组,String为sessionid,Iterable中为同一个session的所有数据 val groupRDD: RDD[(String, Iterable[UserVisitAction])] = actionDatas.groupBy(_.session_id) // 将分组后的数据进行组内排序,String为session,List[(Long, Long)]为一个session中页面跳转的数据 val mapRDD: RDD[(String, List[(Long, Long)])] = groupRDD.mapValues( iter => { val actions: List[UserVisitAction] = iter.toList.sortBy(_.action_time) // 得到【1,2,3,4,5】 // 使用滑窗将数据转换为(为统计单挑数量) // 【1-2,2-3,3-4,4-5】 // 或者使用拉链的方式 // 【1,2,3,4,5】 // 【2,3,4,5】 val ids: List[Long] = actions.map(_.page_id) // val iterator: Iterator[List[Long]] = ids.sliding(2) // while (iterator.hasNext){ // val longs: List[Long] = iterator.next() // (longs.head,longs.last) // } val flowIds: List[(Long, Long)] = ids.zip(ids.tail) flowIds } ) // 不要session,只要session内的数据 val mapRDD2: RDD[List[(Long, Long)]] = mapRDD.map(_._2) // 为方便统计,转换数据格式 val flatRDD: RDD[(Long, Long)] = mapRDD2.flatMap(list => list) // 从一个页面跳转到另一个页面的数量 val reduceRDD: RDD[((Long, Long), Int)] = flatRDD.map((_, 1)).reduceByKey(_ + _) // TODO 统计单跳转换率 reduceRDD.foreach{ case ((id1, id2), cnt) => { println(s"页面【${id1}-${id2}】单跳转换率为:" + ( cnt.toDouble / result.getOrElse(id1,1))) } } sc.stop() } }- 1
- 2
- 3
- 4
- 5
- 6
- 7
- 8
- 9
- 10
- 11
- 12
- 13
- 14
- 15
- 16
- 17
- 18
- 19
- 20
- 21
- 22
- 23
- 24
- 25
- 26
- 27
- 28
- 29
- 30
- 31
- 32
- 33
- 34
- 35
- 36
- 37
- 38
- 39
- 40
- 41
- 42
- 43
- 44
- 45
- 46
- 47
- 48
- 49
- 50
- 51
- 52
- 53
- 54
- 55
- 56
- 57
- 58
- 59
- 60
- 61
- 62
- 63
- 64
- 65
- 66
- 67
- 68
- 69
- 70
- 71
- 72
- 73
- 74
- 75
- 76
- 77
- 78
- 79
- 80
3 只统计特定页面的跳转转化率
object Spark03_Req_PageFlow { def main(args: Array[String]): Unit = { val conf = new SparkConf().setMaster("local").setAppName("PageFlow") val sc = new SparkContext(conf) val fileDatas: RDD[String] = sc.textFile("data/user_visit_action.txt") // 为使用方便,将数据转换成样例类 val actionDatas: RDD[UserVisitAction] = fileDatas.map( data => { val datas: Array[String] = data.split("_") UserVisitAction( datas(0), datas(1).toLong, datas(2), datas(3).toLong, datas(4), datas(5), datas(6).toLong, datas(7).toLong, datas(8), datas(9), datas(10), datas(11), datas(12).toLong, ) } ) // 数据会重复使用,先缓存起来 actionDatas.cache() // 只统计1,2,3,4,5,6,7页面的跳转 val allowIds = List(1,2,3,4,5,6,7) // 【(1,2),(2,3)】 val allowFlowIds: List[(Int, Int)] = allowIds.zip(allowIds.tail) // TODO 计算分母,7不会做分母,使用init方法不包含最后一个 val result: Map[Long, Int] = actionDatas.filter( action => { allowIds.init.contains(action.page_id.toInt) } ).map( action => { (action.page_id, 1) } ).reduceByKey(_ + _).collect().toMap // TODO 计算分子 // 将数据按照session进行分组,String为sessionid,Iterable中为同一个session的所有数据 val groupRDD: RDD[(String, Iterable[UserVisitAction])] = actionDatas.groupBy(_.session_id) // 将分组后的数据进行组内排序,String为session,List[(Long, Long)]为一个session中页面跳转的数据 val mapRDD: RDD[(String, List[(Int, Int)])] = groupRDD.mapValues( iter => { val actions: List[UserVisitAction] = iter.toList.sortBy(_.action_time) // 得到【1,2,3,4,5】 // 使用滑窗将数据转换为(为统计单挑数量) // 【1-2,2-3,3-4,4-5】 // 或者使用拉链的方式 // 【1,2,3,4,5】 // 【2,3,4,5】 val ids: List[Int] = actions.map(_.page_id.toInt) // val iterator: Iterator[List[Long]] = ids.sliding(2) // while (iterator.hasNext){ // val longs: List[Long] = iterator.next() // (longs.head,longs.last) // } val flowIds: List[(Int, Int)] = ids.zip(ids.tail) flowIds.filter( ids => { allowFlowIds.contains(ids) } ) } ) // 不要session,只要session内的数据 val mapRDD2: RDD[List[(Int, Int)]] = mapRDD.map(_._2) // 为方便统计,转换数据格式 val flatRDD: RDD[(Int, Int)] = mapRDD2.flatMap(list => list) // 从一个页面跳转到另一个页面的数量 val reduceRDD: RDD[((Int, Int), Int)] = flatRDD.map((_, 1)).reduceByKey(_ + _) // TODO 统计单跳转换率 reduceRDD.foreach{ case ((id1, id2), cnt) => { println(s"页面【${id1}-${id2}】单跳转换率为:" + ( cnt.toDouble / result.getOrElse(id1,1))) } } sc.stop() } }- 1
- 2
- 3
- 4
- 5
- 6
- 7
- 8
- 9
- 10
- 11
- 12
- 13
- 14
- 15
- 16
- 17
- 18
- 19
- 20
- 21
- 22
- 23
- 24
- 25
- 26
- 27
- 28
- 29
- 30
- 31
- 32
- 33
- 34
- 35
- 36
- 37
- 38
- 39
- 40
- 41
- 42
- 43
- 44
- 45
- 46
- 47
- 48
- 49
- 50
- 51
- 52
- 53
- 54
- 55
- 56
- 57
- 58
- 59
- 60
- 61
- 62
- 63
- 64
- 65
- 66
- 67
- 68
- 69
- 70
- 71
- 72
- 73
- 74
- 75
- 76
- 77
- 78
- 79
- 80
- 81
- 82
- 83
- 84
- 85
- 86
- 87
- 88
- 89
- 90
- 91
- 92
- 93
- 94
三 Spark Yarn模式下的源码
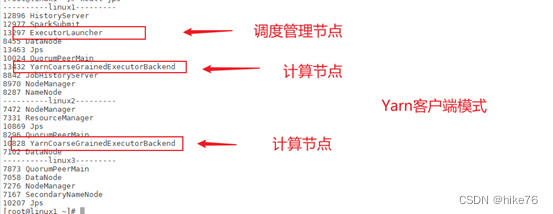
1 Yarn模式下提交应用
bin/spark-submit \ --class org.apache.spark.examples.SparkPi \ --master yarn \ --deploy-mode cluster \ ./examples/jars/spark-examples_2.12-3.0.0.jar \ 10- 1
- 2
- 3
- 4
- 5
- 6
2 submit源码
SparkSubmit(类名) -- 一定有一个main方法 -- doSubmit // 解析参数,args为命令行参数 -- parseArguments(args) // args.asJava:把scala的集合变为java集合 -- parse(args.asJava) // master => --master => yarn // mainClass => --class => SparkPi(WordCount) -- submit -- doRunMain -- runMain // 返回结果:(childArgs, childClasspath, sparkConf, childMainClass) // 【Cluster】childMainClass => org.apache.spark.deploy.yarn.YarnClusterApplication // 【Client 】childMainClass => SparkPi(WordCount) -- prepareSubmitEnvironment // 同java中的Class.forName("xxxxxxx"),反射,会得到当前类的信息 -- mainClass : Class = Utils.classForName(childMainClass) // 想执行以下代码,需要满足classOf[SparkApplication].isAssignableFrom(mainClass)条件:mainClass如果继承自SparkApplication,就可以转换成SparkApplication,否则走b -- 【Cluster】a). mainClass.getConstructor().newInstance().asInstanceOf[SparkApplication] -- 【Client 】b). new JavaMainApplication(mainClass) -- app.start YarnClusterApplication -- start // new ClientArguments // --class => userClass => SparkPI(WordCount) -- new Client -- client.run -- submitApplication // 【Cluster】 command = bin/java org.apache.spark.deploy.yarn.ApplicationMaster // 【Client 】 command = bin/java org.apache.spark.deploy.yarn.ExecutorLauncher --createContainerLaunchContext --createApplicationSubmissionContext- 1
- 2
- 3
- 4
- 5
- 6
- 7
- 8
- 9
- 10
- 11
- 12
- 13
- 14
- 15
- 16
- 17
- 18
- 19
- 20
- 21
- 22
- 23
- 24
- 25
- 26
- 27
- 28
- 29
- 30
- 31
- 32
- 33
- 34
- 35
- 36
- 37
- 38
- 39
- 40
- 41
- 42
- 43
- 44
- 45
- 46
- 47
- 48
- 49
- 50
- 51
(1) 执行架构
代码 – submit(Client(RMClient))-- 【1 submitApplication】-- RM – 【2 启动AM】 – NodeManager (ApplicationMaster)

集群模式

客户端模式
3 ApplicationMaster源码
ApplicationMaster -- main // --class => userClass => SparkPi(WordCount) -- new ApplicationMasterArguments -- master = new ApplicationMaster -- master.run() -- 【Client 】runExecutorLauncher -- 【Cluster】runDriver -- userClassThread = startUserApplication() -- ClassLoader.loadClass(args.userClass) getMethod("main") -- new Thread().start() -- run -- mainMethod.invoke(null, userArgs.toArray) -- WordCount -- new SparkContext() // 创建Spark的环境 -- 【(wordCount)blocking....................】 // Blocking ----------------------------------------- // 等待spark的context对象 -- val sc = ThreadUtils.awaitResult // 注册 -- registerAM // 资源分配 -- createAllocator -- allocator.allocateResources // 分配资源 -- handleAllocatedContainers // 处理容器 -- runAllocatedContainers // bin/java org.apache.spark.executor.YarnCoarseGrainedExecutorBackend,进入此进程中 // Backend:后台 -- prepareCommand -- resumeDriver // 执行Spark作业 -- userClassThread.join()- 1
- 2
- 3
- 4
- 5
- 6
- 7
- 8
- 9
- 10
- 11
- 12
- 13
- 14
- 15
- 16
- 17
- 18
- 19
- 20
- 21
- 22
- 23
- 24
- 25
- 26
- 27
- 28
- 29
- 30
- 31
- 32
- 33
- 34
- 35
- 36
- 37
- 38
- 39
- 40
- 41
- 42
- 43
- 44
- 45
- 46
- 47
- 48
- 49
- 50
- 51
(1)执行架构
代码 – submit(Client(RMClient))-- 【1 submitApplication】-- RM – 【2 启动AM】 – NodeManager (ApplicationMaster 【3 RM启动Driver】(Driver)【4 注册AM告知RM,申请资源】)

4 ExecutorBackend源码
YarnCoarseGrainedExecutorBackend -- main -- CoarseGrainedExecutorBackend.run -- val env = SparkEnv.createExecutorEnv // rpc:进程通信协议 // Endpoint:终端 -- env.rpcEnv.setupEndpoint("Executor")- 1
- 2
- 3
- 4
- 5
- 6
- 7
- 8
- 9
- 10
(1)执行架构
代码 – submit(Client(RMClient))-- 【1 submitApplication】-- RM – 【2 启动AM】 – NodeManager (ApplicationMaster 【3 RM启动Driver】(Driver)【4 注册AM告知RM,申请资源】-- 【5 启动Executor后台】 – ExecutorBackend(Executor)【6 注册Executor】 )
Executor内部存在线程池,一个线程执行一个任务

5 执行流程
当提交作业时,会发出一个指令,这个指令在客户端会创建SparkSubmit对象,是一个进程,SparkSubmit里面包含client,client内部包含一个对远程RM的引用(RMClient),RMClient提交应用程序,之后RM会选择一个NodeManager,启动ApplicationMaster,之后AM会在其进程中启动一个Driver线程,Driver线程会执行main方法,但是main方法不是一次性执行完,当环境对象(Spark上下文)准备好之后会暂停,因为没有资源,之后AM向RM申请资源,RM向AM返回可用资源。
资源准备完毕后,就可以连接container对应的NodeManager,AM启动Executor后台,ExecutorBackend启动完毕后,会向AM返回结果,ExecutorBackend准备执行任务,但此时还没有任务,所以让Driver继续执行,RDD经过一层一层的转换变为一个一个的Task,并将Task放到任务池当中,之后将任务从任务池中取出来,发给ExecutorBackend,ExecutorBackend将任务反序列化之后形成任务对象,再传给Executor计算对象进行计算,Executor中存在线程池,一个线程执行一个Task。

总体流程

-
相关阅读:
封装与访问控制public&private&protected
ABAP json解析使用引用代替预定义数据结构
让我们重新认识一下docker 的全局观
ubutu18.04 使用update-alternatives 对python和python3进行版本管理
全局异常处理器@RestControllerAdvice解析 Springboot项目异常处理 JavaWeb @ExceptionHandler
DB2—03(DB2中常见基础操作)
最棘手的Java面试题(上)
图详解第四篇:单源最短路径--Dijkstra算法
【分享】MySQL安装、配置环境、创建数据库的方法
ubuntu 未发现WIFI适配器的多种情况分析
- 原文地址:https://blog.csdn.net/weixin_43923463/article/details/126511235
