-
Linux使用集成开发方式编译C++程序—笔记2
Ubuntu
镜像下载:http://mirrors.ustc.edu.cn/ubuntu-releases/
官网下载:https://cn.ubuntu.com/download/desktop
下载速度都很快,我选择的版本是Ubuntu 22.04.1 LTS虚拟机选择的是VM ware 16
Qt下载
Qt 国内镜像站下载(较快),这里给大家推荐几个国内著名的 Qt 镜像网站,主要是各个高校的。不同镜像中的文件也不一样,这里推荐中国科学技术大学的镜像。镜像中的不同目录含义在博文:Linux 安装 Qt Creator中有介绍。
中国科学技术大学:http://mirrors.ustc.edu.cn/qtproject/
清华大学:https://mirrors.tuna.tsinghua.edu.cn/qt/
北京理工大学:http://mirror.bit.edu.cn/qtproject/
中国互联网络信息中心:https://mirrors.cnnic.cn/qt/本人下载:qt-opensource-linux-x64-5.9.0.run
配置编译环境
Qt需要用到c++11,因此使用在线安装的方式安装所需环境
sudo apt install gcc g++ make- 1
如果不安装make会导致后续Qt编译的时候找不到make
sudo apt-get install build-essential libgl1-mesa-dev- 1
如果不安装会导致后续Qt编译的时候出现Igc错误,依然编译不过。这些安装后就可以顺利的进入Qt安装环节了。
吐槽Red Hat,需要重新安装yum,而且会出现各种错误,即使yum安装好了依然会出现其他错误。Ubuntu一遍过。
安装Qt
将下载的文件放到Linux安装和配置C++环境—笔记1中设置的共享文件夹中。定位安装文件(qt-opensource-linux-x64-5.9.0.run)所在路径
cd /mnt/hgfs/Vmware_Share- 1
查看路径中所在文件
ls- 1
显示结果
qt-opensource-linux-x64-5.9.0.run- 1
安装,依次输入如下命令。输入qt按下table键Linux系统会自动将文件名补全。
chmod +x qt-opensource-linux-x64-5.9.0.run ./qt-opensource-linux-x64-5.9.0.run- 1
- 2
选择如下所示(这张图是当时在Red Hat截的,Ubuntu上设置都一样就不替换了):

设置环境变量。设置环境变量的目的是为了在任何目录下都可以使用Qt Library。
sudo gedit /etc/profile- 1
然后会弹出一个编辑窗口,在末尾添加以下代码:
export QTDIR=/home/Qt5.9.0/5.9/gcc_64 export LD_LIBRARY_PATH=$LD_LIBRARY_PATH:$QTDIR/lib export PATH=$PATH:$QTDIR/bin- 1
- 2
- 3
修改完成后保存退出,然后再输入:
source /etc/profile,让环境变量生效,或者重启Linux也可以。然后在终端中输入qmake -v- 1
显示结果
QMake version 3.1 Using Qt version 5.9.0 in /opt/Qt5.9.0/5.9/gcc_64/lib- 1
- 2
注意
如果修改profile导致Linux无法进入图形界面(输入账户密码回重新回到系统登录界面),采用博文:linux profile设置错误,Linux修改/etc/profile导致进不去系统中的方法进行操作。
在Linux中/etc/profile 文件,这个文件一但被错误设置就会导致系统不能登陆,对于这个问题可以在命令行模式下把最近对 /etc/profile文件所作的修改去掉即可,具体操作如下:Ctrl+Alt+F1进入命令行模式:
root身份登陆
按照下面的命令执行cd etc 回车 /bin/vi profile 回车 (注意:在这里不那能用直接调用Vi 需要指定目录 即 /bin/vi )- 1
- 2
上面两个命令可以打开 /etc/profile 文件,打开后
输入i 回车 (这是vi的插入操作命令)- 1
然后找到你最近修改过的内容,恢复原来状态或者事删除。然后,按esc键退出插入,分别按
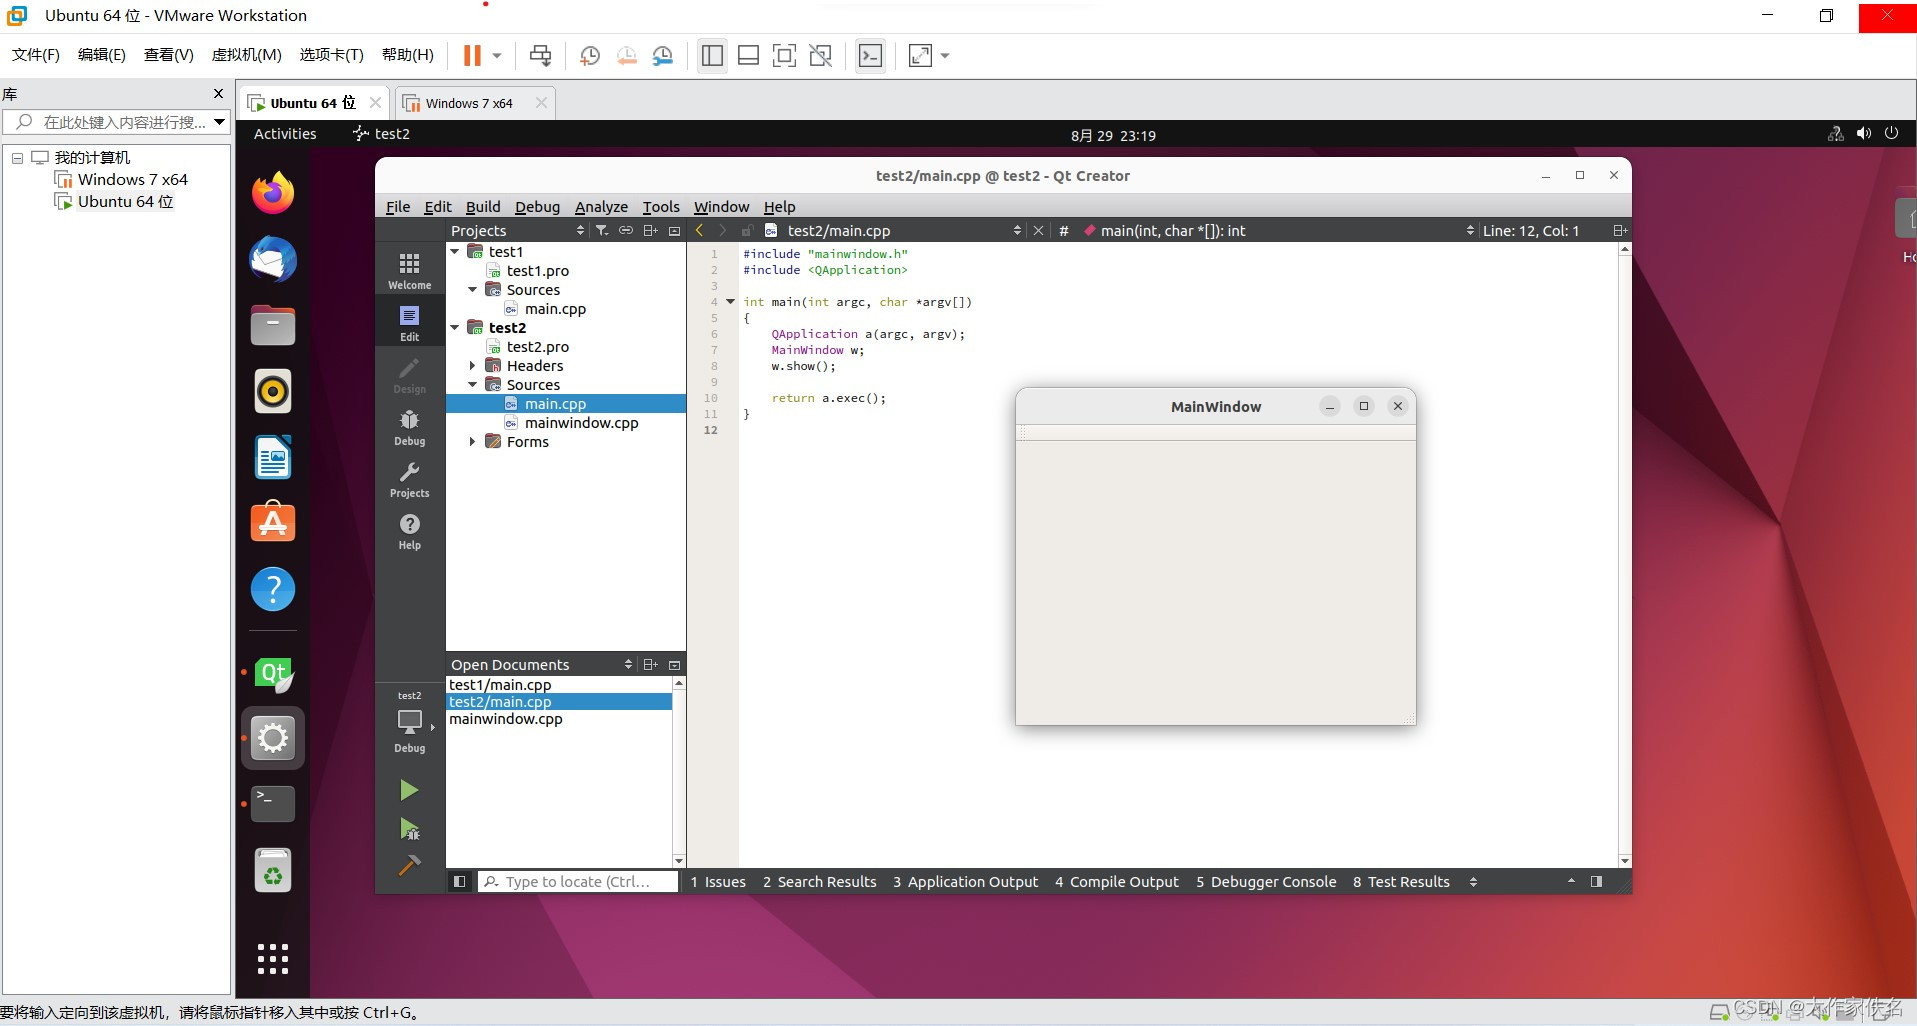
:和输入wq回车,这时profile文件已经保存更新,按Ctrl+Alt+F2切换进入图形界面就可以了。利用Qt Creator编译第一个程序

如果提示/usr/bin/ld: cannot find -lGL collect2: error: ld returned 1 exit status- 1
- 2
解决办法,安装gl库:
sudo apt-get install libgl1-mesa-dev- 1
附录
这部分内容是在Red Hat中安装Qt编译程序时候遇到的各种问题,最终无力解决并放弃,留念。
出现错误:
06:15:34: Could not start process "make" Error while building/deploying project test (kit: Desktop Qt 5.9.0 GCC 64bit) The kit Desktop Qt 5.9.0 GCC 64bit has configuration issues which might be the root cause for this problem. When executing step "Make"- 1
- 2
- 3
- 4
执行命令
sudo dnf install build-essential- 1
显示结果
Updating Subscription Management repositories. Unable to read consumer identity This system is not registered to Red Hat Subscription Management. You can use subscription-manager to register. Error: There are no enabled repos.- 1
- 2
- 3
- 4
[root@linuxprobe ~]# sudo dnf install build-essential Updating Subscription Management repositories. Unable to read consumer identity This system is not registered to Red Hat Subscription Management. You can use subscription-manager to register. Error: There are no enabled repos. [root@linuxprobe ~]# rpm -qa|grep yum|xargs rpm -e --nodeps [root@linuxprobe ~]# rpm -qa|grep yum [root@linuxprobe ~]# cd /etc/yum.repos.d/ [root@linuxprobe yum.repos.d]# wget https://mirrors.aliyun.com/centos/8/BaseOS/x86_64/os/Packages/yum-4.7.0-4.el8.noarch.rpm --2022-08-29 10:33:31-- https://mirrors.aliyun.com/centos/8/BaseOS/x86_64/os/Packages/yum-4.7.0-4.el8.noarch.rpm Resolving mirrors.aliyun.com (mirrors.aliyun.com).. 111.6.249.229, 111.6.249.225, 111.6.249.224, .. Connecting to mirrors.aliyun.com (mirrors.aliyun.com)|111.6.249.229|:443.. connected. HTTP request sent, awaiting response.. 200 OK Length: 209952 (205K) [application/octet-stream] Saving to: ‘yum-4.7.0-4.el8.noarch.rpm’ yum-4.7.0-4.el8.noa 100%[===================>] 205.03K 361KB/s in 0.6s 2022-08-29 10:33:32 (361 KB/s) - ‘yum-4.7.0-4.el8.noarch.rpm’ saved [209952/209952] [root@linuxprobe yum.repos.d]# wget https://mirrors.aliyun.com/centos/8/BaseOS/x86_64/os/Packages/yum-utils-4.0.21-3.el8.noarch.rpm --2022-08-29 10:33:49-- https://mirrors.aliyun.com/centos/8/BaseOS/x86_64/os/Packages/yum-utils-4.0.21-3.el8.noarch.rpm Resolving mirrors.aliyun.com (mirrors.aliyun.com).. 111.6.249.229, 111.6.249.225, 111.6.249.224, .. Connecting to mirrors.aliyun.com (mirrors.aliyun.com)|111.6.249.229|:443.. connected. HTTP request sent, awaiting response.. 200 OK Length: 74276 (73K) [application/octet-stream] Saving to: ‘yum-utils-4.0.21-3.el8.noarch.rpm’ yum-utils-4.0.21-3. 100%[===================>] 72.54K --.-KB/s in 0.1s 2022-08-29 10:33:50 (656 KB/s) - ‘yum-utils-4.0.21-3.el8.noarch.rpm’ saved [74276/74276] [root@linuxprobe yum.repos.d]# rpm -ivh yum-4.7.0-4.el8.noarch.rpm yum-utils-4.0.21-3.el8.noarch.rpm --force --nodeps warning: yum-4.7.0-4.el8.noarch.rpm: Header V3 RSA/SHA256 Signature, key ID 8483c65d: NOKEY Verifying.. ################################# [100%] Preparing.. ################################# [100%] Updating / installing.. 1:yum-utils-4.0.21-3.el8 ################################# [ 50%] 2:yum-4.7.0-4.el8 ################################# [100%] [root@linuxprobe yum.repos.d]# cp /etc/yum.repos.d/redhat.repo /etc/yum.repos.d/redhat.repo.bk [root@linuxprobe yum.repos.d]# vim /etc/yum.repos.d/redhat.repo [root@linuxprobe yum.repos.d]# vim /etc/yum.repos.d/redhat.repo [root@linuxprobe yum.repos.d]# yum makecache Updating Subscription Management repositories. Unable to read consumer identity This system is not registered to Red Hat Subscription Management. You can use subscription-manager to register. EPEL 402 kB/s | 13 MB 00:32 Last metadata expiration check: 0:00:22 ago on Mon 29 Aug 2022 10:36:47 AM CST. Metadata cache created. [root@linuxprobe yum.repos.d]# sudo yum install build-essential Updating Subscription Management repositories. Unable to read consumer identity This system is not registered to Red Hat Subscription Management. You can use subscription-manager to register. Last metadata expiration check: 0:01:13 ago on Mon 29 Aug 2022 10:36:47 AM CST. No match for argument: build-essential Error: Unable to find a match [root@linuxprobe yum.repos.d]# sudo yum install build-essential^C [root@linuxprobe yum.repos.d]#- 1
- 2
- 3
- 4
- 5
- 6
- 7
- 8
- 9
- 10
- 11
- 12
- 13
- 14
- 15
- 16
- 17
- 18
- 19
- 20
- 21
- 22
- 23
- 24
- 25
- 26
- 27
- 28
- 29
- 30
- 31
- 32
- 33
- 34
- 35
- 36
- 37
- 38
- 39
- 40
- 41
- 42
- 43
- 44
- 45
- 46
- 47
- 48
- 49
- 50
- 51
- 52
- 53
- 54
- 55
- 56
- 57
- 58
- 59
卸载Qt
先找到qt的安装目录,默认安装在
/opt目录,目录中有一个MaintenanceTool文件,可以卸载qt。如果忘记安装哪里了,可以通过命令找到。find -name "Qt*"- 1
找到后,定位到安装路径:
cd /home/Qt5.9.0- 1
执行,按照向导卸载即可。
./MaintenanceTool- 1
如果是编译安装,直接删除你安装的文件夹。
-
相关阅读:
练习题(2024/4/)
二叉树的基本性质与遍历
编程可以自学吗
如何修改docker容器中的MySQL数据库的密码?
出现This dependency was not found:解决方法,亲测有用
redis-基于docker搭建redis集群
BI财务分析 – 反映盈利水平利润占比的指标如何分析(上)
ESP32C3 LuatOS RC522①写入数据并读取M1卡
深入浅出排序算法之直接插入排序(拓展:折半插入排序)
C++ 基本的输入输出
- 原文地址:https://blog.csdn.net/wokaowokaowokao12345/article/details/126573601
