-
腾讯云短信使用
腾讯云短信使用
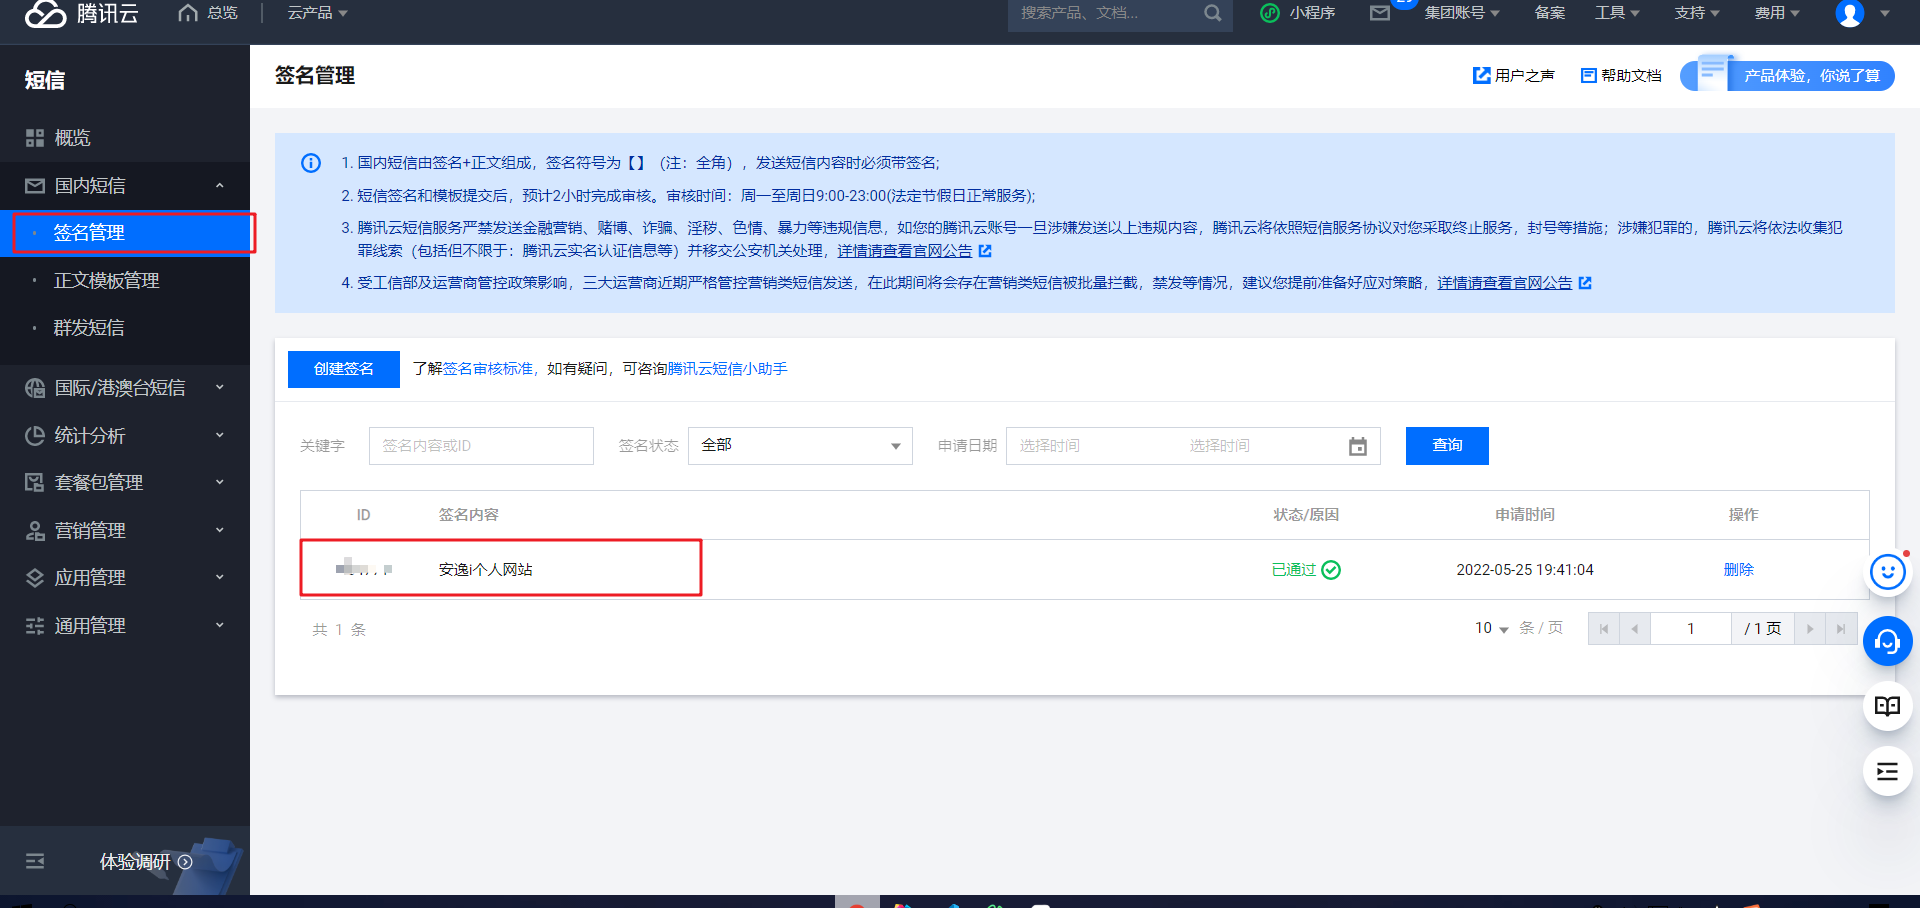
前言:这里介绍创建签名成功后,如何使用腾讯云发送短信。签名申请没有成功的小伙伴,文章末尾附本人微信,可以借大家使用。
本文章所用示例已上传
github:git@github.com:Easesgr/service-sms.git1. 信息准备
准备五个参数来完成短息发送的短信,分别是
secretId,secretKey,sdkAppId,signName,templateId腾讯云账户密钥对
secretId,secretKey


短信应用ID
sdkAppId

短信签名内容(
signName),必须填写已审核通过的签名
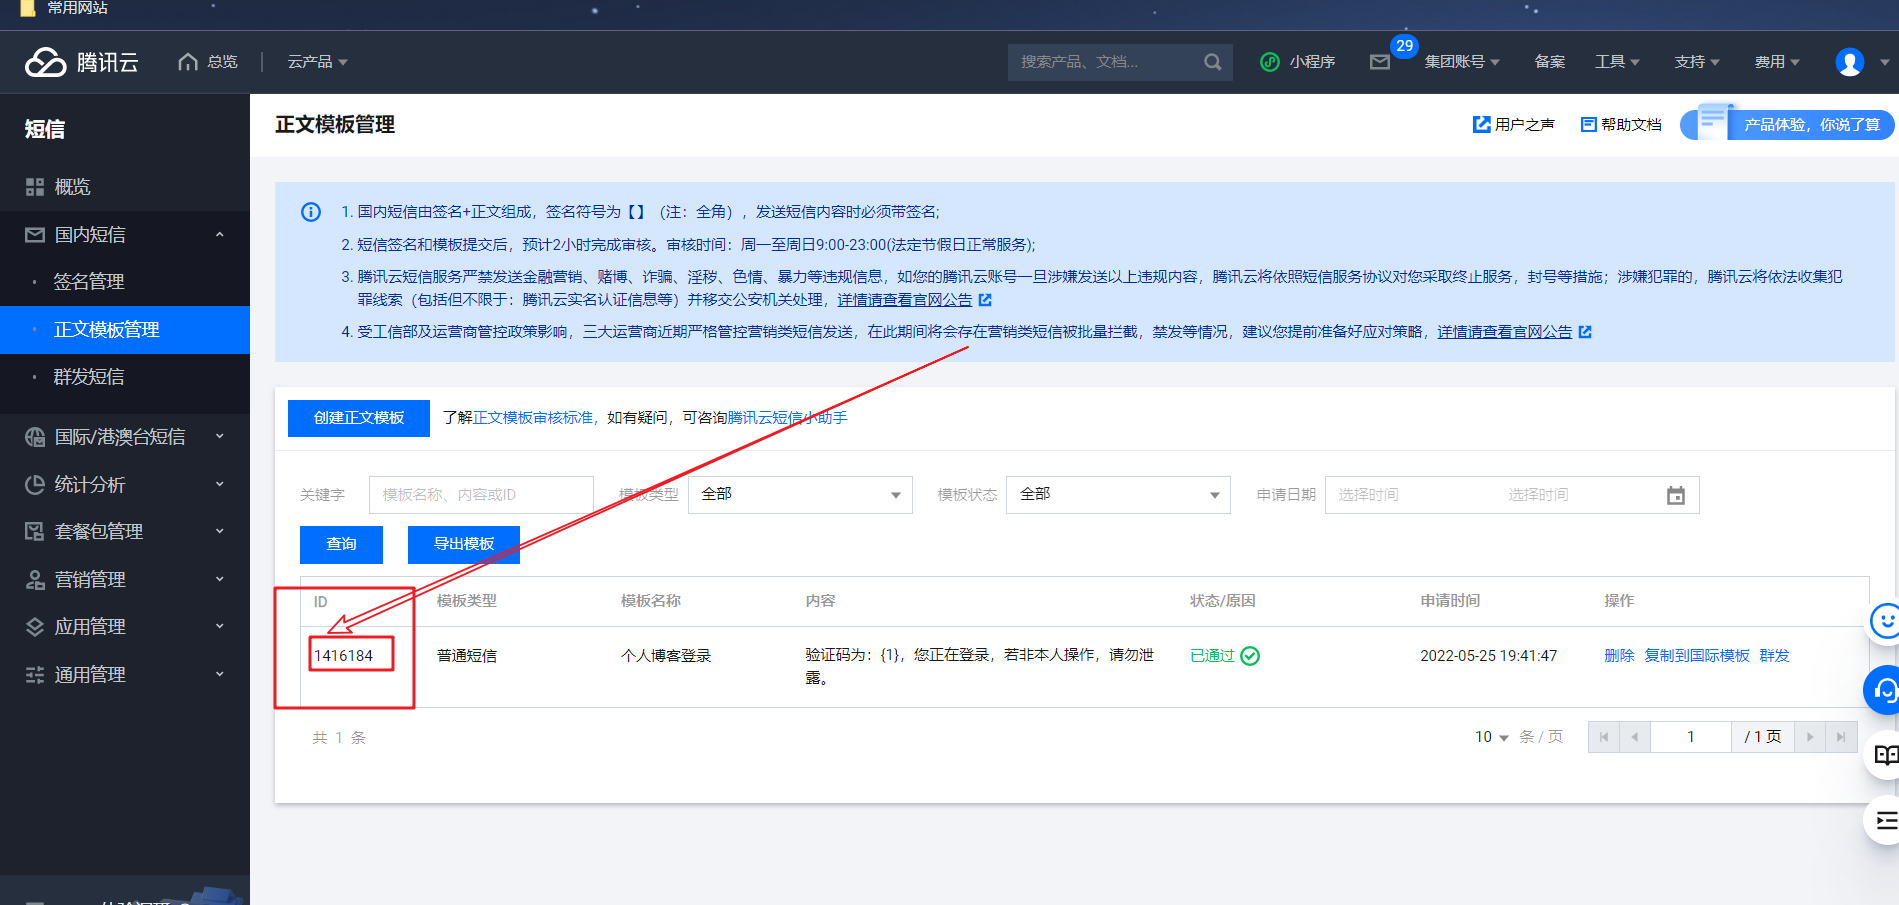
模板 ID(
templateId): 必须填写已审核通过的模板 ID
2.
Springboot调用注:这里只写方法在测试类里面测试,就不使用网络调用啦。
2.1 引入依赖
<dependency> <groupId>com.tencentcloudapigroupId> <artifactId>tencentcloud-sdk-javaartifactId> <version>3.1.270version> dependency>- 1
- 2
- 3
- 4
- 5
- 6
2.2 准备配置文件
写入到配置文件中,方便后期修改
tencent: sms: secretId: 111 secretKey: 111 sdkAppId: 111 templateId: 111 signName: 111- 1
- 2
- 3
- 4
- 5
- 6
- 7
注:这里信息来自上面准备的信息
2.3 创建静态实体类加载配置文件
能使这些配置只被加载一次,后面方便修改,降低耦合度
package com.anyi.sms.common; import lombok.Getter; import lombok.Setter; import org.springframework.beans.factory.InitializingBean; import org.springframework.boot.context.properties.ConfigurationProperties; import org.springframework.stereotype.Component; /** * @author 安逸i * @version 1.0 */ @Getter @Setter @Component @ConfigurationProperties(prefix = "tencent.sms") public class SmsField implements InitializingBean { private String sdkAppId; private String secretId; private String secretKey; private String templateId; private String signName; public static String SDK_ID; public static String KEY_ID; public static String KEY_SECRET; public static String TEMPLATE_CODE; public static String SIGN_NAME; //当私有成员被赋值后,此方法自动被调用,从而初始化常量 @Override public void afterPropertiesSet() throws Exception { SDK_ID = sdkAppId; KEY_ID = secretId; KEY_SECRET = secretKey; TEMPLATE_CODE = templateId; SIGN_NAME = signName; } }- 1
- 2
- 3
- 4
- 5
- 6
- 7
- 8
- 9
- 10
- 11
- 12
- 13
- 14
- 15
- 16
- 17
- 18
- 19
- 20
- 21
- 22
- 23
- 24
- 25
- 26
- 27
- 28
- 29
- 30
- 31
- 32
- 33
- 34
- 35
- 36
- 37
- 38
- 39
2.4 参考官网
api调用方法官网网址:https://cloud.tencent.com/document/product/382/43194
package com.anyi.sms.service.impl; import com.anyi.sms.common.SmsField; import com.anyi.sms.service.SmsService; import com.tencentcloudapi.common.Credential; import com.tencentcloudapi.common.profile.ClientProfile; import com.tencentcloudapi.common.profile.HttpProfile; import com.tencentcloudapi.sms.v20190711.SmsClient; import com.tencentcloudapi.sms.v20190711.models.SendSmsRequest; import com.tencentcloudapi.sms.v20190711.models.SendSmsResponse; import lombok.extern.slf4j.Slf4j; import org.springframework.stereotype.Service; import javax.annotation.Resource; import java.util.concurrent.TimeUnit; /** * @author 安逸i * @version 1.0 */ @Service @Slf4j public class SmsServiceImpl implements SmsService { @Override public void sendCode(String phone,String code) { try { /* 必要步骤: * 实例化一个认证对象,入参需要传入腾讯云账户密钥对secretId,secretKey。 * 这里采用的是从环境变量读取的方式,需要在环境变量中先设置这两个值。 * 你也可以直接在代码中写死密钥对,但是小心不要将代码复制、上传或者分享给他人, * 以免泄露密钥对危及你的财产安全。 * SecretId、SecretKey 查询: https://console.cloud.tencent.com/cam/capi */ Credential cred = new Credential(SmsField.KEY_ID,SmsField.KEY_SECRET); HttpProfile httpProfile = new HttpProfile(); httpProfile.setReqMethod("POST"); httpProfile.setConnTimeout(60); httpProfile.setEndpoint("sms.tencentcloudapi.com"); /* 非必要步骤: * 实例化一个客户端配置对象,可以指定超时时间等配置 */ ClientProfile clientProfile = new ClientProfile(); clientProfile.setSignMethod("HmacSHA256"); clientProfile.setHttpProfile(httpProfile); SmsClient client = new SmsClient(cred, "ap-guangzhou",clientProfile); SendSmsRequest req = new SendSmsRequest(); // 设置 appid String appid = SmsField.SDK_ID; req.setSmsSdkAppid(appid); // 设置 signName 设置签名 String signName = SmsField.SIGN_NAME; req.setSign(signName); // 设置 templateID 模板id String templateID = SmsField.TEMPLATE_CODE; req.setTemplateID(templateID); String[] templateParams = {code}; phone = "+86" + phone; String[] phoneNumbers = {phone}; req.setPhoneNumberSet(phoneNumbers); // 执行发送 req.setTemplateParamSet(templateParams); SendSmsResponse res = client.SendSms(req); // 输出一下结果 log.info(SendSmsResponse.toJsonString(res)); // 发送成功后,可以在此处将验证码 存入redis里面,方便后面验证 // 没有自己调试的时候,可以暂时在控制塔输出 log.info(code); } catch (Exception e) { e.printStackTrace(); } } }- 1
- 2
- 3
- 4
- 5
- 6
- 7
- 8
- 9
- 10
- 11
- 12
- 13
- 14
- 15
- 16
- 17
- 18
- 19
- 20
- 21
- 22
- 23
- 24
- 25
- 26
- 27
- 28
- 29
- 30
- 31
- 32
- 33
- 34
- 35
- 36
- 37
- 38
- 39
- 40
- 41
- 42
- 43
- 44
- 45
- 46
- 47
- 48
- 49
- 50
- 51
- 52
- 53
- 54
- 55
- 56
- 57
- 58
- 59
- 60
- 61
- 62
- 63
- 64
- 65
- 66
- 67
- 68
- 69
- 70
- 71
- 72
- 73
- 74
- 75
- 76
- 77
- 78
- 79
- 80
- 81
- 82
2.5 最终项目目录

controller
package com.anyi.sms.controller; import cn.hutool.core.util.RandomUtil; import com.anyi.sms.service.SmsService; import lombok.extern.slf4j.Slf4j; import org.apache.commons.lang3.RandomUtils; import org.springframework.web.bind.annotation.*; import javax.annotation.Resource; /** * @author 安逸i * @version 1.0 */ @RestController @RequestMapping("/api/sms") //@CrossOrigin //跨域 @Slf4j public class SmsController { @Resource private SmsService smsService; @GetMapping("/send/{phone}") public String sendCode(@PathVariable String phone){ // 使用hutool工具类种RandomUtil 生成六位随机验证码 String code = RandomUtil.randomNumbers(6); smsService.sendCode(phone,code); return "发送验证码成功"; } }- 1
- 2
- 3
- 4
- 5
- 6
- 7
- 8
- 9
- 10
- 11
- 12
- 13
- 14
- 15
- 16
- 17
- 18
- 19
- 20
- 21
- 22
- 23
- 24
- 25
- 26
- 27
- 28
- 29
- 30
- 31
2.6 最终浏览器测试
image-20220828090100641.png

手机收到短信

-
相关阅读:
第18章、探讨C++新标准
JavaScript 用法
禁止瘟疫清零计划 Project Zero与VR一起启动
数据结构-------单链表
如何 build 一个 mysql_client 镜像
基于OpenCV批量分片高像素影像
Android 动画和过渡
编译原理:上下文无关文法 CFG
c++面试题汇总(不定期更新...)
Gin路由中间件详解
- 原文地址:https://blog.csdn.net/sgr011215/article/details/126566290
