-
[SpringBoot系列]缓存解决方案
缓存概述
企业级应用主要作用是信息处理,当需要读取数据时,由于受限于数据库的访问效率,导致整体系统性能偏低。
应用程序直接与数据库打交道,访问效率低
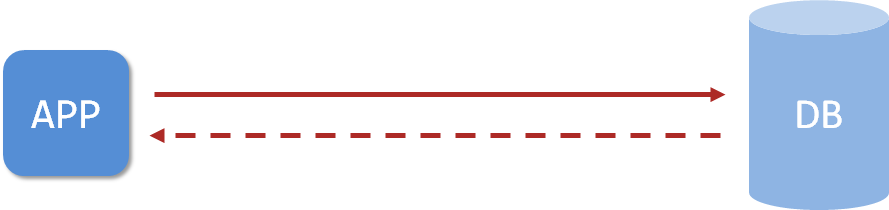
为了改善上述现象,开发者通常会在应用程序与数据库之间建立一种临时的数据存储机制,该区域中的数据在内存中保存,读写速度较快,可以有效解决数据库访问效率低下的问题。这一块临时存储数据的区域就是缓存(cache)。

使用缓存后,应用程序与缓存打交道,缓存与数据库打交道,数据访问效率提高
缓存是一种介于数据永久存储介质与应用程序之间的数据临时存储介质- 使用缓存可以有效的减少低速数据读取过程的次数(例如磁盘IO),提高系统性能。
- 缓存不仅可以用于提高永久性存储介质的数据读取效率,还可以提供临时的数据存储空间。
有时候我们甚至可以建立多级缓存:

而springboot提供了对市面上几乎所有的缓存技术进行整合的方案,下面就一起开启springboot整合缓存之旅。
SpringBoot内置缓存解决方案
springboot技术提供有内置的缓存解决方案,可以帮助开发者快速开启缓存技术,并使用缓存技术进行数据的快速操作,例如读取缓存数据和写入数据到缓存。
步骤①:导入springboot提供的缓存技术对应的starter
<dependency> <groupId>org.springframework.bootgroupId> <artifactId>spring-boot-starter-cacheartifactId> dependency>- 1
- 2
- 3
- 4
步骤②:启用缓存,在引导类上方标注注解@EnableCaching配置springboot程序中可以使用缓存
@SpringBootApplication //开启缓存功能 @EnableCaching public class Springboot19CacheApplication { public static void main(String[] args) { SpringApplication.run(Springboot19CacheApplication.class, args); } }- 1
- 2
- 3
- 4
- 5
- 6
- 7
- 8
步骤③:设置操作的数据是否使用缓存
@Service public class BookServiceImpl implements BookService { @Autowired private BookDao bookDao; @Cacheable(value="cacheSpace",key="#id") public Book getById(Integer id) { return bookDao.selectById(id); } }- 1
- 2
- 3
- 4
- 5
- 6
- 7
- 8
- 9
- 10
在业务方法上面使用注解@Cacheable声明当前方法的返回值放入缓存中,其中要指定缓存的存储位置,以及缓存中保存当前方法返回值对应的名称。上例中value属性描述缓存的存储位置,可以理解为是一个存储空间名,key属性描述了缓存中保存数据的名称,使用#id读取形参中的id值作为缓存名称。
使用@Cacheable注解后,执行当前操作,如果发现对应名称在缓存中没有数据,就正常读取数据,然后放入缓存;如果对应名称在缓存中有数据,就终止当前业务方法执行,直接返回缓存中的数据。
我们在PostMan中多次发送请求:

在我们的日志中可以发现只有第一次操作了数据库,其后都是在缓存中拿的数据:

SpringBoot提供的缓存技术除了提供默认的缓存方案,还可以对其他缓存技术进行整合,统一接口,方便缓存技术的开发与管理:
- Generic
- JCache
Ehcache- Hazelcast
- Infinispan
- Couchbase
Redis- Caffenine
- Simple(默认)
memcached
SpringBoot整合Ehcache缓存
下面就开始springboot整合各种各样的缓存技术,第一个整合Ehcache技术。Ehcache是一种缓存技术,使用springboot整合Ehcache其实就是变更一下缓存技术的实现方式,话不多说,直接开整
步骤①:导入Ehcache的坐标
<dependency> <groupId>net.sf.ehcachegroupId> <artifactId>ehcacheartifactId> dependency>- 1
- 2
- 3
- 4
此处为什么不是导入Ehcache的starter,而是导入技术坐标呢?其实springboot整合缓存技术做的是通用格式,不管你整合哪种缓存技术,只是实现变化了,操作方式一样。这也体现出springboot技术的优点,统一同类技术的整合方式。
步骤②:配置缓存技术实现使用Ehcache
spring: cache: type: ehcache ehcache: config: ehcache.xml- 1
- 2
- 3
- 4
- 5
配置缓存的类型type为ehcache,此处需要说明一下,当前springboot可以整合的缓存技术中包含有ehcach,所以可以这样书写。其实这个type不可以随便写的,不是随便写一个名称就可以整合的。
由于ehcache的配置有独立的配置文件格式,因此还需要指定ehcache的配置文件,以便于读取相应配置
<ehcache xmlns:xsi="http://www.w3.org/2001/XMLSchema-instance" xsi:noNamespaceSchemaLocation="http://ehcache.org/ehcache.xsd" updateCheck="false"> <diskStore path="D:\ehcache" /> <defaultCache eternal="false" diskPersistent="false" maxElementsInMemory="1000" overflowToDisk="false" timeToIdleSeconds="60" timeToLiveSeconds="60" memoryStoreEvictionPolicy="LRU" /> <cache name="smsCode" eternal="false" diskPersistent="false" maxElementsInMemory="1000" overflowToDisk="false" timeToIdleSeconds="10" timeToLiveSeconds="10" memoryStoreEvictionPolicy="LRU" /> ehcache>- 1
- 2
- 3
- 4
- 5
- 6
- 7
- 8
- 9
- 10
- 11
- 12
- 13
- 14
- 15
- 16
- 17
- 18
- 19
- 20
- 21
- 22
- 23
- 24
- 25
- 26
- 27
- 28
- 29
- 30
- 31
- 32
- 33
注意手机验证码的案例中,设置了数据保存的位置是smsCode
@CachePut(value = "smsCode", key = "#tele") public String sendCodeToSMS(String tele) { String code = codeUtils.generator(tele); return code; }- 1
- 2
- 3
- 4
- 5
这个设定需要保障ehcache中有一个缓存空间名称叫做smsCode的配置,前后要统一。在企业开发过程中,通过设置不同名称(name属性)的cache来设定不同的缓存策略,应用于不同的缓存数据。
到这里springboot整合Ehcache就做完了,可以发现一点,原始代码没有任何修改,仅仅是加了一组配置就可以变更缓存供应商了,这也是springboot提供了统一的缓存操作接口的优势,变更实现并不影响原始代码的书写。
总结
- springboot使用Ehcache作为缓存实现需要导入Ehcache的坐标
- 修改设置,配置缓存供应商为ehcache,并提供对应的缓存配置文件
SpringBoot整合Redis缓存
比对使用Ehcache的过程,加坐标,改缓存实现类型为ehcache,做Ehcache的配置。如果还成redis做缓存呢?一模一样,加坐标,改缓存实现类型为redis,做redis的配置。差别之处只有一点,redis的配置可以在yml文件中直接进行配置,无需制作独立的配置文件。
步骤①:导入redis的坐标
<dependency> <groupId>org.springframework.bootgroupId> <artifactId>spring-boot-starter-data-redisartifactId> dependency>- 1
- 2
- 3
- 4
步骤②:配置缓存技术实现使用redis
spring: redis: host: localhost port: 6379 cache: type: redis- 1
- 2
- 3
- 4
- 5
- 6
记得使用redis缓存技术的时候,服务器要开着
如果需要对redis作为缓存进行配置,注意不是对原始的redis进行配置,而是配置redis作为缓存使用相关的配置,隶属于spring.cache.redis节点下,注意不要写错位置了。
spring: redis: host: localhost port: 6379 cache: type: redis redis: use-key-prefix: false key-prefix: sms_ cache-null-values: false time-to-live: 10s- 1
- 2
- 3
- 4
- 5
- 6
- 7
- 8
- 9
- 10
- 11
参数注解:
- time-to-live设置缓存的存活时间
- use-key-prefix不使用键的前缀,我们可以看看当把他设为true的时候,前面的smsCode没了,这样的话风险很高,有可能数据重复。

- key-prefix:指定前缀。我们可以看看
key-prefix: sms_的效果:

- 如果我们
key-prefix和use-key-prefix一起用:


- cache-null-values:是否缓存空值
总结
- springboot使用redis作为缓存实现需要导入redis的坐标
- 修改设置,配置缓存供应商为redis,并提供对应的缓存配置
SpringBoot整合Memcached缓存
目前我们已经掌握了3种缓存解决方案的配置形式,分别是springboot内置缓存,ehcache和redis,本节研究一下国内比较流行的一款缓存memcached。
按照之前的套路,其实变更缓存并不繁琐,但是springboot并没有支持使用memcached作为其缓存解决方案,也就是说在type属性中没有memcached的配置选项,这里就需要更变一下处理方式了。在整合之前先安装memcached。
安装
windows版安装包下载地址:https://www.runoob.com/memcached/window-install-memcached.html
下载的安装包是解压缩就能使用的zip文件,解压缩完毕后会得到如下文件

可执行文件只有一个memcached.exe,使用该文件可以将memcached作为系统服务启动,执行此文件时会出现报错信息,如下:

此处出现问题的原因是注册系统服务时需要使用管理员权限,当前账号权限不足导致安装服务失败,切换管理员账号权限启动命令行

然后再次执行安装服务的命令即可,如下:
memcached.exe -d install- 1
服务安装完毕后可以使用命令启动和停止服务,如下:
memcached.exe -d start # 启动服务 memcached.exe -d stop # 停止服务- 1
- 2
也可以在任务管理器中进行服务状态的切换

变更缓存为Memcached
由于memcached未被springboot收录为缓存解决方案,因此使用memcached需要通过手工硬编码的方式来使用,于是前面的套路都不适用了,需要自己写了。
memcached目前提供有三种客户端技术,分别是Memcached Client for Java、SpyMemcached和Xmemcached,其中性能指标各方面最好的客户端是Xmemcached,本次整合就使用这个作为客户端实现技术了。下面开始使用Xmemcached
客户端技术选择

步骤①:导入xmemcached的坐标
<dependency> <groupId>com.googlecode.xmemcachedgroupId> <artifactId>xmemcachedartifactId> <version>2.4.7version> dependency>- 1
- 2
- 3
- 4
- 5
步骤②:配置memcached,制作memcached的配置类
因为SpringBoot没有整合memcached所以不能在配置文件中配置。只能手工书写配置类
@Configuration public class XMemcachedConfig { @Bean public MemcachedClient getMemcachedClient() throws IOException { MemcachedClientBuilder memcachedClientBuilder = new XMemcachedClientBuilder("localhost:11211"); MemcachedClient memcachedClient = memcachedClientBuilder.build(); return memcachedClient; } }- 1
- 2
- 3
- 4
- 5
- 6
- 7
- 8
- 9
XMemcachedClientBuilder里面写memcached的服务器地址与端口。
memcached默认对外服务端口11211。
步骤③:使用xmemcached客户端操作缓存,注入MemcachedClient对象
@Service public class SMSCodeServiceImpl implements SMSCodeService { @Autowired private CodeUtils codeUtils; @Autowired private MemcachedClient memcachedClient; public String sendCodeToSMS(String tele) { String code = codeUtils.generator(tele); try { memcachedClient.set(tele,10,code); } catch (Exception e) { e.printStackTrace(); } return code; } public boolean checkCode(SMSCode smsCode) { String code = null; try { code = memcachedClient.get(smsCode.getTele()).toString(); } catch (Exception e) { e.printStackTrace(); } return smsCode.getCode().equals(code); } }- 1
- 2
- 3
- 4
- 5
- 6
- 7
- 8
- 9
- 10
- 11
- 12
- 13
- 14
- 15
- 16
- 17
- 18
- 19
- 20
- 21
- 22
- 23
- 24
- 25
- 26
- 27
memcachedClient.set()方法会抛出异常,其中:
第一个参数:指定缓存的key
第二个参数:指定过期时间。0代表永不过期,10就代表10s有效
第三个参数:指定缓存的值
memcachedClient.get()方法同样也会抛异常 设置值到缓存中使用set操作,取值使用get操作,其实更符合我们开发者的习惯。
上述代码中对于服务器的配置使用硬编码写死到了代码中,将此数据提取出来,做成独立的配置属性。
定义配置属性
以下过程采用属性配置方式进行
-
定义配置类,加载必要的配置属性,读取配置文件中memcached节点信息
@Component @ConfigurationProperties(prefix = "memcached") @Data public class XMemcachedProperties { private String servers; private int poolSize; private long opTimeout; }- 1
- 2
- 3
- 4
- 5
- 6
- 7
- 8
-
定义memcached节点信息
memcached: servers: localhost:11211 poolSize: 10 opTimeout: 3000- 1
- 2
- 3
- 4
-
在memcached配置类中加载信息
@Configuration public class XMemcachedConfig { @Autowired private XMemcachedProperties props; @Bean public MemcachedClient getMemcachedClient() throws IOException { MemcachedClientBuilder memcachedClientBuilder = new XMemcachedClientBuilder(props.getServers()); memcachedClientBuilder.setConnectionPoolSize(props.getPoolSize()); memcachedClientBuilder.setOpTimeout(props.getOpTimeout()); MemcachedClient memcachedClient = memcachedClientBuilder.build(); return memcachedClient; } }- 1
- 2
- 3
- 4
- 5
- 6
- 7
- 8
- 9
- 10
- 11
- 12
- 13
总结
- memcached安装后需要启动对应服务才可以对外提供缓存功能,安装memcached服务需要基于windows系统管理员权限
- 由于springboot没有提供对memcached的缓存整合方案,需要采用手工编码的形式创建xmemcached客户端操作缓存
- 导入xmemcached坐标后,创建memcached配置类,注册MemcachedClient对应的bean,用于操作缓存
- 初始化MemcachedClient对象所需要使用的属性可以通过自定义配置属性类的形式加载
SpringBoot整合jetcache缓存
目前我们使用的缓存都是要么A要么B,能不能AB一起用呢?springboot针对缓存的整合仅仅停留在用缓存上面,如果缓存自身不支持同时支持AB一起用,springboot也没办法,所以要想解决AB缓存一起用的问题,就必须找一款缓存能够支持AB两种缓存一起用,有这种缓存吗?还真有,阿里出品,
jetcache。阿里的这个解决方案解决了我们原先的两个问题:
①原来我们使用的几个缓存方案有在yml里面配置的,又在xml里面配置的,还有在配置类里面控制的。很杂,乱了套
②我们在做缓存方案的时候,要么用本地的这种形式,比如说ehcache、simple(默认),我们在使用它们的时候是没有配置ip地址和端口的。要么用远程方案,比如说redis、memcached,我们使用它们的时候都配置了ip地址和端口。本地方案有。远程方案没有,但唯独没有两种方案的中和。我们只所以需要两者的中和,是因为远程方案必然牵扯到网络的问题,他的速度会慢,但是它解决了多台服务器之间共享缓存的问题。而我们用本地解决了速度的问题,但解决不了共享的问题。jetcache严格意义上来说,并不是一个缓存解决方案,只能说他算是一个缓存框架,然后把别的缓存放到jetcache中管理,这样就可以支持AB缓存一起用了。并且jetcache参考了springboot整合缓存的思想,整体技术使用方式和springboot的缓存解决方案思想非常类似。下面咱们就先把jetcache用起来,然后再说它里面的一些小的功能。
做之前要先明确一下,jetcache并不是随便拿两个缓存都能拼到一起去的。目前jetcache支持的缓存方案本地缓存支持两种,远程缓存支持两种,分别如下:
- 本地缓存(Local)
- LinkedHashMap
- Caffeine
- 远程缓存(Remote)
- Redis
- Tair
纯远程方案
步骤①:导入springboot整合jetcache对应的坐标starter,当前坐标默认使用的远程方案是redis
<dependency> <groupId>com.alicp.jetcachegroupId> <artifactId>jetcache-starter-redisartifactId> <version>2.6.2version> dependency>- 1
- 2
- 3
- 4
- 5
步骤②:远程方案基本配置
jetcache: remote: default: type: redis host: localhost port: 6379 poolConfig: maxTotal: 50- 1
- 2
- 3
- 4
- 5
- 6
- 7
- 8
maxTotal表示最大连接数
其中poolConfig是必配项,否则会报错
步骤③:启用缓存,在引导类上方标注注解@EnableCreateCacheAnnotation配置springboot程序中可以使用注解的形式创建缓存
@SpringBootApplication //jetcache启用缓存的主开关 @EnableCreateCacheAnnotation public class Springboot20JetCacheApplication { public static void main(String[] args) { SpringApplication.run(Springboot20JetCacheApplication.class, args); } }- 1
- 2
- 3
- 4
- 5
- 6
- 7
- 8
步骤④:创建缓存对象Cache,并使用注解@CreateCache标记当前缓存的信息,然后使用Cache对象的API操作缓存,put写缓存,get读缓存。
@Service public class SMSCodeServiceImpl implements SMSCodeService { @Autowired private CodeUtils codeUtils; @CreateCache(name="jetCache_",expire = 10,timeUnit = TimeUnit.SECONDS) private Cache<String ,String> jetCache; public String sendCodeToSMS(String tele) { String code = codeUtils.generator(tele); jetCache.put(tele,code); return code; } public boolean checkCode(SMSCode smsCode) { String code = jetCache.get(smsCode.getTele()); return smsCode.getCode().equals(code); } }- 1
- 2
- 3
- 4
- 5
- 6
- 7
- 8
- 9
- 10
- 11
- 12
- 13
- 14
- 15
- 16
- 17
- 18
- 19
private Cache<String ,String> jetCache;- 1
这是创建一个缓存对象,可以理解为定义了一个hashmap,当然其中还有其他的种种设定
@CreateCache(name="jetCache_",expire = 10,timeUnit = TimeUnit.SECONDS)- 1
这一句话相当于告诉jetcache,这是一个缓存对象。
- name是命名空间,相当于Ehcache里面的value
- expire是缓存时间,默认的单位是秒
- timeUnit用来设置缓存时间的单位,当你不想使用默认的单位的时候就可以使用这个配置项
通过上述jetcache使用远程方案连接redis可以看出,jetcache操作缓存时的接口操作更符合开发者习惯,使用缓存就先获取缓存对象Cache,放数据进去就是put,取数据出来就是get,更加简单易懂。并且jetcache操作缓存时,可以为某个缓存对象设置过期时间,将同类型的数据放入缓存中,方便有效周期的管理。
上述方案中使用的是配置中定义的default缓存,其实这个default是个名字,可以随便写,也可以随便加。例如再添加一种缓存解决方案,参照如下配置进行:
jetcache: remote: default: type: redis host: localhost port: 6379 poolConfig: maxTotal: 50 sms: type: redis host: localhost port: 6379 poolConfig: maxTotal: 50- 1
- 2
- 3
- 4
- 5
- 6
- 7
- 8
- 9
- 10
- 11
- 12
- 13
- 14
如果想使用名称是sms的缓存,需要再创建缓存时指定参数area,声明使用对应缓存即可
@Service public class SMSCodeServiceImpl implements SMSCodeService { @Autowired private CodeUtils codeUtils; @CreateCache(area="sms",name="jetCache_",expire = 10,timeUnit = TimeUnit.SECONDS) private Cache<String ,String> jetCache; public String sendCodeToSMS(String tele) { String code = codeUtils.generator(tele); jetCache.put(tele,code); return code; } public boolean checkCode(SMSCode smsCode) { String code = jetCache.get(smsCode.getTele()); return smsCode.getCode().equals(code); } }- 1
- 2
- 3
- 4
- 5
- 6
- 7
- 8
- 9
- 10
- 11
- 12
- 13
- 14
- 15
- 16
- 17
- 18
- 19
纯本地方案
远程方案中,配置中使用remote表示远程,换成local就是本地,只不过类型不一样而已。
步骤①:导入springboot整合jetcache对应的坐标starter
<dependency> <groupId>com.alicp.jetcachegroupId> <artifactId>jetcache-starter-redisartifactId> <version>2.6.2version> dependency>- 1
- 2
- 3
- 4
- 5
步骤②:本地缓存基本配置
jetcache: local: default: type: linkedhashmap keyConvertor: fastjson- 1
- 2
- 3
- 4
- 5
为了加速数据获取时key的匹配速度,jetcache要求指定key的类型转换器。简单说就是,如果你给了一个Object作为key的话,我先用key的类型转换器给转换成字符串,然后再保存。等到获取数据时,仍然是先使用给定的Object转换成字符串,然后根据字符串匹配。由于jetcache是阿里的技术,这里推荐key的类型转换器使用阿里的fastjson。
步骤③:启用缓存
@SpringBootApplication //jetcache启用缓存的主开关 @EnableCreateCacheAnnotation public class Springboot20JetCacheApplication { public static void main(String[] args) { SpringApplication.run(Springboot20JetCacheApplication.class, args); } }- 1
- 2
- 3
- 4
- 5
- 6
- 7
- 8
步骤④:创建缓存对象Cache时,标注当前使用本地缓存
@Service public class SMSCodeServiceImpl implements SMSCodeService { @CreateCache(name="jetCache_",expire = 1000,timeUnit = TimeUnit.SECONDS,cacheType = CacheType.LOCAL) private Cache<String ,String> jetCache; public String sendCodeToSMS(String tele) { String code = codeUtils.generator(tele); jetCache.put(tele,code); return code; } public boolean checkCode(SMSCode smsCode) { String code = jetCache.get(smsCode.getTele()); return smsCode.getCode().equals(code); } }- 1
- 2
- 3
- 4
- 5
- 6
- 7
- 8
- 9
- 10
- 11
- 12
- 13
- 14
- 15
- 16
cacheType控制当前缓存使用本地缓存还是远程缓存,配置cacheType=CacheType.LOCAL即使用本地缓存。
本地+远程方案
本地和远程方法都有了,两种方案一起使用如何配置呢?其实就是将两种配置合并到一起就可以了。
jetcache: local: default: type: linkedhashmap keyConvertor: fastjson remote: default: type: redis host: localhost port: 6379 poolConfig: maxTotal: 50 sms: type: redis host: localhost port: 6379 poolConfig: maxTotal: 50- 1
- 2
- 3
- 4
- 5
- 6
- 7
- 8
- 9
- 10
- 11
- 12
- 13
- 14
- 15
- 16
- 17
- 18
在创建缓存的时候,配置cacheType为BOTH即则本地缓存与远程缓存同时使用。
@Service public class SMSCodeServiceImpl implements SMSCodeService { @CreateCache(name="jetCache_",expire = 1000,timeUnit = TimeUnit.SECONDS,cacheType = CacheType.BOTH) private Cache<String ,String> jetCache; }- 1
- 2
- 3
- 4
- 5
cacheType如果不进行配置,默认值是REMOTE,即仅使用远程缓存方案。关于jetcache的配置,参考以下信息
属性 默认值 说明 jetcache.statIntervalMinutes 0 统计间隔,0表示不统计 jetcache.hiddenPackages 无 自动生成name时,隐藏指定的包名前缀 jetcache.[local|remote].${area}.type 无 缓存类型,本地支持linkedhashmap、caffeine,远程支持redis、tair jetcache.[local|remote].${area}.keyConvertor 无 key转换器,当前仅支持fastjson jetcache.[local|remote].${area}.valueEncoder java 仅remote类型的缓存需要指定,可选java和kryo jetcache.[local|remote].${area}.valueDecoder java 仅remote类型的缓存需要指定,可选java和kryo jetcache.[local|remote].${area}.limit 100 仅local类型的缓存需要指定,缓存实例最大元素数 jetcache.[local|remote].${area}.expireAfterWriteInMillis 无穷大 默认过期时间,毫秒单位 jetcache.local.${area}.expireAfterAccessInMillis 0 仅local类型的缓存有效,毫秒单位,最大不活动间隔 以上方案仅支持手工控制缓存,但是springcache方案中的方法缓存特别好用,给一个方法添加一个注解,方法就会自动使用缓存。jetcache也提供了对应的功能,即方法缓存。
方法缓存
jetcache提供了方法缓存方案,只不过名称变更了而已。在对应的操作接口上方使用注解@Cached即可
步骤①:导入springboot整合jetcache对应的坐标starter
<dependency> <groupId>com.alicp.jetcachegroupId> <artifactId>jetcache-starter-redisartifactId> <version>2.6.2version> dependency>- 1
- 2
- 3
- 4
- 5
步骤②:配置缓存
jetcache: local: default: type: linkedhashmap keyConvertor: fastjson remote: default: type: redis host: localhost port: 6379 keyConvertor: fastjson valueEncode: java valueDecode: java poolConfig: maxTotal: 50 sms: type: redis host: localhost port: 6379 poolConfig: maxTotal: 50- 1
- 2
- 3
- 4
- 5
- 6
- 7
- 8
- 9
- 10
- 11
- 12
- 13
- 14
- 15
- 16
- 17
- 18
- 19
- 20
- 21
由于redis缓存中不支持保存对象,因此需要对redis设置当Object类型数据进入到redis中时如何进行类型转换。需要配置keyConvertor表示key的类型转换方式,同时标注value的转换类型方式,值进入redis时是java类型,标注valueEncode为java,值从redis中读取时转换成java,标注valueDecode为java。
注意,为了实现Object类型的值进出redis,需要保障进出redis的Object类型的数据必须实现序列化接口。
@Data public class Book implements Serializable { private Integer id; private String type; private String name; private String description; }- 1
- 2
- 3
- 4
- 5
- 6
- 7
步骤③:启用缓存时开启方法缓存功能,并配置basePackages,说明在哪些包中开启方法缓存
@SpringBootApplication //jetcache启用缓存的主开关 @EnableCreateCacheAnnotation //开启方法注解缓存 @EnableMethodCache(basePackages = "com.nefu") public class Springboot20JetCacheApplication { public static void main(String[] args) { SpringApplication.run(Springboot20JetCacheApplication.class, args); } }- 1
- 2
- 3
- 4
- 5
- 6
- 7
- 8
- 9
- 10
步骤④:使用注解@Cached标注当前方法使用缓存
@Service public class BookServiceImpl implements BookService { @Autowired private BookDao bookDao; @Override @Cached(name="book",key="#id",expire = 3600,cacheType = CacheType.REMOTE) public Book getById(Integer id) { return bookDao.selectById(id); } }- 1
- 2
- 3
- 4
- 5
- 6
- 7
- 8
- 9
- 10
- 11
结果:

远程方案的数据同步
由于远程方案中redis保存的数据可以被多个客户端共享,这就存在了数据同步问题。jetcache提供了3个注解解决此问题,分别在更新、删除操作时同步缓存数据,和读取缓存时定时刷新数据
更新缓存
@CacheUpdate(name="book_",key="#book.id",value="#book") public boolean update(Book book) { return bookDao.updateById(book) > 0; }- 1
- 2
- 3
- 4
删除缓存
@CacheInvalidate(name="book_",key = "#id") public boolean delete(Integer id) { return bookDao.deleteById(id) > 0; }- 1
- 2
- 3
- 4
定时刷新缓存
使用场景的思考:假如有一张表,现在A系统可以修改这张表,B系统也可以修改这张表。现在A系统把这张表的数据读取放在了缓存中,与此同时B系统把这张表的数据改了。这不就产生误差了么(内存中的数据和表数据不同步)?A系统是不知道此时表已经发生了变化,仍在使用缓存中的旧数据。说白了B系统操作完表之后是不会告诉A系统表发生了变化的。
我们可以使用@CacheRefresh让缓存(此时缓存里的数据)定时刷新,单位默认是秒
@Cached(name="book_",key="#id",expire = 3600,cacheType = CacheType.REMOTE) @CacheRefresh(refresh = 5) public Book getById(Integer id) { return bookDao.selectById(id); }- 1
- 2
- 3
- 4
- 5
如果发现每次走的都是数据库而不是缓存,那么可以考虑一下是不是缓存的时间设置的太短了。
数据报表
jetcache还提供有简单的数据报表功能,帮助开发者快速查看缓存命中信息,只需要添加一个配置即可
jetcache: statIntervalMinutes: 1- 1
- 2
设置后,每1分钟(默认单位)在控制台输出缓存数据命中信息
[DefaultExecutor] c.alicp.jetcache.support.StatInfoLogger : jetcache stat from 2022-02-28 09:32:15,892 to 2022-02-28 09:33:00,003 cache | qps| rate| get| hit| fail| expire| avgLoadTime| maxLoadTime ---------+-------+-------+------+-------+-------+---------+--------------+-------------- book_ | 0.66| 75.86%| 29| 22| 0| 0| 28.0| 188 ---------+-------+-------+------+-------+-------+---------+--------------+--------------- 1
- 2
- 3
- 4
- 5
总结
- jetcache是一个类似于springcache的缓存解决方案,自身不具有缓存功能,它提供有本地缓存与远程缓存多级共同使用的缓存解决方案
- jetcache提供的缓存解决方案受限于目前支持的方案,本地缓存支持两种,远程缓存支持两种
- 注意数据进入远程缓存时的类型转换问题
- jetcache提供方法缓存,并提供了对应的缓存更新与刷新功能
- jetcache提供有简单的缓存信息命中报表方便开发者即时监控缓存数据命中情况
SpringBoot整合j2cache缓存
j2cache是一个缓存整合框架,可以提供缓存的整合方案,使各种缓存搭配使用,自身不提供缓存功能。
jetcache可以在限定范围内构建多级缓存,但是灵活性不足,不能随意搭配缓存,本节介绍一种可以随意搭配缓存解决方案的缓存整合框架,j2cache。下面就来讲解如何使用这种缓存框架,以Ehcache与redis整合为例:
步骤①:导入j2cache、redis、ehcache坐标
<dependency> <groupId>net.oschina.j2cachegroupId> <artifactId>j2cache-coreartifactId> <version>2.8.4-releaseversion> dependency> <dependency> <groupId>net.oschina.j2cachegroupId> <artifactId>j2cache-spring-boot2-starterartifactId> <version>2.8.0-releaseversion> dependency> <dependency> <groupId>net.sf.ehcachegroupId> <artifactId>ehcacheartifactId> dependency>- 1
- 2
- 3
- 4
- 5
- 6
- 7
- 8
- 9
- 10
- 11
- 12
- 13
- 14
j2cache的starter中默认包含了redis坐标,官方推荐使用redis作为二级缓存,因此此处无需导入redis坐标
步骤②:配置一级与二级缓存,并配置一二级缓存间数据传递方式,配置书写在名称为j2cache.properties的文件中。如果使用ehcache还需要单独添加ehcache的配置文件
# 1级缓存 j2cache.L1.provider_class = ehcache ehcache.configXml = ehcache.xml # 2级缓存 j2cache.L2.provider_class = net.oschina.j2cache.cache.support.redis.SpringRedisProvider j2cache.L2.config_section = redis redis.hosts = localhost:6379 # 1级缓存中的数据如何到达二级缓存 j2cache.broadcast = net.oschina.j2cache.cache.support.redis.SpringRedisPubSubPolicy- 1
- 2
- 3
- 4
- 5
- 6
- 7
- 8
- 9
- 10
- 11
此处配置不能乱配置,需要参照官方给出的配置说明进行。例如1级供应商选择ehcache,供应商名称仅仅是一个ehcache,但是2级供应商选择redis时要写专用的Spring整合Redis的供应商类名SpringRedisProvider,而且这个名称并不是所有的redis包中能提供的,也不是spring包中提供的。因此配置j2cache必须参照官方文档配置,而且还要去找专用的整合包,导入对应坐标才可以使用。
一级与二级缓存最重要的一个配置就是两者之间的数据沟通方式,此类配置也不是随意配置的,并且不同的缓存解决方案提供的数据沟通方式差异化很大,需要查询官方文档进行设置。
步骤③:使用缓存
@Service public class SMSCodeServiceImpl implements SMSCodeService { @Autowired private CodeUtils codeUtils; @Autowired private CacheChannel cacheChannel; public String sendCodeToSMS(String tele) { String code = codeUtils.generator(tele); cacheChannel.set("sms",tele,code); return code; } public boolean checkCode(SMSCode smsCode) { String code = cacheChannel.get("sms",smsCode.getTele()).asString(); return smsCode.getCode().equals(code); } }- 1
- 2
- 3
- 4
- 5
- 6
- 7
- 8
- 9
- 10
- 11
- 12
- 13
- 14
- 15
- 16
- 17
- 18
- 19
j2cache的使用和jetcache比较类似,但是无需开启使用的开关,直接定义缓存对象即可使用,缓存对象名CacheChannel。
j2cache的使用不复杂,配置是j2cache的核心,毕竟是一个整合型的缓存框架。缓存相关的配置过多,可以查阅j2cache-core核心包中的j2cache.properties文件中的说明。如下:
#J2Cache configuration ######################################### # Cache Broadcast Method # values: # jgroups -> use jgroups's multicast # redis -> use redis publish/subscribe mechanism (using jedis) # lettuce -> use redis publish/subscribe mechanism (using lettuce, Recommend) # rabbitmq -> use RabbitMQ publisher/consumer mechanism # rocketmq -> use RocketMQ publisher/consumer mechanism # none -> don't notify the other nodes in cluster # xx.xxxx.xxxx.Xxxxx your own cache broadcast policy classname that implement net.oschina.j2cache.cluster.ClusterPolicy ######################################### j2cache.broadcast = redis # jgroups properties jgroups.channel.name = j2cache jgroups.configXml = /network.xml # RabbitMQ properties rabbitmq.exchange = j2cache rabbitmq.host = localhost rabbitmq.port = 5672 rabbitmq.username = guest rabbitmq.password = guest # RocketMQ properties rocketmq.name = j2cache rocketmq.topic = j2cache # use ; to split multi hosts rocketmq.hosts = 127.0.0.1:9876 ######################################### # Level 1&2 provider # values: # none -> disable this level cache # ehcache -> use ehcache2 as level 1 cache # ehcache3 -> use ehcache3 as level 1 cache # caffeine -> use caffeine as level 1 cache(only in memory) # redis -> use redis as level 2 cache (using jedis) # lettuce -> use redis as level 2 cache (using lettuce) # readonly-redis -> use redis as level 2 cache ,but never write data to it. if use this provider, you must uncomment `j2cache.L2.config_section` to make the redis configurations available. # memcached -> use memcached as level 2 cache (xmemcached), # [classname] -> use custom provider ######################################### j2cache.L1.provider_class = caffeine j2cache.L2.provider_class = redis # When L2 provider isn't `redis`, using `L2.config_section = redis` to read redis configurations # j2cache.L2.config_section = redis # Enable/Disable ttl in redis cache data (if disabled, the object in redis will never expire, default:true) # NOTICE: redis hash mode (redis.storage = hash) do not support this feature) j2cache.sync_ttl_to_redis = true # Whether to cache null objects by default (default false) j2cache.default_cache_null_object = true ######################################### # Cache Serialization Provider # values: # fst -> using fast-serialization (recommend) # kryo -> using kryo serialization # json -> using fst's json serialization (testing) # fastjson -> using fastjson serialization (embed non-static class not support) # java -> java standard # fse -> using fse serialization # [classname implements Serializer] ######################################### j2cache.serialization = json #json.map.person = net.oschina.j2cache.demo.Person ######################################### # Ehcache configuration ######################################### # ehcache.configXml = /ehcache.xml # ehcache3.configXml = /ehcache3.xml # ehcache3.defaultHeapSize = 1000 ######################################### # Caffeine configuration # caffeine.region.[name] = size, xxxx[s|m|h|d] # ######################################### caffeine.properties = /caffeine.properties ######################################### # Redis connection configuration ######################################### ######################################### # Redis Cluster Mode # # single -> single redis server # sentinel -> master-slaves servers # cluster -> cluster servers (数据库配置无效,使用 database = 0) # sharded -> sharded servers (密码、数据库必须在 hosts 中指定,且连接池配置无效 ; redis://user:password@127.0.0.1:6379/0) # ######################################### redis.mode = single #redis storage mode (generic|hash) redis.storage = generic ## redis pub/sub channel name redis.channel = j2cache ## redis pub/sub server (using redis.hosts when empty) redis.channel.host = #cluster name just for sharded redis.cluster_name = j2cache ## redis cache namespace optional, default[empty] redis.namespace = ## redis command scan parameter count, default[1000] #redis.scanCount = 1000 ## connection # Separate multiple redis nodes with commas, such as 192.168.0.10:6379,192.168.0.11:6379,192.168.0.12:6379 redis.hosts = 127.0.0.1:6379 redis.timeout = 2000 redis.password = redis.database = 0 redis.ssl = false ## redis pool properties redis.maxTotal = 100 redis.maxIdle = 10 redis.maxWaitMillis = 5000 redis.minEvictableIdleTimeMillis = 60000 redis.minIdle = 1 redis.numTestsPerEvictionRun = 10 redis.lifo = false redis.softMinEvictableIdleTimeMillis = 10 redis.testOnBorrow = true redis.testOnReturn = false redis.testWhileIdle = true redis.timeBetweenEvictionRunsMillis = 300000 redis.blockWhenExhausted = false redis.jmxEnabled = false ######################################### # Lettuce scheme # # redis -> single redis server # rediss -> single redis server with ssl # redis-sentinel -> redis sentinel # redis-cluster -> cluster servers # ######################################### ######################################### # Lettuce Mode # # single -> single redis server # sentinel -> master-slaves servers # cluster -> cluster servers (数据库配置无效,使用 database = 0) # sharded -> sharded servers (密码、数据库必须在 hosts 中指定,且连接池配置无效 ; redis://user:password@127.0.0.1:6379/0) # ######################################### ## redis command scan parameter count, default[1000] #lettuce.scanCount = 1000 lettuce.mode = single lettuce.namespace = lettuce.storage = hash lettuce.channel = j2cache lettuce.scheme = redis lettuce.hosts = 127.0.0.1:6379 lettuce.password = lettuce.database = 0 lettuce.sentinelMasterId = lettuce.maxTotal = 100 lettuce.maxIdle = 10 lettuce.minIdle = 10 # timeout in milliseconds lettuce.timeout = 10000 # redis cluster topology refresh interval in milliseconds lettuce.clusterTopologyRefresh = 3000 ######################################### # memcached server configurations # refer to https://gitee.com/mirrors/XMemcached ######################################### memcached.servers = 127.0.0.1:11211 memcached.username = memcached.password = memcached.connectionPoolSize = 10 memcached.connectTimeout = 1000 memcached.failureMode = false memcached.healSessionInterval = 1000 memcached.maxQueuedNoReplyOperations = 100 memcached.opTimeout = 100 memcached.sanitizeKeys = false- 1
- 2
- 3
- 4
- 5
- 6
- 7
- 8
- 9
- 10
- 11
- 12
- 13
- 14
- 15
- 16
- 17
- 18
- 19
- 20
- 21
- 22
- 23
- 24
- 25
- 26
- 27
- 28
- 29
- 30
- 31
- 32
- 33
- 34
- 35
- 36
- 37
- 38
- 39
- 40
- 41
- 42
- 43
- 44
- 45
- 46
- 47
- 48
- 49
- 50
- 51
- 52
- 53
- 54
- 55
- 56
- 57
- 58
- 59
- 60
- 61
- 62
- 63
- 64
- 65
- 66
- 67
- 68
- 69
- 70
- 71
- 72
- 73
- 74
- 75
- 76
- 77
- 78
- 79
- 80
- 81
- 82
- 83
- 84
- 85
- 86
- 87
- 88
- 89
- 90
- 91
- 92
- 93
- 94
- 95
- 96
- 97
- 98
- 99
- 100
- 101
- 102
- 103
- 104
- 105
- 106
- 107
- 108
- 109
- 110
- 111
- 112
- 113
- 114
- 115
- 116
- 117
- 118
- 119
- 120
- 121
- 122
- 123
- 124
- 125
- 126
- 127
- 128
- 129
- 130
- 131
- 132
- 133
- 134
- 135
- 136
- 137
- 138
- 139
- 140
- 141
- 142
- 143
- 144
- 145
- 146
- 147
- 148
- 149
- 150
- 151
- 152
- 153
- 154
- 155
- 156
- 157
- 158
- 159
- 160
- 161
- 162
- 163
- 164
- 165
- 166
- 167
- 168
- 169
- 170
- 171
- 172
- 173
- 174
- 175
- 176
- 177
- 178
- 179
- 180
- 181
- 182
- 183
- 184
- 185
- 186
- 187
- 188
- 189
- 190
- 191
- 192
- 193
- 194
- 195
- 196
- 197
- 198
- 199
- 200
- 201
总结
- j2cache是一个缓存框架,自身不具有缓存功能,它提供多种缓存整合在一起使用的方案
- j2cache需要通过复杂的配置设置各级缓存,以及缓存之间数据交换的方式
- j2cache操作接口通过CacheChannel实现
附:手机验证码案例
此案例使用SpringBoot内置缓存解决方案
为了便于下面演示各种各样的缓存技术,我们创建一个手机验证码的案例环境,模拟使用缓存保存手机验证码的过程。
手机验证码案例需求如下:
- 输入手机号获取验证码,组织文档以短信形式发送给用户(页面模拟)
- 输入手机号和验证码验证结果
为了描述上述操作,我们制作两个表现层接口,一个用来模拟发送短信的过程,其实就是根据用户提供的手机号生成一个验证码,然后放入缓存,另一个用来模拟验证码校验的过程,其实就是使用传入的手机号和验证码进行匹配,并返回最终匹配结果。下面直接制作本案例的模拟代码,先以上例中springboot提供的内置缓存技术来完成当前案例的制作。
步骤①:导入springboot提供的缓存技术对应的starter
<dependency> <groupId>org.springframework.bootgroupId> <artifactId>spring-boot-starter-cacheartifactId> dependency>- 1
- 2
- 3
- 4
步骤②:启用缓存,在引导类上方标注注解@EnableCaching配置springboot程序中可以使用缓存
@SpringBootApplication //开启缓存功能 @EnableCaching public class Springboot19CacheApplication { public static void main(String[] args) { SpringApplication.run(Springboot19CacheApplication.class, args); } }- 1
- 2
- 3
- 4
- 5
- 6
- 7
- 8
步骤③:定义验证码对应的实体类,封装手机号与验证码两个属性
@Data public class SMSCode { private String tele; private String code; }- 1
- 2
- 3
- 4
- 5
步骤④:定义验证码功能的业务层接口与实现类
public interface SMSCodeService { public String sendCodeToSMS(String tele); public boolean checkCode(SMSCode smsCode); } @Service public class SMSCodeServiceImpl implements SMSCodeService { @Autowired private CodeUtils codeUtils; @CachePut(value = "smsCode", key = "#tele") public String sendCodeToSMS(String tele) { String code = codeUtils.generator(tele); return code; } public boolean checkCode(SMSCode smsCode) { //取出内存中的验证码与传递过来的验证码比对,如果相同,返回true String code = smsCode.getCode(); String cacheCode = codeUtils.get(smsCode.getTele()); return code.equals(cacheCode); } }- 1
- 2
- 3
- 4
- 5
- 6
- 7
- 8
- 9
- 10
- 11
- 12
- 13
- 14
- 15
- 16
- 17
- 18
- 19
- 20
- 21
- 22
- 23
获取验证码后,当验证码失效时必须重新获取验证码,因此在获取验证码的功能上不能使用@Cacheable注解,@Cacheable注解是缓存中没有值则放入值,缓存中有值则取值。此处的功能仅仅是生成验证码并放入缓存,并不具有从缓存中取值的功能,因此不能使用@Cacheable注解,应该使用仅具有向缓存中保存数据的功能,使用@CachePut注解即可。
此处还有几个注意点:
-
如果想要从缓存中取出值,我们可以单独设置一个方法(也就是上述代码中的get方法),使用@Cacheable注解,让方法返回null。这样拿出来的值就会赋给方法的返回值
-
get方法为什么要放在工具类CodeUtils中,就放在业务层的实现类里面不行吗?

-
如果我们这么做的话,会发现我们的注解压根就没有生效。这是因为我们的注解没有被加载到,我们只有按照bean的加载形式加载这个方法才能使我们的注解生效。
-
也就是说直接get()不走Spring容器,注解没有被加载。而codeUtils.get(),codeUtils使我们的工具类,我们把它放在了Spring的容器中,如此加载注解才会生效
对于校验验证码的功能建议放入工具类中进行。
步骤⑤:定义验证码的生成策略与根据手机号读取验证码的功能
@Component public class CodeUtils { private String [] patch = {"000000","00000","0000","000","00","0",""}; public String generator(String tele){ int hash = tele.hashCode(); int encryption = 20206666; long result = hash ^ encryption; long nowTime = System.currentTimeMillis(); result = result ^ nowTime; long code = result % 1000000; code = code < 0 ? -code : code; String codeStr = code + ""; int len = codeStr.length(); return patch[len] + codeStr; } @Cacheable(value = "smsCode",key="#tele") public String get(String tele){ return null; } }- 1
- 2
- 3
- 4
- 5
- 6
- 7
- 8
- 9
- 10
- 11
- 12
- 13
- 14
- 15
- 16
- 17
- 18
- 19
- 20
- 21
- 22
步骤⑥:定义验证码功能的web层接口,一个方法用于提供手机号获取验证码,一个方法用于提供手机号和验证码进行校验
@RestController @RequestMapping("/sms") public class SMSCodeController { @Autowired private SMSCodeService smsCodeService; @GetMapping public String getCode(String tele){ String code = smsCodeService.sendCodeToSMS(tele); return code; } @PostMapping public boolean checkCode(SMSCode smsCode){ return smsCodeService.checkCode(smsCode); } }- 1
- 2
- 3
- 4
- 5
- 6
- 7
- 8
- 9
- 10
- 11
- 12
- 13
- 14
- 15
- 16
- 17
-
相关阅读:
【Spring(三)】熟练掌握Spring的使用
【神经网络】梯度消失与梯度爆炸问题
项目经理都在考PMP?含金量真的很高吗?
【C++】常用遍历算法
JVM类加载机制、双亲委派和SPI机制
C#Socket网络编程
TCP/IP Illustrated Episode 7
DITA-OT 4.0新特性 - PDF themes,定制PDF样式的新方法
Servlet
Dubbo —— 分布式基础 Dubbo 框架入门 —— 快速上手使用 整合 SpringBoot 进行开发 —— 实用案例 —— 以及原理初探
- 原文地址:https://blog.csdn.net/zyb18507175502/article/details/126403322