-
【java_wxid项目】【第六章】【Spring Cloud Security Oauth2集成】
主项目链接:https://gitee.com/java_wxid/java_wxid
项目架构及博文总结:- 点击:【使用Spring Boot快速构建应用】
- 点击:【使用Spring Cloud Open Feign基于动态代理动态构造请求实现与其他系统进行交互】
- 点击:【使用Spring Cloud Hystrix实现服务容错、熔断、降级、监控】
- 点击:【使用Spring Cloud Ribbon以库的方式集成到服务的消费方实现客户端负载均衡】
- 点击:【使用Spring Cloud Gateway作为API网关服务进行请求拦截、服务分发、降级、限流】
- 点击:【使用Spring Cloud Security Oauth2作为微服务统一认证中心实现用户认证和授权访问】
- 点击:【使用Spring Cloud Stream作为消息驱动用于动态的切换中间件】
- 点击:【使用Spring Cloud Skywalking基于字节码注入通过探针方式进行链路追踪、分布式追踪、性能指标分析、应用和服务依赖分析】
- 点击:【使用Spring Cloud Alibaba Nacos实现服务注册/发现/续约/剔除/下线、心跳检测、服务配置管理、基于长轮训机制实现配置动态变更】
- 点击:【使用Spring Cloud Alibaba Seata作为对项目代码无入侵的分布式事务解决方案】
- 点击:【使用Spring Cloud Alibaba Sentinel实现高可用流量防护】
- 点击:【使用Apache ShardingSphere作为关系型数据库中间件实现分库分表、读写分离】
- 点击:【使用Apache Mybatis作为持久层框架用于定制化SQL、存储过程以及高级映射】
- 点击:【使用Redis作为高性能分布式缓存数据库】
- 点击:【使用ElasticSearch全文搜索】
- 点击:【使用MongoDB非关系型数据库】
- 点击:【使用xxl-job作为分布式任务调度平台】
- 点击:【使用Elasticsearch + Logstash + Kibana作为日志收集系统】
- 点击:【使用Apifox作为API文档、API调试、API Mock、API自动化测试】
- 点击:【使用Apache Spark作为基于内存计算的大数据分析引擎用于批处理、交互式查询】
- 点击:【使用ETL工具将数据源抽取到HDFS作为高可靠、高吞吐量的分布式文件系统存储,通过Hive清洗、处理和计算原始数据,Hive清洗处理后的结果,将存入Hbase,海量数据随机查询场景从HBase查询数据】
- 点击:【使用领域驱动DDD设计和设计模式进行开发】
- 点击:【使用Netty基于Java NIO封装的高性能的网络通信框架】
- 点击:【使用k8s、docker、docker-compose、宝塔面板进行环境搭建和部署】
- 点击:【使用Vue渐进式JavaScript框架作为适用场景丰富的Web前端框架】
- 点击:【分享人才筛选、工作分配、高效办公、项目推动等团队管理经验】
项目模块:
前期规划,实现部分java_wxid ├── demo // 演示模块 │ └── 模块名称:apache-mybatis-demo模块 //Apache Mybatis集成(已实现并有博文总结) │ └── 模块名称:apache-shardingsphere-demo模块 //Apache ShardingSphere集成(已实现并有博文总结) │ └── 模块名称:design-demo模块 //设计模式实战落地(已实现并有博文总结) │ └── 模块名称:elasticsearch-demo模块 //ElasticSearch集成(已实现并有博文总结) │ └── 模块名称:mongodb-demo模块 //MongoDB集成(已实现并有博文总结) │ └── 模块名称:redis-demo模块 //Redis集成(已实现并有博文总结) │ └── 模块名称:spring-boot-demo模块 //Spring Boot快速构建应用(已实现并有博文总结) │ └── 模块名称:spring-cloud-alibaba-nacos-demo模块 //Spring Cloud Alibaba Nacos集成(已实现并有博文总结) │ └── 模块名称:spring-cloud-alibaba-seata-demo模块 //Spring Cloud Alibaba Seata集成(已实现并有博文总结) │ └── 模块名称:spring-cloud-alibaba-sentinel-demo模块 //Spring Cloud Alibaba Sentinel集成(已实现并有博文总结) │ └── 模块名称:spring-cloud-gateway-demo模块 //Spring Cloud Gateway集成(已实现并有博文总结) │ └── 模块名称:spring-cloud-hystrix-demo模块 //Spring Cloud Hystrix集成(已实现并有博文总结) │ └── 模块名称:spring-cloud-open-feign-demo模块 //Spring Cloud Open Feign集成(已实现并有博文总结) │ └── 模块名称:spring-cloud-ribbon-demo模块 //Spring Cloud Ribbon集成(已实现并有博文总结) │ └── 模块名称:spring-cloud-security-oauth2-demo模块 //Spring Cloud Security Oauth2集成(已实现并有博文总结) │ └── 模块名称:spring-cloud-security-oauth2-sso-client-demo模块 //Spring Cloud Security Oauth2集成(已实现并有博文总结) │ └── 模块名称:spring-cloud-skywalking-demo模块 //Spring Cloud Skywalking集成(已实现并有博文总结) │ └── 模块名称:spring-cloud-stream-demo模块 //Spring Cloud Stream集成(已实现并有博文总结) │ └── 模块名称:swagger-demo模块 //springfox-swagger2集成(已实现并有博文总结) │ └── 模块名称:xxl-job模块 //xxl-job集成(已实现并有博文总结) │ └── 模块名称:apache-spark-demo模块 //Apache Spark集成 │ └── 模块名称:etl-hdfs-hive-hbase-demo模块 //ETL、HDFS、Hive、Hbase集成 │ └── 模块名称:ddd-mode-demo模块 //DDD领域设计 │ └── 模块名称:netty-demo模块 //Netty集成 │ └── 模块名称:vue-demo模块 //前端vue集成 ├── document // 文档 │ └── JavaKnowledgeDocument //java知识点 │ └── java基础知识点.md │ └── mq知识点.md │ └── mysql知识点.md │ └── redis知识点.md │ └── springcould知识点.md │ └── spring知识点.md │ └── FounderDocument //创始人 │ └── 创始人.md- 1
- 2
- 3
- 4
- 5
- 6
- 7
- 8
- 9
- 10
- 11
- 12
- 13
- 14
- 15
- 16
- 17
- 18
- 19
- 20
- 21
- 22
- 23
- 24
- 25
- 26
- 27
- 28
- 29
- 30
- 31
- 32
- 33
- 34
- 35
- 36
- 37
系列文章:快速集成各种微服务相关的技术,帮助大家可以快速集成到自己的项目中,节约开发时间。
提示:系列文章还未全部完成,后续的文章,会慢慢补充进去的。文章目录
- 创建spring-cloud-security-oauth2-demo项目
- 修改pom.xml
- 创建bootstrap.yml文件
- 修改application.properties文件
- 创建一个空的config.properties文件
- 创建jwt.jks文件
- 修改SpringCloudSecurityOauth2DemoApplication
- 创建数据库表结构
- 创建AuthResourceServerConfig
- 创建AuthServerJdbcTokenStoreConfig.java
- 创建AuthServerJwtTokenStoreConfig
- 创建AuthServerRedisTokenStoreConfig.java
- 创建AuthTokenEnhancer
- 创建JwtTokenStoreConfig
- 创建RedisStoreConfig
- 创建WebSecurityConfig
- 创建SecurityOauth2Controller
- 创建AppUserinfoEntity
- 创建ResultData
- 创建UserInfoFeignService
- 创建JWTAuthenticationEntryPoint.java
- 创建JWTAuthenticationFilter.java
- 创建JWTAuthorizationFilter.java
- 创建UserServiceHystrix
- 创建JwtCAProperties
- 创建AppUserDetailsService
- 创建UserInfoDetails
- 创建JwtTokenUtil
- 验证Spring Cloud Security Oauth2是否工作
- 创建spring-cloud-security-oauth2-sso-client-demo项目(实现单点登录)
创建spring-cloud-security-oauth2-demo项目
项目代码:https://gitee.com/java_wxid/java_wxid/tree/master/demo/spring-cloud-security-oauth2-demo
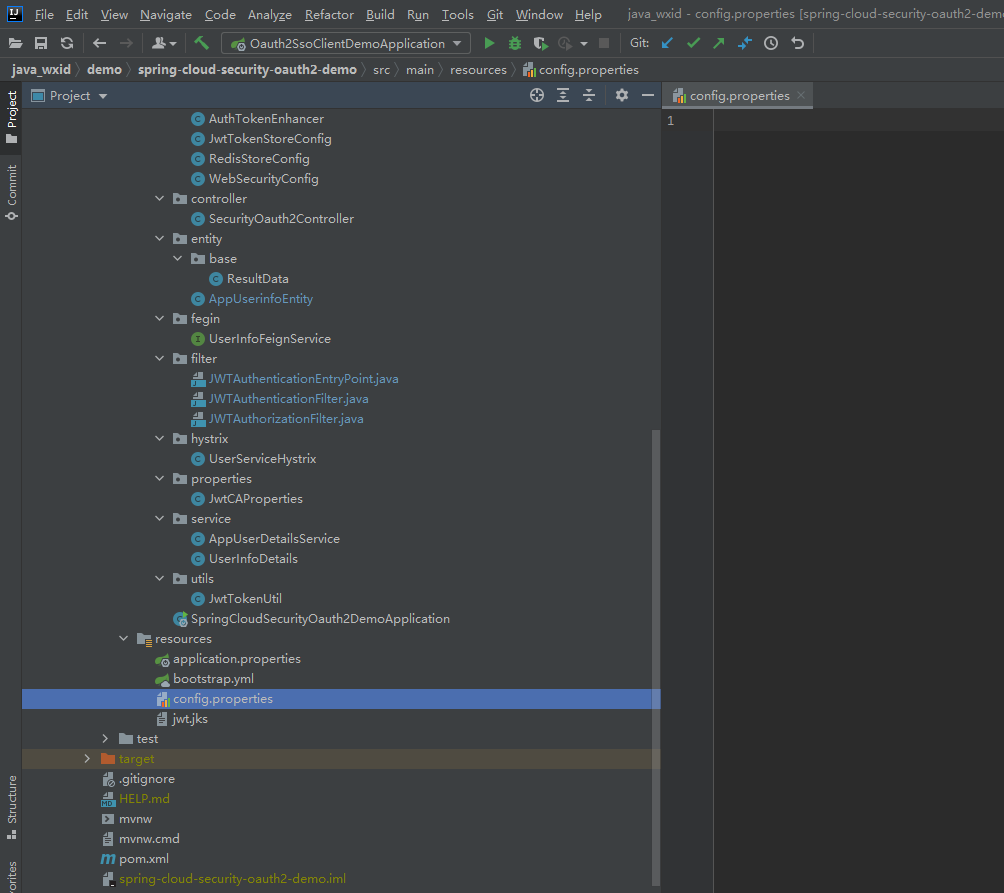
项目结构如下(示例):

修改pom.xml
代码如下(示例):
<?xml version="1.0" encoding="UTF-8"?> <project xmlns="http://maven.apache.org/POM/4.0.0" xmlns:xsi="http://www.w3.org/2001/XMLSchema-instance" xsi:schemaLocation="http://maven.apache.org/POM/4.0.0 https://maven.apache.org/xsd/maven-4.0.0.xsd"> <modelVersion>4.0.0</modelVersion> <groupId>com.example</groupId> <artifactId>spring-cloud-security-oauth2-demo</artifactId> <version>0.0.1-SNAPSHOT</version> <name>spring-cloud-security-oauth2-demo</name> <description>Demo project for Spring Boot</description> <!-- 属性配置--> <properties> <project.build.sourceEncoding>UTF-8</project.build.sourceEncoding> <project.reporting.outputEncoding>UTF-8</project.reporting.outputEncoding> <java.version>1.8</java.version> <!--引入 Spring Boot、Spring Cloud、Spring Cloud Alibaba 三者 BOM 文件,进行依赖版本的管理,防止不兼容。 在 https://dwz.cn/mcLIfNKt 文章中,Spring Cloud Alibaba 开发团队推荐了三者的依赖关系--> <spring.boot.version>2.3.12.RELEASE</spring.boot.version> <spring.cloud.version>Hoxton.SR12</spring.cloud.version> <spring.cloud.alibaba.version>2.2.7.RELEASE</spring.cloud.alibaba.version> </properties> <dependencies> <dependency> <groupId>org.springframework.boot</groupId> <artifactId>spring-boot-starter</artifactId> </dependency> <dependency> <groupId>org.springframework.boot</groupId> <artifactId>spring-boot-starter-test</artifactId> <scope>test</scope> </dependency> <!--代表web模块,在这个模块中含了许多JAR包,有spring相关的jar,内置tomcat服务器,jackson等, 这些web项目中常用的的功能都会自动引入--> <dependency> <groupId>org.springframework.boot</groupId> <artifactId>spring-boot-starter-web</artifactId> </dependency> <!-- Alibaba Nacos 配置 --> <dependency> <groupId>com.alibaba.cloud</groupId> <artifactId>spring-cloud-starter-alibaba-nacos-discovery</artifactId> </dependency> <dependency> <groupId>com.alibaba.cloud</groupId> <artifactId>spring-cloud-starter-alibaba-nacos-config</artifactId> </dependency> <!-- 在SpringBoot 2.4.x的版本之后,对于bootstrap.properties/bootstrap.yaml配置文件 (我们合起来成为Bootstrap配置文件)的支持,其实这个jar包里什么都没有,就只有一个标识类Marker, 用来标识要开启Bootstrap配置文件的支持,由于父类用了2.5.6版本需要导入如下的依赖--> <dependency> <groupId>org.springframework.cloud</groupId> <artifactId>spring-cloud-starter-bootstrap</artifactId> <version>3.1.0</version> </dependency> <!-- spring security oauth2--> <dependency> <groupId>org.springframework.cloud</groupId> <artifactId>spring-cloud-starter-oauth2</artifactId> </dependency> <!-- JWT依赖--> <dependency> <groupId>io.jsonwebtoken</groupId> <artifactId>jjwt</artifactId> <version>0.9.1</version> </dependency> <!-- lombok插件--> <dependency> <groupId>org.projectlombok</groupId> <artifactId>lombok</artifactId> <version>RELEASE</version> <scope>compile</scope> </dependency> <!-- commons-lang3工具包--> <dependency> <groupId>org.apache.commons</groupId> <artifactId>commons-lang3</artifactId> <version>3.10</version> </dependency> <!--openfeign客户端依赖--> <dependency> <groupId>org.springframework.cloud</groupId> <artifactId>spring-cloud-openfeign-core</artifactId> <version>2.2.6.RELEASE</version> </dependency> <!--引入HttpClient依赖--> <dependency> <groupId>io.github.openfeign</groupId> <artifactId>feign-httpclient</artifactId> </dependency> <!-- 引入Feign Slf4j --> <dependency> <groupId>com.netflix.feign</groupId> <artifactId>feign-slf4j</artifactId> <version>8.14.4</version> </dependency> <!-- jdbc--> <dependency> <groupId>org.springframework.boot</groupId> <artifactId>spring-boot-starter-jdbc</artifactId> </dependency> <dependency> <groupId>mysql</groupId> <artifactId>mysql-connector-java</artifactId> </dependency> <!-- redis --> <dependency> <groupId>org.springframework.boot</groupId> <artifactId>spring-boot-starter-data-redis</artifactId> </dependency> <dependency> <groupId>org.apache.commons</groupId> <artifactId>commons-pool2</artifactId> </dependency> <!-- fastjson--> <dependency> <groupId>com.alibaba</groupId> <artifactId>fastjson</artifactId> <version>1.2.62</version> </dependency> </dependencies> <!-- 引入 Spring Boot、Spring Cloud、Spring Cloud Alibaba 三者 BOM 文件,进行依赖版本的管理,防止不兼容。 在 https://dwz.cn/mcLIfNKt 文章中,Spring Cloud Alibaba 开发团队推荐了三者的依赖关系 --> <dependencyManagement> <dependencies> <dependency> <groupId>org.springframework.boot</groupId> <artifactId>spring-boot-starter-parent</artifactId> <version>${spring.boot.version}</version> <type>pom</type> <scope>import</scope> </dependency> <dependency> <groupId>org.springframework.cloud</groupId> <artifactId>spring-cloud-dependencies</artifactId> <version>${spring.cloud.version}</version> <type>pom</type> <scope>import</scope> </dependency> <dependency> <groupId>com.alibaba.cloud</groupId> <artifactId>spring-cloud-alibaba-dependencies</artifactId> <version>${spring.cloud.alibaba.version}</version> <type>pom</type> <scope>import</scope> </dependency> </dependencies> </dependencyManagement> <build> <plugins> <plugin> <groupId>org.apache.maven.plugins</groupId> <artifactId>maven-compiler-plugin</artifactId> <version>2.4</version> <configuration> <source>${java.version}</source> <target>${java.version}</target> <encoding>${project.build.sourceEncoding}</encoding> </configuration> </plugin> </plugins> <resources> <resource> <directory>src/main/resources</directory> <filtering>true</filtering> <excludes> <exclude>**/*.jkssrc/main/resources false **/ - 1
- 2
- 3
- 4
- 5
- 6
- 7
- 8
- 9
- 10
- 11
- 12
- 13
- 14
- 15
- 16
- 17
- 18
- 19
- 20
- 21
- 22
- 23
- 24
- 25
- 26
- 27
- 28
- 29
- 30
- 31
- 32
- 33
- 34
- 35
- 36
- 37
- 38
- 39
- 40
- 41
- 42
- 43
- 44
- 45
- 46
- 47
- 48
- 49
- 50
- 51
- 52
- 53
- 54
- 55
- 56
- 57
- 58
- 59
- 60
- 61
- 62
- 63
- 64
- 65
- 66
- 67
- 68
- 69
- 70
- 71
- 72
- 73
- 74
- 75
- 76
- 77
- 78
- 79
- 80
- 81
- 82
- 83
- 84
- 85
- 86
- 87
- 88
- 89
- 90
- 91
- 92
- 93
- 94
- 95
- 96
- 97
- 98
- 99
- 100
- 101
- 102
- 103
- 104
- 105
- 106
- 107
- 108
- 109
- 110
- 111
- 112
- 113
- 114
- 115
- 116
- 117
- 118
- 119
- 120
- 121
- 122
- 123
- 124
- 125
- 126
- 127
- 128
- 129
- 130
- 131
- 132
- 133
- 134
- 135
- 136
- 137
- 138
- 139
- 140
- 141
- 142
- 143
- 144
- 145
- 146
- 147
- 148
- 149
- 150
- 151
- 152
- 153
- 154
- 155
- 156
- 157
- 158
- 159
- 160
- 161
- 162
- 163
- 164
- 165
- 166
- 167
- 168
- 169
- 170
- 171
- 172
- 173
- 174
- 175
- 176
- 177
- 178
- 179
- 180
- 181
- 182
- 183
- 184
- 185
- 186
- 187
- 188
- 189
- 190
- 191
- 192
- 193
创建bootstrap.yml文件
代码如下(示例):
#bootstrap.yml优先级比application.yml优先级高 spring: #prefix−{spring.profile.active}.${file-extension} #nacos会根据当前环境去拼接配置名称查找相应配置文件, #示例:{spring.application.name}-{spring.profiles.active}-{spring.cloud.nacos.config.file-extension} #获取到值:nacos-autoconfig-service-dev.yml profiles: #开发环境dev,测试环境test,生产环境prod active: dev application: #配置应用的名称,用于获取配置 name: security-oauth2 main: allow-bean-definition-overriding: true cloud: nacos: discovery: # 服务注册地址 server-addr: ip:8848 config: #nacos配置中心地址 server-addr: ip:8848 #配置中心的命名空间id namespace: 9e50b6d9-6c3d-4e7a-b701-10f085e4b98d #配置分组,默认没有也可以 group: DEFAULT_GROUP #配置文件后缀,用于拼接配置配置文件名称,目前只支持yaml和properties file-extension: yaml #配置自动刷新 refresh-enabled: true #配置文件的前缀,默认是application.name的值,如果配了prefix,就取prefix的值 #prefix: nacos-autoconfig-service-${spring.profile.active} # 配置编码 encode: UTF-8 username: nacos password: nacos datasource: driver-class-name: com.mysql.cj.jdbc.Driver url: jdbc:mysql://ip:3306/oauth2?useUnicode=true&characterEncoding=UTF-8&serverTimezone=GMT%2b8 username: root password: ca0a997ee4770063 hikari: minimum-idle: 5 idle-timeout: 600000 maximum-pool-size: 10 auto-commit: true pool-name: MyHikariCP max-lifetime: 3000000 #连接最大存活时间,默认值30分钟.设置应该比mysql设置的超时时间短 connection-timeout: 30000 connection-test-query: SELECT 1 #连接测试查询 redis: host: ip database: 0 client-name: root password: ca0a997ee4770063 auth: jwt: keyPairName: jwt.jks keyPairAlias: jwt keyPairSecret: 123456 keyPairStoreSecret: 123456- 1
- 2
- 3
- 4
- 5
- 6
- 7
- 8
- 9
- 10
- 11
- 12
- 13
- 14
- 15
- 16
- 17
- 18
- 19
- 20
- 21
- 22
- 23
- 24
- 25
- 26
- 27
- 28
- 29
- 30
- 31
- 32
- 33
- 34
- 35
- 36
- 37
- 38
- 39
- 40
- 41
- 42
- 43
- 44
- 45
- 46
- 47
- 48
- 49
- 50
- 51
- 52
- 53
- 54
- 55
- 56
- 57
- 58
- 59
- 60
- 61
修改application.properties文件
server.port=8807- 1
创建一个空的config.properties文件
创建jwt.jks文件

# Keytool 是一个java提供的证书管理工具 # -alias:密钥的别名 # -keyalg:使用的hash算法 # -keypass:密钥的访问密码 # -keystore:密钥库文件名,jwt.jks -> 生成的证书 # -storepass:密钥库的访问密码 keytool -genkeypair -alias jwt -keyalg RSA -keypass 123456 -keystore jwt.jks -storepass 123456 # 查询证书 keytool -list -keystore jwt.jks- 1
- 2
- 3
- 4
- 5
- 6
- 7
- 8
- 9
- 10
- 11
把生成的文件复制到项目的resource目录下面


修改SpringCloudSecurityOauth2DemoApplication
代码如下(示例):
package com.example.springcloudsecurityoauth2demo; import org.springframework.boot.SpringApplication; import org.springframework.boot.autoconfigure.SpringBootApplication; import org.springframework.cloud.client.discovery.EnableDiscoveryClient; @EnableDiscoveryClient @SpringBootApplication public class SpringCloudSecurityOauth2DemoApplication { public static void main(String[] args) { SpringApplication.run(SpringCloudSecurityOauth2DemoApplication.class, args); } }- 1
- 2
- 3
- 4
- 5
- 6
- 7
- 8
- 9
- 10
- 11
- 12
- 13
- 14
- 15
- 16
创建数据库表结构
代码如下(示例):
#官方的sql: https://github.com/spring-projects/spring-security-oauth/blob/master/spring-security-oauth2/src/test/resources/schema.sql CREATE TABLE `clientdetails` ( `appId` varchar(128) NOT NULL, `resourceIds` varchar(255) DEFAULT NULL, `appSecret` varchar(255) DEFAULT NULL, `scope` varchar(255) DEFAULT NULL, `grantTypes` varchar(255) DEFAULT NULL, `redirectUrl` varchar(255) DEFAULT NULL, `authorities` varchar(255) DEFAULT NULL, `access_token_validity` int(11) DEFAULT NULL, `refresh_token_validity` int(11) DEFAULT NULL, `additionalInformation` varchar(4096) DEFAULT NULL, `autoApproveScopes` varchar(255) DEFAULT NULL, PRIMARY KEY (`appId`) ) ENGINE=InnoDB DEFAULT CHARSET=utf8; CREATE TABLE `oauth_access_token` ( `token_id` varchar(255) DEFAULT NULL, `token` blob, `authentication_id` varchar(128) NOT NULL, `user_name` varchar(255) DEFAULT NULL, `client_id` varchar(255) DEFAULT NULL, `authentication` blob, `refresh_token` varchar(255) DEFAULT NULL, PRIMARY KEY (`authentication_id`) ) ENGINE=InnoDB DEFAULT CHARSET=utf8; CREATE TABLE `oauth_approvals` ( `userId` varchar(255) DEFAULT NULL, `clientId` varchar(255) DEFAULT NULL, `scope` varchar(255) DEFAULT NULL, `status` varchar(10) DEFAULT NULL, `expiresAt` timestamp NULL DEFAULT NULL, `lastModifiedAt` timestamp NULL DEFAULT NULL ) ENGINE=InnoDB DEFAULT CHARSET=utf8; CREATE TABLE `oauth_client_details` ( `client_id` varchar(128) NOT NULL, `resource_ids` varchar(255) DEFAULT NULL, `client_secret` varchar(255) DEFAULT NULL, `scope` varchar(255) DEFAULT NULL, `authorized_grant_types` varchar(255) DEFAULT NULL, `web_server_redirect_uri` varchar(255) DEFAULT NULL, `authorities` varchar(255) DEFAULT NULL, `access_token_validity` int(11) DEFAULT NULL, `refresh_token_validity` int(11) DEFAULT NULL, `additional_information` varchar(4096) DEFAULT NULL, `autoapprove` varchar(255) DEFAULT NULL, PRIMARY KEY (`client_id`) ) ENGINE=InnoDB DEFAULT CHARSET=utf8; CREATE TABLE `oauth_client_token` ( `token_id` varchar(255) DEFAULT NULL, `token` blob, `authentication_id` varchar(128) NOT NULL, `user_name` varchar(255) DEFAULT NULL, `client_id` varchar(255) DEFAULT NULL, PRIMARY KEY (`authentication_id`) ) ENGINE=InnoDB DEFAULT CHARSET=utf8; CREATE TABLE `oauth_code` ( `code` varchar(255) DEFAULT NULL, `authentication` blob ) ENGINE=InnoDB DEFAULT CHARSET=utf8; CREATE TABLE `oauth_refresh_token` ( `token_id` varchar(255) DEFAULT NULL, `token` blob, `authentication` blob ) ENGINE=InnoDB DEFAULT CHARSET=utf8;- 1
- 2
- 3
- 4
- 5
- 6
- 7
- 8
- 9
- 10
- 11
- 12
- 13
- 14
- 15
- 16
- 17
- 18
- 19
- 20
- 21
- 22
- 23
- 24
- 25
- 26
- 27
- 28
- 29
- 30
- 31
- 32
- 33
- 34
- 35
- 36
- 37
- 38
- 39
- 40
- 41
- 42
- 43
- 44
- 45
- 46
- 47
- 48
- 49
- 50
- 51
- 52
- 53
- 54
- 55
- 56
- 57
- 58
- 59
- 60
- 61
- 62
- 63
- 64
- 65
- 66
- 67
- 68
- 69
- 70
- 71
- 72
插入语句
insert into `oauth_client_details` (`client_id`, `resource_ids`, `client_secret`, `scope`, `authorized_grant_types`, `web_server_redirect_uri`, `authorities`, `access_token_validity`, `refresh_token_validity`, `additional_information`, `autoapprove`) values('client','auth','$2a$10$dis6W.9y3lqGKHCM89WCa.XiE4zkGND63TdKzLtR/jnSJvTsoOcy.','All','authorization_code,password,refresh_token,implicit','http://localhost:8807/securityOauth2/getCodeByCallback',NULL,NULL,NULL,NULL,'true');- 1
如下图(示例):

创建AuthResourceServerConfig
代码如下(示例):
package com.example.springcloudsecurityoauth2demo.config; import org.springframework.context.annotation.Configuration; import org.springframework.security.config.annotation.web.builders.HttpSecurity; import org.springframework.security.oauth2.config.annotation.web.configuration.EnableResourceServer; import org.springframework.security.oauth2.config.annotation.web.configuration.ResourceServerConfigurerAdapter; /** * @Author: liaozhiwei * @Description: 资源服务配置 * @Date: Created in 18:19 2022/8/23 */ @Configuration @EnableResourceServer public class AuthResourceServerConfig extends ResourceServerConfigurerAdapter { @Override public void configure(HttpSecurity http) throws Exception { //利用RequestMatcher对象来进行路径匹配了,调用了antMatchers方法来定义什么样的请求可以放过,什么样的请求需要验证 http.authorizeRequests() .anyRequest().authenticated() .and().requestMatchers().antMatchers("/user/**"); } }- 1
- 2
- 3
- 4
- 5
- 6
- 7
- 8
- 9
- 10
- 11
- 12
- 13
- 14
- 15
- 16
- 17
- 18
- 19
- 20
- 21
- 22
- 23
- 24
- 25
创建AuthServerJdbcTokenStoreConfig.java
这个是基于DB模式配置授权服务器存储第三方客户端的信息,由于DB/Jwt/Redis三种方式选择其中一个进行存储,目前测试过可行,所以注释了
代码如下(示例):
//package com.example.springcloudsecurityoauth2demo.config; // //import com.example.springcloudsecurityoauth2demo.service.AppUserDetailsService; //import org.springframework.beans.factory.annotation.Autowired; //import org.springframework.context.annotation.Bean; //import org.springframework.context.annotation.Configuration; //import org.springframework.http.HttpMethod; //import org.springframework.security.authentication.AuthenticationManager; //import org.springframework.security.oauth2.config.annotation.configurers.ClientDetailsServiceConfigurer; //import org.springframework.security.oauth2.config.annotation.web.configuration.AuthorizationServerConfigurerAdapter; //import org.springframework.security.oauth2.config.annotation.web.configuration.EnableAuthorizationServer; //import org.springframework.security.oauth2.config.annotation.web.configurers.AuthorizationServerEndpointsConfigurer; //import org.springframework.security.oauth2.config.annotation.web.configurers.AuthorizationServerSecurityConfigurer; //import org.springframework.security.oauth2.provider.ClientDetailsService; //import org.springframework.security.oauth2.provider.client.JdbcClientDetailsService; //import org.springframework.security.oauth2.provider.token.TokenEnhancer; //import org.springframework.security.oauth2.provider.token.TokenEnhancerChain; //import org.springframework.security.oauth2.provider.token.store.JdbcTokenStore; //import org.springframework.security.oauth2.provider.token.store.JwtAccessTokenConverter; //import javax.sql.DataSource; //import java.util.ArrayList; //import java.util.List; // ///** // * @Author: liaozhiwei // * @Description: 第一种方式:基于DB模式配置授权服务器存储第三方客户端的信息 // * @Date: Created in 18:17 2022/8/23 // */ //@Configuration //@EnableAuthorizationServer //public class AuthServerJdbcTokenStoreConfig extends AuthorizationServerConfigurerAdapter { // // //第一种方式:使用密码模式需要配置(使用jdbc的方式) // @Autowired // private DataSource dataSource; // @Bean // public JdbcTokenStore jdbcTokenStore(){ // return new JdbcTokenStore(dataSource); // } // @Bean // public ClientDetailsService clientDetailsService(){ // return new JdbcClientDetailsService(dataSource); // } // // @Autowired // private JwtAccessTokenConverter jwtAccessTokenConverter; // // @Autowired // private AppUserDetailsService userDetailService; // // @Autowired // private AuthenticationManager authenticationManagerBean; // // @Autowired // private AuthTokenEnhancer authTokenEnhancer; // // /** // * @Description 第三方信息的存储 // **/ // @Override // public void configure(ClientDetailsServiceConfigurer clients) throws Exception { // /** // * 第一步 // *授权码模式(安全级别最高) // *http://localhost:8807/oauth/authorize?response_type=code&client_id=client&redirect_uri=http://www.baidu.com&scope=all // *或者 // *http://localhost:8807/oauth/authorize?response_type=code&client_id=client // *password模式 // *http://localhost:8807/oauth/token?username=liaozhiwei&password=123456&grant_type=password&client_id=client&client_secret=client_secret&scope=all // *刷新令牌 // *http://localhost:8080/oauth/token?grant_type=refresh_token&client_id=client&client_secret=client_secret&refresh_token=eyJhbGciOiJSUzI1NiIsInR5cCI6IkpXVCJ9.eyJ1c2VyX25hbWUiOiJsaWFvemhpd2VpIiwic2NvcGUiOlsiYWxsIl0sImF0aSI6IjJiYjg5NDY5LWIyNmYtNGQwNC05YTZjLTJjYmZkYjIzMDgyNyIsImV4cCI6MTY2MjE3ODkzMiwiYXV0aG9yaXRpZXMiOlsiYWRtaW4iXSwianRpIjoiNzBmOTc0NWItNGZmOS00ZTY5LThiOWMtNzY5ZGNkODc5NTcwIiwiY2xpZW50X2lkIjoiY2xpZW50In0.Uy6s5uIT2h_vv6DezssqzA1d7iNpqyfNReiAygmYrapPuc1Beyetoxbf3_zduD8BhZkKva7Qna_L9lFQKZuzzSx25RLgG07YzDZnuUPkCVYisxZ4bhmOuJYndKzrZmZBqmK2P9MQwLhasEgcpZoR5RJurV15fZOO5IvOI6xvgM0XkqalnEwYWf5e5JYLEEBqQqTpkEoP6wH3SSBsRFuH10l6qKqUXFd_nO37hO1p-d2uX-qMBTGPZ57xiaz97x5FLGxh2dbskmxyTnf-jAiTHlRdrfvIHDh312uW4iyENZpg8HEg3OjUHYc-7OY4U9UrHQx0YQbJ01SuKLCFEIx-aA // */ // /** // * 第二步 // * 获取access_token // * http://localhost:8807/oauth/token?grant_type=authorization_code&client_id=client&client_secret=client_secret&code=07Sn4f // */ // // 第三方信息的存储 基于jdbc // clients.withClientDetails(clientDetailsService()); // } // // @Override // public void configure(AuthorizationServerEndpointsConfigurer endpoints) { // //配置JWT的内容增强器 // TokenEnhancerChain enhancerChain = new TokenEnhancerChain(); // Listdelegates = new ArrayList<>(); // delegates.add(authTokenEnhancer); // delegates.add(jwtAccessTokenConverter); // enhancerChain.setTokenEnhancers(delegates); // // //第一种:使用密码模式需要配置(使用jdbc的方式) // endpoints.authenticationManager(authenticationManagerBean) // .reuseRefreshTokens(false) //refresh_token是否重复使用 // .userDetailsService(userDetailService) //刷新令牌授权包含对用户信息的检查 // .tokenStore(new JdbcTokenStore(dataSource)) //指定token存储策略是jwt,存储到mysql // .accessTokenConverter(jwtAccessTokenConverter) // .tokenEnhancer(enhancerChain) //配置tokenEnhancer // .allowedTokenEndpointRequestMethods(HttpMethod.GET,HttpMethod.POST,HttpMethod.DELETE,HttpMethod.PUT); //支持GET,POST请求,DELETE请求,PUT请求 // } // // /** // * 授权服务器安全配置 // * @param security // * @throws Exception // */ // @Override // public void configure(AuthorizationServerSecurityConfigurer security) { // //第三方客户端校验token需要带入 clientId 和clientSecret来校验 // security.checkTokenAccess("isAuthenticated()") // .tokenKeyAccess("isAuthenticated()");//来获取我们的tokenKey需要带入clientId,clientSecret // //允许表单认证 // security.allowFormAuthenticationForClients(); // } //} //- 1
- 2
- 3
- 4
- 5
- 6
- 7
- 8
- 9
- 10
- 11
- 12
- 13
- 14
- 15
- 16
- 17
- 18
- 19
- 20
- 21
- 22
- 23
- 24
- 25
- 26
- 27
- 28
- 29
- 30
- 31
- 32
- 33
- 34
- 35
- 36
- 37
- 38
- 39
- 40
- 41
- 42
- 43
- 44
- 45
- 46
- 47
- 48
- 49
- 50
- 51
- 52
- 53
- 54
- 55
- 56
- 57
- 58
- 59
- 60
- 61
- 62
- 63
- 64
- 65
- 66
- 67
- 68
- 69
- 70
- 71
- 72
- 73
- 74
- 75
- 76
- 77
- 78
- 79
- 80
- 81
- 82
- 83
- 84
- 85
- 86
- 87
- 88
- 89
- 90
- 91
- 92
- 93
- 94
- 95
- 96
- 97
- 98
- 99
- 100
- 101
- 102
- 103
- 104
- 105
- 106
- 107
- 108
- 109
- 110
- 111
- 112
- 113
- 114
- 115
- 116
创建AuthServerJwtTokenStoreConfig
这个是基于jwt.jks文件授权服务器存储第三方客户端的信息,由于DB/Jwt/Redis三种方式选择其中一个进行存储,目前测试过可行
代码如下(示例):
package com.example.springcloudsecurityoauth2demo.config; import com.example.springcloudsecurityoauth2demo.service.AppUserDetailsService; import org.springframework.beans.factory.annotation.Autowired; import org.springframework.beans.factory.annotation.Qualifier; import org.springframework.context.annotation.Configuration; import org.springframework.http.HttpMethod; import org.springframework.security.authentication.AuthenticationManager; import org.springframework.security.crypto.password.PasswordEncoder; import org.springframework.security.oauth2.config.annotation.configurers.ClientDetailsServiceConfigurer; import org.springframework.security.oauth2.config.annotation.web.configuration.AuthorizationServerConfigurerAdapter; import org.springframework.security.oauth2.config.annotation.web.configuration.EnableAuthorizationServer; import org.springframework.security.oauth2.config.annotation.web.configurers.AuthorizationServerEndpointsConfigurer; import org.springframework.security.oauth2.config.annotation.web.configurers.AuthorizationServerSecurityConfigurer; import org.springframework.security.oauth2.provider.token.TokenEnhancer; import org.springframework.security.oauth2.provider.token.TokenEnhancerChain; import org.springframework.security.oauth2.provider.token.TokenStore; import org.springframework.security.oauth2.provider.token.store.JwtAccessTokenConverter; import java.util.ArrayList; import java.util.List; /** * @Author: liaozhiwei * @Description: 第二种方式:基于jwt.jks文件授权服务器存储第三方客户端的信息 * @Date: Created in 18:17 2022/8/23 */ @Configuration @EnableAuthorizationServer public class AuthServerJwtTokenStoreConfig extends AuthorizationServerConfigurerAdapter { //第二种方式:使用密码模式需要配置(使用jwt文件的方式) @Autowired @Qualifier("jwtTokenStore") private TokenStore jwtTokenStore; @Autowired private JwtAccessTokenConverter jwtAccessTokenConverter; @Autowired private AppUserDetailsService userDetailService; @Autowired private AuthenticationManager authenticationManagerBean; @Autowired private AuthTokenEnhancer authTokenEnhancer; @Autowired private PasswordEncoder passwordEncoder; /** * @Description 第三方信息的存储 **/ @Override public void configure(ClientDetailsServiceConfigurer clients) throws Exception { /** * 第一种方式:授权码模式(安全级别最高)获取access_token * 第一步 * http://127.0.0.1:8807/oauth/authorize?response_type=code&client_id=client&redirect_uri=http://www.baidu.com&scope=all *或者 * http://127.0.0.1:8807/oauth/authorize?response_type=code&client_id=client * 第二步 * 获取access_token * http://127.0.0.1:8807/oauth/token?grant_type=authorization_code&client_id=client&client_secret=client_secret&code=JQFXW7 * 第二种方式:password模式获取access_token * http://127.0.0.1:8807/oauth/token?username=liaozhiwei&password=123456&grant_type=password&client_id=client&client_secret=client_secret&scope=all * 刷新令牌获取access_token *http://127.0.0.1:8807/oauth/token?grant_type=refresh_token&client_id=client&client_secret=client_secret&refresh_token= */ /** * 其他服务发起请求使用access_token进行授权 * http://127.0.0.1:8808/securityOauth2/getUserByTokenStore?access_token= * http://127.0.0.1:8808/securityOauth2/getUserByAuthentication?access_token= * http://127.0.0.1:8808/securityOauth2/getUserByRequest?access_token= * */ clients.inMemory() //配置client_id .withClient("client") //配置client-secret .secret(passwordEncoder.encode("client_secret")) //配置访问token的有效期 .accessTokenValiditySeconds(3600) //配置刷新token的有效期 .refreshTokenValiditySeconds(864000) //配置redirect_uri,用于授权成功后跳转,可以配置多个,例如:.redirectUris("http://localhost:8081/login","http://localhost:8082/login") .redirectUris("http://127.0.0.1:8807/securityOauth2/redirectUris") //自动授权配置 .autoApprove(true) //配置申请的权限范围 .scopes("all") /** * 配置grant_type,表示授权类型 * authorization_code: 授权码 * password: 密码 * client_credentials: 客户端 * refresh_token: 更新令牌 */ .authorizedGrantTypes("authorization_code","password","refresh_token"); } @Override public void configure(AuthorizationServerEndpointsConfigurer endpoints) throws Exception { //配置JWT的内容增强器 TokenEnhancerChain enhancerChain = new TokenEnhancerChain(); List<TokenEnhancer> delegates = new ArrayList<>(); delegates.add(authTokenEnhancer); delegates.add(jwtAccessTokenConverter); enhancerChain.setTokenEnhancers(delegates); //第二种:使用密码模式需要配置(使用jwt文件的方式) endpoints.authenticationManager(authenticationManagerBean) //使用密码模式需要配置 .reuseRefreshTokens(false) //refresh_token是否重复使用 .userDetailsService(userDetailService) //刷新令牌授权包含对用户信息的检查 .tokenStore(jwtTokenStore) //配置存储令牌策略(使用jwt文件存储的方式) .accessTokenConverter(jwtAccessTokenConverter) .tokenEnhancer(enhancerChain) //配置tokenEnhancer .allowedTokenEndpointRequestMethods(HttpMethod.GET,HttpMethod.POST,HttpMethod.DELETE,HttpMethod.PUT); //支持GET,POST请求,DELETE请求,PUT请求 } /** * 授权服务器安全配置 * @param security * @throws Exception */ @Override public void configure(AuthorizationServerSecurityConfigurer security) throws Exception { // 允许客户表单认证,不加的话/oauth/token无法访问 security.allowFormAuthenticationForClients() // 对于CheckEndpoint控制器[框架自带的校验]的/oauth/token端点允许所有客户端发送器请求而不会被Spring-security拦截 // 开启/oauth/token_key验证端口无权限访问 .tokenKeyAccess("permitAll()") // 要访问/oauth/check_token必须设置为permitAll(),但这样所有人都可以访问了,设为isAuthenticated()又导致访问不了,这个问题暂时没找到解决方案 // 开启/oauth/check_token验证端口认证权限访问 .checkTokenAccess("permitAll()") // //第三方客户端校验token需要带入 clientId 和clientSecret来校验 .checkTokenAccess("isAuthenticated()") .tokenKeyAccess("isAuthenticated()");//来获取我们的tokenKey需要带入clientId,clientSecret //允许客户表单认证,不加的话/oauth/token无法访问 security.allowFormAuthenticationForClients(); } }- 1
- 2
- 3
- 4
- 5
- 6
- 7
- 8
- 9
- 10
- 11
- 12
- 13
- 14
- 15
- 16
- 17
- 18
- 19
- 20
- 21
- 22
- 23
- 24
- 25
- 26
- 27
- 28
- 29
- 30
- 31
- 32
- 33
- 34
- 35
- 36
- 37
- 38
- 39
- 40
- 41
- 42
- 43
- 44
- 45
- 46
- 47
- 48
- 49
- 50
- 51
- 52
- 53
- 54
- 55
- 56
- 57
- 58
- 59
- 60
- 61
- 62
- 63
- 64
- 65
- 66
- 67
- 68
- 69
- 70
- 71
- 72
- 73
- 74
- 75
- 76
- 77
- 78
- 79
- 80
- 81
- 82
- 83
- 84
- 85
- 86
- 87
- 88
- 89
- 90
- 91
- 92
- 93
- 94
- 95
- 96
- 97
- 98
- 99
- 100
- 101
- 102
- 103
- 104
- 105
- 106
- 107
- 108
- 109
- 110
- 111
- 112
- 113
- 114
- 115
- 116
- 117
- 118
- 119
- 120
- 121
- 122
- 123
- 124
- 125
- 126
- 127
- 128
- 129
- 130
- 131
- 132
- 133
- 134
- 135
- 136
- 137
- 138
- 139
- 140
- 141
- 142
- 143
- 144
- 145
- 146
- 147
- 148
- 149
- 150
创建AuthServerRedisTokenStoreConfig.java
这个是基于Redis模式配置授权服务器存储第三方客户端的信息,由于DB/Jwt/Redis三种方式选择其中一个进行存储,目前测试过可行,所以注释掉了。
代码如下(示例)://package com.example.springcloudsecurityoauth2demo.config; // //import org.springframework.beans.factory.annotation.Qualifier; //import org.springframework.security.crypto.password.PasswordEncoder; //import org.springframework.security.oauth2.provider.token.TokenStore; //import com.example.springcloudsecurityoauth2demo.service.AppUserDetailsService; //import org.springframework.beans.factory.annotation.Autowired; //import org.springframework.context.annotation.Configuration; //import org.springframework.http.HttpMethod; //import org.springframework.security.authentication.AuthenticationManager; //import org.springframework.security.oauth2.config.annotation.configurers.ClientDetailsServiceConfigurer; //import org.springframework.security.oauth2.config.annotation.web.configuration.AuthorizationServerConfigurerAdapter; //import org.springframework.security.oauth2.config.annotation.web.configuration.EnableAuthorizationServer; //import org.springframework.security.oauth2.config.annotation.web.configurers.AuthorizationServerEndpointsConfigurer; //import org.springframework.security.oauth2.config.annotation.web.configurers.AuthorizationServerSecurityConfigurer; //import org.springframework.security.oauth2.provider.token.TokenEnhancer; //import org.springframework.security.oauth2.provider.token.TokenEnhancerChain; //import org.springframework.security.oauth2.provider.token.store.JwtAccessTokenConverter; //import java.util.ArrayList; //import java.util.List; // ///** // * @Author: liaozhiwei // * @Description: 第三种方式:基于Redis模式配置授权服务器存储第三方客户端的信息 // * @Date: Created in 18:17 2022/8/23 // */ //@Configuration //@EnableAuthorizationServer //public class AuthServerRedisTokenStoreConfig extends AuthorizationServerConfigurerAdapter { // // //使用密码模式需要配置(使用redis的方式) // @Autowired // @Qualifier("redisTokenStore") // private TokenStore redisTokenStore; // // @Autowired // private JwtAccessTokenConverter jwtAccessTokenConverter; // // @Autowired // private AppUserDetailsService userDetailService; // // @Autowired // private AuthenticationManager authenticationManagerBean; // // @Autowired // private AuthTokenEnhancer authTokenEnhancer; // // @Autowired // private PasswordEncoder passwordEncoder; // // /** // * @Description 第三方信息的存储 // **/ // @Override // public void configure(ClientDetailsServiceConfigurer clients) throws Exception { // /** // *授权码模式 // *http://localhost:8807/oauth/authorize?response_type=code&client_id=client&redirect_uri=http://www.baidu.com&scope=all // *或者 // *http://localhost:8807/oauth/authorize?response_type=code&client_id=client // *password模式 // *http://localhost:8807/oauth/token?username=liaozhiwei&password=123456&grant_type=password&client_id=client&client_secret=client-secret&scope=all // *刷新令牌 // *http://localhost:8080/oauth/token?grant_type=refresh_token&client_id=client&client_secret=client-secret&refresh_token=eyJhbGciOiJSUzI1NiIsInR5cCI6IkpXVCJ9.eyJ1c2VyX25hbWUiOiJsaWFvemhpd2VpIiwic2NvcGUiOlsiYWxsIl0sImF0aSI6IjJiYjg5NDY5LWIyNmYtNGQwNC05YTZjLTJjYmZkYjIzMDgyNyIsImV4cCI6MTY2MjE3ODkzMiwiYXV0aG9yaXRpZXMiOlsiYWRtaW4iXSwianRpIjoiNzBmOTc0NWItNGZmOS00ZTY5LThiOWMtNzY5ZGNkODc5NTcwIiwiY2xpZW50X2lkIjoiY2xpZW50In0.Uy6s5uIT2h_vv6DezssqzA1d7iNpqyfNReiAygmYrapPuc1Beyetoxbf3_zduD8BhZkKva7Qna_L9lFQKZuzzSx25RLgG07YzDZnuUPkCVYisxZ4bhmOuJYndKzrZmZBqmK2P9MQwLhasEgcpZoR5RJurV15fZOO5IvOI6xvgM0XkqalnEwYWf5e5JYLEEBqQqTpkEoP6wH3SSBsRFuH10l6qKqUXFd_nO37hO1p-d2uX-qMBTGPZ57xiaz97x5FLGxh2dbskmxyTnf-jAiTHlRdrfvIHDh312uW4iyENZpg8HEg3OjUHYc-7OY4U9UrHQx0YQbJ01SuKLCFEIx-aA // */ // // clients.inMemory() // //配置client_id // .withClient("client") // //配置client-secret // .secret(passwordEncoder.encode("client-secret")) // //配置访问token的有效期 // .accessTokenValiditySeconds(3600) // //配置刷新token的有效期 // .refreshTokenValiditySeconds(864000) // //配置redirect_uri,用于授权成功后跳转,可以配置多个,例如:.redirectUris("http://localhost:8081/login","http://localhost:8082/login") // .redirectUris("http://www.baidu.com") // //配置申请的权限范围 // .scopes("all") // //自动授权配置 // .autoApprove(true) // /** // * 配置grant_type,表示授权类型 // * authorization_code: 授权码 // * password: 密码 // * client_credentials: 客户端 // * refresh_token: 更新令牌 // * implicit:简化模式 // */ // .authorizedGrantTypes("authorization_code","password","refresh_token"); // } // // @Override // public void configure(AuthorizationServerEndpointsConfigurer endpoints) throws Exception { // //配置JWT的内容增强器 // TokenEnhancerChain enhancerChain = new TokenEnhancerChain(); // Listdelegates = new ArrayList<>(); // delegates.add(authTokenEnhancer); // delegates.add(jwtAccessTokenConverter); // enhancerChain.setTokenEnhancers(delegates); // // //使用密码模式需要配置(使用redis的方式) // endpoints.authenticationManager(authenticationManagerBean) //使用密码模式需要配置 // .reuseRefreshTokens(false) //refresh_token是否重复使用 // .userDetailsService(userDetailService) //刷新令牌授权包含对用户信息的检查 // .tokenStore(redisTokenStore) //指定token存储到redis // .accessTokenConverter(jwtAccessTokenConverter) // .allowedTokenEndpointRequestMethods(HttpMethod.GET,HttpMethod.POST,HttpMethod.DELETE,HttpMethod.PUT); //支持GET,POST请求,DELETE请求,PUT请求 // } // // /** // * 授权服务器安全配置 // * @param security // * @throws Exception // */ // @Override // public void configure(AuthorizationServerSecurityConfigurer security) throws Exception { // //第三方客户端校验token需要带入 clientId 和clientSecret来校验 // security.checkTokenAccess("isAuthenticated()") // .tokenKeyAccess("isAuthenticated()");//来获取我们的tokenKey需要带入clientId,clientSecret // //允许表单认证 // security.allowFormAuthenticationForClients(); // } // // //} //- 1
- 2
- 3
- 4
- 5
- 6
- 7
- 8
- 9
- 10
- 11
- 12
- 13
- 14
- 15
- 16
- 17
- 18
- 19
- 20
- 21
- 22
- 23
- 24
- 25
- 26
- 27
- 28
- 29
- 30
- 31
- 32
- 33
- 34
- 35
- 36
- 37
- 38
- 39
- 40
- 41
- 42
- 43
- 44
- 45
- 46
- 47
- 48
- 49
- 50
- 51
- 52
- 53
- 54
- 55
- 56
- 57
- 58
- 59
- 60
- 61
- 62
- 63
- 64
- 65
- 66
- 67
- 68
- 69
- 70
- 71
- 72
- 73
- 74
- 75
- 76
- 77
- 78
- 79
- 80
- 81
- 82
- 83
- 84
- 85
- 86
- 87
- 88
- 89
- 90
- 91
- 92
- 93
- 94
- 95
- 96
- 97
- 98
- 99
- 100
- 101
- 102
- 103
- 104
- 105
- 106
- 107
- 108
- 109
- 110
- 111
- 112
- 113
- 114
- 115
- 116
- 117
- 118
- 119
- 120
- 121
- 122
- 123
- 124
- 125
- 126
- 127
- 128
创建AuthTokenEnhancer
代码如下(示例):
package com.example.springcloudsecurityoauth2demo.config; import org.springframework.security.core.userdetails.UserDetails; import org.springframework.security.oauth2.common.DefaultOAuth2AccessToken; import org.springframework.security.oauth2.common.OAuth2AccessToken; import org.springframework.security.oauth2.provider.OAuth2Authentication; import org.springframework.security.oauth2.provider.token.TokenEnhancer; import java.util.HashMap; import java.util.Map; /** * @Author: liaozhiwei * @Description: TODO * @Date: Created in 18:20 2022/8/23 */ public class AuthTokenEnhancer implements TokenEnhancer { @Override public OAuth2AccessToken enhance(OAuth2AccessToken accessToken, OAuth2Authentication authentication) { UserDetails userinfoDetails = (UserDetails) authentication.getPrincipal(); final Map<String, Object> additionalInfo = new HashMap<>(); final Map<String, Object> retMap = new HashMap<>(); //todo 这里暴露userId到Jwt的令牌中,后期可以根据自己的业务需要 进行添加字段 additionalInfo.put("userName",userinfoDetails.getUsername()); retMap.put("additionalInfo",additionalInfo); ((DefaultOAuth2AccessToken) accessToken).setAdditionalInformation(retMap); return accessToken; } }- 1
- 2
- 3
- 4
- 5
- 6
- 7
- 8
- 9
- 10
- 11
- 12
- 13
- 14
- 15
- 16
- 17
- 18
- 19
- 20
- 21
- 22
- 23
- 24
- 25
- 26
- 27
- 28
- 29
- 30
- 31
创建JwtTokenStoreConfig
代码如下(示例):
package com.example.springcloudsecurityoauth2demo.config; import com.example.springcloudsecurityoauth2demo.properties.JwtCAProperties; import org.springframework.beans.factory.annotation.Autowired; import org.springframework.boot.context.properties.EnableConfigurationProperties; import org.springframework.context.annotation.Bean; import org.springframework.context.annotation.Configuration; import org.springframework.core.io.ClassPathResource; import org.springframework.security.oauth2.provider.token.store.JwtAccessTokenConverter; import org.springframework.security.rsa.crypto.KeyStoreKeyFactory; import java.security.KeyPair; import org.springframework.security.oauth2.provider.token.TokenStore; import org.springframework.security.oauth2.provider.token.store.JwtTokenStore; /** * @Author: liaozhiwei * @Description: jwt.jks文件形式存储 * @Date: Created in 19:09 2022/8/23 */ @Configuration @EnableConfigurationProperties(value = JwtCAProperties.class) public class JwtTokenStoreConfig { //第二种方式:使用jwt文件的方式 @Bean public TokenStore jwtTokenStore(){ return new JwtTokenStore(jwtAccessTokenConverter()); } @Bean public AuthTokenEnhancer authTokenEnhancer() { return new AuthTokenEnhancer(); } @Autowired private JwtCAProperties jwtCAProperties; @Bean public KeyPair keyPair() { KeyStoreKeyFactory keyStoreKeyFactory = new KeyStoreKeyFactory( new ClassPathResource(jwtCAProperties.getKeyPairName()), jwtCAProperties.getKeyPairSecret().toCharArray()); return keyStoreKeyFactory.getKeyPair(jwtCAProperties.getKeyPairAlias(), jwtCAProperties.getKeyPairStoreSecret().toCharArray()); } @Bean public JwtAccessTokenConverter jwtAccessTokenConverter(){ JwtAccessTokenConverter accessTokenConverter = new JwtAccessTokenConverter(); //配置JWT使用的秘钥 非对称加密 accessTokenConverter.setKeyPair(keyPair()); return accessTokenConverter; } }- 1
- 2
- 3
- 4
- 5
- 6
- 7
- 8
- 9
- 10
- 11
- 12
- 13
- 14
- 15
- 16
- 17
- 18
- 19
- 20
- 21
- 22
- 23
- 24
- 25
- 26
- 27
- 28
- 29
- 30
- 31
- 32
- 33
- 34
- 35
- 36
- 37
- 38
- 39
- 40
- 41
- 42
- 43
- 44
- 45
- 46
- 47
- 48
- 49
- 50
- 51
- 52
- 53
- 54
- 55
- 56
- 57
- 58
创建RedisStoreConfig
代码如下(示例):
package com.example.springcloudsecurityoauth2demo.config; import org.springframework.beans.factory.annotation.Autowired; import org.springframework.context.annotation.Configuration; import org.springframework.data.redis.connection.RedisConnectionFactory; import org.springframework.context.annotation.Bean; import org.springframework.security.oauth2.provider.token.TokenStore; import org.springframework.security.oauth2.provider.token.store.redis.RedisTokenStore; /** * @Author: liaozhiwei * @Description: 第三种方式:redis存储 * @Date: Created in 19:09 2022/8/23 */ @Configuration public class RedisStoreConfig { @Autowired private RedisConnectionFactory redisConnectionFactory; //第三种:使用密码模式需要配置(使用redis的方式) // @Bean // public TokenStore redisTokenStore(){ // // access_token // return new RedisTokenStore(redisConnectionFactory); // } }- 1
- 2
- 3
- 4
- 5
- 6
- 7
- 8
- 9
- 10
- 11
- 12
- 13
- 14
- 15
- 16
- 17
- 18
- 19
- 20
- 21
- 22
- 23
- 24
- 25
- 26
- 27
- 28
创建WebSecurityConfig
代码如下(示例):
package com.example.springcloudsecurityoauth2demo.config; //import com.example.springcloudsecurityoauth2demo.filter.JWTAuthenticationEntryPoint; //import com.example.springcloudsecurityoauth2demo.filter.JWTAuthenticationFilter; //import com.example.springcloudsecurityoauth2demo.filter.JWTAuthorizationFilter; import com.example.springcloudsecurityoauth2demo.service.AppUserDetailsService; import org.springframework.beans.factory.annotation.Autowired; import org.springframework.context.annotation.Bean; import org.springframework.context.annotation.Configuration; import org.springframework.security.authentication.AuthenticationManager; import org.springframework.security.config.annotation.authentication.builders.AuthenticationManagerBuilder; import org.springframework.security.config.annotation.web.builders.HttpSecurity; import org.springframework.security.config.annotation.web.configuration.EnableWebSecurity; import org.springframework.security.config.annotation.web.configuration.WebSecurityConfigurerAdapter; import org.springframework.security.config.http.SessionCreationPolicy; import org.springframework.security.crypto.bcrypt.BCryptPasswordEncoder; import org.springframework.security.crypto.password.PasswordEncoder; import org.springframework.web.cors.CorsConfiguration; import org.springframework.web.cors.CorsConfigurationSource; import org.springframework.web.cors.UrlBasedCorsConfigurationSource; /** * @Author: liaozhiwei * @Description: 配置SpringSecurity,“将Spring Security与Spring Gateway一起使用时出现无法访问javax.servlet.Filter”错误”, * * 把Spring Gateway和Spring Security放在一起,因为我想保护我的网关。但是在实现了以下扩展WebSecurityConfigurerAdapter的类之后, * * 项目抛出java:无法访问javax.servlet.Filter * * 从Spring Cloud Gateway文档中:Spring Cloud Gateway需要Spring Boot和Spring Webflux提供的Netty运行时。 * * 它不能在传统的Servlet容器中工作,也不能在构建为WAR时工作。扩展WebSecurityConfigurerAdapter是为了基于servlet的应用程序 * @Date: Created in 18:11 2022/8/23 */ @EnableWebSecurity @Configuration public class WebSecurityConfig extends WebSecurityConfigurerAdapter { @Autowired private AppUserDetailsService userDetailService; @Override protected void configure(AuthenticationManagerBuilder auth) throws Exception { auth.userDetailsService(userDetailService); } @Bean @Override public AuthenticationManager authenticationManagerBean() throws Exception { // oauth2 密码模式需要拿到这个bean return super.authenticationManagerBean(); } /** * @Description 密码模式 * @MethodReturnType org.springframework.security.crypto.password.PasswordEncoder * @Author zhiwei Liao * @Date 2021/8/17 15:46 **/ @Bean public PasswordEncoder passwordEncoder() { return new BCryptPasswordEncoder(); } @Override protected void configure(HttpSecurity http) throws Exception { //第一种方式 http.formLogin().permitAll() .and().authorizeRequests() .antMatchers("/oauth/**").permitAll()//不拦截 .anyRequest() .authenticated() .and().logout().permitAll()//退出放行 .and().csrf().disable();//关闭CSRF保护 //第二种方式 /* http.cors() .and().authorizeRequests() .antMatchers("/user/**").hasRole("admin") .anyRequest().permitAll() // 添加JWT登录拦截器 .and().addFilter(new JWTAuthenticationFilter(authenticationManager())) // 添加JWT鉴权拦截器 .addFilter(new JWTAuthorizationFilter(authenticationManager())) // 设置Session的创建策略为:Spring Security不创建HttpSession .sessionManagement().sessionCreationPolicy(SessionCreationPolicy.STATELESS) // 匿名用户访问无权限资源时的异常处理 .and().exceptionHandling().authenticationEntryPoint(new JWTAuthenticationEntryPoint()) .and().csrf().disable();//关闭CSRF保护*/ } @Bean CorsConfigurationSource corsConfigurationSource(){ final UrlBasedCorsConfigurationSource source = new UrlBasedCorsConfigurationSource(); // 注册跨域配置 source.registerCorsConfiguration("/**", new CorsConfiguration().applyPermitDefaultValues()); return source; } }- 1
- 2
- 3
- 4
- 5
- 6
- 7
- 8
- 9
- 10
- 11
- 12
- 13
- 14
- 15
- 16
- 17
- 18
- 19
- 20
- 21
- 22
- 23
- 24
- 25
- 26
- 27
- 28
- 29
- 30
- 31
- 32
- 33
- 34
- 35
- 36
- 37
- 38
- 39
- 40
- 41
- 42
- 43
- 44
- 45
- 46
- 47
- 48
- 49
- 50
- 51
- 52
- 53
- 54
- 55
- 56
- 57
- 58
- 59
- 60
- 61
- 62
- 63
- 64
- 65
- 66
- 67
- 68
- 69
- 70
- 71
- 72
- 73
- 74
- 75
- 76
- 77
- 78
- 79
- 80
- 81
- 82
- 83
- 84
- 85
- 86
- 87
- 88
- 89
- 90
- 91
- 92
- 93
- 94
- 95
- 96
- 97
创建SecurityOauth2Controller
代码如下(示例):
package com.example.springcloudsecurityoauth2demo.controller; import io.jsonwebtoken.Jwts; import org.springframework.beans.factory.annotation.Autowired; import org.springframework.security.core.Authentication; import org.springframework.security.oauth2.provider.OAuth2Authentication; import org.springframework.security.oauth2.provider.token.TokenStore; import org.springframework.web.bind.annotation.GetMapping; import org.springframework.web.bind.annotation.RequestMapping; import org.springframework.web.bind.annotation.RequestParam; import org.springframework.web.bind.annotation.RestController; import javax.servlet.http.HttpServletRequest; import java.nio.charset.StandardCharsets; /** * @Author: liaozhiwei * @Description: 获取当前登录用户信息 * @Date: Created in 09:24 2022/8/24 */ @RestController @RequestMapping("/securityOauth2") public class SecurityOauth2Controller { /** * 根据重定向的返回地址获取授权码 * @return */ @RequestMapping("/getCodeByCallback") public Object getCodeByCallback() { return "这是一个回调方法(授权码模式:A网站提供一个链接,用户点击后就会跳转到B网站,用户跳转后,B网站会要求用户登录,然后询问是否同意给予A网站授权,用户表示同意,这时B网站就会跳回redirect_uri参数指定的网址,也就是当前这个接口,跳转时,会传回一个授权码"; } /** * 回调方法 * @return */ @RequestMapping("/redirectUris") public Object redirectUris(HttpServletRequest request) { return "这是一个回调方法,第三方应用授权登录之后,回调到这里,我们可以进行自己系统登录业务,将用户的登录信息录入"; } @Autowired private TokenStore tokenService; /** * 获取当前登录用户信息 * @param token * @return */ @RequestMapping("/getUserByTokenStore") public Object getUserByTokenStore(@RequestParam("access_token") String token) { OAuth2Authentication oAuth2Authentication = tokenService.readAuthentication(token); return oAuth2Authentication.getUserAuthentication().getPrincipal(); } /** * 获取当前登录用户信息 * @param request * @return */ @GetMapping("/getUserByRequest") public Object getUserByRequest(HttpServletRequest request) { String header = request.getHeader("Authorization"); String token; if(header!=null){ token = header.substring(header.indexOf("bearer") + 7); }else { token = request.getParameter("access_token"); } return Jwts.parser() .setSigningKey("123123".getBytes(StandardCharsets.UTF_8)) .parseClaimsJws(token) .getBody(); } }- 1
- 2
- 3
- 4
- 5
- 6
- 7
- 8
- 9
- 10
- 11
- 12
- 13
- 14
- 15
- 16
- 17
- 18
- 19
- 20
- 21
- 22
- 23
- 24
- 25
- 26
- 27
- 28
- 29
- 30
- 31
- 32
- 33
- 34
- 35
- 36
- 37
- 38
- 39
- 40
- 41
- 42
- 43
- 44
- 45
- 46
- 47
- 48
- 49
- 50
- 51
- 52
- 53
- 54
- 55
- 56
- 57
- 58
- 59
- 60
- 61
- 62
- 63
- 64
- 65
- 66
- 67
- 68
- 69
- 70
- 71
- 72
- 73
- 74
- 75
- 76
- 77
- 78
- 79
- 80
- 81
创建AppUserinfoEntity
代码如下(示例):
package com.example.springcloudsecurityoauth2demo.entity; import lombok.Getter; import lombok.Setter; /** * @Author: liaozhiwei * @Description: 用户的实体类 * @Date: Created in 18:24 2022/8/23 */ @Setter @Getter public class AppUserinfoEntity { private String userId; private String userName; private String userStatus; private String credential; }- 1
- 2
- 3
- 4
- 5
- 6
- 7
- 8
- 9
- 10
- 11
- 12
- 13
- 14
- 15
- 16
- 17
- 18
- 19
- 20
- 21
- 22
- 23
创建ResultData
代码如下(示例):
package com.example.springcloudsecurityoauth2demo.entity.base; /** * @Author: liaozhiwei * @Description: TODO * @Date: Created in 18:34 2022/8/23 */ import lombok.Data; import lombok.NoArgsConstructor; import java.io.Serializable; @Data @NoArgsConstructor public class ResultData<T> implements Serializable { /** * 状态码 */ public boolean status = true; /** * 状态码 */ private Integer code = 200; /** * 接口返回信息 */ private String msg; /** * 数据对象 */ private T data; /** * 初始化一个新创建的 ResultData 对象 * * @param status 状态码 * @param msg 返回内容 */ public ResultData(Boolean status, String msg) { this.status = status; this.msg = msg; } /** * 初始化一个新创建的 ResultData 对象 * * @param status 状态码 * @param msg 返回内容 * @param data 数据对象 */ public ResultData(Boolean status, String msg, T data, Integer code) { this.status = status; this.msg = msg; this.data = data; this.code = code; } public ResultData(T data) { this.data = data; } /** * 返回成功消息 * * @param msg 返回内容 * @param data 数据对象 * @return 成功消息 */ public static <T> ResultData<T> success(String msg, T data) { return new ResultData<T>(true, msg, data, 200); } /** * 返回成功消息 * * @param msg 返回内容 * @return 成功消息 */ public static <T> ResultData<T> success(String msg) { return ResultData.success(msg, null); } /** * 返回成功消息 * * @return 成功消息 */ public static <T> ResultData<T> success() { return ResultData.success(null); } /** * 返回成功数据 * * @return 成功消息 */ public static <T> ResultData<T> success(T data) { return ResultData.success(null, data); } /** * 返回错误消息 * * @return */ public static <T> ResultData<T> error() { return ResultData.error(null); } /** * 返回错误消息 * * @param msg 返回内容 * @return 警告消息 */ public static <T> ResultData<T> error(String msg) { return ResultData.error(msg, null); } /** * 返回错误消息 * * @param code 状态码 * @param msg 返回内容 * @return 警告消息 */ public static <T> ResultData<T> error(Integer code, String msg) { return new ResultData<T>(false, msg, null, code); } /** * 返回错误消息 * * @param msg 返回内容 * @param data 数据对象 * @return 警告消息 */ public static <T> ResultData<T> error(String msg, T data) { return new ResultData<T>(false, msg, data, 500); } }- 1
- 2
- 3
- 4
- 5
- 6
- 7
- 8
- 9
- 10
- 11
- 12
- 13
- 14
- 15
- 16
- 17
- 18
- 19
- 20
- 21
- 22
- 23
- 24
- 25
- 26
- 27
- 28
- 29
- 30
- 31
- 32
- 33
- 34
- 35
- 36
- 37
- 38
- 39
- 40
- 41
- 42
- 43
- 44
- 45
- 46
- 47
- 48
- 49
- 50
- 51
- 52
- 53
- 54
- 55
- 56
- 57
- 58
- 59
- 60
- 61
- 62
- 63
- 64
- 65
- 66
- 67
- 68
- 69
- 70
- 71
- 72
- 73
- 74
- 75
- 76
- 77
- 78
- 79
- 80
- 81
- 82
- 83
- 84
- 85
- 86
- 87
- 88
- 89
- 90
- 91
- 92
- 93
- 94
- 95
- 96
- 97
- 98
- 99
- 100
- 101
- 102
- 103
- 104
- 105
- 106
- 107
- 108
- 109
- 110
- 111
- 112
- 113
- 114
- 115
- 116
- 117
- 118
- 119
- 120
- 121
- 122
- 123
- 124
- 125
- 126
- 127
- 128
- 129
- 130
- 131
- 132
- 133
- 134
- 135
- 136
- 137
- 138
- 139
- 140
- 141
- 142
- 143
- 144
- 145
- 146
- 147
- 148
- 149
创建UserInfoFeignService
代码如下(示例):
package com.example.springcloudsecurityoauth2demo.fegin; import com.example.springcloudsecurityoauth2demo.entity.AppUserinfoEntity; import com.example.springcloudsecurityoauth2demo.entity.base.ResultData; import com.example.springcloudsecurityoauth2demo.hystrix.UserServiceHystrix; import org.springframework.cloud.openfeign.FeignClient; import org.springframework.stereotype.Component; import org.springframework.web.bind.annotation.GetMapping; import org.springframework.web.bind.annotation.RequestParam; /** * @Author: liaozhiwei * @Description: TODO 远程调用用户模块的接口获取用户信息,这里就不写用户模块了 * @Date: Created in 18:33 2022/8/23 */ @Component @FeignClient(name = "user", fallback = UserServiceHystrix.class, path = "/user") public interface UserInfoFeignService { @GetMapping("/getUserinfoById") ResultData<AppUserinfoEntity> getUserinfoById(@RequestParam("userId") String userId); @GetMapping("/getUserByUserName") ResultData<AppUserinfoEntity> getUserByUserName(@RequestParam("username") String username); }- 1
- 2
- 3
- 4
- 5
- 6
- 7
- 8
- 9
- 10
- 11
- 12
- 13
- 14
- 15
- 16
- 17
- 18
- 19
- 20
- 21
- 22
- 23
- 24
- 25
- 26
- 27
创建JWTAuthenticationEntryPoint.java
代码如下(示例):
//package com.example.springcloudsecurityoauth2demo.filter; // //import com.alibaba.fastjson.JSON; //import org.springframework.security.core.AuthenticationException; //import org.springframework.security.web.AuthenticationEntryPoint; //import javax.servlet.ServletException; //import javax.servlet.http.HttpServletRequest; //import javax.servlet.http.HttpServletResponse; //import java.io.IOException; // // ///** // * @Author: liaozhiwei // * @Description: 匿名用户访问资源时无权限的处理 // * @Date: Created in 11:13 2022/8/24 // */ // //public class JWTAuthenticationEntryPoint implements AuthenticationEntryPoint { // // @Override // public void commence(HttpServletRequest request, HttpServletResponse response, // AuthenticationException authException) throws IOException, ServletException { // response.setCharacterEncoding("utf-8"); // response.setContentType("text/javascript;charset=utf-8"); // response.getWriter().print(JSON.toJSONString("未登录,没有访问权限")); // } //}- 1
- 2
- 3
- 4
- 5
- 6
- 7
- 8
- 9
- 10
- 11
- 12
- 13
- 14
- 15
- 16
- 17
- 18
- 19
- 20
- 21
- 22
- 23
- 24
- 25
- 26
- 27
- 28
创建JWTAuthenticationFilter.java
代码如下(示例):
//package com.example.springcloudsecurityoauth2demo.filter; // //import com.alibaba.fastjson.JSON; //import com.example.springcloudsecurityoauth2demo.utils.JwtTokenUtil; //import org.springframework.security.authentication.*; //import org.springframework.security.core.Authentication; //import org.springframework.security.core.AuthenticationException; //import org.springframework.security.core.GrantedAuthority; //import org.springframework.security.core.userdetails.User; //import org.springframework.security.web.authentication.UsernamePasswordAuthenticationFilter; //import javax.servlet.FilterChain; //import javax.servlet.ServletException; //import javax.servlet.http.HttpServletRequest; //import javax.servlet.http.HttpServletResponse; //import java.io.IOException; //import java.util.Collection; // ///** // * @Author: liaozhiwei // * @Description: TODO // * @Date: Created in 16:13 2022/8/24 // */ // //public class JWTAuthenticationFilter extends UsernamePasswordAuthenticationFilter { // // private AuthenticationManager authenticationManager; // // public JWTAuthenticationFilter(AuthenticationManager authenticationManager) { // this.authenticationManager = authenticationManager; // } // // @Override // public Authentication attemptAuthentication(HttpServletRequest request, HttpServletResponse response) throws AuthenticationException { // UsernamePasswordAuthenticationToken token = new UsernamePasswordAuthenticationToken( // request.getParameter("username"), request.getParameter("password")); // return authenticationManager.authenticate(token); // } // // @Override // protected void successfulAuthentication(HttpServletRequest request, HttpServletResponse response, FilterChain chain, Authentication authResult) throws IOException, ServletException { // User user = (User) authResult.getPrincipal(); // // 从User中获取权限信息 // Collection authorities = user.getAuthorities(); // // 创建Token // String token = JwtTokenUtil.createToken(user.getUsername(), authorities.toString()); // response.setCharacterEncoding("UTF-8"); // response.setContentType("application/json; charset=utf-8"); // // 在请求头里返回创建成功的token // // 设置请求头为带有"Bearer "前缀的token字符串 // response.setHeader("token", JwtTokenUtil.TOKEN_PREFIX + token); // response.setContentType("text/json;charset=utf-8"); // response.getWriter().write(JSON.toJSONString("登录成功")); // } // // @Override // protected void unsuccessfulAuthentication(HttpServletRequest request, HttpServletResponse response, AuthenticationException failed) throws IOException, ServletException { // String returnData=""; // if (failed instanceof AccountExpiredException) { // returnData="账号过期"; // }else if (failed instanceof BadCredentialsException) { // returnData="密码错误"; // }else if (failed instanceof CredentialsExpiredException) { // returnData="密码过期"; // }else if (failed instanceof DisabledException) { // returnData="账号不可用"; // }else if (failed instanceof LockedException) { // returnData="账号锁定"; // }else if (failed instanceof InternalAuthenticationServiceException) { // returnData="用户不存在"; // }else{ // returnData="未知异常"; // } // // response.setContentType("text/json;charset=utf-8"); // response.getWriter().write(JSON.toJSONString(returnData)); // } //}- 1
- 2
- 3
- 4
- 5
- 6
- 7
- 8
- 9
- 10
- 11
- 12
- 13
- 14
- 15
- 16
- 17
- 18
- 19
- 20
- 21
- 22
- 23
- 24
- 25
- 26
- 27
- 28
- 29
- 30
- 31
- 32
- 33
- 34
- 35
- 36
- 37
- 38
- 39
- 40
- 41
- 42
- 43
- 44
- 45
- 46
- 47
- 48
- 49
- 50
- 51
- 52
- 53
- 54
- 55
- 56
- 57
- 58
- 59
- 60
- 61
- 62
- 63
- 64
- 65
- 66
- 67
- 68
- 69
- 70
- 71
- 72
- 73
- 74
- 75
- 76
- 77
- 78
创建JWTAuthorizationFilter.java
代码如下(示例):
//package com.example.springcloudsecurityoauth2demo.filter; // //import com.example.springcloudsecurityoauth2demo.utils.JwtTokenUtil; //import org.apache.commons.lang3.StringUtils; //import org.springframework.security.authentication.AuthenticationManager; //import org.springframework.security.authentication.UsernamePasswordAuthenticationToken; //import org.springframework.security.core.authority.SimpleGrantedAuthority; //import org.springframework.security.core.context.SecurityContextHolder; //import org.springframework.security.web.authentication.www.BasicAuthenticationFilter; //import javax.servlet.FilterChain; //import javax.servlet.ServletException; //import javax.servlet.http.HttpServletRequest; //import javax.servlet.http.HttpServletResponse; //import java.io.IOException; //import java.util.ArrayList; //import java.util.Collection; // ///** // * @Author: liaozhiwei // * @Description: TODO // * @Date: Created in 16:13 2022/8/24 // */ // //public class JWTAuthorizationFilter extends BasicAuthenticationFilter { // // // public JWTAuthorizationFilter(AuthenticationManager authenticationManager) { // super(authenticationManager); // } // // @Override // protected void doFilterInternal(HttpServletRequest request, HttpServletResponse response, FilterChain filterChain) throws ServletException, IOException { // String tokenHeader = request.getHeader(JwtTokenUtil.TOKEN_HEADER); // // 若请求头中没有Authorization信息 或是Authorization不以Bearer开头 则直接放行 // if (tokenHeader == null || !tokenHeader.startsWith(JwtTokenUtil.TOKEN_PREFIX)){ // filterChain.doFilter(request, response); // return; // } // // 若请求头中有token 则调用下面的方法进行解析 并设置认证信息 // SecurityContextHolder.getContext().setAuthentication(getAuthentication(tokenHeader)); // super.doFilterInternal(request, response, filterChain); // } // // /* // * 从token中获取用户信息并新建一个token // * @param tokenHeader 字符串形式的Token请求头 // * @return 带用户名和密码以及权限的Authentication // */ // private UsernamePasswordAuthenticationToken getAuthentication(String tokenHeader) { // // 去掉前缀 获取Token字符串 // String token = tokenHeader.replace(JwtTokenUtil.TOKEN_PREFIX, ""); // // 从Token中解密获取用户名 // String username = JwtTokenUtil.getUsername(token); // // 从Token中解密获取用户角色 // String role = JwtTokenUtil.getUserRole(token); // // 将[ROLE_XXX,ROLE_YYY]格式的角色字符串转换为数组 // String[] roles = StringUtils.strip(role, "[]").split(", "); // Collectionauthorities=new ArrayList<>(); // for (String s:roles) // { // authorities.add(new SimpleGrantedAuthority(s)); // } // if (username != null) // { // return new UsernamePasswordAuthenticationToken(username, null,authorities); // } // return null; // } //}- 1
- 2
- 3
- 4
- 5
- 6
- 7
- 8
- 9
- 10
- 11
- 12
- 13
- 14
- 15
- 16
- 17
- 18
- 19
- 20
- 21
- 22
- 23
- 24
- 25
- 26
- 27
- 28
- 29
- 30
- 31
- 32
- 33
- 34
- 35
- 36
- 37
- 38
- 39
- 40
- 41
- 42
- 43
- 44
- 45
- 46
- 47
- 48
- 49
- 50
- 51
- 52
- 53
- 54
- 55
- 56
- 57
- 58
- 59
- 60
- 61
- 62
- 63
- 64
- 65
- 66
- 67
- 68
- 69
- 70
创建UserServiceHystrix
代码如下(示例):
package com.example.springcloudsecurityoauth2demo.hystrix; /** * @Author: liaozhiwei * @Description: TODO * @Date: Created in 18:37 2022/8/23 */ import com.example.springcloudsecurityoauth2demo.entity.AppUserinfoEntity; import com.example.springcloudsecurityoauth2demo.entity.base.ResultData; import com.example.springcloudsecurityoauth2demo.fegin.UserInfoFeignService; import org.springframework.stereotype.Component; /** * @author zhiwei Liao * @version 1.0 * @Description * @Date 2021/8/17 15:25 */ @Component public class UserServiceHystrix implements UserInfoFeignService { @Override public ResultData<AppUserinfoEntity> getUserinfoById(String userId) { return null; } @Override public ResultData<AppUserinfoEntity> getUserByUserName(String username) { return null; } }- 1
- 2
- 3
- 4
- 5
- 6
- 7
- 8
- 9
- 10
- 11
- 12
- 13
- 14
- 15
- 16
- 17
- 18
- 19
- 20
- 21
- 22
- 23
- 24
- 25
- 26
- 27
- 28
- 29
- 30
- 31
- 32
- 33
- 34
- 35
创建JwtCAProperties
代码如下(示例):
package com.example.springcloudsecurityoauth2demo.properties; import lombok.Data; import org.springframework.boot.context.properties.ConfigurationProperties; /** * @Author: liaozhiwei * @Description: 读取配置文件中的属性配置 * @Date: Created in 19:10 2022/8/23 */ @Data @ConfigurationProperties(prefix = "auth.jwt") public class JwtCAProperties { /** * 证书名称 */ private String keyPairName; /** * 证书别名 */ private String keyPairAlias; /** * 证书私钥 */ private String keyPairSecret; /** * 证书存储密钥 */ private String keyPairStoreSecret; }- 1
- 2
- 3
- 4
- 5
- 6
- 7
- 8
- 9
- 10
- 11
- 12
- 13
- 14
- 15
- 16
- 17
- 18
- 19
- 20
- 21
- 22
- 23
- 24
- 25
- 26
- 27
- 28
- 29
- 30
- 31
- 32
- 33
- 34
- 35
- 36
- 37
- 38
创建AppUserDetailsService
代码如下(示例):
package com.example.springcloudsecurityoauth2demo.service; import com.example.springcloudsecurityoauth2demo.entity.AppUserinfoEntity; import com.example.springcloudsecurityoauth2demo.entity.base.ResultData; import com.example.springcloudsecurityoauth2demo.fegin.UserInfoFeignService; import lombok.extern.slf4j.Slf4j; import org.apache.commons.lang3.StringUtils; import org.springframework.beans.factory.annotation.Autowired; import org.springframework.context.annotation.Lazy; import org.springframework.security.core.authority.AuthorityUtils; import org.springframework.security.core.userdetails.User; import org.springframework.security.core.userdetails.UserDetails; import org.springframework.security.core.userdetails.UserDetailsService; import org.springframework.security.core.userdetails.UsernameNotFoundException; import org.springframework.security.crypto.password.PasswordEncoder; import org.springframework.stereotype.Service; /** * @Author: liaozhiwei * @Description: TODO * @Date: Created in 18:13 2022/8/23 */ @Service @Slf4j public class AppUserDetailsService implements UserDetailsService { @Autowired @Lazy private PasswordEncoder passwordEncoder; @Override public UserDetails loadUserByUsername(String username) throws UsernameNotFoundException { //第一种方式:写死直接返回 String password = passwordEncoder.encode("123456"); System.out.println(password); return new User("liaozhiwei",password, AuthorityUtils.commaSeparatedStringToAuthorityList("admin"));//AuthorityUtils.commaSeparatedStringToAuthorityList("admin")用来为用户分配权限 /* // 第二种方式: 查数据库获取用户信息 rpc调用 // 加载用户信息 if (StringUtils.isEmpty(username)) { log.warn("用户登陆用户名为空:{}", username); throw new UsernameNotFoundException("用户名不能为空"); } AppUserinfoEntity userUserinfo = getByUserName(username); if (null == userUserinfo) { log.warn("根据用户名没有查询到对应的用户信息:{}", username); } log.info("根据用户名:{}获取用户登陆信息:{}", username, userUserinfo); // 用户信息的封装 implements UserDetails UserInfoDetails memberDetails = new UserInfoDetails(userUserinfo); return memberDetails;*/ } @Autowired private UserInfoFeignService userInfoFeignService; public AppUserinfoEntity getByUserName(String username) { // fegin获取用户信息 ResultData<AppUserinfoEntity> resultData = userInfoFeignService.getUserByUserName(username); return resultData.getData(); } }- 1
- 2
- 3
- 4
- 5
- 6
- 7
- 8
- 9
- 10
- 11
- 12
- 13
- 14
- 15
- 16
- 17
- 18
- 19
- 20
- 21
- 22
- 23
- 24
- 25
- 26
- 27
- 28
- 29
- 30
- 31
- 32
- 33
- 34
- 35
- 36
- 37
- 38
- 39
- 40
- 41
- 42
- 43
- 44
- 45
- 46
- 47
- 48
- 49
- 50
- 51
- 52
- 53
- 54
- 55
- 56
- 57
- 58
- 59
- 60
- 61
- 62
- 63
- 64
- 65
创建UserInfoDetails
代码如下(示例):
package com.example.springcloudsecurityoauth2demo.service; /** * @Author: liaozhiwei * @Description: TODO * @Date: Created in 19:04 2022/8/23 */ import com.example.springcloudsecurityoauth2demo.entity.AppUserinfoEntity; import org.springframework.security.core.GrantedAuthority; import org.springframework.security.core.authority.SimpleGrantedAuthority; import org.springframework.security.core.userdetails.UserDetails; import java.util.Arrays; import java.util.Collection; /** * @Author: liaozhiwei * @Description: TODO * @Date: Created in 19:13 2022/8/23 */ public class UserInfoDetails implements UserDetails { private AppUserinfoEntity userUserinfo; public UserInfoDetails(AppUserinfoEntity userUserinfo) { this.userUserinfo = userUserinfo; } @Override public Collection<? extends GrantedAuthority> getAuthorities() { //返回当前用户的权限 BRAC user role authority return Arrays.asList(new SimpleGrantedAuthority("TEST")); } // 获取用户密码(凭证) @Override public String getPassword() { return userUserinfo.getCredential(); } // 获取用户名 @Override public String getUsername() { return userUserinfo.getUserName(); } // 判断帐号是否已经过期 @Override public boolean isAccountNonExpired() { return true; } // 判断帐号是否已被锁定 @Override public boolean isAccountNonLocked() { return true; } // 判断用户凭证是否已经过期 @Override public boolean isCredentialsNonExpired() { return true; } // 判断用户帐号是否已启用 @Override public boolean isEnabled() { return !userUserinfo.getUserStatus().equals("FREEZE"); } public AppUserinfoEntity getUserUserinfo() { return userUserinfo; } }- 1
- 2
- 3
- 4
- 5
- 6
- 7
- 8
- 9
- 10
- 11
- 12
- 13
- 14
- 15
- 16
- 17
- 18
- 19
- 20
- 21
- 22
- 23
- 24
- 25
- 26
- 27
- 28
- 29
- 30
- 31
- 32
- 33
- 34
- 35
- 36
- 37
- 38
- 39
- 40
- 41
- 42
- 43
- 44
- 45
- 46
- 47
- 48
- 49
- 50
- 51
- 52
- 53
- 54
- 55
- 56
- 57
- 58
- 59
- 60
- 61
- 62
- 63
- 64
- 65
- 66
- 67
- 68
- 69
- 70
- 71
- 72
- 73
- 74
- 75
创建JwtTokenUtil
代码如下(示例):
package com.example.springcloudsecurityoauth2demo.utils; import io.jsonwebtoken.Claims; import io.jsonwebtoken.Jwts; import io.jsonwebtoken.SignatureAlgorithm; import java.util.Date; import java.util.HashMap; import java.util.Map; /** * @Author: liaozhiwei * @Description: TODO * @Date: Created in 19:13 2022/8/24 */ public class JwtTokenUtil { // Token请求头 public static final String TOKEN_HEADER = "Authorization"; // Token前缀 public static final String TOKEN_PREFIX = "Bearer "; // 签名主题 public static final String SUBJECT = "app"; // 过期时间 public static final long EXPIRITION = 24 * 60 * 60 ; // 应用密钥 public static final String APPSECRET_KEY = "123123"; // 角色权限声明 private static final String ROLE_CLAIMS = "role"; /** * 生成Token */ public static String createToken(String username,String role) { Map<String,Object> map = new HashMap<>(); map.put(ROLE_CLAIMS, role); String token = Jwts .builder() .setSubject(username) .setClaims(map) .claim("username",username) .setIssuedAt(new Date()) .setExpiration(new Date(System.currentTimeMillis() + EXPIRITION)) .signWith(SignatureAlgorithm.HS256, APPSECRET_KEY).compact(); return token; } /** * 校验Token */ public static Claims checkJWT(String token) { try { final Claims claims = Jwts.parser().setSigningKey(APPSECRET_KEY).parseClaimsJws(token).getBody(); return claims; } catch (Exception e) { e.printStackTrace(); return null; } } /** * 从Token中获取username */ public static String getUsername(String token){ Claims claims = Jwts.parser().setSigningKey(APPSECRET_KEY).parseClaimsJws(token).getBody(); return claims.get("username").toString(); } /** * 从Token中获取用户角色 */ public static String getUserRole(String token){ Claims claims = Jwts.parser().setSigningKey(APPSECRET_KEY).parseClaimsJws(token).getBody(); return claims.get("role").toString(); } /** * 校验Token是否过期 */ public static boolean isExpiration(String token){ Claims claims = Jwts.parser().setSigningKey(APPSECRET_KEY).parseClaimsJws(token).getBody(); return claims.getExpiration().before(new Date()); } }- 1
- 2
- 3
- 4
- 5
- 6
- 7
- 8
- 9
- 10
- 11
- 12
- 13
- 14
- 15
- 16
- 17
- 18
- 19
- 20
- 21
- 22
- 23
- 24
- 25
- 26
- 27
- 28
- 29
- 30
- 31
- 32
- 33
- 34
- 35
- 36
- 37
- 38
- 39
- 40
- 41
- 42
- 43
- 44
- 45
- 46
- 47
- 48
- 49
- 50
- 51
- 52
- 53
- 54
- 55
- 56
- 57
- 58
- 59
- 60
- 61
- 62
- 63
- 64
- 65
- 66
- 67
- 68
- 69
- 70
- 71
- 72
- 73
- 74
- 75
- 76
- 77
- 78
- 79
- 80
- 81
- 82
验证Spring Cloud Security Oauth2是否工作
首先要获取access_token,然后根据access_token认证授权
授权码模式
获取授权码
浏览器请求:http://127.0.0.1:8807/oauth/authorize?response_type=code&client_id=client
重定向为:http://127.0.0.1:8807/login
输入
用户名:liaozhiwei
密码:123456
如下图(示例):

授权登录之后会进行回调获取授权码
如下图(示例):

填入授权码code获取获取access_token
发起请求:http://127.0.0.1:8807/oauth/token?grant_type=authorization_code&client_id=client&client_secret=client_secret&code=12PVmF
如下图(示例):

password模式
http://127.0.0.1:8807/oauth/token?username=liaozhiwei&password=123456&grant_type=password&client_id=client&client_secret=client_secret&scope=all
如下图(示例):

刷新令牌获取access_token
http://127.0.0.1:8807/oauth/token?grant_type=refresh_token&client_id=client&client_secret=client_secret&refresh_token=
如下图(示例):

请求(示例):http://127.0.0.1:8807/oauth/token?grant_type=refresh_token&client_id=client&client_secret=client_secret&refresh_token=eyJhbGciOiJSUzI1NiIsInR5cCI6IkpXVCJ9.eyJ1c2VyX25hbWUiOiJsaWFvemhpd2VpIiwic2NvcGUiOlsiYWxsIl0sImF0aSI6ImZlNzJhYTE2LTM2M2EtNDFlNS05YWM2LTY0MDhkYjIzZWMyMCIsImFkZGl0aW9uYWxJbmZvIjp7InVzZXJOYW1lIjoibGlhb3poaXdlaSJ9LCJleHAiOjE2NjIyMTkzNjcsImF1dGhvcml0aWVzIjpbImFkbWluIl0sImp0aSI6IjFkNjRiMGI5LTkwNTQtNGMzYi05OWY1LTJjYzVjZGIxMTk2NSIsImNsaWVudF9pZCI6ImNsaWVudCJ9.cp6KF2XQJlNBRQTJXSvPpKh0t7jIAcJ9KegA60QIEK7dUYnMMf9b9I5Zu8AlmcQAq0tGGNTTLm1Wo42fYOWCElotRYDx-465kemhcuf-nHdGQ-qXDYMuhOKO5hlG1eajMD1ceoPK71dAxvEMRWAC5hk3_PmxlPIyaO-mDQJB3PhaDjEVNGhRncp7u5-UkPL3gZg1D9r-Yk1gDB9R1Qe7UDv0oBa_u07Vm1Q8i8tXnm6__6Xi2E16HBP0c872jc6voG2LCtcA5LMoPTHQlg3xAPodTuF7ncy188vXPAUzHf2Cp8ITH2lpJ68Jl0XQq8kz9vfv3r1_vK9_mbVAiys1UQ- 1
发起请求使用access_token进行授权获取登录用户信息
http://127.0.0.1:8807/securityOauth2/getUserByTokenStore?access_token=
如下图(示例):

 到这里其实已经可以验证我们通过授权码和密码模式获取access_token,然后通过access_token获取登录用户的消息了,当然还有更多的验证在代码里面已经实现了,这里我只对获取登录用户进行演示校验过程
创建spring-cloud-security-oauth2-sso-client-demo项目(实现单点登录)
项目代码:https://gitee.com/java_wxid/java_wxid/tree/master/demo/spring-cloud-security-oauth2-sso-client-demo
项目结构如下图(示例):

修改pom.xml文件
如下(示例):
<?xml version="1.0" encoding="UTF-8"?> <project xmlns="http://maven.apache.org/POM/4.0.0" xmlns:xsi="http://www.w3.org/2001/XMLSchema-instance" xsi:schemaLocation="http://maven.apache.org/POM/4.0.0 https://maven.apache.org/xsd/maven-4.0.0.xsd"> <modelVersion>4.0.0</modelVersion> <groupId>com.example</groupId> <artifactId>spring-cloud-security-oauth2-sso-client-demo</artifactId> <version>0.0.1-SNAPSHOT</version> <name>spring-cloud-security-oauth2-sso-client-demo</name> <description>Demo project for Spring Boot</description> <!-- 属性配置--> <properties> <project.build.sourceEncoding>UTF-8</project.build.sourceEncoding> <project.reporting.outputEncoding>UTF-8</project.reporting.outputEncoding> <java.version>1.8</java.version> <!--引入 Spring Boot、Spring Cloud、Spring Cloud Alibaba 三者 BOM 文件,进行依赖版本的管理,防止不兼容。 在 https://dwz.cn/mcLIfNKt 文章中,Spring Cloud Alibaba 开发团队推荐了三者的依赖关系--> <spring.boot.version>2.3.12.RELEASE</spring.boot.version> <spring.cloud.version>Hoxton.SR12</spring.cloud.version> <spring.cloud.alibaba.version>2.2.7.RELEASE</spring.cloud.alibaba.version> </properties> <dependencies> <dependency> <groupId>org.springframework.boot</groupId> <artifactId>spring-boot-starter</artifactId> </dependency> <dependency> <groupId>org.springframework.boot</groupId> <artifactId>spring-boot-starter-test</artifactId> <scope>test</scope> </dependency> <!-- 代表web模块,在这个模块中含了许多JAR包,有spring相关的jar,内置tomcat服务器,jackson等,这些web项目中常用的的功能都会自动引入--> <dependency> <groupId>org.springframework.boot</groupId> <artifactId>spring-boot-starter-web</artifactId> </dependency> <!-- Alibaba Nacos 配置 --> <dependency> <groupId>com.alibaba.cloud</groupId> <artifactId>spring-cloud-starter-alibaba-nacos-discovery</artifactId> </dependency> <dependency> <groupId>com.alibaba.cloud</groupId> <artifactId>spring-cloud-starter-alibaba-nacos-config</artifactId> </dependency> <!-- 在SpringBoot 2.4.x的版本之后,对于bootstrap.properties/bootstrap.yaml配置文件(我们合起来成为Bootstrap配置文件)的支持,其实这个jar包里什么都没有,就只有一个标识类Marker,用来标识要开启Bootstrap配置文件的支持,由于父类用了2.5.6版本需要导入如下的依赖--> <dependency> <groupId>org.springframework.cloud</groupId> <artifactId>spring-cloud-starter-bootstrap</artifactId> <version>3.1.0</version> </dependency> <dependency> <groupId>org.springframework.cloud</groupId> <artifactId>spring-cloud-starter-oauth2</artifactId> </dependency> <!--JWT依赖--> <dependency> <groupId>io.jsonwebtoken</groupId> <artifactId>jjwt</artifactId> <version>0.9.1</version> </dependency> <dependency> <groupId>org.springframework.boot</groupId> <artifactId>spring-boot-starter-test</artifactId> <scope>test</scope> </dependency> </dependencies> <!-- 引入 Spring Boot、Spring Cloud、Spring Cloud Alibaba 三者 BOM 文件,进行依赖版本的管理,防止不兼容。 在 https://dwz.cn/mcLIfNKt 文章中,Spring Cloud Alibaba 开发团队推荐了三者的依赖关系 --> <dependencyManagement> <dependencies> <dependency> <groupId>org.springframework.boot</groupId> <artifactId>spring-boot-starter-parent</artifactId> <version>${spring.boot.version}</version> <type>pom</type> <scope>import</scope> </dependency> <dependency> <groupId>org.springframework.cloud</groupId> <artifactId>spring-cloud-dependencies</artifactId> <version>${spring.cloud.version}</version> <type>pom</type> <scope>import</scope> </dependency> <dependency> <groupId>com.alibaba.cloud</groupId> <artifactId>spring-cloud-alibaba-dependencies</artifactId> <version>${spring.cloud.alibaba.version}</version> <type>pom</type> <scope>import</scope> </dependency> </dependencies> </dependencyManagement> <build> <plugins> <plugin> <groupId>org.springframework.boot</groupId> <artifactId>spring-boot-maven-plugin</artifactId> </plugin> </plugins> </build> </project>- 1
- 2
- 3
- 4
- 5
- 6
- 7
- 8
- 9
- 10
- 11
- 12
- 13
- 14
- 15
- 16
- 17
- 18
- 19
- 20
- 21
- 22
- 23
- 24
- 25
- 26
- 27
- 28
- 29
- 30
- 31
- 32
- 33
- 34
- 35
- 36
- 37
- 38
- 39
- 40
- 41
- 42
- 43
- 44
- 45
- 46
- 47
- 48
- 49
- 50
- 51
- 52
- 53
- 54
- 55
- 56
- 57
- 58
- 59
- 60
- 61
- 62
- 63
- 64
- 65
- 66
- 67
- 68
- 69
- 70
- 71
- 72
- 73
- 74
- 75
- 76
- 77
- 78
- 79
- 80
- 81
- 82
- 83
- 84
- 85
- 86
- 87
- 88
- 89
- 90
- 91
- 92
- 93
- 94
- 95
- 96
- 97
- 98
- 99
- 100
- 101
- 102
- 103
- 104
- 105
- 106
- 107
- 108
- 109
- 110
- 111
- 112
- 113
- 114
- 115
- 116
- 117
- 118
- 119
创建bootstrap.yml文件
代码如下(示例):
#bootstrap.yml优先级比application.yml优先级高 spring: #prefix−{spring.profile.active}.${file-extension} #nacos会根据当前环境去拼接配置名称查找相应配置文件, #示例:{spring.application.name}-{spring.profiles.active}-{spring.cloud.nacos.config.file-extension} #获取到值:nacos-autoconfig-service-dev.yml profiles: #开发环境dev,测试环境test,生产环境prod active: dev application: #配置应用的名称,用于获取配置 name: security-oauth2-sso-client main: allow-bean-definition-overriding: true cloud: nacos: discovery: # 服务注册地址 server-addr: ip:8848 config: #nacos配置中心地址 server-addr: ip:8848 #配置中心的命名空间id namespace: 9e50b6d9-6c3d-4e7a-b701-10f085e4b98d #配置分组,默认没有也可以 group: DEFAULT_GROUP #配置文件后缀,用于拼接配置配置文件名称,目前只支持yaml和properties file-extension: yaml #配置自动刷新 refresh-enabled: true #配置文件的前缀,默认是application.name的值,如果配了prefix,就取prefix的值 #prefix: nacos-autoconfig-service-${spring.profile.active} # 配置编码 encode: UTF-8 username: nacos password: nacos- 1
- 2
- 3
- 4
- 5
- 6
- 7
- 8
- 9
- 10
- 11
- 12
- 13
- 14
- 15
- 16
- 17
- 18
- 19
- 20
- 21
- 22
- 23
- 24
- 25
- 26
- 27
- 28
- 29
- 30
- 31
- 32
- 33
- 34
- 35
- 36
- 37
修改application.properties文件
代码如下(示例):
server.port=8808 server.servlet.session.cookie.name=OAUTH2-CLIENT-SESSIONID${server.port} oauth2-server-url: http://127.0.0.1:8807 security.oauth2.client.client-id=client security.oauth2.client.use-current-uri=false security.oauth2.client.client-secret=client_secret security.oauth2.client.user-authorization-uri=${oauth2-serverurl}/oauth/authorize security.oauth2.client.access-token-uri=${oauth2-server-url}/oauth/token security.oauth2.resource.jwt.key-uri=${oauth2-server-url}/oauth/token_key- 1
- 2
- 3
- 4
- 5
- 6
- 7
- 8
- 9
- 10
修改SpringCloudSecurityOauth2SsoClientDemoApplication
代码如下(示例):
package com.luban.oauth2ssoclientdemo; import org.springframework.boot.SpringApplication; import org.springframework.boot.autoconfigure.SpringBootApplication; import org.springframework.boot.autoconfigure.security.oauth2.client.EnableOAuth2Sso; import org.springframework.cloud.client.discovery.EnableDiscoveryClient; @SpringBootApplication /*@EnableOAuth2Sso单点登录的原理简单来说就是:标注有@EnableOAuth2Sso的OAuth2 Client应用在通过某种 OAuth2授权流程获取访问令牌后(一般是授权码流程),通过访问令牌访问userDetails用户明细这个受保护资源服务, 获取用户信息后,将用户信息转换为Spring Security上下文中的认证后凭证Authentication,从而完成标注有 @EnableOAuth2Sso的OAuth2 Client应用自身的登录认证的过程。整个过程是基于OAuth2的SSO单点登录*/ @EnableOAuth2Sso @EnableDiscoveryClient public class SpringCloudSecurityOauth2SsoClientDemoApplication { public static void main(String[] args) { SpringApplication.run(SpringCloudSecurityOauth2SsoClientDemoApplication.class, args); } }- 1
- 2
- 3
- 4
- 5
- 6
- 7
- 8
- 9
- 10
- 11
- 12
- 13
- 14
- 15
- 16
- 17
- 18
- 19
- 20
- 21
- 22
创建UserController
代码如下(示例):
package com.luban.oauth2ssoclientdemo.controller; import org.springframework.web.bind.annotation.RequestMapping; import org.springframework.web.bind.annotation.RestController; /** * @Author: liaozhiwei * @Description: TODO * @Date: Created in 09:24 2022/8/24 */ @RestController @RequestMapping("/user") public class UserController { @RequestMapping("/testCallback") public Object testCallback() { return ""; } }- 1
- 2
- 3
- 4
- 5
- 6
- 7
- 8
- 9
- 10
- 11
- 12
- 13
- 14
- 15
- 16
- 17
- 18
- 19
- 20
校验请求是否有到授权服务器进行授权
浏览器发起请求:http://localhost:8808/user/getUserByAuthentication
重定向到登录页面:
输入
用户名:liaozhiwei
密码:123456
如下图(示例):

授权登录之会进行回调,返回授权码
如下图(示例):
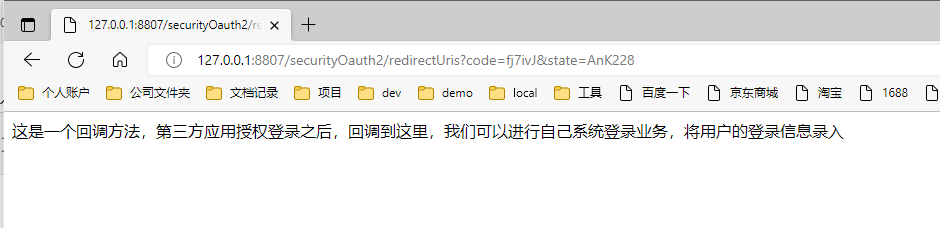
拿到授权码获取access_token
http://127.0.0.1:8807/oauth/token?grant_type=authorization_code&client_id=client&client_secret=client_secret&code=fj7ivJ
如下图(示例):
到这里为止,可以发现单点登录也基本校验成功了 -
相关阅读:
人工智能与机器学习
C#通过Process调用Python脚本
【CesiumJS入门】(11)加载LAS点云数据
CSS特效009:音频波纹加载律动
命令行交互性三个级别及其自动化解决方案
EF Core助力信创国产数据库
最全百科:什么是精益生产?有哪些难点?怎么解决?
Excel函数公式大全—LOOKUP函数
uniapp中H5网页和打包app分别生成二维码
【算法模板】快速排序模板
- 原文地址:https://blog.csdn.net/java_wxid/article/details/126514228
