-
修改安卓控件信息(Handler)和webView(自己做浏览器)的使用
安卓的Handler消息处理机制
例子一:
package com.example.myapplication; import androidx.annotation.NonNull; import androidx.appcompat.app.AppCompatActivity; import android.app.Activity; import android.os.Bundle; import android.os.Handler; import android.os.Message; import android.view.View; import android.widget.TextView; public class MainActivity extends Activity { public TextView textView; public Handler h; @Override protected void onCreate(Bundle savedInstanceState) { super.onCreate(savedInstanceState); setContentView(R.layout.activity_main); textView = (TextView) findViewById(R.id.textView1); //安卓的Handler消息处理机制 h=new Handler(){ @Override public void handleMessage(@NonNull Message msg) { super.handleMessage(msg); textView.setText(msg.what+"S"); } }; } public void testFunc(View v){ new Thread(new Runnable() { @Override public void run() { for (int i = 0; i < 10; i++) { Message message = new Message(); message.what = i; h.sendMessage(message); try { Thread.sleep(1000); } catch (InterruptedException e) { e.printStackTrace(); } } } }).start(); } }- 1
- 2
- 3
- 4
- 5
- 6
- 7
- 8
- 9
- 10
- 11
- 12
- 13
- 14
- 15
- 16
- 17
- 18
- 19
- 20
- 21
- 22
- 23
- 24
- 25
- 26
- 27
- 28
- 29
- 30
- 31
- 32
- 33
- 34
- 35
- 36
- 37
- 38
- 39
- 40
- 41
- 42
- 43
- 44
- 45
- 46
- 47
- 48
- 49
- 50
- 51
安卓页面
<?xml version="1.0" encoding="utf-8"?> <androidx.constraintlayout.widget.ConstraintLayout xmlns:android="http://schemas.android.com/apk/res/android" xmlns:app="http://schemas.android.com/apk/res-auto" xmlns:tools="http://schemas.android.com/tools" android:layout_width="match_parent" android:layout_height="match_parent" tools:context=".MainActivity"> <TextView android:id="@+id/textView1" android:layout_width="wrap_content" android:layout_height="wrap_content" android:text="Hello World!" app:layout_constraintBottom_toBottomOf="parent" app:layout_constraintEnd_toEndOf="parent" app:layout_constraintHorizontal_bias="0.089" app:layout_constraintStart_toStartOf="parent" app:layout_constraintTop_toTopOf="parent" app:layout_constraintVertical_bias="0.039" /> <Button android:id="@+id/button" android:layout_width="wrap_content" android:layout_height="wrap_content" android:layout_marginStart="51dp" android:layout_marginTop="115dp" android:text="Button" android:onClick="testFunc" app:layout_constraintStart_toStartOf="parent" app:layout_constraintTop_toTopOf="parent" /> </androidx.constraintlayout.widget.ConstraintLayout>- 1
- 2
- 3
- 4
- 5
- 6
- 7
- 8
- 9
- 10
- 11
- 12
- 13
- 14
- 15
- 16
- 17
- 18
- 19
- 20
- 21
- 22
- 23
- 24
- 25
- 26
- 27
- 28
- 29
- 30
- 31
- 32
例子二:
package com.example.myapplication; import android.annotation.SuppressLint; import android.app.Activity; import android.os.Bundle; import android.os.Handler; import android.os.Message; import android.view.View; import android.widget.TextView; import androidx.annotation.NonNull; import androidx.appcompat.app.AppCompatActivity; import java.io.IOException; import java.io.OutputStream; import java.net.Socket; public class MainActivity extends AppCompatActivity { public Handler handler; public TextView tx; @Override protected void onCreate(Bundle savedInstanceState) { super.onCreate(savedInstanceState); setContentView(R.layout.activity_main); tx=(TextView) findViewById(R.id.txx); handler=new Handler(){ @Override public void handleMessage(Message msg) { super.handleMessage(msg); Bundle b=msg.getData(); String str=b.getString("msg"); tx.setText(str); } }; } public void send(View V) { switch (V.getId()) { case R.id.fowear: M1.m1("gotostring",handler); break; } } }- 1
- 2
- 3
- 4
- 5
- 6
- 7
- 8
- 9
- 10
- 11
- 12
- 13
- 14
- 15
- 16
- 17
- 18
- 19
- 20
- 21
- 22
- 23
- 24
- 25
- 26
- 27
- 28
- 29
- 30
- 31
- 32
- 33
- 34
- 35
- 36
- 37
- 38
- 39
- 40
- 41
- 42
- 43
- 44
- 45
- 46
- 47
- 48
- 49
- 50
- 51
- 52
- 53
- 54
- 55
- 56
- 57
- 58
- 59
- 60
- 61
- 62
- 63
- 64
- 65
- 66
- 67
- 68
M1`文件代码
package com.example.myapplication; import android.os.Bundle; import android.os.Handler; import android.os.Message; import java.io.IOException; import java.io.InputStream; import java.io.OutputStream; import java.net.Socket; public class M1 { public static void m1(String Data, Handler h){ new Thread(new Runnable() { @Override public void run() { try { Socket client = new Socket("192.168.31.151",8888); OutputStream out =client.getOutputStream();//获取发送通道 int len=0; out.write(Data.getBytes());//发送数据 InputStream in =client.getInputStream(); byte[] data=new byte[128]; len= in.read(data); String str=new String(data,0,len); Message msg=new Message(); Bundle b=new Bundle(); b.putString("msg",str); msg.setData(b); h.sendMessage(msg); } catch (IOException e) { e.printStackTrace(); } } }).start(); } }- 1
- 2
- 3
- 4
- 5
- 6
- 7
- 8
- 9
- 10
- 11
- 12
- 13
- 14
- 15
- 16
- 17
- 18
- 19
- 20
- 21
- 22
- 23
- 24
- 25
- 26
- 27
- 28
- 29
- 30
- 31
- 32
- 33
- 34
- 35
- 36
- 37
- 38
- 39
- 40
- 41
- 42
- 43
- 44
- 45
页面
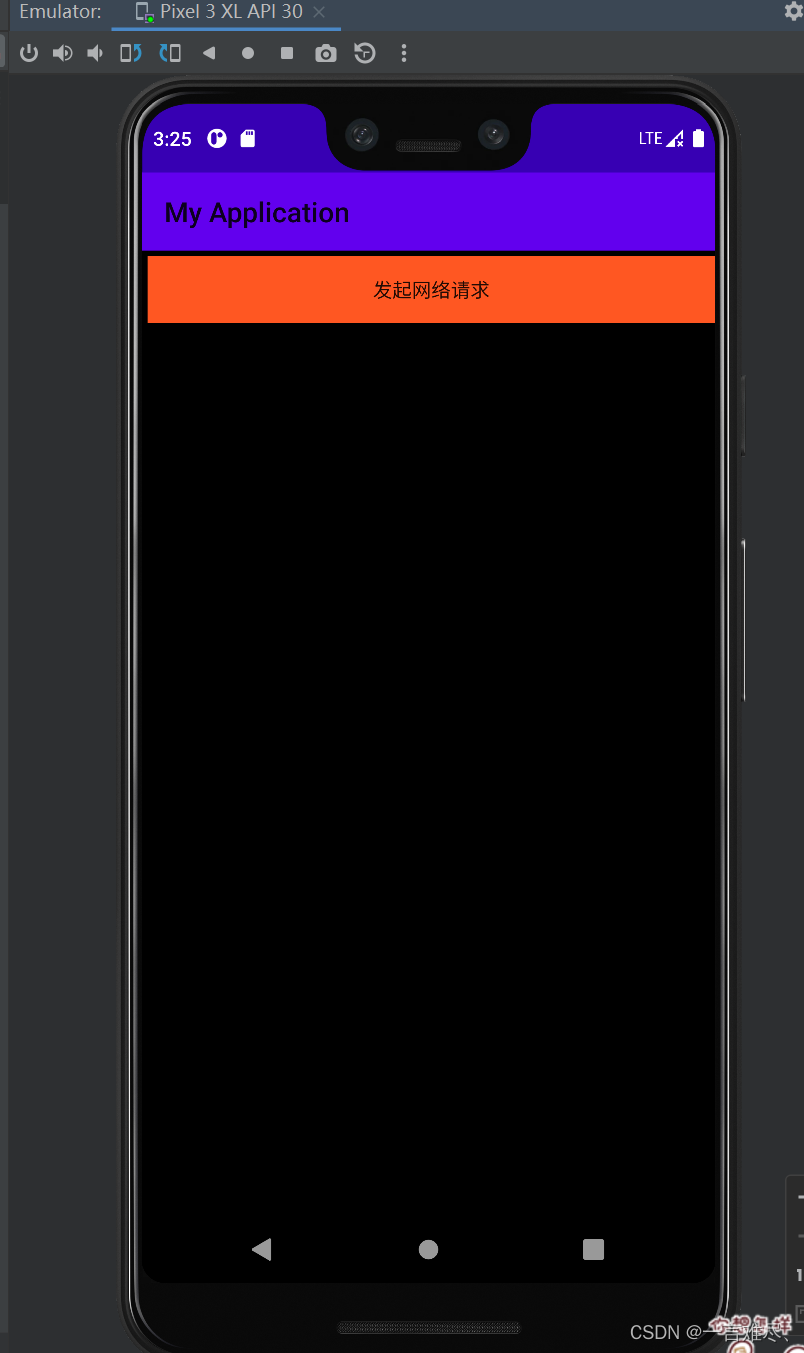
<?xml version="1.0" encoding="utf-8"?> <RelativeLayout xmlns:android="http://schemas.android.com/apk/res/android" xmlns:app="http://schemas.android.com/apk/res-auto" xmlns:tools="http://schemas.android.com/tools" android:layout_width="match_parent" android:layout_height="match_parent" android:background="#000000" tools:context=".MainActivity"> <Button android:id="@+id/fowear" android:layout_width="match_parent" android:layout_height="wrap_content" android:layout_marginStart="4dp" android:layout_marginTop="4dp" android:background="#FF5722" android:onClick="send" android:text="发起网络请求" app:layout_constraintStart_toStartOf="parent" app:layout_constraintTop_toTopOf="parent" /> <TextView android:id="@+id/txx" android:layout_width="wrap_content" android:layout_height="wrap_content" android:textSize="35dp" android:textColor="#ffff" android:layout_centerInParent="true" app:layout_constraintStart_toStartOf="parent" app:layout_constraintTop_toTopOf="parent" /> </RelativeLayout>- 1
- 2
- 3
- 4
- 5
- 6
- 7
- 8
- 9
- 10
- 11
- 12
- 13
- 14
- 15
- 16
- 17
- 18
- 19
- 20
- 21
- 22
- 23
- 24
- 25
- 26
- 27
- 28
- 29
- 30
- 31
- 32
- 33
- 34
=========================================================================================================
webView的使用
Android WebView在Android平台上是一个特殊的View,它能用来显示网页,这个WebView类可以被用来在app中仅仅显示一张在线的网页,当然还可以用来开发浏览器。
WebView内部实现是采用渲染引擎(WebKit)来展示view的内容,提供网页前进后退、网页放大、缩小、搜索等功能。
WebView是一个基于WebKit引擎、展现Web页面的控件,Android的WebView在低版本和高版本采用了不同的WebKit版本内核。
WebView的最简单的使用方式即是直接显示网页内容,有以下两个步骤:
在布局文件中添加WebView控件;
在代码中让WebView控件加载显示网页。
下面我们直接讲解使用WebView控件显示百度首页的网页内容的案例:首先,我们在布局文件中来添加WebView控件,如下:
接着,我们需要在代码中让WebView控件加载显示网页,如下:
public class WebViewActivity extends AppCompatActivity {
@Override
protected void onCreate(Bundle savedInstanceState) {
super.onCreate(savedInstanceState);
setContentView(R.layout.activity_web_view);
//获得控件
WebView webView = (WebView) findViewById(R.id.wv_webview);
//访问网页
webView.loadUrl(“http://www.baidu.com”);
//系统默认会通过手机浏览器打开网页,为了能够直接通过WebView显示网页,则必须设置
webView.setWebViewClient(new WebViewClient(){
@Override
public boolean shouldOverrideUrlLoading(WebView view, String url) {
//使用WebView加载显示url
view.loadUrl(url);
//返回true
return true;
}
});
}
}package com.example.myapplication; import androidx.appcompat.app.AppCompatActivity; import android.os.Bundle; import android.view.KeyEvent; import android.webkit.WebView; import android.webkit.WebViewClient; import android.widget.EditText; import android.widget.TextView; public class MainActivity extends AppCompatActivity { @Override protected void onCreate(Bundle savedInstanceState) { super.onCreate(savedInstanceState); setContentView(R.layout.activity_main); EditText ed=(EditText)findViewById(R.id.ed); WebView wb=(WebView)findViewById(R.id.ww); wb.setWebViewClient(new WebViewClient()); ed.setOnEditorActionListener(new TextView.OnEditorActionListener() { @Override //输入后回车跳转 public boolean onEditorAction(TextView v, int actionId, KeyEvent event) { String str=ed.getText().toString(); wb.loadUrl(str); return (event.getKeyCode()==KeyEvent.KEYCODE_ENTER); } }); } }- 1
- 2
- 3
- 4
- 5
- 6
- 7
- 8
- 9
- 10
- 11
- 12
- 13
- 14
- 15
- 16
- 17
- 18
- 19
- 20
- 21
- 22
- 23
- 24
- 25
- 26
- 27
- 28
- 29
- 30
- 31
- 32
- 33
- 34
页面
<?xml version="1.0" encoding="utf-8"?> <RelativeLayout xmlns:android="http://schemas.android.com/apk/res/android" xmlns:app="http://schemas.android.com/apk/res-auto" xmlns:tools="http://schemas.android.com/tools" android:layout_width="match_parent" android:layout_height="match_parent" tools:context=".MainActivity"> <LinearLayout android:id="@+id/jj" android:layout_width="match_parent" android:layout_height="wrap_content" app:layout_constraintEnd_toEndOf="parent" app:layout_constraintStart_toStartOf="parent" app:layout_constraintTop_toTopOf="@+id/ww"> <EditText android:id="@+id/ed" android:layout_width="match_parent" android:layout_height="match_parent" android:hint="请输入网站" > </EditText> </LinearLayout> <WebView android:id="@+id/ww" android:layout_width="match_parent" android:layout_height="match_parent" android:layout_below="@id/jj" app:layout_constraintBottom_toBottomOf="parent" app:layout_constraintEnd_toEndOf="parent" app:layout_constraintStart_toStartOf="parent" app:layout_constraintTop_toTopOf="parent" /> </RelativeLayout>- 1
- 2
- 3
- 4
- 5
- 6
- 7
- 8
- 9
- 10
- 11
- 12
- 13
- 14
- 15
- 16
- 17
- 18
- 19
- 20
- 21
- 22
- 23
- 24
- 25
- 26
- 27
- 28
- 29
- 30
- 31
- 32
- 33
- 34
- 35
- 36

注:使用网络都需加入权限
<uses-permission android:name="android.permission.INTERNET"/>- 1
关于android:错误消息’java.net.SocketException:套接字失败:EACCES(权限被拒绝)解决方法
<uses-permission android:name="android.permission.INTERNET" /> <uses-permission android:name="android.permission.ACCESS_NETWORK_STATE" /> <uses-permission android:name="android.permission.ACCESS_WIFI_STATE" />- 1
- 2
- 3
- 4
- 5
- 6
原文:解决方法
-
相关阅读:
js 中的 Event Loop 以及 宏任务 与 微任务
仓库管理系统源代码集合,带图片展示和网站演示
工作小计-GPU硬编以及依赖库 nvcuvid&nvidia-encode
HTTP协议
计算机组成原理习题课第三章-2(唐朔飞)
PCIE下载的驱动安装
css的颜色值表达方式(共计6种)
Pico示波器 汽车振动异响(NVH)解决方案
6-13 折半查找
【电商数仓】数仓搭建之原始数据(Operation Data Store -- ODS)层(用户行为数据、业务数据)
- 原文地址:https://blog.csdn.net/weixin_49001476/article/details/126457228
