-
随手记录第五话 -- SpringCache搭配Redis的实现以及设置每个key的过期时间
在以前的学习过程中以前用过
net.sf.ehcache中的EhCacheCache ,觉得挺省事的,就是配置起来麻烦而且出了问题没啥地方找,就放弃了。现在springcache也集成了这个,自然是要来回顾回顾的。总所周知spring全家桶就是为了解放程序员双手的,重点是学习的资料也多,一起来看看吧。
1.springcache介绍
Spring 从3.1 开始定义了org.springframework.cache.Cache
和org.springframework.cache.CacheManager 接口来统一不同的缓存技术;
并支持使用JCache(JSR-107)注解简化我们开发;Cache 接口为缓存的组件规范定义,包含缓存的各种操作集合; Cache 接口下Spring 提供了各种xxxCache 的实现;
如RedisCache , EhCacheCache , ConcurrentMapCache 等;每次调用需要缓存的接口时,会先根据设置的key查询一遍缓存,如果存在则直接返回,不再继续走业务代码。
缓存管理器以及支持的组件

常用注解说明注解/key 说明 @Cacheable 主要针对方法配置,能够根据方法的请求参数对结果做缓存 @CachPut 保证方法被调用,也对结果做缓存 @CacheEvict 清空缓存 @Cache 三者搭配使用 @EnableCaching 开启基于注解的缓存功能 value 缓存的名称,必须指定一个,例如: value="name_str"key 指定key名,支持SpEl表达式例如 #p0,#user.id,key="#p0"cacheManager 指定缓存管理器 keyGenerator 缓存数据时的生成策略 condition 条件判断在方法前后都判断,返回true才缓存,例如: condition="#p0=33"allEntries(@CacheEvict ) 是否情况所有缓存,true情况指定缓存,例如 @CacheEvict(value = "name_str", allEntries = true)beforeInvocation(@CacheEvict ) 是否在执行前就清空,默认false,如果请求保存则不会情况 unless(@Cacheable,@CachePut) 在方法执行之后判断,可以拿返回值来决定是否缓存,false才缓存。例如 #result.size == 0,result.size>0才缓存2.依赖配置
基于
spring-boot-starter-parent 2.6.8,单独用也是可以的//在GenericCacheConfiguration类注入默认的缓存管理器是SimpleCacheManager @Bean SimpleCacheManager cacheManager(CacheManagerCustomizers customizers, Collection<Cache> caches) { SimpleCacheManager cacheManager = new SimpleCacheManager(); cacheManager.setCaches(caches); return customizers.customize(cacheManager); } //默认的缓存容器是一个ConcurentHashMap public abstract class AbstractCacheManager implements CacheManager, InitializingBean { private final ConcurrentMap<String, Cache> cacheMap = new ConcurrentHashMap(16);- 1
- 2
- 3
- 4
- 5
- 6
- 7
- 8
- 9
- 10
默认的就不说了,这里是搭配redis使用
<dependency> <groupId>org.springframework.bootgroupId> <artifactId>spring-boot-starter-data-redisartifactId> dependency> <dependency> <groupId>org.springframework.bootgroupId> <artifactId>spring-boot-starter-cacheartifactId> dependency>- 1
- 2
- 3
- 4
- 5
- 6
- 7
- 8
application.yml
spring: redis: database: 0 host: 192.168.0.100 port: 6379 password: #连接超时时间 timeout: 5000- 1
- 2
- 3
- 4
- 5
- 6
- 7
- 8
3.简单使用
启动类上添加
@EnableCaching,接口实现如下//p1取第一个参数为key值,最终存储缓存的key为 name_put::{value} @Cacheable(value = "name_put", key = "#p1") @GetMapping("/put") public String putByName(@RequestParam String name, @RequestParam String value) { log.info("put name:{},{}", name, value); return "my name is " + name + value; }- 1
- 2
- 3
- 4
- 5
- 6
- 7
请求两次接口,查看日志
c.e.demo.controller.CacheController : put name:qwerty,hello2
只输出一条日志查看redis发现有些是乱码并且是永久的,虽然调用同一方法取是没什么问题,但是要是直接redis取有就问题了

4.自定义过期时间
也就是自定义RedisCacheConfiguration,在自动注入包中找到如下代码
spring-boot-autoconfigure-2.6.8.jar/spring.factories
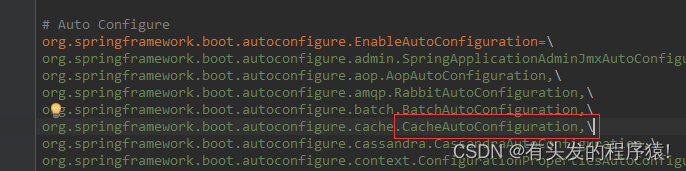
这个类上的有个注解扫描@Import({ CacheConfigurationImportSelector.class, CacheManagerEntityManagerFactoryDependsOnPostProcessor.class }) //找到这个内部类 /** * {@link ImportSelector} to add {@link CacheType} configuration classes. */ static class CacheConfigurationImportSelector implements ImportSelector { @Override public String[] selectImports(AnnotationMetadata importingClassMetadata) { CacheType[] types = CacheType.values(); String[] imports = new String[types.length]; for (int i = 0; i < types.length; i++) { imports[i] = CacheConfigurations.getConfigurationClass(types[i]); } return imports; } }- 1
- 2
- 3
- 4
- 5
- 6
- 7
- 8
- 9
- 10
- 11
- 12
- 13
- 14
- 15
- 16
- 17
- 18
CacheType有这些类型,主要是看的redis
static { Map<CacheType, String> mappings = new EnumMap<>(CacheType.class); mappings.put(CacheType.GENERIC, GenericCacheConfiguration.class.getName()); mappings.put(CacheType.EHCACHE, EhCacheCacheConfiguration.class.getName()); mappings.put(CacheType.HAZELCAST, HazelcastCacheConfiguration.class.getName()); mappings.put(CacheType.INFINISPAN, InfinispanCacheConfiguration.class.getName()); mappings.put(CacheType.JCACHE, JCacheCacheConfiguration.class.getName()); mappings.put(CacheType.COUCHBASE, CouchbaseCacheConfiguration.class.getName()); mappings.put(CacheType.REDIS, RedisCacheConfiguration.class.getName()); mappings.put(CacheType.CAFFEINE, CaffeineCacheConfiguration.class.getName()); mappings.put(CacheType.SIMPLE, SimpleCacheConfiguration.class.getName()); mappings.put(CacheType.NONE, NoOpCacheConfiguration.class.getName()); MAPPINGS = Collections.unmodifiableMap(mappings); }- 1
- 2
- 3
- 4
- 5
- 6
- 7
- 8
- 9
- 10
- 11
- 12
- 13
- 14
找到
RedisCacheConfiguration注册的cacheManagerbean@Bean RedisCacheManager cacheManager(CacheProperties cacheProperties, CacheManagerCustomizers cacheManagerCustomizers, ObjectProvider<org.springframework.data.redis.cache.RedisCacheConfiguration> redisCacheConfiguration, ObjectProvider<RedisCacheManagerBuilderCustomizer> redisCacheManagerBuilderCustomizers, RedisConnectionFactory redisConnectionFactory, ResourceLoader resourceLoader) { RedisCacheManagerBuilder builder = RedisCacheManager.builder(redisConnectionFactory).cacheDefaults( //处理redisCacheConfiguration determineConfiguration(cacheProperties, redisCacheConfiguration, resourceLoader.getClassLoader())); List<String> cacheNames = cacheProperties.getCacheNames(); if (!cacheNames.isEmpty()) { builder.initialCacheNames(new LinkedHashSet<>(cacheNames)); } if (cacheProperties.getRedis().isEnableStatistics()) { builder.enableStatistics(); } redisCacheManagerBuilderCustomizers.orderedStream().forEach((customizer) -> customizer.customize(builder)); return cacheManagerCustomizers.customize(builder.build()); }- 1
- 2
- 3
- 4
- 5
- 6
- 7
- 8
- 9
- 10
- 11
- 12
- 13
- 14
- 15
- 16
- 17
- 18
- 19
而在RedisCacheConfiguration中是有过期时间ttl的
public class RedisCacheConfiguration { private final Duration ttl; private final boolean cacheNullValues; private final CacheKeyPrefix keyPrefix; private final boolean usePrefix; 。。。 //接下来在看下初始化方法 private org.springframework.data.redis.cache.RedisCacheConfiguration determineConfiguration( CacheProperties cacheProperties, ObjectProvider<org.springframework.data.redis.cache.RedisCacheConfiguration> redisCacheConfiguration, ClassLoader classLoader) { //getIfAvailable 从容器中拿,没拿到才创建 return redisCacheConfiguration.getIfAvailable(() -> createConfiguration(cacheProperties, classLoader)); } //创建的关键代码 org.springframework.data.redis.cache.RedisCacheConfiguration config = org.springframework.data.redis.cache.RedisCacheConfiguration .defaultCacheConfig();- 1
- 2
- 3
- 4
- 5
- 6
- 7
- 8
- 9
- 10
- 11
- 12
- 13
- 14
- 15
- 16
- 17
- 18
- 19
- 20
既然是容器中拿,我们就自然就可以直接注册bean到容器中去,这样拿到的就是我们注册的bean了
4.1 过期时间统一
@Bean public RedisCacheConfiguration redisCacheConfiguration() { // 使用 fastJson来序列化数据 FastJsonRedisSerializer<Object> fastJsonRedisSerializer = new FastJsonRedisSerializer<>(Object.class); //相当于new了一个RedisCacheConfiguration RedisCacheConfiguration configuration = RedisCacheConfiguration.defaultCacheConfig(); configuration = configuration.serializeValuesWith // 指定value序列化器 (RedisSerializationContext.SerializationPair.fromSerializer(fastJsonRedisSerializer)) // 指定 key的TTL .entryTtl(Duration.ofMinutes(2)) // 指定前缀 .prefixCacheNameWith("springcache::"); return configuration; }- 1
- 2
- 3
- 4
- 5
- 6
- 7
- 8
- 9
- 10
- 11
- 12
- 13
- 14
- 15
- 16
接下来再调用试试看

没有乱码也设置过期时间了!
但是这里很明显,如果设置缓存过期时间,那所有的都是这个过期时间,那怎么给每个key设置过期时间呢。4.2 每个key设置不同的过期时间
底层用的是Cache类,这里就得找到
RedisCache这个类了public class RedisCache extends AbstractValueAdaptingCache { private static final byte[] BINARY_NULL_VALUE = RedisSerializer.java().serialize(NullValue.INSTANCE); private final String name; private final RedisCacheWriter cacheWriter; //经过实践可以通过反射修改这个类,然后设置到cache中去 //虽然是private final的,但好在不是基础数据类型也没有经过赋值 private final RedisCacheConfiguration cacheConfig; private final ConversionService conversionService;- 1
- 2
- 3
- 4
- 5
- 6
- 7
- 8
- 9
- 10
默认的自定义
RedisCacheConfigurationbean注释掉entryTtl(Duration.ofMinutes(2)).prefixCacheNameWith,新增一个注解类,设置过期时间,通过cacheResolver来反射注入@Cacheable(value = "name_str", key = "#p1", cacheResolver = "redisExpireCacheResolver") @CacheTTL(ttl = 3,unit = TimeUnit.MINUTES) @GetMapping("/get") public String getByName(@RequestParam String name, @RequestParam String value) { log.info("get name:{}", name); return "my name is " + name + value; } //新增注解 @Target(ElementType.METHOD) @Retention(RetentionPolicy.RUNTIME) public @interface CacheTTL { //默认120秒失效 long ttl() default 120l; //默认单位秒 TimeUnit unit() default TimeUnit.SECONDS; } //注册自定义的缓存生成策略 @Bean public CacheResolver redisExpireCacheResolver(@Autowired CacheManager cacheManager) { return new RedisExpireCacheResolver(cacheManager); }- 1
- 2
- 3
- 4
- 5
- 6
- 7
- 8
- 9
- 10
- 11
- 12
- 13
- 14
- 15
- 16
- 17
- 18
- 19
- 20
- 21
- 22
- 23
来看下
RedisExpireCacheResolver的实现public class RedisExpireCacheResolver extends SimpleCacheResolver { public RedisExpireCacheResolver(CacheManager cacheManager) { super(cacheManager); } @Override public Collection<? extends Cache> resolveCaches(CacheOperationInvocationContext<?> context) { //直接参考AbstractCacheResolver#resolveCaches的代码 //获取当前注解中的缓存名 Collection<String> cacheNames = getCacheNames(context); if (cacheNames == null) { return Collections.EMPTY_LIST; } else { Collection<Cache> result = new ArrayList(cacheNames.size()); Iterator var4 = cacheNames.iterator(); while (var4.hasNext()) { String cacheName = (String) var4.next(); //获取到缓存对象 Cache cache = this.getCacheManager().getCache(cacheName); if (cache == null) { throw new IllegalArgumentException("Cannot find cache named '" + cacheName + "' for " + context.getOperation()); } //只有这里是新增 解析注解 反射替换RedisCacheConfiguration this.parseCacheExpire(cache, context); result.add(cache); } return result; } } private void parseCacheExpire(Cache cache, CacheOperationInvocationContext<?> context) { Method method = context.getMethod(); //判断是否包含过期时间注解 if (method.isAnnotationPresent(CacheTTL.class)) { CacheTTL cacheTTL = method.getAnnotation(CacheTTL.class); Duration duration = Duration.ofSeconds(cacheTTL.unit().toSeconds(cacheTTL.ttl())); //转成RedisCache 这个时候cacheConfig是空的,也就让反射有了可乘之机 RedisCache redisCache = (RedisCache) cache; RedisCacheConfiguration cacheConfiguration = redisCache.getCacheConfiguration(); //新生成一个configuration RedisCacheConfiguration cacheConfig = RedisCacheConfiguration.defaultCacheConfig(); //这里也是搬运 只不过参数需要对应修改 cacheConfig = cacheConfig.serializeValuesWith( cacheConfiguration.getValueSerializationPair()) .entryTtl(duration) .prefixCacheNameWith("springcache:"); //通过反射注入 Field field = ReflectionUtils.findField(RedisCache.class, "cacheConfig", RedisCacheConfiguration.class); field.setAccessible(true); ReflectionUtils.setField(field, redisCache, cacheConfig); } } }- 1
- 2
- 3
- 4
- 5
- 6
- 7
- 8
- 9
- 10
- 11
- 12
- 13
- 14
- 15
- 16
- 17
- 18
- 19
- 20
- 21
- 22
- 23
- 24
- 25
- 26
- 27
- 28
- 29
- 30
- 31
- 32
- 33
- 34
- 35
- 36
- 37
- 38
- 39
- 40
- 41
- 42
- 43
- 44
- 45
- 46
- 47
- 48
- 49
- 50
- 51
- 52
- 53
- 54
- 55
- 56
再次调用测试

针对不同的key失效时间不同,无过期注解的则无过期时间,总体也是达到可用的情况了虽然不规范,但总体还好,反射用的好,啥代码都能跑。哈哈哈!
如果还有其他的更好的方式实现的,欢迎评论区留言哦
以上就是本章的全部内容了。上一篇:随手记录第四话 – elasticsearch基于docker安装以及SpringBoot集成使用
下一篇:随手记录第六话 – 在Mac上搭建整个开发环境记录(Java、Python、Vue、Docker、Idea)读书有三到,谓心到,眼到,口到
-
相关阅读:
第三章 C程序设计
[100天算法】-x 的平方根(day 61)
jsoncpp库的使用及用httplib库搭建HTTP服务器
08、JavaWeb启程——HTTP协议
Dapr学习积累(一)
路由 知识
stream()流的一些常用方法
如何设计物联网通信协议?
SpringCloud-Gateway网关实现入参统一解密
【hadoop运维】running beyond physical memory limits:正确配置yarn中的mapreduce内存
- 原文地址:https://blog.csdn.net/qq_35551875/article/details/126409828
