-
【OpenCV】- 多边形将轮廓包围
说明:实际应用中,常常会将检测到的轮廓用多边形表示出来的需求。
1、返回外部矩形边界:boundingRect()函数
说明:此函数计算并返回指定点集最外面的矩形边界
Rect point=boundingRect(InputArray points)- 1
唯一的参数为输入的二维点集,可以是std::vector或Mat类型
2、寻找最小包围矩形:minAreaRect()函数
说明:对于给定的2D点集,寻找可旋转的最小面积的包围矩形,返回四个点
RotatedRect box=minAreaRect(InputArray points)- 1
唯一的参数为输入的二维点集,可以是std::vector或Mat类型
示例程序:创建包围轮廓的矩形边界
说明:随机生成3~103个彩色点,然后绘制一个可以旋转的最小矩形,把随机生成的点都包围进去
#include#include #include #include using namespace std; using namespace cv; int main() { Mat image(600, 600, CV_8UC3); RNG& rng = theRNG(); while (1) { //参数初始化 int count = rng.uniform(3, 103); vector<Point> points; for (int i = 0; i < count; i++) { Point point; point.x = rng.uniform(image.cols / 4, image.cols * 3 / 4); point.y = rng.uniform(image.rows / 4, image.rows * 3 / 4); points.push_back(point); } //给定的2D点集,寻找最小面积的包围矩形 RotatedRect box = minAreaRect(Mat(points)); // Point2f vertex[4]; box.points(vertex); //绘制出随机颜色的点 image = Scalar::all(0); for (int i = 0; i < count; i++) { circle(image, points[i], 3, Scalar(rng.uniform(0, 255), rng.uniform(0, 255), rng.uniform(0, 255)), FILLED,LINE_AA); } //绘制出最小面积的包围矩形 for (int i = 0; i < 4; i++) { //第一个线段的终点,又是第二个线段的起点 line(image, vertex[i], vertex[(i + 1) % 4], Scalar(rng.uniform(0, 255), rng.uniform(0, 255), rng.uniform(0, 255)), 2, LINE_AA); cout << vertex[i] << ":" << vertex[(i + 1) % 4] << endl; } imshow("矩形包围示例", image); char key = (char)waitKey(); if (key == 27 || key == 'q' || key == 'Q') break; } return 0; } - 1
- 2
- 3
- 4
- 5
- 6
- 7
- 8
- 9
- 10
- 11
- 12
- 13
- 14
- 15
- 16
- 17
- 18
- 19
- 20
- 21
- 22
- 23
- 24
- 25
- 26
- 27
- 28
- 29
- 30
- 31
- 32
- 33
- 34
- 35
- 36
- 37
- 38
- 39
- 40
- 41
- 42
- 43
- 44
- 45
- 46
- 47
- 48

3、寻找最小包围圆形:minEnclosingCircle()函数
说明:利用迭代算法,对给定的2D点集,去寻找面积最小的可包围它们的圆形
void minEnclosingCircle(InputArray points,Point2f& center,float& radius)- 1
- 第一个参数:输入的二维点集,可以为std::vector<>或Mat类型
- 第二个参数:圆的输出圆心
- 第三个参数:圆的输出半径
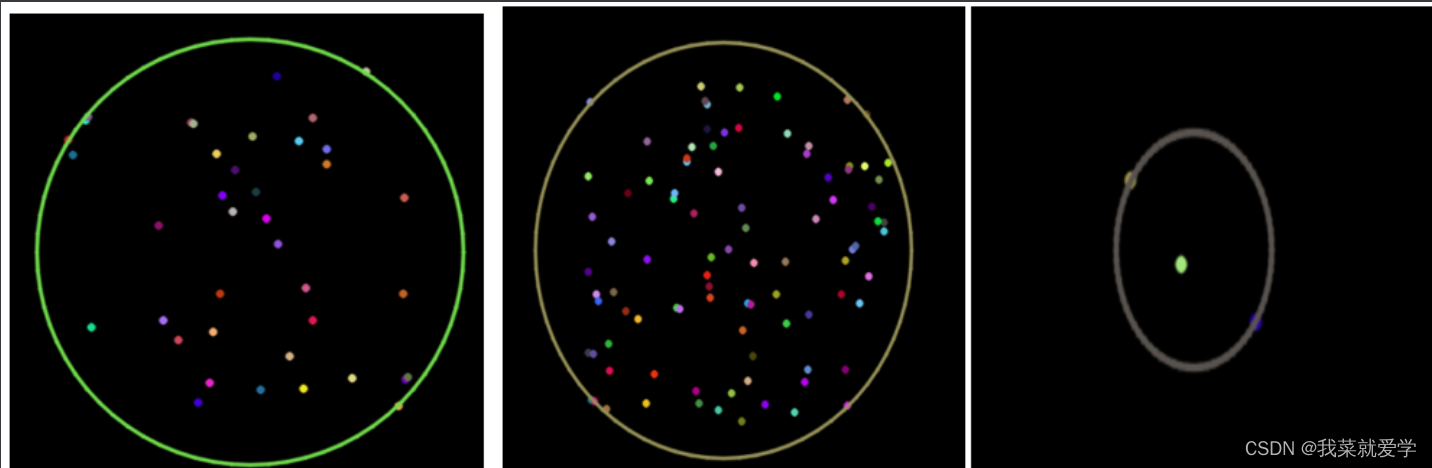
示例程序:创建包围轮廓的圆形边界
说明:随机生成3~103个彩色点,然后绘制一个可以旋转的圆,把随机生成的点都包围进去
#include#include #include #include using namespace std; using namespace cv; int main() { Mat image(600, 600, CV_8UC3); RNG& rng = theRNG(); while (1) { //参数初始化 int count = rng.uniform(3, 103); vector<Point> points; for (int i = 0; i < count; i++) { Point point; point.x = rng.uniform(image.cols / 4, image.cols * 3 / 4); point.y = rng.uniform(image.rows / 4, image.rows * 3 / 4); points.push_back(point); } //给定的2D点集,寻找最小面积的包围圆 Point2f center; float radius = 0; minEnclosingCircle(Mat(points), center, radius); //绘制出随机颜色的点 image = Scalar::all(0); for (int i = 0; i < count; i++) { circle(image, points[i], 3, Scalar(rng.uniform(0, 255), rng.uniform(0, 255), rng.uniform(0, 255)), FILLED,LINE_AA); } //绘制出最小面积的包围矩形 circle(image, center, radius, Scalar(rng.uniform(0, 255), rng.uniform(0, 255), rng.uniform(0, 255)), 2, LINE_AA); cout << center << ":" << radius << endl; imshow("圆形包围示例", image); char key = (char)waitKey(); if (key == 27 || key == 'q' || key == 'Q') break; } return 0; } - 1
- 2
- 3
- 4
- 5
- 6
- 7
- 8
- 9
- 10
- 11
- 12
- 13
- 14
- 15
- 16
- 17
- 18
- 19
- 20
- 21
- 22
- 23
- 24
- 25
- 26
- 27
- 28
- 29
- 30
- 31
- 32
- 33
- 34
- 35
- 36
- 37
- 38
- 39
- 40
- 41
- 42
- 43
4、用椭圆拟合二维点集:fitEllipse()函数
说明:此函数作用是椭圆拟合二维点集
void RotatedRect fitEllipse(InputArray points)- 1
唯一的参数为输入的二维点集,可以是std::vector或Mat类型
5、逼近多边形曲线:approxPolyDP()函数
说明:approxPolyDP()函数是用指定精度逼近多边形曲线
void approxPolyDP(InputArray curve,OutputArray approxCurve,double epsilon,bool closed)- 1
- 第一个参数:InputArray类型的curve输入的二维点集,可以为std::vector或Mat类型
- 第二个参数:OutputArray 类型的approxCurve多边形逼近的结果,其类型应该和输入的二维点集的类型一致。
- 第三个参数:double类型的epsilon逼近的精度,为原始曲线和即近似曲线间的最大值
- 第四个参数:bool类型的closed如果其为真,则近似的曲线为封闭曲线(首尾相连),否则,曲线不封闭。
6、综合示例程序:使用多边形包围轮廓
#include#include #include #include using namespace std; using namespace cv; #define WINDOW_NAME1 "【原始图窗口】" #define WINDOW_NAME2 "【效果图窗口】" Mat g_srcImage; Mat g_grayImage; int g_nThresh = 50; //阈值 int g_maxThresh = 255; //阈值最大值 RNG g_rng(12345); //随机数生成器 static void ShowHelpTxte(); void on_ContoursChange(int, void *); int main() { system("color 1A"); //加载源图像 g_srcImage = imread("E:\\Pec\\风景.jpg", 1); //得到的原图转换为灰度并进行平滑 cvtColor(g_srcImage, g_grayImage, COLOR_BGR2GRAY); blur(g_grayImage, g_grayImage, Size(3, 3)); namedWindow(WINDOW_NAME1, WINDOW_AUTOSIZE); imshow(WINDOW_NAME1, g_srcImage); createTrackbar("阈值:", WINDOW_NAME1, &g_nThresh, g_maxThresh, on_ContoursChange); on_ContoursChange(0, 0);//调用一次进行初始化 waitKey(0); return 0; } void on_ContoursChange(int, void *) { //定义一些参数 Mat threshold_output; vector<vector<Point>> contours; vector<Vec4i>hierarchy; //对图像进行二值化,控制阈值 threshold(g_grayImage, threshold_output, g_nThresh, 255, THRESH_BINARY); //寻找轮廓; findContours(threshold_output, contours, hierarchy, RETR_TREE, CHAIN_APPROX_SIMPLE, Point(0, 0)); //多边形逼近轮廓+获取矩形和圆形边界框 vector<vector<Point>>contours_poly(contours.size()); vector<Rect> boundRect(contours.size()); vector<Point2f>center(contours.size()); vector<float>radius(contours.size()); //一个循环,遍历所有部分 for (unsigned int i = 0; i < contours.size(); i++) { //用指定精度逼近多边形曲线 approxPolyDP(Mat(contours[i]), contours_poly[i], 3, true); //计算点集的最外面(up-right)矩形边界 boundRect[i] = boundingRect(Mat(contours_poly[i])); //对给定的2D点集,寻找最小面积的包围圆形 minEnclosingCircle(contours_poly[i], center[i], radius[i]); } //绘制多边形轮廓+包围矩形框+圆形框 Mat drawing = Mat::zeros(threshold_output.size(), CV_8UC3); for (int unsigned i = 0; i < contours.size(); i++) { Scalar color = Scalar(g_rng.uniform(0, 255), g_rng.uniform(0, 255), g_rng.uniform(0, 255)); //绘制轮廓 drawContours(drawing, contours_poly, i, color, 1, 8, vector<Vec4i>(), 0, Point()); //绘制矩形 rectangle(drawing, boundRect[i].tl(), boundRect[i].br(), color, 2, 8, 0); //绘制圆形 circle(drawing, center[i], (int)radius[i], color, 2, 8, 0); } namedWindow(WINDOW_NAME2, WINDOW_AUTOSIZE); imshow(WINDOW_NAME2, drawing); } - 1
- 2
- 3
- 4
- 5
- 6
- 7
- 8
- 9
- 10
- 11
- 12
- 13
- 14
- 15
- 16
- 17
- 18
- 19
- 20
- 21
- 22
- 23
- 24
- 25
- 26
- 27
- 28
- 29
- 30
- 31
- 32
- 33
- 34
- 35
- 36
- 37
- 38
- 39
- 40
- 41
- 42
- 43
- 44
- 45
- 46
- 47
- 48
- 49
- 50
- 51
- 52
- 53
- 54
- 55
- 56
- 57
- 58
- 59
- 60
- 61
- 62
- 63
- 64
- 65
- 66
- 67
- 68
- 69
- 70
- 71
原图展示:

阈值为50效果图: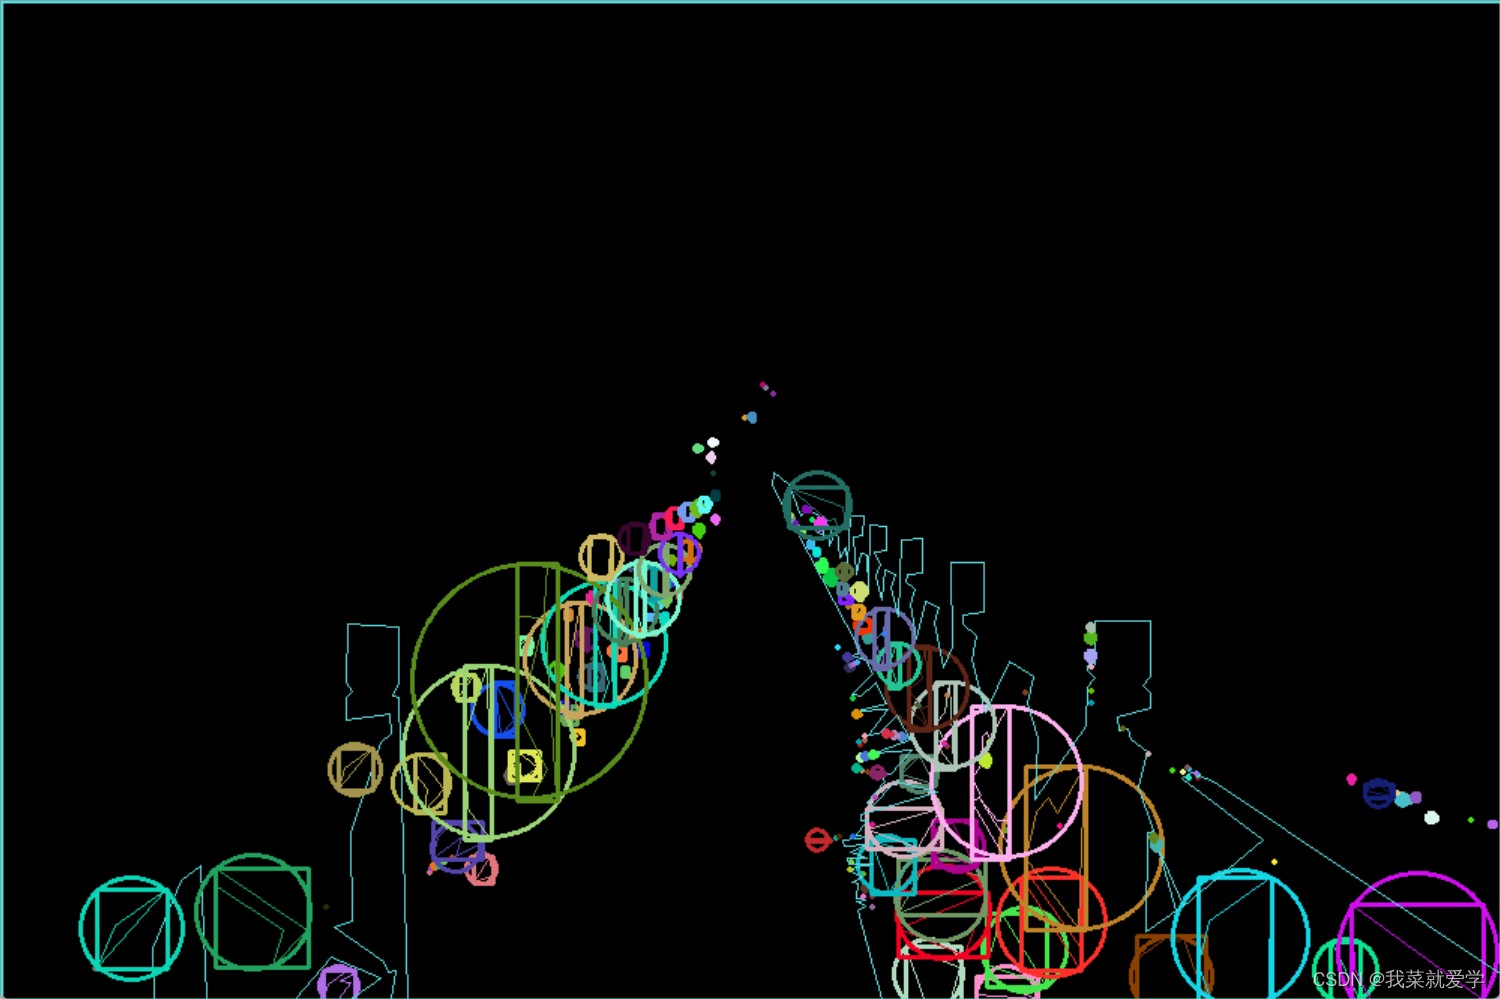
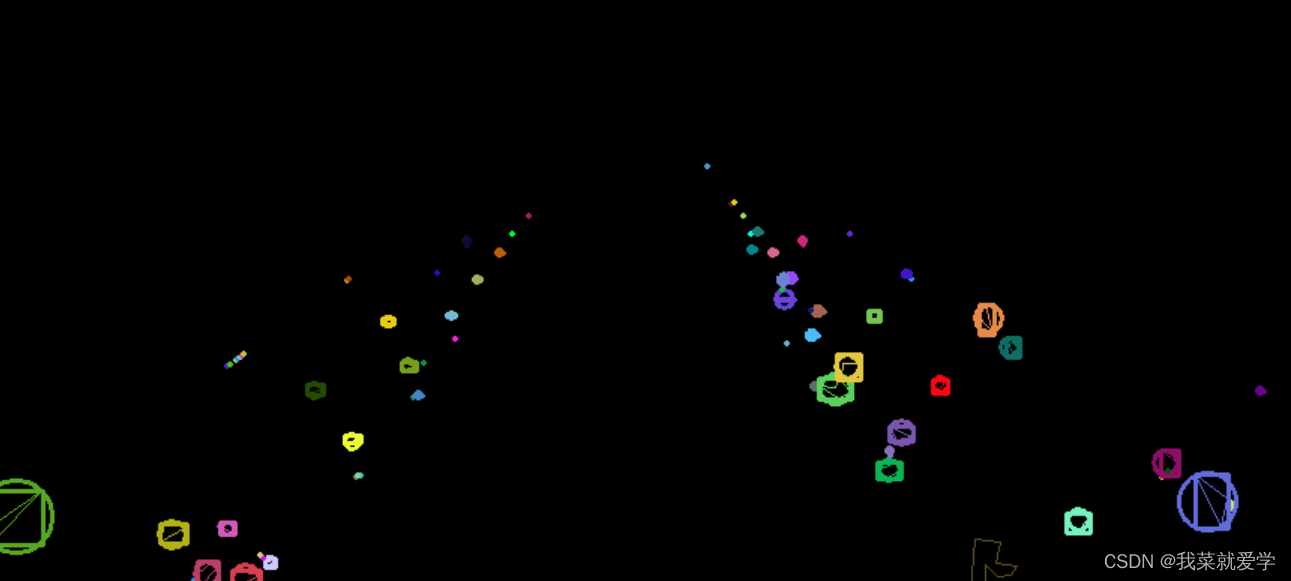
阈值25的时候:
阈值150的时候:

-
相关阅读:
网站如何快速变成灰色?,几行代码就搞定了!
传述最详细的干货,让简历面试不再成为你找工作的绊脚石
js基础笔记学习28-逻辑与和或
Vue基础入门超基础。
金蝶迷路“云”丛中
OpenCVSharp入门学习①-获取本地摄像头数据
【个人记录 | UNet | 整理ing】
宇视摄像机实况画面不清晰排查方法
Qt学习05 Qt Creator工程介绍
设计模式-职责链模式
- 原文地址:https://blog.csdn.net/qq_44859533/article/details/126309672
