-
谷粒商城-商品服务(分类、品牌管理)
分类管理
1 查询三级分类
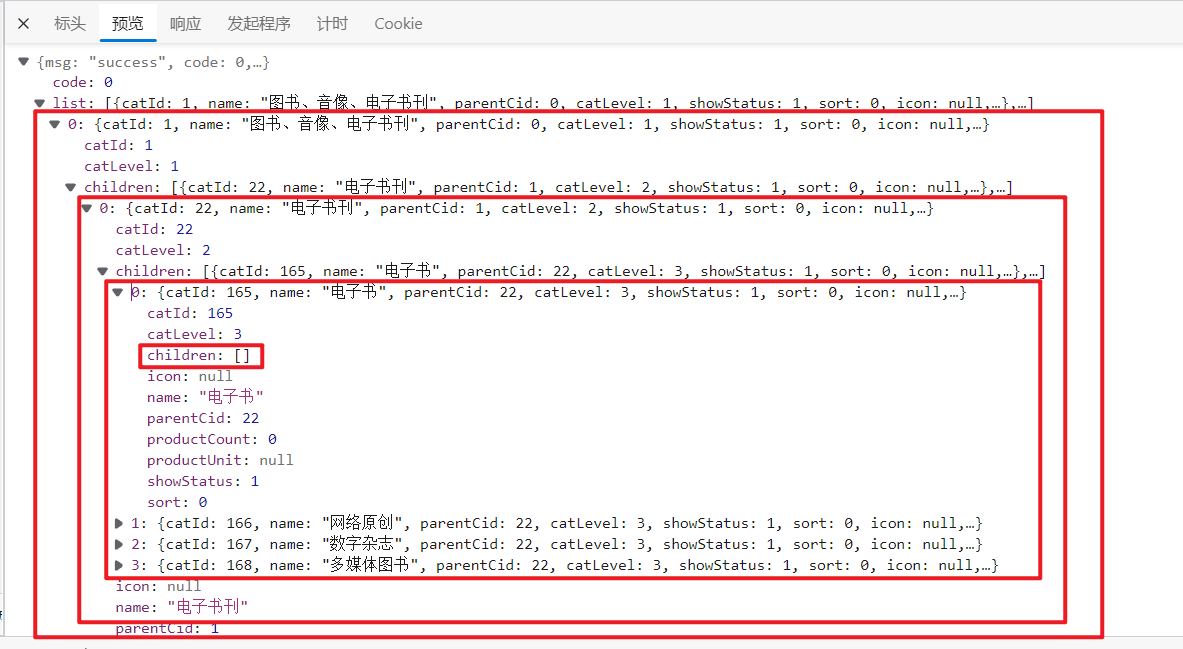
由于分类是有多级的,在数据库中的存储是用pid来表示父子关系的。所以我们在后端需要对分类做处理,以供前端渲染出更清晰的分类层级关系。
我们这里是三级分类,如果不知道有多少级的话,最好的方式是用递归来寻找子分类。
我这里没有跟老师使用Stream流的方式来做,我还是使用了for循环,感觉这样看着更舒服。(自我感觉)而且我额外创建了一个VO实体类,用于组装数据返回给前端。
@Override public List<CategoryEntityVO> listWithTree() { // 1、先从数据库中获取到所有的分类 List<CategoryEntity> allCategory = categoryDao.selectList(null); // 2、准备好一个分类信息VO实体类,用于组装格式返回给前端 List<CategoryEntityVO> allCategoryVO = new ArrayList<>(); // 3、把所有分类信息组装到VO实体类集合 for (CategoryEntity categoryEntity : allCategory) { CategoryEntityVO categoryEntityVO = new CategoryEntityVO(); BeanUtils.copyProperties(categoryEntity, categoryEntityVO); allCategoryVO.add(categoryEntityVO); } // 4、查询到所有的根节点,并获取他们的子分类,把最终组装完毕的集合放到list中 List<CategoryEntityVO> list = new ArrayList<>(); for (CategoryEntityVO categoryVO : allCategoryVO) { if (categoryVO.getParentCid() == 0) { categoryVO.setChildren(getChildren(categoryVO, allCategoryVO)); list.add(categoryVO); } } list.sort((c1, c2) -> (c1.getSort() == null ? new Integer(0) : c1.getSort()).compareTo(c2.getSort() == null ? new Integer(0) : c2.getSort())); return list; } // 递归查询每个分类下的子分类 public List<CategoryEntityVO> getChildren(CategoryEntityVO root, List<CategoryEntityVO> all) { // 1、创建子分类集合 List<CategoryEntityVO> childrenList = new ArrayList<>(); // 2、查询是否有子分类 for (CategoryEntityVO category : all) { if (root.getCatId().equals(category.getParentCid())) { // 3、若有子分类,先将其添加到children属性中 childrenList.add(category); // 4、递归查询该子分类是否也有子分类,递归退出条件就是直到循环结束都找不到子分类。 category.setChildren(getChildren(category, all)); } } childrenList.sort((c1, c2) -> (c1.getSort() == null ? new Integer(0) : c1.getSort()).compareTo(c2.getSort() == null ? new Integer(0) : c2.getSort())); return childrenList; }- 1
- 2
- 3
- 4
- 5
- 6
- 7
- 8
- 9
- 10
- 11
- 12
- 13
- 14
- 15
- 16
- 17
- 18
- 19
- 20
- 21
- 22
- 23
- 24
- 25
- 26
- 27
- 28
- 29
- 30
- 31
- 32
- 33
- 34
- 35
- 36
- 37
- 38
- 39
- 40
- 41
请求地址:http://localhost:9001/product/category/list
2 配置网关路由与路径重写
2.1 先修改后台管理页面
- 启动renren-fast,后台管理系统项目
- 启动后台管理系统的前端项目
- 使用人人快速创建目录、菜单(创建之后,目录和菜单都会写到gulimall-admin数据库的sys_menu表中)

- 找到路由展示的组件

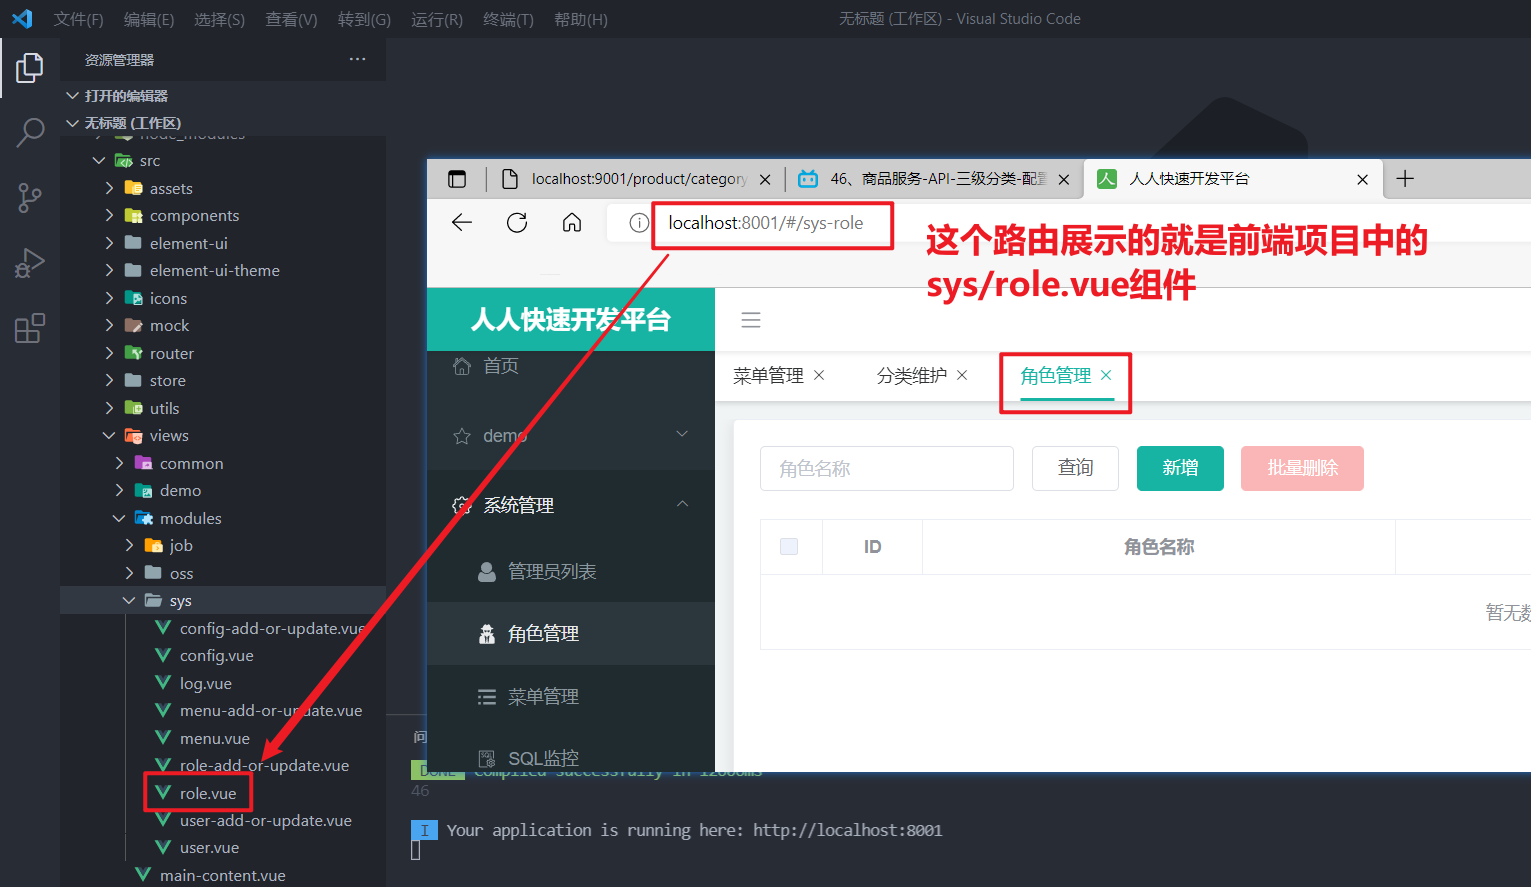
- 所以我们要为刚刚创建的 商品系统/分类维护 创建组件

- 引入element-ui的树形控件
官方地址:https://element.eleme.cn/#/zh-CN/component/tree

2.2 配置网关
- 现在的树形结构数据是写死的,我们需要调用之前的获取分类接口来获取。可以参考其他组件,查看该项目中发送请求的方式:

复制到category组件中进行修改

测试发现,发送请求失败,请求的IP错误(基本路径错误)
就算基本路径正确了,那如果我们要请求其他服务时,不是又得改地址了嘛。。所以这样不行,这时就需要网关来统一管理请求了。
- 查询基本路径的配置位置:(CTRL+shift+f)

- 我们修改基本路径,统一地向网关发送请求:http://localhost:88/api

api前缀是为了做一个标识,表示这个请求是后台管理系统的,要送到renren-fast服务。
修改了基本路径之后,我们发现连登录验证码都没有了,因为它对网关发起了请求:
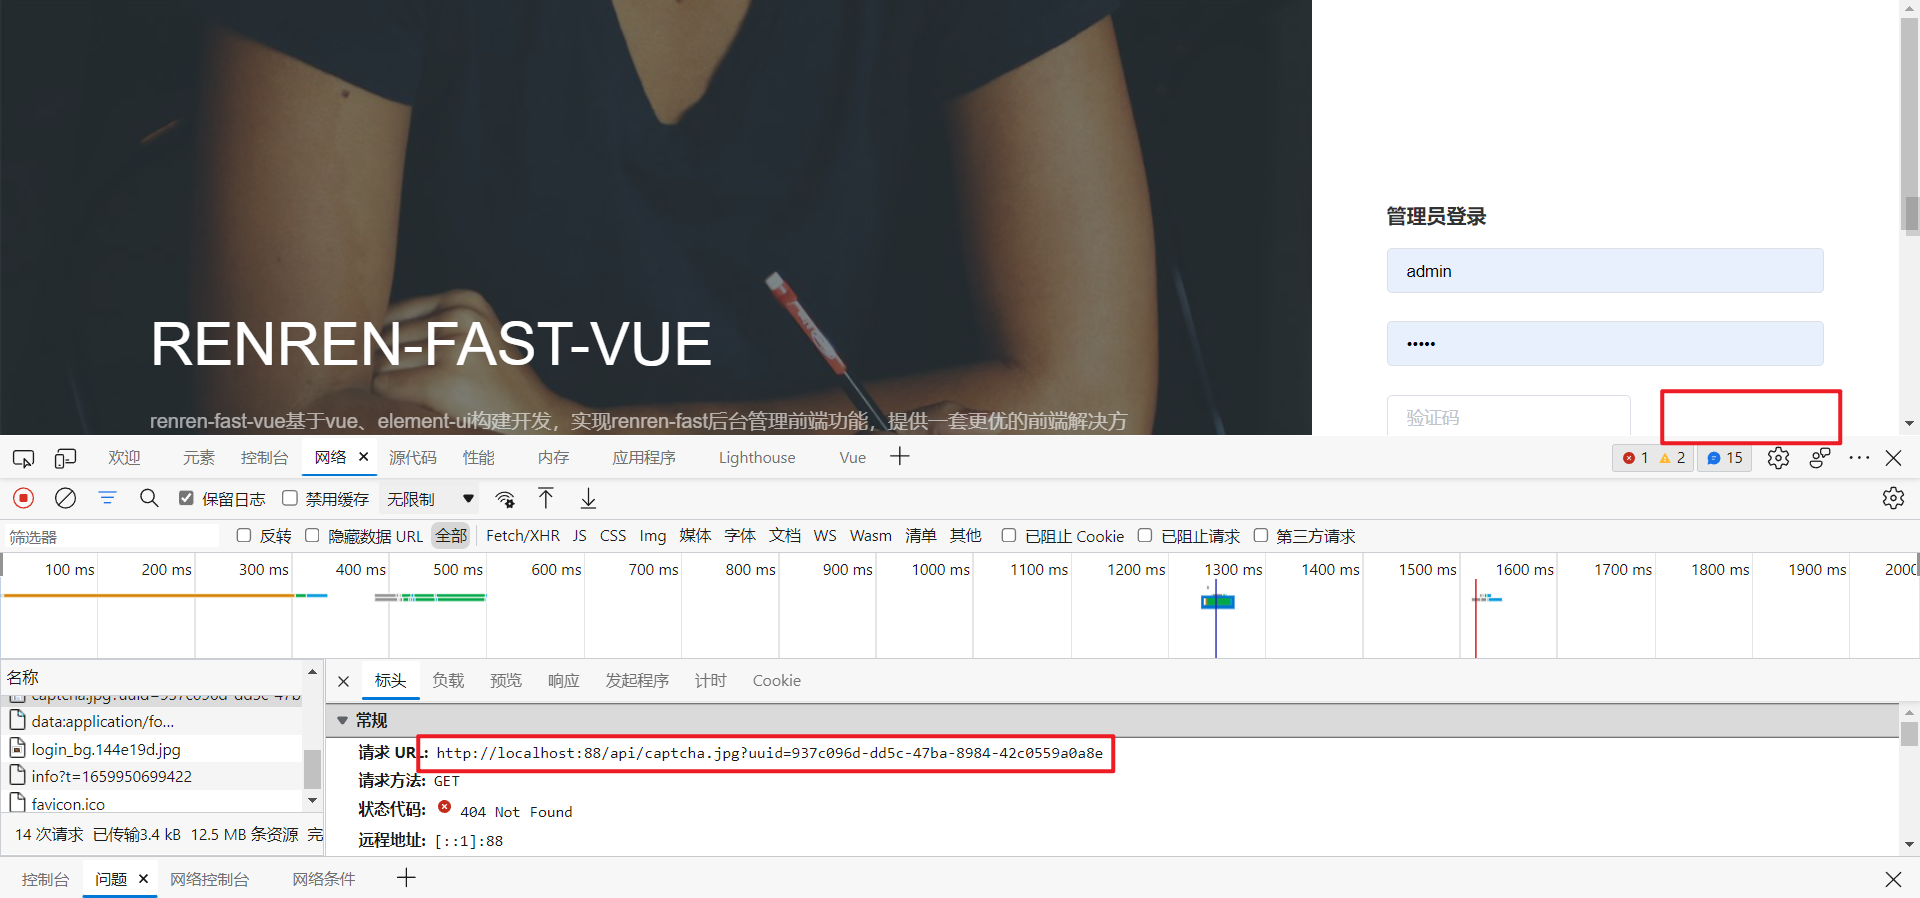
但是验证码是来源于 renren-fast 这个项目,所以我们可以先让网关把所有的请求都转给 renren-fast 这个服务。那要转发给这个服务呢,这个服务就需要注册到注册中心。
- 在 renren-fast 服务中引入nacos的相关依赖。
这里由于renren-fast不是咱们写的,它的依赖有可能跟我们的依赖不匹配,引入nacos后又和springcloud不匹配,导致启动不起来。
那么这时就需要降低renren-fast的springboot版本和单独设置nacos的版本。
<parent> <groupId>org.springframework.bootgroupId> <artifactId>spring-boot-starter-parentartifactId> <version>2.2.6.RELEASEversion> <relativePath/> parent> <dependency> <groupId>com.alibaba.cloudgroupId> <artifactId>spring-cloud-starter-alibaba-nacos-discoveryartifactId> <version>2.2.1.RELEASEversion> dependency> <dependency> <groupId>com.alibaba.cloudgroupId> <artifactId>spring-cloud-starter-alibaba-nacos-configartifactId> <version>2.2.1.RELEASEversion> dependency>- 1
- 2
- 3
- 4
- 5
- 6
- 7
- 8
- 9
- 10
- 11
- 12
- 13
- 14
- 15
- 16
- 17
- 18
- 19
还有一个地方要处理:解决renren-fast整合spring cloud alibaba nacos时出现版本不一致问题
- 对renren-fast服务做相关配置,注册到注册中心
- 配置nacos注册中心的地址
- 配置程序名
- 加入服务发现的注解

- 配置网关路由规则
spring: cloud: nacos: discovery: server-addr: 127.0.0.1:8848 gateway: # 路由数组 routes: - id: admin_route # lb:load balance,是负载均衡的意思,负载均衡到指定的服务 uri: lb://renren-fast predicates: # 表示路径中包含 /api/** ;前端项目:/api - Path=/api/**- 1
- 2
- 3
- 4
- 5
- 6
- 7
- 8
- 9
- 10
- 11
- 12
- 13
- 14
- 配置完网关路由规则后再次测试

还是请求这个地址,但是验证码依然请求失败了。
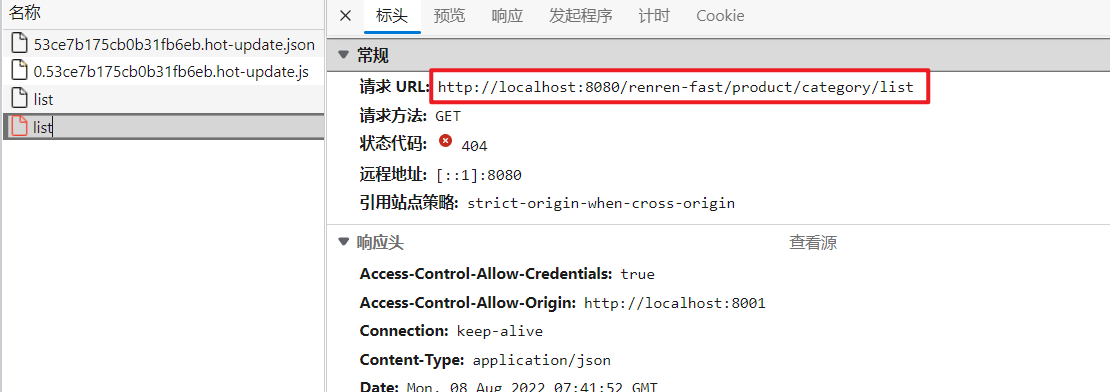
我们来分析一波,请求发送到网关,网关检测到路径中包含api,满足admin_route的断言,把请求转到renren-fast。但是转到的详细地址是哪呢:首先从注册中心中找到了renren-fast服务的地址,http://192.168.121.1:8080,然后就去请求http://192.168.121.1:8080/api/captcha.jpg,但是原本的请求验证码的默认地址是 http://localhost:8080/renren-fast/captcha.jpg。
还有一个问题:为什么renren-fast里的接口,请求时需要在中间加上服务名(http://localhost:8080/renren-fast/captcha.jpg),而我们之前配置的商品服务,请求树形分类的时候不需要加上服务名(http://localhost:9001/product/category/list),因为:

renren-fast服务里配置了servlet应用程序名,所以请求时需要加上这个。
所以,我们希望网关能把我们的请求路径:http://localhost:88/api/captcha.jpg 转成真正的访问路径:http://localhost:8080/renren-fast/captcha.jpg
那怎么转呢?使用网关的路径重写!
spring: cloud: nacos: discovery: server-addr: 127.0.0.1:8848 gateway: # 路由数组 routes: - id: admin_route # lb:load balance,是负载均衡的意思,负载均衡到指定的服务 uri: lb://renren-fast predicates: # 表示路径中包含 /api/** ;前端项目:/api - Path=/api/** filters: # 表示会把 /api/** 替换成 /renren-fast/** - RewritePath=/api/(?- 1
- 2
- 3
- 4
- 5
- 6
- 7
- 8
- 9
- 10
- 11
- 12
- 13
- 14
- 15
- 16
- 17
真鸡儿烦,配置完路径重写后又碰到版本问题了。。瞎处理了一番,不知道咋好的:
参考资料:https://blog.csdn.net/qq_43788878/article/details/115894882

- 点击登录,出现了跨域问题

为什么登录就跨域,验证码就不跨域呢?
跨域的概念:跨域问题指的是浏览器屏蔽了不同源的应用的响应数据,后端接受了请求,也响应了数据,但是被浏览器屏蔽了,前端浏览器和网关不存在跨域问题,网关只负责把请求响应给指定的路径,没有响应数据。
一个猜测:看了获取验证码和登录的接口,并进行了对比。验证码不是return响应出来的,是通过一个write()的方法直接写出来的。所以没有跨域问题?
2.3 网关统一配置跨域
可以为每一个服务做跨域处理。但因为现在是网关代理给其他服务的,所以我们可以在网关统一配置跨域,创建一个配置类:

还需要把renren-fast自带的跨域配置注掉,因为我们是向网关发送请求,它等于给我们多加了一些响应头。

最终测试:

成功登录!
3 渲染三级分类
登录到首页后,直接点击分类维护:

请求失败,为什么呢?分析一波:
请求地址中包含了api,前面我们在网关内配置了请求内含有api的话,会转发到renren-fast服务,所以分类维护的请求最终是转发到http://192.168.121.1:8080/renren-fast/product/category/list,可是分类维护的地址应该是http://192.168.121.1:9001/product/category/list,所以需要再给网关配置一个路由规则。
spring: cloud: nacos: discovery: server-addr: 127.0.0.1:8848 gateway: # 路由数组 routes: # 因为这个路由和下面那个路由很相似,下面那个包含这个,所以需要把更精确的写在上面 - id: product_route uri: lb://gulimall-product predicates: - Path=/api/product/** filters: # 把api删掉就行了 - RewritePath=/api/(?- 1
- 2
- 3
- 4
- 5
- 6
- 7
- 8
- 9
- 10
- 11
- 12
- 13
- 14
- 15
- 16
- 17
- 18
- 19
- 20
- 21
- 22
- 23
- 24
注意:若有两个路由的断言属于包含关系,需要把更精确的写在上面,上面的优先级比下面的更高。

配置完新的网关路由规则后,重启网关服务,这时候,分类列表就能正常访问了。最后,修改前端代码,渲染分类列表:

4 删除分类
4.1 页面效果
使用element-ui的树形控件,并设置按钮的显示(一二级节点能够新增节点,三级节点不能再新增节点;有子节点的不能删除;)并添加选择框,以供之后批量删除:

4.2 配置逻辑删除
使用MybatisPlus的逻辑删除插件,可以使用
show_status字段来做逻辑删除:
查看官方文档配置:逻辑删除 | MyBatis-Plus
配置后,MybatisPlus的查询语句是:SELECT … FROM pms_category WHERE show_status=1
加了
show_status来做是否删除的判断。删除时也是使用update语句把show_status字段改为0。4.3 删除分类
服务端
/** * 删除 * @RequestBody:需要接收请求体——一个数组,所以需要Post请求 */ @PostMapping("/delete") public R delete(@RequestBody Long[] catIds){ categoryService.removeMenuByIds(Arrays.asList(catIds)); return R.ok(); }- 1
- 2
- 3
- 4
- 5
- 6
- 7
- 8
- 9
/** * 批量删除 */ @Override public void removeMenuByIds(List<Long> menuList) { //TODO:后端需要再次判断要删除的节点底下还有没有节点 categoryDao.deleteBatchIds(menuList); }- 1
- 2
- 3
- 4
- 5
- 6
- 7
- 8
前端
<el-tree :data="data" :props="defaultProps" @node-click="handleNodeClick" :expand-on-click-node="false" show-checkbox node-key="catId" :default-expanded-keys="expandedKeys" >el-tree>- 1
- 2
- 3
- 4
- 5
- 6
- 7
- 8
- 9
data() { return { data: [], defaultProps: { children: "children", label: "name", }, expandedKeys: [] }; }, remove(node, data) { console.log("remove", node, data); // 把id组装为一个数组 let ids = [data.catId] this.$confirm(`确定对[id=${ids.join(',')}]进行删除操作?`, '提示', { confirmButtonText: '确定', cancelButtonText: '取消', type: 'warning' }).then(() => { this.$http({ url: this.$http.adornUrl("/product/category/delete"), method: "post", data: this.$http.adornData(ids, false), }).then(({ data }) => { console.log(data) if (data && data.code === 0) { this.$message({ message: "操作成功", type: "success", duration: 1500, }); } else { this.$message.error(data.msg); } // 刷新出新的分类菜单 this.getDataList(); // 设置需要默认展开的菜单 this.expandedKeys = [node.parent.data.catId] }) }).catch(() => {}) }- 1
- 2
- 3
- 4
- 5
- 6
- 7
- 8
- 9
- 10
- 11
- 12
- 13
- 14
- 15
- 16
- 17
- 18
- 19
- 20
- 21
- 22
- 23
- 24
- 25
- 26
- 27
- 28
- 29
- 30
- 31
- 32
- 33
- 34
- 35
- 36
- 37
- 38
- 39
- 40
- 41
- 42
- 43
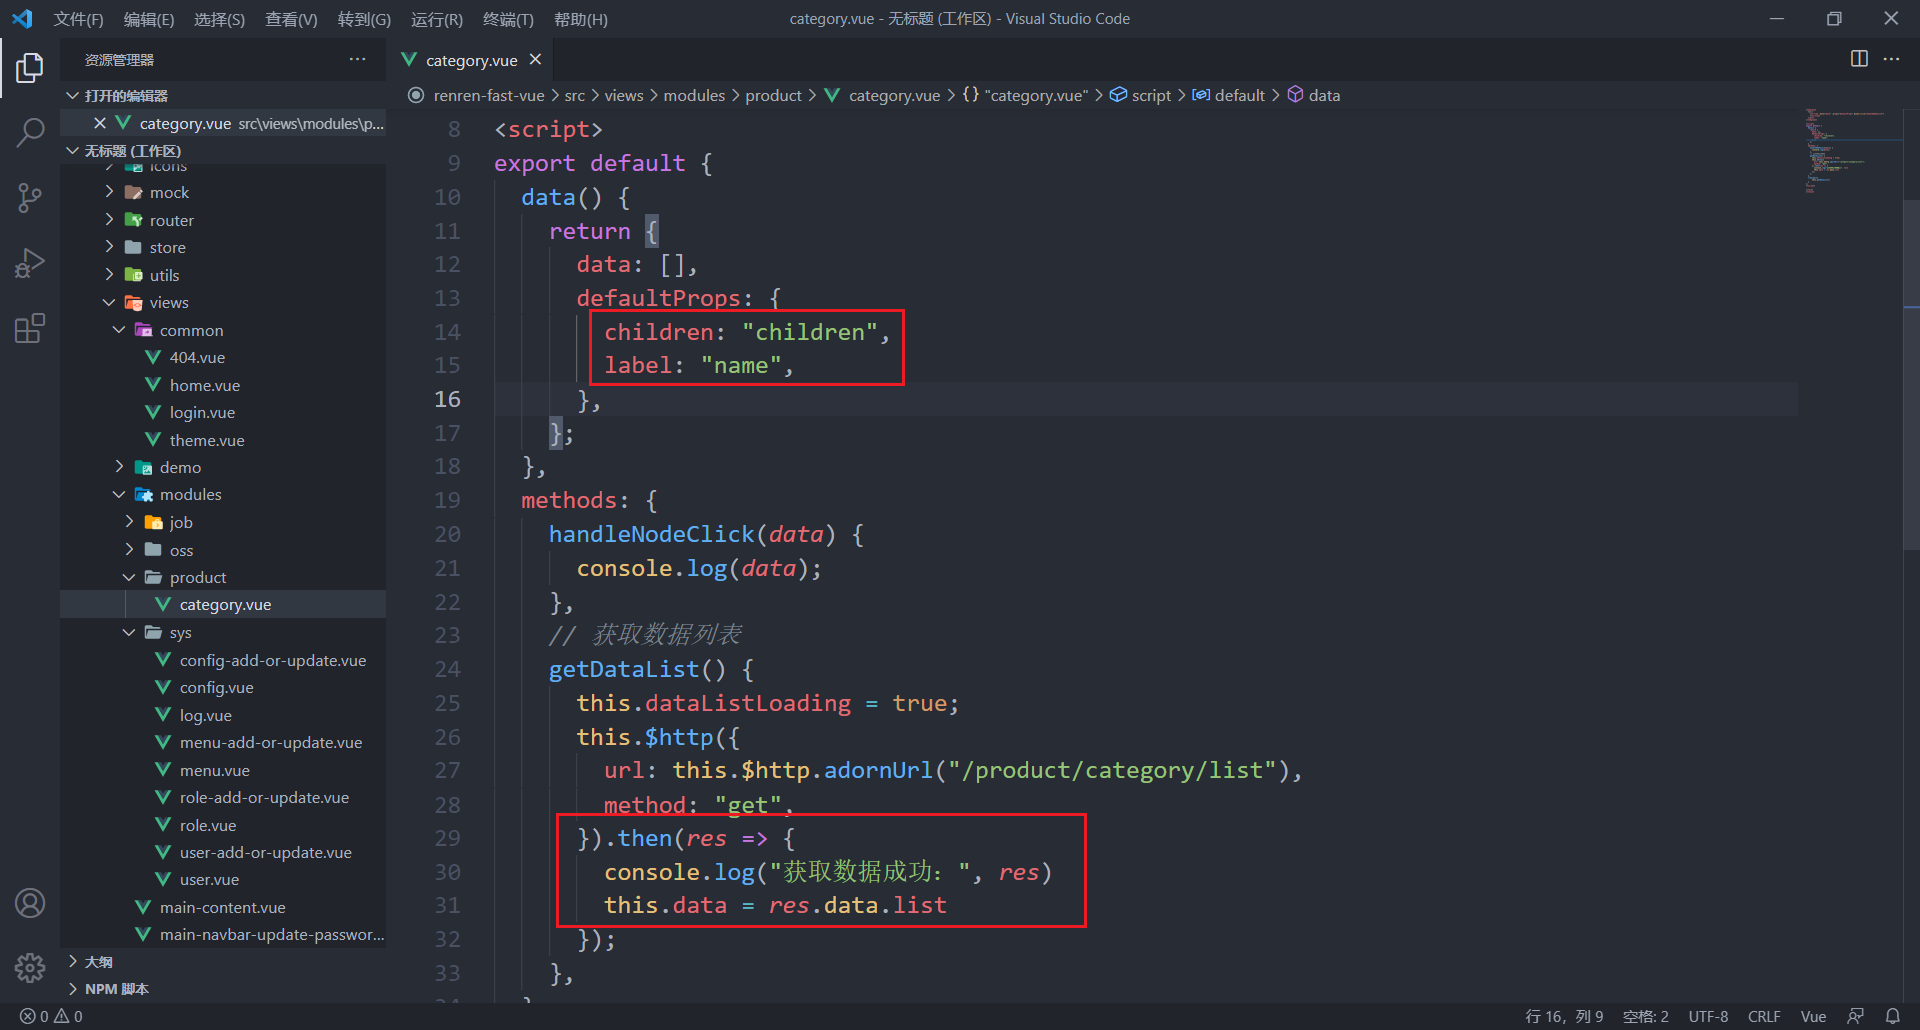
5 新增分类
data() { return { dialogVisible: false, // 提前把category里面的属性准备好,用于发送给后端 category: { name: "", parentCid: 0, catLevel: 0, showStatus: 1, sort: 0, }, formLabelWidth: "120px", data: [], defaultProps: { children: "children", label: "name", }, expandedKeys: [], }; }, methods: { handleNodeClick(data) { console.log(data); }, // 获取数据列表 getDataList() { this.dataListLoading = true; this.$http({ url: this.$http.adornUrl("/product/category/list"), method: "get", }).then((res) => { console.log("获取数据成功:", res); this.data = res.data.list; }); }, // 添加分类 addCategory() { console.log("addCategory", this.category); this.$http({ url: this.$http.adornUrl("/product/category/save"), method: "post", data: this.$http.adornData(this.category, false), }).then(({ data }) => { console.log(data); if (data && data.code === 0) { this.$message({ message: "操作成功", type: "success", duration: 1500, }); } else { this.$message.error(data.msg); } this.dialogVisible = false // 刷新出新的分类菜单 this.getDataList(); // 设置需要默认展开的菜单 this.expandedKeys = [this.category.parentCid]; }); }, append(data) { console.log("append", data); this.category.parentCid = data.catId; this.category.catLevel = data.catLevel + 1; this.category.showStatus = 1; this.category.sort = 0; this.dialogVisible = true; }, remove(node, data) { console.log("remove", node, data); // 把id组装为一个数组 let ids = [data.catId]; this.$confirm(`确定对 [${data.name}] 进行删除操作?`, "提示", { confirmButtonText: "确定", cancelButtonText: "取消", type: "warning", }) .then(() => { this.$http({ url: this.$http.adornUrl("/product/category/delete"), method: "post", data: this.$http.adornData(ids, false), }).then(({ data }) => { console.log(data); if (data && data.code === 0) { this.$message({ message: "操作成功", type: "success", duration: 1500, }); } else { this.$message.error(data.msg); } // 刷新出新的分类菜单 this.getDataList(); // 设置需要默认展开的菜单 this.expandedKeys = [node.parent.data.catId]; }); }) .catch(() => {}); }, },- 1
- 2
- 3
- 4
- 5
- 6
- 7
- 8
- 9
- 10
- 11
- 12
- 13
- 14
- 15
- 16
- 17
- 18
- 19
- 20
- 21
- 22
- 23
- 24
- 25
- 26
- 27
- 28
- 29
- 30
- 31
- 32
- 33
- 34
- 35
- 36
- 37
- 38
- 39
- 40
- 41
- 42
- 43
- 44
- 45
- 46
- 47
- 48
- 49
- 50
- 51
- 52
- 53
- 54
- 55
- 56
- 57
- 58
- 59
- 60
- 61
- 62
- 63
- 64
- 65
- 66
- 67
- 68
- 69
- 70
- 71
- 72
- 73
- 74
- 75
- 76
- 77
- 78
- 79
- 80
- 81
- 82
- 83
- 84
- 85
- 86
- 87
- 88
- 89
- 90
- 91
- 92
- 93
- 94
- 95
- 96
- 97
- 98
- 99
- 100
- 101
- 102
- 103
- 104
- 105
- 106

6 修改分类
6.1 修改分类名称
修改分类可以和新增分类复用一个对话框,不过这就需要做一下两个功能的区分:
{{ node.label }} 添加节点 修改节点 删除节点 - 1
- 2
- 3
- 4
- 5
- 6
- 7
- 8
- 9
- 10
- 11
- 12
- 13
- 14
- 15
- 16
- 17
- 18
- 19
- 20
- 21
- 22
- 23
- 24
- 25
- 26
- 27
- 28
- 29
- 30
- 31
- 32
- 33
- 34
- 35
- 36
- 37
- 38
- 39
- 40
- 41
- 42
- 43
- 44
- 45
- 46
- 47
- 48
- 49
- 50
- 51
- 52
- 53
- 54
- 55
- 56
- 57
- 58
- 59
- 60
- 61
- 62
- 63
- 64
- 65
- 66
- 67
- 68
- 69
- 70
- 71
- 72
- 73
- 74
- 75
- 76
- 77
- 78
- 79
- 80
- 81
- 82
- 83
- 84
- 85
- 86
- 87
- 88
- 89
- 90
- 91
- 92
- 93
- 94
- 95
- 96
- 97
- 98
- 99
- 100
- 101
- 102
- 103
- 104
- 105
- 106
- 107
- 108
- 109
- 110
- 111
- 112
- 113
- 114
- 115
- 116
- 117
- 118
- 119
- 120
- 121
- 122
- 123
- 124
- 125
- 126
- 127
- 128
- 129
- 130
- 131
- 132
- 133
- 134
- 135
- 136
- 137
- 138
- 139
- 140
- 141
- 142
- 143
- 144
- 145
- 146
- 147
- 148
- 149
- 150
- 151
- 152
- 153
- 154
- 155
- 156
- 157
- 158
- 159
- 160
- 161
- 162
- 163
- 164
- 165
- 166
- 167
- 168
- 169
- 170
- 171
- 172
- 173
- 174
- 175
- 176
- 177
- 178
- 179
- 180
- 181
- 182
- 183
- 184
- 185
- 186
- 187
- 188
- 189
- 190
- 191
- 192
- 193
- 194
- 195
- 196
- 197
- 198
- 199
- 200
- 201
- 202
- 203
- 204
- 205
- 206
- 207
- 208
- 209
- 210
- 211
- 212
- 213
- 214
- 215
- 216
- 217
- 218
- 219
- 220
- 221
- 222
- 223
- 224
- 225
- 226
- 227
- 228
- 229
- 230
- 231
- 232
- 233
- 234
- 235
- 236
- 237
- 238
- 239
- 240
- 241
- 242
- 243
- 244
- 245
- 246
- 247
- 248
- 249
- 250
- 251
- 252
- 253
- 254
- 255
- 256
- 257
- 258
- 259
- 260
- 261
- 262
6.2 拖拽修改(效果)
- 需要在树结构上加上所需属性:
- draggable:可拖拽
- :allow-drop=“allowDrop”:拖拽时判定目标节点能否被放置。(还需要定义一个方法来判断)
- 由于我们限制层级关系只能有3层,所以限制关系有:
- 被拖动的当前节点以及所在的父节点的总层数不能大于3
- 拖拽总层数 + 目标位置的父节点层数 <= 3
// 拖拽的限制条件 allowDrop(draggingNode, dropNode, type) { // 1、被拖动的当前节点以及所在的父节点的总层数不能大于3 this.countNode(draggingNode.data); // 被拖拽节点及其子节点一共的深度(拖拽总层数) 1 - 3 + 1 = -1(若移动的是叶子节点,会导致进不去递归方法) let depth = this.maxLevel - draggingNode.data.catLevel + 1; // console.log("深度:", depth) if (depth >= 3) { return false; } // 2、拖拽总层数 + 目标位置的父节点层数 <= 3 let targetDepth = dropNode.data.catLevel; let totalDepth = 0; if (type == "inner") { totalDepth = depth + targetDepth; if (totalDepth > 3) { return false; } } else { totalDepth = depth + targetDepth - 1; if (totalDepth > 3) { return false; } } // console.log("totalDepth: ", totalDepth, "type: ", type) return true; }, // 求出被拖拽节点的最大深度 countNode(node) { if (node.children != null && node.children.length > 0) { for (let i = 0; i < node.children.length; i++) { const element = node.children[i]; if (element.catLevel > this.maxLevel) { this.maxLevel = element.catLevel; } this.countNode(element); } } }- 1
- 2
- 3
- 4
- 5
- 6
- 7
- 8
- 9
- 10
- 11
- 12
- 13
- 14
- 15
- 16
- 17
- 18
- 19
- 20
- 21
- 22
- 23
- 24
- 25
- 26
- 27
- 28
- 29
- 30
- 31
- 32
- 33
- 34
- 35
- 36
- 37
- 38
- 39
6.3 拖拽修改(数据收集)
要清楚拖拽后有哪些信息可能会改变:
- parent_cid:父分类id
- cat_level:层级
- sort:排序
被拖拽节点的放置位置(before、after、inner):before/after和inner要分开考虑
data(){ return { // 用于记录所有需要更新数据的节点 updateNodes: [], } } handleDrop(draggingNode, dropNode, dropType, ev) { let pCid = 0; // 记录节点到达目标位置后,该层的所有节点 let siblings = []; // 1、父分类id if (dropType == "inner") { pCid = dropNode.data.catId; siblings = dropNode.childNodes; } else if (dropType == "after" || dropType == "before") { pCid = dropNode.parent.data.catId; siblings = dropNode.parent.childNodes; } // 2、排序 for (let i = 0; i < siblings.length; i++) { const element = siblings[i]; // 遍历到当前节点,需要还需要修改它的父id和层级。排序是所有都需要 if (element.data.catId == draggingNode.data.catId) { // 3、层级 if (element.childNodes != null && element.childNodes.length > 0) { this.updateChildNodesLevel(element); } // 将节点直接拉到第一层,可能会导致没有父id if (pCid == undefined) { pCid = 0 } this.updateNodes.push({ catId: element.data.catId, parentCid: pCid, sort: i, catLevel: element.level, }); } else{ this.updateNodes.push({ catId: element.data.catId, sort: i }); } } console.log(this.updateNodes) }, // 更新被拖拽节点的子节点的层级 updateChildNodesLevel(node) { for (let i = 0; i < node.childNodes.length; i++) { const element = node.childNodes[i]; this.updateNodes.push({ catId: element.data.catId, catLevel: element.level, }); if (element.childNodes != null && element.childNodes.length > 0) { this.updateChildNodesLevel(element); } } },- 1
- 2
- 3
- 4
- 5
- 6
- 7
- 8
- 9
- 10
- 11
- 12
- 13
- 14
- 15
- 16
- 17
- 18
- 19
- 20
- 21
- 22
- 23
- 24
- 25
- 26
- 27
- 28
- 29
- 30
- 31
- 32
- 33
- 34
- 35
- 36
- 37
- 38
- 39
- 40
- 41
- 42
- 43
- 44
- 45
- 46
- 47
- 48
- 49
- 50
- 51
- 52
- 53
- 54
- 55
- 56
- 57
- 58
- 59
- 60
- 61
- 62
6.4 拖拽修改(功能完成)
最后一步设置了
批量保存的功能,和是否开启拖拽的功能:- 为了防误操作,添加了开启拖拽的开关
- 不用每一次拖拽都和后端进行操作,所有操作结束了,点击批量保存,一次性请求后端。
由于有修改,所以原先的代码中也改了部分东西。具体我也记乱了,直接上代码。
批量保存 {{ node.label }} 添加节点 修改节点 删除节点 - 1
- 2
- 3
- 4
- 5
- 6
- 7
- 8
- 9
- 10
- 11
- 12
- 13
- 14
- 15
- 16
- 17
- 18
- 19
- 20
- 21
- 22
- 23
- 24
- 25
- 26
- 27
- 28
- 29
- 30
- 31
- 32
- 33
- 34
- 35
- 36
- 37
- 38
- 39
- 40
- 41
- 42
- 43
- 44
- 45
- 46
- 47
- 48
- 49
- 50
- 51
- 52
- 53
- 54
- 55
- 56
- 57
- 58
- 59
- 60
- 61
- 62
- 63
- 64
- 65
- 66
- 67
- 68
- 69
- 70
- 71
- 72
- 73
- 74
- 75
- 76
- 77
- 78
- 79
- 80
- 81
- 82
- 83
- 84
- 85
- 86
- 87
- 88
- 89
- 90
- 91
- 92
- 93
- 94
- 95
- 96
- 97
- 98
- 99
- 100
- 101
- 102
- 103
- 104
- 105
- 106
- 107
- 108
- 109
- 110
- 111
- 112
- 113
- 114
- 115
- 116
- 117
- 118
- 119
- 120
- 121
- 122
- 123
- 124
- 125
- 126
- 127
- 128
- 129
- 130
- 131
- 132
- 133
- 134
- 135
- 136
- 137
- 138
- 139
- 140
- 141
- 142
- 143
- 144
- 145
- 146
- 147
- 148
- 149
- 150
- 151
- 152
- 153
- 154
- 155
- 156
- 157
- 158
- 159
- 160
- 161
- 162
- 163
- 164
- 165
- 166
- 167
- 168
- 169
- 170
- 171
- 172
- 173
- 174
- 175
- 176
- 177
- 178
- 179
- 180
- 181
- 182
- 183
- 184
- 185
- 186
- 187
- 188
- 189
- 190
- 191
- 192
- 193
- 194
- 195
- 196
- 197
- 198
- 199
- 200
- 201
- 202
- 203
- 204
- 205
- 206
- 207
- 208
- 209
- 210
- 211
- 212
- 213
- 214
- 215
- 216
- 217
- 218
- 219
- 220
- 221
- 222
- 223
- 224
- 225
- 226
- 227
- 228
- 229
- 230
- 231
- 232
- 233
- 234
- 235
- 236
- 237
- 238
- 239
- 240
- 241
- 242
- 243
- 244
- 245
- 246
- 247
- 248
- 249
- 250
- 251
- 252
- 253
- 254
- 255
- 256
- 257
- 258
- 259
- 260
- 261
- 262
- 263
- 264
- 265
- 266
- 267
- 268
- 269
- 270
- 271
- 272
- 273
- 274
- 275
- 276
- 277
- 278
- 279
- 280
- 281
- 282
- 283
- 284
- 285
- 286
- 287
- 288
- 289
- 290
- 291
- 292
- 293
- 294
- 295
- 296
- 297
- 298
- 299
- 300
- 301
- 302
- 303
- 304
- 305
- 306
- 307
- 308
- 309
- 310
- 311
- 312
- 313
- 314
- 315
- 316
- 317
- 318
- 319
- 320
- 321
- 322
- 323
- 324
- 325
- 326
- 327
- 328
- 329
- 330
- 331
- 332
- 333
- 334
- 335
- 336
- 337
- 338
- 339
- 340
- 341
- 342
- 343
- 344
- 345
- 346
- 347
- 348
- 349
- 350
- 351
- 352
- 353
- 354
- 355
- 356
- 357
- 358
- 359
- 360
- 361
- 362
- 363
- 364
- 365
- 366
- 367
- 368
- 369
- 370
- 371
- 372
- 373
- 374
- 375
- 376
- 377
- 378
- 379
- 380
- 381
- 382
- 383
- 384
- 385
- 386
- 387
- 388
- 389
- 390
- 391
- 392
- 393
- 394
- 395
- 396
- 397
- 398
- 399
- 400
- 401
- 402
- 403
- 404
- 405
- 406
- 407
- 408
- 409
- 410
- 411
- 412
- 413
- 414
7 批量删除分类
加个按钮,绑定删除方法:
batchDelete() { let checkedKeys = this.$refs.tree.getCheckedKeys(); let deleteCatIds = [] for (let i = 0; i < checkedKeys.length; i++) { const key = checkedKeys[i]; deleteCatIds.push(key); } this.$confirm(`确定对进行批量删除操作?`, "提示", { confirmButtonText: "确定", cancelButtonText: "取消", type: "warning", }) .then(() => { this.$http({ url: this.$http.adornUrl("/product/category/delete"), method: "post", data: this.$http.adornData(deleteCatIds, false), }).then(({ data }) => { console.log(data); if (data && data.code === 0) { this.$message({ message: "操作成功", type: "success", duration: 1500, }); } else { this.$message.error(data.msg); } // 刷新出新的分类菜单 this.getDataList(); }); }) .catch(() => {}); },- 1
- 2
- 3
- 4
- 5
- 6
- 7
- 8
- 9
- 10
- 11
- 12
- 13
- 14
- 15
- 16
- 17
- 18
- 19
- 20
- 21
- 22
- 23
- 24
- 25
- 26
- 27
- 28
- 29
- 30
- 31
- 32
- 33
- 34
- 35
- 36
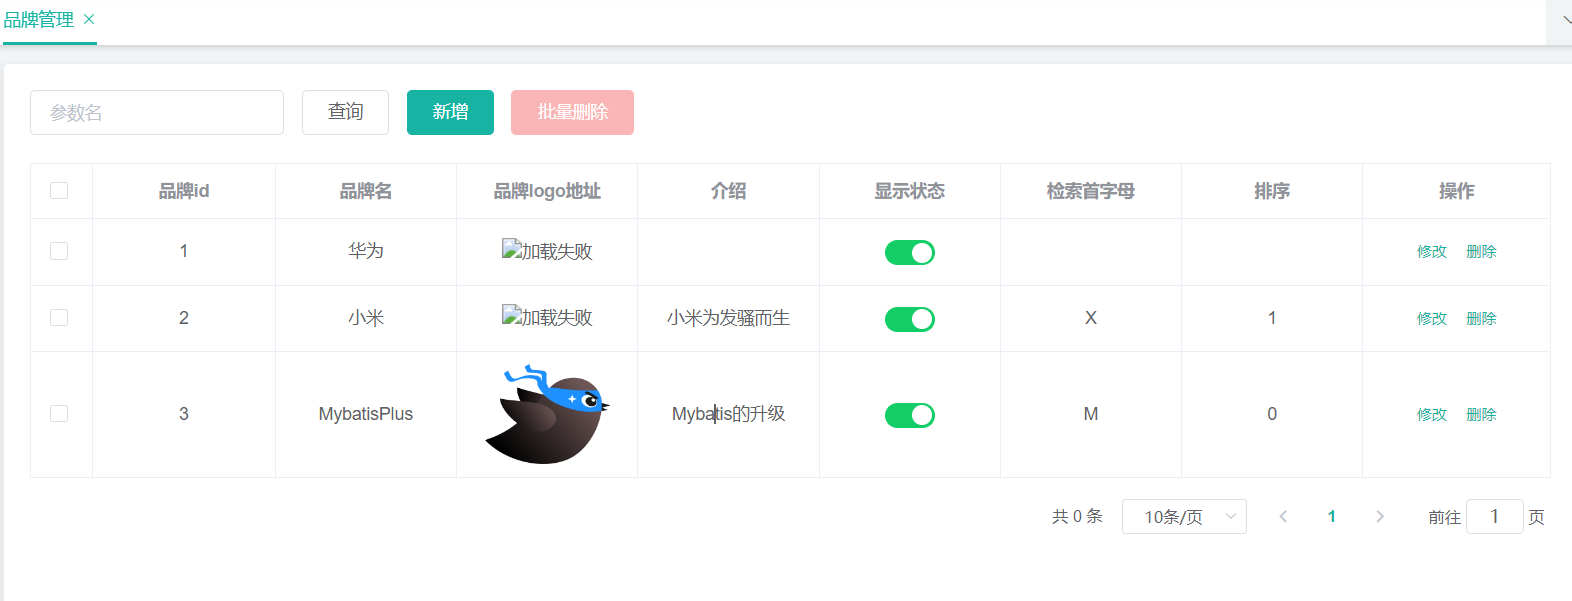
品牌管理
1 前置操作
- 首先在后台管理的前端中配置
品牌管理菜单。

- 引入之前由逆向工程生成的Vue模板

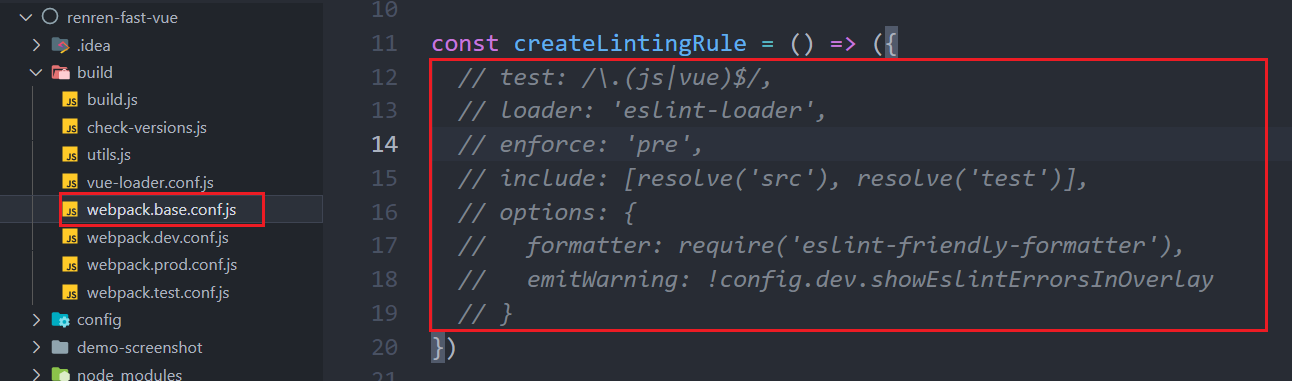
- eslint检查太严格了,把它干掉
- 暂时把权限校验关掉

- 为前端做一下修改

<el-table-column prop="showStatus" header-align="center" align="center" label="显示状态" > <template slot-scope="scope"> <el-switch v-model="scope.row.showStatus" active-color="#13ce66" inactive-color="#ff4949" :active-value="1" :inactive-value="0" @change="updateBrandStatus(scope.row)" > el-switch> template> el-table-column>- 1
- 2
- 3
- 4
- 5
- 6
- 7
- 8
- 9
- 10
- 11
- 12
- 13
- 14
- 15
- 16
- 17
- 18
updateBrandStatus(data){ let {brandId, showStatus} = data this.$http({ url: this.$http.adornUrl("/product/brand/update"), method: "post", data: this.$http.adornData({brandId, showStatus}, false), }).then(({ data }) => { if (data && data.code === 0) { this.$message({ message: "操作成功", type: "success", duration: 1500 }); } else { this.$message.error(data.msg); } this.getDataList(); }); },- 1
- 2
- 3
- 4
- 5
- 6
- 7
- 8
- 9
- 10
- 11
- 12
- 13
- 14
- 15
- 16
- 17
- 18
- 19
2 文件上传功能
2.1 测试文件上传
品牌logo应该是上传的,而不是手动填写的,所以我们要配置一个图片上传的功能:
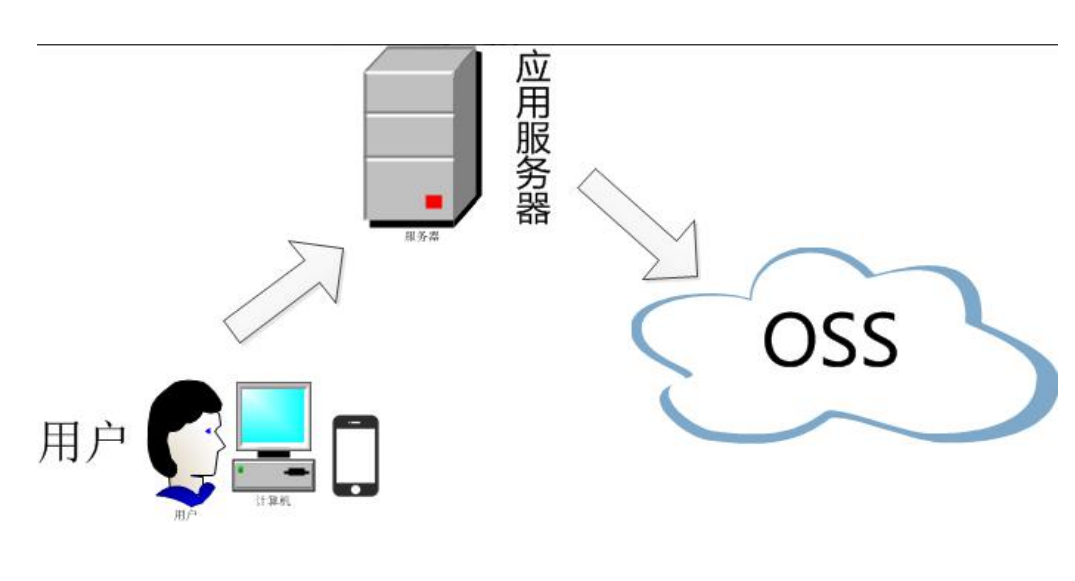
分布式系统的文件上传和单机不同。

使用阿里云OSS对象存储,上传文件有两种方式。第二种方式安全性更高。

如何使用:https://help.aliyun.com/document_detail/32009.html
注:创建子账户来访问对象存储时,需要给子账户赋予管理对象存储的权限,否则无法上传和查看。
2.2 引入springcloudalibaba的封装的OSS
- 引入依赖
注:有可能版本太高,导致依赖引入问题。需要手动指定oss的版本
<dependency> <groupId>com.alibaba.cloudgroupId> <artifactId>spring-cloud-starter-alicloud-ossartifactId> <version>2.2.0.RELEASEversion> dependency>- 1
- 2
- 3
- 4
- 5
- 6
- 添加配置
spring: cloud: # 阿里云OSS alicloud: access-key:- 1
- 2
- 3
- 4
- 5
- 6
- 7
- 8
咱有nacos配置中心,这些信息完全可以配置在配置中心。
- 测试
@Resource OSSClient ossClient; @Test void testFileUpload(){ // 填写Bucket名称 String bucketName = "img-beg"; // 填写Object完整路径,完整路径中不能包含Bucket名称,例如exampledir/exampleobject.txt。 String objectName = "gulimall/test2.png"; // 填写本地文件的完整路径,例如D:\\localpath\\examplefile.txt。 // 如果未指定本地路径,则默认从示例程序所属项目对应本地路径中上传文件流。 String filePath= "E:\\some\\ProgrammerDog.png"; try { InputStream inputStream = new FileInputStream(filePath); // 创建PutObject请求。 ossClient.putObject(bucketName, objectName, inputStream); System.out.println("上传成功..."); } catch (OSSException oe) { System.out.println("上传失败..."); } catch (FileNotFoundException e) { e.printStackTrace(); } finally { if (ossClient != null) { ossClient.shutdown(); } } }- 1
- 2
- 3
- 4
- 5
- 6
- 7
- 8
- 9
- 10
- 11
- 12
- 13
- 14
- 15
- 16
- 17
- 18
- 19
- 20
- 21
- 22
- 23
- 24
- 25
- 26
- 27
- 28
2.3 OSS获取服务端签名
因为项目之后会有非常多的第三方服务调用,对象存储、发送短信、物流查询…,所以我们可以为整个项目创建一个服务专门用来调用第三方功能。
- 创建微服务
gulimall-third-party
[外链图片转存失败,源站可能有防盗链机制,建议将图片保存下来直接上传(img-y4MOc3Xd-1660287723488)(https://img-beg.oss-cn-hangzhou.aliyuncs.com/img/%E5%88%9B%E5%BB%BA%E7%AC%AC%E4%B8%89%E6%96%B9%E6%9C%8D%E5%8A%A1.gif)]
-
在
gulimall-third-party中引入common,并把common中的对象存储依赖移过来 -
配置注册中心和配置中心,并新建配置
-
将对象存储的的配置信息配置到配置中心
-
写controller
@RestController @RefreshScope public class OssController { @Autowired(required = false) OSS ossClient; @Value("${spring.cloud.alicloud.access-key}") private String accessId; @Value("${spring.cloud.alicloud.secret-key}") private String accessKey; @Value("${spring.cloud.alicloud.oss.endpoint}") private String endpoint; @Value("${spring.cloud.alicloud.oss.bucket}") private String bucket; @RequestMapping("/oss/policy") public Map<String, String> policy() { // 填写Host地址,格式为https://bucketname.endpoint。 String host = String.format("https://%s.%s", bucket, endpoint); // 设置上传回调URL,即回调服务器地址,用于处理应用服务器与OSS之间的通信。OSS会在文件上传完成后,把文件上传信息通过此回调URL发送给应用服务器。 // String callbackUrl = "https://192.168.0.0:8888"; String dir = LocalDate.now().toString() + "/"; Map<String, String> respMap = null; try { long expireTime = 30; long expireEndTime = System.currentTimeMillis() + expireTime * 1000; Date expiration = new Date(expireEndTime); PolicyConditions policyConds = new PolicyConditions(); policyConds.addConditionItem(PolicyConditions.COND_CONTENT_LENGTH_RANGE, 0, 1048576000); policyConds.addConditionItem(MatchMode.StartWith, PolicyConditions.COND_KEY, dir); String postPolicy = ossClient.generatePostPolicy(expiration, policyConds); byte[] binaryData = postPolicy.getBytes(StandardCharsets.UTF_8); String encodedPolicy = BinaryUtil.toBase64String(binaryData); String postSignature = ossClient.calculatePostSignature(postPolicy); respMap = new LinkedHashMap<String, String>(); respMap.put("accessid", accessId); respMap.put("policy", encodedPolicy); respMap.put("signature", postSignature); respMap.put("dir", dir); respMap.put("host", host); respMap.put("expire", String.valueOf(expireEndTime / 1000)); } catch (Exception e) { // Assert.fail(e.getMessage()); System.out.println(e.getMessage()); } return respMap; } }- 1
- 2
- 3
- 4
- 5
- 6
- 7
- 8
- 9
- 10
- 11
- 12
- 13
- 14
- 15
- 16
- 17
- 18
- 19
- 20
- 21
- 22
- 23
- 24
- 25
- 26
- 27
- 28
- 29
- 30
- 31
- 32
- 33
- 34
- 35
- 36
- 37
- 38
- 39
- 40
- 41
- 42
- 43
- 44
- 45
- 46
- 47
- 48
- 49
- 50
- 51
- 52
- 53
- 调用测试

- 修改接口访问地址,并配置网关
@RestController @RequestMapping("/thirdparty") @RefreshScope public class OssController { }- 1
- 2
- 3
- 4
- 5
- 6
- id: third_party_route uri: lb://gulimall-third-party predicates: - Path=/api/thirdparty/** filters: - RewritePath=/api/(?- 1
- 2
- 3
- 4
- 5
- 6

2.4 前后端联调上传功能
- 引入已有的上传组件
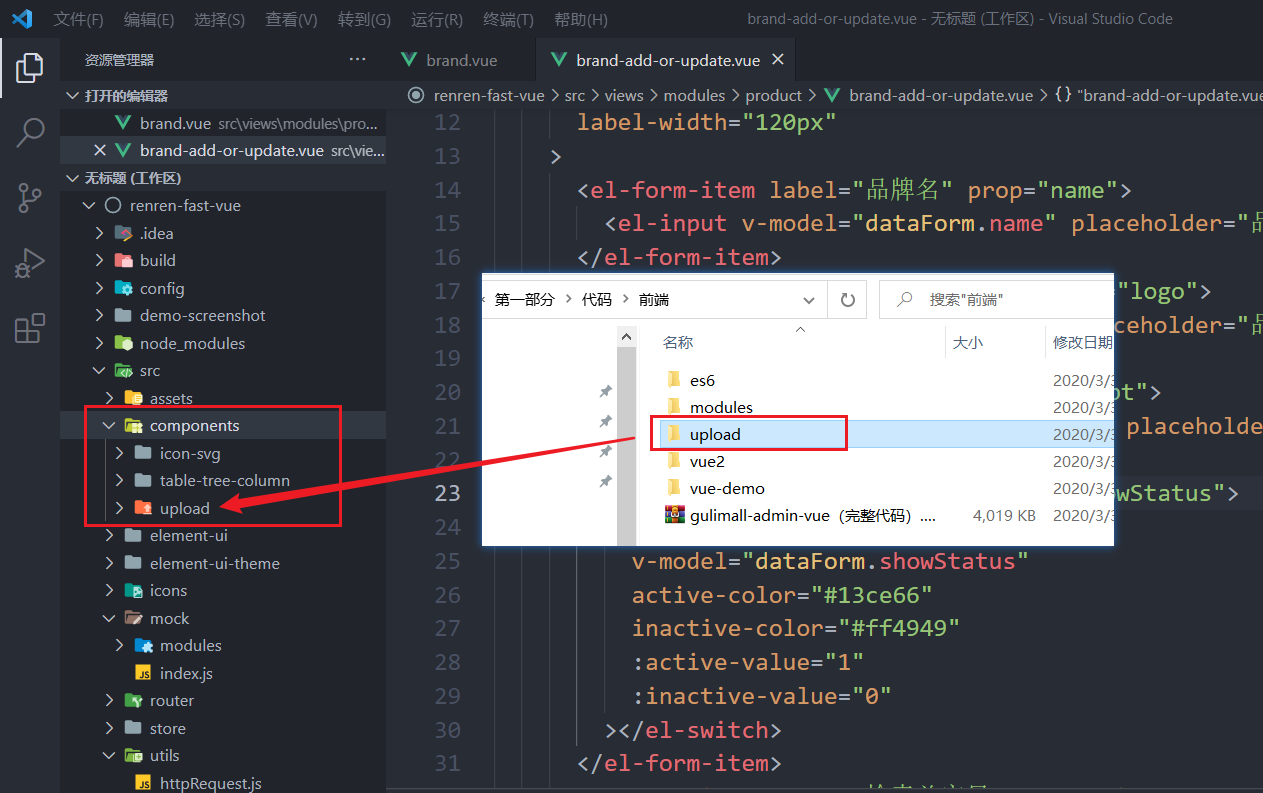
- 修改上传组件中的配置信息为自己的

- 将单文件上传组件导入到修改页面
<el-form-item label="品牌logo地址" prop="logo"> <single-upload v-model="dataForm.logo">single-upload> el-form-item>- 1
- 2
- 3
import singleUpload from "@/components/upload/singleUpload" export default { components:{ singleUpload } }- 1
- 2
- 3
- 4
- 5
- 6
- 此时上传会有跨域问题,还需要修改CORS

- 再次测试上传功能


- 在首页表格中显示logo图片,而不是一大串的地址
<el-table-column prop="logo" header-align="center" align="center" label="品牌logo地址" > <template slot-scope="scope"> <img :src="scope.row.logo" style="width: 100px; height: 80px" alt="加载失败"/> template> el-table-column>- 1
- 2
- 3
- 4
- 5
- 6
- 7
- 8
- 9
- 10
3 新增品牌
3.1 表单校验
前端校验
data() { // 首字母校验 let validatePassFirstLetter = (rule, value, callback) => { if (value === "") { callback(new Error("首字母不能为空")); } else if (value.length > 1) { callback(new Error("首字母只能是一个字符")); } else if (!/^[a-zA-Z]$/.test(value)) { callback(new Error("首字母必须是a-z或A-Z")); } else { callback(); } }; // 排序校验 let validatePassSort = (rule, value, callback) => { if (value === "") { callback(new Error("排序不能为空")); } else if (!/^[1-9]+$/.test(value)) { callback(new Error("排序必须数字(数)")); } else { callback(); } }; return { visible: false, dataForm: { brandId: 0, name: "", logo: "", descript: "", showStatus: "", firstLetter: "", sort: "", }, dataRule: { name: [{ required: true, message: "品牌名不能为空", trigger: "blur" }], logo: [ { required: true, message: "品牌logo地址不能为空", trigger: "blur" }, ], descript: [ { required: true, message: "介绍不能为空", trigger: "blur" }, ], showStatus: [ { required: true, message: "显示状态[0-不显示;1-显示]不能为空", trigger: "blur", }, ], firstLetter: [{ validator: validatePassFirstLetter, trigger: "blur" }], sort: [{ validator: validatePassSort, trigger: "blur" }], }, }; },- 1
- 2
- 3
- 4
- 5
- 6
- 7
- 8
- 9
- 10
- 11
- 12
- 13
- 14
- 15
- 16
- 17
- 18
- 19
- 20
- 21
- 22
- 23
- 24
- 25
- 26
- 27
- 28
- 29
- 30
- 31
- 32
- 33
- 34
- 35
- 36
- 37
- 38
- 39
- 40
- 41
- 42
- 43
- 44
- 45
- 46
- 47
- 48
- 49
- 50
- 51
- 52
- 53
- 54

后端校验
使用JSR303,JSR是Java Specification Requests的缩写,意思是Java 规范提案。
- 需要引入依赖
<dependency> <groupId>org.springframework.bootgroupId> <artifactId>spring-boot-starter-validationartifactId> <version>2.2.1.RELEASEversion> dependency>- 1
- 2
- 3
- 4
- 5
- 为实体类属性加校验注解,并定义提示内容(填写的内容是错误时的提示信息)
/** * 品牌名 * @NotBlank: 该注解的元素不能为null而且需要包含至少一个非空格的字符。 */ @NotBlank private String name; // 也可以自定义提示信息 @NotBlank(message = "品牌名不能为空") private String name;- 1
- 2
- 3
- 4
- 5
- 6
- 7
- 8
- 9
- 10
- 开启校验
如果只在实体类的属性上标了校验注解,而没有开启校验的话,是没有用的。
在controller的方法里添加一个注解:@Valid
/** * 保存 */ @RequestMapping("/save") // @RequiresPermissions("product:brand:save") public R save(@Valid @RequestBody BrandEntity brand){ brandService.save(brand); return R.ok(); }- 1
- 2
- 3
- 4
- 5
- 6
- 7
- 8
- 9
- 10
- 获取校验结果并返回给前端:
给校验的bean后紧跟一个BindingResult就可以获取到校验的结果。实质是:捕捉异常
@RequestMapping("/save") public R save(@Valid @RequestBody BrandEntity brand, BindingResult result){ if (result.hasErrors()){ Map<String, String> map = new HashMap<>(); result.getFieldErrors().forEach((item)->{ // 获取错误信息 String message = item.getDefaultMessage(); // 获取错误的属性 String field = item.getField(); map.put(field, message); }); return R.error(400, "提交的数据不合法").put("data", map); }else { brandService.save(brand); return R.ok(); } }- 1
- 2
- 3
- 4
- 5
- 6
- 7
- 8
- 9
- 10
- 11
- 12
- 13
- 14
- 15
- 16
- 17
- 18
- 为其他属性也添加校验规则
@Data @TableName("pms_brand") public class BrandEntity implements Serializable { private static final long serialVersionUID = 1L; /** * 品牌id */ @TableId private Long brandId; /** * 品牌名 * * @NotBlank: 该注解的元素不能为null而且需要包含至少一个非空格的字符。 */ @NotBlank(message = "品牌名不能为空") private String name; /** * 品牌logo地址 */ @NotEmpty(message = "logo不能为空") @URL(message = "logo必须是一个合法的URL地址") private String logo; /** * 介绍 */ private String descript; /** * 显示状态[0-不显示;1-显示] */ @NotNull(message = "显示状态不能为空") @Range(min = 0, max = 1, message = "显示状态只能是0或1") @Digits(integer = 1, fraction = 0, message = "显示状态只能是整数0或整数1") private Integer showStatus; /** * 检索首字母 */ @NotEmpty(message = "首字母不能为空") @Pattern(regexp = "^[a-zA-Z]$", message = "首字母只能是一个字母") private String firstLetter; /** * 排序 */ @NotNull(message = "排序不能为空") @Min(value = 0, message = "排序必须大于等于0") private Integer sort; }- 1
- 2
- 3
- 4
- 5
- 6
- 7
- 8
- 9
- 10
- 11
- 12
- 13
- 14
- 15
- 16
- 17
- 18
- 19
- 20
- 21
- 22
- 23
- 24
- 25
- 26
- 27
- 28
- 29
- 30
- 31
- 32
- 33
- 34
- 35
- 36
- 37
- 38
- 39
- 40
- 41
- 42
- 43
- 44
- 45
- 46
- 47
需要注意每一个注解所支持的类型。

3.2 统一异常处理
处理校验异常
在之后,很多业务里的新增、修改都需要加入校验功能,而且这块代码又是重复的,每一个都需要校验检查,返回成功或者失败,这样做太麻烦了,我们需要做一个统一的处理,写一个集中处理所有异常的类。
- 新建一个类:com.example.gulimall.product.exception.GulimallExceptionControllerAdvice.java,并添加注解:@ControllerAdvice
// @ControllerAdvice是专门用来处理异常的 @ControllerAdvice public class GulimallExceptionControllerAdvice { }- 1
- 2
- 3
- 4
- 5
- 既然要统一处理异常了,那就需要把校验的异常抛出来。但是我们之前写的BindingResult是接收异常的,所以需要把它删掉。
@RequestMapping("/save") // @RequiresPermissions("product:brand:save") public R save(@Valid @RequestBody BrandEntity brand){ // if (result.hasErrors()){ // Map- 1
- 2
- 3
- 4
- 5
- 6
- 7
- 8
- 9
- 10
- 11
- 12
- 13
- 14
- 15
- 16
- 17
- 18
- 19
- 20
- 21
- 使用统一处理异常的类来捕捉异常
/** * 集中处理所有异常 */ @Slf4j //@ControllerAdvice(basePackages = "com.example.gulimall.product.controller") //@ResponseBody // 这个注解=上面两个,类型RestController=ResponseBody+Controller @RestControllerAdvice(basePackages = "com.example.gulimall.product.controller") public class GulimallExceptionControllerAdvice { @ExceptionHandler(value = {Exception.class}) public R handleValidException(Exception e){ log.error("数据校验出现问题:{},异常类型是:{}", e.getMessage(), e.getClass()); return R.error(); } }- 1
- 2
- 3
- 4
- 5
- 6
- 7
- 8
- 9
- 10
- 11
- 12
- 13
- 14
- 15
- 16
输出异常: 2022-08-11 16:34:34.910 ERROR 37916 --- [nio-9001-exec-1] .g.p.e.GulimallExceptionControllerAdvice : 数据校验出现问题:Validation failed for argument [0] in public com.example.common.utils.R com.example.gulimall.product.controller.BrandController.save(com.example.gulimall.product.entity.BrandEntity) with 5 errors: [Field error in object 'brandEntity' on field 'sort': rejected value [null]; codes [NotNull.brandEntity.sort,NotNull.sort,NotNull.java.lang.Integer,NotNull]; arguments [org.springframework.context.support.DefaultMessageSourceResolvable: codes [brandEntity.sort,sort]; arguments []; default message [sort]]; default message [排序不能为空]] [Field error in object 'brandEntity' on field 'showStatus': rejected value [null]; codes [NotNull.brandEntity.showStatus,NotNull.showStatus,NotNull.java.lang.Integer,NotNull]; arguments [org.springframework.context.support.DefaultMessageSourceResolvable: codes [brandEntity.showStatus,showStatus]; arguments []; default message [showStatus]]; default message [显示状态不能为空]] [Field error in object 'brandEntity' on field 'name': rejected value [ ]; codes [NotBlank.brandEntity.name,NotBlank.name,NotBlank.java.lang.String,NotBlank]; arguments [org.springframework.context.support.DefaultMessageSourceResolvable: codes [brandEntity.name,name]; arguments []; default message [name]]; default message [品牌名不能为空]] [Field error in object 'brandEntity' on field 'logo': rejected value [asdf]; codes [URL.brandEntity.logo,URL.logo,URL.java.lang.String,URL]; arguments [org.springframework.context.support.DefaultMessageSourceResolvable: codes [brandEntity.logo,logo]; arguments []; default message [logo],[Ljavax.validation.constraints.Pattern$Flag;@185719d9,,-1,,.*]; default message [logo必须是一个合法的URL地址]] [Field error in object 'brandEntity' on field 'firstLetter': rejected value [null]; codes [NotEmpty.brandEntity.firstLetter,NotEmpty.firstLetter,NotEmpty.java.lang.String,NotEmpty]; arguments [org.springframework.context.support.DefaultMessageSourceResolvable: codes [brandEntity.firstLetter,firstLetter]; arguments []; default message [firstLetter]]; default message [首字母不能为空]] ,异常类型是:class org.springframework.web.bind.MethodArgumentNotValidException- 1
- 2
异常信息就是刚才的校验异常信息,那么我们就能猜测这个异常类型应该就是校验异常,那我们就可以让异常处理类的感知更精确一些:
@ExceptionHandler(value = {MethodArgumentNotValidException.class}) public R handleValidException(MethodArgumentNotValidException e){ log.error("数据校验出现问题:{},异常类型是:{}", e.getMessage(), e.getClass()); return R.error(); }- 1
- 2
- 3
- 4
- 5
- 用统一异常类来返回异常信息
尝试一下就知道,MethodArgumentNotValidException类中的方法和BindingResult提供的方法相同,那么可以断定我们可以使用它来做和之前完全相同的功能。
@ExceptionHandler(value = {MethodArgumentNotValidException.class}) public R handleValidException(MethodArgumentNotValidException e) { Map<String, String> map = new HashMap<>(); e.getFieldErrors().forEach((item) -> { // 获取错误信息 String message = item.getDefaultMessage(); // 获取错误的属性 String field = item.getField(); map.put(field, message); }); return R.error(400, "提交的数据不合法").put("data", map); }- 1
- 2
- 3
- 4
- 5
- 6
- 7
- 8
- 9
- 10
- 11
- 12

处理所有异常
这个范围大的异常处理要放在范围小的后面。
@ExceptionHandler(value = {Exception.class}) public R handleException(Exception e){ return R.error(); }- 1
- 2
- 3
- 4
系统错误码
等到后来业务众多,接口也会变得很多,返回的状态码就变得重要了。所以我们需要统一各种返回的状态码。
错误码和错误信息定义类
1.错误码定义规则为5位数字
2.前两位表示业务场景,最后三位表示错误码。例如:10001。10:通用,001:系统未知
异常
3.维护错误码后需要维护错误描述,将他们定义为枚举形式
错误码列表:
10:通用
11:商品
12:订单
13:购物车
14:物流- 写一个枚举类
public enum BizCodeEnum { UNKNOWN_EXCEPTION(10000, "系统未知异常"), VALID_EXCEPTION(10001, "参数格式校验失败"); private final int code; private final String msg; BizCodeEnum(int code, String msg) { this.code = code; this.msg = msg; } public int getCode() { return code; } public String getMsg() { return msg; } }- 1
- 2
- 3
- 4
- 5
- 6
- 7
- 8
- 9
- 10
- 11
- 12
- 13
- 14
- 15
- 16
- 17
- 18
- 19
- 20
- 在异常处理类中使用枚举类提供的状态码和信息
@Slf4j @RestControllerAdvice(basePackages = "com.example.gulimall.product.controller") public class GulimallExceptionControllerAdvice { @ExceptionHandler(value = {MethodArgumentNotValidException.class}) public R handleValidException(MethodArgumentNotValidException e) { Map<String, String> map = new HashMap<>(); e.getFieldErrors().forEach((item) -> { // 获取错误信息 String message = item.getDefaultMessage(); // 获取错误的属性 String field = item.getField(); map.put(field, message); }); return R.error(BizCodeEnum.VALID_EXCEPTION.getCode(), BizCodeEnum.VALID_EXCEPTION.getMsg()).put("data", map); } @ExceptionHandler(value = {Exception.class}) public R handleException(Exception e){ return R.error(BizCodeEnum.UNKNOWN_EXCEPTION.getCode(), BizCodeEnum.UNKNOWN_EXCEPTION.getMsg()); } }- 1
- 2
- 3
- 4
- 5
- 6
- 7
- 8
- 9
- 10
- 11
- 12
- 13
- 14
- 15
- 16
- 17
- 18
- 19
- 20
- 21
- 22
3.3 JSR303分组校验
为什么要分组校验呢?有可能我们在新增和修改功能时,想要校验的字段和校验规则是不一样的。比如新增时我们不需要提供id,因为MP帮我们自动生成,但是修改时,又必须携带id,所以这两个功能的校验规则是不同的。
- 创建分组接口

空接口,接口内什么都不需要。
- 为属性指定组,例如品牌id:
/** * 品牌id */ @NotNull(message = "修改时,品牌id不能为空", groups = {UpdateGroup.class}) @Null(message = "新增时,品牌id不需要提供", groups = {AddGroup.class}) @TableId private Long brandId;- 1
- 2
- 3
- 4
- 5
- 6
- 7
- 使用
@Validated({AddGroup.class})指定要校验哪一组:
/** * 保存 * @Valid:开启校验 */ @RequestMapping("/save") public R save(@Validated({AddGroup.class}) @RequestBody BrandEntity brand) { brandService.save(brand); return R.ok(); } /** * 修改 */ @RequestMapping("/update") public R update(@Validated(value = {UpdateGroup.class}) @RequestBody BrandEntity brand) { brandService.updateById(brand); return R.ok(); }- 1
- 2
- 3
- 4
- 5
- 6
- 7
- 8
- 9
- 10
- 11
- 12
- 13
- 14
- 15
- 16
- 17
- 18
- 19
没有指定分组的校验注解,在分组校验的情况下不生效。在不分组的情况下才会校验。
3.4 自定义校验(手写注解)
手写注解
自定义校验有3个步骤:
- 编写一个自定义的校验注解
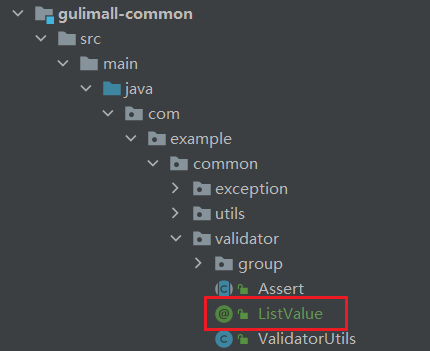
/** * 这些头部注解是从别的注解上面抄过来的 * @Target: 这个注解可以标注在哪些位置 * @Constraint: 这个注解是使用那个校验器进行校验的 */ @Target({ METHOD, FIELD, ANNOTATION_TYPE, CONSTRUCTOR, PARAMETER, TYPE_USE }) @Retention(RUNTIME) @Documented @Constraint(validatedBy = { }) public @interface ListValue { // 我们可以指定一个默认的提示信息(手动创建配置文件) String message() default "{com.example.common.validator.ListValue.message}"; Class<?>[] groups() default { }; Class<? extends Payload>[] payload() default { }; // 提供的能够校验通过的值 int[] vals() default { }; }- 1
- 2
- 3
- 4
- 5
- 6
- 7
- 8
- 9
- 10
- 11
- 12
- 13
- 14
- 15
- 16
- 17
- 18
- 19
- 20
- 21
- 22
创建提示信息的配置文件
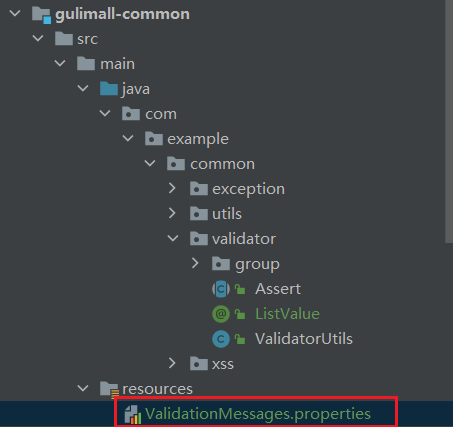
com.example.common.validator.ListValue.message=必须提交指定的值- 1
- 编写一个自定义的校验器

public class ListValueConstraintValidator implements ConstraintValidator<ListValue, Integer> { // 用于存储注解内被给予的值 private Set<Integer> set = new HashSet<>(); // 初始化方法 @Override public void initialize(ListValue constraintAnnotation) { // 获取注解内被给予的值 int[] vals = constraintAnnotation.vals(); for (int val : vals) { set.add(val); } } // 判断是否校验成功 /** * @param value 需要校验的值(被标注解的属性的值) */ @Override public boolean isValid(Integer value, ConstraintValidatorContext context) { // 如果提供的值在能够校验通过的值,则校验通过 return set.contains(value); } }- 1
- 2
- 3
- 4
- 5
- 6
- 7
- 8
- 9
- 10
- 11
- 12
- 13
- 14
- 15
- 16
- 17
- 18
- 19
- 20
- 21
- 22
- 23
- 24
- 25
- 26
- 关联自定义的校验器和自定义的校验注解
@Target({ METHOD, FIELD, ANNOTATION_TYPE, CONSTRUCTOR, PARAMETER, TYPE_USE }) @Retention(RUNTIME) @Documented // 关联校验器 @Constraint(validatedBy = { ListValueConstraintValidator.class }) public @interface ListValue { // 我们可以指定一个默认的提示信息 String message() default "{com.example.common.validator.ListValue.message}"; Class<?>[] groups() default { }; Class<? extends Payload>[] payload() default { }; // 提供的能够校验通过的值 int[] vals() default { }; }- 1
- 2
- 3
- 4
- 5
- 6
- 7
- 8
- 9
- 10
- 11
- 12
- 13
- 14
- 15
- 16
- 17
- 18
- 验证注解
/** * 显示状态[0-不显示;1-显示] */ @NotNull(message = "显示状态不能为空", groups = {AddGroup.class, UpdateGroup.class}) @ListValue(vals = {0, 1}, groups = {AddGroup.class}) private Integer showStatus;- 1
- 2
- 3
- 4
- 5
- 6
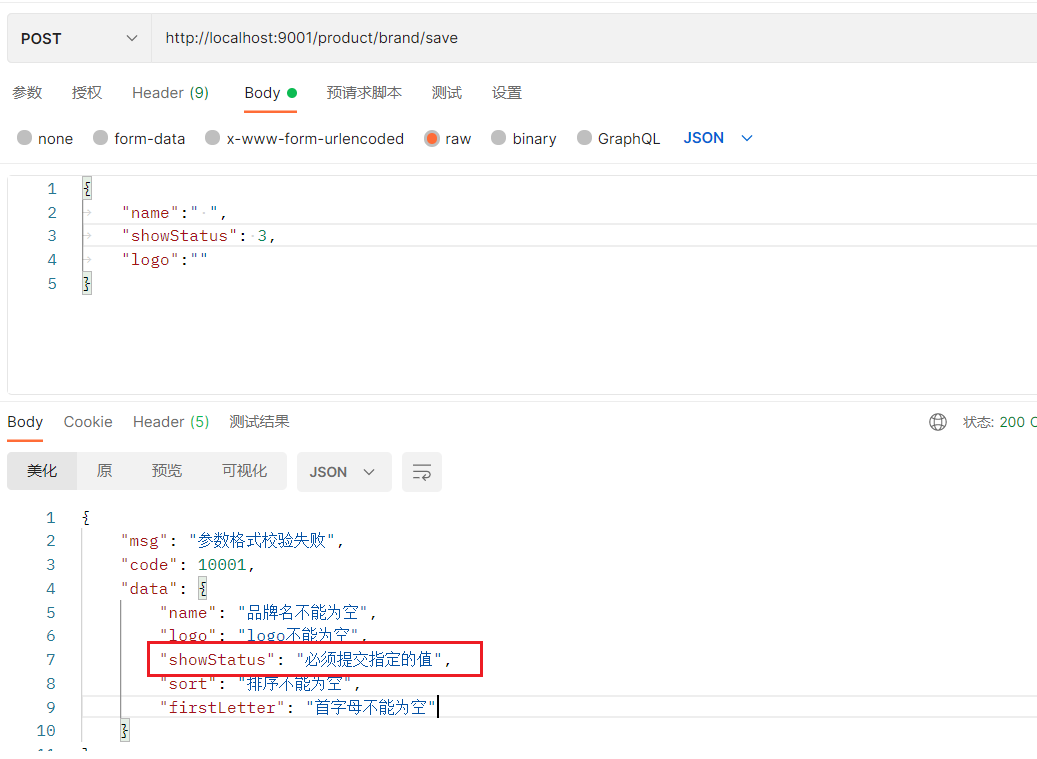
返回的提示信息可能会乱码,解决方法:https://blog.csdn.net/qq_25844803/article/details/107660291
处理显示状态
由于前端有一个单独修改显示状态的功能,它只会传status过来,所以如果还是使用原来的更新方法的话,会导致别的值没传而报错,所以需要单独处理:
-
为这个方法专门创建一个组 UpdateStatusGroup
-
复制一份update的方法,只用来更新status。
/** * 修改显示状态 */ @RequestMapping("/update/status") public R updateStatus(@Validated(value = {UpdateStatusGroup.class}) @RequestBody BrandEntity brand) { brandService.updateById(brand); return R.ok(); }- 1
- 2
- 3
- 4
- 5
- 6
- 7
- 8
- 9
- 把status属性上加上这个组,别的属性不用动,最终提交上来的时候就只会校验status
/** * 显示状态[0-不显示;1-显示] */ @NotNull(message = "显示状态不能为空", groups = {AddGroup.class, UpdateGroup.class, UpdateStatusGroup.class}) @ListValue(vals = {0, 1}, groups = {AddGroup.class, UpdateGroup.class, UpdateStatusGroup.class}) private Integer showStatus;- 1
- 2
- 3
- 4
- 5
- 6
-
相关阅读:
8.11 Day39----框架面试题
Web前端:JavaScript在网络游戏中的使用
npm i -S vue-router vuex axios element-ui
jquery广告图片切换效果
如何让JOIN跑得更快
六、鼎捷T100采购应付之应付暂估管理篇
工程伦理--8.4 组织不服从
算法实战:亲自写红黑树之三 算法详解
vscode ssh linux C++ 程序调试
浅谈无线测温产品在菲律宾某工厂配电项目的应用
- 原文地址:https://blog.csdn.net/qq_46095164/article/details/126304519
