-
4、 后台服务配制以及代码生成[木字楠博客]
1、Log4j2配制
1.1、pom文件配制
我们需要剔除掉spring Web模块中slf4j的日志部分,否则将会与slf4j2产生依赖冲突
<dependency> <groupId>org.springframework.bootgroupId> <artifactId>spring-boot-starter-webartifactId> <version>${springboot.version}version> <exclusions> <exclusion> <artifactId>logback-classicartifactId> <groupId>ch.qos.logbackgroupId> exclusion> <exclusion> <groupId>org.apache.logging.log4jgroupId> <artifactId>log4j-to-slf4jartifactId> exclusion> exclusions> dependency> <dependency> <groupId>org.springframework.bootgroupId> <artifactId>spring-boot-starter-log4j2artifactId> <version>${springboot.version}version> dependency>- 1
- 2
- 3
- 4
- 5
- 6
- 7
- 8
- 9
- 10
- 11
- 12
- 13
- 14
- 15
- 16
- 17
- 18
- 19
- 20
- 21
- 22
- 23
1.2、resource中添加log4j2.xml
<configuration status="WARN" monitorInterval="30"> <properties> <property name="LOG_HOME">/opt/logsproperty> <property name="LOG_NAME">nanjustar-server-logsproperty> <property name="LOG_FORMAT">[%d{yyyy-MM-dd HH:mm:ss.SSS}] %p %t %c[%L] - %m %nproperty> <property name="LOG_FORMAT_CONSOLE">%d{yyyy-MM-dd HH:mm:ss.SSS} %highlight{%-5level} [%t] %highlight{%c{1.}.%M(%L)}: %msg%n%throwableproperty> <property name="BACKUP_HOME">${LOG_HOME}/$${date:yyyy-MM}property> <property name="BACK_HZ">%d{yyyy-MM-dd}property> properties> <appenders> <console name="console" target="SYSTEM_OUT"> <PatternLayout pattern="${LOG_FORMAT_CONSOLE}" disableAnsi="false" noConsoleNoAnsi="false"/> console> appenders> <loggers> <root level="info"> <appender-ref ref="console"/> <appender-ref ref="infoLog"/> <appender-ref ref="warnLog"/> <appender-ref ref="errorLog"/> root> loggers> configuration>- 1
- 2
- 3
- 4
- 5
- 6
- 7
- 8
- 9
- 10
- 11
- 12
- 13
- 14
- 15
- 16
- 17
- 18
- 19
- 20
- 21
- 22
- 23
- 24
- 25
- 26
- 27
- 28
- 29
- 30
- 31
- 32
- 33
- 34
- 35
- 36
- 37
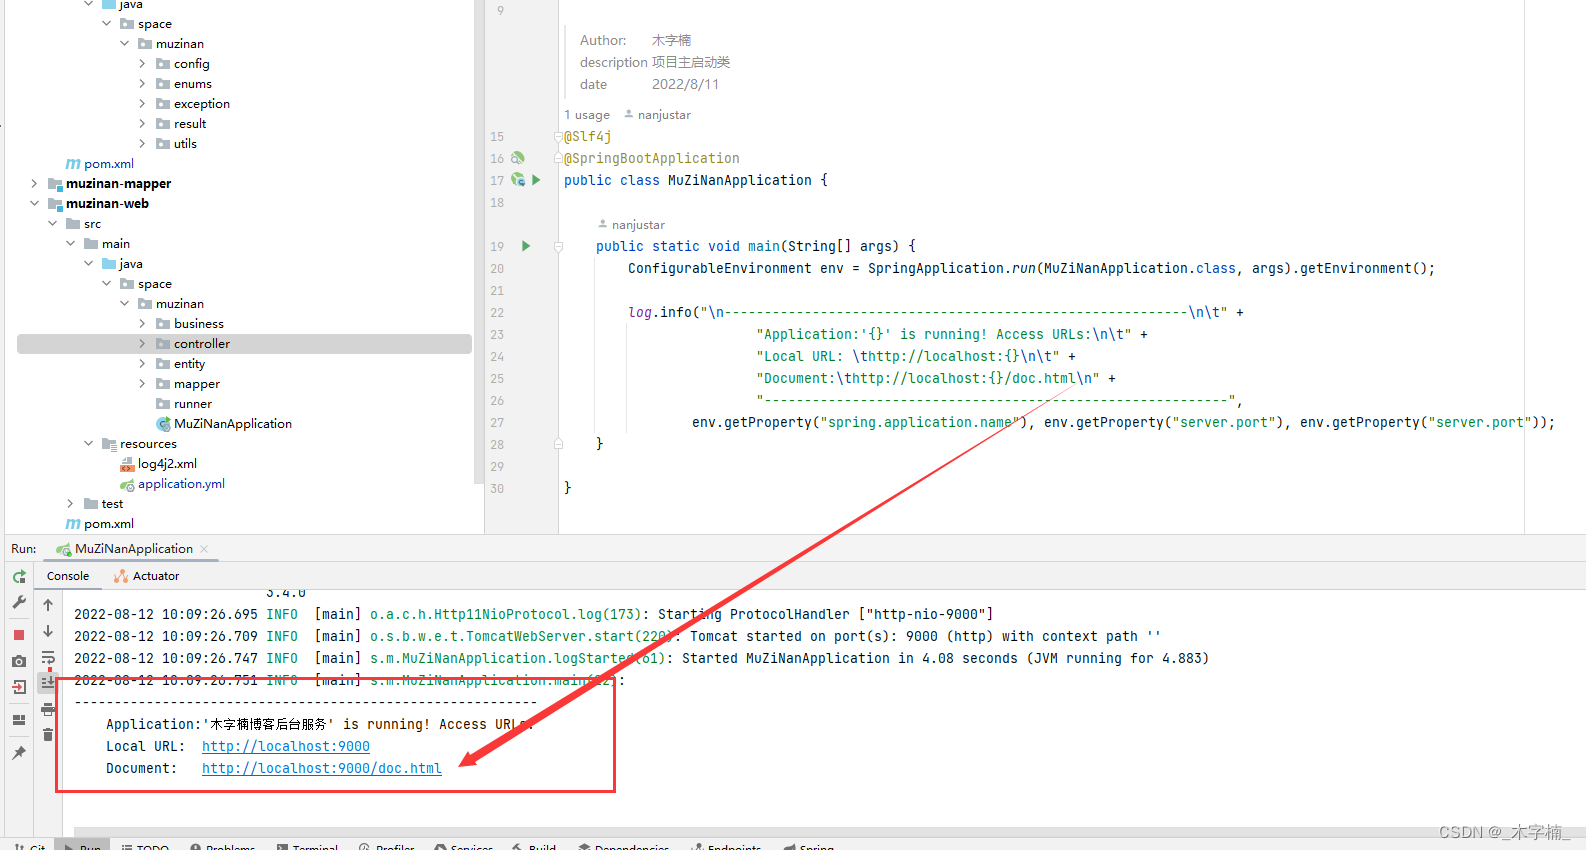
1.3、启动测试

1.4、日志简单使用
/** * @author 木字楠 * @description 项目主启动类 * @date 2022/8/11 */ @Slf4j @SpringBootApplication public class MuZiNanApplication { public static void main(String[] args) { ConfigurableEnvironment env = SpringApplication.run(MuZiNanApplication.class, args).getEnvironment(); log.info("\n----------------------------------------------------------\n\t" + "Application:'{}' is running! Access URLs:\n\t" + "Local URL: \thttp://localhost:{}\n\t" + "Document:\thttp://localhost:{}/doc.html\n" + "----------------------------------------------------------", env.getProperty("spring.application.name"), env.getProperty("server.port"), env.getProperty("server.port")); } }- 1
- 2
- 3
- 4
- 5
- 6
- 7
- 8
- 9
- 10
- 11
- 12
- 13
- 14
- 15
- 16
- 17
- 18
- 19
- 20
- 21

2、Swagger3引入
2.1、依赖引入
<swagger.version>3.0.0swagger.version> <knife4j.version>2.0.4knife4j.version>- 1
- 2
- 3
<dependency> <groupId>io.springfoxgroupId> <artifactId>springfox-boot-starterartifactId> <version>${swagger.version}version> <exclusions> <exclusion> <groupId>io.swaggergroupId> <artifactId>swagger-modelsartifactId> exclusion> exclusions> dependency> <dependency> <groupId>com.github.xiaoymingroupId> <artifactId>knife4j-spring-boot-starterartifactId> <version>${knife4j.version}version> dependency>- 1
- 2
- 3
- 4
- 5
- 6
- 7
- 8
- 9
- 10
- 11
- 12
- 13
- 14
- 15
- 16
- 17
- 18
- 19
2.2、Swagger配制
# custom Configuration application: #Swagger Configuration swagger: isEnable: true- 1
- 2
- 3
- 4
- 5
/** * @author 木字楠 * @version 1.0 */ @Configuration public class SwaggerConfig { @Value("${application.swagger.isEnable}") private boolean isEnable; @Bean public Docket createSecurityRestApi(){ return createRestApi("system","space.muzinan.controller.security"); } /** * 创建api * @param groupName 分组名称 * @param basePackage 包路径 * @return Docket */ public Docket createRestApi(String groupName,String basePackage) { return new Docket(DocumentationType.OAS_30) .enable(isEnable) .apiInfo(apiInfo()) .groupName(groupName) .select() .apis(RequestHandlerSelectors.basePackage(basePackage)) .paths(PathSelectors.any()) .build(); } /** * api简介信息 * @return ApiInfo */ private ApiInfo apiInfo() { return new ApiInfoBuilder() .title("标题:木字楠博客系统后台接口文档") .description("描述:木字楠博客系统后端接口服务...") .contact(new Contact("楠橘星", "www.muzinan.space", "486356410@qq.com")) .version("v1.0") .build(); } }- 1
- 2
- 3
- 4
- 5
- 6
- 7
- 8
- 9
- 10
- 11
- 12
- 13
- 14
- 15
- 16
- 17
- 18
- 19
- 20
- 21
- 22
- 23
- 24
- 25
- 26
- 27
- 28
- 29
- 30
- 31
- 32
- 33
- 34
- 35
- 36
- 37
- 38
- 39
- 40
- 41
- 42
- 43
- 44
- 45
2.3、访问Swagger

3、代码生成
3.1、依赖引入
<dependency> <groupId>com.baomidougroupId> <artifactId>mybatis-plus-generatorartifactId> <version>3.4.0version> dependency> <dependency> <groupId>org.apache.velocitygroupId> <artifactId>velocity-engine-coreartifactId> <version>2.0version> dependency>- 1
- 2
- 3
- 4
- 5
- 6
- 7
- 8
- 9
- 10
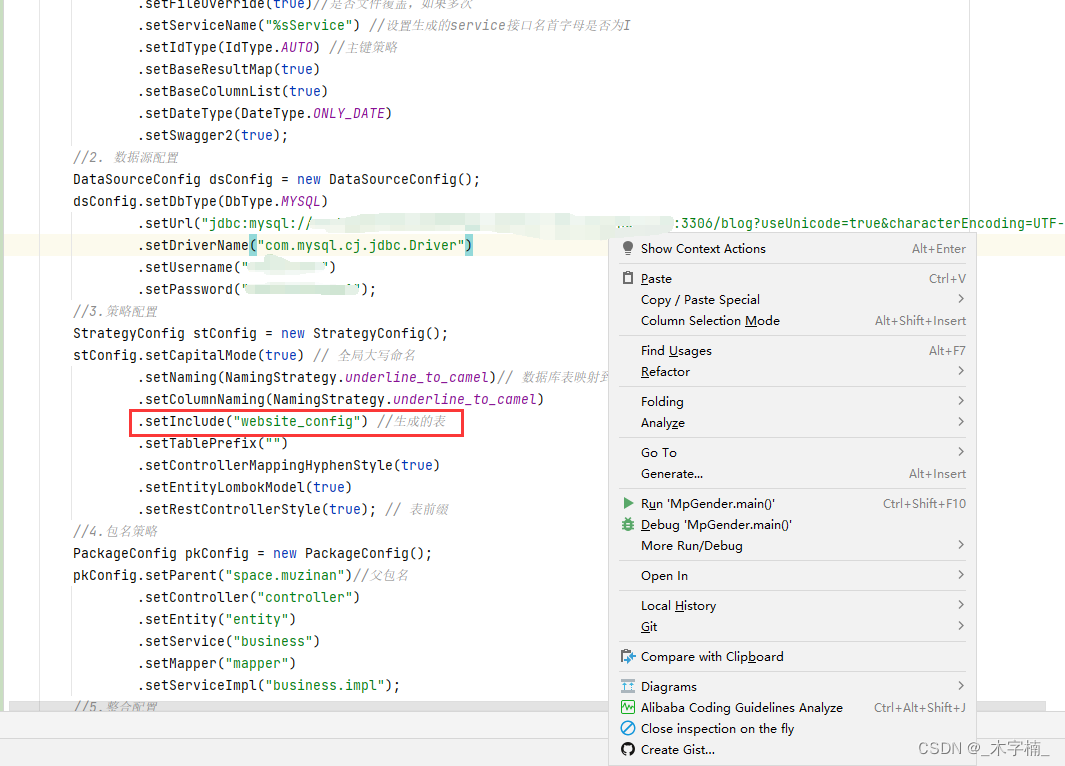
3.2、生成代码
/** ** MySQL 生成演示 *
*/ public static void main(String[] args) { //1. 全局配置 GlobalConfig config = new GlobalConfig(); //是否支持AR模式 config.setActiveRecord(true) .setAuthor("MuZiNan") //作者 .setOutputDir("D:\\Desktop\\Security") //生成路径 .setFileOverride(true)//是否文件覆盖,如果多次 .setServiceName("%sService") //设置生成的service接口名首字母是否为I .setIdType(IdType.AUTO) //主键策略 .setBaseResultMap(true) .setBaseColumnList(true) .setDateType(DateType.ONLY_DATE) .setSwagger2(true); //2. 数据源配置 DataSourceConfig dsConfig = new DataSourceConfig(); dsConfig.setDbType(DbType.MYSQL) .setUrl("jdbc:mysql://[ip]:[port]/blog?useUnicode=true&characterEncoding=UTF-8&useSSL=false&serverTimezone=Asia/Shanghai&allowPublicKeyRetrieval=true") .setDriverName("com.mysql.cj.jdbc.Driver") .setUsername("[用户名]") .setPassword("[密码]"); //3.策略配置 StrategyConfig stConfig = new StrategyConfig(); stConfig.setCapitalMode(true) // 全局大写命名 .setNaming(NamingStrategy.underline_to_camel)// 数据库表映射到实体的命名策略 .setColumnNaming(NamingStrategy.underline_to_camel) .setInclude("表名称") //生成的表 .setTablePrefix("表前缀") .setControllerMappingHyphenStyle(true) .setEntityLombokModel(true) .setRestControllerStyle(true); // 表前缀 //4.包名策略 PackageConfig pkConfig = new PackageConfig(); pkConfig.setParent("space.muzinan")//父包名 .setController("controller") .setEntity("entity") .setService("business") .setMapper("mapper") .setServiceImpl("business.impl"); //5.整合配置 AutoGenerator ag = new AutoGenerator().setGlobalConfig(config) .setDataSource(dsConfig) .setStrategy(stConfig) .setPackageInfo(pkConfig); ag.execute(); }- 1
- 2
- 3
- 4
- 5
- 6
- 7
- 8
- 9
- 10
- 11
- 12
- 13
- 14
- 15
- 16
- 17
- 18
- 19
- 20
- 21
- 22
- 23
- 24
- 25
- 26
- 27
- 28
- 29
- 30
- 31
- 32
- 33
- 34
- 35
- 36
- 37
- 38
- 39
- 40
- 41
- 42
- 43
- 44
- 45
- 46
- 47
- 48
- 49
- 50
- 51
3.3、开始生成代码
因为我们的项目是多模块项目,所以我们先暂且将所有代码生成在web模块。
生成完毕,我们手动将代码拖到对应模块

3.4、代码结构
web模块 => 存放Controller

Business模块 => 主要存放接口实现类

Mapper模块 => Mapper接口 以及 xml文件

api 模块 => 实体类、api接口

common 模块 => 工具类、配置类、枚举类、常量类…

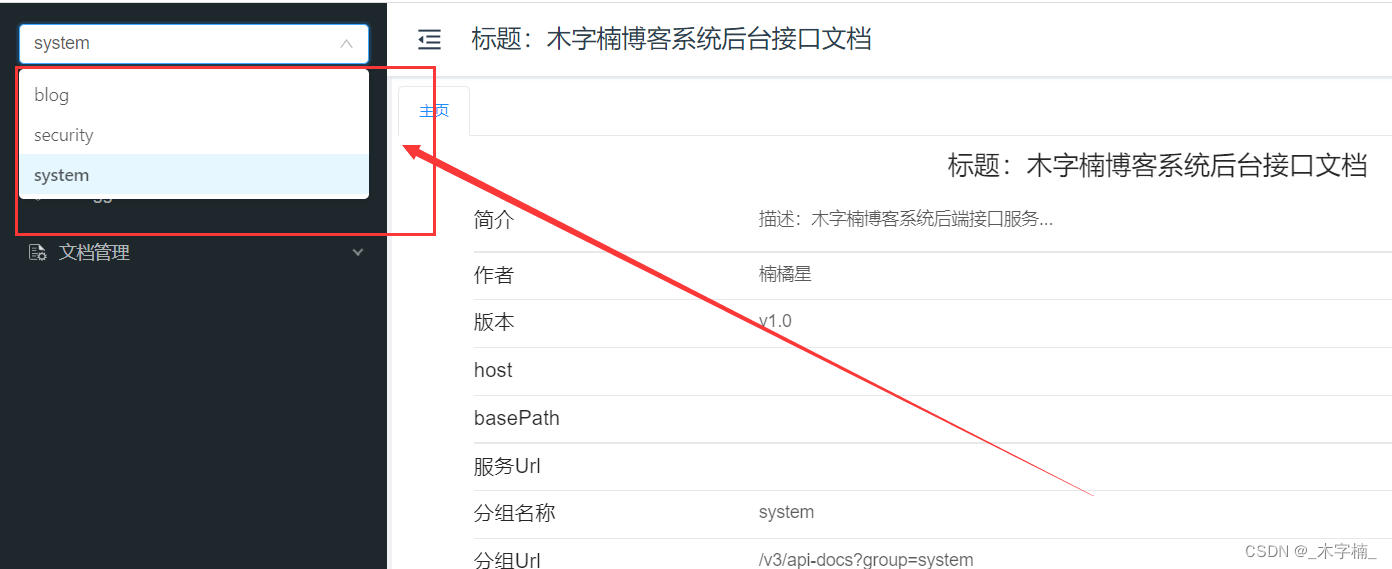
3.5、swagger配制修改
@Bean public Docket createSecurityRestApi() { return createRestApi("security", "space.muzinan.controller.security"); } @Bean public Docket createSystemRestApi() { return createRestApi("system", "space.muzinan.controller.system"); } @Bean public Docket createBlogRestApi() { return createRestApi("blog", "space.muzinan.controller.blog"); }- 1
- 2
- 3
- 4
- 5
- 6
- 7
- 8
- 9
- 10
- 11
- 12
- 13
- 14
添加以上配制之后swagger被区分为三个分组,在Controller上添加@Api(tags ={“”})即可显示对应接口
-
相关阅读:
[QCM6125][Android13] 默认允许使用usb权限
C++ opencv 通道分离与合并
premiere 图片突出滑块效果
CLion 2023:专注于C和C++编程的智能IDE mac/win版
查看mysql的版本
怎么批量添加事件(事件委托)?
Hudi Spark SQL Call Procedures学习总结(一)(查询统计表文件信息)
【机器学习】机器学习重要分支——强化学习:从理论到实践
PHP Discord获取频道消息功能实现
Rocky9.2根目录满了如何扩容根目录
- 原文地址:https://blog.csdn.net/nanshen__/article/details/126290069
