-
java基础13
线程
线程的相关概念


线程的其他概念
并行:指两个或多个事件在同一时刻点发生;
并发:指两个或多个事件在同一时间段内发生(交替进行)
线程的使用
创建线程的两种方式

继承Thread类
如果主线程先结束了,子线程还没结束,不代表程序的进程结束了

public class ThreadUse { @Override public void run() { super.run(); } public static void main(String[] args) throws InterruptedException { Cat cat = new Cat(); cat.start();//启动线程 //说明:当main线程启动一个子线程Thread-0,主线程不会阻塞.会继续执行 //这时主线程和子线程会交替执行 for (int i = 0; i < 10; i++) { System.out.println(i); Thread.sleep(1000); } } } //1.当一个类继承了Thread该类就可以作为一个线程类了 //2.我们会重写run方法,写上自己的业务代码 //3.run Thread类实现类Runnable接口的run方法 class Cat extends Thread { int times = 0; @Override public void run() {//重写run方法,写上自己的逻辑 while (times < 10) { System.out.println("我是小喵喵" + (++times) + "线程名" + Thread.currentThread().getName()); try { Thread.sleep(1000); } catch (InterruptedException e) { e.printStackTrace(); } } } }- 1
- 2
- 3
- 4
- 5
- 6
- 7
- 8
- 9
- 10
- 11
- 12
- 13
- 14
- 15
- 16
- 17
- 18
- 19
- 20
- 21
- 22
- 23
- 24
- 25
- 26
- 27
- 28
- 29
- 30
- 31
- 32
- 33
- 34
- 35
- 36
- 37
run方法和start方法的区别
1、线程中的start()方法和run()方法的主要区别在于,当程序调用start()方法,将会创建一个新线程去执行run()方法中的代码。但是如果直接调用run()方法的话,会直接在当前线程中执行run()中的代码,注意,这里不会创建新线程。这样run()就像一个普通方法一样。
2、另外当一个线程启动之后,不能重复调用start(),否则会报IllegalStateException异常。但是可以重复调用run()方法。
总结起来就是run()就是一个普通的方法,而start()会创建一个新线程去执行run()的代码。
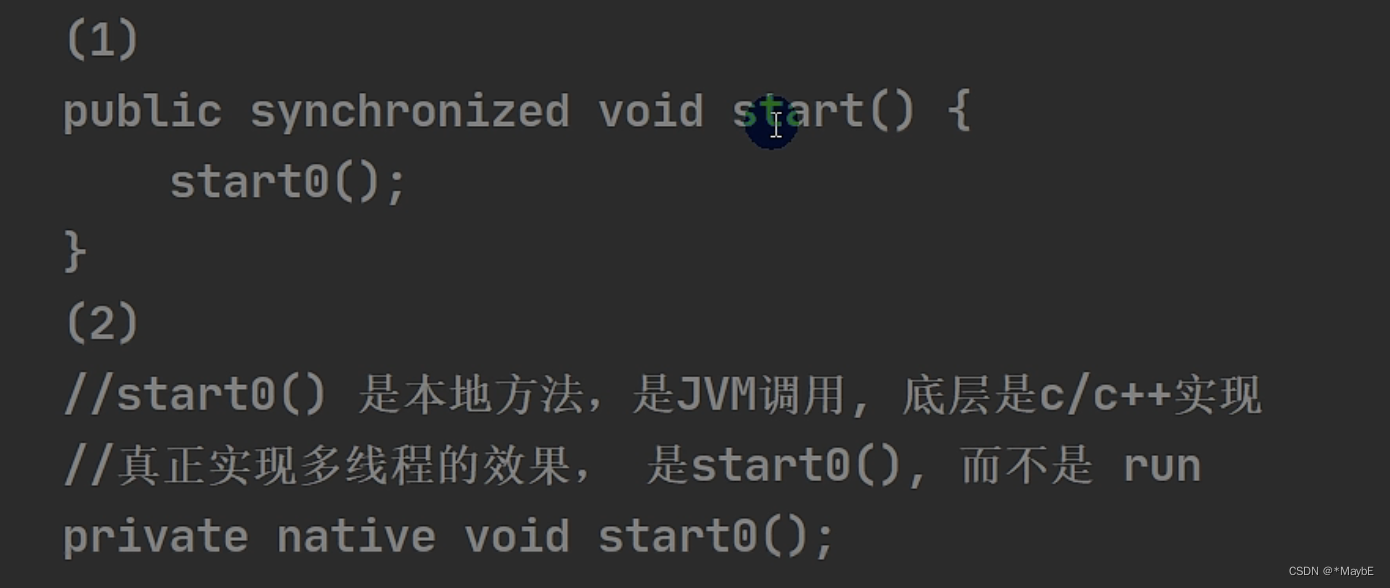
源码解读
真正实现多线程效果的是本地的start0方法而不是run方法

实现Runnable接口
java是单继承的,所以想要创建线程只能通过实现Runnable接口来实现


具体实现方法(静态代理方式)
在Thread实例中传入要创建线程的对象
public class ThreadUse02 { public static void main(String[] args) { Dog dog = new Dog(); //dog.start();这里不能调用start,因为没有这个方法 //只能创建Thread对象,把dog对象(实现了Runnable),放入Thread Thread thread = new Thread(dog); //然后调用thread的start方法 thread.start(); for (int i = 0; i < 10; i++) { System.out.println(i); } } } class Dog implements Runnable { int times = 0; @Override public void run() { while (times < 10) { System.out.println("我是汪汪" + (++times)); try { Thread.sleep(1000); } catch (InterruptedException e) { e.printStackTrace(); } } } }- 1
- 2
- 3
- 4
- 5
- 6
- 7
- 8
- 9
- 10
- 11
- 12
- 13
- 14
- 15
- 16
- 17
- 18
- 19
- 20
- 21
- 22
- 23
- 24
- 25
- 26
- 27
- 28
- 29
- 30
模拟静态代理方式
要点:
1. 代理类和被代理类要实现同一个接口
2. 代理的构造方法中传入被代理对象
3. 代理调用接口中的某个方法,但实际的运行类型是被代理的类型(这边start和start0是为了模拟底层实现)//线程代理类,模拟了极简的的Thread类 class ThreadProxy implements Runnable { //定义了Runnable类型的target private Runnable target = null; @Override public void run() { if (target != null) { target.run();//动态绑定(运行类型是传入代理的实参的运行类型,也就是Tiger类型,然后会调用tiger的run方法) } } //把形参赋给实参 public ThreadProxy(Runnable target) { this.target = target; } //代理实例化后,使用代理的start()方法来对用本地的start0方法,该方法会对用run方法 public void start() { start0(); } public void start0() { run(); } } class Animal { } //java中单继承,所以继承了Animal就不能继承Thread类了,所以只能实现Runnable接口 class Tiger extends Animal implements Runnable { int count = 0; @Override public void run() { System.out.println("老虎在咆哮" + (++count)); } }- 1
- 2
- 3
- 4
- 5
- 6
- 7
- 8
- 9
- 10
- 11
- 12
- 13
- 14
- 15
- 16
- 17
- 18
- 19
- 20
- 21
- 22
- 23
- 24
- 25
- 26
- 27
- 28
- 29
- 30
- 31
- 32
- 33
- 34
- 35
- 36
- 37
- 38
- 39
- 40
- 41
多线程执行
public class MulThread02 { public static void main(String[] args) { T1 t1 = new T1(); T2 t2 = new T2(); Thread thread1 = new Thread(t1); Thread thread2 = new Thread(t2); thread1.start(); thread2.start(); } } class T1 implements Runnable { int count = 0; @Override public void run() { while (count < 5) { System.out.println("hi" + (++count)); try { Thread.sleep(1000); } catch (InterruptedException e) { e.printStackTrace(); } } } } class T2 implements Runnable { int count = 0; @Override public void run() { while (count < 10) { System.out.println("hello world" + (++count)); try { Thread.sleep(1000); } catch (InterruptedException e) { e.printStackTrace(); } } } }- 1
- 2
- 3
- 4
- 5
- 6
- 7
- 8
- 9
- 10
- 11
- 12
- 13
- 14
- 15
- 16
- 17
- 18
- 19
- 20
- 21
- 22
- 23
- 24
- 25
- 26
- 27
- 28
- 29
- 30
- 31
- 32
- 33
- 34
- 35
- 36
- 37
- 38
- 39
- 40
- 41
- 42
- 43
继承Thread和实现Runnable的区别

多线程售票问题

出现了超卖问题

线程终止
两种方式

这边的通知方式其实就是设计一个标志public class quit { public static void main(String[] args) { T t = new T(); t.start(); try { Thread.sleep(10000); } catch (InterruptedException e) { e.printStackTrace(); } t.setLoop(false); } } class T extends Thread { int i = 0; boolean loop = true; public void setLoop(boolean loop) { this.loop = loop; } @Override public void run() { while (loop) { try { Thread.sleep(50); } catch (InterruptedException e) { e.printStackTrace(); } System.out.println(++i); } } }- 1
- 2
- 3
- 4
- 5
- 6
- 7
- 8
- 9
- 10
- 11
- 12
- 13
- 14
- 15
- 16
- 17
- 18
- 19
- 20
- 21
- 22
- 23
- 24
- 25
- 26
- 27
- 28
- 29
- 30
- 31
- 32
- 33
- 34
- 35
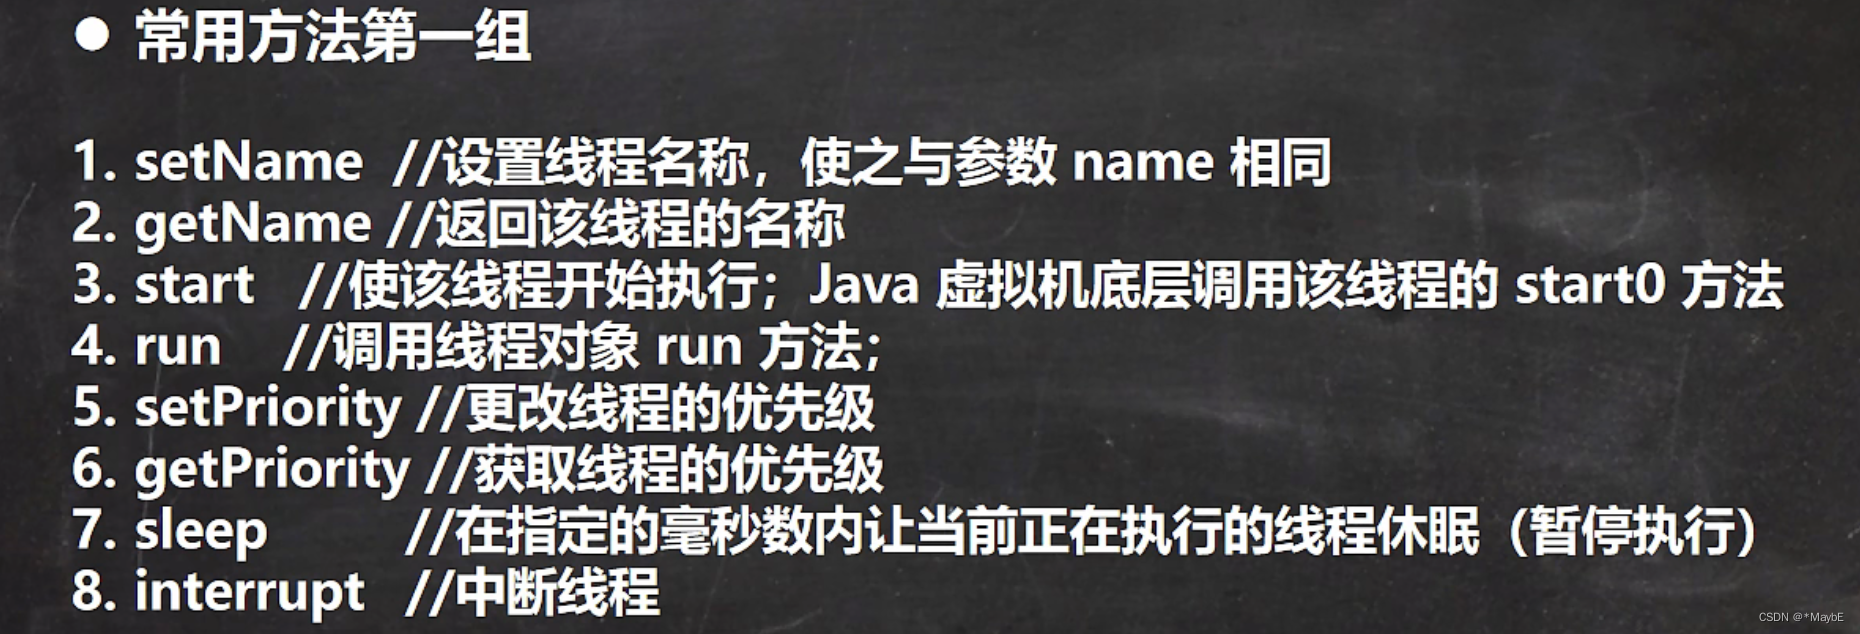
线程常用方法
注意:
- 继承了Thread类才有的
- 优先级只是说概率变大了,并不一定按照优先级顺序执行
- interrupt()方法只是改变中断状态,不会中断一个正在运行的线程,它会设置该线程的中断状态位,即设置为true,中断的结果线程是死亡、还是等待新的任务或是继续运行至下一步,就取决于这个程序本身。(可以利用使用interrupt方法会修改isInterrupted状态位来中断循环,或者使用interrupt方法中断sleep时会抛出异常来中断进程)
public class ThreadJoinDemo { public static void main(String[] args) throws InterruptedException { final Thread thread1 = new Thread(new Runnable() { @Override public void run() { System.out.println("打开冰箱!"); } }); final Thread thread2 = new Thread(new Runnable() { @Override public void run() { try { thread1.join(); } catch (InterruptedException e) { e.printStackTrace(); } System.out.println("拿出一瓶牛奶!"); } }); final Thread thread3 = new Thread(new Runnable() { @Override public void run() { try { thread2.join(); } catch (InterruptedException e) { e.printStackTrace(); } System.out.println("关上冰箱!"); } }); //下面三行代码顺序可随意调整,程序运行结果不受影响,因为我们在子线程中通过“join()方法”已经指定了运行顺序。 thread3.start(); thread2.start(); thread1.start(); } }- 1
- 2
- 3
- 4
- 5
- 6
- 7
- 8
- 9
- 10
- 11
- 12
- 13
- 14
- 15
- 16
- 17
- 18
- 19
- 20
- 21
- 22
- 23
- 24
- 25
- 26
- 27
- 28
- 29
- 30
- 31
- 32
- 33
- 34
- 35
- 36
- 37
- 38
- 39
- 40
2.在主线程中通过join()方法指定顺序
public class ThreadMainJoinDemo { public static void main(String[] args) throws InterruptedException { final Thread thread1 = new Thread(new Runnable() { @Override public void run() { System.out.println("打开冰箱!"); } }); final Thread thread2 = new Thread(new Runnable() { @Override public void run() { System.out.println("拿出一瓶牛奶!"); } }); final Thread thread3 = new Thread(new Runnable() { @Override public void run() { System.out.println("关上冰箱!"); } }); thread1.start(); thread1.join(); thread2.start(); thread2.join(); thread3.start(); } }- 1
- 2
- 3
- 4
- 5
- 6
- 7
- 8
- 9
- 10
- 11
- 12
- 13
- 14
- 15
- 16
- 17
- 18
- 19
- 20
- 21
- 22
- 23
- 24
- 25
- 26
- 27
- 28
- 29
- 30

注意:- yield不一定礼让成功
- join一定成功,先start后join
- 可以通过join指定线程的执行顺序
1.在子线程中通过join()方法指定顺序
注意事项和细节

用户线程和守护线程


用法
daemon.setDaemon(true);
注意: 该方法在start方法前,否则报异常线程的生命周期


线程同步
线程同步机制

线程同步的方法
Synchronized关键字

线程同步的原理
始终只能有一个线程去“开锁”,操作数据

互斥锁

售票问题(有助于充分理解线程)
注意事项:
- 要知道当前到底有几个线程
- 要知道当前的票是属于线程对象的还是属于线程类变量的
package com.bijing.thread.ticket; /** * @author 毕晶 * @date 2022/6/18 8:22 PM */ public class SellTicket { public static void main(String[] args) throws InterruptedException { //三个线程对象,只能通过static来实现资源"票"共享,锁的是类对象,资源也是类变量 //类变量num=100; // T1 t1 = new T1(); // T1 t2 = new T1(); // T1 t3 = new T1(); // t1.start(); // t2.start(); // t3.start(); // 三个线程对象,但是共享了同一个线程资源(类变量的),有static,锁定还是类对象 // T2 t1 = new T2(); // T2 t2 = new T2(); // T2 t3 = new T2(); // new Thread(t1).start(); // new Thread(t2).start(); // new Thread(t3).start(); // 同一份资源"票"被三个线程共享,无static,锁的是当前获得资源的线程对象,一个厕所三个人用,谁用谁上锁 T3 t3 = new T3(); new Thread(t3).start(); new Thread(t3).start(); new Thread(t3).start(); // 三份资源"票"被三个线程共享,无static,锁的是当前获得资源的线程对象,三个厕所三个人用,谁用谁上锁 // T4 t1 = new T4(); // T4 t2 = new T4(); // T4 t3 = new T4(); // new Thread(t1).start(); // new Thread(t2).start(); // new Thread(t3).start(); } } class T1 extends Thread { public static int num = 500; public static boolean flag = true; @Override public void run() { while (flag) { sell(); } } public synchronized static void sell() { if (num > 0) { try { Thread.sleep(50); } catch (InterruptedException e) { e.printStackTrace(); } System.out.println("窗口 " + Thread.currentThread().getName() + " 售出一张票, 剩余票数=" + (--num)); } else { System.out.println("售票结束"); flag = false; return; } } } class T2 implements Runnable { public static int num = 500; public static boolean flag = true; @Override public void run() { while (flag) { sell(); } } public synchronized static void sell() { if (num > 0) { try { Thread.sleep(50); } catch (InterruptedException e) { e.printStackTrace(); } System.out.println("窗口 " + Thread.currentThread().getName() + " 售出一张票, 剩余票数=" + (--num)); } else { System.out.println("售票结束"); flag = false; return; } } } class T3 implements Runnable { public int num = 500; @Override public void run() { while (true) { synchronized (this) { if (num > 0) { try { Thread.sleep(50); } catch (InterruptedException e) { e.printStackTrace(); } System.out.println("窗口 " + Thread.currentThread().getName() + " 售出一张票, 剩余票数=" + (--num)); } else { System.out.println("售票结束"); break; } } } } } class T4 implements Runnable { public int num = 100; @Override public void run() { synchronized (this) { while (true) { if (num > 0) { try { Thread.sleep(50); } catch (InterruptedException e) { e.printStackTrace(); } System.out.println("窗口 " + Thread.currentThread().getName() + " 售出一张票, 剩余票数=" + (--num)); } else { System.out.println("售票结束"); break; } } } } }- 1
- 2
- 3
- 4
- 5
- 6
- 7
- 8
- 9
- 10
- 11
- 12
- 13
- 14
- 15
- 16
- 17
- 18
- 19
- 20
- 21
- 22
- 23
- 24
- 25
- 26
- 27
- 28
- 29
- 30
- 31
- 32
- 33
- 34
- 35
- 36
- 37
- 38
- 39
- 40
- 41
- 42
- 43
- 44
- 45
- 46
- 47
- 48
- 49
- 50
- 51
- 52
- 53
- 54
- 55
- 56
- 57
- 58
- 59
- 60
- 61
- 62
- 63
- 64
- 65
- 66
- 67
- 68
- 69
- 70
- 71
- 72
- 73
- 74
- 75
- 76
- 77
- 78
- 79
- 80
- 81
- 82
- 83
- 84
- 85
- 86
- 87
- 88
- 89
- 90
- 91
- 92
- 93
- 94
- 95
- 96
- 97
- 98
- 99
- 100
- 101
- 102
- 103
- 104
- 105
- 106
- 107
- 108
- 109
- 110
- 111
- 112
- 113
- 114
- 115
- 116
- 117
- 118
- 119
- 120
- 121
- 122
- 123
- 124
- 125
- 126
- 127
- 128
- 129
- 130
- 131
- 132
- 133
- 134
- 135
- 136
- 137
- 138
- 139
- 140
- 141
- 142
- 143
- 144
线程死锁

释放锁

不释放锁

作业

分析:- 一个类访问另一个类的数据,要么用static,要么实例化一个类,这边显示实例化更好
- 在随机打印过程中要读取Q,这显然是并发的,所以要使用多线程,如果就单线程的话会出现打印动作不结束,读取Q就不进行
public class Homework01 { public static void main(String[] args) { T1 t1 = new T1(); T2 t2 = new T2(t1); // t1.setDaemon(true); 或者不用setLoop,用守护线程,把t1设为守护线程,t2完成后t1自动结束 t1.start(); t2.start(); } } class T1 extends Thread { private boolean loop = true; @Override public void run() { while (loop) { System.out.println((int) (Math.random() * 100 + 1)); try { Thread.sleep(1000); } catch (InterruptedException e) { e.printStackTrace(); } } } public void setLoop(boolean loop) { this.loop = loop; } } class T2 extends Thread { Scanner scanner = new Scanner(System.in); String input; T1 t1; // 确保t2操作的是同一个t1 public T2(T1 t1) { this.t1 = t1; } @Override public void run() { while (true) { System.out.println("请输入:"); input = scanner.next(); if (input.contains("Q")) { t1.setLoop(false); break; } } } }- 1
- 2
- 3
- 4
- 5
- 6
- 7
- 8
- 9
- 10
- 11
- 12
- 13
- 14
- 15
- 16
- 17
- 18
- 19
- 20
- 21
- 22
- 23
- 24
- 25
- 26
- 27
- 28
- 29
- 30
- 31
- 32
- 33
- 34
- 35
- 36
- 37
- 38
- 39
- 40
- 41
- 42
- 43
- 44
- 45
- 46
- 47
- 48
- 49
- 50
- 51
- 52
- 53
-
相关阅读:
【数据挖掘】2019年 Quiz 1-2 整理 带答案
【IDEA中集成SpringBoot源码环境详细步骤讲解】
unresolved external symbol w32_fcntl
ROS的TF变换理解
【算法集训专题攻克篇】第二十五篇之树状数组
vue轮询方法
【Unity】Unity开发进阶(七)双刃剑:扩展方法
如何在PDF上编辑文字?这三个方法让你轻松实现
R语言使用mlr包创建回归任务、指定回归学习函数为KNN回归模型、网格搜索、交叉验证调节KNN模型的超参数K获取模型最佳的K值
说说对Redux中间件的理解?常用的中间件有哪些?实现原理?
- 原文地址:https://blog.csdn.net/weixin_43903745/article/details/126272572
