-
react 低代码图编辑探索
主要实现
- 基于react可拖拽低代码实现
- 基于图展示组件的图编辑实现
- 基于JsonSchema的低代码展示实现
github:https://github.com/li-car-fei/react-visual-design
参考低代码实现:
https://github.com/quarkcms/quark-ui
https://github.com/react-visual-design/react-visual-design
图显示组件:
https://github.com/crubier/react-graph-vis低代码可拖拽流程实现原理

edit界面需要完成信息的传递工作,因此需要将组件数据注册在这里,组件操作所有相关函数都写在这里,以便通信之后完成数据的改写操作- 中间的显示通过Iframe完成,而Iframe组件只负责新建iframe并完成信息的传递,实际页面显示是通过路由定向到
/visual-page/checked-comp完成 - 对应的页面则依靠Drop与
/mobile_components完成页面渲染,对应的数据操作都window.parent.postMessage传递到上层,上层完成对应数据的修改操作 - 而中间显示页面通过
/mobile_components封装好的传入data进行渲染 - 右端的修改组件,根据
/mobile_components预先写好的schema.json配合formily进行配置,表单组件根据新建的属性与配置完成渲染
由于使用Iframe进行信息的传递,因此所有操作方法和数据可以都放在上层主页面中,将一个通过
switch case的列举函数传入子展示组件则可以完成所有操作:const handleEditItemClick = ({ id, compDefaultData }) => { if (id !== activeCompId) { const matchComp = find(selectedList, { id }) matchComp.data = matchComp.data || compDefaultData propFormIns = createForm() propFormIns.setValues(_.cloneDeep(matchComp.data), 'overwrite') // return this.setState() before SetActiveCompId(id) setSelectedList([...selectedList]) } } const handleDrop = ({ index, name }) => { const id = v4() setSelectedList([...(selectedList.splice(index, 0, { name, id }))]) } const onReceiveMessage = e => { try { if (e.data.toString() !== '[object Object]') { const data = JSON.parse(e.data) switch (data.func) { case 'handleDrop': handleDrop(data.params) break; case 'handleEditItemClick': handleEditItemClick(data.params) break; case 'handleOperateItem': handleOperateItem(data.params) break; default: break } } } catch (err) { console.error(err) } }- 1
- 2
- 3
- 4
- 5
- 6
- 7
- 8
- 9
- 10
- 11
- 12
- 13
- 14
- 15
- 16
- 17
- 18
- 19
- 20
- 21
- 22
- 23
- 24
- 25
- 26
- 27
- 28
- 29
- 30
- 31
- 32
- 33
- 34
- 35
- 36
- 37
- 38
- 39
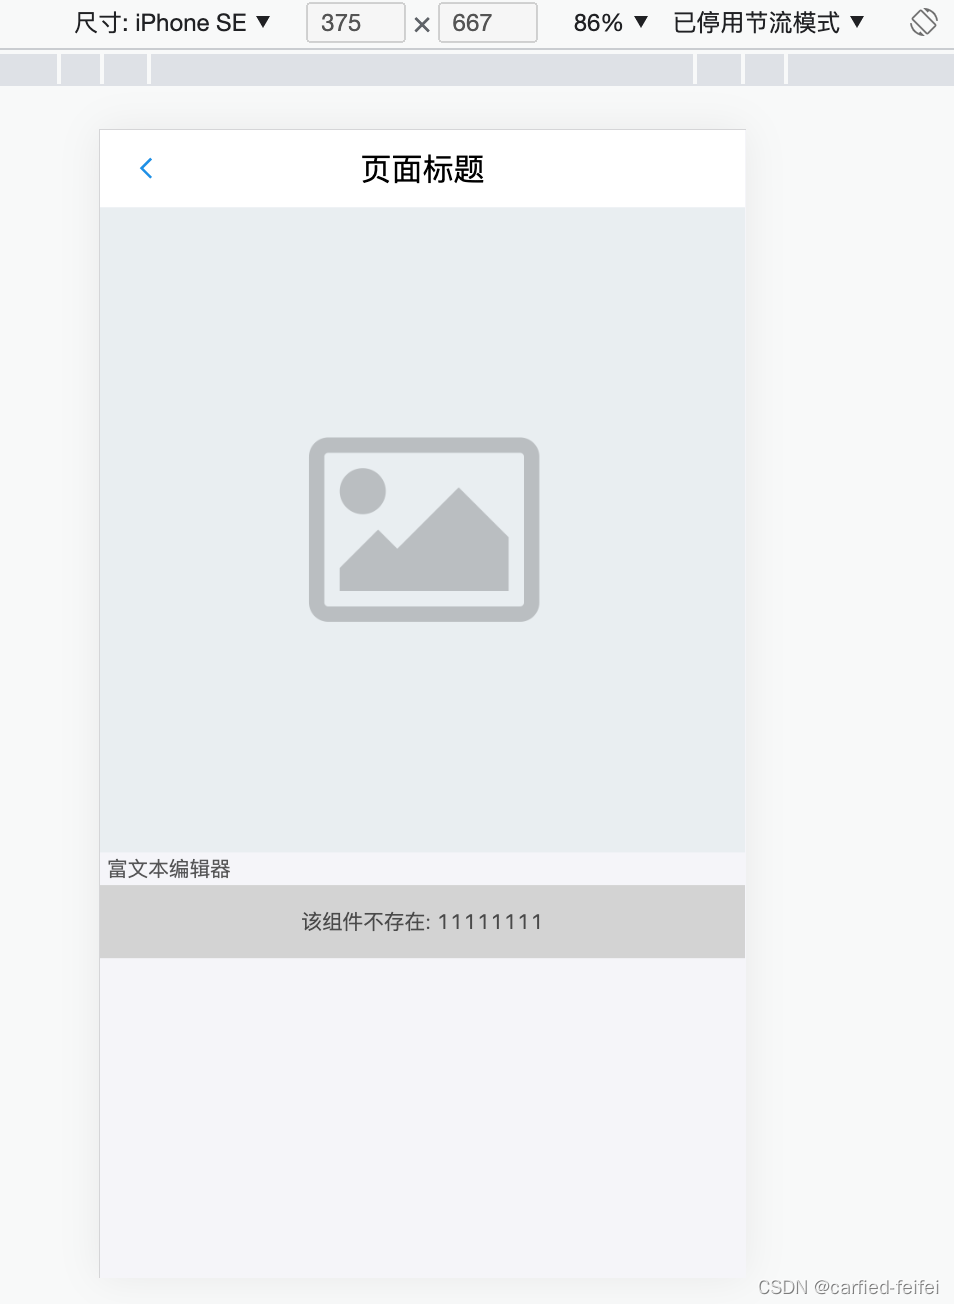
基于JsonSchema的低代码展示实现
通过JsonSchema格式的数据进行配置,而通过一个遍历算法将配置转换为对应的组件,即可完成;
如下的配置:
export default { 'mobile_demo': { body: [ { component: 'NavBar', data: {"title": "页面标题", "mode": "light"} }, { component: 'Image', data: {"src": "", "link": "https://github.com/react-visual-design/react-visual-design"} }, { component: 'RichText', data: { "content": "富文本编辑器" } }, { component: 'none_comp', data: '11111111' } ] } }- 1
- 2
- 3
- 4
- 5
- 6
- 7
- 8
- 9
- 10
- 11
- 12
- 13
- 14
- 15
- 16
- 17
- 18
- 19
- 20
- 21
- 22
经过匹配算法与展示页面的简单
map():// 匹配算法 import * as VisualDesignComponents from '@/mobile_components' export const componentRender = (body: any, data, callback) => { if (body === null || body === undefined) { return null; } if (typeof body === 'string' || typeof body === 'number') { return body; } const components = body.map((item: any) => { if (VisualDesignComponents[item.component]) { const Comp = VisualDesignComponents[item.component] return {Comp, data: item.data} } return { Comp: 'none_comp', data: item.data } }); return components } // 展示页面map function Render(props: any) { const components = componentRender(props.body, props.data, props.callback) return ( (typeof components === 'string') ? ( <span dangerouslySetInnerHTML={{ __html: components }} /> ) : ( map(components, (item, index) => { if(item.Comp === 'none_comp'){ return (<div key={ `index-null` } style={{ 'padding': '12px 0', 'textAlign': 'center', 'background': 'lightgray' }}> 该组件不存在: { item.data} </div>) } const Comp = item.Comp; return (<Comp data={item.data} key={ `index-${ index}` }></Comp>) }) ) ) }- 1
- 2
- 3
- 4
- 5
- 6
- 7
- 8
- 9
- 10
- 11
- 12
- 13
- 14
- 15
- 16
- 17
- 18
- 19
- 20
- 21
- 22
- 23
- 24
- 25
- 26
- 27
- 28
- 29
- 30
- 31
- 32
- 33
- 34
- 35
- 36
- 37
- 38
- 39
- 40
- 41
- 42
- 43
- 44
渲染结果:
基于图展示组件的图编辑实现
此页面原理与可拖拽低代码编辑页面相似,将图数据及其操作函数放在上层页面,而将实时数据与
switch case操作函数传到子展示组件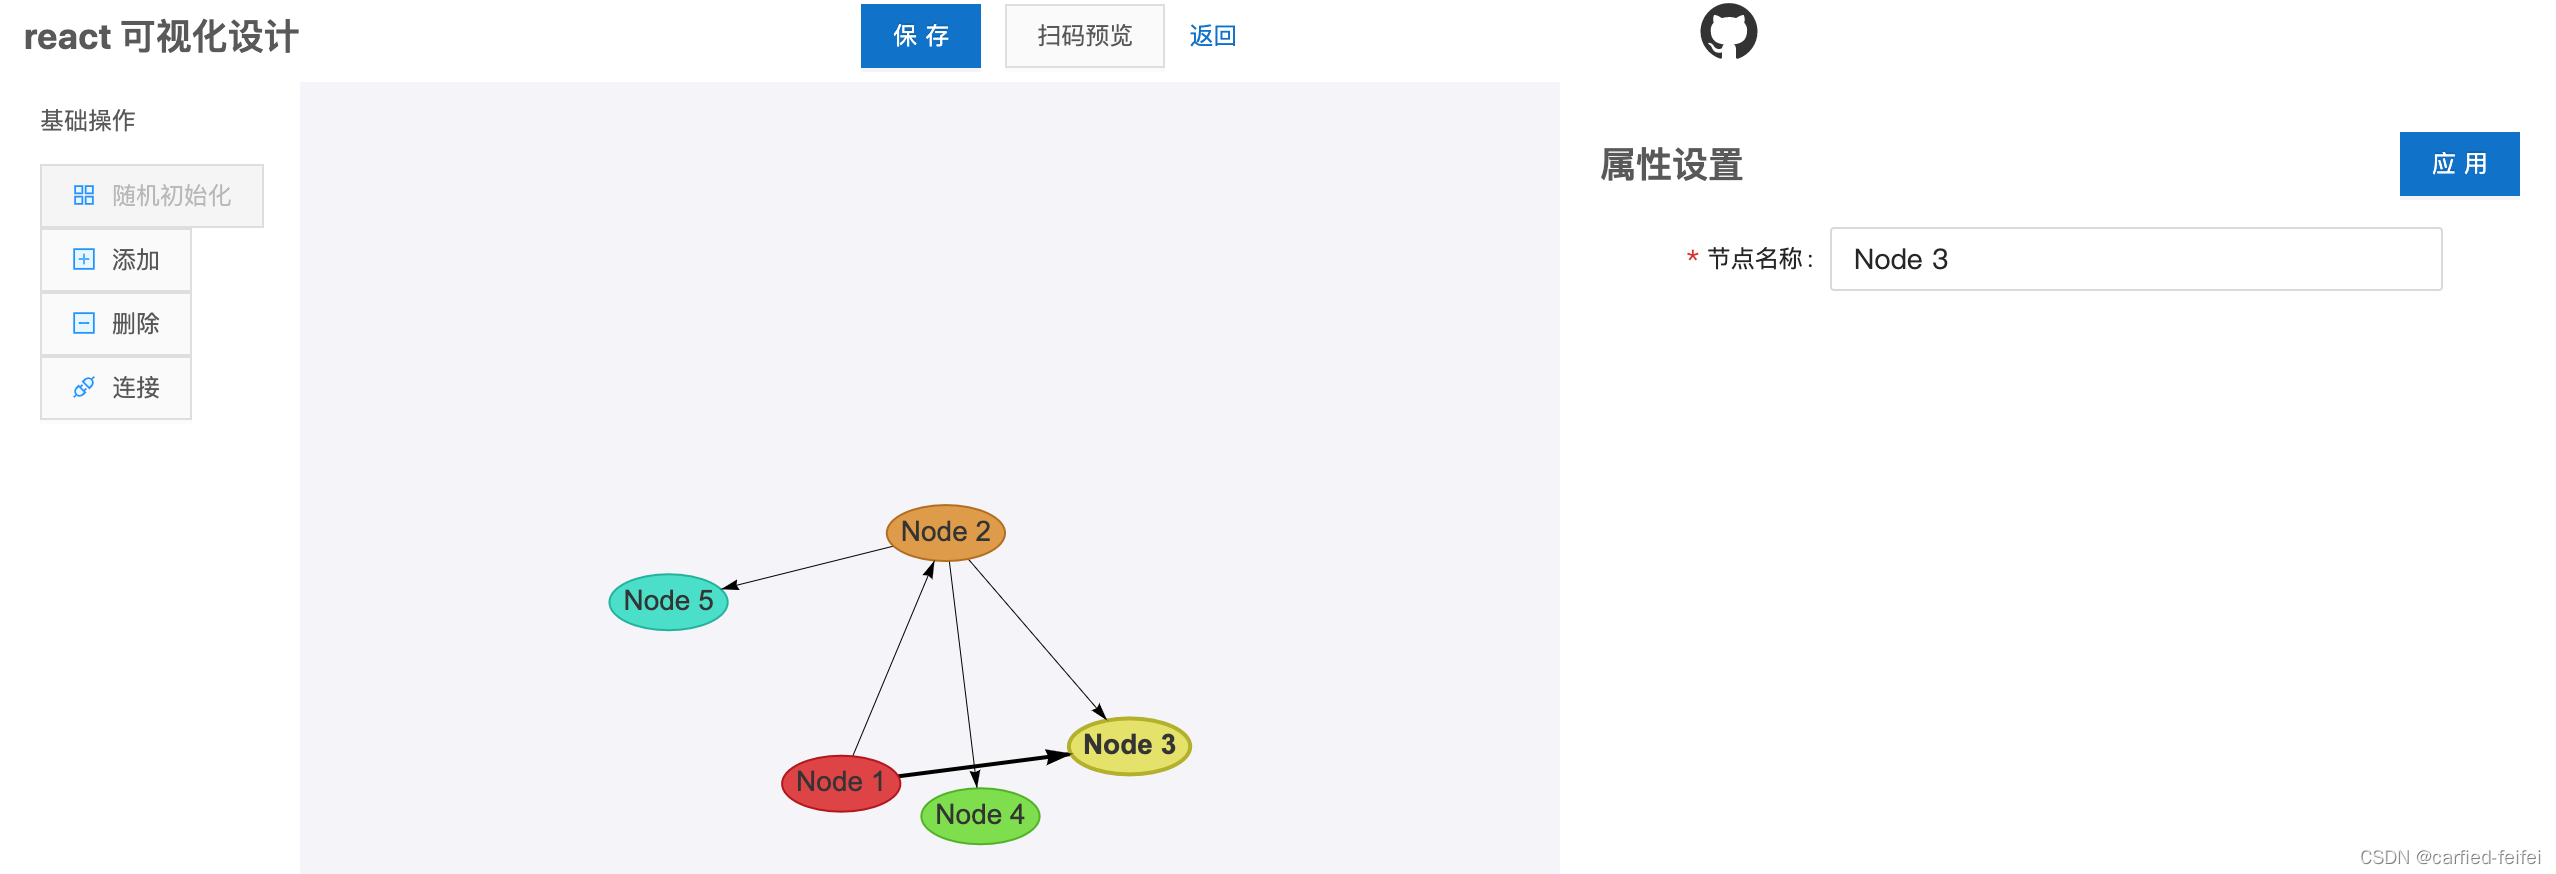
支持增加,删除,连接以及信息编辑操作,后续会继续扩展结束
欢迎指正与讨论
-
相关阅读:
一些逻辑漏洞案例
Java选择题
Vue 路由props 多路由参数时使用
C语言实验五 循环结构程序设计(二)
resnet解释--突破层数理论限制
影像组学特征提取代码错误
Qt之进程通信-QProcess(含源码+注释)
泰山派学习笔记(二)一步一步编译SDK文件
Access-Control-Allow-Origin跨域问题,使用Nginx配置来解决
Python web开发中的单元测试自动化技巧!
- 原文地址:https://blog.csdn.net/weixin_43783814/article/details/126185922
