-
YOLOv7训练自己的数据集
目录
YOLOv7下载地址:YOLOv7: Trainable bag-of-freebies sets new state-of-the-art for real-time object detectors
1、制作YOLO格式数据集
1.1、数据集
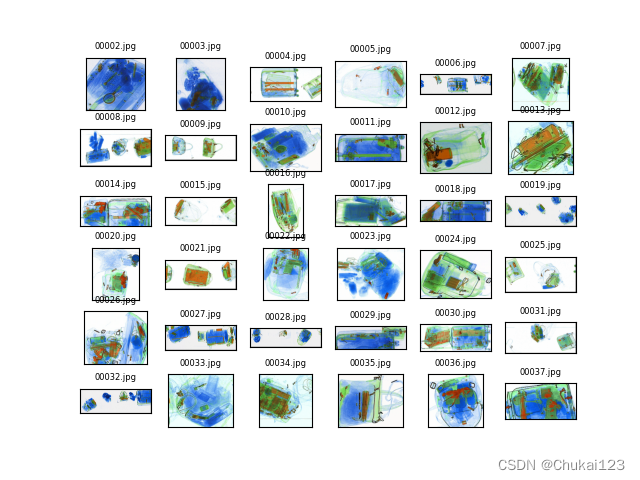
本文采用的是EDS数据集:包含了来自 3 台不同 X 光机器的 14219 张图片, 其中 10 类物品, 共计 31655 个目标实例,均由专业标注人员进行标注。

每一台机器对应一个数据集,分别对应domain1、domain2和domain3,下图对应每个数据集中的类别分布且相对均匀。

代码显示部分图像:
- import matplotlib.pyplot as plt
- import glob
- import cv2
- def show_multi_img(imgpath,num):
- """
- :param imgpath: 图像地址
- :param num: 输出图像的数量:eg:6*6,一幅图展示36张
- :return:
- """
- img_path = glob.glob(imgpath+"/*")
- plt.figure()
- for i in range(1,num*num+1):
- img = cv2.imread(img_path[i])
- title = img_path[i].split("\\")[1]
- plt.subplot(num,num,i)
- plt.imshow(img)
- plt.title(title,fontsize=6)
- plt.xticks([])
- plt.yticks([])
- plt.axis("on")
- plt.savefig("final.png")
- plt.show()
- if __name__ == "__main__":
- image_dir = "./domain2/image"
- show_multi_img(image_dir,6)
每个domain分别由image和txt组成:


1.2、如何转换为YOLOv7所需的格式?
首先来看一下yolo数据的标注:

EDS数据集格式:

假设图像的高度和宽度分别为H和W,bbox的左上角坐标为(xmin,ymin),右下角坐标为(xmax,ymax),则中心点(x_center,y_center),即
x_center = xmin + (xmax - xmin)/2
y_center = ymin + (ymax - ymin)/2
W = xmax - xmin
H = ymax - ymin
则YOLO数据格式为:label, x_, y_, w_, h_,则有对应关系:
x_ = x_center / img_width
y_ = y_center / img_height
w_ = W / img_width
h_ = H / img_height
其中label对应的是数字,需要将EDS中的类名转换为数字表示,img_width和img_height为图像的原始的宽度和高度,可以通过cv2.imread()读取,然后shape获取宽度和高度
- img= cv2.imread("./domain/image/00001.jpg")
- img_height,img_width,_ = img.shape
显示一幅图像并将bbox绘制在原图中:
- import cv2
- f = open("./domain1/txt/00004.txt",encoding="utf-8")
- img = cv2.imread('./domain1/image/00004.jpg')
- img_height,img_width,_ = img.shape
- for line in f.readlines():
- text = str(line.split(" ")[1])
- xmin = float(line.split(" ")[2])
- ymin = float(line.split(" ")[3])
- xmax = float(line.split(" ")[4])
- ymax = float(line.split(" ")[5])
- print("xmin:{},xmax:{},ymin:{},ymax:{}".format(xmin,xmax,ymin,ymax))
- x_center = xmin + (xmax - xmin) / 2
- y_center = ymin + (ymax - ymin) / 2
- w = xmax - xmin
- h = ymax - ymin
- # 保留6位小数
- x_center = round(x_center / img_width, 6)
- y_center = round(y_center / img_height, 6)
- w = round(w / img_width, 6)
- h = round(h / img_height, 6)
- # print(x_center,y_center,w,h)
- # 将yolo格式转换原始的格式进行验证
- x1 = int((float(x_center)-float(w)/2)*img_width)
- y1 = int((float(y_center) - float(h) / 2) * img_height)
- x2 = int((float(x_center) + float(w) / 2) * img_width)
- y2 = int((float(y_center) + float(h) / 2) * img_height)
- print(x1,y1,x2,y2)
- cv2.rectangle(img,(x1,y1),(x2,y2),(0,255,255),3)
- cv2.putText(img,text,(int(xmin),int(ymin)-5),cv2.FONT_HERSHEY_SIMPLEX, 0.5, (0, 0, 255), 2)
- cv2.imshow("show",img)
- cv2.waitKey(0)
- cv2.imwrite("bbox.png",img)

转换前:xmin:84.0,ymin:369.0,xmax:342.0,ymax:554.0
转换后:xmin:83,ymin:368,xmax:341,ymax:553
转换前:xmin:210.0,ymin:409.0,xmax:591.0,ymax:691.0
转换后:xmin:210,ymin:409,xmax:591,ymax:691
转换前:xmin:182.0,ymin:457.0,xmax:364.0,ymax:550.0
转换后:xmin:181,ymin:456,xmax:364,ymax:549-------------------------------------------------------------------------------------
这里还是存在一些转换的误差,不过影响没那么大。
注意:如果没有的标注数据可以用,可以下载LabelImg,进行YOLO格式的数据集标注,直接生存对应的yolo格式的数据集。
1.3、如何批量化生成YOLO格式的txt标注
- import glob
- import os
- import cv2
- txt_file = r".\domain1\txt"
- name = glob.glob(os.path.join(txt_file,"*.txt"))
- list_1 = []
- for i in name:
- f = open(i,encoding="utf-8")
- byt = f.readlines()
- for line in byt:
- list_1.append(line.split(" ")[1])
- x = line.split(" ")[2]
- y = line.split(" ")[3]
- w = line.split(" ")[4]
- h = line.split(" ")[5]
- # print(x,y,w,h)
- # 读取所有txt中的目标,并去重
- list2 = list(set(list_1))
- # print(list2)
- l = {} # EDS数据类名对应的数字
- j = 0
- for i in list2:
- l[i] = j
- j += 1
- print(l) #对应的字典形式
- # yolov7的第一列是cls_id x y w h 其中坐标(x,y)是中心点坐标,并且是相对于图片宽高的比例值 ,并非绝对坐标
- img_path = "./domain1/image"
- out_path = "./out"
- list_1 = []
- name = glob.glob(os.path.join(txt_file,"*.txt"))
- for i in name:
- if not os.path.exists(out_path):
- os.mkdir(out_path)
- with open(os.path.join(out_path, i.split("\\")[3].split(".")[0] + ".txt"), "w") as f_1:
- img_name = i.split("\\")[3].split(".")[0] + ".jpg"
- img = os.path.join(img_path,img_name)
- img_ = cv2.imread(img)
- img_height, img_width, _ = img_.shape
- f = open(i,encoding="utf-8")
- byt = f.readlines()
- for line in byt:
- class_num = l[line.split(" ")[1]]
- xmin = float(line.split(" ")[2])
- ymin = float(line.split(" ")[3])
- xmax = float(line.split(" ")[4])
- ymax = float(line.split(" ")[5])
- x_center = xmin + (xmax - xmin) / 2
- y_center = ymin + (ymax - ymin) / 2
- w = xmax - xmin
- h = ymax - ymin
- x_center = round(x_center / img_width, 6)
- y_center = round(y_center / img_height, 6)
- w = round(w / img_width, 6)
- h = round(h / img_height, 6)
- info = [str(i) for i in [class_num, x_center, y_center, w, h]]
- print(info)
- f_1.write(" ".join(info)+"\n")
1.4、如何划分YOLO的train、val和test
本文制作好的数据集:YOLO格式的EDS数据集,免费欢迎下载!感谢支持!
- # 将图片和标注数据按比例切分为 训练集和测试集
- import shutil
- import random
- import os
- # 原始路径,需要修改
- image_original_path = './domain1/image/'
- label_original_path = './out/'
- # 训练集路径,需要修改
- train_image_path = 'E:\yolov7\data\images\\train\\'
- train_label_path = 'E:\yolov7\data\labels\\train\\'
- # 验证集路径,需要修改
- val_image_path = 'E:\yolov7\data\images\\val\\'
- val_label_path = 'E:\yolov7\data\labels\\val\\'
- # 测试集路径,需要修改
- test_image_path = 'E:\yolov7\data\images\\test\\'
- test_label_path = 'E:\yolov7\data\labels\\test\\'
- # 数据集划分比例,训练集75%,验证集15%,测试集15%,按需修改
- train_percent = 0.7
- val_percent = 0.15
- test_percent = 0.1
- # 检查文件夹是否存在
- def mkdir():
- if not os.path.exists(train_image_path):
- os.makedirs(train_image_path)
- if not os.path.exists(train_label_path):
- os.makedirs(train_label_path)
- if not os.path.exists(val_image_path):
- os.makedirs(val_image_path)
- if not os.path.exists(val_label_path):
- os.makedirs(val_label_path)
- if not os.path.exists(test_image_path):
- os.makedirs(test_image_path)
- if not os.path.exists(test_label_path):
- os.makedirs(test_label_path)
- def main():
- mkdir()
- total_txt = os.listdir(label_original_path)
- num_txt = len(total_txt)
- list_all_txt = range(num_txt) # 范围 range(0, num)
- num_train = int(num_txt * train_percent)
- num_val = int(num_txt * val_percent)
- num_test = num_txt - num_train - num_val
- train = random.sample(list_all_txt, num_train)
- # train从list_all_txt取出num_train个元素
- # 所以list_all_txt列表只剩下了这些元素:val_test
- val_test = [i for i in list_all_txt if not i in train]
- # 再从val_test取出num_val个元素,val_test剩下的元素就是test
- val = random.sample(val_test, num_val)
- print("训练集数目:{}, 验证集数目:{},测试集数目:{}".format(len(train), len(val), len(val_test) - len(val)))
- for i in list_all_txt:
- name = total_txt[i][:-4]
- srcImage = image_original_path + name + '.jpg'
- srcLabel = label_original_path + name + '.txt'
- if i in train:
- dst_train_Image = train_image_path + name + '.jpg'
- dst_train_Label = train_label_path + name + '.txt'
- shutil.copyfile(srcImage, dst_train_Image)
- shutil.copyfile(srcLabel, dst_train_Label)
- elif i in val:
- dst_val_Image = val_image_path + name + '.jpg'
- dst_val_Label = val_label_path + name + '.txt'
- shutil.copyfile(srcImage, dst_val_Image)
- shutil.copyfile(srcLabel, dst_val_Label)
- else:
- dst_test_Image = test_image_path + name + '.jpg'
- dst_test_Label = test_label_path + name + '.txt'
- shutil.copyfile(srcImage, dst_test_Image)
- shutil.copyfile(srcLabel, dst_test_Label)
- if __name__ == '__main__':
- main()
2、使用YOLOv7训练自己的模型
采用git拉取:
git clone https://github.com/wongkinyiu/yolov72.1、测试预训练的yolov7.pt
官网提供了下载链接,可以直接下载,或者直接从csdn里下载:YOLOv7预训练权重

预训练权重下载完成后,打开detect.py
直接运行即可,其他都选择默认的参数!
(1)测试图片
或者修改--source为自己的图像路径,同样也可以修改--weights=your_weight_path,测试自己训练的模型
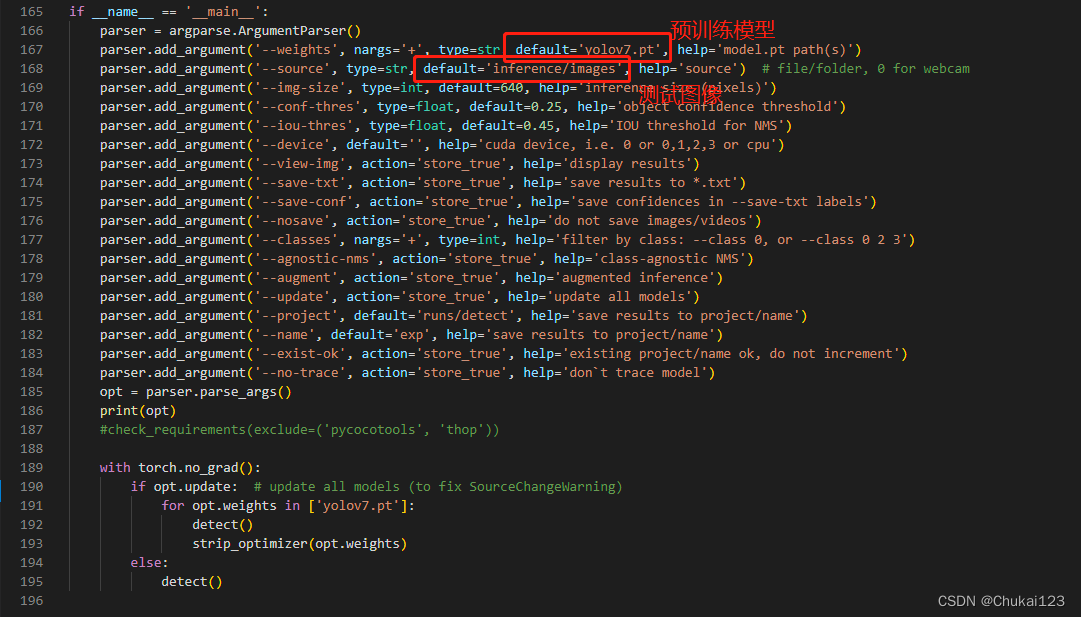
测试yolov7.pt的识别效果

看下官方提供处理图像的代码:utils.datasets
- class LoadImages: # for inference
- def __init__(self, path, img_size=640, stride=32):
- """
- path:图像路径
- img_size:最终要测试的图像尺寸
- stride:这个主要用于pad一些小的图像以满足实际测试图像的尺寸
- return:
- path:图像的路径
- img:resize后的图像
- img0:原始图像
- self.cap
- """
- # 遍历输入的测试图像路径,files保存测试的地址
- p = str(Path(path).absolute()) # os-agnostic absolute path
- if '*' in p:
- files = sorted(glob.glob(p, recursive=True)) # glob
- elif os.path.isdir(p):
- files = sorted(glob.glob(os.path.join(p, '*.*'))) # dir
- elif os.path.isfile(p):
- files = [p] # files
- else:
- raise Exception(f'ERROR: {p} does not exist')
- # 通过图像地址的后缀判断是图像还是视频,然后用list格式保存
- images = [x for x in files if x.split('.')[-1].lower() in img_formats]
- videos = [x for x in files if x.split('.')[-1].lower() in vid_formats]
- # 文件里总共有多少和多少视频
- ni, nv = len(images), len(videos)
- self.img_size = img_size
- self.stride = stride
- self.files = images + videos # list格式
- self.nf = ni + nv # number of files
- self.video_flag = [False] * ni + [True] * nv # 用于判断是不是视频
- self.mode = 'image'
- if any(videos): # 判断videos是否存在
- self.new_video(videos[0]) # new video
- else:
- self.cap = None
- assert self.nf > 0, f'No images or videos found in {p}. ' \
- f'Supported formats are:\nimages: {img_formats}\nvideos: {vid_formats}'
- # __iter__迭代器,系统定义的名字
- def __iter__(self):
- self.count = 0
- return self
- def __next__(self):
- if self.count == self.nf:
- raise StopIteration
- path = self.files[self.count]
- if self.video_flag[self.count]:
- # Read video
- self.mode = 'video'
- ret_val, img0 = self.cap.read()
- if not ret_val:
- self.count += 1
- self.cap.release()
- if self.count == self.nf: # last video
- raise StopIteration
- else:
- path = self.files[self.count]
- self.new_video(path)
- ret_val, img0 = self.cap.read()
- self.frame += 1
- print(f'video {self.count + 1}/{self.nf} ({self.frame}/{self.nframes}) {path}: ', end='')
- else:
- # Read image
- self.count += 1
- img0 = cv2.imread(path) # BGR
- assert img0 is not None, 'Image Not Found ' + path
- #print(f'image {self.count}/{self.nf} {path}: ', end='')
- # Padded resize
- img = letterbox(img0, self.img_size, stride=self.stride)[0]
- # Convert
- img = img[:, :, ::-1].transpose(2, 0, 1) # BGR to RGB, to 3x416x416
- img = np.ascontiguousarray(img)
- return path, img, img0, self.cap
- def new_video(self, path):
- self.frame = 0
- self.cap = cv2.VideoCapture(path)
- self.nframes = int(self.cap.get(cv2.CAP_PROP_FRAME_COUNT))
- def __len__(self):
- return self.nf # number of files
(2)测试本地摄像头
简单的一个获取本地摄像头的代码
- import cv2
- def access_camera(url,output_path):
- if url == int(0):
- cap = cv2.VideoCapture(url)
- else:
- cap = cv2.VideoCapture(url)
- while(cap.isOpened()):
- # Capture frame-by-frame
- ret, frame = cap.read()
- # Display the resulting frame
- cv2.imshow('frame',frame)
- cv2.imwrite(output_path,frame)
- print("图像保存成功!")
- if cv2.waitKey(1) & 0xFF == ord('q'):
- break
- # When everything done, release the capture
- cap.release()
- cv2.destroyAllWindows()
- if __name__ == "__main__":
- url = 'http://admin:admin@192.168.1.3:8081/video' # 调用IP摄像机
- output_path = "./runs/detect/img.png"
- # url = 0 # 调用笔记本摄像头
- access_camera(url,output_path)
yolov7提供的代码,其实思路是一样的
- class LoadWebcam: # for inference
- def __init__(self, pipe='0', img_size=640, stride=32):
- """
- pipe:0表示使用本地摄像头
- img_size:图像大小
- stride:
- """
- self.img_size = img_size
- self.stride = stride
- if pipe.isnumeric():
- pipe = eval(pipe) # local camera
- # pipe = 'rtsp://192.168.1.64/1' # IP camera
- # pipe = 'rtsp://username:password@192.168.1.64/1' # IP camera with login
- # pipe = 'http://wmccpinetop.axiscam.net/mjpg/video.mjpg' # IP golf camera
- self.pipe = pipe
- self.cap = cv2.VideoCapture(pipe) # video capture object
- self.cap.set(cv2.CAP_PROP_BUFFERSIZE, 3) # set buffer size
- def __iter__(self):
- self.count = -1
- return self
- def __next__(self):
- self.count += 1
- if cv2.waitKey(1) == ord('q'): # q to quit
- self.cap.release()
- cv2.destroyAllWindows()
- raise StopIteration
- # Read frame
- if self.pipe == 0: # local camera
- ret_val, img0 = self.cap.read()
- img0 = cv2.flip(img0, 1) # flip left-right
- else: # IP camera
- n = 0
- while True:
- n += 1
- self.cap.grab()
- if n % 30 == 0: # skip frames
- ret_val, img0 = self.cap.retrieve()
- if ret_val:
- break
- # Print
- assert ret_val, f'Camera Error {self.pipe}'
- img_path = 'webcam.jpg'
- print(f'webcam {self.count}: ', end='')
- # Padded resize
- img = letterbox(img0, self.img_size, stride=self.stride)[0]
- # Convert
- img = img[:, :, ::-1].transpose(2, 0, 1) # BGR to RGB, to 3x416x416
- img = np.ascontiguousarray(img)
- return img_path, img, img0, None
- def __len__(self):
- return 0
(3)测试视频流效果
- class LoadStreams: # multiple IP or RTSP cameras
- def __init__(self, sources='streams.txt', img_size=640, stride=32):
- self.mode = 'stream'
- self.img_size = img_size
- self.stride = stride
- if os.path.isfile(sources):
- with open(sources, 'r') as f:
- sources = [x.strip() for x in f.read().strip().splitlines() if len(x.strip())]
- else:
- sources = [sources]
- n = len(sources)
- self.imgs = [None] * n
- self.sources = [clean_str(x) for x in sources] # clean source names for later
- for i, s in enumerate(sources):
- # Start the thread to read frames from the video stream
- print(f'{i + 1}/{n}: {s}... ', end='')
- url = eval(s) if s.isnumeric() else s
- if 'youtube.com/' in str(url) or 'youtu.be/' in str(url): # if source is YouTube video
- check_requirements(('pafy', 'youtube_dl'))
- import pafy
- url = pafy.new(url).getbest(preftype="mp4").url
- cap = cv2.VideoCapture(url)
- assert cap.isOpened(), f'Failed to open {s}'
- w = int(cap.get(cv2.CAP_PROP_FRAME_WIDTH))
- h = int(cap.get(cv2.CAP_PROP_FRAME_HEIGHT))
- self.fps = cap.get(cv2.CAP_PROP_FPS) % 100
- _, self.imgs[i] = cap.read() # guarantee first frame
- thread = Thread(target=self.update, args=([i, cap]), daemon=True)
- print(f' success ({w}x{h} at {self.fps:.2f} FPS).')
- thread.start()
- print('') # newline
- # check for common shapes
- s = np.stack([letterbox(x, self.img_size, stride=self.stride)[0].shape for x in self.imgs], 0) # shapes
- self.rect = np.unique(s, axis=0).shape[0] == 1 # rect inference if all shapes equal
- if not self.rect:
- print('WARNING: Different stream shapes detected. For optimal performance supply similarly-shaped streams.')
- def update(self, index, cap):
- # Read next stream frame in a daemon thread
- n = 0
- while cap.isOpened():
- n += 1
- # _, self.imgs[index] = cap.read()
- cap.grab()
- if n == 4: # read every 4th frame
- success, im = cap.retrieve()
- self.imgs[index] = im if success else self.imgs[index] * 0
- n = 0
- time.sleep(1 / self.fps) # wait time
- def __iter__(self):
- self.count = -1
- return self
- def __next__(self):
- self.count += 1
- img0 = self.imgs.copy()
- if cv2.waitKey(1) == ord('q'): # q to quit
- cv2.destroyAllWindows()
- raise StopIteration
- # Letterbox
- img = [letterbox(x, self.img_size, auto=self.rect, stride=self.stride)[0] for x in img0]
- # Stack
- img = np.stack(img, 0)
- # Convert
- img = img[:, :, :, ::-1].transpose(0, 3, 1, 2) # BGR to RGB, to bsx3x416x416
- img = np.ascontiguousarray(img)
- return self.sources, img, img0, None
- def __len__(self):
- return 0 # 1E12 frames = 32 streams at 30 FPS for 30 years
获取到所有的图像或者视频流,然后将获取的图像输入对应的model中,查看一下官方提供的detect.py代码
- def detect(save_img=False):
- source, weights, view_img, save_txt, imgsz, trace = opt.source, opt.weights, opt.view_img, opt.save_txt, opt.img_size, not opt.no_trace
- save_img = not opt.nosave and not source.endswith('.txt') # save inference images
- webcam = source.isnumeric() or source.endswith('.txt') or source.lower().startswith(
- ('rtsp://', 'rtmp://', 'http://', 'https://'))
- # Directories
- save_dir = Path(increment_path(Path(opt.project) / opt.name, exist_ok=opt.exist_ok)) # increment run
- (save_dir / 'labels' if save_txt else save_dir).mkdir(parents=True, exist_ok=True) # make dir
- # Initialize
- set_logging()
- device = select_device(opt.device)
- half = device.type != 'cpu' # half precision only supported on CUDA
- # Load model
- model = attempt_load(weights, map_location=device) # load FP32 model
- stride = int(model.stride.max()) # model stride
- imgsz = check_img_size(imgsz, s=stride) # check img_size
- if trace:
- model = TracedModel(model, device, opt.img_size)
- if half:
- model.half() # to FP16
- # Second-stage classifier
- classify = False
- if classify:
- modelc = load_classifier(name='resnet101', n=2) # initialize
- modelc.load_state_dict(torch.load('weights/resnet101.pt', map_location=device)['model']).to(device).eval()
- # Set Dataloader
- vid_path, vid_writer = None, None
- if webcam:
- view_img = check_imshow()
- cudnn.benchmark = True # set True to speed up constant image size inference
- dataset = LoadStreams(source, img_size=imgsz, stride=stride)
- else:
- dataset = LoadImages(source, img_size=imgsz, stride=stride)
- # Get names and colors
- names = model.module.names if hasattr(model, 'module') else model.names
- colors = [[random.randint(0, 255) for _ in range(3)] for _ in names]
- # Run inference
- if device.type != 'cpu':
- model(torch.zeros(1, 3, imgsz, imgsz).to(device).type_as(next(model.parameters()))) # run once
- t0 = time.time()
- for path, img, im0s, vid_cap in dataset:
- img = torch.from_numpy(img).to(device)
- img = img.half() if half else img.float() # uint8 to fp16/32
- img /= 255.0 # 0 - 255 to 0.0 - 1.0
- if img.ndimension() == 3:
- img = img.unsqueeze(0)
- # Inference
- t1 = time_synchronized()
- pred = model(img, augment=opt.augment)[0]
- # Apply NMS
- pred = non_max_suppression(pred, opt.conf_thres, opt.iou_thres, classes=opt.classes, agnostic=opt.agnostic_nms)
- t2 = time_synchronized()
- # Apply Classifier
- if classify:
- pred = apply_classifier(pred, modelc, img, im0s)
- # Process detections
- for i, det in enumerate(pred): # detections per image
- if webcam: # batch_size >= 1
- p, s, im0, frame = path[i], '%g: ' % i, im0s[i].copy(), dataset.count
- else:
- p, s, im0, frame = path, '', im0s, getattr(dataset, 'frame', 0)
- p = Path(p) # to Path
- save_path = str(save_dir / p.name) # img.jpg
- txt_path = str(save_dir / 'labels' / p.stem) + ('' if dataset.mode == 'image' else f'_{frame}') # img.txt
- s += '%gx%g ' % img.shape[2:] # print string
- gn = torch.tensor(im0.shape)[[1, 0, 1, 0]] # normalization gain whwh
- if len(det):
- # Rescale boxes from img_size to im0 size
- det[:, :4] = scale_coords(img.shape[2:], det[:, :4], im0.shape).round()
- # Print results
- for c in det[:, -1].unique():
- n = (det[:, -1] == c).sum() # detections per class
- s += f"{n} {names[int(c)]}{'s' * (n > 1)}, " # add to string
- # Write results
- for *xyxy, conf, cls in reversed(det):
- if save_txt: # Write to file
- xywh = (xyxy2xywh(torch.tensor(xyxy).view(1, 4)) / gn).view(-1).tolist() # normalized xywh
- line = (cls, *xywh, conf) if opt.save_conf else (cls, *xywh) # label format
- with open(txt_path + '.txt', 'a') as f:
- f.write(('%g ' * len(line)).rstrip() % line + '\n')
- if save_img or view_img: # Add bbox to image
- label = f'{names[int(cls)]} {conf:.2f}'
- plot_one_box(xyxy, im0, label=label, color=colors[int(cls)], line_thickness=3)
- # Print time (inference + NMS)
- #print(f'{s}Done. ({t2 - t1:.3f}s)')
- # Stream results
- if view_img:
- cv2.imshow(str(p), im0)
- cv2.waitKey(1) # 1 millisecond
- # Save results (image with detections)
- if save_img:
- if dataset.mode == 'image':
- cv2.imwrite(save_path, im0)
- print(f" The image with the result is saved in: {save_path}")
- else: # 'video' or 'stream'
- if vid_path != save_path: # new video
- vid_path = save_path
- if isinstance(vid_writer, cv2.VideoWriter):
- vid_writer.release() # release previous video writer
- if vid_cap: # video
- fps = vid_cap.get(cv2.CAP_PROP_FPS)
- w = int(vid_cap.get(cv2.CAP_PROP_FRAME_WIDTH))
- h = int(vid_cap.get(cv2.CAP_PROP_FRAME_HEIGHT))
- else: # stream
- fps, w, h = 30, im0.shape[1], im0.shape[0]
- save_path += '.mp4'
- vid_writer = cv2.VideoWriter(save_path, cv2.VideoWriter_fourcc(*'mp4v'), fps, (w, h))
- vid_writer.write(im0)
- if save_txt or save_img:
- s = f"\n{len(list(save_dir.glob('labels/*.txt')))} labels saved to {save_dir / 'labels'}" if save_txt else ''
- #print(f"Results saved to {save_dir}{s}")
- print(f'Done. ({time.time() - t0:.3f}s)')
2.2、训练自己数据的YOLOv7模型
根据前面的方法制作自己数据集,放在yolov7/data目录下

在yolov7/data目录下创建一个dataset.yaml文件,可以参考官方提供的coco.yaml

自己的配置文件dataset.yaml
- train: E:/yolov7/data/images/train # train images
- val: E:/yolov7/data/images/val # val images
- test: E:/yolov7/data/images/test # test images (optional)
- # Classes
- nc: 10 # number of classes
- names: ['laptop','pressure','device','plasticbottle','scissor','knife','lighter','powerbank','glassbottle','umbrella'] # class names

开始训练。。。漫长的等待了,最终所有的训练信息都保存在yolov7/runs/train/exp目录下

2.3、测试自己训练的模型
修改detect.py中的weights地址 ,这个模型我只训练了10次,效果也还行。


2.4、测试关键点检测
首先下载官方提供的预训练模型yolov7-w6-pose.pt
- import matplotlib
- """
- 未使用matplotlib.use('TkAgg')
- 出现问题:UserWarning: Matplotlib is currently using agg, which is a non-GUI backend
- """
- matplotlib.use('TkAgg')
- import matplotlib.pyplot as plt
- print(matplotlib.get_backend())
- import torch
- import cv2
- from torchvision import transforms
- import numpy as np
- from utils.datasets import letterbox
- # 查看GUI backbend环境,主要是查看每个调用的代码环境下是否都是相同的环境
- print(matplotlib.get_backend())
- from utils.general import non_max_suppression_kpt
- print(matplotlib.get_backend())
- from utils.plots import output_to_keypoint, plot_skeleton_kpts
- # plots中matplotlib.get_backend()设置不同,记得修改
- print(matplotlib.get_backend())
- device = torch.device("cuda:0" if torch.cuda.is_available() else "cpu")
- weigths = torch.load('../yolov7-w6-pose.pt')
- model = weigths['model']
- model = model.half().to(device)
- _ = model.eval()
- image = cv2.imread('../person.jpeg')
- image = letterbox(image, 960, stride=64, auto=True)[0]
- image_ = image.copy()
- image = transforms.ToTensor()(image)
- image = torch.tensor(np.array([image.numpy()]))
- image = image.to(device)
- image = image.half()
- output, _ = model(image)
- output = non_max_suppression_kpt(output, 0.25, 0.65, nc=model.yaml['nc'], nkpt=model.yaml['nkpt'], kpt_label=True)
- output = output_to_keypoint(output)
- nimg = image[0].permute(1, 2, 0) * 255
- nimg = nimg.cpu().numpy().astype(np.uint8)
- nimg = cv2.cvtColor(nimg, cv2.COLOR_RGB2BGR)
- for idx in range(output.shape[0]):
- plot_skeleton_kpts(nimg, output[idx, 7:].T, 3)
- plt.figure(figsize=(8,8))
- plt.axis('off')
- plt.imshow(nimg)
- plt.savefig("person_detection.png")
- plt.show()

报错信息:

在utils.plots.py中的442-443行中的增加detach()不在进行反向传播即可

未完待续。。。
-
相关阅读:
java计算机毕业设计基于springboo高校学报论文在线投稿系统
微服务-Eureka
「SpringCloud」10 Stream消息驱动
【C++】多态
面试五 -bind 和 function
动态规划:11分割等和子集
[Linux打怪升级之路]-yun安装和gcc的使用
神经网络算法有哪些模型,神经网络模型应用实例
我的创作纪念日——创作者2年
通过 filesystem 的 inode 设计,理解数组与链表
- 原文地址:https://blog.csdn.net/weixin_43687366/article/details/126166982
