-
Nginx快速上手
Nginx
基础知识
正向代理
安装在客户端的代理工具
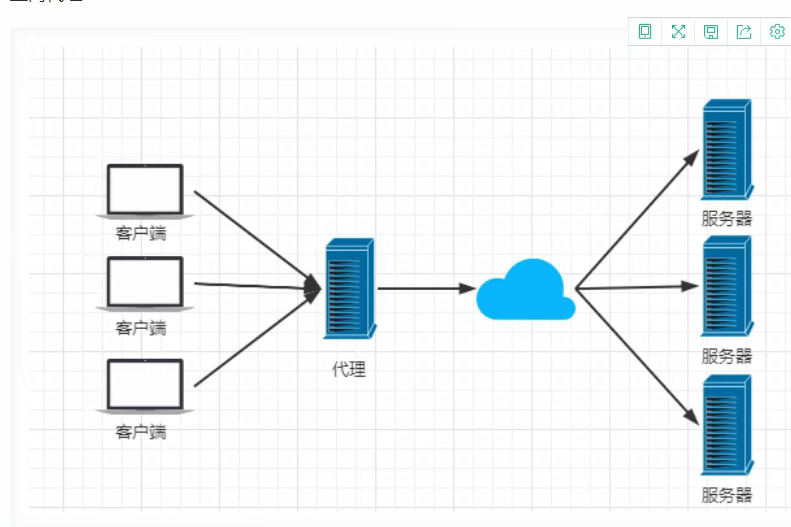
反向代理
在服务器端的代理

负载均衡策略
Nginx提供的负载均衡策略有两种:内置策略和扩展策略。内置策略为轮询,加权轮询,ip hash。扩展策略则比较多样
- 轮询

- 加权轮询

- ip hash
ip hash对客户端请求的ip进行hash操作,然后根据hash结果将同一个客户端ip的请求分发给固定的服务器。可以解决session不共享的问题,但更推荐使用redis来解决该问题。

动静分离
动静分离,在我们的软件开发中,有些请求是需要后台处理的,有些请求时不需要经过后台处理的(css、js、jpg等),这些不需要经过后台处理的文件称为静态文件。让动态网站里的动态动态网页根据一定规则把不变的资源和经常变得资源区分开来,动静资源做好了拆分以后,我们就可以根据静态资源的特点将其做缓存操作。提高资源相应的速度。

安装
windows下安装
- 下载压缩包

-
将其解压到没有中文的路径下
-
cmd 下运行nginx.exe或者双击运行
-
访问localhost

linus下安装
- 下载压缩包

- 上传至服务器
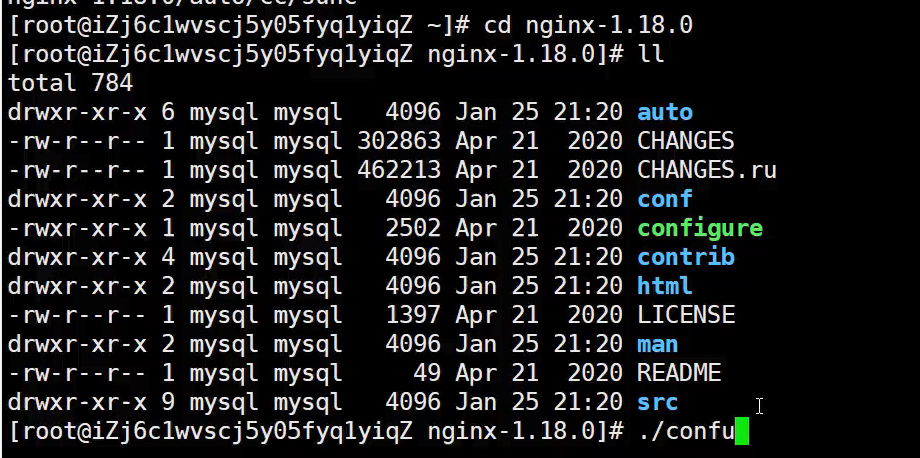
- 解压
tar -zxvf nginx-1.18.0.tar.gz- 1
- 运行配置文件并编译
cd nginx-1.18.0 ./configure make make install- 1
- 2
- 3
- 4

- 执行nginx文件

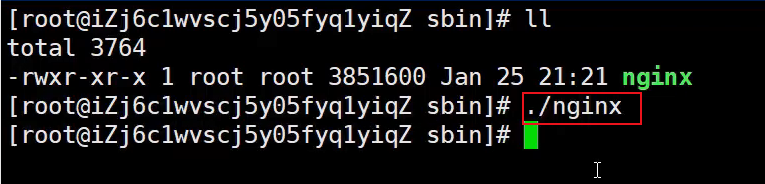
常用命令
cd /usr/local/nginx/sbin/ ./nginx 启动 ./nginx -s stop 停止 ./nginx -s quit 安全退出 ./nginx -s reload 重新加载配置文件 ps aux|grep nginx 查看nginx进程- 1
- 2
- 3
- 4
- 5
- 6
- 7
- 8
- 9
- 10
- 11
注意:如何连接不上,检查阿里云安全组是否开放端口,或者服务器防火墙是否开放端口!
相关命令:# 开启 service firewalld start # 重启 service firewalld restart # 关闭 service firewalld stop # 查看防火墙规则 firewall-cmd --list-all # 查询端口是否开放 firewall-cmd --query-port=8080/tcp # 开放80端口 firewall-cmd --permanent --add-port=80/tcp # 移除端口 firewall-cmd --permanent --remove-port=8080/tcp #重启防火墙(修改配置后要重启防火墙) firewall-cmd --reload # 参数解释 1、firwall-cmd:是Linux提供的操作firewall的一个工具; 2、--permanent:表示设置为持久; 3、--add-port:标识添加的端口;- 1
- 2
- 3
- 4
- 5
- 6
- 7
- 8
- 9
- 10
- 11
- 12
- 13
- 14
- 15
- 16
- 17
- 18
- 19
- 20
- 21
- 22
- 23
- 24
- 25
- 26
- 27
- 28
- 29
- 30
- 31
- 32
- 33
- 34
- 35
- 36
- 37
- 38
- 39
- 40
- 41
- 42
- 43
Nginx文件配置
... #全局块 events { #events块 ... } http #http块 { ... #http全局块 server #server块 { ... #server全局块 location [PATTERN] #location块 { ... } location [PATTERN] { ... } } server { ... } ... #http全局块 }- 1
- 2
- 3
- 4
- 5
- 6
- 7
- 8
- 9
- 10
- 11
- 12
- 13
- 14
- 15
- 16
- 17
- 18
- 19
- 20
- 21
- 22
- 23
- 24
- 25
- 26
- 27
- 1、全局块:配置影响nginx全局的指令。一般有运行nginx服务器的用户组,nginx进程pid存放路径,日志存放路径,配置文件引入,允许生成worker process数等。
- 2、events块:配置影响nginx服务器或与用户的网络连接。有每个进程的最大连接数,选取哪种事件驱动模型处理连接请求,是否允许同时接受多个网路连接,开启多个网络连接序列化等。
- 3、http块:可以嵌套多个server,配置代理,缓存,日志定义等绝大多数功能和第三方模块的配置。如文件引入,mime-type定义,日志自定义,是否使用sendfile传输文件,连接超时时间,单连接请求数等。
- 4、server块:配置虚拟主机的相关参数,一个http中可以有多个server。
- 5、location块:配置请求的路由,以及各种页面的处理情况。
实战样例
# 工作进程数 # 1.默认:worker_processes: 1 # 2.调大:worker_processes: CPU核心数,(双核4线程,可以设置为4) worker_processes 1; # events : 配置影响nginx服务器或与用户的网络连接 events { # worker_connections,单个工作进程可以允许同时建立外部连接的数量 worker_connections 1024; } # http : 可以嵌套多个server,配置代理,缓存,日志定义等绝大多数功能和第三方模块的配置 http { #文件扩展名与文件类型映射表 include mime.types; #默认文件类型,默认为text/plain default_type application/octet-stream; # 开启高效文件传输模式 sendfile on; # 连接超时时间,默认为75s,可以在http,server,location块。 keepalive_timeout 65; # 文件大小限制,默认1m client_max_body_size 20m; # server块:配置虚拟主机的相关参数, server { listen 80; server_name localhost; # location块:配置请求的路由,以及各种页面的处理情况。 location / { ##请求的url过滤,正则匹配,~为区分大小写,~*为不区分大小写。 root /usr/project/dist; #根目录 try_files $uri $uri/ /index.html; #当用户请求 http://localhost/example 时,这里的 $uri 就是 /example index index.html index.htm; #设置默认页 } location /profile/ { alias /home/ruoyi/uploadPath/; } location /prod-api/{ # 重定义发往后端服务器的请求头 # 语法格式: proxy_set_header Field Value; proxy_set_header Host $http_host; proxy_set_header X-Real-IP $remote_addr; proxy_set_header REMOTE-HOST $remote_addr; proxy_set_header X-Forwarded-For $proxy_add_x_forwarded_for; # proxy_pass转发请求,且url不会变化 proxy_pass http://localhost:8080/; } location /dev-api/{ proxy_set_header Host $http_host; proxy_set_header X-Real-IP $remote_addr; proxy_set_header REMOTE-HOST $remote_addr; proxy_set_header X-Forwarded-For $proxy_add_x_forwarded_for; proxy_pass http://localhost:8080/; } error_page 500 502 503 504 /50x.html; # 配置/50x.html具体跳转的地址 location = /50x.html { #放错误页面的目录路径 root html; } } }- 1
- 2
- 3
- 4
- 5
- 6
- 7
- 8
- 9
- 10
- 11
- 12
- 13
- 14
- 15
- 16
- 17
- 18
- 19
- 20
- 21
- 22
- 23
- 24
- 25
- 26
- 27
- 28
- 29
- 30
- 31
- 32
- 33
- 34
- 35
- 36
- 37
- 38
- 39
- 40
- 41
- 42
- 43
- 44
- 45
- 46
- 47
- 48
- 49
- 50
- 51
- 52
- 53
- 54
- 55
- 56
- 57
- 58
- 59
- 60
- 61
- 62
- 63
- 64
- 65
- 66
- 67
- 68
- 69
- 70
- 71
- 72
- 73
- 74
-
相关阅读:
JVM系列——jvm常用指令,问题排查
如何使用Python进行Web开发,如Flask或Django?
Python Pandas数据处理作图——波尔共振实验
深入理解Linux网络技术内 幕(八)——设备注册和初始化
在RT-Thread下为MPU手搓以太网MAC驱动-4
内网配置git代理
Vue/React 前端高频面试
java版工程管理系统Spring Cloud+Spring Boot+Mybatis实现工程管理系统源码
合肥先进光源束测专用网络的规划-续
机器学习代码问题总结
- 原文地址:https://blog.csdn.net/qq_50665031/article/details/126157195


