-
pytorch、tensorflow对比学习—张量
张量
前言
本文是《pytorch-tensorflow-Comparative study》,pytorch和tensorflow对比学习专栏,第一章——张量。
虽然说这两个框架在语法和接口的命名上有很多地方是不同的,但是深度学习的建模过程确实基本上都是一个套路的。
所以该笔记的笔记方式是:在使用相同的处理功能模块上,对比记录pytorch和tensorflow两者的API接口,和语法。

1,有利于深入理解深度学习建模过程流程。
2,有利于理解pytorch,和tensorflow设计上的不同,更加灵活的使用在自己的项目中。
3,有利于深入理解各个功能模块的使用。
本章节主要对比学习pytorch 和tensorflow有关张量操作的的API接口,和语法。

张量的数据结构
程序 = 数据结构+算法。
TensorFlow和pytorch程序 = 张量数据结构 + 计算图算法语言,区别在于pythorch都是动态图语言,tensorflow在1.X静态图,tensorflow2.x之后的版本吸收了动态图的思想,既可以使用动态图,也可以使用静态图。

张量和计算图是 TensorFlow和pythorch的核心概念。
Tensorflow和pythorch的基本数据结构是张量Tensor。张量即多维数组。和numpy中的array很类似。
本节我们主要介绍二者种张量的数据类型、张量的维度、张量的尺寸、张量和numpy数组等基本概念,已经比较其中的不同,加深记忆。
张量数据类型
pytorch在使用pytorch过程中会发现他的语法非常拟合python语法形式,张量的数据类型和numpy.array基本一一对应,但是不支持str类型,(在pytorch的张量数据结构中基本不需要用到str类型,这是因为张量基本是用于数值计算的)。
包括:
torch.float64(torch.double),torch.float32(torch.float),torch.float16,torch.int64(torch.long),torch.int32(torch.int),torch.int16,torch.int8,torch.uint8,torch.bool
一般神经网络建模使用的都是torch.float32类型。
import numpy as np import torch # 自动推断数据类型 i = torch.tensor(1);print(i,i.dtype) x = torch.tensor(2.0);print(x,x.dtype) b = torch.tensor(True);print(b,b.dtype) # tensor(1) torch.int64 # tensor(2.) torch.float32 # tensor(True) torch.bool- 1
- 2
- 3
- 4
- 5
- 6
- 7
- 8
- 9
- 10
- 11
# 指定数据类型 i = torch.tensor(1,dtype = torch.int32);print(i,i.dtype) x = torch.tensor(2.0,dtype = torch.double);print(x,x.dtype) # tensor(1, dtype=torch.int32) torch.int32 # tensor(2., dtype=torch.float64) torch.float64- 1
- 2
- 3
- 4
- 5
- 6
# 使用特定类型构造函数 i = torch.IntTensor(1);print(i,i.dtype) x = torch.Tensor(np.array(2.0));print(x,x.dtype) #等价于torch.FloatTensor b = torch.BoolTensor(np.array([1,0,2,0])); print(b,b.dtype) #tensor([5], dtype=torch.int32) torch.int32 #tensor(2.) torch.float32 #tensor([ True, False, True, False]) torch.bool- 1
- 2
- 3
- 4
- 5
- 6
- 7
- 8
- 9
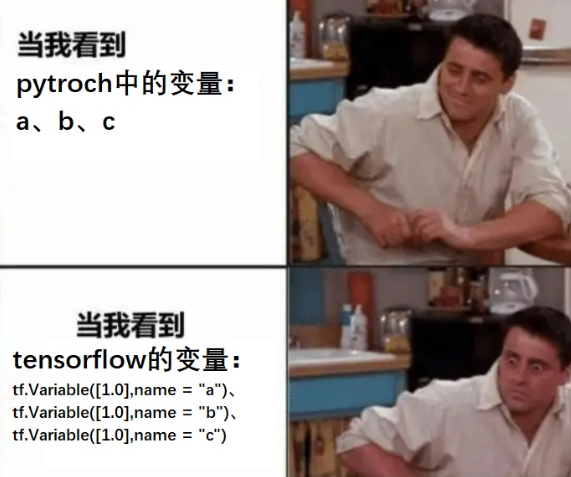
tensorflowtensorflow 由于刚开始设计之初在TensorFlow1.0时代,采用的是静态计算图,需要先使用TensorFlow的各种算子创建计算图,然后再开启一个会话Session,显式执行计算图。因此在定义变量(以及算子)不像python以及pythorch语法一样这么随意自由,需要更严格的声明。虽然在TensorFlow2.0时代,加入了动态计算图,使得算子的设计可以更加灵活,便于调试,但是定义变量的方式依旧传承下来。
(本质原因是2.0时代相对于1.0时代,相当于增加了一层由动态算子图编译为静态图的封装。这个问题将在tensorflow机制原理中讲解,这里只做简要说明)。
tensorflow的张量数据结构又分类为:常量constant和变量Variable.
常量的值在计算图中不可以被重新赋值,变量可以在计算图中用assign等算子重新赋值。(pytorch中就没有这样的区分)。
其他方面张量的数据类型和numpy.array基本一一对应。

常量变量
import numpy as np import tensorflow as tf i = tf.constant(1) # tf.int32 类型常量 l = tf.constant(1,dtype = tf.int64) # tf.int64 类型常量 f = tf.constant(1.23) #tf.float32 类型常量 d = tf.constant(3.14,dtype = tf.double) # tf.double 类型常量 s = tf.constant("hello world") # tf.string类型常量 b = tf.constant(True) #tf.bool类型常量 print(tf.int64 == np.int64) print(tf.bool == np.bool) print(tf.double == np.float64) print(tf.string == np.unicode) # tf.string类型和np.unicode类型不等价 #True #True #True #False- 1
- 2
- 3
- 4
- 5
- 6
- 7
- 8
- 9
- 10
- 11
- 12
- 13
- 14
- 15
- 16
- 17
- 18
- 19
- 20
因为tensorflow有常量constant和变量Variable.的区分,因此tensorflow中可以自己定义str,这也是和pytorch的一个不同。
这并不是因为pytorch没有常量constant而无法定义str,而是因为pytorch设计之初就有着和python语言很好的融合性。pytorch在使用张量数据时可以自动分析那些元素做变量使用,那些做常量使用。pytorch并不需要自己定义str变量,直接使用python定义的str就可以。而tensorflow在编译静态图的时候会跳脱python编译的过程,使用自己的编译库,因此它也需要留有自己定义变量接口的原因。
因此这也是同样基于python语言来使用的两个库,tensorflow要显得比pytorch臃肿一些的原因,但是这也是tensorflow能够做到更快速度所不得不做出的牺牲。
变量张量
模型中需要被训练的参数一般被设置成变量。
# 常量值不可以改变,常量的重新赋值相当于创造新的内存空间 c = tf.constant([1.0,2.0]) print(c) print(id(c)) c = c + tf.constant([1.0,1.0]) print(c) print(id(c)) # tf.Tensor([1. 2.], shape=(2,), dtype=float32) # 5276289568 # tf.Tensor([2. 3.], shape=(2,), dtype=float32) # 5276290240 # 变量的值可以改变,可以通过assign, assign_add等方法给变量重新赋值 v = tf.Variable([1.0,2.0],name = "v") print(v) print(id(v)) v.assign_add([1.0,1.0]) print(v) print(id(v)) ## 5276259888 # # 5276259888 - 1
- 2
- 3
- 4
- 5
- 6
- 7
- 8
- 9
- 10
- 11
- 12
- 13
- 14
- 15
- 16
- 17
- 18
- 19
- 20
- 21
- 22
不同数据类型进行转换
pytorch# 不同类型进行转换 i = torch.tensor(1); print(i,i.dtype) x = i.float(); print(x,x.dtype) #调用 float方法转换成浮点类型 y = i.type(torch.float); print(y,y.dtype) #使用type函数转换成浮点类型 z = i.type_as(x);print(z,z.dtype) #使用type_as方法转换成某个Tensor相同类型 # tensor(1) torch.int64 # tensor(1.) torch.float32 # tensor(1.) torch.float32 # tensor(1.) torch.float32- 1
- 2
- 3
- 4
- 5
- 6
- 7
- 8
- 9
- 10
tensorflow可以用tf.cast改变张量的数据类型。
h = tf.constant([123,456],dtype = tf.int32) f = tf.cast(h,tf.float32) print(h.dtype, f.dtype) #- 1
- 2
- 3
- 4
张量的维度
pytroch中不同类型的数据可以用不同维度(dimension)的张量来表示。
tensorflow中不同类型的数据可以用不同维度(rank)的张量来表示。
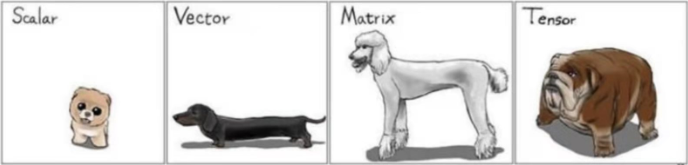
标量为0维张量,向量为1维张量,矩阵为2维张量。
彩色图像有rgb三个通道,可以表示为3维张量。
视频还有时间维,可以表示为4维张量。
可以简单地总结为:有几层中括号,就是多少维的张量。

pytorchscalar = torch.tensor(True) print(scalar) print(scalar.dim()) # 标量,0维张量 # tensor(True) # 0- 1
- 2
- 3
- 4
- 5
vector = torch.tensor([1.0,2.0,3.0,4.0]) #向量,1维张量 print(vector) print(vector.dim()) # tensor([1., 2., 3., 4.]) # 1- 1
- 2
- 3
- 4
- 5
matrix = torch.tensor([[1.0,2.0],[3.0,4.0]]) #矩阵, 2维张量 print(matrix) print(matrix.dim())- 1
- 2
- 3
tensor3 = torch.tensor([[[1.0,2.0],[3.0,4.0]],[[5.0,6.0],[7.0,8.0]]]) # 3维张量 print(tensor3) print(tensor3.dim()) # tensor([[[1., 2.], # [3., 4.]], # # [[5., 6.], # [7., 8.]]]) # 3- 1
- 2
- 3
- 4
- 5
- 6
- 7
- 8
- 9
- 10
tensorflowscalar = tf.constant(True) #标量,0维张量 print(tf.rank(scalar)) print(scalar.numpy().ndim) # tf.rank的作用和numpy的ndim方法相同 # tf.Tensor(0, shape=(), dtype=int32) # 0- 1
- 2
- 3
- 4
- 5
vector = tf.constant([1.0,2.0,3.0,4.0]) #向量,1维张量 print(tf.rank(vector)) print(np.ndim(vector.numpy())) # tf.Tensor(1, shape=(), dtype=int32) # 1- 1
- 2
- 3
- 4
- 5
matrix = tf.constant([[1.0,2.0],[3.0,4.0]]) #矩阵, 2维张量 print(tf.rank(matrix).numpy()) print(np.ndim(matrix)) # 2 # 2- 1
- 2
- 3
- 4
- 5
tensor3 = tf.constant([[[1.0,2.0],[3.0,4.0]],[[5.0,6.0],[7.0,8.0]]]) # 3维张量 print(tensor3) print(tf.rank(tensor3)) # tf.Tensor( # [[[1. 2.] # [3. 4.]] # # [[5. 6.] # [7. 8.]]], shape=(2, 2, 2), dtype=float32) # tf.Tensor(3, shape=(), dtype=int32)- 1
- 2
- 3
- 4
- 5
- 6
- 7
- 8
- 9
- 10
张量的尺寸
pytorch可以使用 shape属性或者 size()方法查看张量在每一维的长度.
scalar = torch.tensor(True) print(scalar.size()) print(scalar.shape) # torch.Size([]) # torch.Size([])- 1
- 2
- 3
- 4
- 5
matrix = torch.tensor([[1.0,2.0],[3.0,4.0]]) print(matrix.size()) # torch.Size([2, 2])- 1
- 2
- 3
tensorflow可以用numpy方法将tensorflow中的张量转化成numpy中的张量。
可以用shape方法查看张量的尺寸。
y = tf.constant([[1.0,2.0],[3.0,4.0]]) print(y.numpy()) #转换成np.array print(y.shape) # [[1. 2.] # [3. 4.]] # (2, 2)- 1
- 2
- 3
- 4
- 5
- 6
张量的结构操作
张量结构操作诸如:张量创建,索引切片,维度变换,合并分割。
创建张量
张量创建的许多方法和numpy中创建array的方法很像。
简单张量创建
import numpy as np import torch import tensorflow as tf import numpy as np- 1
- 2
- 3
- 4
- 5
pytorchtensorflowa = torch.tensor([1,2,3],dtype = torch.float) a = tf.constant([1,2,3],dtype = tf.float32) #tensor([1., 2., 3.]) #[1 2 3] b = torch.arange(1,10,step = 2) b = tf.range(1,10,delta = 2) #tensor([1, 3, 5, 7, 9]) #[1 3 5 7 9] c = torch.linspace(0.0,2*3.14,10) c = tf.linspace(0.0,2*3.14,100) #tensor([0.0000, 0.6978, 1.3956, …4.1867, 4.8844, 5.5822, 6.2800]) #[0 0.697777808 1.39555562 … 4.88444471 5.58222246 6.28] d = torch.zeros((3,3)) d = tf.zeros([3,3]) tf.print(d) #tensor([[0., 0., 0.], [0., 0., 0.], [0., 0., 0.]]) #[[0 0 0] [0 0 0] [0 0 0]] a = torch.ones((3,3),dtype = torch.int) a = tf.ones([3,3]) #tensor([[1, 1, 1], [1, 1, 1], [1, 1, 1]], dtype=torch.int32) #[[1 1 1] [1 1 1] [1 1 1]] b = torch.zeros_like(a,dtype = torch.float) b = tf.zeros_like(a,dtype= tf.float32) #tensor([[0., 0., 0.], [0., 0., 0.], [0., 0., 0.]]) #[[0 0 0] [0 0 0] [0 0 0]] torch.fill_(b,5) b = tf.fill(b,5) #tensor([[5., 5., 5.], [5., 5., 5.], [5., 5., 5.]]) #[5., 5., 5.], [5., 5., 5.], [5., 5., 5.] 特殊矩阵 I = torch.eye(3,3) #单位矩阵 I = tf.eye(3,3) #单位矩阵 #tensor([[1., 0., 0.], [0., 1., 0.], [0., 0., 1.]]) #[[1 0 0] [0 1 0] [0 0 1]] t = torch.diag(torch.tensor([1,2,3])) #对角矩阵 t = tf.linalg.diag([1,2,3]) #对角阵 #tensor([[1, 0, 0], [0, 2, 0], [0, 0, 3]]) #[[1 0 0] [0 2 0] [0 0 3]]
均匀随机分布
pytorch#均匀随机分布 torch.manual_seed(0) minval,maxval = 0,10 a = minval + (maxval-minval)*torch.rand([5]) print(a) # tensor([4.9626, 7.6822, 0.8848, 1.3203, 3.0742])- 1
- 2
- 3
- 4
- 5
- 6
tensorflow#均匀分布随机 tf.random.set_seed(1.0) a = tf.random.uniform([5],minval=0,maxval=10) tf.print(a) # [1.65130854 9.01481247 6.30974197 4.34546089 2.9193902]- 1
- 2
- 3
- 4
- 5
正态分布随机
pytorch#正态分布随机 b = torch.normal(mean = torch.zeros(3,3), std = torch.ones(3,3)) print(b) # tensor([[-1.3836, 0.2459, -0.1312], # [-0.1785, -0.5959, 0.2739], # [ 0.5679, -0.6731, -1.2095]]) #正态分布随机 mean,std = 2,5 c = std*torch.randn((3,3))+mean print(c) # tensor([[ 8.7204, 13.9161, -0.8323], # [ -3.7681, -10.5115, 6.3778], # [-11.3628, 1.8433, 4.4939]])- 1
- 2
- 3
- 4
- 5
- 6
- 7
- 8
- 9
- 10
- 11
- 12
- 13
tensorflow#正态分布随机 b = tf.random.normal([3,3],mean=0.0,stddev=1.0) tf.print(b) # [[0.403087884 -1.0880208 -0.0630953535] # [1.33655667 0.711760104 -0.489286453] # [-0.764221311 -1.03724861 -1.25193381]] #正态分布随机,剔除2倍方差以外数据重新生成 c = tf.random.truncated_normal((5,5), mean=0.0, stddev=1.0, dtype=tf.float32) tf.print(c) # [[-0.457012236 -0.406867266 0.728577733 -0.892977774 -0.369404584] # [0.323488563 1.19383323 0.888299048 1.25985599 -1.95951891] # [-0.202244401 0.294496894 -0.468728036 1.29494202 1.48142183] # [0.0810953453 1.63843894 0.556645 0.977199793 -1.17777884] # [1.67368948 0.0647980496 -0.705142677 -0.281972528 0.126546144]]- 1
- 2
- 3
- 4
- 5
- 6
- 7
- 8
- 9
- 10
- 11
- 12
- 13
- 14
整数随机排列
pytorch#整数随机排列 d = torch.randperm(20) print(d) # tensor([ 5, 15, 19, 10, 7, 17, 0, 4, 12, 16, 14, 13, 1, 3, 9, 6, 18, 2, # 8, 11])- 1
- 2
- 3
- 4
- 5

索引切片
张量的索引切片方式和numpy几乎是一样的。切片时支持缺省参数和省略号。

**pytorch中:**可以通过索引和切片对部分元素进行修改。
此外,对于不规则的切片提取,可以使用torch.index_select, torch.masked_select, torch.take
如果要通过修改张量的某些元素得到新的张量,可以使用torch.where,torch.masked_fill,torch.index_fill。
**tensorflow中:**对于tf.Variable,可以通过索引和切片对部分元素进行修改。
对于提取张量的连续子区域,也可以使用tf.slice.
此外,对于不规则的切片提取,可以使用tf.gather,tf.gather_nd,tf.boolean_mask。
tf.boolean_mask功能最为强大,它可以实现tf.gather,tf.gather_nd的功能,并且tf.boolean_mask还可以实现布尔索引。
如果要通过修改张量的某些元素得到新的张量,可以使用tf.where,tf.scatter_nd。
切片查询
现有如下张量 t :
t = tensor([[4, 7, 0, 1, 3], [6, 4, 8, 4, 6], [3, 4, 0, 1, 2], [5, 6, 8, 1, 2], [6, 9, 3, 8, 4]], dtype=torch.int32)- 1
- 2
- 3
- 4
- 5
pytorchtensorflow第0行 print(t[0]) tf.print(t[0]) 倒数第一行 print(t[-1]) tf.print(t[-1]) 第1行第3列 print(t[1,3]) tf.print(t[1,3]) print(t[1][3])) tf.print(t[1][3])) 第1行至第3行 print(t[1:4,:]) tf.print(t[1:4,:]) tf.print(tf.slice(t,[1,0],[3,5])) 第1行至最后一行,第0列到最后一列每隔两列取一列 print(t[1:4,:4:2]) tf.print(t[1:4,:4:2])
可以使用索引和切片修改部分元素
pytorch#可以使用索引和切片修改部分元素 x = torch.tensor([[1,2],[3,4]],dtype = torch.float32,requires_grad=True) x.data[1,:] = torch.tensor([0.0,0.0]) # tensor([[1., 2.], # [0., 0.]], requires_grad=True)- 1
- 2
- 3
- 4
- 5
- 6
tensorflow需要张量是变量Variable格式
#对变量来说,还可以使用索引和切片修改部分元素 x = tf.Variable([[1,2],[3,4]],dtype = tf.float32) x[1,:].assign(tf.constant([0.0,0.0])) tf.print(x) # [[1 2] # [0 0]]- 1
- 2
- 3
- 4
- 5
- 6
- 7
省略号可以表示多个冒号
t = tensor([[[ 0, 1, 2], [ 3, 4, 5], [ 6, 7, 8]], [[ 9, 10, 11], [12, 13, 14], [15, 16, 17]], [[18, 19, 20], [21, 22, 23], [24, 25, 26]]])- 1
- 2
- 3
- 4
- 5
- 6
- 7
- 8
- 9
- 10
- 11
pytorch#省略号可以表示多个冒号 print(a[...,1]) # tensor([[ 1, 4, 7], # [10, 13, 16], # [19, 22, 25]])- 1
- 2
- 3
- 4
- 5
tensorflow#省略号可以表示多个冒号 tf.print(a[...,1]) # [[ 1, 4, 7], # [10, 13, 16], # [19, 22, 25]]- 1
- 2
- 3
- 4
- 5
以上切片方式相对规则,下面是对于不规则的切片提取
在pytorch中:可以使用torch.index_select, torch.take, torch.gather, torch.masked_select.
在tensorflow中:可以使用tf.gather,tf.gather_nd,tf.boolean_mask。
现在有一个张量 t ,它表示班级成绩册,有4个班级,每个班级10个学生,每个学生7门科目成绩。可以用一个4×10×7的张量来表示。
t = tensor([[[55, 95, 3, 18, 37, 30, 93], [17, 26, 15, 3, 20, 92, 72], [74, 52, 24, 58, 3, 13, 24], [81, 79, 27, 48, 81, 99, 69], [56, 83, 20, 59, 11, 15, 24], [72, 70, 20, 65, 77, 43, 51], [61, 81, 98, 11, 31, 69, 91], [93, 94, 59, 6, 54, 18, 3], [94, 88, 0, 59, 41, 41, 27], [69, 20, 68, 75, 85, 68, 0]], [[17, 74, 60, 10, 21, 97, 83], [28, 37, 2, 49, 12, 11, 47], [57, 29, 79, 19, 95, 84, 7], [37, 52, 57, 61, 69, 52, 25], [73, 2, 20, 37, 25, 32, 9], [39, 60, 17, 47, 85, 44, 51], [45, 60, 81, 97, 81, 97, 46], [ 5, 26, 84, 49, 25, 11, 3], [ 7, 39, 77, 77, 1, 81, 10], [39, 29, 40, 40, 5, 6, 42]], [[50, 27, 68, 4, 46, 93, 29], [95, 68, 4, 81, 44, 27, 89], [ 9, 55, 39, 85, 63, 74, 67], [37, 39, 8, 77, 89, 84, 14], [52, 14, 22, 20, 67, 20, 48], [52, 82, 12, 15, 20, 84, 32], [92, 68, 56, 49, 40, 56, 38], [49, 56, 10, 23, 90, 9, 46], [99, 68, 51, 6, 74, 14, 35], [33, 42, 50, 91, 56, 94, 80]], [[18, 72, 14, 28, 64, 66, 87], [33, 50, 75, 1, 86, 8, 50], [41, 23, 56, 91, 35, 20, 31], [ 0, 72, 25, 16, 21, 78, 76], [88, 68, 33, 36, 64, 91, 63], [26, 26, 2, 60, 21, 5, 93], [17, 44, 64, 51, 16, 9, 89], [58, 91, 33, 64, 38, 47, 19], [66, 65, 48, 38, 19, 84, 12], [70, 33, 25, 58, 24, 61, 59]]], dtype=torch.int32)- 1
- 2
- 3
- 4
- 5
- 6
- 7
- 8
- 9
- 10
- 11
- 12
- 13
- 14
- 15
- 16
- 17
- 18
- 19
- 20
- 21
- 22
- 23
- 24
- 25
- 26
- 27
- 28
- 29
- 30
- 31
- 32
- 33
- 34
- 35
- 36
- 37
- 38
- 39
- 40
- 41
- 42
- 43
抽取每个班级第0个学生,第5个学生,第9个学生的全部成绩
pytorch#抽取每个班级第0个学生,第5个学生,第9个学生的全部成绩 torch.index_select(scores,dim = 1,index = torch.tensor([0,5,9]))- 1
- 2
tensorflow#抽取每个班级第0个学生,第5个学生,第9个学生的全部成绩 p = tf.gather(scores,[0,5,9],axis=1)- 1
- 2
抽取每个班级第0个学生,第5个学生,第9个学生的第1门课程,第3门课程,第6门课程成绩
pytorchq = torch.index_select(torch.index_select(scores,dim = 1,index = torch.tensor([0,5,9])) ,dim=2,index = torch.tensor([1,3,6]))- 1
- 2
tensorflow#抽取每个班级第0个学生,第5个学生,第9个学生的第1门课程,第3门课程,第6门课程成绩 q = tf.gather(tf.gather(scores,[0,5,9],axis=1),[1,3,6],axis=2)- 1
- 2
抽取第0个班级第0个学生,第2个班级的第4个学生,第3个班级的第6个学生的全部成绩
pytorch#抽取第0个班级第0个学生的第0门课程,第2个班级的第4个学生的第1门课程,第3个班级的第9个学生第6门课程成绩 #take将输入看成一维数组,输出和index同形状 s = torch.take(scores,torch.tensor([0*10*7+0,2*10*7+4*7+1,3*10*7+9*7+6]))- 1
- 2
- 3
tensorflow以上tf.gather和tf.gather_nd的功能也可以用tf.boolean_mask来实现。
# 抽取第0个班级第0个学生,第2个班级的第4个学生,第3个班级的第6个学生的全部成绩 #indices的长度为采样样本的个数,每个元素为采样位置的坐标 s = tf.gather_nd(scores,indices = [(0,0),(2,4),(3,6)]) #抽取第0个班级第0个学生,第2个班级的第4个学生,第3个班级的第6个学生的全部成绩 s = tf.boolean_mask(scores, [[True,False,False,False,False,False,False,False,False,False], [False,False,False,False,False,False,False,False,False,False], [False,False,False,False,True,False,False,False,False,False], [False,False,False,False,False,False,True,False,False,False]])- 1
- 2
- 3
- 4
- 5
- 6
- 7
- 8
- 9
- 10
其他:
pytorch以上这些方法仅能提取张量的部分元素值,但不能更改张量的部分元素值得到新的张量。
如果要通过修改张量的部分元素值得到新的张量,可以使用torch.where,torch.index_fill 和 torch.masked_fill
torch.where可以理解为if的张量版本。
torch.index_fill的选取元素逻辑和torch.index_select相同。
torch.masked_fill的选取元素逻辑和torch.masked_select相同。
#抽取分数大于等于80分的分数(布尔索引) #结果是1维张量 g = torch.masked_select(scores,scores>=80)- 1
- 2
- 3
#如果分数大于60分,赋值成1,否则赋值成0 ifpass = torch.where(scores>60,torch.tensor(1),torch.tensor(0))- 1
- 2
#将每个班级第0个学生,第5个学生,第9个学生的全部成绩赋值成满分 torch.index_fill(scores,dim = 1,index = torch.tensor([0,5,9]),value = 100) #等价于 scores.index_fill(dim = 1,index = torch.tensor([0,5,9]),value = 100) #将分数小于60分的分数赋值成60分 b = torch.masked_fill(scores,scores<60,60) #等价于b = scores.masked_fill(scores<60,60)- 1
- 2
- 3
- 4
- 5
- 6
tensorflow以上这些方法仅能提取张量的部分元素值,但不能更改张量的部分元素值得到新的张量。
如果要通过修改张量的部分元素值得到新的张量,可以使用tf.where和tf.scatter_nd。
tf.where可以理解为if的张量版本,此外它还可以用于找到满足条件的所有元素的位置坐标。
tf.scatter_nd的作用和tf.gather_nd有些相反,tf.gather_nd用于收集张量的给定位置的元素,
而tf.scatter_nd可以将某些值插入到一个给定shape的全0的张量的指定位置处。
#找到张量中小于0的元素,将其换成np.nan得到新的张量 #tf.where和np.where作用类似,可以理解为if的张量版本 c = tf.constant([[-1,1,-1],[2,2,-2],[3,-3,3]],dtype=tf.float32) d = tf.where(c<0,tf.fill(c.shape,np.nan),c)- 1
- 2
- 3
- 4
- 5
#找到张量中小于0的元素,将其换成np.nan得到新的张量 #tf.where和np.where作用类似,可以理解为if的张量版本 c = tf.constant([[-1,1,-1],[2,2,-2],[3,-3,3]],dtype=tf.float32) d = tf.where(c<0,tf.fill(c.shape,np.nan),c)- 1
- 2
- 3
- 4
- 5
#将张量的第[0,0]和[2,1]两个位置元素替换为0得到新的张量 d = c - tf.scatter_nd([[0,0],[2,1]],[c[0,0],c[2,1]],c.shape)- 1
- 2
#scatter_nd的作用和gather_nd有些相反 #可以将某些值插入到一个给定shape的全0的张量的指定位置处。 indices = tf.where(c<0) tf.scatter_nd(indices,tf.gather_nd(c,indices),c.shape)- 1
- 2
- 3
- 4
通过以上例子可以pytorch和tensorflow作用的接口对比:
相同行表示作用一样
pytorch tensorflow torch.index_select tf.gather torch.take 无 无 tf.gather_nd tf.masked_select tf.boolean_mask torch.where tf.where torch.index_fill tf.scatter_nd 维度变换
pythorch中:维度变换相关函数主要有 torch.reshape(或者调用张量的view方法), torch.squeeze, torch.unsqueeze, torch.transpose
tensorflow中:维度变换相关函数主要有 tf.reshape, tf.squeeze, tf.expand_dims, tf.transpose.
作用 pythorch tensorflow 可以改变张量的形状 torch.reshape/view tf.reshape 可以减少维度 torch.squeeze tf.squeeze 可以增加维度 torch.unsqueeze tf.expand_dims 可以交换维度 torch.transpose tf.transpose 
改变张量的形状
pythorch# 构建多维张量a: torch.manual_seed(0) minval,maxval = 0,255 a = (minval + (maxval-minval)*torch.rand([1,3,3,2])).int() print(a.shape) print(a) # torch.Size([1, 3, 3, 2]) # tensor([[[[126, 195], # [ 22, 33], # [ 78, 161]], # # [[124, 228], # [116, 161], # [ 88, 102]], # # [[ 5, 43], # [ 74, 132], # [177, 204]]]], dtype=torch.int32)- 1
- 2
- 3
- 4
- 5
- 6
- 7
- 8
- 9
- 10
- 11
- 12
- 13
- 14
- 15
- 16
- 17
- 18
# 张量的view方法有时候会调用失败,可以使用reshape方法。 # 改成 (3,6)形状的张量 b = a.view([3,6]) #torch.reshape(a,[3,6]) print(b.shape) print(b) # torch.Size([3, 6]) # tensor([[126, 195, 22, 33, 78, 161], # [124, 228, 116, 161, 88, 102], # [ 5, 43, 74, 132, 177, 204]], dtype=torch.int32)- 1
- 2
- 3
- 4
- 5
- 6
- 7
- 8
- 9
# 改回成 [1,3,3,2] 形状的张量 c = torch.reshape(b,[1,3,3,2]) # b.view([1,3,3,2]) print(c) # tensor([[[[126, 195], # [ 22, 33], # [ 78, 161]], # # [[124, 228], # [116, 161], # [ 88, 102]], # # [[ 5, 43], # [ 74, 132], # [177, 204]]]], dtype=torch.int32)- 1
- 2
- 3
- 4
- 5
- 6
- 7
- 8
- 9
- 10
- 11
- 12
- 13
- 14
tensorflow# 改成 (3,6)形状的张量 b = tf.reshape(a,[3,6]) tf.print(b.shape) # TensorShape([3, 6]) # 改回成 [1,3,3,2] 形状的张量 c = tf.reshape(b,[1,3,3,2])- 1
- 2
- 3
- 4
- 5
- 6
- 7
- 8
减少维度、增加维度
pytorcha = torch.tensor([[1.0,2.0]]) s = torch.squeeze(a) print(a) print(s) print(a.shape) print(s.shape) # tensor([[1., 2.]]) # tensor([1., 2.]) # torch.Size([1, 2]) # torch.Size([2])- 1
- 2
- 3
- 4
- 5
- 6
- 7
- 8
- 9
- 10
#在第0维插入长度为1的一个维度 d = torch.unsqueeze(s,axis=0) print(s) print(d) print(s.shape) print(d.shape) # tensor([1., 2.]) # tensor([[1., 2.]]) # torch.Size([2]) # torch.Size([1, 2])- 1
- 2
- 3
- 4
- 5
- 6
- 7
- 8
- 9
- 10
- 11
tensorflows = tf.squeeze(a) tf.print(s.shape) # TensorShape([3, 3, 2])- 1
- 2
- 3
d = tf.expand_dims(s,axis=0) #在第0维插入长度为1的一个维度 #- 1
- 2
交换维度
pytroch
torch.transpose可以交换张量的维度,torch.transpose常用于图片存储格式的变换上。
如果是二维的矩阵,通常会调用矩阵的转置方法 matrix.t(),等价于 torch.transpose(matrix,0,1)。
minval=0 maxval=255 # Batch,Height,Width,Channel data = torch.floor(minval + (maxval-minval)*torch.rand([100,256,256,4])).int() print(data.shape) # 转换成 Pytorch默认的图片格式 Batch,Channel,Height,Width # 需要交换两次 # data_t = torch.transpose(torch.transpose(data,1,2),1,3) print(data_t.shape) # torch.Size([100, 256, 256, 4]) # torch.Size([100, 4, 256, 256])- 1
- 2
- 3
- 4
- 5
- 6
- 7
- 8
- 9
- 10
- 11
- 12
matrix = torch.tensor([[1,2,3],[4,5,6]]) print(matrix) print(matrix.t()) #等价于torch.transpose(matrix,0,1) # tensor([[1, 2, 3], # [4, 5, 6]]) # tensor([[1, 4], # [2, 5], # [3, 6]])- 1
- 2
- 3
- 4
- 5
- 6
- 7
- 8
tensorflowtf.transpose可以交换张量的维度,与tf.reshape不同,它会改变张量元素的存储顺序。
tf.transpose常用于图片存储格式的变换上。
# Batch,Height,Width,Channel a = tf.random.uniform(shape=[100,600,600,4],minval=0,maxval=255,dtype=tf.int32) tf.print(a.shape) # 转换成 Channel,Height,Width,Batch s= tf.transpose(a,perm=[3,1,2,0]) tf.print(s.shape) # TensorShape([100, 600, 600, 4]) # TensorShape([4, 600, 600, 100])- 1
- 2
- 3
- 4
- 5
- 6
- 7
- 8
- 9
合并分割
和numpy类似,可以用concat和stack方法对多个张量进行合并,可以用tf.split方法把一个张量分割成多个张量。
作用 pytorch tensorflow 合并 torch.cat tf.concat 堆叠 torch.stack tf.stack 分割 torch.split tf.split 
合并和堆叠
pytorcha = torch.tensor([[1.0,2.0],[3.0,4.0]]) b = torch.tensor([[5.0,6.0],[7.0,8.0]]) c = torch.tensor([[9.0,10.0],[11.0,12.0]]) abc_cat = torch.cat([a,b,c],dim = 0) print(abc_cat.shape) print(abc_cat) # torch.Size([6, 2]) # tensor([[ 1., 2.], # [ 3., 4.], # [ 5., 6.], # [ 7., 8.], # [ 9., 10.], # [11., 12.]]) torch.cat([a,b,c],axis = 1) # tensor([[ 1., 2., 5., 6., 9., 10.], # [ 3., 4., 7., 8., 11., 12.]])- 1
- 2
- 3
- 4
- 5
- 6
- 7
- 8
- 9
- 10
- 11
- 12
- 13
- 14
- 15
- 16
- 17
- 18
abc_stack = torch.stack([a,b,c],axis = 0) #torch中dim和axis参数名可以混用 print(abc_stack.shape) print(abc_stack) # torch.Size([3, 2, 2]) # tensor([[[ 1., 2.], # [ 3., 4.]], # # [[ 5., 6.], # [ 7., 8.]], # # [[ 9., 10.], # [11., 12.]]]) torch.stack([a,b,c],axis = 1) # tensor([[[ 1., 2.], # [ 5., 6.], # [ 9., 10.]], # # [[ 3., 4.], # [ 7., 8.], # [11., 12.]]])- 1
- 2
- 3
- 4
- 5
- 6
- 7
- 8
- 9
- 10
- 11
- 12
- 13
- 14
- 15
- 16
- 17
- 18
- 19
- 20
- 21
tensorflowa = tf.constant([[1.0,2.0],[3.0,4.0]]) b = tf.constant([[5.0,6.0],[7.0,8.0]]) c = tf.constant([[9.0,10.0],[11.0,12.0]]) tf.concat([a,b,c],axis = 0) #- 1
- 2
- 3
- 4
- 5
- 6
- 7
- 8
- 9
- 10
- 11
- 12
- 13
- 14
- 15
- 16
- 17
tf.stack([a,b,c]) # 默认axis=0 #- 1
- 2
- 3
- 4
- 5
- 6
- 7
- 8
- 9
- 10
- 11
- 12
- 13
- 14
- 15
- 16
- 17
- 18
- 19
- 20
分割split
split是torch.cat的逆运算,可以指定分割份数平均分割,也可以通过指定每份的记录数量进行分割。
pytrochprint(abc_cat) a,b,c = torch.split(abc_cat,split_size_or_sections = 2,dim = 0) #每份2个进行分割 print(a) print(b) print(c)- 1
- 2
- 3
- 4
- 5
print(abc_cat) p,q,r = torch.split(abc_cat,split_size_or_sections =[4,1,1],dim = 0) #每份分别为[4,1,1] print(p) print(q) print(r) # tensor([[ 1., 2.], # [ 3., 4.], # [ 5., 6.], # [ 7., 8.], # [ 9., 10.], # [11., 12.]]) # tensor([[1., 2.], # [3., 4.], # [5., 6.], # [7., 8.]]) # tensor([[ 9., 10.]]) # tensor([[11., 12.]])- 1
- 2
- 3
- 4
- 5
- 6
- 7
- 8
- 9
- 10
- 11
- 12
- 13
- 14
- 15
- 16
- 17
tensorflow#tf.split(value,num_or_size_splits,axis) tf.split(c,3,axis = 0) #指定分割份数,平均分割 # [- 1
- 2
- 3
- 4
- 5
- 6
- 7
- 8
- 9
- 10
- 11
tf.split(c,[2,2,2],axis = 0) #指定每份的记录数量 # [- 1
- 2
- 3
- 4
- 5
- 6
- 7
- 8
- 9
- 10
张量的数学运算
张量数学运算主要有:标量运算,向量运算,矩阵运算。另外我们会介绍张量运算的广播机制。
标量运算
张量的数学运算符可以分为标量运算符、向量运算符、以及矩阵运算符。
加减乘除乘方,以及三角函数,指数,对数等常见函数,逻辑比较运算符等都是标量运算符。
标量运算符的特点是对张量实施逐元素运算。
有些标量运算符对常用的数学运算符进行了重载。并且支持类似numpy的广播特性。
对于tensorflow来说,许多标量运算符都在tf.math模块下。
import tensorflow as tf import numpy as np import torch- 1
- 2
- 3
运算 pyhtorch tensorflow 加 + + 减 — — 乘 * * 除 / / 幂运算 ** ** 开方 **(0.5); torch.sqrt **(0.5) ; tf.sqrt 取模 % ;torch.fmod % ; tf.math.mod 地板除法 // // 保留整数部分,四舍五入 torch.round(x) tf.math.round(x) 保留整数部分,向下归整 torch.floor(x) tf.math.floor(x) 保留整数部分,向上归整 torch.ceil(x) tf.math.ceil(x) 保留整数部分,向0归整 torch.trunc(x) 大于,小于,等于 >;<;==;torch.ge;lo;eq > ; < ; == 或,且,非 & ;| ; ! & ;| ; ! 作除法取剩余的部分,结果恒正 torch.remainder 取大值 torch.max(a,b) tf.maximum(a,b) 取小值 torch.min(a,b) tf.minimum(a,b) 多张量求和 a+b+c tf.add_n([a,b,c] 幅值裁剪 torch.clamp(x,min=-1,max = 1) tf.clip_by_value(x,clip_value_min=-1,clip_value_max=1) z = torch.clamp(x,max = 1) z = tf.clip_by_norm(x,clip_norm = 3) 部分代码示例:
pytorch# 多涨量求和 a = torch.tensor([1.0,8.0]) b = torch.tensor([5.0,6.0]) c = torch.tensor([6.0,7.0]) d = a+b+c print(d) # tensor([12., 21.])- 1
- 2
- 3
- 4
- 5
- 6
- 7
- 8
# 幅值裁剪 x = torch.tensor([0.9,-0.8,100.0,-20.0,0.7]) y = torch.clamp(x,min=-1,max = 1) z = torch.clamp(x,max = 1) print(y) print(z) tensor([ 0.9000, -0.8000, 1.0000, -1.0000, 0.7000]) tensor([ 0.9000, -0.8000, 1.0000, -20.0000, 0.7000])- 1
- 2
- 3
- 4
- 5
- 6
- 7
- 8
tensorflowa = tf.constant([1.0,8.0]) b = tf.constant([5.0,6.0]) c = tf.constant([6.0,7.0]) tf.add_n([a,b,c]) #- 1
- 2
- 3
- 4
- 5
# 幅值裁剪 x = tf.constant([0.9,-0.8,100.0,-20.0,0.7]) y = tf.clip_by_value(x,clip_value_min=-1,clip_value_max=1) z = tf.clip_by_norm(x,clip_norm = 3) tf.print(y) tf.print(z) [0.9 -0.8 1 -1 0.7] [0.0264732055 -0.0235317405 2.94146752 -0.588293493 0.0205902718]- 1
- 2
- 3
- 4
- 5
- 6
- 7
- 8

向量运算
向量运算符只在一个特定轴上运算,将一个向量映射到一个标量或者另外一个向量。
tensorflow中: 许多向量运算符都以reduce开头。
运算 pytorch tensorflow 向量求和 torch.sum(a) tf.reduce_sum(a) 平均 torch.mean(a) tf.reduce_mean(a) 最大值 torch.max(a) tf.reduce_max(a) 最小值 torch.min(a) tf.reduce_min(a) 累乘 torch.prod(a) tf.reduce_prod(a) 标准差 torch.std(a) 无 方差 torch.var(a) 无 中位数 torch.median(a) 无 cum扫描累加 torch.cumsum(a,0) tf.math.cumsum(a) cum扫描累乘 torch.cumprod(a,0) tf.math.cumprod(a) cum扫描最大值 torch.cummax(a,0).values/index 无 cum扫描最小值 torch.cummin(a,0).values/index 无 取最大值索引 无 tf.argmax(a) 取最小值索引 无 tf.argmin(a) 向量排序 torch.topk(a,2,dim = 0) tf.math.top_k(a,3,sorted=True) torch.sort(a,dim = 1) 无 部分代码示例:
pytrocha = torch.arange(1,10).float()- 1
#指定维度计算统计值 b = a.view(3,3) print(b) print(torch.max(b,dim = 0)) print(torch.max(b,dim = 1)) # tensor([[1., 2., 3.], # [4., 5., 6.], # [7., 8., 9.]]) # torch.return_types.max( # values=tensor([7., 8., 9.]), # indices=tensor([2, 2, 2])) # torch.return_types.max( # values=tensor([3., 6., 9.]), # indices=tensor([2, 2, 2]))- 1
- 2
- 3
- 4
- 5
- 6
- 7
- 8
- 9
- 10
- 11
- 12
- 13
- 14
- 15
#cum扫描 a = torch.arange(1,10) print(torch.cumsum(a,0)) print(torch.cumprod(a,0)) print(torch.cummax(a,0).values) print(torch.cummax(a,0).indices) print(torch.cummin(a,0)) # tensor([ 1, 3, 6, 10, 15, 21, 28, 36, 45]) # tensor([ 1, 2, 6, 24, 120, 720, 5040, 40320, 362880]) # tensor([1, 2, 3, 4, 5, 6, 7, 8, 9]) # tensor([0, 1, 2, 3, 4, 5, 6, 7, 8]) # torch.return_types.cummin( # values=tensor([1, 1, 1, 1, 1, 1, 1, 1, 1]), # indices=tensor([0, 0, 0, 0, 0, 0, 0, 0, 0]))- 1
- 2
- 3
- 4
- 5
- 6
- 7
- 8
- 9
- 10
- 11
- 12
- 13
- 14
- 15
#torch.sort和torch.topk可以对张量排序 a = torch.tensor([[9,7,8],[1,3,2],[5,6,4]]).float() print(torch.topk(a,2,dim = 0),"\n") print(torch.topk(a,2,dim = 1),"\n") print(torch.sort(a,dim = 1),"\n") # torch.return_types.topk( # values=tensor([[9., 7., 8.], # [5., 6., 4.]]), # indices=tensor([[0, 0, 0], # [2, 2, 2]])) # # torch.return_types.topk( # values=tensor([[9., 8.], # [3., 2.], # [6., 5.]]), # indices=tensor([[0, 2], # [1, 2], # [1, 0]])) # # torch.return_types.sort( # values=tensor([[7., 8., 9.], # [1., 2., 3.], # [4., 5., 6.]]), # indices=tensor([[1, 2, 0], # [0, 2, 1], # [2, 0, 1]]))- 1
- 2
- 3
- 4
- 5
- 6
- 7
- 8
- 9
- 10
- 11
- 12
- 13
- 14
- 15
- 16
- 17
- 18
- 19
- 20
- 21
- 22
- 23
- 24
- 25
- 26
- 27
tensorflowa = tf.range(1,10)- 1
#张量指定维度计算统计值 b = tf.reshape(a,(3,3)) tf.print(tf.reduce_sum(b, axis=1, keepdims=True)) tf.print(tf.reduce_sum(b, axis=0, keepdims=True)) # [[6] # [15] # [24]] # [[12 15 18]] #利用tf.foldr实现tf.reduce_sum s = tf.foldr(lambda a,b:a+b,tf.range(10)) tf.print(s) # 45- 1
- 2
- 3
- 4
- 5
- 6
- 7
- 8
- 9
- 10
- 11
- 12
- 13
#bool类型的reduce p = tf.constant([True,False,False]) q = tf.constant([False,False,True]) tf.print(tf.reduce_all(p)) tf.print(tf.reduce_any(q)) # 0 # 1- 1
- 2
- 3
- 4
- 5
- 6
- 7
#cum扫描累积 a = tf.range(1,10) tf.print(tf.math.cumsum(a)) tf.print(tf.math.cumprod(a)) # [1 3 6 ... 28 36 45] # [1 2 6 ... 5040 40320 362880]- 1
- 2
- 3
- 4
- 5
- 6
#arg最大最小值索引 a = tf.range(1,10) tf.print(tf.argmax(a)) tf.print(tf.argmin(a)) # 8 # 0- 1
- 2
- 3
- 4
- 5
- 6
#tf.math.top_k可以用于对张量排序 a = tf.constant([1,3,7,5,4,8]) values,indices = tf.math.top_k(a,3,sorted=True) tf.print(values) tf.print(indices) # [8 7 5] # [5 2 3]- 1
- 2
- 3
- 4
- 5
- 6
- 7
- 8
- 9
矩阵运算

矩阵必须是二维的。类似[1,2,3]这样的不是矩阵。
矩阵运算包括:矩阵乘法,矩阵转置,矩阵逆,矩阵求迹,矩阵范数,矩阵行列式,矩阵求特征值,矩阵分解等运算。
在tensorflow中:除了一些常用的运算外,大部分和矩阵有关的运算都在tf.linalg(线性代数)子包中。
运算 pytorch tensorflow 矩阵乘法 a@b; torch.matmul(a,b);torch.mm(a,b) a@b;tf.matmul(a,b) 矩阵转置 a.t() tf.transpose(a) 矩阵逆 torch.inverse(a) tf.linalg.inv(a) 矩阵求迹(trace) torch.trace(a) tf.linalg.trace(a) 矩阵求范数 torch.norm(a) tf.linalg.norm(a) 矩阵行列式 torch.det(a) tf.linalg.det(a) 矩阵特征值 torch.eig(a,eigenvectors=True) tf.linalg.eigvals(a) 矩阵QR分解(正交三角分解) torch.qr(a) tf.linalg.qr(a) 矩阵svd分解(奇异值分解) u,s,v = torch.svd(a) s,u,v = tf.linalg.svd(a) 广播机制

pytorch 和 TensorFlow的广播规则和numpy是一样的:
- 1、如果张量的维度不同,将维度较小的张量进行扩展,直到两个张量的维度都一样。
- 2、如果两个张量在某个维度上的长度是相同的,或者其中一个张量在该维度上的长度为1,那么我们就说这两个张量在该维度上是相容的。
- 3、如果两个张量在所有维度上都是相容的,它们就能使用广播。
- 4、广播之后,每个维度的长度将取两个张量在该维度长度的较大值。
- 5、在任何一个维度上,如果一个张量的长度为1,另一个张量长度大于1,那么在该维度上,就好像是对第一个张量进行了复制。
pytorch中:torch.broadcast_tensors可以将多个张量根据广播规则转换成相同的维度。
tensorflow中:tf.broadcast_to 以显式的方式按照广播机制扩展张量的维度。
代码示例:
pytorcha = torch.tensor([1,2,3]) b = torch.tensor([[0,0,0],[1,1,1],[2,2,2]]) print(b + a) # tensor([[1, 2, 3], # [2, 3, 4], # [3, 4, 5]])- 1
- 2
- 3
- 4
- 5
- 6
a_broad,b_broad = torch.broadcast_tensors(a,b) print(a_broad,"\n") print(b_broad,"\n") print(a_broad + b_broad) # tensor([[1, 2, 3], # [1, 2, 3], # [1, 2, 3]]) # # tensor([[0, 0, 0], # [1, 1, 1], # [2, 2, 2]]) # # tensor([[1, 2, 3], # [2, 3, 4], # [3, 4, 5]])- 1
- 2
- 3
- 4
- 5
- 6
- 7
- 8
- 9
- 10
- 11
- 12
- 13
- 14
- 15
tensorflowa = tf.constant([1,2,3]) b = tf.constant([[0,0,0],[1,1,1],[2,2,2]]) b + a #等价于 b + tf.broadcast_to(a,b.shape) <tf.Tensor: shape=(3, 3), dtype=int32, numpy= # array([[1, 2, 3], # [2, 3, 4], # [3, 4, 5]], dtype=int32)>- 1
- 2
- 3
- 4
- 5
- 6
- 7
tf.broadcast_to(a,b.shape) #- 1
- 2
- 3
- 4
- 5
#计算广播后计算结果的形状,静态形状,TensorShape类型参数 tf.broadcast_static_shape(a.shape,b.shape) # TensorShape([3, 3]) #计算广播后计算结果的形状,动态形状,Tensor类型参数 c = tf.constant([1,2,3]) d = tf.constant([[1],[2],[3]]) tf.broadcast_dynamic_shape(tf.shape(c),tf.shape(d)) #- 1
- 2
- 3
- 4
- 5
- 6
- 7
- 8
- 9
说明
笔记中很多代码案例来自于:
《20天吃掉那只Pytorch》
- 🚀 github项目地址: https://github.com/lyhue1991/eat_pytorch_in_20_days
《30天吃掉那只TensorFlow2》
- 🚀 github项目地址: https://github.com/lyhue1991/eat_tensorflow2_in_30_days
感兴趣的同学可以进入学习。
===========================================================================
我的笔记一部分是将这两项目中内容整理归纳,一部分是相应功能的内容自己找资料整理归纳。
笔记以MD格式存入我的git仓库,另外代码案例所需要数据集文件也在其中:可以clone下来学习使用。
《pytorch-tensorflow对比学习笔记》
🚀 github项目地址: https://github.com/Boris-2021/pytorch-tensorflow-Comparative-study
===========================================================================
笔记中增加了很多趣味性的图片,增加阅读乐趣。
===========================================================================
感觉对你的学习有帮助,就点个星,点个赞,点个关注再走把,整理不易,拒绝白嫖从我做起!

-
相关阅读:
一文读懂vue3和vue2的API风格对比
网络原理
【数据结构与算法】<==>栈和队列的OJ题
(二十三)大数据实战——Flume数据采集之采集数据聚合案例实战
【数据结构】二叉树遍历的实现(超详细解析,小白必看系列)
kafka 命令行使用 消息的写入和读取 quickstart
[重庆思庄每日技术分享]-oracle EM13.4 安装失败之后的处理
最全ROS 入门
2024年11月1日Github流行趋势
macos知名的清理软件 cleanmymac和腾讯柠檬哪个好 cleanmymacx有必要买吗
- 原文地址:https://blog.csdn.net/qq_58832911/article/details/125952712
