-
Spring 通过注解来存储和读取对象
目录
1. 创建Spring 项目
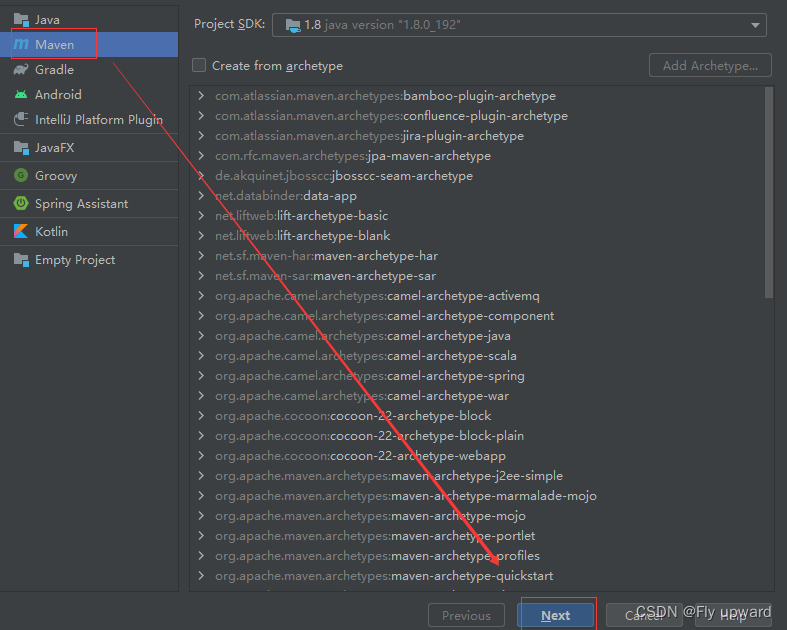
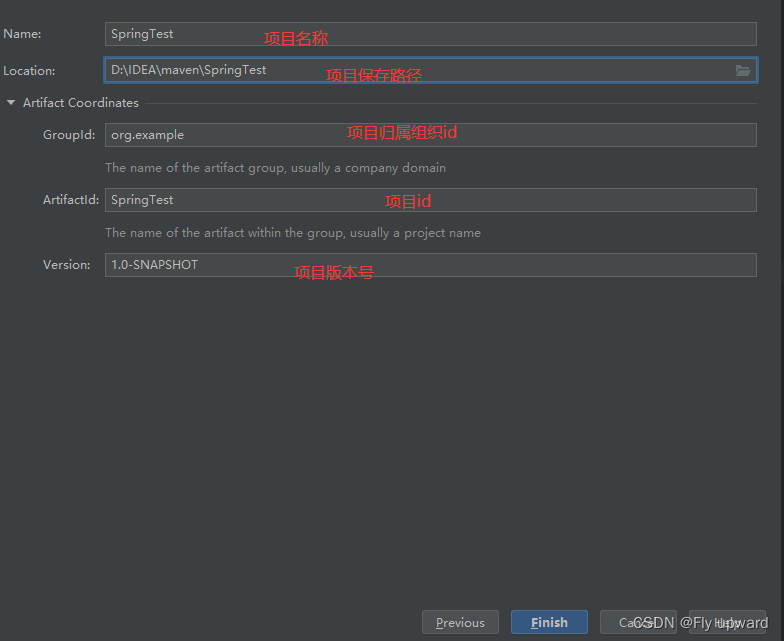
1)创建个普通 Maven 项。
2.)添加 Spring 框架持(spring-context、spring-beans)。
3)添加启动类。
1.1创建个 Maven 项
1.2 添加 Spring 框架支持
在项的 pom.xml 中添加 Spring 框架的持,xml 配置如下:
org.springframework spring-context 5.2.3.RELEASE org.springframework spring-beans 5.2.3.RELEASE - 1
- 2
- 3
- 4
- 5
- 6
- 7
- 8
- 9
- 10
- 11
- 12
- 13
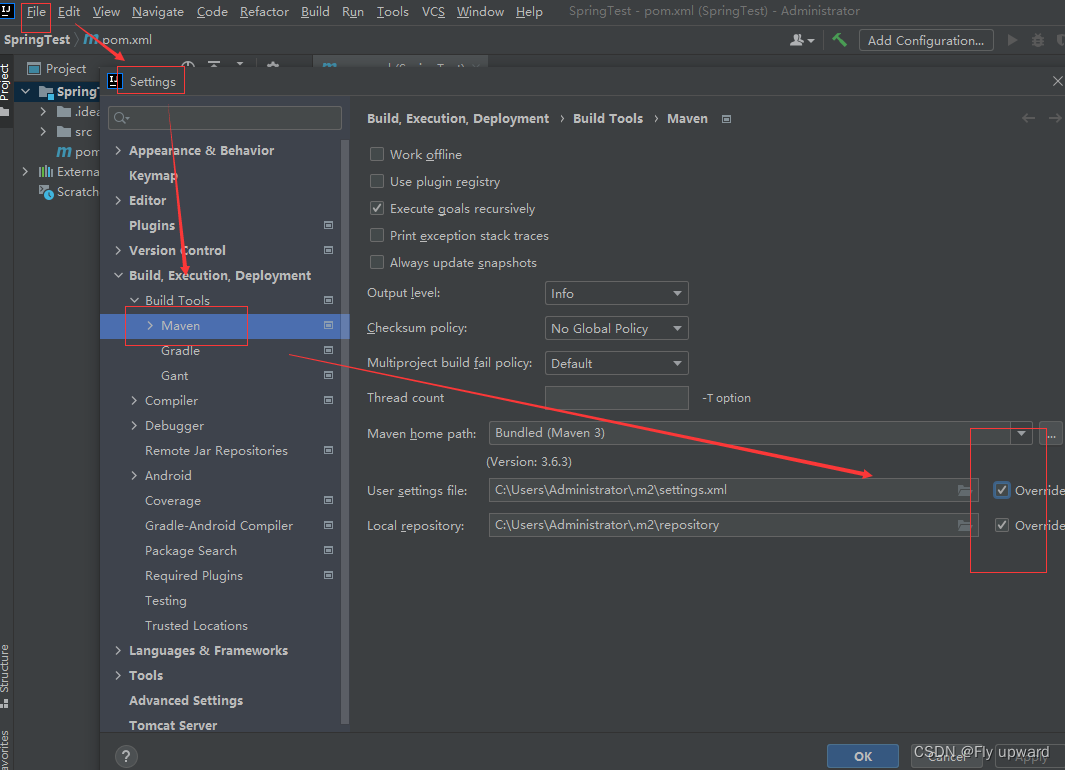
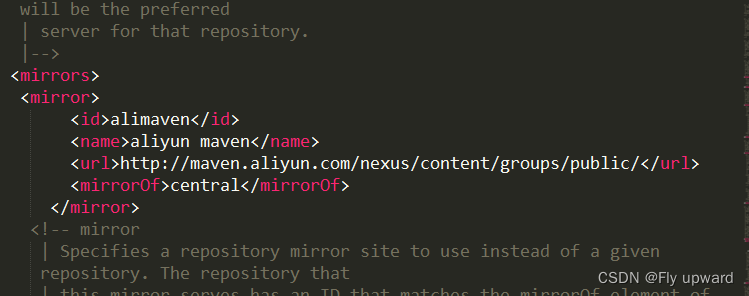
配置国内源
将下面两个框都要勾选上
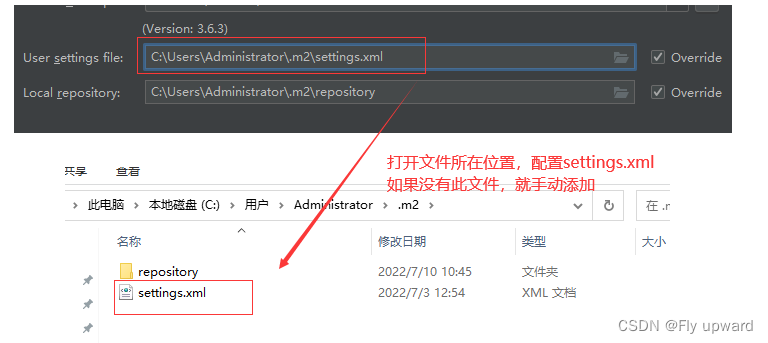
settings.xml 文件配置代码:
alimaven aliyun maven http://maven.aliyun.com/nexus/content/groups/public/ central - 1
- 2
- 3
- 4
- 5
- 6
- 7
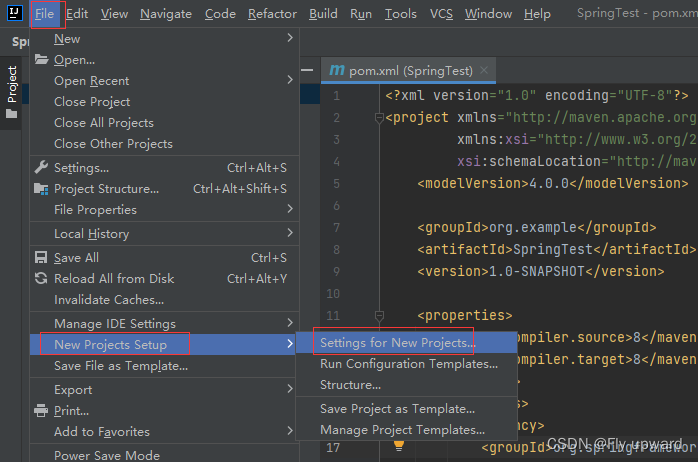
修改位置如下
配置好之后,如果想下一次的项目也使用该国内源,则需下面的配置

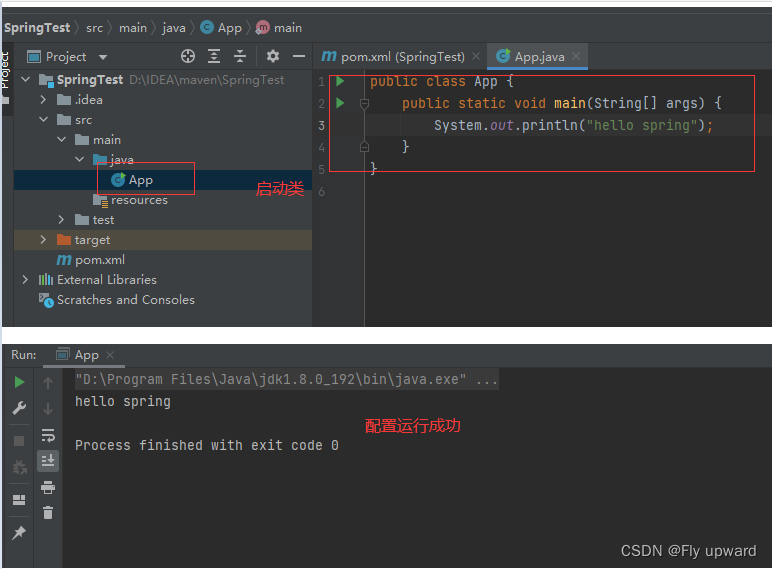
1.3 添加启动类
最后在创建好的项 java 件夹下创建个启动类,包含 main 法即可
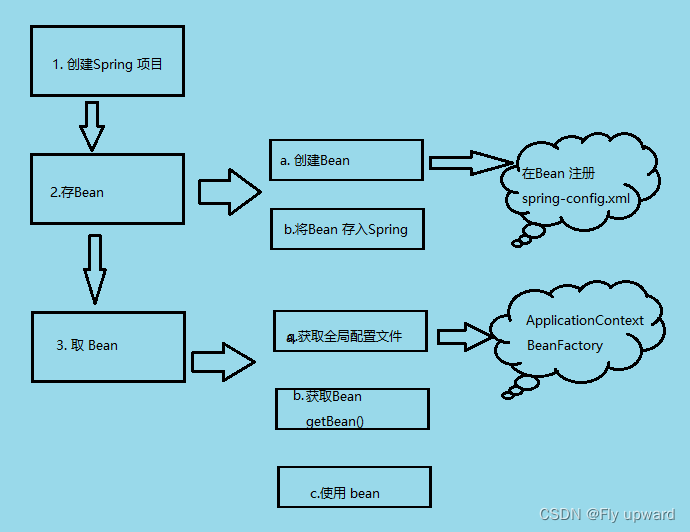
2. 存储 Bean 对象
存储 Bean 分为以下 3步:
1)存储 Bean 之前,先得有 Bean 才,因此先要创建个 Bean。
2)配置件 spring-config.xml
3)将创建的 Bean 注册到 Spring 容器中。
2.1创建Bean
Bean 就是 Java 语中的个普通对象,实现代码如下:
public class User { public static void say(String name){ System.out.println("hello " + name); } }- 1
- 2
- 3
- 4
- 5
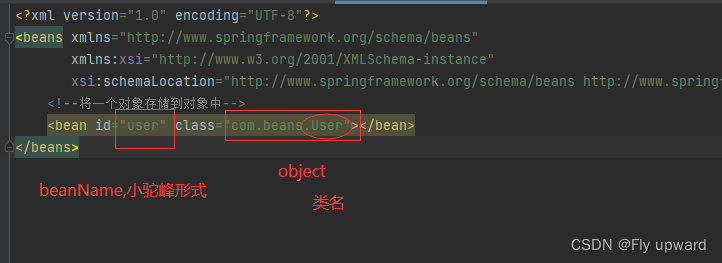
2.2配置spring-config.xml
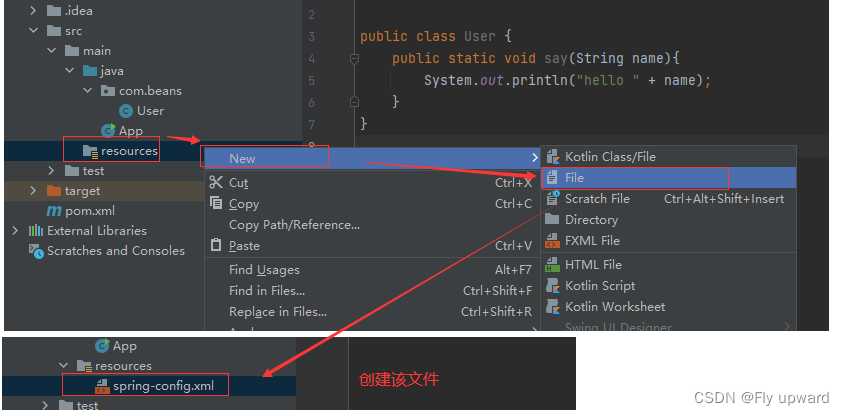
在文件中添加以下代码
- 1
- 2
- 3
- 4
- 5
- 6
再将 User 对象注册到spring-config.xml 中就可以,具体操作是在 中添加如下配置:
3. 获取并使用Bean 对象
获取并使 Bean 对象,分为以下 3 步:
1. 得到 Spring 上下对象,因为对象都交给 Spring 管理了,所以获取对象要从 Spring 中获取,那么就得先得到 Spring 的上下。
2. 通过 Spring 上下,获取某个指定的 Bean 对象。
3. 使 Bean 对象。
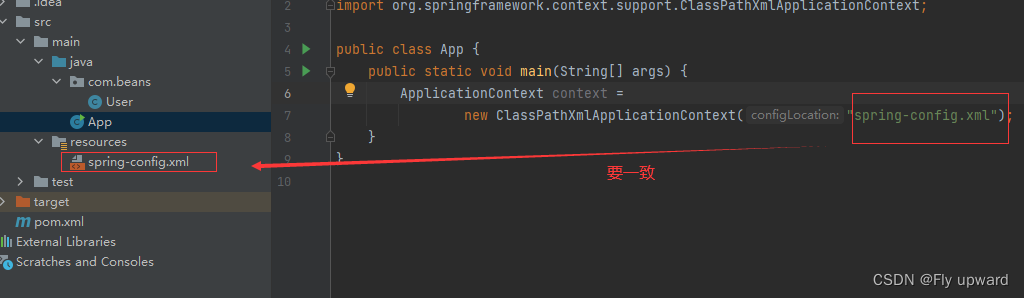
3.1 创建Sprign 上下文
Spring 上下对象可使 ApplicationContext,代码如下
public static void main(String[] args) { ApplicationContext context = new ClassPathXmlApplicationContext("spring-config.xml"); }- 1
- 2
- 3
- 4
除了 ApplicationContext 之外,我们还可以使 BeanFactory 来作为 Spring 的上下,如下代码所示
// 1.得到 bean 工厂 BeanFactory factory = new XmlBeanFactory( new ClassPathResource("spring-config.xml")); // 2.获取 bean User user = (User) factory.getBean("user"); // 3.使用 bean user.say("黄小小");- 1
- 2
- 3
- 4
- 5
- 6
- 7
ApplicationContext 和 BeanFactory 效果是样的,ApplicationContext 属于 BeanFactory 的类, 它们的区别如下
1)继承关系和功能来说:Spring 容器有两个顶级的接:BeanFactory 和ApplicationContext。
其中 BeanFactory 提供了基础的访问容器的能, ApplicationContext 属于 BeanFactory 的类,它除了继承了 BeanFactory 的所有功能之外,它还拥有独特的特性,还添加了对国际化持、资源访问持、以及事件传播等的持。
2)从性能来说:ApplicationContext 是次性加载并初始化所有的 Bean 对象, BeanFactory是需要那个才去加载那个,因此更加轻量。
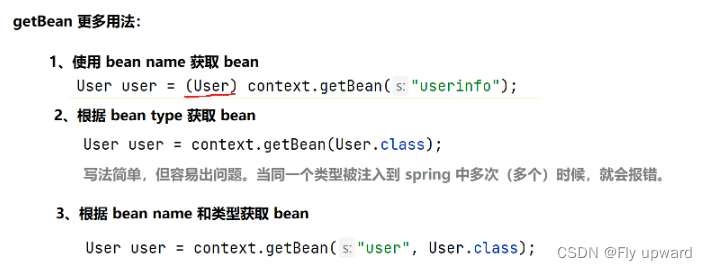
3.2获取指定的 Bean 对象
//2.根据上下文对象提供的方法获取到 bean //User user = (User) context.getBean("user");//与spring-config.xml 中的id 一致 //User user = context.getBean(User.class);//不需要强转,但不建议使用 User user = context.getBean("user",User.class);//精准并不需要强转,推荐使用- 1
- 2
- 3
- 4
- 5

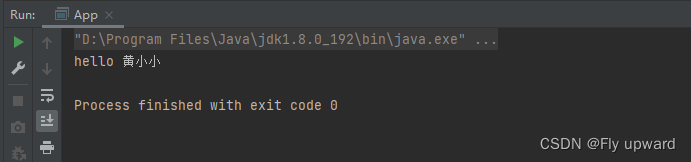
3.3 使用Bean
//3.使用 user.say("黄小小");- 1
- 2
总代码:
public class App { public static void main(String[] args) { //1.得到 spring 上下文对象 ApplicationContext context = new ClassPathXmlApplicationContext("spring-config.xml"); //2.根据上下文对象提供的方法获取到 bean //User user = (User) context.getBean("user");//与spring-config.xml 中的id 一致 //User user = context.getBean(User.class);//不需要强转,但不建议使用 User user = context.getBean("user",User.class);//精准并不需要强转,推荐使用 //3.使用 user.say("黄小小"); } }- 1
- 2
- 3
- 4
- 5
- 6
- 7
- 8
- 9
- 10
- 11
- 12
- 13
- 14
4.总结
更简单的获取和存储对象
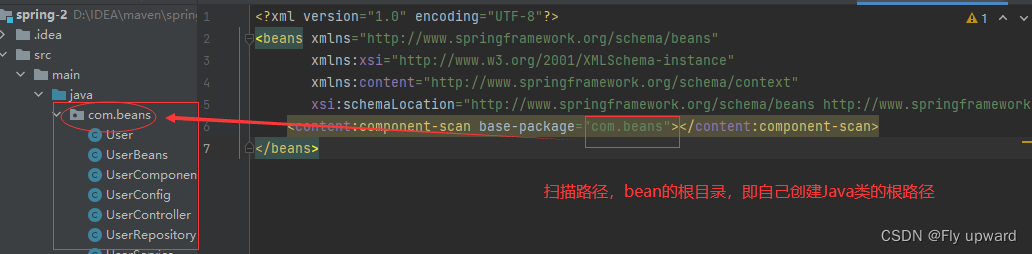
5.配置扫描路径
想要将对象成功的存储到 Spring 中,我们需要配置下存储对象的扫描包路径,只有被配置的包下的所有类,添加了注解才能被正确的识别并保存到 Spring 中。
在 spring-config.xml 添加如下配置:
- 1
- 2
- 3
- 4
- 5
- 6
- 7
6.添加注解存储 bean对象
想要将对象存储在 Spring 中,有两种注解类型可以实现:
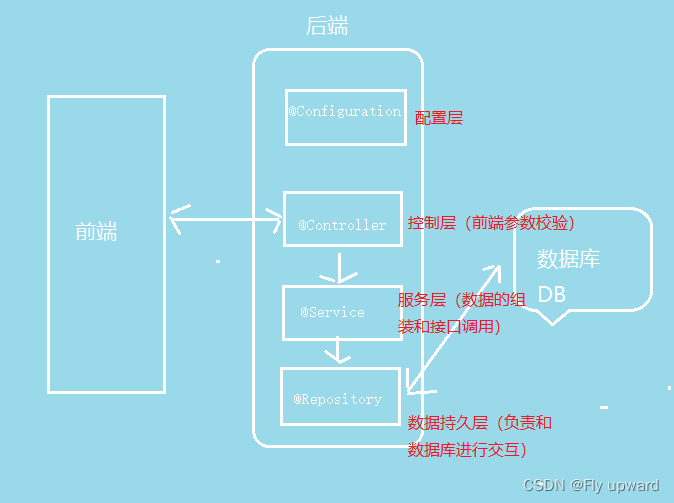
1) 类注解:@Controller、@Service、@Repository、@Component、@Configuration。
2) 法注解:@Bean
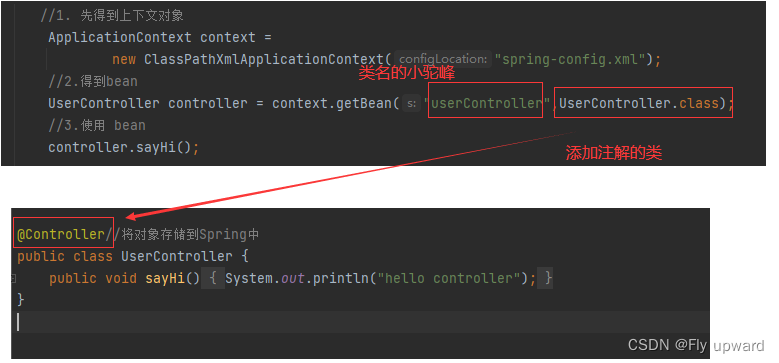
6.1 @Controller(控制器存储)
使 @Controller 存储 bean 的代码如下所示:
在要扫描的根路径(com.beans)下创建一个UserController 类
import org.springframework.stereotype.Controller; @Controller//将对象存储到Spring中 public class UserController { public void sayHi() { System.out.println("hello controller"); } }- 1
- 2
- 3
- 4
- 5
- 6
- 7
- 8
在main 方法中用读取对象的式来读取上的 UserController 对象,如下代码所示
public class App { public static void main(String[] args) { //1. 先得到上下文对象 ApplicationContext context = new ClassPathXmlApplicationContext("spring-config.xml"); //2.得到bean UserController controller = context.getBean("userController",UserController.class); //3.使用 bean controller.sayHi(); } }- 1
- 2
- 3
- 4
- 5
- 6
- 7
- 8
- 9
- 10
- 11
- 12
代码注入解释:
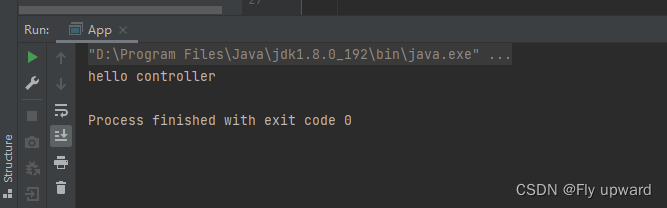
获取结果
6.2 @Service (服务器存储)
使 @Service 存储 bean 的代码如下所示:
在要扫描的根路径(com.beans)下创建一个UserService类
import org.springframework.stereotype.Service; @Service public class UserService { public void sayHi() { System.out.println("hello service"); } }- 1
- 2
- 3
- 4
- 5
- 6
- 7
- 8
在main 方法中用读取对象的式来读取上的 UserService 对象,如下代码所示
public class App { public static void main(String[] args) { //1. 先得到上下文对象 ApplicationContext context = new ClassPathXmlApplicationContext("spring-config.xml"); //2.得到bean UserService service = context.getBean("userService",UserService.class); //3.使用 bean service.sayHi(); } }- 1
- 2
- 3
- 4
- 5
- 6
- 7
- 8
- 9
- 10
- 11
- 12
- 13
6.3 @Repository (仓库存储)
使 @Repository 存储 bean 的代码如下所示:
在要扫描的根路径(com.beans)下创建一个UserRepository 类
import org.springframework.stereotype.Repository; @Repository public class UserRepository { public void sayHi() { System.out.println("hello repository"); } }- 1
- 2
- 3
- 4
- 5
- 6
- 7
- 8
在main 方法中用读取对象的式来读取上的 UserController 对象,如下代码所示
public class App { public static void main(String[] args) { //1. 先得到上下文对象 ApplicationContext context = new ClassPathXmlApplicationContext("spring-config.xml"); //2.得到bean UserRepository repository = context.getBean("userRepository",UserRepository.class); //3.使用 bean repository.sayHi(); } }- 1
- 2
- 3
- 4
- 5
- 6
- 7
- 8
- 9
- 10
- 11
- 12
- 13
6.4 @Component (组件存储)
使用@Component 存储 bean 的代码如下所示:
在要扫描的根路径(com.beans)下创建一个UserComponent 类
import org.springframework.stereotype.Component; @Component public class UserComponent { public void sayHi() { System.out.println("hello component"); } }- 1
- 2
- 3
- 4
- 5
- 6
- 7
- 8
在main 方法中用读取对象的式来读取上的 UserComponent 对象,如下代码所示
public class App { public static void main(String[] args) { //1. 先得到上下文对象 ApplicationContext context = new ClassPathXmlApplicationContext("spring-config.xml"); //2.得到bean UserComponent component = context.getBean("userComponent",UserComponent.class); //3.使用 bean component.sayHi(); } }- 1
- 2
- 3
- 4
- 5
- 6
- 7
- 8
- 9
- 10
- 11
- 12
- 13
6.5@Configuration(配置存储)
使用@Configuration 存储 bean 的代码如下所示:
在要扫描的根路径(com.beans)下创建一个UserConfig 类
@Configuration public class UserConfig { public void sayHi() { System.out.println("hello Configuration"); } }- 1
- 2
- 3
- 4
- 5
- 6
在main 方法中用读取对象的式来读取上的 UserConfig 对象,如下代码所示
public class App { public static void main(String[] args) { //1. 先得到上下文对象 ApplicationContext context = new ClassPathXmlApplicationContext("spring-config.xml"); //2.得到bean UserConfig config = context.getBean("userConfig",UserConfig.class); //3.使用 bean config.sayHi(); } }- 1
- 2
- 3
- 4
- 5
- 6
- 7
- 8
- 9
- 10
- 11
- 12
- 13
6.6 为什么需要五大注解
让代码可读性提高,能直观的判断当前类的用途
查看 @Controller / @Service / @Repository / @Configuration 等注解的源码发现,
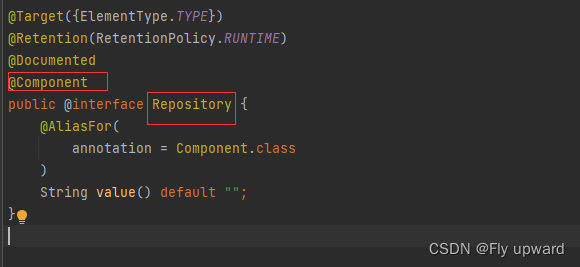
这些注解都有个注解 @Component,说明它们本身就是属于 @Component 的“类。
6.7 方法注解 @Bean
6.7.1 方法注解配合类注解使用
1)创建一个 bean
在要扫描的根路径(com.beans)下创建一个 UserBeans 类
在 Spring 框架的设计中,法注解 @Bean 要配合类注解才能将对象正常的存储到 Spring 容器中
@Component public class UserBeans { @Bean public User user1() { User user = new User(); user.setId(1); user.setName("黄小小"); return user; } }- 1
- 2
- 3
- 4
- 5
- 6
- 7
- 8
- 9
- 10
然后创建一个User对象
public class User { private int id; private String name; @Override public String toString() { return "User{" + "id=" + id + ", name='" + name + ''' + '}'; } public int getId() { return id; } public void setId(int id) { this.id = id; } public String getName() { return name; } public void setName(String name) { this.name = name; } }- 1
- 2
- 3
- 4
- 5
- 6
- 7
- 8
- 9
- 10
- 11
- 12
- 13
- 14
- 15
- 16
- 17
- 18
- 19
- 20
- 21
- 22
- 23
- 24
- 25
- 26
- 27
- 28
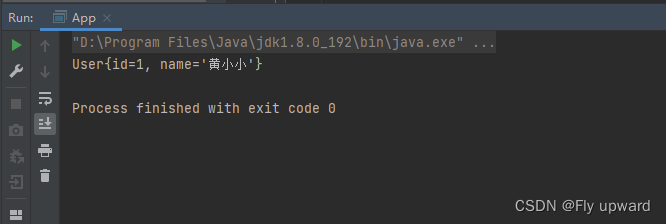
在main 方法中用读取对象的式来读取上的 User对象,如下代码所示
public class App { public static void main(String[] args) { //1. 先得到上下文对象 ApplicationContext context = new ClassPathXmlApplicationContext("spring-config.xml"); User user = context.getBean("user1",User.class); System.out.println(user); } }- 1
- 2
- 3
- 4
- 5
- 6
- 7
- 8
- 9
- 10
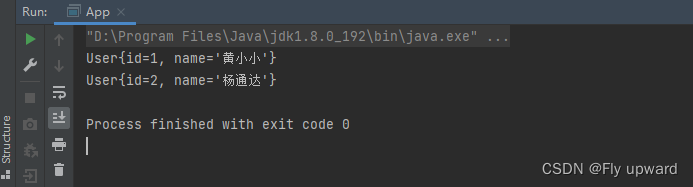
6.7.2 重命名Bean
当 User 类里面有多个对象时,可以通过设置 name 属性给 Bean 对象进重命名操作,如下代码
@Component public class UserBeans { @Bean(name = "in") public User user1() { User user1 = new User(); user1.setId(1); user1.setName("黄小小"); return user1; } @Bean(name = "to") public User user2() { User user2 = new User(); user2.setId(2); user2.setName("杨通达"); return user2; } }- 1
- 2
- 3
- 4
- 5
- 6
- 7
- 8
- 9
- 10
- 11
- 12
- 13
- 14
- 15
- 16
- 17
- 18
- 19
通过使用 Bean 里面的 name 就可以获取对象了
public class App { public static void main(String[] args) { //1. 先得到上下文对象 ApplicationContext context = new ClassPathXmlApplicationContext("spring-config.xml"); User user1 = context.getBean("in",User.class); System.out.println(user1); User user2 = context.getBean("to",User.class); System.out.println(user2); } }- 1
- 2
- 3
- 4
- 5
- 6
- 7
- 8
- 9
- 10
- 11
- 12
- 13
- 14
8.获取 Bean 对象
获取 bean 对象也叫做对象装配,是把对象取出来放到某个类中,有时候也叫对象注。
类似于把 B 中的对象取出来放到 A 类当中
对象装配(对象注)的实现法以下 3 种:
1. 属性注
2. 构造法注
3. Setter 注
8.1 属性注入
属性注是使 @Autowired 实现的。
下面将 UserService 类注到 UserController2 类中。
UserService类
@Service public class UserService { public void sayHi() { System.out.println("hello service"); } }- 1
- 2
- 3
- 4
- 5
- 6
- 7
UserController2 类
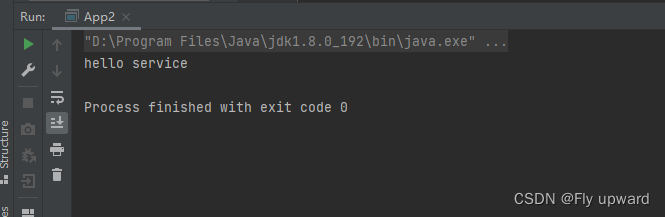
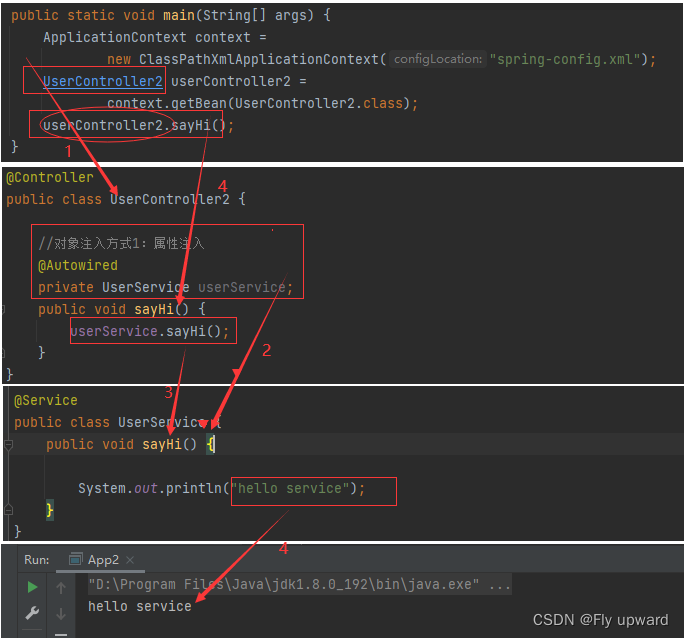
@Controller public class UserController2 { //对象注入方式1:属性注入 @Autowired private UserService userService; public void sayHi() { userService.sayHi(); } }- 1
- 2
- 3
- 4
- 5
- 6
- 7
- 8
- 9
- 10
main方法
public class App2 { public static void main(String[] args) { ApplicationContext context = new ClassPathXmlApplicationContext("spring-config.xml"); UserController2 userController2 = context.getBean(UserController2.class); userController2.sayHi(); } }- 1
- 2
- 3
- 4
- 5
- 6
- 7
- 8
- 9
获取结果
整个获取的调用链过程:
8.2 构造方法注入
其中UserService类和上面属性注入的一样。
构造法注是在类的构造法中实现注,如下代码所示
@Controller public class UserController3 { private UserService userService; //构造方法注入(官方推荐) @Autowired public UserController3(UserService userService) { this.userService = userService; } /* //当有多个构造方法时,上面的 @Autowired 不能省略 public UserController3(UserService userService, int num) { this.userService = userService; }*/ public void sayHi() { userService.sayHi(); } }- 1
- 2
- 3
- 4
- 5
- 6
- 7
- 8
- 9
- 10
- 11
- 12
- 13
- 14
- 15
- 16
- 17
- 18
- 19
8.3 Setter 注入
Setter 注和属性的 Setter 法实现类似,只不过在设置 set 法的时候需要加上 @Autowired 注
解,如下代码所示:
@Controller public class UserController4 { private UserService userService; //Setter 注? @Autowired public void setUserService(UserService userService) { this.userService = userService; } public void sayHi() { userService.sayHi(); } }- 1
- 2
- 3
- 4
- 5
- 6
- 7
- 8
- 9
- 10
- 11
- 12
- 13
- 14
8.4三种注优缺点分析
1)属性注的优点是简洁,使便;缺点是只能于 IoC 容器,如果是 IoC 容器不可,并且只有在使的时候才会出现 NPE(空指针异常)。
2)构造法注是 Spring 推荐的注式,它的缺点是如果有多个注会显得较臃肿,但出现这种情况你应该考虑下当前类是否符合程序的单职责的设计模式了,它的优点是通性,在使之前定能把保证注的类不为空。
3)Setter 式是 Spring 前期版本推荐的注式,但通性不如构造法,所有 Spring 现版本已经推荐使构造法注的式来进类注了
8.5 @Resource:另一种注入关键字
在进类注时,除了可以使 @Autowired 关键字之外,我们还可以使 @Resource 进注,如下代码所示
@Controller public class UserController4 { private UserService userService; //Setter 注? //@Autowired @Resource public void setUserService(UserService userService) { this.userService = userService; } public void sayHi() { userService.sayHi(); } }- 1
- 2
- 3
- 4
- 5
- 6
- 7
- 8
- 9
- 10
- 11
- 12
- 13
- 14
- 15
- 16
@Autowired 和 @Resource 的区别
1)出身不同:@Resource 来自于 JDK ,@Autowrired 是Spring 框架提供的
2)用法不同:@Autowired 支持属性注入、构造方法注入和Setter 注入,而 @Resource 不支持构造方法注入。
3)支持的参数不同:@Resource 支持更多的参数设置,比如 name 、type 设置,而@Autowired 只支持required 参数设置。
先自我介绍一下,小编13年上师交大毕业,曾经在小公司待过,去过华为OPPO等大厂,18年进入阿里,直到现在。深知大多数初中级java工程师,想要升技能,往往是需要自己摸索成长或是报班学习,但对于培训机构动则近万元的学费,着实压力不小。自己不成体系的自学效率很低又漫长,而且容易碰到天花板技术停止不前。因此我收集了一份《java开发全套学习资料》送给大家,初衷也很简单,就是希望帮助到想自学又不知道该从何学起的朋友,同时减轻大家的负担。添加下方名片,即可获取全套学习资料哦
-
相关阅读:
基于网络表示学习的 新闻推荐算法研究与系统实现
当mysql表从压缩表变成普通表会发生什么
牛客首发半小时点击过热,300MB 实战 SpringBoot 笔记 GitHub 上被爆赞
企业网络流量分析监控软件
垃圾图像识别易语言代码
【Android面试八股文】讲一讲StackOverFlow和OOM的区别?栈和堆分别存储的是什么?
硬科技企业社区“曲率引擎”品牌正式发布
基于FME Desktop和FME Server的数据增量自动更新
第五章 函数与位运算
前端实现csv文件的解析预览、上传、下载
- 原文地址:https://blog.csdn.net/bsegebr/article/details/126114183
