
-
备战春招,面试刷题跟他复习,一个月全搞定! 置顶 精华
寒江雪 发布于 2019-04-15 15:32:18- 赞 11
- |
- 回帖 7
-
从零开始—仿牛客网讨论社区项目(一)
主要技术架构:
SpringBoot Spring SpringMVC MyBatis Redis Kakfa Elasticsearch Spring Security Spring Actator
1.配置项目环境
在Spring Boot Initializr中或者Idea中初始化一个SpringBoot项目并导出

使用Idea打开导出的项目
2.MyBatis配置
各个层之间的关系如下
 在Maven Repository搜索MySql Maven配置文件,在resources文件包内的pom.xml文件中导入相关的配置文件依赖,并在application.properties文件中配置相关的参数。
# ServerProperties server.port=8080 server.servlet.context-path=/community # ThymeleafProperties spring.thymeleaf.cache=false # DataSourceProperties spring.datasource.driver-class-name=com.mysql.cj.jdbc.Driver spring.datasource.url=jdbc:mysql://localhost:3306/community?characterEncoding=utf-8&useSSL=false&serverTimezone=Hongkong #数据库的名称、密码等 spring.datasource.username=root spring.datasource.password=123456 spring.datasource.type=com.zaxxer.hikari.HikariDataSource #最大连接数、超时时间等 spring.datasource.hikari.maximum-pool-size=15 spring.datasource.hikari.minimum-idle=5 spring.datasource.hikari.idle-timeout=30000 # MybatisProperties #mapper扫描路径 mybatis.mapper-locations=classpath:mapper/*.xml #在communtiy下创建实体类 mybatis.type-aliases-package=com.nowcoder.community.entity mybatis.configuration.useGeneratedKeys=true mybatis.configuration.mapUnderscoreToCamelCase=true- 1
- 2
- 3
- 4
- 5
- 6
- 7
- 8
- 9
- 10
- 11
- 12
- 13
- 14
- 15
- 16
- 17
- 18
- 19
- 20
- 21
- 22
- 23
- 24
- 25
- 26
在community文件下创建config entity文件包,在resources文件下创建mapper文件包
在entity文件下创建User类
public class User { private int id; private String username; private String password; private String salt; private String email; private int type; private int status; private String activationCode; private String headerUrl; private Date createTime; public int getId() { return id; } public void setId(int id) { this.id = id; } public String getUsername() { return username; } public void setUsername(String username) { this.username = username; } public String getPassword() { return password; } public void setPassword(String password) { this.password = password; } public String getSalt() { return salt; } public void setSalt(String salt) { this.salt = salt; } public String getEmail() { return email; } public void setEmail(String email) { this.email = email; } public int getType() { return type; } public void setType(int type) { this.type = type; } public int getStatus() { return status; } public void setStatus(int status) { this.status = status; } public String getActivationCode() { return activationCode; } public void setActivationCode(String activationCode) { this.activationCode = activationCode; } public String getHeaderUrl() { return headerUrl; } public void setHeaderUrl(String headerUrl) { this.headerUrl = headerUrl; } public Date getCreateTime() { return createTime; } public void setCreateTime(Date createTime) { this.createTime = createTime; } @Override public String toString() { return "User{" + "id=" + id + ", username='" + username + ''' + ", password='" + password + ''' + ", salt='" + salt + ''' + ", email='" + email + ''' + ", type=" + type + ", status=" + status + ", activationCode='" + activationCode + ''' + ", headerUrl='" + headerUrl + ''' + ", createTime=" + createTime + '}'; } }- 1
- 2
- 3
- 4
- 5
- 6
- 7
- 8
- 9
- 10
- 11
- 12
- 13
- 14
- 15
- 16
- 17
- 18
- 19
- 20
- 21
- 22
- 23
- 24
- 25
- 26
- 27
- 28
- 29
- 30
- 31
- 32
- 33
- 34
- 35
- 36
- 37
- 38
- 39
- 40
- 41
- 42
- 43
- 44
- 45
- 46
- 47
- 48
- 49
- 50
- 51
- 52
- 53
- 54
- 55
- 56
- 57
- 58
- 59
- 60
- 61
- 62
- 63
- 64
- 65
- 66
- 67
- 68
- 69
- 70
- 71
- 72
- 73
- 74
- 75
- 76
- 77
- 78
- 79
- 80
- 81
- 82
- 83
- 84
- 85
- 86
- 87
- 88
- 89
- 90
- 91
- 92
- 93
- 94
- 95
- 96
- 97
- 98
- 99
- 100
- 101
- 102
- 103
- 104
- 105
- 106
- 107
- 108
- 109
- 110
在dao文件下创建UserMapper接口访问数据库
@Mapper public interface UserMapper { User selectById(int id); User selectByName(String username); User selectByEmail(String email); int insertUser(User user); int updateStatus(int id, int status); int updateHeader(int id, String headerUrl); int updatePassword(int id, String password); }- 1
- 2
- 3
- 4
- 5
- 6
- 7
- 8
- 9
- 10
- 11
- 12
- 13
- 14
- 15
- 16
- 17
- 18
使用Mapper注解,并在mapper文件下创建user-mapp.xml,使得方法与Sql语句相关联,Mybatis 的xml配置可以在官网找到相关的配置。
username, password, salt, email, type, status, activation_code, header_url, create_time id, username, password, salt, email, type, status, activation_code, header_url, create_time insert into user ( ) values(#{username}, #{password}, #{salt}, #{email}, #{type}, #{status}, #{activationCode}, #{headerUrl}, #{createTime}) update user set status = #{status} where id = #{id} update user set header_url = #{headerUrl} where id = #{id} update user set password = #{password} where id = #{id} - 1
- 2
- 3
- 4
- 5
- 6
- 7
- 8
- 9
- 10
- 11
- 12
- 13
- 14
- 15
- 16
- 17
- 18
- 19
- 20
- 21
- 22
- 23
- 24
- 25
- 26
- 27
- 28
- 29
- 30
- 31
- 32
- 33
- 34
- 35
- 36
- 37
- 38
- 39
- 40
- 41
- 42
- 43
- 44
- 45
- 46
- 47
- 48
- 49
- 50
可以使用@Test注解测试相关方法是否正常使用
3.开发社区首页功能:
3.1 开发社区首页显示前10个帖子
在Entity创建DiscussPost类,用于表示发送的相关数据,并在dao文件中创建DiscussPostMapper接口
public class DiscussPost { private int id; private int userId; private String title; private String content; private int type; private int status; private Date createTime; private int commentCount; private double score; public int getId() { return id; } public void setId(int id) { this.id = id; } public int getUserId() { return userId; } public void setUserId(int userId) { this.userId = userId; } public String getTitle() { return title; } public void setTitle(String title) { this.title = title; } public String getContent() { return content; } public void setContent(String content) { this.content = content; } public int getType() { return type; } public void setType(int type) { this.type = type; } public int getStatus() { return status; } public void setStatus(int status) { this.status = status; } public Date getCreateTime() { return createTime; } public void setCreateTime(Date createTime) { this.createTime = createTime; } public int getCommentCount() { return commentCount; } public void setCommentCount(int commentCount) { this.commentCount = commentCount; } public double getScore() { return score; } public void setScore(double score) { this.score = score; } @Override public String toString() { return "DiscussPost{" + "id=" + id + ", userId=" + userId + ", title='" + title + ''' + ", content='" + content + ''' + ", type=" + type + ", status=" + status + ", createTime=" + createTime + ", commentCount=" + commentCount + ", score=" + score + '}'; } } @Mapper public interface DiscussPostMapper { // 考虑到后期分页功能加入offset 和 limit变量 // @Param注解用于给参数取别名, // 如果只有一个参数,并且在里使用,则必须加别名. List selectDiscussPosts(int userId, int offset, int limit); int selectDiscussPostRows(@Param("userId") int userId); } - 1
- 2
- 3
- 4
- 5
- 6
- 7
- 8
- 9
- 10
- 11
- 12
- 13
- 14
- 15
- 16
- 17
- 18
- 19
- 20
- 21
- 22
- 23
- 24
- 25
- 26
- 27
- 28
- 29
- 30
- 31
- 32
- 33
- 34
- 35
- 36
- 37
- 38
- 39
- 40
- 41
- 42
- 43
- 44
- 45
- 46
- 47
- 48
- 49
- 50
- 51
- 52
- 53
- 54
- 55
- 56
- 57
- 58
- 59
- 60
- 61
- 62
- 63
- 64
- 65
- 66
- 67
- 68
- 69
- 70
- 71
- 72
- 73
- 74
- 75
- 76
- 77
- 78
- 79
- 80
- 81
- 82
- 83
- 84
- 85
- 86
- 87
- 88
- 89
- 90
- 91
- 92
- 93
- 94
- 95
- 96
- 97
- 98
- 99
- 100
- 101
- 102
- 103
- 104
- 105
- 106
- 107
- 108
- 109
- 110
- 111
- 112
- 113
在mapper文件下创建相关的xml文件用于数据库操作
id, user_id, title, content, type, status, create_time, comment_count, score - 1
- 2
- 3
- 4
- 5
- 6
- 7
- 8
- 9
- 10
- 11
- 12
- 13
- 14
- 15
- 16
- 17
- 18
- 19
- 20
- 21
- 22
- 23
- 24
- 25
- 26
- 27
- 28
- 29
- 30
- 31
在service文件下创建DiscussPostService类,用于服务层使用(使用@Service注解)
@Service public class DiscussPostService { @Autowired private DiscussPostMapper discussPostMapper; public ListfindDiscussPosts(int userId, int offset, int limit) { return discussPostMapper.selectDiscussPosts(userId, offset, limit); } public int findDiscussPostRows(int userId) { return discussPostMapper.selectDiscussPostRows(userId); } } - 1
- 2
- 3
- 4
- 5
- 6
- 7
- 8
- 9
- 10
- 11
- 12
- 13
- 14
- 15
将静态资源(css image js等文件)放到static文件下,将模板文件(site index.html)放到templates文件下。
接下来开发视图层,新建一个HomeController在controller文件下使用@Controller注解
//Controller访问路径可以省略 @Controller public class HomeController { //注入对象 @Autowired private DiscussPostService discussPostService; @Autowired private UserService userService; //使用GET方法 @RequestMapping(path = "/index", method = RequestMethod.GET) Listlist = discussPostService.findDiscussPosts(0, page.getOffset(), page.getLimit()); List - 1
- 2
- 3
- 4
- 5
- 6
- 7
- 8
- 9
- 10
- 11
- 12
- 13
- 14
- 15
- 16
- 17
- 18
- 19
- 20
- 21
- 22
- 23
- 24
- 25
- 26
- 27
- 28
- 29
- 30
- 31
更改Index.html文件,使用Thymeleaf对其中相对路径进行更改,并显示相关的帖子。
-
备战春招,面试刷题跟他复习,一个月全搞定! 置顶 精华
寒江雪 发布于 2019-04-15 15:32:18- 赞 11
- |
- 回帖 7
- 1
- 2
- 3
- 4
- 5
- 6
- 7
- 8
- 9
- 10
- 11
- 12
- 13
- 14
- 15
- 16
- 17
- 18
- 19
- 20
- 21
- 22
完整的HTML文件如下:
牛客网-首页 - 1
- 2
- 3
- 4
- 5
- 6
- 7
- 8
- 9
- 10
- 11
- 12
- 13
- 14
- 15
- 16
- 17
- 18
- 19
- 20
- 21
- 22
- 23
- 24
- 25
- 26
- 27
- 28
- 29
- 30
- 31
- 32
- 33
- 34
- 35
- 36
- 37
- 38
- 39
- 40
- 41
- 42
- 43
- 44
- 45
- 46
- 47
- 48
- 49
- 50
- 51
- 52
- 53
- 54
- 55
- 56
- 57
- 58
- 59
- 60
- 61
- 62
- 63
- 64
- 65
- 66
- 67
- 68
- 69
- 70
- 71
- 72
- 73
- 74
- 75
- 76
- 77
- 78
- 79
- 80
- 81
- 82
- 83
- 84
- 85
- 86
- 87
- 88
- 89
- 90
- 91
- 92
- 93
- 94
- 95
- 96
- 97
- 98
- 99
- 100
- 101
- 102
- 103
- 104
- 105
- 106
- 107
- 108
- 109
- 110
- 111
- 112
- 113
- 114
- 115
- 116
- 117
- 118
- 119
- 120
- 121
- 122
- 123
- 124
- 125
- 126
- 127
- 128
- 129
- 130
- 131
- 132
- 133
- 134
- 135
- 136
- 137
- 138
- 139
- 140
- 141
- 142
- 143
- 144
- 145
- 146
- 147
- 148
- 149
- 150
- 151
- 152
- 153
- 154
- 155
- 156
- 157
- 158
- 159
- 160
- 161
- 162
- 163
- 164
- 165
- 166
- 167
- 168
- 169
- 170
- 171
- 172
- 173
- 174
- 175
- 176
- 177
- 178
- 179
- 180
- 181
- 182
- 183
- 184
- 185
- 186
- 187
- 188
- 189
- 190
- 191
- 192
- 193
- 194
- 195
- 196
- 197
- 198
- 199
- 200
- 201
- 202
- 203
- 204
- 205
- 206
- 207
- 208
- 209
- 210
- 211
- 212
- 213
- 214
- 215
- 216
- 217
- 218
- 219
- 220
- 221
- 222
- 223
- 224
- 225
- 226
- 227
- 228
- 229
- 230
- 231
- 232
- 233
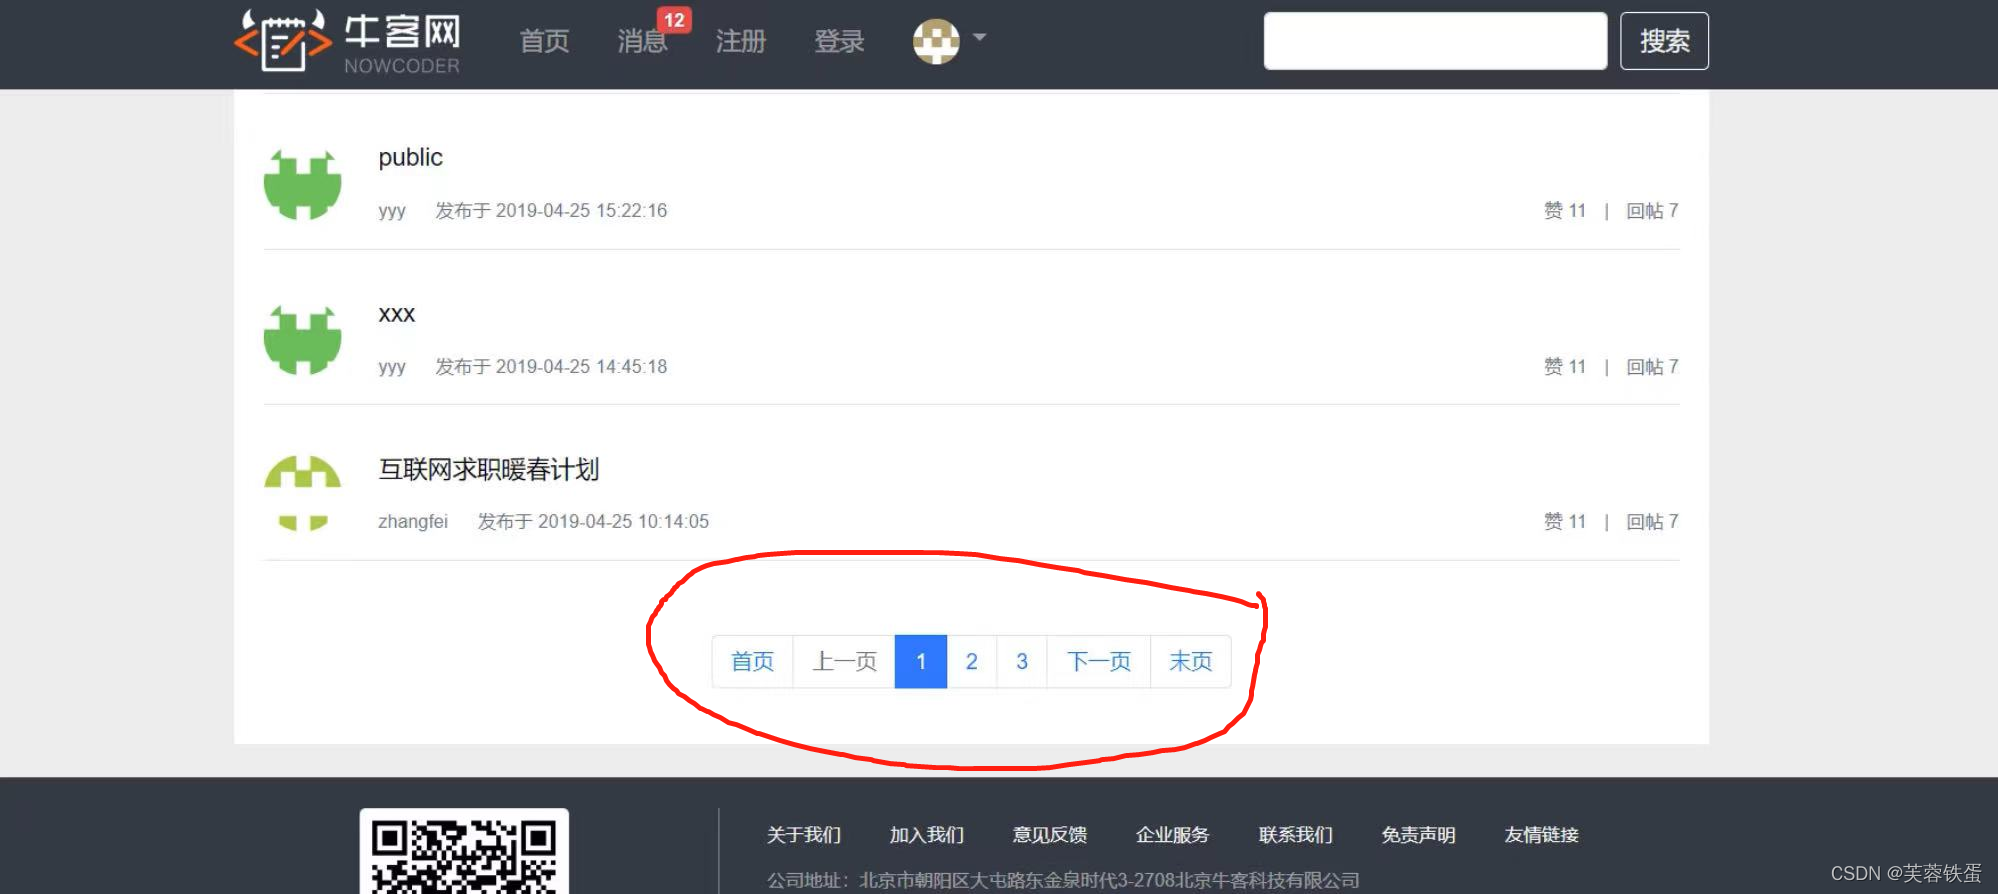
3.2开发分页组件,分页显示所有帖子
在entity文件下创建page类,用于记录分页数据
/** * 封装分页相关的信息. */ public class Page { // 当前页码 private int current = 1; // 显示上限 private int limit = 10; // 数据总数(用于计算总页数) private int rows; // 查询路径(用于复用分页链接) private String path; public int getCurrent() { return current; } public void setCurrent(int current) { if (current >= 1) { this.current = current; } } public int getLimit() { return limit; } public void setLimit(int limit) { if (limit >= 1 && limit <= 100) { this.limit = limit; } } public int getRows() { return rows; } public void setRows(int rows) { if (rows >= 0) { this.rows = rows; } } public String getPath() { return path; } public void setPath(String path) { this.path = path; } /** * 获取当前页的起始行 * * @return */ public int getOffset() { // current * limit - limit return (current - 1) * limit; } /** * 获取总页数 * * @return */ public int getTotal() { // rows / limit [+1] if (rows % limit == 0) { return rows / limit; } else { return rows / limit + 1; } } /** * 获取起始页码 * * @return */ public int getFrom() { int from = current - 2; return from < 1 ? 1 : from; } /** * 获取结束页码 * * @return */ public int getTo() { int to = current + 2; int total = getTotal(); return to > total ? total : to; } }- 1
- 2
- 3
- 4
- 5
- 6
- 7
- 8
- 9
- 10
- 11
- 12
- 13
- 14
- 15
- 16
- 17
- 18
- 19
- 20
- 21
- 22
- 23
- 24
- 25
- 26
- 27
- 28
- 29
- 30
- 31
- 32
- 33
- 34
- 35
- 36
- 37
- 38
- 39
- 40
- 41
- 42
- 43
- 44
- 45
- 46
- 47
- 48
- 49
- 50
- 51
- 52
- 53
- 54
- 55
- 56
- 57
- 58
- 59
- 60
- 61
- 62
- 63
- 64
- 65
- 66
- 67
- 68
- 69
- 70
- 71
- 72
- 73
- 74
- 75
- 76
- 77
- 78
- 79
- 80
- 81
- 82
- 83
- 84
- 85
- 86
- 87
- 88
- 89
- 90
- 91
- 92
- 93
- 94
- 95
- 96
- 97
- 98
更改HomeController,加入分页的方法。
//Controller访问路径可以省略 @Controller public class HomeController { //注入对象 @Autowired private DiscussPostService discussPostService; @Autowired private UserService userService; //使用GET方法 @RequestMapping(path = "/index", method = RequestMethod.GET) public String getIndexPage(Model model, Page page) { // 方法调用钱,SpringMVC会自动实例化Model和Page,并将Page注入Model. // 所以,在thymeleaf中可以直接访问Page对象中的数据. page.setRows(discussPostService.findDiscussPostRows(0)); page.setPath("/index"); Listlist = discussPostService.findDiscussPosts(0, page.getOffset(), page.getLimit()); List - 1
- 2
- 3
- 4
- 5
- 6
- 7
- 8
- 9
- 10
- 11
- 12
- 13
- 14
- 15
- 16
- 17
- 18
- 19
- 20
- 21
- 22
- 23
- 24
- 25
- 26
- 27
- 28
- 29
- 30
- 31
- 32
- 33
- 34
- 35
- 36
在更改Index.html问件中分页的方法
- 1
- 2
- 3
- 4
- 5
- 6
- 7
- 8
- 9
- 10
- 11
- 12
- 13
- 14
- 15
- 16
- 17
- 18
- 19
- 20
- 21
效果图如下:
4.开发社区登录模块
4.1邮件发送
在Maven Repository搜索Spring Mail配置文件并加入到poml文件中,在application.properties文件中配置Mail的参数。
# ServerProperties server.port=8080 server.servlet.context-path=/community # ThymeleafProperties spring.thymeleaf.cache=false # DataSourceProperties spring.datasource.driver-class-name=com.mysql.cj.jdbc.Driver spring.datasource.url=jdbc:mysql://localhost:3306/community?characterEncoding=utf-8&useSSL=false&serverTimezone=Hongkong spring.datasource.username=root spring.datasource.password=lihonghe spring.datasource.type=com.zaxxer.hikari.HikariDataSource spring.datasource.hikari.maximum-pool-size=15 spring.datasource.hikari.minimum-idle=5 spring.datasource.hikari.idle-timeout=30000 # MybatisProperties mybatis.mapper-locations=classpath:mapper/*.xml mybatis.type-aliases-package=com.nowcoder.community.entity mybatis.configuration.useGeneratedKeys=true mybatis.configuration.mapUnderscoreToCamelCase=true # MailProperties spring.mail.host=smtp.sina.com spring.mail.port=465 #自己的邮箱 spring.mail.username=nowcoder@sina.com spring.mail.password=nowcoder123 spring.mail.protocol=smtps spring.mail.properties.mail.smtp.ssl.enable=true- 1
- 2
- 3
- 4
- 5
- 6
- 7
- 8
- 9
- 10
- 11
- 12
- 13
- 14
- 15
- 16
- 17
- 18
- 19
- 20
- 21
- 22
- 23
- 24
- 25
- 26
- 27
- 28
- 29
- 30
- 31
- 32
如果发送不了邮件,需要在个人邮箱的网站设置启用授权码,验证手机,并修改properties文件中关于Email的配置
# MailProperties spring.mail.host=smtp.sina.com #spring.mail.port=465 spring.mail.username=nowcoder@sina.com spring.mail.password=3398c6c71399f9fe #spring.mail.protocol=smtps #spring.mail.properties.mail.smtp.ssl.enable=true spring.mail.properties.mail.smtl.auth=true- 1
- 2
- 3
- 4
- 5
- 6
- 7
- 8
在community文件下创建util工具文件包,并在util包中创建MailClient类使用@Component注解,并创建发送邮件的方法。
@Component public class MailClient { private static final Logger logger = LoggerFactory.getLogger(MailClient.class); @Autowired private JavaMailSender mailSender; //从配置文件中获取值 @Value("${spring.mail.username}") private String from; public void sendMail(String to, String subject, String content) { try { MimeMessage message = mailSender.createMimeMessage(); MimeMessageHelper helper = new MimeMessageHelper(message); helper.setFrom(from); helper.setTo(to); helper.setSubject(subject); helper.setText(content, true); mailSender.send(helper.getMimeMessage()); } catch (MessagingException e) { logger.error("发送邮件失败:" + e.getMessage()); } } }- 1
- 2
- 3
- 4
- 5
- 6
- 7
- 8
- 9
- 10
- 11
- 12
- 13
- 14
- 15
- 16
- 17
- 18
- 19
- 20
- 21
- 22
- 23
- 24
- 25
- 26
- 27
4.2注册功能

在Controller层下创建LoginController类,实现登录界面跳转到注册页面,使用@Controller注解。
@Controller public class LoginController implements CommunityConstant { @RequestMapping(path = "/register", method = RequestMethod.GET) public String getRegisterPage() { return "/site/register"; } @RequestMapping(path = "/login", method = RequestMethod.GET) public String getLoginPage() { return "/site/login"; } }- 1
- 2
- 3
- 4
- 5
- 6
- 7
- 8
- 9
- 10
- 11
- 12
- 13
使用模板引擎thymeleaf修改注册页面regist.html。
牛客网-注册 注 册
- 1
- 2
- 3
- 4
- 5
- 6
- 7
- 8
- 9
- 10
- 11
- 12
- 13
- 14
- 15
- 16
- 17
- 18
- 19
- 20
- 21
- 22
- 23
- 24
- 25
- 26
- 27
- 28
- 29
- 30
- 31
- 32
- 33
- 34
- 35
- 36
- 37
- 38
- 39
- 40
- 41
- 42
- 43
- 44
- 45
- 46
- 47
- 48
- 49
- 50
- 51
- 52
- 53
- 54
- 55
- 56
- 57
- 58
- 59
- 60
- 61
- 62
- 63
- 64
- 65
- 66
- 67
- 68
- 69
- 70
- 71
- 72
- 73
- 74
- 75
- 76
- 77
- 78
- 79
- 80
- 81
- 82
- 83
- 84
- 85
- 86
- 87
- 88
- 89
- 90
- 91
- 92
- 93
- 94
- 95
- 96
- 97
- 98
- 99
- 100
- 101
- 102
- 103
- 104
- 105
- 106
- 107
- 108
- 109
- 110
- 111
- 112
- 113
- 114
- 115
- 116
- 117
- 118
- 119
- 120
- 121
- 122
- 123
- 124
- 125
- 126
- 127
- 128
- 129
- 130
- 131
- 132
- 133
- 134
- 135
- 136
- 137
- 138
- 139
- 140
- 141
- 142
- 143
- 144
- 145
- 146
- 147
- 148
- 149
- 150
- 151
- 152
- 153
- 154
- 155
- 156
- 157
- 158
- 159
- 160
- 161
- 162
- 163
- 164
- 165
- 166
- 167
- 168
- 169
- 170
- 171
- 172
- 173
- 174
- 175
- 176
- 177
- 178
- 179
- 180
- 181
- 182
- 183
- 184
- 185
- 186
- 187
- 188
- 189
- 190
- 191
- 192
- 193
在Maven Repository搜索commons lang配置文件并加入到poml文件中。在properties文件中加入community的路径。
# community community.path.domain=http://localhost:8080- 1
- 2
在util中添加CommunityUtil工具类,方便生成密码。
public class CommunityUtil { // 生成随机字符串 public static String generateUUID() { return UUID.randomUUID().toString().replaceAll("-", ""); } // MD5加密 // hello -> abc123def456 // hello + 3e4a8 -> abc123def456abc public static String md5(String key) { if (StringUtils.isBlank(key)) { return null; } return DigestUtils.md5DigestAsHex(key.getBytes()); } }- 1
- 2
- 3
- 4
- 5
- 6
- 7
- 8
- 9
- 10
- 11
- 12
- 13
- 14
- 15
- 16
- 17
- 18
在Service中更新UserService类,用于注册用户业务,并更新激活页面activation.html。
@Service public class UserService implements CommunityConstant { @Autowired private UserMapper userMapper; @Autowired private MailClient mailClient; @Autowired private TemplateEngine templateEngine; @Value("${community.path.domain}") private String domain; @Value("${server.servlet.context-path}") private String contextPath; @Autowired private LoginTicketMapper loginTicketMapper; public User findUserById(int id) { return userMapper.selectById(id); } public Map牛客网-激活账号 xxx@xxx.com, 您好!
您正在注册牛客网, 这是一封激活邮件, 请点击 此链接, 激活您的牛客账号!
- 1
- 2
- 3
- 4
- 5
- 6
- 7
- 8
- 9
- 10
- 11
- 12
- 13
- 14
- 15
- 16
- 17
- 18
- 19
- 20
- 21
- 22
- 23
- 24
- 25
- 26
- 27
- 28
- 29
- 30
- 31
- 32
- 33
- 34
- 35
- 36
- 37
- 38
- 39
- 40
- 41
- 42
- 43
- 44
- 45
- 46
- 47
- 48
- 49
- 50
- 51
- 52
- 53
- 54
- 55
- 56
- 57
- 58
- 59
- 60
- 61
- 62
- 63
- 64
- 65
- 66
- 67
- 68
- 69
- 70
- 71
- 72
- 73
- 74
- 75
- 76
- 77
- 78
- 79
- 80
- 81
- 82
- 83
- 84
- 85
- 86
- 87
- 88
- 89
- 90
- 91
- 92
- 93
- 94
- 95
- 96
- 97
- 98
- 99
- 100
- 101
- 102
- 103
- 104
- 105
- 106
- 107
- 108
- 109
- 110
- 111
- 112
- 113
- 114
- 115
- 116
- 117
- 118
- 119
- 120
- 121
- 122
- 123
- 124
- 125
- 126
- 127
- 128
- 129
- 130
- 131
- 132
- 133
- 134
- 135
- 136
- 137
- 138
- 139
- 140
- 141
- 142
- 143
- 144
- 145
- 146
- 147
- 148
- 149
- 150
- 151
- 152
- 153
- 154
- 155
- 156
- 157
- 158
- 159
- 160
- 161
- 162
注册之后需要更新LoginController,处理注册完成的请求。
@Controller public class LoginController implements CommunityConstant { private static final Logger logger = LoggerFactory.getLogger(LoginController.class); @Autowired private UserService userService; @Autowired private Producer kaptchaProducer; @Value("${server.servlet.context-path}") private String contextPath; @RequestMapping(path = "/register", method = RequestMethod.GET) public String getRegisterPage() { return "/site/register"; } @RequestMapping(path = "/login", method = RequestMethod.GET) public String getLoginPage() { return "/site/login"; } @RequestMapping(path = "/register", method = RequestMethod.POST) public String register(Model model, User user) { Map- 1
- 2
- 3
- 4
- 5
- 6
- 7
- 8
- 9
- 10
- 11
- 12
- 13
- 14
- 15
- 16
- 17
- 18
- 19
- 20
- 21
- 22
- 23
- 24
- 25
- 26
- 27
- 28
- 29
- 30
- 31
- 32
- 33
- 34
- 35
- 36
- 37
- 38
- 39
- 40
- 41
更新operate-result页面。
牛客网-操作结果 - 1
- 2
- 3
- 4
- 5
- 6
- 7
- 8
- 9
- 10
- 11
- 12
- 13
- 14
- 15
- 16
- 17
- 18
- 19
- 20
- 21
- 22
- 23
- 24
- 25
- 26
- 27
- 28
- 29
- 30
- 31
- 32
- 33
- 34
- 35
- 36
- 37
- 38
- 39
- 40
- 41
- 42
- 43
- 44
- 45
- 46
- 47
- 48
- 49
- 50
- 51
- 52
- 53
- 54
- 55
- 56
- 57
- 58
- 59
- 60
- 61
- 62
- 63
- 64
- 65
- 66
- 67
- 68
- 69
- 70
- 71
- 72
- 73
- 74
- 75
- 76
- 77
- 78
- 79
- 80
- 81
- 82
- 83
- 84
- 85
- 86
- 87
- 88
- 89
- 90
- 91
- 92
- 93
- 94
- 95
- 96
- 97
- 98
- 99
- 100
- 101
- 102
- 103
- 104
- 105
- 106
- 107
- 108
- 109
- 110
- 111
- 112
- 113
- 114
- 115
- 116
- 117
- 118
- 119
- 120
- 121
- 122
- 123
- 124
- 125
- 126
- 127
- 128
- 129
- 130
- 131
- 132
- 133
- 134
- 135
- 136
- 137
- 138
- 139
- 140
- 141
- 142
- 143
- 144
- 145
- 146
- 147
- 148
- 149
- 150
- 151
- 152
- 153
在utill中创建一个CommunityConstant接口,用于表示注册状态码。
public interface CommunityConstant { /** * 激活成功 */ int ACTIVATION_SUCCESS = 0; /** * 重复激活 */ int ACTIVATION_REPEAT = 1; /** * 激活失败 */ int ACTIVATION_FAILURE = 2; /** * 默认状态的登录凭证的超时时间 */ int DEFAULT_EXPIRED_SECONDS = 3600 * 12; /** * 记住状态的登录凭证超时时间 */ int REMEMBER_EXPIRED_SECONDS = 3600 * 24 * 100; }- 1
- 2
- 3
- 4
- 5
- 6
- 7
- 8
- 9
- 10
- 11
- 12
- 13
- 14
- 15
- 16
- 17
- 18
- 19
- 20
- 21
- 22
- 23
- 24
- 25
- 26
- 27
- 28
更新LoginController的功能,并更改Index.html文件相对应位置的模板参数。
@Controller public class LoginController implements CommunityConstant { private static final Logger logger = LoggerFactory.getLogger(LoginController.class); @Autowired private UserService userService; @Autowired private Producer kaptchaProducer; @Value("${server.servlet.context-path}") private String contextPath; @RequestMapping(path = "/register", method = RequestMethod.GET) public String getRegisterPage() { return "/site/register"; } @RequestMapping(path = "/login", method = RequestMethod.GET) public String getLoginPage() { return "/site/login"; } @RequestMapping(path = "/register", method = RequestMethod.POST) public String register(Model model, User user) { Map- 1
- 2
- 3
- 4
- 5
- 6
- 7
- 8
- 9
- 10
- 11
- 12
- 13
- 14
- 15
- 16
- 17
- 18
- 19
- 20
- 21
- 22
- 23
- 24
- 25
- 26
- 27
- 28
- 29
- 30
- 31
- 32
- 33
- 34
- 35
- 36
- 37
- 38
- 39
- 40
- 41
- 42
- 43
- 44
- 45
- 46
- 47
- 48
- 49
- 50
- 51
- 52
- 53
- 54
- 55
- 56
- 57
- 58
4.3会话管理

使用Cookie保存一些信息,可以使用浏览器插件查看Cookie(F12控制台)

有关Cookie的一个小示例:
// cookie示例 @RequestMapping(path = "/cookie/set", method = RequestMethod.GET) @ResponseBody public String setCookie(HttpServletResponse response) { // 创建cookie Cookie cookie = new Cookie("code", CommunityUtil.generateUUID()); // 设置cookie生效的范围 cookie.setPath("/community/alpha"); // 设置cookie的生存时间 cookie.setMaxAge(60 * 10); // 发送cookie response.addCookie(cookie); return "set cookie"; } @RequestMapping(path = "/cookie/get", method = RequestMethod.GET) @ResponseBody public String getCookie(@CookieValue("code") String code) { System.out.println(code); return "get cookie"; } // session示例 @RequestMapping(path = "/session/set", method = RequestMethod.GET) @ResponseBody public String setSession(HttpSession session) { session.setAttribute("id", 1); session.setAttribute("name", "Test"); return "set session"; } @RequestMapping(path = "/session/get", method = RequestMethod.GET) @ResponseBody public String getSession(HttpSession session) { System.out.println(session.getAttribute("id")); System.out.println(session.getAttribute("name")); return "get session"; }- 1
- 2
- 3
- 4
- 5
- 6
- 7
- 8
- 9
- 10
- 11
- 12
- 13
- 14
- 15
- 16
- 17
- 18
- 19
- 20
- 21
- 22
- 23
- 24
- 25
- 26
- 27
- 28
- 29
- 30
- 31
- 32
- 33
- 34
- 35
- 36
- 37
- 38
- 39
- 40
- 41
cookie和session的区别

后期可以考虑将Session数据传输到redis数据库中,用于保存一些登陆凭证
4.4生成验证码
验证码使用Kaptcha jar包用于随机生成字符和图片。在Maven Repository搜索Kaptcha配置文件,在resources文件包内的pom.xml文件中导入相关的配置文件依赖。在community目录下创建config文件包并创建KaptchaConfig配置类,使用@Configuration注解。
@Configuration public class KaptchaConfig { @Bean public Producer kaptchaProducer() { Properties properties = new Properties(); properties.setProperty("kaptcha.image.width", "100"); properties.setProperty("kaptcha.image.height", "40"); properties.setProperty("kaptcha.textproducer.font.size", "32"); properties.setProperty("kaptcha.textproducer.font.color", "0,0,0"); properties.setProperty("kaptcha.textproducer.char.string", "0123456789ABCDEFGHIJKLMNOPQRSTUVWXYAZ"); properties.setProperty("kaptcha.textproducer.char.length", "4"); properties.setProperty("kaptcha.noise.impl", "com.google.code.kaptcha.impl.NoNoise"); DefaultKaptcha kaptcha = new DefaultKaptcha(); Config config = new Config(properties); kaptcha.setConfig(config); return kaptcha; } }- 1
- 2
- 3
- 4
- 5
- 6
- 7
- 8
- 9
- 10
- 11
- 12
- 13
- 14
- 15
- 16
- 17
- 18
- 19
- 20
- 21
在LoginController文件中完善验证码功能,并完善登陆页面.html文件中验证码的模板,并实现刷新验证码的功能。
@RequestMapping(path = "/kaptcha", method = RequestMethod.GET) public void getKaptcha(HttpServletResponse response, HttpSession session) { // 生成验证码 String text = kaptchaProducer.createText(); BufferedImage image = kaptchaProducer.createImage(text); // 将验证码存入session session.setAttribute("kaptcha", text); // 将突图片输出给浏览器 response.setContentType("image/png"); try { OutputStream os = response.getOutputStream(); ImageIO.write(image, "png", os); } catch (IOException e) { logger.error("响应验证码失败:" + e.getMessage()); } } @RequestMapping(path = "/login", method = RequestMethod.POST) public String login(String username, String password, String code, boolean rememberme, Model model, HttpSession session, HttpServletResponse response) { // 检查验证码 String kaptcha = (String) session.getAttribute("kaptcha"); if (StringUtils.isBlank(kaptcha) || StringUtils.isBlank(code) || !kaptcha.equalsIgnoreCase(code)) { model.addAttribute("codeMsg", "验证码不正确!"); return "/site/login"; }- 1
- 2
- 3
- 4
- 5
- 6
- 7
- 8
- 9
- 10
- 11
- 12
- 13
- 14
- 15
- 16
- 17
- 18
- 19
- 20
- 21
- 22
- 23
- 24
- 25
- 26
- 27
- 28
刷新验证码方法:
- 1
- 2
- 3
- 4
- 5
- 6
4.5登录、退出功能
密码使用MD5加密

数据库中有关于登录凭证的ticket,使用这个ticket作为登陆凭证。涉及到数据库的操作,就要处理LoginTicketMapper。
LoginTicketMapper(这里是mapper的另外一种写法,不用再resource里面创建mapper文件):
@Mapper public interface LoginTicketMapper { @Insert({ "insert into login_ticket(user_id,ticket,status,expired) ", "values(#{userId},#{ticket},#{status},#{expired})" }) @Options(useGeneratedKeys = true, keyProperty = "id") int insertLoginTicket(LoginTicket loginTicket); @Select({ "select id,user_id,ticket,status,expired ", "from login_ticket where ticket=#{ticket}" }) LoginTicket selectByTicket(String ticket); @Update({ "" }) int updateStatus(String ticket, int status); }- 1
- 2
- 3
- 4
- 5
- 6
- 7
- 8
- 9
- 10
- 11
- 12
- 13
- 14
- 15
- 16
- 17
- 18
- 19
- 20
- 21
- 22
- 23
- 24
- 25
- 26
- 27
在UserService中增加登陆的方法,并在login.html中增加相应的修改:
public Map- 1
- 2
- 3
- 4
- 5
- 6
- 7
- 8
- 9
- 10
- 11
- 12
- 13
- 14
- 15
- 16
- 17
- 18
- 19
- 20
- 21
- 22
- 23
- 24
- 25
- 26
- 27
- 28
- 29
- 30
- 31
- 32
- 33
- 34
- 35
- 36
- 37
- 38
- 39
- 40
- 41
- 42
- 43
- 44
增加Controller层中的登录方法:
@RequestMapping(path = "/login", method = RequestMethod.POST) public String login(String username, String password, String code, boolean rememberme, Model model, HttpSession session, HttpServletResponse response) { // 检查验证码 String kaptcha = (String) session.getAttribute("kaptcha"); if (StringUtils.isBlank(kaptcha) || StringUtils.isBlank(code) || !kaptcha.equalsIgnoreCase(code)) { model.addAttribute("codeMsg", "验证码不正确!"); return "/site/login"; } // 检查账号,密码 int expiredSeconds = rememberme ? REMEMBER_EXPIRED_SECONDS : DEFAULT_EXPIRED_SECONDS; Map- 1
- 2
- 3
- 4
- 5
- 6
- 7
- 8
- 9
- 10
- 11
- 12
- 13
- 14
- 15
- 16
- 17
- 18
- 19
- 20
- 21
- 22
- 23
- 24
- 25
- 26
- 27
- 28
- 29
- 30
- 31
4.6显示登陆信息
使用拦截器实现

在controller层下创建Interceptor文件包,
拦截器的方法
// 在Controller之前执行 @Override public boolean preHandle(HttpServletRequest request, HttpServletResponse response, Object handler) throws Exception { logger.debug("preHandle: " + handler.toString()); return true; } // 在Controller之后执行 @Override public void postHandle(HttpServletRequest request, HttpServletResponse response, Object handler, ModelAndView modelAndView) throws Exception { logger.debug("postHandle: " + handler.toString()); } // 在TemplateEngine之后执行 @Override public void afterCompletion(HttpServletRequest request, HttpServletResponse response, Object handler, Exception ex) throws Exception { logger.debug("afterCompletion: " + handler.toString()); }- 1
- 2
- 3
- 4
- 5
- 6
- 7
- 8
- 9
- 10
- 11
- 12
- 13
- 14
- 15
- 16
- 17
- 18
在cpnfig文件下创建配置类WebMvcConfig,配置拦截器。
@Configuration public class WebMvcConfig implements WebMvcConfigurer { //测试拦截器方法 @Autowired private AlphaInterceptor alphaInterceptor; @Autowired private LoginTicketInterceptor loginTicketInterceptor; @Autowired private LoginRequiredInterceptor loginRequiredInterceptor; @Override public void addInterceptors(InterceptorRegistry registry) { registry.addInterceptor(alphaInterceptor) .excludePathPatterns("/**/*.css", "/**/*.js", "/**/*.png", "/**/*.jpg", "/**/*.jpeg") .addPathPatterns("/register", "/login"); registry.addInterceptor(loginTicketInterceptor) .excludePathPatterns("/**/*.css", "/**/*.js", "/**/*.png", "/**/*.jpg", "/**/*.jpeg"); } }- 1
- 2
- 3
- 4
- 5
- 6
- 7
- 8
- 9
- 10
- 11
- 12
- 13
- 14
- 15
- 16
- 17
- 18
- 19
- 20
- 21
- 22
- 23
- 24
- 25
在请求开始之前查询登录用户:
在Interceptor文件下创建LoginTicketInterceptor,实现拦截器的方法。
@Component public class LoginTicketInterceptor implements HandlerInterceptor { @Autowired private UserService userService; @Autowired private HostHolder hostHolder; @Override public boolean preHandle(HttpServletRequest request, HttpServletResponse response, Object handler) throws Exception { // 从cookie中获取凭证 String ticket = CookieUtil.getValue(request, "ticket"); if (ticket != null) { // 查询凭证 LoginTicket loginTicket = userService.findLoginTicket(ticket); // 检查凭证是否有效 if (loginTicket != null && loginTicket.getStatus() == 0 && loginTicket.getExpired().after(new Date())) { // 根据凭证查询用户 User user = userService.findUserById(loginTicket.getUserId()); // 在本次请求中持有用户 hostHolder.setUser(user); } } return true; } @Override public void postHandle(HttpServletRequest request, HttpServletResponse response, Object handler, ModelAndView modelAndView) throws Exception { User user = hostHolder.getUser(); if (user != null && modelAndView != null) { modelAndView.addObject("loginUser", user); } } @Override public void afterCompletion(HttpServletRequest request, HttpServletResponse response, Object handler, Exception ex) throws Exception { hostHolder.clear(); } }- 1
- 2
- 3
- 4
- 5
- 6
- 7
- 8
- 9
- 10
- 11
- 12
- 13
- 14
- 15
- 16
- 17
- 18
- 19
- 20
- 21
- 22
- 23
- 24
- 25
- 26
- 27
- 28
- 29
- 30
- 31
- 32
- 33
- 34
- 35
- 36
- 37
- 38
- 39
- 40
- 41
- 42
在Util文件中创建Cookie工具,以及HostHolder工具用于代替session对象。完成过后修改相应的html文件。
public class CookieUtil { public static String getValue(HttpServletRequest request, String name) { if (request == null || name == null) { throw new IllegalArgumentException("参数为空!"); } Cookie[] cookies = request.getCookies(); if (cookies != null) { for (Cookie cookie : cookies) { if (cookie.getName().equals(name)) { return cookie.getValue(); } } } return null; } } /** * 持有用户信息,用于代替session对象. */ @Component public class HostHolder { private ThreadLocalusers = new ThreadLocal<>(); public void setUser(User user) { users.set(user); } public User getUser() { return users.get(); } public void clear() { users.remove(); } } - 1
- 2
- 3
- 4
- 5
- 6
- 7
- 8
- 9
- 10
- 11
- 12
- 13
- 14
- 15
- 16
- 17
- 18
- 19
- 20
- 21
- 22
- 23
- 24
- 25
- 26
- 27
- 28
- 29
- 30
- 31
- 32
- 33
- 34
- 35
- 36
- 37
- 38
- 39
- 40
- 41
- 42
4.7账号设置
用户自己上传头像,请求必须是POST请求,表单:enctype = “multipart/form-data”,SpringMVC通过MutipartFile上传文件。
创建Usercontroller
@Controller @RequestMapping("/user") public class UserController { private static final Logger logger = LoggerFactory.getLogger(UserController.class); @Value("${community.path.upload}") private String uploadPath; @Value("${community.path.domain}") private String domain; @Value("${server.servlet.context-path}") private String contextPath; @Autowired private UserService userService; @Autowired private HostHolder hostHolder; @LoginRequired @RequestMapping(path = "/setting", method = RequestMethod.GET) public String getSettingPage() { return "/site/setting"; } @LoginRequired @RequestMapping(path = "/upload", method = RequestMethod.POST) public String uploadHeader(MultipartFile headerImage, Model model) { if (headerImage == null) { model.addAttribute("error", "您还没有选择图片!"); return "/site/setting"; } String fileName = headerImage.getOriginalFilename(); String suffix = fileName.substring(fileName.lastIndexOf(".")); if (StringUtils.isBlank(suffix)) { model.addAttribute("error", "文件的格式不正确!"); return "/site/setting"; } // 生成随机文件名 fileName = CommunityUtil.generateUUID() + suffix; // 确定文件存放的路径 File dest = new File(uploadPath + "/" + fileName); try { // 存储文件 headerImage.transferTo(dest); } catch (IOException e) { logger.error("上传文件失败: " + e.getMessage()); throw new RuntimeException("上传文件失败,服务器发生异常!", e); } // 更新当前用户的头像的路径(web访问路径) // http://localhost:8080/community/user/header/xxx.png User user = hostHolder.getUser(); String headerUrl = domain + contextPath + "/user/header/" + fileName; userService.updateHeader(user.getId(), headerUrl); return "redirect:/index"; } @RequestMapping(path = "/header/{fileName}", method = RequestMethod.GET) public void getHeader(@PathVariable("fileName") String fileName, HttpServletResponse response) { // 服务器存放路径 fileName = uploadPath + "/" + fileName; // 文件后缀 String suffix = fileName.substring(fileName.lastIndexOf(".")); // 响应图片 response.setContentType("image/" + suffix); try ( FileInputStream fis = new FileInputStream(fileName); OutputStream os = response.getOutputStream(); ) { byte[] buffer = new byte[1024]; int b = 0; while ((b = fis.read(buffer)) != -1) { os.write(buffer, 0, b); } } catch (IOException e) { logger.error("读取头像失败: " + e.getMessage()); } } }- 1
- 2
- 3
- 4
- 5
- 6
- 7
- 8
- 9
- 10
- 11
- 12
- 13
- 14
- 15
- 16
- 17
- 18
- 19
- 20
- 21
- 22
- 23
- 24
- 25
- 26
- 27
- 28
- 29
- 30
- 31
- 32
- 33
- 34
- 35
- 36
- 37
- 38
- 39
- 40
- 41
- 42
- 43
- 44
- 45
- 46
- 47
- 48
- 49
- 50
- 51
- 52
- 53
- 54
- 55
- 56
- 57
- 58
- 59
- 60
- 61
- 62
- 63
- 64
- 65
- 66
- 67
- 68
- 69
- 70
- 71
- 72
- 73
- 74
- 75
- 76
- 77
- 78
- 79
- 80
- 81
- 82
- 83
- 84
- 85
- 86
配置setting.html的静态资源路径
牛客网-账号设置 上传头像
修改密码
- 1
- 2
- 3
- 4
- 5
- 6
- 7
- 8
- 9
- 10
- 11
- 12
- 13
- 14
- 15
- 16
- 17
- 18
- 19
- 20
- 21
- 22
- 23
- 24
- 25
- 26
- 27
- 28
- 29
- 30
- 31
- 32
- 33
- 34
- 35
- 36
- 37
- 38
- 39
- 40
- 41
- 42
- 43
- 44
- 45
- 46
- 47
- 48
- 49
- 50
- 51
- 52
- 53
- 54
- 55
- 56
- 57
- 58
- 59
- 60
- 61
- 62
- 63
- 64
- 65
- 66
- 67
- 68
- 69
- 70
- 71
- 72
- 73
- 74
- 75
- 76
- 77
- 78
- 79
- 80
- 81
- 82
- 83
- 84
- 85
- 86
- 87
- 88
- 89
- 90
- 91
- 92
- 93
- 94
- 95
- 96
- 97
- 98
- 99
- 100
- 101
- 102
- 103
- 104
- 105
- 106
- 107
- 108
- 109
- 110
- 111
- 112
- 113
- 114
- 115
- 116
- 117
- 118
- 119
- 120
- 121
- 122
- 123
- 124
- 125
- 126
- 127
- 128
- 129
- 130
- 131
- 132
- 133
- 134
- 135
- 136
- 137
- 138
- 139
- 140
- 141
- 142
- 143
- 144
- 145
- 146
- 147
- 148
- 149
- 150
- 151
- 152
- 153
- 154
- 155
- 156
- 157
- 158
- 159
- 160
- 161
- 162
- 163
- 164
- 165
- 166
- 167
- 168
- 169
- 170
- 171
- 172
- 173
- 174
- 175
- 176
- 177
- 178
- 179
- 180
- 181
- 182
- 183
- 184
- 185
- 186
- 187
- 188
- 189
- 190
- 191
- 192
- 193
- 194
- 195
- 196
- 197
- 198
- 199
- 200
- 201
- 202
修改配置文件中,上传文件的保存位置。
community.path.upload=d:/work/data/upload- 1
4.8检查登陆状态
防止未登录访问某些资源,可以使用拦截器和注解。
使用注解,在community创建annotation文件创建Login注解。
@Target(ElementType.METHOD) @Retention(RetentionPolicy.RUNTIME) public @interface LoginRequired { }- 1
- 2
- 3
- 4
- 5
- 6
- 7
给Usercontroller中的方法,加入@LoginRequire注解,并创建拦截器拦截带注解的方法。
创建一个新的拦截器LoginRequireInterceptor。
@Component public class LoginRequiredInterceptor implements HandlerInterceptor { @Autowired private HostHolder hostHolder; @Override public boolean preHandle(HttpServletRequest request, HttpServletResponse response, Object handler) throws Exception { //保证拦截的是方法 if (handler instanceof HandlerMethod) { HandlerMethod handlerMethod = (HandlerMethod) handler; Method method = handlerMethod.getMethod(); LoginRequired loginRequired = method.getAnnotation(LoginRequired.class); if (loginRequired != null && hostHolder.getUser() == null) { response.sendRedirect(request.getContextPath() + "/login"); return false; } } return true; } }- 1
- 2
- 3
- 4
- 5
- 6
- 7
- 8
- 9
- 10
- 11
- 12
- 13
- 14
- 15
- 16
- 17
- 18
- 19
- 20
- 21
项目代码及相关资源:Ming-XMU (Yiming Zhang) · GitHub
麻烦点点小星星!!!!!!
CSDN下载需要积分基于SpringBoot仿牛客网讨论社区项目-Java文档类资源-CSDN下载
从零开始—仿牛客网讨论社区项目(一)_芙蓉铁蛋的博客-CSDN博客
?从零开始—仿牛客网讨论社区项目(二)_芙蓉铁蛋的博客-CSDN博客
从零开始—仿牛客网讨论社区项目(三)_芙蓉铁蛋的博客-CSDN博客
从零开始—仿牛客网讨论社区项目(四)_芙蓉铁蛋的博客-CSDN博客
从零开始—仿牛客网讨论社区项目(五)_芙蓉铁蛋的博客-CSDN博客
从零开始—仿牛客网讨论社区项目(六)_芙蓉铁蛋的博客-CSDN博客
仿牛客网讨论社区项目—优化网站性能_芙蓉铁蛋的博客-CSDN博客
仿牛客网讨论社区项目—项目总结及项目常见面试题_芙蓉铁蛋的博客-CSDN博客
先自我介绍一下,小编13年上师交大毕业,曾经在小公司待过,去过华为OPPO等大厂,18年进入阿里,直到现在。深知大多数初中级java工程师,想要升技能,往往是需要自己摸索成长或是报班学习,但对于培训机构动则近万元的学费,着实压力不小。自己不成体系的自学效率很低又漫长,而且容易碰到天花板技术停止不前。因此我收集了一份《java开发全套学习资料》送给大家,初衷也很简单,就是希望帮助到想自学又不知道该从何学起的朋友,同时减轻大家的负担。添加下方名片,即可获取全套学习资料哦
(一)esp32开发环境搭建(VSCode+IDF实现单步调试)
Mysql 安全加固经验总结
【洛谷P2258】子矩阵【DFS+DP】
高并发环境下生成序列编码重复问题分析
图像色彩空间的改变
Opencv学习笔记(十二):图片腐蚀和膨胀操作
Nginx重写功能和反向代理
keycloak~为keycloak-services项目添加第三方模块(首创)
【容器】Docker(学习笔记)