-
OAuth2:搭建授权服务器
第一步就是最重要的,我们需要搭建一个验证服务器,它是我们进行权限校验的核心,验证服务器有很多的第三方实现也有Spring官方提供的实现,这里我们使用Spring官方提供的验证服务器。
这里我们将最开始保存好的项目解压,就重新创建一个新的项目,首先我们在父项目中添加最新的SpringCloud依赖:
- <dependency>
- <groupId>org.springframework.cloudgroupId>
- <artifactId>spring-cloud-dependenciesartifactId>
- <version>2021.0.1version>
- <type>pomtype>
- <scope>importscope>
- dependency>
接着创建一个新的模块
auth-service,添加依赖:- <dependencies>
- <dependency>
- <groupId>org.springframework.bootgroupId>
- <artifactId>spring-boot-starter-webartifactId>
- dependency>
- <dependency>
- <groupId>org.springframework.bootgroupId>
- <artifactId>spring-boot-starter-securityartifactId>
- dependency>
- <dependency>
- <groupId>org.springframework.cloudgroupId>
- <artifactId>spring-cloud-starter-oauth2artifactId>
- <version>2.2.5.RELEASEversion>
- dependency>
- dependencies>
接着我们修改一下配置文件:
- server:
- port: 8500
- servlet:
- #为了防止一会在服务之间跳转导致Cookie打架(因为所有服务地址都是localhost,都会存JSESSIONID)
- #这里修改一下context-path,这样保存的Cookie会使用指定的路径,就不会和其他服务打架了
- #但是注意之后的请求都得在最前面加上这个路径
- context-path: /sso
接着我们需要编写一下配置类,这里需要两个配置类,一个是OAuth2的配置类,还有一个是SpringSecurity的配置类:
- @Configuration
- public class SecurityConfiguration extends WebSecurityConfigurerAdapter {
- @Override
- protected void configure(HttpSecurity http) throws Exception {
- http
- .authorizeRequests()
- .anyRequest().authenticated() //
- .and()
- .formLogin().permitAll(); //使用表单登录
- }
- @Override
- protected void configure(AuthenticationManagerBuilder auth) throws Exception {
- BCryptPasswordEncoder encoder = new BCryptPasswordEncoder();
- auth
- .inMemoryAuthentication() //直接创建一个用户,懒得搞数据库了
- .passwordEncoder(encoder)
- .withUser("test").password(encoder.encode("123456")).roles("USER");
- }
- @Bean //这里需要将AuthenticationManager注册为Bean,在OAuth配置中使用
- @Override
- public AuthenticationManager authenticationManagerBean() throws Exception {
- return super.authenticationManagerBean();
- }
- }
- @EnableAuthorizationServer //开启验证服务器
- @Configuration
- public class OAuth2Configuration extends AuthorizationServerConfigurerAdapter {
- @Resource
- private AuthenticationManager manager;
- private final BCryptPasswordEncoder encoder = new BCryptPasswordEncoder();
- /**
- * 这个方法是对客户端进行配置,一个验证服务器可以预设很多个客户端,
- * 之后这些指定的客户端就可以按照下面指定的方式进行验证
- * @param clients 客户端配置工具
- */
- @Override
- public void configure(ClientDetailsServiceConfigurer clients) throws Exception {
- clients
- .inMemory() //这里我们直接硬编码创建,当然也可以像Security那样自定义或是使用JDBC从数据库读取
- .withClient("web") //客户端名称,随便起就行
- .secret(encoder.encode("654321")) //只与客户端分享的secret,随便写,但是注意要加密
- .autoApprove(false) //自动审批,这里关闭,要的就是一会体验那种感觉
- .scopes("book", "user", "borrow") //授权范围,这里我们使用全部all
- .authorizedGrantTypes("client_credentials", "password", "implicit", "authorization_code", "refresh_token");
- //授权模式,一共支持5种,除了之前我们介绍的四种之外,还有一个刷新Token的模式
- //这里我们直接把五种都写上,方便一会实验,当然各位也可以单独只写一种一个一个进行测试
- //现在我们指定的客户端就支持这五种类型的授权方式了
- }
- @Override
- public void configure(AuthorizationServerSecurityConfigurer security) {
- security
- .passwordEncoder(encoder) //编码器设定为BCryptPasswordEncoder
- .allowFormAuthenticationForClients() //允许客户端使用表单验证,一会我们POST请求中会携带表单信息
- .checkTokenAccess("permitAll()"); //允许所有的Token查询请求
- }
- @Override
- public void configure(AuthorizationServerEndpointsConfigurer endpoints) {
- endpoints
- .authenticationManager(manager);
- //由于SpringSecurity新版本的一些底层改动,这里需要配置一下authenticationManager,才能正常使用password模式
- }
- }
接着我们就可以启动服务器了:

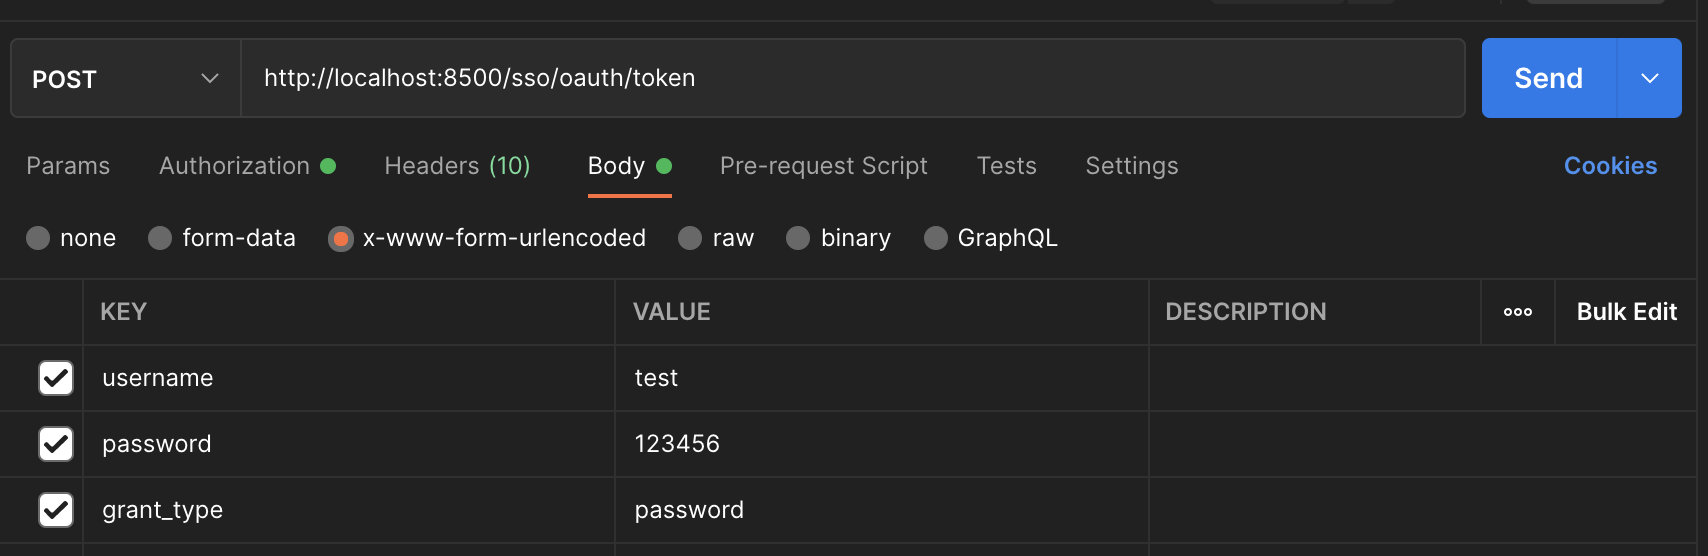
然后我们使用Postman进行接口测试,首先我们从最简单的客户端模式进行测试,客户端模式只需要提供id和secret即可直接拿到Token,注意需要再添加一个grant_type来表明我们的授权方式,默认请求路径为http://localhost:8500/sso/oauth/token:

发起请求后,可以看到我们得到了Token,它是以JSON格式给到我们的:

我们还可以访问 http://localhost:8500/sso/oauth/check_token 来验证我们的Token是否有效:

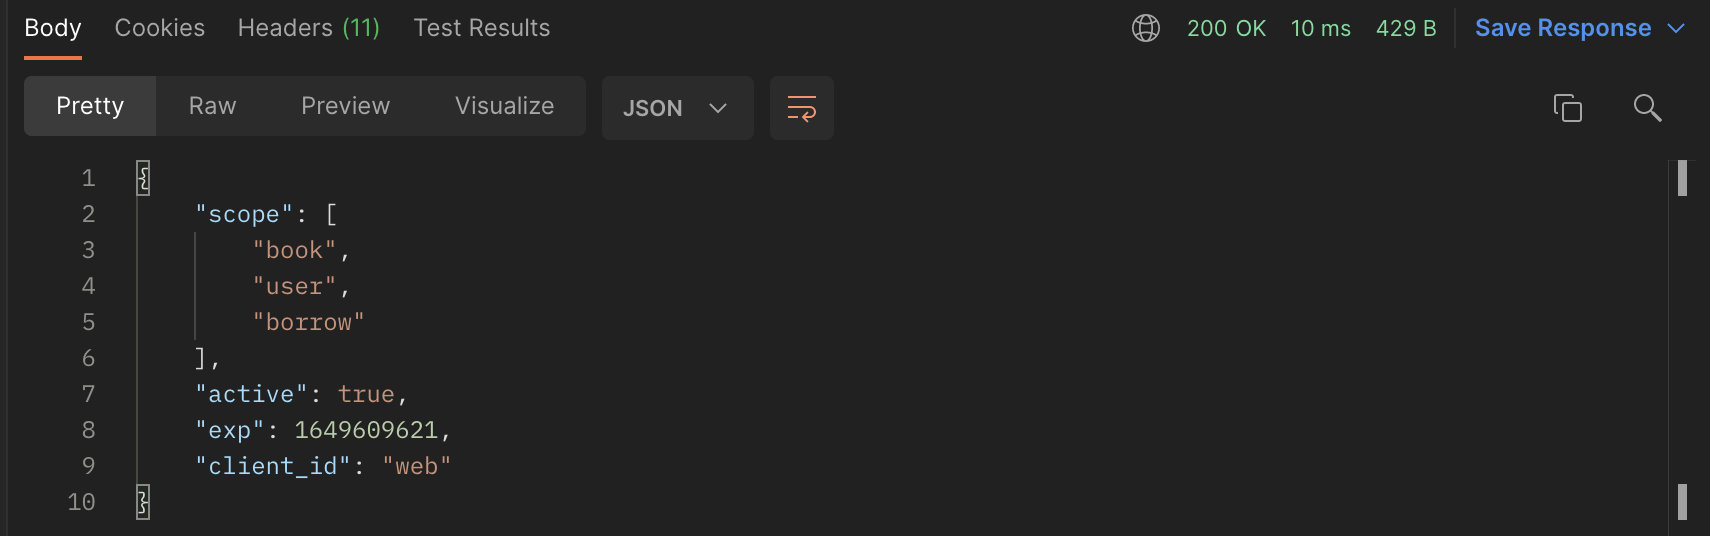
可以看到active为true,表示我们刚刚申请到的Token是有效的。
接着我们来测试一下第二种password模式,我们还需要提供具体的用户名和密码,授权模式定义为password即可:
接着我们需要在请求头中添加Basic验证信息,这里我们直接填写id和secret即可:
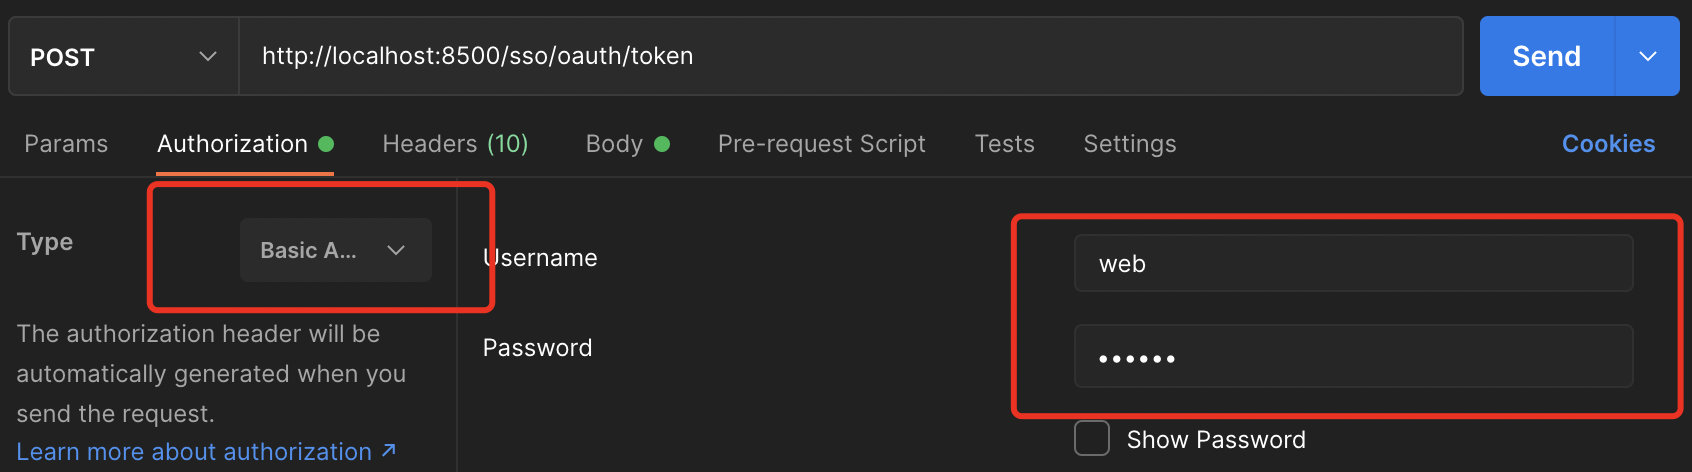
可以看到在请求头中自动生成了Basic验证相关内容:


响应成功,得到Token信息,并且这里还多出了一个refresh_token,这是用于刷新Token的,我们之后会进行讲解。

查询Token信息之后还可以看到登录的具体用户以及角色权限等。
接着我们来看隐式授权模式,这种模式我们需要在验证服务器上进行登录操作,而不是直接请求Token,验证登录请求地址:http://localhost:8500/sso/oauth/authorize?client_id=web&response_type=token
注意response_type一定要是token类型,这样才会直接返回Token,浏览器发起请求后,可以看到熟悉而又陌生的界面,没错,实际上这里就是使用我们之前讲解的SpringSecurity进行登陆,当然也可以配置一下记住我之类的功能,这里就不演示了:

但是登录之后我们发现出现了一个错误:

这是因为登录成功之后,验证服务器需要将结果给回客户端,所以需要提供客户端的回调地址,这样浏览器就会被重定向到指定的回调地址并且请求中会携带Token信息,这里我们随便配置一个回调地址:
- @Override
- public void configure(ClientDetailsServiceConfigurer clients) throws Exception {
- clients
- .inMemory()
- .withClient("web")
- .secret(encoder.encode("654321"))
- .autoApprove(false)
- .scopes("book", "user", "borrow")
- .redirectUris("http://localhost:8201/login") //可以写多个,当有多个时需要在验证请求中指定使用哪个地址进行回调
- .authorizedGrantTypes("client_credentials", "password", "implicit", "authorization_code", "refresh_token");
- }
接着重启验证服务器,再次访问:

可以看到这里会让我们选择哪些范围进行授权,就像我们在微信小程序中登陆一样,会让我们授予用户信息权限、支付权限、信用查询权限等,我们可以自由决定要不要给客户端授予访问这些资源的权限,这里我们全部选择授予:

授予之后,可以看到浏览器被重定向到我们刚刚指定的回调地址中,并且携带了Token信息,现在我们来校验一下看看:

可以看到,Token也是有效的。
最后我们来看看第四种最安全的授权码模式,这种模式其实流程和上面是一样的,但是请求的是code类型:http://localhost:8500/sso/oauth/authorize?client_id=web&response_type=code
可以看到访问之后,依然会进入到回调地址,但是这时给的就是授权码了,而不是直接给Token,那么这个Token该怎么获取呢?

按照我们之前讲解的原理,我们需要携带授权码和secret一起请求,才能拿到Token,正常情况下是由回调的服务器进行处理,这里我们就在Postman中进行,我们复制刚刚得到的授权码,接口依然是
localhost:8500/sso/oauth/token:
可以看到结果也是正常返回了Token信息:

这样我们四种最基本的Token请求方式就实现了。
最后还有一个是刷新令牌使用的,当我们的Token过期时,我们就可以使用这个refresh_token来申请一个新的Token:

但是执行之后我们发现会直接出现一个内部错误:


查看日志发现,这里还需要我们单独配置一个UserDetailsService,我们直接把Security中的实例注册为Bean:
- @Bean
- @Override
- public UserDetailsService userDetailsServiceBean() throws Exception {
- return super.userDetailsServiceBean();
- }
然后在Endpoint中设置:
- @Resource
- UserDetailsService service;
- @Override
- public void configure(AuthorizationServerEndpointsConfigurer endpoints) {
- endpoints
- .userDetailsService(service)
- .authenticationManager(manager);
- }
最后再次尝试刷新Token:

OK,成功刷新Token,返回了一个新的。
-
相关阅读:
【Java 基础篇】Java同步代码块解决数据安全
关于Input【type=number】可以输入e问题及解决方案
[线程安全问题] 多线程到底可能会带来哪些风险?
单链表习题(对应章节chapter2)
常见弱口令汇编
基于树莓派的蓄电池控制系统
Linux学习-30-chgrp、chown等修改文件和目录的所有者和所属组命令
跨模态检索论文阅读:(PTP)Position-guided Text Prompt for Vision-Language Pre-training
会话跟踪技术学习笔记(Cookie+Session)+ HTTP学习笔记
软件开发 23个设计模式收集
- 原文地址:https://blog.csdn.net/Leon_Jinhai_Sun/article/details/126072394
