-
Vue(七):vue项目发布到服务器
1、打包
首先有nginx环境 再发布vue项目
打包
npm run build- 1

结束后生成dist文件

2、部署
我这里用的是Xshell7 和 Xftp7
Linux操作
首先保证服务器地址正常使用后再登陆Xshell 要素如下:
1、http://00.111.222.123 (地址)
2、root (账号)
3、XXXXXX (密码)
将打包好的 dist 项目文件上传(方法很多 一般我是直接拽一( o=^•ェ•)o ┏━┓)
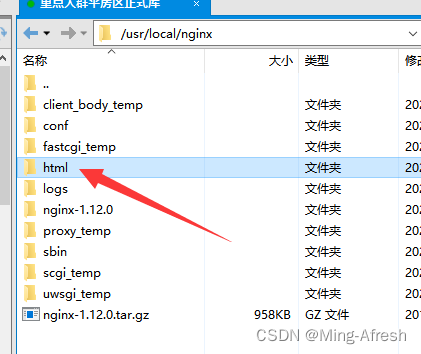
可以新建一个html文件夹(当然了 配置的时候别忘了路径)可以把dist文件直接拽进去 或者 把dist文件夹里的内容拽进去(总之就是配置时候的路径!陆静!!鹿颈!!!)/usr/local/nginx- 1
一般情况nginx配置文件的路径为根目录下的:
/usr/local/nginx/conf- 1

用记事本打开编辑即可(最好提前备份一下 当然了弄坏了再找一个就行 我这就有一(ง •_•)ง)
#user nobody; worker_processes 1; #error_log logs/error.log; #error_log logs/error.log notice; #error_log logs/error.log info; #pid logs/nginx.pid; events { worker_connections 1024; } http { include mime.types; default_type application/octet-stream; #log_format main '$remote_addr - $remote_user [$time_local] "$request" ' # '$status $body_bytes_sent "$http_referer" ' # '"$http_user_agent" "$http_x_forwarded_for"'; #access_log logs/access.log main; sendfile on; #tcp_nopush on; #keepalive_timeout 0; keepalive_timeout 65; #gzip on; server { # 1.监听 2001 端口 listen 2001; # 2.这是你部署的IP,你服务器的公网IP server_name 8.129.38.87; # 3.这里配置前端打包文件的映射路径 root /usr/local/nginx/html; #charset koi8-r; #access_log logs/host.access.log main; location / { root html; try_files $uri $uri/ /index.html; index index.html index.htm; } # 4.解决跨域问题,将需要代理的后端地址写在 proxy_pass 后面 # 将所有的 http://8.129.38.87:2001/front 请求,转发到 http://edufront.lagou.com/front location /front { proxy_pass http://edufront.lagou.com; } # 5.同理,可配置多个 location ,关于nginx代理的相关配置请自行网上查找 location /boss { proxy_pass http://eduboss.lagou.com; # proxy_redirect off; # proxy_set_header Host $host; # proxy_set_header X-Real-IP $remote_addr; # proxy_set_header X-Forwarded-For $proxy_add_x_forwarded_for; } #error_page 404 /404.html; # redirect server error pages to the static page /50x.html # error_page 500 502 503 504 /50x.html; location = /50x.html { root html; } # proxy the PHP scripts to Apache listening on 127.0.0.1:80 # #location ~ \.php$ { # proxy_pass http://127.0.0.1; #} # pass the PHP scripts to FastCGI server listening on 127.0.0.1:9000 # #location ~ \.php$ { # root html; # fastcgi_pass 127.0.0.1:9000; # fastcgi_index index.php; # fastcgi_param SCRIPT_FILENAME /scripts$fastcgi_script_name; # include fastcgi_params; #} # deny access to .htaccess files, if Apache's document root # concurs with nginx's one # #location ~ /\.ht { # deny all; #} } # another virtual host using mix of IP-, name-, and port-based configuration # #server { # listen 8000; # listen somename:8080; # server_name somename alias another.alias; # location / { # root html; # index index.html index.htm; # } #} # HTTPS server # #server { # listen 443 ssl; # server_name localhost; # ssl_certificate cert.pem; # ssl_certificate_key cert.key; # ssl_session_cache shared:SSL:1m; # ssl_session_timeout 5m; # ssl_ciphers HIGH:!aNULL:!MD5; # ssl_prefer_server_ciphers on; # location / { # root html; # index index.html index.htm; # } #} }- 1
- 2
- 3
- 4
- 5
- 6
- 7
- 8
- 9
- 10
- 11
- 12
- 13
- 14
- 15
- 16
- 17
- 18
- 19
- 20
- 21
- 22
- 23
- 24
- 25
- 26
- 27
- 28
- 29
- 30
- 31
- 32
- 33
- 34
- 35
- 36
- 37
- 38
- 39
- 40
- 41
- 42
- 43
- 44
- 45
- 46
- 47
- 48
- 49
- 50
- 51
- 52
- 53
- 54
- 55
- 56
- 57
- 58
- 59
- 60
- 61
- 62
- 63
- 64
- 65
- 66
- 67
- 68
- 69
- 70
- 71
- 72
- 73
- 74
- 75
- 76
- 77
- 78
- 79
- 80
- 81
- 82
- 83
- 84
- 85
- 86
- 87
- 88
- 89
- 90
- 91
- 92
- 93
- 94
- 95
- 96
- 97
- 98
- 99
- 100
- 101
- 102
- 103
- 104
- 105
- 106
- 107
- 108
- 109
- 110
- 111
- 112
- 113
- 114
- 115
- 116
- 117
- 118
- 119
- 120
- 121
- 122
- 123
- 124
- 125
- 126
- 127
- 128
- 129
- 130
- 131
- 132
- 133
- 134
- 135
- 136
- 137
常用配置:

当我们写好端口、域名、部署位置 后要重启一下nginx
# 普通账户使用 sudo usr/local/nginx/sbin/nginx -s reload sudo 你的nginx安装的路径/sbin/nginx -s reload # root账户使用 usr/local/nginx/sbin/nginx -s reload # 执行ps -ef|grep nginx,查看启动情况 ps -ef|grep nginx- 1
- 2
- 3
- 4
- 5
- 6
- 7
- 8
- 9
发布完成一🔈一一🔉🔉一一一🔊🔊🔊
捎带手写一下Nginx的启动、停止和重启↓↓↓↓↓↓↓↓↓↓↓↓↓↓↓↓往下看(づ ̄ 3 ̄)づ
3、Nginx的启动、停止和重启
①启动
启动代码格式:nginx安装目录地址 -c nginx配置文件地址 例如:
[root@LinuxServer sbin]# /usr/local/nginx/sbin/nginx -c /usr/local/nginx/conf/nginx.conf- 1
②停止
Nginx的停止有三种方式:
一🎆🎆🎆 从容停止 🎆🎆🎆一
查看进程号:[root@LinuxServer ~]# ps -ef|grep nginx

杀死进程:[root@LinuxServer ~]# kill -QUIT 2072

一🎆🎆🎆 快速停止 🎆🎆🎆一
查看进程号:[root@LinuxServer ~]# ps -ef|grep nginx

杀死进程:[root@LinuxServer ~]# kill -TERM 2132 或 [root@LinuxServer ~]# kill -INT 2132

一🎆🎆🎆 强制停止 🎆🎆🎆一
[root@LinuxServer ~]# pkill -9 nginx③重启
Ⅰ、验证nginx配置文件是否正确
————方法 ⅰ :进入nginx安装目录sbin下,输入命令./nginx -t 看到如下显示nginx.conf syntax is ok nginx.conf test is successful 说明配置文件正确!

————方法 ⅱ :在启动命令-c前加-t

Ⅱ、重启Nginx服务——☜(゚ヮ゚☜)☜(゚ヮ゚☜)☜(゚ヮ゚☜)☜(゚ヮ゚☜)☜(゚ヮ゚☜)☜(゚ヮ゚☜)
————方法 ⅰ :进入nginx可执行目录sbin下,输入命令./nginx -s reload 即可

————方法 ⅱ :查找当前nginx进程号,然后输入命令:kill -HUP 进程号 实现重启nginx服务

4、发布失败api强制写入方法
如果发布失败了 可以试一试api强制写入方法 细节一手conf——o( ̄▽ ̄)d
server { listen 80 ssl; server_name xxxx.conbig.cn; root /usr/local/nginx/html; index index.html index.htm; ssl_certificate 1234567_xxxx.conbig.cn.pem; ssl_certificate_key 1234567_xxxx.conbig.cn.key; ssl_session_cache shared:SSL:1m; ssl_session_timeout 5m; ssl_ciphers HIGH:!aNULL:!MD5; ssl_prefer_server_ciphers on; location / { proxy_set_header Host $HOST; proxy_connect_timeout 6000; proxy_read_timeout 6000; } location /monitoringSystem { proxy_pass http://00.111.222.123:1234/monitoringSystem; } }- 1
- 2
- 3
- 4
- 5
- 6
- 7
- 8
- 9
- 10
- 11
- 12
- 13
- 14
- 15
- 16
- 17
- 18
- 19
- 20
- 21
- 22
- 23
- 24
- 25
- 26
- 27
- 28
5、项目打包后部署到服务器 请求不到后台接口解决方法
如果发生本地开发没问题能正常请求到接口,部署后页面也能展示出来就是接口的数据请求不到 network

对比了本地的页面

可以发现是remote address出了问题,如果你也是 就往下看吧一(づ ̄ 3 ̄)づ
经过查询得知:Remote Address代表的是当前HTTP请求的远程地址,即HTTP请求的源地址。
我的猜想是proxy代理在本地环境下用的是localhost即127.0.0.1进行转发代理的,而部署到服务器后相当于换了个环境( ip地 址和端口已经改变 ),此时proxy代理就出错了。
解决方法: 地址错误了,那就换到正确的地址。
即:本地开发环境代理时用127.0.0.1,生产环境用服务器的ip 在Vue中要实现这个效果就需要用到全局环境变量了。
然后proxy代理和axios请求那也要改一下(请忽略我写的 “/monitoringSystem” )

再更改页面中的data()和钩子函数地址链接方式一( ̄︶ ̄*))( ̄︶ ̄*))( ̄︶ ̄*))okk
-
相关阅读:
计算机网络 - 链路层
向毕业妥协系列之深度学习笔记(三)DL的实用层面(上)
ghidra
[Ynoi2017] 由乃的 OJ 水题LCT
.NET餐厅管理系统user数据帮助类查找用户姓名、判断用户电话号码是已否存在、获取用户信息、获取管理员权限、注册
秒杀系统设计
Matlab绘图(2)通过代码进行局部放大绘图、多文件绘图
家政服务行业怎么做微信小程序开发
vue3封装弹窗组件实现父子双向绑定
2023年9月上旬大模型新动向集锦
- 原文地址:https://blog.csdn.net/Start_Simple/article/details/126056577
