-
Spring——以IOC、AOP为核心的轻量级框架
目录
2.3.1ApplicationContext 接口(容器)
2.5 基于注解的 DI(Dependency Injection)
2.5.4 byType自动注入@Autowired(掌握)
2.5.5 byName自动注入@Qualifier(了解)
3.6.7AspectJ框架切换JDK动态代理和CGLib动态代理
4.6 MyBatis框架与Hibernate框架使用的事务管理器(面试点)
4.6.2 Spring+ Hibernate的事务管理器配置
01 Spring概述
1.1Spring框架是什么
Spring 是于 2003 年兴起的一个轻量级的 Java 开发框架,它是为了解决企业应用开发的复杂性而创建的。spring的核心是控制反转(IOC)和面向切面编程(AOP)。Spring 是可以在 Java SE/EE 中使用的轻量级开源框架。
Spring 的主要作用就是为代码“解耦”,降低代码间的耦合度。就是让对象和对象(模块和模块)之间关系不是使用代码关联,而是通过配置来说明。即在 Spring 中说明对象(模块)的关系。
Spring 根据代码的功能特点,使用 Ioc 降低业务对象之间耦合度。IoC 使得主业务在相互调用过程中,不用再自己维护关系了,即不用再自己创建要使用的对象了。而是由 Spring 容器统一管理,自动“注入”,注入即赋值。 而 AOP 使得系统级服务得到了最大复用,且不用再由程序员手工将系统级服务“混杂”到主业务逻辑中了,而是由 Spring 容器统一完成“织入”。
1.2Spring官网
Spring官网有Spring家族技术的介绍,有相应框架的jar 包和文档,还有源码文件,必要的时候可以参考。
1.3Spring的优点
- Spring 是一个框架,是一个半成品的软件。
- 有 20 个模块组成。
- Spring 是存储对象的容器,不装文本和数字,装的是对象,用来管理对象。
1.3.1轻量
- Spring 框架使用的 jar 都比较小,一般在 1M 以下或者几百 kb。
- Spring 核心功能的所需的 jar 总共在 3M 左右。
- Spring 框架运行占用的资源少,运行效率高。不依赖其他 jar。
1.3.2 针对接口编程,解耦合
- Spring 提供了 Ioc 控制反转,由容器管理对象,对象的依赖关系。
- 原来在程序代码中的对象创建方式,现在由容器完成。
- 对象之间的依赖解耦合。
1.3.3 AOP编程的支持
将公共的、通用的、重复的代码单独开发,在需要的时候反织回去。底层的原理是动态代理。
通过 Spring 提供的 AOP 功能,方便进行面向切面的编程,许多不容易用传统 OOP 实现的功能可以通过 AOP 轻松应付,在 Spring 中,开发人员可以从繁杂的事务管理代码中解脱出来,通过声明式方式灵活地进行事务的管理,提高开发效率和质量。
1.3.4方便集成各种优秀框架
Spring 不排斥各种优秀的开源框架,相反 Spring 可以降低各种框架的使用难度,Spring 提供了对各种优秀框架(如 Struts2,Hibernate、MyBatis)等的直接支持。简化框架的使用。
Spring 像插线板一样,其他框架是插头,可以容易的组合到一起。需要使用哪个框架,就把这个插头放入插线板。不需要可以轻易的移除。
1.4Spring体系结构
![[外链图片转存失败,源站可能有防盗链机制,建议将图片保存下来直接上传(img-Tsma86UO-1658153514963)(../../../../Pictures/Spring/wps229.jpg)]](https://1000bd.com/contentImg/2022/08/01/063056835.jpeg)
Spring 由 20 多个模块组成,它们可以分为
- 数据访问/集成(Data Access/Integration)
- Web
- 面向切面编程(AOP, Aspects)
- 提供JVM 的代理(Instrumentation)
- 消息发送(Messaging)
- 核心容器(Core Container)
- 测试(Test)
02 IoC 控制反转
- 控制反转IoC(Inversion of Control) 是一个概念,是一种思想。
- 指将传统上由程序代码直接操控的对象调用权交给容器,通过容器来实现对象的装配和管理。
- 控制反转就是对对象控制权的转移,从程序代码本身反转到了外部容器。通过容器实现对象的创建,属性赋值, 依赖的管理。
- IoC 是一个概念,是一种思想,其实现方式多种多样。当前比较流行的实现方式是依赖注入。应用广泛。
依赖:
classA 类中含有 classB 的实例,在 classA 中调用 classB 的方法完成功能,即 classA对 classB 有依赖。
Ioc 的实现:
依赖注入:DI(Dependency Injection),程序代码不做定位查询,这些工作由容器自行完成。
-
依赖注入 DI 是指程序运行过程中,若需要调用另一个对象协助时,无须在代码中创建被调用者,而是依赖于外部容器,由外部容器创建后传递给程序。
-
Spring 的依赖注入对调用者与被调用者几乎没有任何要求,完全支持对象之间依赖关系的管理。
-
Spring 框架使用依赖注入(DI)实现 IoC。
-
Spring 容器是一个超级大工厂,负责创建、管理所有的 Java 对象,这些 Java 对象被称为 Bean。
-
Spring 容器管理着容器中 Bean 之间的依赖关系,Spring 使用“依赖注入”的方式来管理 Bean 之间的依赖关系。
-
使用 IoC 实现对象之间的解耦和。
2.1 基于 XML 的 DI
2.1.1 开发工具准备
开发工具: idea2020.1
依赖管理: maven3.6.3
jdk: 1.8及以上
2.1.2 设置maven的本地仓库
![[外链图片转存失败,源站可能有防盗链机制,建议将图片保存下来直接上传(img-SEFAVCp8-1658153514964)(../../../../Pictures/Spring/wps230.png)]](https://1000bd.com/contentImg/2022/07/21/155502761.png)
2.2 Spring的第一个程序
实现步骤如下:
1.1.1 创建maven项目
![[外链图片转存失败,源站可能有防盗链机制,建议将图片保存下来直接上传(img-dchUQ8hU-1658153514964)(../../../../Pictures/Spring/wps231.jpg)]](https://1000bd.com/contentImg/2022/07/21/155503047.JPEG)
2.2.1 引入maven依赖pom.xml
- <properties>
- <project.build.sourceEncoding>UTF-8project.build.sourceEncoding>
- <maven.compiler.source>1.8maven.compiler.source>
- <maven.compiler.target>1.8maven.compiler.target>
- properties>
- <dependencies>
- <dependency>
- <groupId>junitgroupId>
- <artifactId>junitartifactId>
- <version>4.11version>
- <scope>testscope>
- dependency>
- <dependency>
- <groupId>org.springframeworkgroupId>
- <artifactId>spring-contextartifactId>
- <version>5.2.5.RELEASEversion>
- dependency>
- dependencies>
2.2.2定义实体类
- public class Student {
- private String name;
- private int age;
- //无参构造方法是为spring提供创建对象
- public Student() {
- System.**out**.println("我是学生类的无参构造方法");
- }
- //setXXX方法是为spring提供进行赋值操作的
- public void setName(String name) {
- this.name = name;
- }
- public void setAge(int age) {
- this.age = age;
- }
- @Override
- public String toString() {
- return "Student{" +
- "name='" + name + '\'' +
- ", age=" + age +
- '}';
- }
- }
2.2.3 创建Spring的配置文件
在 src/main/resources/目录现创建一个xml 文件,文件名可以随意,但 Spring 建议的名称为 applicationContext.xml。
spring 配置中需要加入约束文件才能正常使用,约束文件是 xsd 扩展名。
![[外链图片转存失败,源站可能有防盗链机制,建议将图片保存下来直接上传(img-4BkHVsDU-1658153514965)(../../../../Pictures/Spring/wps232.jpg)]](https://1000bd.com/contentImg/2022/07/21/155503281.JPEG)
:用于定义一个实例对象。一个实例对应一个 bean 元素。
id:该属性是 Bean 实例的唯一标识,程序通过 id 属性访问 Bean,Bean 与 Bean 间的依赖关系也是通过 id 属性关联的。
class:指定该Bean所属的类,注意这里只能是类,不能是接口。
2.2.4 创建测试类
![[外链图片转存失败,源站可能有防盗链机制,建议将图片保存下来直接上传(img-EaA30XLq-1658153514965)(../../../../Pictures/Spring/wps233.jpg)]](https://1000bd.com/contentImg/2022/07/21/155503549.JPEG)
2.2.5 使用Spring创建非自定义的类
spring 配置文件加入 java.util.Date 定义:
id="myDate" class="java.util.Date" /> MyTest 测试类中:
调用 getBean(“myDate”); 获取日期类对象。
2.3 容器接口和实现类
2.3.1ApplicationContext 接口(容器)
![[外链图片转存失败,源站可能有防盗链机制,建议将图片保存下来直接上传(img-IQq8IqcJ-1658153514965)(../../../../Pictures/Spring/wps234.png)]](https://1000bd.com/contentImg/2022/07/21/155503714.png)
ApplicationContext 用于加载 Spring 的配置文件,在程序中充当“容器”的角色。其实现类有两个。
若 Spring 配置文件存放在项目的类路径下,则使用 ClassPathXmlApplicationContext 实现类进行加载。
![[外链图片转存失败,源站可能有防盗链机制,建议将图片保存下来直接上传(img-ShFRzYJd-1658153514966)(../../../../Pictures/Spring/wps235.jpg)]](https://1000bd.com/contentImg/2022/07/21/155503992.JPEG)
(2)ApplicationContext容器中对象的装配时机
ApplicationContext 容器,会在容器对象初始化时,将其中的所有对象一次性全部装配好。以后代码中若要使用到这些对象,只需从内存中直接获取即可。执行效率较高。但占用内存。Spring初始化对象时要使用无参的构造方法,切记保证类中有无参构造方法。
![[外链图片转存失败,源站可能有防盗链机制,建议将图片保存下来直接上传(img-QVckImJv-1658153514966)(../../../../Pictures/Spring/wps236.jpg)]](https://1000bd.com/contentImg/2022/07/21/155504282.JPEG)
2.4 注入分类
- bean 实例在调用无参构造器创建对象后,就要对 bean 对象的属性进行初始化。
- 初始化是由容器自动完成的,称为注入。
- 根据注入方式的不同,常用的有两类:set 注入、构造注入。
2.4.1 set 注入(掌握)
- set 注入也叫设值注入
- 是指通过 setter 方法传入被调用者的实例。
- 这种注入方式简单、直观,因而在 Spring 的依赖注入中大量使用。
![[外链图片转存失败,源站可能有防盗链机制,建议将图片保存下来直接上传(img-EmpxKArM-1658325726818)(../../../../Pictures/Spring/wps237.jpg)]](https://1000bd.com/contentImg/2022/07/21/155504525.JPEG)
测试类:
![[外链图片转存失败,源站可能有防盗链机制,建议将图片保存下来直接上传(img-FTDEV0ye-1658325726818)(../../../../Pictures/Spring/wps238.jpg)]](https://1000bd.com/contentImg/2022/07/21/155504784.JPEG)
还可以创建系统类的对象并赋值。
![[外链图片转存失败,源站可能有防盗链机制,建议将图片保存下来直接上传(img-sFQg5Sjm-1658325726819)(../../../../Pictures/Spring/wps239.jpg)]](https://1000bd.com/contentImg/2022/07/21/155505019.JPEG)
- 当指定 bean 的某属性值为另一 bean 的实例时,通过 ref 指定它们间的引用关系。
- ref 的值必须为某 bean 的 id 值。
![[外链图片转存失败,源站可能有防盗链机制,建议将图片保存下来直接上传(img-irJyFJVf-1658325726819)(../../../../Pictures/Spring/wps240.jpg)]](https://1000bd.com/contentImg/2022/07/21/155505285.JPEG)
对于其它 Bean 对象的引用,使用标签的 ref 属性。
测试方法:
![[外链图片转存失败,源站可能有防盗链机制,建议将图片保存下来直接上传(img-2Zu5u0bO-1658325726819)(../../../../Pictures/Spring/wps241.jpg)]](https://1000bd.com/contentImg/2022/07/21/155505557.JPEG)
2.4.2 构造方法注入
- 构造注入是指,在构造调用者实例的同时,完成被调用者的实例化。
- 即,使用构造器设置依赖关系。
- 在实体类中必须提供相应参数的构造方法。
constructor-arg:通过构造函数注入
property:通过setxx方法注入。标签中用于指定参数的属性有:
- Ø name:指定参数名称。
- Ø index:指明该参数对应着构造器的第几个参数,从 0 开始。不过,该属性不要也行, 但要注意,若参数类型相同,或之间有包含关系,则需要保证赋值顺序要与构造器中的参数顺序一致。
- //提供有参的构造方法为进行注入值
- public Student(String myname, int myage) {
- this.name = myname;
- this.age = myage;
- }
- public Student(String name, int age, School school) {
- this.name = name;
- this.age = age;
- this.school = school;
- }
applicationContext.xml文件中:
- <bean id="school" class="com.bjpowernode.pojo.s03.School">
- <constructor-arg name="name" value="清华大学">constructor-arg>
- <constructor-arg name="address" value="北京海淀区">constructor-arg>
- bean>
- <bean id="stu" class="com.bjpowernode.pojo.s03.Student">
- <constructor-arg name="age" value="22">constructor-arg>
- <constructor-arg name="name" value="张三">constructor-arg>
- <constructor-arg name="school" ref="school">constructor-arg>
- bean>
测试类:
![[外链图片转存失败,源站可能有防盗链机制,建议将图片保存下来直接上传(img-qozbuYkP-1658325726819)(../../../../Pictures/Spring/wps242.jpg)]](https://1000bd.com/contentImg/2022/07/21/155505731.JPEG)
- <bean id="stuindex" class="com.bjpowernode.pojo.s03.Student">
- <constructor-arg index="1" value="22">constructor-arg>
- <constructor-arg index="0" value="李四">constructor-arg>
- <constructor-arg index="2" ref="school">constructor-arg>
- bean>
- <bean id="stuno" class="com.bjpowernode.pojo.s03.Student">
- <constructor-arg value="李四">constructor-arg>
- <constructor-arg value="22">constructor-arg>
- <constructor-arg ref="school">constructor-arg>
- bean>
注意:此种方式的注入一定要按类中构造方法的参数的顺序来进行注入。
![[外链图片转存失败,源站可能有防盗链机制,建议将图片保存下来直接上传(img-nhQ8v0Wr-1658325726820)(../../../../Pictures/Spring/wps243.jpg)]](https://1000bd.com/contentImg/2022/07/21/155506079.JPEG)
2.4.3引用类型属性自动注入
- 对于引用类型属性的注入,也可不在配置文件中显示的注入。
- 可以通过为标签设置 autowire 属性值,为引用类型属性进行隐式自动注入(默认是不自动注入引用类型属性)。
根据自动注入判断标准的不同,可以分为两种:
- byName:根据名称自动注入
- byType: 根据类型自动注入
- 当配置文件中被调用者 bean 的 id 值与代码中调用者 bean 类的属性名相同时,
可使用byName 方式,让容器自动将被调用者 bean 注入给调用者 bean。 - 容器是通过调用者的 bean类的属性名与配置文件的被调用者 bean 的 id 进行比较而实现自动注入的。
![[外链图片转存失败,源站可能有防盗链机制,建议将图片保存下来直接上传(img-FaFuPgKj-1658325726820)(../../../../Pictures/Spring/wps244.jpg)]](https://1000bd.com/contentImg/2022/07/21/155506292.JPEG)
![[外链图片转存失败,源站可能有防盗链机制,建议将图片保存下来直接上传(img-SWZ4wisy-1658325726820)(../../../../Pictures/Spring/wps245.jpg)]](https://1000bd.com/contentImg/2022/07/21/155506512.JPEG)
-
配置文件中被调用者 bean 的 class 属性指定的类,
要与代码中调用者 bean 类的某引用类型属性类型同源。 -
什么是同源类型:
a.被注入的类型(Student中的school)与注入的类型是完全相同的类型
b.被注入的类型(Student中的school父)与注入的类型(子)是父子类
c.被注入的类型(Student中的school接口)与注入的类型(实现类)是接口和实现类的类型注意:在有父子类的情况下,使用按类型注入,就意味着有多个可注入的对象.此时按照名称进行二次筛选,选中与被注入对象相同名称的对象进行注入. -
但这样的同源的被调用 bean 只能有一个。多于一个,容器就不知该匹配哪一个了。
![[外链图片转存失败,源站可能有防盗链机制,建议将图片保存下来直接上传(img-Pruc8XuJ-1658325726821)(../../../../Pictures/Spring/wps246.jpg)]](https://1000bd.com/contentImg/2022/07/21/155506709.JPEG)
![[外链图片转存失败,源站可能有防盗链机制,建议将图片保存下来直接上传(img-huz2qyCx-1658325726821)(../../../../Pictures/Spring/wps247.jpg)]](https://1000bd.com/contentImg/2022/07/21/155506878.JPEG)
![[外链图片转存失败,源站可能有防盗链机制,建议将图片保存下来直接上传(img-6kjAH52u-1658325726821)(../../../../Pictures/Spring/wps248.jpg)]](https://1000bd.com/contentImg/2022/07/21/155507033.JPEG)
2.4.4 Spring创建对象的作用域
- Spring容器创建的对象默认的作用域是单例模式的.
- 单例模式的目的就是无论访问多少次,得到的都是同一个对象.
- 例如各种开发工具基本上都是单例的存在.但画图的工具是非单例的模式.
我们可以通过创建系统时间来验证Spring创建对象的默认单例模式.
- <bean id="mydate" class="java.util.Date" scope="singleton"> ===>单例模式
- bean>
可以设置为非单例的方式:
- <bean id="mydate" class="java.util.Date" scope="prototype">===>非单例模式
- bean>
测试代码:
- @Test public void testSpringStudent()throws Exception{
- //创建容器对象并启动.自动完成容器中所有对象的创建,默认调用无参的构造方法.
- //如果没有提供无参的构造方法,则容器炸掉
- ApplicationContext ac = new ClassPathXmlApplicationContext("s04/applicationContext.xml");
- Date date1 = (Date) ac.getBean("mydate");
- System.out.println("第一次取出的对象:"+date1);
- System.out.println("********************");
- Thread.sleep(3000);
- Date date2 = (Date) ac.getBean("mydate");
- System.out.println("第二次取出的对象:"+date2);
- System.out.println(date1==date2);
- }
运行结果:
![[外链图片转存失败,源站可能有防盗链机制,建议将图片保存下来直接上传(img-ZFubGv8K-1658325726822)(../../../../Pictures/Spring/wps249.jpg)]](https://1000bd.com/contentImg/2022/07/21/155507260.JPEG)
2.4.5项目案例
案例:
使用三层架构完成用户数据的增加操作.由Spring容器负责对象的创建与依赖注入.
分析:
在分层开发中,Spring管理controller,service,dao各层的实现类对象的创建及依赖管理。
创建对象的思路分析:
![[外链图片转存失败,源站可能有防盗链机制,建议将图片保存下来直接上传(img-1c0814t6-1658325726822)(../../../../Pictures/Spring/wps250.jpg)]](https://1000bd.com/contentImg/2022/07/21/155507556.JPEG)
项目结构:
使用三层架构进行用户的插入操作.界面层,业务逻辑层,数据访问层(模拟).
Spring会接管三层架构中哪些对象的创建?界面层的对象,业务逻辑层的对象,数据访问层的对象.
非Spring接管下的三层项目构建:
- 实体类com.bjpowernode.pojo
- Users
- 数据访问层com.bjpowernode.dao
- UsersMapper.java(接口)
- UsersMapperImpl.java(实现类)
- 业务逻辑层com.bjpowernode.service
- UsersService.java(接口)
- UsersServiceImpl.java(实现类 )
- 界面层com.bjpowernode.controller
- UsersController.java(Servlet)—>创建一个普通类担当servlet的功能
代码实现:
2.5 基于注解的 DI(Dependency Injection)
- 依赖注入:DI(Dependency Injection),DI 使用注解将不再需要在 Spring 配置文件中声明bean 实例。
- Spring 中使用注解, 需要在原有 Spring 运行环境基础上再做一些改变。
- 需要在 Spring 配置文件中配置组件扫描器,用于在指定的基本包中扫描注解。
![[外链图片转存失败,源站可能有防盗链机制,建议将图片保存下来直接上传(img-2l7pdvX2-1658325726822)(../../../../Pictures/Spring/wps252.jpg)]](https://1000bd.com/contentImg/2022/07/21/155508108.JPEG)
指定多个包的三种方式:
- 使用多个 context:component-scan 指定不同的包路径
![[外链图片转存失败,源站可能有防盗链机制,建议将图片保存下来直接上传(img-5ItuesZN-1658325726823)(../../../../Pictures/Spring/wps253.jpg)]](https://1000bd.com/contentImg/2022/07/21/155508278.JPEG)
- 指定 base-package 的值使用分隔符
分隔符可以使用逗号(,)或分号(;),还可以使用空格,不建议使用空格。
使用逗号分隔:
![[外链图片转存失败,源站可能有防盗链机制,建议将图片保存下来直接上传(img-flfnDPgI-1658325726823)(../../../../Pictures/Spring/wps254.jpg)]](https://1000bd.com/contentImg/2022/07/21/155508497.JPEG)
使用分号分隔:
![[外链图片转存失败,源站可能有防盗链机制,建议将图片保存下来直接上传(img-GzObLKQZ-1658325726823)(../../../../Pictures/Spring/wps255.jpg)]](https://1000bd.com/contentImg/2022/07/21/155508731.JPEG)
- base-package 是指定到父包名
base-package 的值表是基本包,容器启动会扫描包及其子包中的注解,当然也会扫描到子包下级的子包。所以 base-package 可以指定一个父包就可以。
![[外链图片转存失败,源站可能有防盗链机制,建议将图片保存下来直接上传(img-dy2hBP1M-1658325726824)(../../../../Pictures/Spring/wps256.jpg)]](https://1000bd.com/contentImg/2022/07/21/155508966.JPEG)
或者最顶级的父包
![[外链图片转存失败,源站可能有防盗链机制,建议将图片保存下来直接上传(img-FenLitci-1658325726824)(../../../../Pictures/Spring/wps257.jpg)]](https://1000bd.com/contentImg/2022/07/21/155509176.JPEG)
但不建议使用顶级的父包,扫描的路径比较多,导致容器启动时间变慢。指定到目标包和合适的。也就是注解所在包全路径。例如注解的类在 com.bjpowernode.beans 包中。
![[外链图片转存失败,源站可能有防盗链机制,建议将图片保存下来直接上传(img-G874vOdL-1658325726824)(../../../../Pictures/Spring/wps258.jpg)]](https://1000bd.com/contentImg/2022/07/21/155509405.JPEG)
2.5.1常用注解
- @Component :创建所有对象都可以使用此注解,除了控制器,业务逻辑层,数据访问层的对象
- @Controller:创建控制器层的对象,此对象可以接收用户请求,返回处理结果
- @Service:创建业务逻辑层的对象,此对象可施事务控制,向上给控制器返回数据,向下调用数据访问层
- @Repository:创建数据访问层的对象 ,对数据库中的数据进行增删改查操作
- @Value:给简单类型赋值
- @Autowired:给引用类型按类型注入
- @Qualifier:给引用类型按名称注入
2.5.2定义Bean的注解@Component(掌握)
需要在类上使用注解@Component,该注解的 value 属性用于指定该 bean 的 id 值。
![[外链图片转存失败,源站可能有防盗链机制,建议将图片保存下来直接上传(img-nW84YIL6-1658325726824)(../../../../Pictures/Spring/wps259.jpg)]](https://1000bd.com/contentImg/2022/07/21/155509561.JPEG)
- @Component 都可以创建对象,但另外三个注解还有其他的含义,
- @Service 创建业务层对象,业务层对象可以加入事务功能,
- @Controller 注解创建的对象可以作为处理器接收用户的请求。
- @Repository,@Service,@Controller 是对@Component 注解的细化,标注不同层的对象。
即持久层对象,业务层对象,控制层对象。 - @Component 不指定 value 属性,bean 的 id 是类名的首字母小写。


2.5.3 简单类型属性注入@Value(掌握)
需要在属性上使用注解@Value,该注解的 value 属性用于指定要注入的值。
使用该注解完成属性注入时,类中无需 setter。当然,若属性有 setter,则也可将其加到 setter 上。
![[外链图片转存失败,源站可能有防盗链机制,建议将图片保存下来直接上传(img-Gmz3ugIF-1658325726825)(../../../../Pictures/Spring/wps262.jpg)]](https://1000bd.com/contentImg/2022/07/21/155510174.JPEG)
2.5.4 byType自动注入@Autowired(掌握)
- 需要在引用属性上使用注解@Autowired,该注解默认使用按类型自动装配 Bean 的方式。
- 使用该注解完成属性注入时,类中无需 setter。
- 当然,若属性有 setter,则也可将其加到 setter 上。
![[外链图片转存失败,源站可能有防盗链机制,建议将图片保存下来直接上传(img-9EgtPpsP-1658325726825)(../../../../Pictures/Spring/wps263.jpg)]](https://1000bd.com/contentImg/2022/07/21/155510558.JPEG)
@Autowired 还有一个属性 required,默认值为 true,表示当匹配失败后,会终止程序运行。
若将其值设置为 false,则匹配失败,将被忽略,未匹配的属性值为 null。
注意:如果可注入的类型多于一个,则按名称进行二次匹配.如果有匹配到则注入,如果没有匹配到,则报错。
![[外链图片转存失败,源站可能有防盗链机制,建议将图片保存下来直接上传(img-DNk0Nrxk-1658325726826)(../../../../Pictures/Spring/wps264.jpg)]](https://1000bd.com/contentImg/2022/07/21/155510792.JPEG)
2.5.5 byName自动注入@Qualifier(了解)
- 需要在引用属性上联合使用注解@Autowired 与@Qualifier。
- @Qualifier 的 value 属性用于指定要匹配的 Bean 的 id 值。
- 类中无需 set 方法,也可加到 set 方法上。
- 当有相同类型的多个实现类时,使用@qualifier就可以确定是哪个实现类了。
![[外链图片转存失败,源站可能有防盗链机制,建议将图片保存下来直接上传(img-2aAvcS8d-1658325726826)(../../../../Pictures/Spring/wps265.jpg)]](https://1000bd.com/contentImg/2022/07/21/155510956.JPEG)
如果可注入的类型多于一个,则按名称进行匹配.如果有匹配到则注入,如果没有匹配到,则报错。
总结:
依赖注入的注解
简单类型(8种基本类型+String)的注入
@Value:用来给简单类型注入值引用类型的注入
@Autowired:使用类型注入值,从整个Bean工厂中搜索同源类型的对象进行注入.
同源类型也可注入.
什么是同源类型:
a.被注入的类型(Student中的school)与注入的类型是完全相同的类型
b.被注入的类型(Student中的school父)与注入的类型(子)是父子类
c.被注入的类型(Student中的school接口)与注入的类型(实现类)是接口和实现类的类型注意:在有父子类的情况下,使用按类型注入,就意味着有多个可注入的对象.此时按照名称进行二次筛选,选中与被注入对象相同名称的对象进行注入.
@Autowired
@Qualifier(“名称”):使用名称注入值,从整个Bean工厂中搜索相同名称的对象进行注入.注意:如果有父子类的情况下,直接按名称进行注入值.
2.5.6 基于注解三层架构的项目改造
在每个类上添加创建对象的注解@Controller,@Service,@Repository,
每个需要依赖注入的成员变量使用按类型@Autowired依赖注入即可.- UsersMapperImpl.java
- @Repository
- public class UsersMapperImpl implements UsersMapper {
- @Override
- public int insert(Users users) {
- System.out.println(users.getName()+"增加成功!");
- return 1;
- }
- }
- UsersServiceImpl.java
- @Service
- public class UsersServiceImpl implements UsersService {
- //切记切记:一定会有数据访问层的对象,调用它完成底层数据库的操作
- @Autowired
- UsersMapper usersMapper;//= new UsersMapperImpl();
- @Override
- public int insert(Users u) {
- return usersMapper.insert(u);
- }
- }
- UsersController.java
- @Controller
- public class UsersController {
- //切记切记:一定会有业务逻辑层的对象,指向实现类
- @Autowired
- UsersService usersService;// = new UsersServiceImpl();
- //完成控制器中的增加用户的方法
- public int insert(Users users){
- return usersService.insert(users);
- }
- }
2.5.7 注解@resource自动注入(了解)
- Spring 提供了对jdk 中@Resource 注解的支持。
- @Resource 注解既可以按名称匹配Bean, 也可以按类型匹配 Bean。
- 默认是按名称注入。
- 使用该注解,要求 JDK 必须是 6 及以上版本。
- @Resource 可在属性上,也可在 set 方法上。
@Resource 注解若不带任何参数,采用默认按名称的方式注入,按名称不能注入 bean, 则会按照类型进行 Bean 的匹配注入。
![[外链图片转存失败,源站可能有防盗链机制,建议将图片保存下来直接上传(img-pPm6DGjM-1658325726826)(../../../../Pictures/Spring/wps266.jpg)]](https://1000bd.com/contentImg/2022/07/21/155511137.JPEG)
@Resource 注解指定其 name 属性,则 name 的值即为按照名称进行匹配的 Bean 的 id。
![[外链图片转存失败,源站可能有防盗链机制,建议将图片保存下来直接上传(img-gfj8KFME-1658325726827)(../../../../Pictures/Spring/wps267.jpg)]](https://1000bd.com/contentImg/2022/07/21/155511391.JPEG)
2.6 注解与XML的对比
注解优点:
- 方便
- 直观
- 高效(代码少,没有配置文件的书写那么复杂)
注解弊端:
- 以硬编码的方式写入到 Java 代码中,修改是需要重新编译代码的
XML 方式优点:
- 配置和代码是分离的
- 在 xml 中做修改,无需编译代码,只需重启服务器即可将新的配置加载。
XML 方式缺点:
- 编写麻烦,效率低,大型项目过于复杂
2.7 为应用指定多个Spring配置文件
在实际应用里,随着应用规模的增加,系统中 Bean 数量也大量增加,导致配置文件变得非常庞大、臃肿。为了避免这种情况的产生,提高配置文件的可读性与可维护性,可以将
Spring 配置文件分解成多个配置文件。
2.7.1 拆分策略
常见的拆分策略有按模块拆分和按层拆分,当然在实际工作中,会有更细的拆分方法。
- 按模块拆分,例如用户模块
applicationContext_user.xml,
applicationContext_book.xml,
每个xml文件中都包含相应的xxxController,xxxService,xxxDao的对象的创建。 - 按层拆分,例如拆分成
applicationContext_controller.xml,
applicationContext_service.xml,
applicationContext_dao.xml等,每个xml文件中有相关对象的创建,例如:applicationContext_controller.xml文件中包含userController,bookController等对象的创建。![- [外链图片转存失败,源站可能有防盗链机制,建议将图片保存下来直接上传(img-COyFATGV-1658325726827)(../../../../Pictures/Spring/wps268.jpg)]](https://1000bd.com/contentImg/2022/07/21/155511588.JPEG)
2.7.2 拆分后整合
可以使用通配符进行整合。但此时要求父配置文件名不能满足所能匹配的格式,否则将出现循环递归包含。就本例而言,父配置文件不能匹配 applicationContext-.xml 的格式,即不能起名为applicationContext-total.xml。
多个配置文件中有一个总文件,总配置文件将各其它子文件通过引入。在 Java
代码中只需要使用总配置文件对容器进行初始化即可。注意:可以使用通配符*进行批量整合。
![[外链图片转存失败,源站可能有防盗链机制,建议将图片保存下来直接上传(img-xkXntu8p-1658325726827)(../../../../Pictures/Spring/wps269.jpg)]](https://1000bd.com/contentImg/2022/07/21/155511840.JPEG)
![[外链图片转存失败,源站可能有防盗链机制,建议将图片保存下来直接上传(img-i0i3uPRE-1658325726828)(../../../../Pictures/Spring/wps270.jpg)]](https://1000bd.com/contentImg/2022/07/21/155512057.JPEG)
03 AOP面向切面编程
3.1 AOP概述
- AOP(Aspect Orient Programming),意为:面向切面编程,可通过运行期动态代理实现程序功能的统一维护的一种技术。
- AOP 是 Spring 框架中的一个重要内容。
- 面向切面编程是从动态角度考虑程序运行过程。
- AOP 底层,就是采用动态代理模式实现的。
- 采用了两种代理:JDK 的动态代理,与 CGLIB的动态代理。
- 利用 AOP 可以对业务逻辑的各个部分进行隔离,从而使得业务逻辑各部分之间的耦合度降低,提高程序的可重用性,同时提高了开发的效率。
何为面向切面编程?
- 面向切面编程,就是将交叉业务逻辑封装成切面,利用 AOP 容器的功能将切面织入到主业务逻辑中。
- 所谓交叉业务逻辑是指,通用的、与主业务逻辑无关的代码,如安全检查、事务、日志、缓存等。
- 若不使用 AOP,则会出现代码纠缠,即交叉业务逻辑与主业务逻辑混合在一起。这样, 会使主业务逻辑变的混杂不清。
- 例如,转账,在真正转账业务逻辑前后,需要权限控制、日志记录、加载事务、结束事务等交叉业务逻辑,而这些业务逻辑与主业务逻辑间并无直接关系。但它们的代码量所占比重能达到总代码量的一半甚至还多。它们的存在,不仅产生了大量的“冗余”代码,还大大干扰了主业务逻辑—转账。
3.2 面向切面编程对有什么好处
1.减少重复;
2.专注业务;
注意:面向切面编程只是面向对象编程的一种补充。用 AOP 减少重复代码,专注业务实现。
![[外链图片转存失败,源站可能有防盗链机制,建议将图片保存下来直接上传(img-vxUDJAok-1658409935533)(../../../../Pictures/Spring/wps271.jpg)]](https://1000bd.com/contentImg/2022/08/01/063056945.jpeg)
3.3 模拟AOP框架实现
主要的目的是进行业务逻辑与切面的解耦合。完全分离业务逻辑和切面。
分为五个版本:
1)版本一:业务和切面紧耦合在一起。
2)版本二:子类代理实现切面功能增强。
3)版本三:使用静态代理分离业务。
4)版本四:使用静态代理分离业务和切面。
5)版本五:使用动态代理优化业务和切面的解耦合。
3.3.1 代码实现版本一
业务和切面紧耦合在一起。
- public class BookServiceImpl {
- public void buy(){
- try {
- //切面部分:事务处理
- System.out.println("事务开启......");
- //主业务实现
- System.out.println("图书购买业务的实现............");
- //切面部分:事务处理
- System.out.println("事务提交......");
- } catch (Exception e) {
- //切面部分:事务处理
- System.out.println("事务回滚..........");
- }
- }
- }
3.3.2 代码实现版本二
子类代理实现切面功能增强
- public class BookServiceImpl {
- public void buy(){
- //实现主业务功能
- System.out.println("图书购买业务的实现...........");
- }
- }
- public class SubBookServiceImpl extends BookServiceImpl {
- //重写父类的业务方法,增强切面(事务)的功能
- @Override
- public void buy() {
- try {
- //切面部分:
- System.out.println("事务开启................");
- super.buy();
- //切面部分:
- System.out.println("事务提交................");
- } catch (Exception e) {
- //切面部分:
- System.out.println("事务回滚................");
- }
- }
- }
3.3.3 代码实现版本三
使用静态代理分离业务
- public interface Service {
- public void buy();
- }
- public class BookServiceImpl implements Service {
- @Override
- public void buy() {
- //只要完成主业务功能就行
- System.out.println("图书购买业务实现...............");
- }
- }
- public class ProductServiceImpl implements Service{
- @Override
- public void buy() {
- System.out.println("商品购买业务实现..............");
- }
- }
- public class Agent implements Service {
- //上接口上灵活,目标对象灵活切换
- public Service target;
- //使用构造方法传入目标对象
- public Agent(Service target){
- this.target = target;
- }
- @Override
- public void buy() {
- try {
- //切面功能实现
- System.out.println("事务开启...........");
- //业务功能实现
- target.buy();
- //切面功能实现
- System.out.println("事务提交");
- } catch (Exception e) {
- System.out.println("事务回滚.............");
- }
- }
- }
- public class MyTest03 {
- @Test
- public void test03(){
- Service service = new Agent(new ProductServiceImpl());
- service.buy();
- }
- }
3.3.4 代码实现版本四
使用静态代理分离业务和切面
- public interface AOP {
- default void before(){}
- default void after(){}
- default void exception(){}
- }
- public class TransAop implements AOP {
- @Override
- public void before() {
- System.out.println("事务开启............");
- }
- @Override
- public void after() {
- System.out.println("事务提交...........");
- }
- @Override
- public void exception() {
- System.out.println("事务回滚...........");
- }
- }
- public class LogAop implements AOP {
- @Override
- public void before() {
- System.out.println("前置日志输出 .............");
- }
- }
- public interface Service {
- public void buy();
- }
- public class BookServiceImpl implements Service {
- @Override
- public void buy() {
- //只要完成主业务功能就行
- System.out.println("图书购买业务实现...............");
- }
- }
- public class ProductServiceImpl implements Service{
- @Override
- public void buy() {
- System.out.println("商品购买业务实现..............");
- }
- }
- public class Agent implements Service{
- public Service target;
- //为了灵活的切换业务,上接口
- public AOP aop;
- //为了灵活的切换切面,上接口
- public Agent(Service target,AOP aop){
- this.target = target;
- this.aop = aop;
- }
- @Override
- public void buy() {
- try {
- //切面功能
- aop.before();
- //哪个实现类来了,调用哪个实现类的功能
- //业务功能
- target.buy();
- //切面功能
- aop.after();
- } catch (Exception e) {
- aop.exception();
- }
- }
- }
- public class MyTest04 {
- @Test
- public void test03(){
- Service agent = new Agent(new ProductServiceImpl(),new LogAop());
- agent.buy();
- }
- }
3.3.5 代码实现版本五
完全的解耦了业务与服务性质的业务(切面),切换功能和方面更灵活。
但是只能是buy()一个功能,如果再代理的功能多了,就不行了,解决方案是动态代理模式。
- public class ProxyFactory {
- //通过方法参数传入目标对象和切面对象
- public static Object getAgent(Service target,AOP aop){
- return Proxy.newProxyInstance(
- //类加载
- target.getClass().getClassLoader(),
- //目标对象实现的所有接口
- target.getClass().getInterfaces(),
- //代理功能实现
- new InvocationHandler() {
- @Override
- public Object invoke(
- //生成的代理对象
- Object proxy,
- //正在被调用的目标方法bug(),show()
- Method method,
- //目标方法的参数
- Object[] args) throws Throwable {
- Object obj=null;
- try {
- aop.before();
- //灵活的进行切面功能切换
- obj = method.invoke(target,args);
- //灵活的进行业务功能切换
- aop.after();
- //灵活的进行切面功能切换
- } catch (Exception e) {
- aop.exception();
- //灵活的进行切面功能切换
- }
- return obj;//目标方法的返回值
- }
- });
- //返回动态代理对象
- }
- }
- public class MyTest05 {
- @Test
- public void test03(){
- //得到代理对象
- Service agent = (Service) ProxyFactory.getAgent(new ProductServiceImpl(),new TransAop());
- Service agent1 = (Service) ProxyFactory.getAgent(agent,new LogAop()); agent1.buy();
- }
- }
![运行结果 :[外链图片转存失败,源站可能有防盗链机制,建议将图片保存下来直接上传(img-p9b3kodx-1658409935534)(../../../../Pictures/Spring/wps272.jpg)]](https://1000bd.com/contentImg/2022/08/01/063057047.jpeg)
这个解决方案很好的解决了业务和切面的紧耦合。可以灵活的进行业务的切换,可以灵活的进行切面的切换。可以嵌套切面的处理。
3.4 Spring的AOP通知类型(了解)
Spring支持AOP的编程,常用的有以下几种:
1)Before通知:在目标方法被调用前调用,涉及接口org.springframework.aop.MethodBeforeAdvice;
2)After通知:在目标方法被调用后调用,涉及接口为org.springframework.aop.AfterReturningAdvice;
3)Throws通知:目标方法抛出异常时调用,涉及接口org.springframework.aop.ThrowsAdvice;
4)Around通知:拦截对目标对象方法调用,涉及接口为org.aopalliance.intercept.MethodInterceptor。案例:
- LogAdvice.java
- public class LogAdvice implements MethodBeforeAdvice {
- private static SimpleDateFormat sf = new SimpleDateFormat("yyyy年MM月dd日");
- @Override
- public void before(Method m, Object[] args, Object arg2)
- throws Throwable {
- System.out.println("\n[系统日志]["+sf.format(new Date())
- +"]"+m.getName()
- +"("+Arrays.toString(args)
- +")");
- }
- }
BookService .java
- public interface BookService {
- public boolean buy(String userName,String bookName,double price);
- public void comment(String userName,String comments);
- }
BookServiceImpl .java
- public class BookServiceImpl implements BookService {
- /* 购买图书 */
- @Override
- public boolean buy(String userName, String bookName, double price) {
- System.out.println("业务buy开始执行");
- System.out.println(userName+"购买了图书"+bookName);
- System.out.println(userName+"增加积分"+(int)(price/10));
- System.out.println("图书购买完毕,向物流下单....");
- System.out.println("业务buy结束");
- return true;
- }
- /* 发表评论 */
- @Override
- public void comment(String userName, String comments) {
- System.out.println("业务comment开始执行");
- System.out.println(userName+"发表图书评论"+comments);
- System.out.println("业务comment执行结束");
- }
- }
applicationContext.xml
- <bean id="bookServiceTarget"class="com.oracle.aop.biz.impl.BookServiceImpl">bean>
- <bean id="logAdvice" class="com.oracle.aop.LogAdvice">bean>
- <bean id="bookService" class="org.springframework.aop.framework.ProxyFactoryBean">
- <property name="proxyInterfaces">
- <value>com.oracle.aop.biz.BookServicevalue>
- property>
- <property name="interceptorNames">
- <list>
- <value>logAdvicevalue>
- list>
- property>
- <property name="target" ref="bookServiceTarget">property>
- bean>
TestAOP.java
- public class TestAOP {
- @Test
- public void testAop(){
- ApplicationContext context= new ClassPathXmlApplicationContext("applicationContext.xml");
- BookService bookservice=(BookService)context.getBean("bookService");
- bookservice.buy("高志水", "CMMi实务手册", 50);
- bookservice.comment("王筝","《盗墓笔记》一点都不恐怖,很好看!");
- }
- }
![运行结果[外链图片转存失败,源站可能有防盗链机制,建议将图片保存下来直接上传(img-wBth6oyD-1658409935535)(../../../../Pictures/Spring/wps273.jpg)]](https://1000bd.com/contentImg/2022/08/01/063057143.jpeg)
Spring的AOP利用一种称为“横切”的技术,剖解开封装的对象内部,并将那些影响了多个类的公共行为封装到一个可重用模块,并将其名为“Aspect”,即方面。所谓“方面”,
简单地说,就是将那些与业务无关,却为业务模块所共同调用的逻辑或责任封装起来,便于减少系统的重复代码,降低模块间的耦合度,并有利于未来的可操作性和可维护性。
AOP代表的是一个横向的关系,如果说“对象”是一个空心的圆柱体,其中封装的是对象的属性和行为;那么面向方面编程的方法,就仿佛一把利刃,将这些空心圆柱体剖开,以获得其内部的消息。而剖开的切面,也就是所谓的“方面”了。然后它又以巧夺天功的妙手将这些剖开的切面复原,不留痕迹。
总结:AOP的核心思想就是“将应用程序中的商业逻辑同对其提供支持的通用服务进行分离。
3.5 AOP编程术语(掌握)
(1)切面(Aspect)
- 切面泛指交叉业务逻辑,或是公共的,通用的业务。
- 上例中的事务处理、日志处理就可以理解为切面。常用的切面是通知(Advice)。
- 实际就是对主业务逻辑的一种增强。
(2)连接点(JoinPoint)
- 连接点指可以被切面织入的具体方法。
- 通常业务接口中的方法均为连接点。
(3)切入点(Pointcut)
- 切入点指声明的一个或多个连接点的集合。
- 通过切入点指定一组方法。
- 被标记为 final 的方法是不能作为连接点与切入点的。
- 因为最终的是不能被修改的,不能被增强的。
(4)目标对象(Target)
- 目标对象指 将要被增强 的对象。
- 即包含主业务逻辑的 类的对象。
- 上例中 的BookServiceImpl 的对象若被增强,则该类称为目标类,该类对象称为目标对象。
- 当然, 不被增强,也就无所谓目标不目标了。
(5)通知(Advice)
- 通知表示切面的执行时间,Advice 也叫增强。
- 上例中的 MyInvocationHandler 就可以理解为是一种通知。
- 换个角度来说,通知定义了增强代码切入到目标代码的时间点,是目标方法执行之前执行,还是之后执行等。
- 通知类型不同,切入时间不同。
- 切入点定义切入的位置,通知定义切入的时机。
3.6AspectJ对AOP的实现(掌握)
- 对于 AOP 这种编程思想,很多框架都进行了实现。
- Spring 就是其中之一,可以完成面向切面编程。
- 然而,AspectJ 也实现了 AOP 的功能,且其实现方式更为简捷,使用更为方便, 而且还支持注解式开发。
- 所以,Spring 又将 AspectJ 的对于 AOP 的实现也引入到了自己的框架中。
- 在 Spring 中使用 AOP 开发时,一般使用 AspectJ 的实现方式。
3.6.1AspectJ 简介
AspectJ 是一个优秀面向切面的框架,它扩展了 Java 语言,提供了强大的切面实现。
官网地址:http://www.eclipse.org/aspectj/
AspetJ 是 Eclipse 的开源项目,官网介绍如下:
![[外链图片转存失败,源站可能有防盗链机制,建议将图片保存下来直接上传(img-qPDwdN9J-1658492075853)(../../../../Pictures/Spring/wps274.jpg)]](https://1000bd.com/contentImg/2022/08/01/063057235.jpeg)
a seamless aspect-oriented extension to the Javatm programming language(一种基于 Java 平台的面向切面编程的语言)
Java platform compatible(兼容 Java 平台,可以无缝扩展)
easy to learn and use(易学易用)
3.6.2 AspectJ 的通知类型(理解)
AspectJ 中常用的通知有四种类型:
(1)前置通知@Before
(2)后置通知@AfterReturning
(3)环绕通知@Around
(4)最终通知@After
(5)定义切入点@Pointcut(了解)
3.6.3AspectJ的切入点表达式(掌握)
AspectJ 定义了专门的表达式用于指定切入点。表达式的原型是:
![[外链图片转存失败,源站可能有防盗链机制,建议将图片保存下来直接上传(img-rlYjEIEr-1658492075861)(../../../../Pictures/Spring/wps275.jpg)]](https://1000bd.com/contentImg/2022/08/01/063057327.jpeg)
解释:
modifiers-pattern 访问权限类型
ret-type-pattern 返回值类型
declaring-type-pattern 包名类名
name-pattern(param-pattern) 方法名(参数类型和参数个数)
throws-pattern 抛出异常类型
?表示可选的部分
以上表达式共 4 个部分可简化如下:
execution(访问权限方法返回值 方法声明(参数)异常类型)
切入点表达式要匹配的对象就是目标方法的方法名。所以,execution 表达式中明显就是方法的签名。注意,表达式中黑色文字表示可省略部分,各部分间用空格分开。在其中可以使用以下符号:
![[外链图片转存失败,源站可能有防盗链机制,建议将图片保存下来直接上传(img-gbjTLEp3-1658492075861)(../../../../Pictures/Spring/wps276.jpg)]](https://1000bd.com/contentImg/2022/08/01/063057417.jpeg)
举例:
execution(public (…))
指定切入点为:任意公共方法。
execution(* set*(…))
指定切入点为:任何一个以“set”开始的方法。
execution( com.xyz.service.impl…(…))
指定切入点为:定义在 service 包里的任意类的任意方法。
execution(com.xyz.service….(…)) * com.xyz.service.power2.aa..(…)
指定切入点为:定义在 service 包或者子包里的任意类的任意方法。“…”出现在类名中时,后面必须跟“*”,表示包、子包下的所有类。
execution(* …service..(…)) a.b.service..(…) a.b.c.d.service..*(…)
指定所有包下的 serivce 子包下所有类(接口)中所有方法为切入点
execution(* .service..*(…))
指定只有一级包下的 serivce 子包下所有类(接口)中所有方法为切入点
execution(* .ISomeService.(…))
指定只有一级包下的 ISomeSerivce 接口中所有方法为切入点
execution(* …ISomeService.(…))
指定所有包下的 ISomeSerivce 接口中所有方法为切入点
execution(* com.xyz.service.IAccountService.*(…))
指定切入点为:IAccountService 接口中的任意方法。
execution(* com.xyz.service.IAccountService+.*(…))
指定切入点为:IAccountService 若为接口,则为接口中的任意方法及其所有实现类中的任意方法;若为类,则为该类及其子类中的任意方法。
execution(* joke(String,int)))
指定切入点为:所有的 joke(String,int)方法,且 joke()方法的第一个参数是 String,第二个参数是 int。如果方法中的参数类型是 java.lang 包下的类,可以直接使用类名,否则必须使用全限定类名,如 joke( java.util.List, int)。
execution(* joke(String,*)))
指定切入点为:所有的 joke()方法,该方法第一个参数为 String,第二个参数可以是任意类型,如joke(String s1,String s2)和joke(String s1,double d2)都是,但joke(String s1,double d2,String
s3)不是。
execution(* joke(String,…)))
指定切入点为:所有的 joke()方法,该方法第一个参数为 String,后面可以有任意个参数且参数类型不限,如 joke(String s1)、joke(String s1,String s2)和 joke(String s1,double d2,String s3) 都是。
execution(* joke(Object))
指定切入点为:所有的 joke()方法,方法拥有一个参数,且参数是 Object 类型。joke(Object ob)是,但,joke(String s)与 joke(User u)均不是。
execution(* joke(Object+)))
指定切入点为:所有的 joke()方法,方法拥有一个参数,且参数是 Object 类型或该类的子类。不仅 joke(Object ob)是,joke(String s)和 joke(User u)也是。
3.6.4AspectJ的开发环境(掌握)
- <dependency>
- <groupId>junitgroupId>
- <artifactId>junitartifactId>
- <version>4.11version>
- <scope>testscope>
- dependency>
- <dependency>
- <groupId>org.springframeworkgroupId>
- <artifactId>spring-contextartifactId>
- <version>5.2.5.RELEASEversion>
- dependency>
- <dependency>
- <groupId>org.springframeworkgroupId>
- <artifactId>spring-aspectsartifactId>
- <version>5.2.5.RELEASEversion>
- dependency>
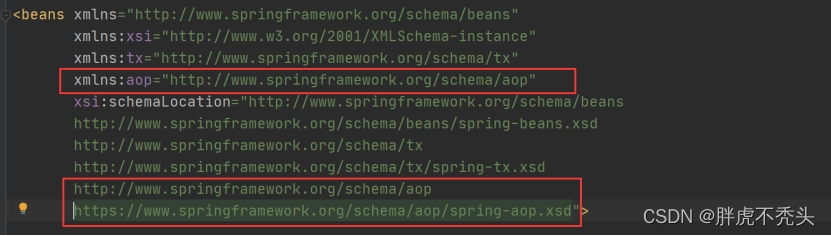
在 AspectJ 实现 AOP 时,要引入 AOP 的约束。配置文件中使用的 AOP 约束中的标签, 均是 AspectJ 框架使用的,而非 Spring 框架本身在实现 AOP 时使用的。
AspectJ 对于 AOP 的实现有注解和配置文件两种方式,常用是注解方式。
3.6.5AspectJ基于注解的AOP实现(掌握)
AspectJ 提供了以注解方式对于 AOP 的实现。
Step1:定义业务接口与实现类
![[外链图片转存失败,源站可能有防盗链机制,建议将图片保存下来直接上传(img-mDLx6lCR-1658587183344)(../../../../Pictures/Spring/wps277.jpg)]](https://1000bd.com/contentImg/2022/08/01/063057681.jpeg)
Step2:定义切面类
类中定义了若干普通方法,将作为不同的通知方法,用来增强功能。
- @Aspect
- //交给AspectJ框架去识别切面类,来进行切面方法的调用
- public class MyAspect {
- /*前置通知中的切面方法的规范
- 1)访问权限是public
- 2)没有返回值void
- 3)切面方法的名称自定义
- 4)切面方法可以没有参数,如果有也是固定的类型JoinPoint
- 5)使用@Before注解表明是前切功能
- 6)@Before的参数: value:*指定切入点表达式
- public String doSome(String name, int age)
- */
- @Before(value = "execution( * com.bjpowernode.s01.*.*(..))")
- public void myBefore(){
- System.out.println("前置功能输出...............");
- }
- 切入点表达式其它形式:
- @Aspect public class MyAspect {
- @Before(value = "execution(public void com.bjpowernode.s01.SomeServiceImpl.doSome(String,int))")
- @Before(value = "execution(* com.bjpowernode.s01.SomeServiceImpl.*(String,int))")
- @Before(value = "execution(* *...s01.SomeServiceImpl.*(..))")
- @Before(value = "execution(* *.*(..))")
- public void myAspect() {
- System.out.println("我是前置日志处理.........");
- }
- }
Step3:声明目标对象切面类对象
![[外链图片转存失败,源站可能有防盗链机制,建议将图片保存下来直接上传(img-IKixta0b-1658587183346)(../../../../Pictures/Spring/wps278.jpg)]](https://1000bd.com/contentImg/2022/08/01/063057923.jpeg)
Step4:注册 AspectJ 的自动代理
- 在定义好切面 Aspect 后,需要通知 Spring 容器,让容器生成“目标类+ 切面”的代理对象。
- 这个代理是由容器自动生成的。只需要在 Spring 配置文件中注册一个基于 aspectj 的自动代理生成器,其就会自动扫描到@Aspect 注解,并按通知类型与切入点,将其织入,并生成代理。
![[外链图片转存失败,源站可能有防盗链机制,建议将图片保存下来直接上传(img-u9B3pRNo-1658587183346)(../../../../Pictures/Spring/wps279.jpg)]](https://1000bd.com/contentImg/2022/08/01/063058079.jpeg)
- < aop:aspectj-autoproxy/ >的底层是由 AnnotationAwareAspectJ AutoProxyCreator 实现的。
- 从其类名就可看出,是基于 AspectJ 的注解适配自动代理生成器。
- 其工作原理是,aop:aspectj-autoproxy/通过扫描找到@Aspect 定义的切面类,再由切面类根据切入点找到目标类的目标方法,再由通知类型找到切入的时间点。
Step5:测试类中使用目标对象的 id
- @Test public void test01(){
- ApplicationContext ac = new ClassPathXmlApplicationContext("s01/applicationContext.xml");
- SomeService someService = (SomeService) ac.getBean("someService");
- System.out.println(someService.getClass());
- String s = someService.doSome("张三",22);
- System.out.println(s);
- }
![运行结果:[外链图片转存失败,源站可能有防盗链机制,建议将图片保存下来直接上传(img-Hd6vH4hf-1658587183347)(../../../../Pictures/Spring/wps280.jpg)]](https://1000bd.com/contentImg/2022/08/01/063058238.jpeg)
(2) @Before前置通知-方法有JoinPoint参数
- 在目标方法执行之前执行。被注解为前置通知的方法,可以包含一个 JoinPoint 类型参数。
- 该类型的对象本身就是切入点表达式。
- 通过JoinPoint 类型参数,可获取切入点表达式、方法签名、目标对象等。
- 不光前置通知的方法,可以包含一个 JoinPoint 类型参数,所有的通知方法均可包含该参数。
- @Aspect //交给AspectJ框架去识别切面类,来进行切面方法的调用
- public class MyAspect {
- @Before(value = "execution( * com.bjpowernode.s01.*.*(..))")
- public void myBefore(JoinPoint joinPoint){
- System.out.println("前置功能输出...............");
- System.out.println("目标方法的签名:"+joinPoint.getSignature());
- System.out.println("目标方法的所有参数:"+ Arrays.toString(joinPoint.getArgs()));
- }
- }
![运行结果:[外链图片转存失败,源站可能有防盗链机制,建议将图片保存下来直接上传(img-W64DY3tP-1658587183347)(../../../../Pictures/Spring/wps281.jpg)]](https://1000bd.com/contentImg/2022/08/01/063058515.jpeg)
(3) @AfterReturning后置通知-注解有returning属性
-
在目标方法执行之后执行。所以可以获取到目标方法的返回值。
-
该注解的 returning 属性就是用于指定接收方法返回值的变量名的。
被注解为后置通知的方法,除了可以包含 JoinPoint 参数外,还可以包含用于接收返回值的变量。
-
该变量最好为 Object 类型,因为目标方法的返回值可能是任何类型。
接口方法:
- public interface SomeService {
- String doSome(String name, int age);
- Student change();
- }
实现方法:
- @Component public class SomeServiceImpl implements SomeService {
- @Override
- public String doSome(String name, int age) {
- System.**out**.println(name+"doSome方法被调用 (主业务方法)");
- return "abcd";
- }
- @Override
- public Student change() {
- return new Student("张三");
- }
- }
定义切面:
- @Aspect //交给AspectJ框架扫描识别切面类
- @Component public class MyAspect {
- /* 后置通知切面方法的规范
- 1)访问权限是 public
- 2)切面方法没有返回值 void
- 3)方法自定义
- 4)切面方法可以没有参数,如果有参数则是目标方法的返回值,也可以包含参数JoinPoint,它必须是第一个参数
- 5)使用@AfterReturning注解
- 6)参数value:指定切入点表达式 returning:指定目标方法返回值的形参名称,此名称必须与切面方法的参数名称一致
- */
- @AfterReturning(value = "execution(* com.bjpowernode.s02.SomeServiceImpl.*(..))",returning = "obj")
- public void myAfterReturning(Object obj){
- System.out.println("后置通知..........");
- //改变目标方法的返回值
- if(obj != null){
- if(obj instanceof String){
- String s = ((String) obj).toUpperCase();
- //转为大写
- System.out.println("在切面方法中的输出:"+s);
- }
- if(obj instanceof Student){
- ((Student) obj).setName("李四");
- System.out.println("在切面方法中的输出"+(Student)obj);
- }
- }
- }
- }
测试类:
- @Test public void test01(){
- ApplicationContext ac = new ClassPathXmlApplicationContext("s02/applicationContext.xml");
- SomeServiceImpl someService = (SomeServiceImpl) ac.getBean("someServiceImpl");
- System.out.println(someService.getClass());
- String s = someService.doSome("张三",22);
- System.out.println("在测试类中输出目标方法的返回值---"+s);
- }
![运行结果:[外链图片转存失败,源站可能有防盗链机制,建议将图片保存下来直接上传(img-c66DBGkX-1658587183347)(../../../../Pictures/Spring/wps282.jpg)]](https://1000bd.com/contentImg/2022/08/01/063058660.jpeg)
可以改变目标方法的返回值(目标方法的返回值是引用类型)
- @Test public void test03(){
- ApplicationContext ac = new ClassPathXmlApplicationContext("s02/applicationContext.xml");
- SomeServiceImpl someService = (SomeServiceImpl) ac.getBean("someServiceImpl");
- System.out.println(someService.getClass());
- Student stu = someService.change();
- System.out.println("在测试类中输出目标方法的返回值---"+stu);
- }
![运行结果:[外链图片转存失败,源站可能有防盗链机制,建议将图片保存下来直接上传(img-zqG8jBTG-1658587183348)(../../../../Pictures/Spring/wps283.jpg)]](https://1000bd.com/contentImg/2022/08/01/063058949.jpeg)
(4) @Around环绕通知增强方法有ProceedingJoinPoint
- 在目标方法执行之前之后执行。
- 被注解为环绕增强的方法要有返回值,Object 类型。
- 并且方法可以包含一个 ProceedingJoinPoint 类型的参数。
- 接口 ProceedingJoinPoint 其有一个proceed()方法,用于执行目标方法。
- 若目标方法有返回值,则该方法的返回值就是目标方法的返回值。最后,环绕增强方法将其返回值返回。
- 该增强方法实际是拦截了目标方法的执行。
接口方法:
- public interface SomeService {
- String doSome(String name, int age);
- }
接口方法的实现:
- @Component public class SomeServiceImpl implements SomeService {
- @Override
- public String doSome(String name, int age) {
- System.out.println(name+"doSome方法被调用 (主业务方法)");
- return "abcd";
- }
- }
定义切面:
- @Aspect @Component public class MyAspect {
- //环绕通知方法的规范
- /*
- 1)访问权限是 public
- 2)切面方法有返回值,此返回值就是目标方法的返回值.
- 3)切面方法的名称自定义
- 4)切面方法有参数,参数就是目标方法.它是ProceedingJoinPoint的类型
- 5)必须要回避异常Throwable
- 6)使用@Around注解
- 7)参数:value:指定切入点表达式
- */
- //普通的环绕通知实现
- @Around(value = "execution(* com.bjpowernode.s03.SomeServiceImpl.*(..))")
- public Object myAround(ProceedingJoinPoint pjp)throws Throwable{
- //前切功能增强
- System.**out**.println("环绕通知中前切功能 .............");
- //调用目标方法
- Object obj = pjp.proceed();
- //method.invoke();
- //后切功能增强
- System.**out**.println("环绕通知中后切功能 .............");
- return obj.toString().toUpperCase();
- }
- }
![运行结果:[外链图片转存失败,源站可能有防盗链机制,建议将图片保存下来直接上传(img-x6Wwy0NI-1658587183348)(../../../../Pictures/Spring/wps284.jpg)]](https://1000bd.com/contentImg/2022/08/01/063059087.jpeg)
定义访问限制和修改返回值:
- @Around(value = "execution(* com.bjpowernode.s03.SomeServiceImpl.*(..))")
- public Object myAround(ProceedingJoinPoint pjp)throws Throwable{
- //取出目标方法的参数,进行判断,来决定是否调用目标方法以及增强功能
- Object []args = pjp.getArgs();
- if(args != null && args.length >1){
- String name = (String) args[0];
- if("张三".equals(name)){
- System.out.println("前置通知实现........");
- Object obj = pjp.proceed();
- System.out.println("后置通知实现........");
- return obj.toString().toUpperCase();
- }
- }
- System.out.println("目标方法拒绝访问 !");
- return null;
- }
- 测试类:@Test public void test01(){
- ApplicationContext ac = new ClassPathXmlApplicationContext("s03/applicationContext.xml");
- SomeServiceImpl someService = (SomeServiceImpl) ac.getBean("someServiceImpl");
- System.out.println(someService.getClass());
- String s = someService.doSome("张三1",22);
- System.out.println("在测试类中输出目标方法的返回值---"+s);
- }
![运行结果:[外链图片转存失败,源站可能有防盗链机制,建议将图片保存下来直接上传(img-J6gIURvj-1658587183348)(../../../../Pictures/Spring/wps285.jpg)]](https://1000bd.com/contentImg/2022/08/01/063059249.jpeg)
无论目标方法是否抛出异常,该增强均会被执行。
接口方法:
- public interface SomeService {
- String doSome(String name, int age);
- }
方法实现:
- @Component
- public class SomeServiceImpl implements SomeService {
- @Override
- public String doSome(String name, int age) {
- System.out.println(name+"doSome方法被调用 (主业务方法)");
- System.out.println(1/0);
- return "abcd";
- }
- }
定义切面:
- @Aspect
- @Component
- public class MyAspect {
- /*
- 最终方法的规范
- 1)访问权限是public
- 2)切面方法没有返回值void
- 3)方法名称自定义
- 4)方法可以没有参数,也可以有,则JoinPoint.
- 5)使用@After注解
- 6)参数:value:指定切入点表达式
- */
- @After(value = "execution(* com.bjpowernode.s04.SomeServiceImpl.*(..))")
- public void myAfter(){
- System.out.println("最终通知被执行.............");
- }
- }
- 测试类:@Test public void test01(){
- ApplicationContext ac = new ClassPathXmlApplicationContext("s04/applicationContext.xml");
- SomeServiceImpl someService = (SomeServiceImpl) ac.getBean("someServiceImpl");
- System.out.println(someService.getClass());
- String s = someService.doSome("张三",22);
- System.out.println("在测试类中输出目标方法的返回值---"+s);
- }
运行结果:
![[外链图片转存失败,源站可能有防盗链机制,建议将图片保存下来直接上传(img-2Q28VdWR-1658587183349)(../../../../Pictures/Spring/wps286.jpg)]](https://1000bd.com/contentImg/2022/08/01/063059382.jpeg)
- 当较多的通知增强方法使用相同的 execution 切入点表达式时,编写、维护均较为麻烦。
- AspectJ 提供了@Pointcut 注解,用于定义 execution 切入点表达式。
- 其用法是,将@Pointcut 注解在一个方法之上,以后所有的 execution 的 value 属性值均可使用该方法名作为切入点。
- 代表的就是@Pointcut 定义的切入点。这个使用@Pointcut 注解的方法一般使用 private 的标识方法,即没有实际作用的方法。
- @Aspect @Component public class MyAspect {
- /*最终方法的规范
- 1)访问权限是public
- 2)切面方法没有返回值void
- 3)方法名称自定义
- 4)方法可以没有参数,也可以有,则JoinPoint.
- 5)使用@After注解
- 6)参数:value:指定切入点表达式
- */
- @After(value = "mycut()")
- public void myAfter(){
- System.**out**.println("最终通知被执行.............");
- }
- @Before(value = "mycut()")
- public void myBefore(){
- System.**out**.println("前置通知被执行.............");
- }
- @AfterReturning(value = "mycut()",returning = "obj")
- public void myAfterReturning(Object obj){
- System.**out**.println("后置通知被执行.............");
- }
- //给切入点表达式起别名
- @Pointcut(value = "execution(* com.bjpowernode.s04.SomeServiceImpl.*(..))")
- public void mycut(){}
- }
- 运行结果:
![[外链图片转存失败,源站可能有防盗链机制,建议将图片保存下来直接上传(img-HEvqwtd3-1658587183349)(../../../../Pictures/Spring/wps287.jpg)]](https://1000bd.com/contentImg/2022/08/01/063059632.jpeg)
3.6.6 SpringAOP与AspectJ的区别
![[外链图片转存失败,源站可能有防盗链机制,建议将图片保存下来直接上传(img-S9meeA4j-1658587183349)(../../../../Pictures/Spring/wps288.jpg)]](https://1000bd.com/contentImg/2022/08/01/063059913.jpeg)
3.6.7AspectJ框架切换JDK动态代理和CGLib动态代理
===>默认是JDK动态代理,取时必须使用接口类型
==>设置为CGLib子类代理,可以使用接口和实现类接 记住:使用接口来接,永远不出错.
04 Spring集成MyBatis
将 MyBatis 与 Spring 进行整合,主要解决的问题就是将 SqlSessionFactory 对象交由 Spring 来管理。所以,该整合只需要将 SqlSessionFactory 的对象生成器 SqlSessionFactoryBean 注册在 Spring 容器中,再将其注入给 Dao 的实现类即可完成整合。
实现 Spring 与 MyBatis 的整合。常用的方式:扫描的 Mapper 动态代理。Spring 像插线板一样,mybatis 框架是插头,可以容易的组合到一起。插线板 spring 插上 mybatis,两个框架就是一个整体。
4.1 Spring的事务管理
事务原本是数据库中的概念,在实际项目的开发中,进行事务的处理一般是在业务逻辑层, 即 Service 层。这样做是为了能够使用事务的特性来管理关联操作的业务。
在 Spring 中通常可以通过以下两种方式来实现对事务的管理:
(1)使用 Spring 的事务注解管理事务
(2)使用 AspectJ 的 AOP 配置管理事务(声明式事务管理)
4.2 Spring中事务的五大隔离级别
- 读未提交(Read Uncommitted):允许脏读,也就是可能读取到其他会话中未提交事务修改的数据
- 读已提交(Read Committed):只能读取到已经提交的数据。Oracle等多数数据库默认都是该级别 (不重复读)
- 可重复读(Repeated Read):可重复读。在同一个事务内的查询都是事务开始时刻一致的,InnoDB默认级别。在SQL标准中,该隔离级别消除了不可重复读,但是还存在幻象读,但是innoDB解决了幻读
- 串行读(Serializable):完全串行化的读,每次读都需要获得表级共享锁,读写相互都会阻塞
![[外链图片转存失败,源站可能有防盗链机制,建议将图片保存下来直接上传(img-0TUD2unA-1658679269317)(../../../../Pictures/Spring/wps289.jpg)]](https://1000bd.com/contentImg/2022/08/01/063100040.jpeg)
4.3 不同数据库的隔离级别(面试点)
MySQL:mysql默认的事务处理级别是’REPEATABLE-READ’,也就是可重复读
Oracle:oracle数据库支持READ COMMITTED 和 SERIALIZABLE这两种事务隔离级别。
默认系统事务隔离级别是READ COMMITTED,也就是读已提交
4.4 Spring事务的传播特性
![[外链图片转存失败,源站可能有防盗链机制,建议将图片保存下来直接上传(img-14yp3uxn-1658679269318)(../../../../Pictures/Spring/wps290.jpg)]](https://1000bd.com/contentImg/2022/08/01/063100181.jpeg)
总结:
常用
- PROPAGATION_REQUIRED:必被包含事务
- PROPAGATION_REQUIRES_NEW:自己新开事务,不管之前是否有事务
- PROPAGATION_SUPPORTS:支持事务,如果加入的方法有事务,则支持事务,如果没有,不单开事务
- PROPAGATION_NEVER:不能运行中事务中,如果包在事务中,抛异常
- PROPAGATION_NOT_SUPPORTED:不支持事务,运行在非事务的环境
不常用
- PROPAGATION_MANDATORY:必须包在事务中,没有事务则抛异常
- PROPAGATION_NESTED:嵌套事务
4.5 @Transactional的参数讲解
![[外链图片转存失败,源站可能有防盗链机制,建议将图片保存下来直接上传(img-rjBNYKIA-1658679269319)(../../../../Pictures/Spring/wps291.jpg)]](https://1000bd.com/contentImg/2022/08/01/063100322.jpeg)
示例:
- @Transactional(readOnly = false, // 读写事务
- timeout = -1, // 事务的超时时间不限制(数据库有异常或没有连接上,等待的时间,但还是要看连接的数据库是如何设置的。
- //noRollbackFor = ArithmeticException.class, // noRollbackFor设置遇到指定的错误不用回滚。此处是遇到数学异常不回滚
- isolation = Isolation.DEFAULT, // 事务的隔离级别,数据库的默认
- propagation = Propagation.REQUIRED // 事务的传播行为,此处是指当前的方法要在事务中去执行。
- )
@Transactional有几点需要注意
- 只能声明在public的method。原因是spring是通过JDK代理或者CGLIB代理的,生成的代理类,只能处理public方法,注解放在类名称上面,这样你配置的这个@Transactional 对这个类中的所有public方法都起作用,@Transactional 在方法名上,只对这个方法有作用,同样必须是public的方法。
- 不能被类内部方法调用。还是因为代理的原因,类内部自调用,不会经过代理类,所以@Transactional不会生效
4.6 MyBatis框架与Hibernate框架使用的事务管理器(面试点)
4.6.1 Spring+MyBatis的事务管理器配置
- <bean id="transactionManager" class="**org.springframework.jdbc.datasource.DataSourceTransactionManager**">
- <property name="dataSource" ref="dataSource" />
- bean>
- <tx:annotation-driven transaction-manager="transactionManager" />
4.6.2 Spring+ Hibernate的事务管理器配置
- <bean id="transactionManager" class="**org.springframework.orm.hibernate3.HibernateTransactionManager**">
- <property name="sessionFactory" ref="sessionFactory" />
- bean>
- <tx:annotation-driven transaction-manager="transactionManager" proxy-target-class="true" />
4.7Spring中事务的实现
Spring中事务的实现有两种方式,一种是基于xml文件的实现,一种是基于注解方式实现。在SSM的开发中,多使用注解方式实现事务的处理。
4.7.1 基于xml方式的实现
实现步骤:
- <dependencies>
- <dependency>
- <groupId>junitgroupId>
- <artifactId>junitartifactId>
- <version>4.11version>
- <scope>testscope>
- dependency>
- <dependency>
- <groupId>org.springframeworkgroupId>
- <artifactId>spring-aspectsartifactId>
- <version>5.2.5.RELEASEversion>
- dependency>
- <dependency>
- <groupId>org.springframeworkgroupId>
- <artifactId>spring-contextartifactId>
- <version>5.2.5.RELEASEversion>
- dependency>
- <dependency>
- <groupId>org.springframeworkgroupId>
- <artifactId>spring-txartifactId>
- <version>5.2.5.RELEASEversion>
- dependency>
- <dependency>
- <groupId>org.springframeworkgroupId>
- <artifactId>spring-jdbcartifactId>
- <version>5.2.5.RELEASEversion>
- dependency>
- <dependency>
- <groupId>org.mybatisgroupId>
- <artifactId>mybatisartifactId>
- <version>3.5.1version>
- dependency>
- <dependency>
- <groupId>org.mybatisgroupId>
- <artifactId>mybatis-springartifactId>
- <version>1.3.1version>
- dependency>
- <dependency>
- <groupId>mysqlgroupId>
- <artifactId>mysql-connector-javaartifactId>
- <version>8.0.22version>
- dependency>
- <dependency>
- <groupId>com.alibabagroupId>
- <artifactId>druidartifactId>
- <version>1.1.12version>
- dependency> dependencies><build>
- <resources>
- <resource>
- <directory>src/main/javadirectory>
- <includes>
- <include>**/*.propertiesinclude>
- <include>**/*.xmlinclude>
- includes>
- <filtering>falsefiltering>
- resource>
- <resource>
- <directory>src/main/resourcesdirectory>
- <includes>
- <include>**/*.propertiesinclude>
- <include>**/*.xmlinclude>
- includes>
- <filtering>falsefiltering>
- resource>
- resources>
- build>
![[外链图片转存失败,源站可能有防盗链机制,建议将图片保存下来直接上传(img-GS5G5z4O-1658763749526)(../../../../Pictures/Spring/wps293.jpg)] [外链图片转存失败,源站可能有防盗链机制,建议将图片保存下来直接上传(img-VJYlK7N9-1658763749527)(../../../../Pictures/Spring/wps294.jpg)]](https://1000bd.com/contentImg/2022/08/01/063100431.jpeg)

- <bean id="transactionManager" class="org.springframework.jdbc.datasource.DataSourceTransactionManager">
- <property name="dataSource" ref="dataSource">property>
- bean>
- <tx:advice id="txAdvice" transaction-manager="transactionManager">
- <tx:attributes>
- <tx:method name="*get*" read-only="true"/>
- <tx:method name="*select*" read-only="true"/>
- <tx:method name="*find*" read-only="true"/>
- <tx:method name="*search*" read-only="true"/>
- <tx:method name="*add*" propagation="REQUIRED" />
- <tx:method name="*save*" propagation="REQUIRED" no-rollback-for="ArithmeticException"/>
- <tx:method name="*insert*" propagation="REQUIRED" no-rollback-for="ArithmeticException"/>
- <tx:method name="*delete*" propagation="REQUIRED"/>
- <tx:method name="*remove*" propagation="REQUIRED"/>
- <tx:method name="*clean*" propagation="REQUIRED"/>
- <tx:method name="*update*" propagation="REQUIRED"/>
- <tx:method name="*modify*" propagation="REQUIRED"/>
- <tx:method name="*set*" propagation="REQUIRED"/>
- <tx:method name="*change*" propagation="REQUIRED"/>
- <tx:method name="*" propagation="SUPPORTS"/>
- tx:attributes>
- tx:advice>
- <aop:config >
- <aop:pointcut id="pointcat" expression="execution(* com.bjpowernode.service.*.*(..))">aop:pointcut>
- <aop:advisor advice-ref="txAdvice" pointcut-ref="pointcat">aop:advisor>
- aop:config>
4.7.2 基于注解方式实现
- <bean id="transactionManager" class="org.springframework.jdbc.datasource.DataSourceTransactionManager">
- <property name="dataSource" ref="dataSource">property>
- bean>
- <tx:annotation-driven>tx:annotation-driven>
- @Service
- //交给Spring接管,进行对象的创建,并且自动注入mapper
- @Transactional( propagation = Propagation.*REQUIRED*
- //必须添加事务
- ,readOnly = true
- //只读事务(用于查询操作)
- ,timeout = -1 //设置连接永不超时
- ,noRollbackForClassName = "ArithmeticException"
- //遇到这个异常不回滚事务
- ,isolation = Isolation.*DEFAULT*
- //使用数据库的隔离级别
- ) public class UsersServiceImpl implements UsersService {
4.7.3 Spring+MyBatis整合案例
整合实现步骤:
1.新建maven工程,添加各种依赖
2.修改目录结构
3.添加SqlMapConfig.xml和XXXMapper.xml模板
![[外链图片转存失败,源站可能有防盗链机制,建议将图片保存下来直接上传(img-eXCv8zlV-1658763749527)(../../../../Pictures/Spring/wps295.jpg)] 添加模板内容[外链图片转存失败,源站可能有防盗链机制,建议将图片保存下来直接上传(img-DOwp3gUa-1658763749528)(../../../../Pictures/Spring/wps296.jpg)]](https://1000bd.com/contentImg/2022/08/01/063100748.jpeg)

4.添加db.properties文件
5.添加SqlMapConfig.xml文件
6.添加applicationContext_dao.xml文件并实现功能
![[外链图片转存失败,源站可能有防盗链机制,建议将图片保存下来直接上传(img-V4T8vUXW-1658763749528)(../../../../Pictures/Spring/wps297.jpg)]](https://1000bd.com/contentImg/2022/08/01/063101366.jpeg)
7.添加applicationContext_service.xml文件并实现功能(注解驱动)
![[外链图片转存失败,源站可能有防盗链机制,建议将图片保存下来直接上传(img-wQmEJWC7-1658763749528)(../../../../Pictures/Spring/wps298.jpg)]](https://1000bd.com/contentImg/2022/08/01/063101695.jpeg)
8.添加applicationContext_trans.xml文件(xml配置文件方式)
- <import resource="classpath:applicationContext_dao.xml">import>
- <context:component-scan base-package="com.bjpowernode.service">context:component-scan>
- <bean id="transactionManager" class="org.springframework.jdbc.datasource.DataSourceTransactionManager">
- <property name="dataSource" ref="dataSource">property>
- bean>
- <tx:advice id="txAdvice" transaction-manager="transactionManager">
- <tx:attributes>
- <tx:method name="get*" read-only="true" />
- <tx:method name="select*" read-only="true"/>
- <tx:method name="find*" read-only="true"/>
- <tx:method name="search*" read-only="true"/>
- <tx:method name="insert*" propagation="REQUIRED">tx:method>
- <tx:method name="add*" propagation="REQUIRED">tx:method>
- <tx:method name="save*" propagation="REQUIRED" no-rollback-for="ArithmeticException">tx:method>
- <tx:method name="set*" propagation="REQUIRED">tx:method>
- <tx:method name="update*" propagation="REQUIRED">tx:method>
- <tx:method name="modify*" propagation="REQUIRED">tx:method>
- <tx:method name="change*" propagation="REQUIRED">tx:method>
- <tx:method name="delete*" propagation="REQUIRED">tx:method>
- <tx:method name="remove*" propagation="REQUIRED">tx:method>
- <tx:method name="clear*" propagation="REQUIRED">tx:method>
- <tx:method name="empty*" propagation="REQUIRED">tx:method>
- <tx:method name="*" propagation="SUPPORTS">tx:method>
- tx:attributes>
- tx:advice>
- <aop:config>
- <aop:pointcut id="pointcut" expression="execution(* com.bjpowernode.service.*.*(..))"/>
- <aop:advisor advice-ref="txAdvice" pointcut-ref="pointcut">aop:advisor> aop:config>
9.新建库springuser,新建表users,accounts
10.新建实体类Users,Accounts
![[外链图片转存失败,源站可能有防盗链机制,建议将图片保存下来直接上传(img-C7KnCAHO-1658763749529)(../../../../Pictures/Spring/wps299.jpg)]](https://1000bd.com/contentImg/2022/08/01/063102038.jpeg)
11.新建mapper包下的接口和.xml文件
![[外链图片转存失败,源站可能有防盗链机制,建议将图片保存下来直接上传(img-KldEXUXe-1658763749529)(../../../../Pictures/Spring/wps300.jpg)]](https://1000bd.com/contentImg/2022/08/01/063102242.jpeg)
12.新建service包下的接口和接口实现类
![[外链图片转存失败,源站可能有防盗链机制,建议将图片保存下来直接上传(img-7VLZhmyl-1658763749529)(../../../../Pictures/Spring/wps301.jpg)]](https://1000bd.com/contentImg/2022/08/01/063102479.jpeg)
![UsersServiceImpl.java[外链图片转存失败,源站可能有防盗链机制,建议将图片保存下来直接上传(img-KWrX6lLQ-1658763749529)(../../../../Pictures/Spring/wps302.jpg)]](https://1000bd.com/contentImg/2022/08/01/063102679.jpeg)
![AccountsServiceImpl.java[外链图片转存失败,源站可能有防盗链机制,建议将图片保存下来直接上传(img-0XDDewtl-1658763749530)(../../../../Pictures/Spring/wps303.jpg)]](https://1000bd.com/contentImg/2022/08/01/063102851.jpeg)
13.新建测试类,完成功能测试
测试结果总结如下:
![[外链图片转存失败,源站可能有防盗链机制,建议将图片保存下来直接上传(img-r50yIFxi-1658763749530)(../../../../Pictures/Spring/wps304.jpg)]](https://1000bd.com/contentImg/2022/08/01/063103116.jpeg)
4.8 Spring Bean的生命周期
4.8.1 Spring Bean的生命周期图示
- Spring作为当前Java最流行、最强大的轻量级框架,受到了程序员的热烈欢迎。
- 准确的了解Spring Bean的生命周期是非常必要的。
- 我们通常使用ApplicationContext作为Spring容器,这里我们讲的也是 ApplicationContext中Bean的生命周期。
![[外链图片转存失败,源站可能有防盗链机制,建议将图片保存下来直接上传(img-DN5mYzV4-1658763749531)(../../../../Pictures/Spring/wps305.jpg)] [外链图片转存失败,源站可能有防盗链机制,建议将图片保存下来直接上传(img-IGCaYZm2-1658763749531)(../../../../Pictures/Spring/wps306.jpg)]](https://1000bd.com/contentImg/2022/08/01/063103273.jpeg)

4.8.2 Spring Bean的生命周期中各种方法分类
Bean的完整生命周期经历了各种方法调用,这些方法可以划分为以下几类:
1、Bean自身的方法:这个包括了Bean本身调用的方法和通过配置文件中的init-method和destroy-method指定的方法
2、Bean级生命周期接口方法:这个包括了BeanNameAware、BeanFactoryAware、InitializingBean和DiposableBean这些接口的方法
3、容器级生命周期接口方法:这个包括了InstantiationAwareBeanPostProcessor 和 BeanPostProcessor 这两个接口实现,一般称它们的实现类为“后处理器”。
4、工厂后处理器接口方法:这个包括了AspectJWeavingEnabler, ConfigurationClassPostProcessor, CustomAutowireConfigurer等等非常有用的工厂后处理器 接口的方法。工厂后处理器也是容器级的。在应用上下文装配配置文件之后立即调用。
总结:class(UsersService)-实例化-对象属性填充(AccountsService)-初始化(DefaultUsers)AOP-代理对象-bean.
- @Service
- //交给Spring去创建对象
- IOC@Transactional =èAOP处理
- public class UsersServiceImpl implements UsersService {
- //切记切记:一定有数据访问层的对象
- @Autowired
- UsersMapper usersMapper;
- //由Spring负责依赖注入
- IOCDefaultUsers users;=è初始化处理的对象
- @Override
- public int insert(Users users) {
- int num = usersMapper.insert(users)***\*;
- System.out.println("用户增加成功!num="+num);
- System.out.println(1);
- return num;
- }
- }
4.9 Spring中用到的设计模式总结
Spring框架中用到了很多的设计模式,总结如下:
- 工厂模式:Spring通过工厂模式BeanFactory,ApplicationContext创建Bean对象。
- 代理设计模式:SpringAOP的实现,底层使用了动态代理模式。
- 单例模式:Spring中的Bean默认都是单例的。
- 模板方法模式:Spring中jdbcTemplate,hibernateTemplate等以Template结尾的类都用到了模板模式。
- 装饰模式:我们的项目需要连接多个数据库,而不同的客户在访问时可能会访问不同的数据库,这种模式可以让我们根据用户的需求动态的切换数据库。
- 观察者模式:Spring的事件驱动是观察者模式的应用。
- 适配器模式:SpringAOP的增强功能使用到了适配器模式。
-
相关阅读:
正则表达式re总结
背包问题 [动态规划] (01,完全,多重,混合)
力扣第40天----第121题、第122题
汽车与交通运输行业智能车辆体验 | 达索系统百世慧®
Kylin ext3/4 xfs手动扩容根分区
TCP三次握手与四次挥手详细解释与文献参考
三星大规模生产3nm芯片?预计明年就能流通各大手机厂商手中
Java学习笔记18——SQLite3数据库安装与使用
Mysql(存储引擎)
33.1.2 安装Keepalived
- 原文地址:https://blog.csdn.net/m0_61163395/article/details/125985768