-
学习笔记:如何在 Vue 项目中使用 MQTT
一、项目搭建:
官网学习链接:如何在 Vue 项目中使用 MQTT
github库:https://github.com/emqx/MQTT-Client-Examples/tree/master/mqtt-client-Vue.js
----要是直接进github库进不去,就先进 https://github.com/emqx/MQTT-Client-Examples/tree/master,再进入mqtt-client-Vue.js分支。1、初始化vue的项目:
(1)新建项目:自己选定一个文件夹,用于存放vue的文件,执行
vue create mqtt_vue11(2)安装 MQTT 客户端库:在 VSCode 中打开 vue 文件,新建一个终端,输入
npm install mqtt --save
2、创建代码目录:
- github上面的代码不能下载使用,只能手动构造。
- 构造如图所示的代码目录。

3、添加官方代码:
home.scss文件代码直接复制过来;
main.js文件代码复制过来。main.js会添加 ‘element-ui’ 的相关依赖。如果不添加会报以下错误:
【解决】Unknown custom element: <el-card> - did you register the component correctly?
import Vue from 'vue' import App from './App.vue' // Unknown custom element:- did you register the component correctly? For recursive components, make sure to provide the "name" option. import ElementUI from 'element-ui' import 'element-ui/lib/theme-chalk/index.css' Vue.use(ElementUI) Vue.config.productionTip = false new Vue({ render: h => h(App), }).$mount('#app')- 1
- 2
- 3
- 4
- 5
- 6
- 7
- 8
- 9
- 10
- 11
- 12
vue.config.js文件代码:
const { defineConfig } = require('@vue/cli-service') const webpack = require("webpack"); module.exports = defineConfig({ transpileDependencies: true, configureWebpack: { plugins: [ new webpack.ProvidePlugin({ process: "process/browser", Buffer: ["buffer", "Buffer"], }), ], }, })- 1
- 2
- 3
- 4
- 5
- 6
- 7
- 8
- 9
- 10
- 11
- 12
- 13
- 14
App.vue文件代码:
<template> <div id="app"> <img alt="Vue logo" src="./assets/logo.png"> <HelloWorld msg="Welcome to Your Vue.js App"/> </div> </template> <script> import HelloWorld from './components/HelloWorld.vue' export default { name: 'App', components: { HelloWorld, } } </script> <style> #app { font-family: Avenir, Helvetica, Arial, sans-serif; -webkit-font-smoothing: antialiased; -moz-osx-font-smoothing: grayscale; text-align: center; color: #2c3e50; margin-top: 60px; } </style>- 1
- 2
- 3
- 4
- 5
- 6
- 7
- 8
- 9
- 10
- 11
- 12
- 13
- 14
- 15
- 16
- 17
- 18
- 19
- 20
- 21
- 22
- 23
- 24
- 25
HelloWorld.vue文件代码:
----文件代码中,笔者修改了 发布/订阅 的话题topic的名称。
----如果读者是刚开始接触MQTT.js,建议从笔者【lzl学习笔记:MQTT.js 入门教程】开始学习,先理解mqtt.js的机制,在搭建vue的MQTT项目,会更好理解一点。
<template> <div class="home-container"> <el-card shadow="always" style="margin-bottom:30px;"> <div class="emq-title"> Configuration </div> <el-form ref="configForm" hide-required-asterisk size="small" label-position="top" :model="connection"> <el-row :gutter="20"> <el-col :span="8"> <el-form-item prop="host" label="Host"> <el-input v-model="connection.host"></el-input> </el-form-item> </el-col> <el-col :span="8"> <el-form-item prop="port" label="Port"> <el-input v-model.number="connection.port" type="number" placeholder="8083/8084"></el-input> </el-form-item> </el-col> <el-col :span="8"> <el-form-item prop="endpoint" label="Mountpoint"> <el-input v-model="connection.endpoint" placeholder="/mqtt"></el-input> </el-form-item> </el-col> <el-col :span="8"> <el-form-item prop="clientId" label="Client ID"> <el-input v-model="connection.clientId"> </el-input> </el-form-item> </el-col> <el-col :span="8"> <el-form-item prop="username" label="Username"> <el-input v-model="connection.username"></el-input> </el-form-item> </el-col> <el-col :span="8"> <el-form-item prop="password" label="Password"> <el-input v-model="connection.password"></el-input> </el-form-item> </el-col> <el-col :span="24"> <el-button type="success" size="small" class="conn-btn" style="margin-right: 20px;" :disabled="client.connected" @click="createConnection" > {{ client.connected ? 'Connected' : 'Connect' }} </el-button> <el-button v-if="client.connected" type="danger" size="small" class="conn-btn" @click="destroyConnection"> Disconnect </el-button> </el-col> </el-row> </el-form> </el-card> <el-card shadow="always" style="margin-bottom:30px;"> <div class="emq-title"> Subscribe </div> <el-form ref="subscription" hide-required-asterisk size="small" label-position="top" :model="subscription"> <el-row :gutter="20"> <el-col :span="8"> <el-form-item prop="topic" label="Topic"> <el-input v-model="subscription.topic"></el-input> </el-form-item> </el-col> <el-col :span="8"> <el-form-item prop="qos" label="QoS"> <el-select v-model="subscription.qos"> <el-option v-for="(item, index) in qosList" :key="index" :label="item.label" :value="item.value" ></el-option> </el-select> </el-form-item> </el-col> <el-col :span="8"> <el-button :disabled="!client.connected" type="success" size="small" class="subscribe-btn" @click="doSubscribe" > {{ subscribeSuccess ? 'Subscribed' : 'Subscribe' }} </el-button> <el-button :disabled="!client.connected" type="success" size="small" class="subscribe-btn" style="margin-left:20px" @click="doUnSubscribe" v-if="subscribeSuccess" > Unsubscribe </el-button> </el-col> </el-row> </el-form> </el-card> <el-card shadow="always" style="margin-bottom:30px;"> <div class="emq-title"> Publish </div> <el-form ref="publish" hide-required-asterisk size="small" label-position="top" :model="publish"> <el-row :gutter="20"> <el-col :span="8"> <el-form-item prop="topic" label="Topic"> <el-input v-model="publish.topic"></el-input> </el-form-item> </el-col> <el-col :span="8"> <el-form-item prop="payload" label="Payload"> <el-input v-model="publish.payload" size="small"></el-input> </el-form-item> </el-col> <el-col :span="8"> <el-form-item prop="qos" label="QoS"> <el-select v-model="publish.qos"> <el-option v-for="(item, index) in qosList" :key="index" :label="item.label" :value="item.value" ></el-option> </el-select> </el-form-item> </el-col> </el-row> </el-form> <el-col :span="24"> <el-button :disabled="!client.connected" type="success" size="small" class="publish-btn" @click="doPublish"> Publish </el-button> </el-col> </el-card> <el-card shadow="always" style="margin-bottom:30px;"> <div class="emq-title"> Receive </div> <el-col :span="24"> <el-input type="textarea" :rows="3" style="margin-bottom: 15px" v-model="receiveNews"></el-input> </el-col> </el-card> </div> </template> <script> import mqtt from 'mqtt' export default { name: 'HelloWorld', props: { msg: String }, data() { return { connection: { host: 'broker.emqx.io', port: 8083, endpoint: '/mqtt', clean: true, // 保留会话 connectTimeout: 4000, // 超时时间 reconnectPeriod: 4000, // 重连时间间隔 // 认证信息 clientId: 'emqx_vue_test_lzl', username: 'emqx_test1', password: 'emqx_test1', }, subscription: { topic: 'testtopic/lzl-MQTTX', qos: 0, }, publish: { topic: 'topic/vue-browser-lzl', qos: 0, payload: '{ "msg": "Hello, I am browser." }', }, receiveNews: '', qosList: [ { label: 0, value: 0 }, { label: 1, value: 1 }, { label: 2, value: 2 }, ], client: { connected: false, }, subscribeSuccess: false, } }, methods: { // 创建连接 createConnection() { // 连接字符串, 通过协议指定使用的连接方式 // ws 未加密 WebSocket 连接 // wss 加密 WebSocket 连接 // mqtt 未加密 TCP 连接 // mqtts 加密 TCP 连接 // wxs 微信小程序连接 // alis 支付宝小程序连接 const { host, port,endpoint, ...options } = this.connection // const connectUrl = `ws://${host}:${port}${endpoint}`//broker.emqx.io:8083 try { this.client = mqtt.connect(connectUrl, options) } catch (error) { console.log('mqtt.connect error', error) } this.client.on('connect', () => { console.log('Connection succeeded!') }) this.client.on('error', error => { console.log('Connection failed', error) }) this.client.on('message', (topic, message) => { this.receiveNews = this.receiveNews.concat(message) console.log(`Received message ${message} from topic ${topic}`) }) }, // 订阅主题 doSubscribe() { const { topic, qos } = this.subscription this.client.subscribe(topic, { qos }, (error, res) => { if (error) { console.log('Subscribe to topics error', error) return } this.subscribeSuccess = true console.log('Subscribe to topics res', res) }) }, // 取消订阅 doUnSubscribe() { const { topic } = this.subscription this.client.unsubscribe(topic, error => { if (error) { console.log('Unsubscribe error', error) } }) }, // 发送消息 doPublish() { const { topic, qos, payload } = this.publish this.client.publish(topic, payload, qos, error => { if (error) { console.log('Publish error', error) } }) }, // 断开连接 destroyConnection() { if (this.client.connected) { try { this.client.end() this.client = { connected: false, } console.log('Successfully disconnected!') } catch (error) { console.log('Disconnect failed', error.toString()) } } }, }, } </script> <style lang="scss"> @import url('../assets/style/home.scss'); .home-container { max-width: 1100px; margin: 0 auto; .conn-btn { color: #fff; background-color: #00b173; font-size: 14px; } .publish-btn { margin-bottom: 20px; float: right; } .el-button--success { background-color: #34c388 !important; border-color: #34c388 !important; font-size: 14px !important; } .el-button--danger { background-color: #f5222d !important; border-color: #f5222d !important; } .el-form-item { &.is-error { .el-input__inner, .el-textarea__inner { box-shadow: 0 0 0 2px rgba(245, 34, 45, 0.2); } } &.is-success { .el-input__inner, .el-textarea__inner { border-color: #34c388 !important; } } } } </style>- 1
- 2
- 3
- 4
- 5
- 6
- 7
- 8
- 9
- 10
- 11
- 12
- 13
- 14
- 15
- 16
- 17
- 18
- 19
- 20
- 21
- 22
- 23
- 24
- 25
- 26
- 27
- 28
- 29
- 30
- 31
- 32
- 33
- 34
- 35
- 36
- 37
- 38
- 39
- 40
- 41
- 42
- 43
- 44
- 45
- 46
- 47
- 48
- 49
- 50
- 51
- 52
- 53
- 54
- 55
- 56
- 57
- 58
- 59
- 60
- 61
- 62
- 63
- 64
- 65
- 66
- 67
- 68
- 69
- 70
- 71
- 72
- 73
- 74
- 75
- 76
- 77
- 78
- 79
- 80
- 81
- 82
- 83
- 84
- 85
- 86
- 87
- 88
- 89
- 90
- 91
- 92
- 93
- 94
- 95
- 96
- 97
- 98
- 99
- 100
- 101
- 102
- 103
- 104
- 105
- 106
- 107
- 108
- 109
- 110
- 111
- 112
- 113
- 114
- 115
- 116
- 117
- 118
- 119
- 120
- 121
- 122
- 123
- 124
- 125
- 126
- 127
- 128
- 129
- 130
- 131
- 132
- 133
- 134
- 135
- 136
- 137
- 138
- 139
- 140
- 141
- 142
- 143
- 144
- 145
- 146
- 147
- 148
- 149
- 150
- 151
- 152
- 153
- 154
- 155
- 156
- 157
- 158
- 159
- 160
- 161
- 162
- 163
- 164
- 165
- 166
- 167
- 168
- 169
- 170
- 171
- 172
- 173
- 174
- 175
- 176
- 177
- 178
- 179
- 180
- 181
- 182
- 183
- 184
- 185
- 186
- 187
- 188
- 189
- 190
- 191
- 192
- 193
- 194
- 195
- 196
- 197
- 198
- 199
- 200
- 201
- 202
- 203
- 204
- 205
- 206
- 207
- 208
- 209
- 210
- 211
- 212
- 213
- 214
- 215
- 216
- 217
- 218
- 219
- 220
- 221
- 222
- 223
- 224
- 225
- 226
- 227
- 228
- 229
- 230
- 231
- 232
- 233
- 234
- 235
- 236
- 237
- 238
- 239
- 240
- 241
- 242
- 243
- 244
- 245
- 246
- 247
- 248
- 249
- 250
- 251
- 252
- 253
- 254
- 255
- 256
- 257
- 258
- 259
- 260
- 261
- 262
- 263
- 264
- 265
- 266
- 267
- 268
- 269
- 270
- 271
- 272
- 273
- 274
- 275
- 276
- 277
- 278
- 279
- 280
- 281
- 282
- 283
- 284
- 285
- 286
- 287
- 288
- 289
- 290
- 291
- 292
- 293
- 294
- 295
- 296
- 297
- 298
- 299
- 300
- 301
- 302
- 303
- 304
- 305
- 306
- 307
- 308
- 309
- 310
- 311
- 312
- 313
二、运行项目
(1)运行 / 调试项目最最令人头疼抓狂的了,因为很容易报错……
这一点不太好提供解决办法,只能靠读者遇到什么问题自行查询解决了(只能说,官方文档是没有问题的,鄙人曾经就调试崩溃到怀疑是官方文档的问题)
- 提供几点解决办法:
【解决】启动vue项目报错:npm ERR! enoent ENOENT: no such file or directory, open’E:xxxx\package.json’
【解决】ERROR in [eslint] ESLint is not a constructor
【解决】Syntax Error: Error: PostCSS received undefined instead of CSS string.【Cannot find module ‘sass’】
【解决】Unknown custom element: <el-card> - did you register the component correctly? - 可能使用到的指令:
npm install url
npm install sass-loader
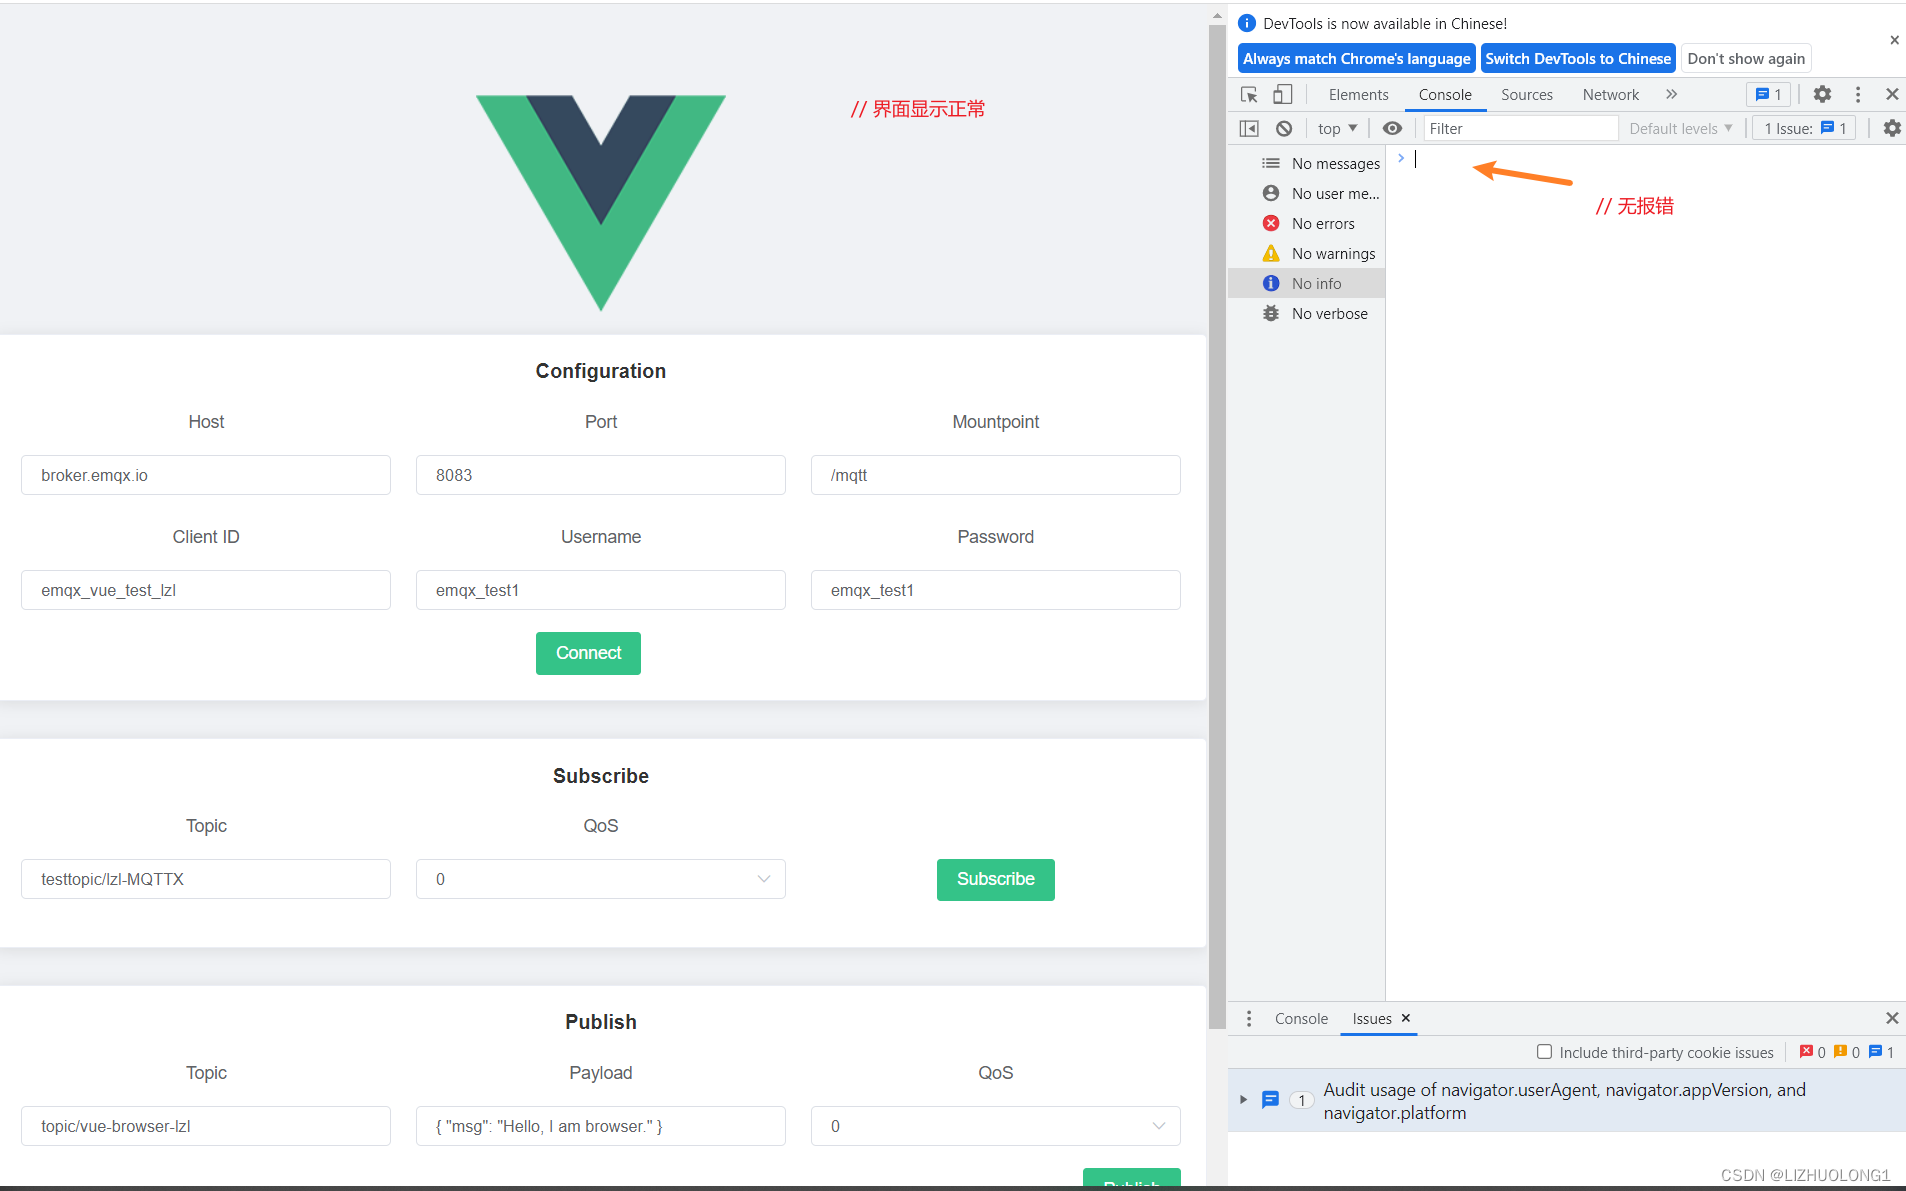
(2)当读者运行到此步,浏览器还没有报错的时候:那就恭喜读者接近胜利的曙光了
三、连接MQTT服务器,并与【MQTTX客户端】进行通信
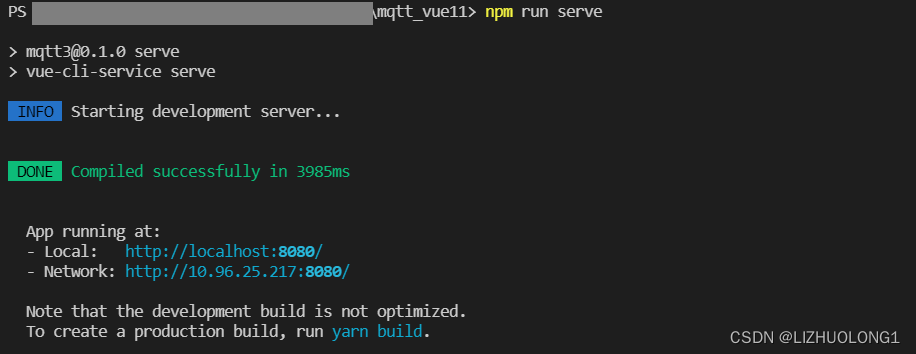
- 终端中执行
npm run serve - 点击web界面中
Connected与【MQTTX客户端】建立连接。 - 点击web界面中
Subscribe订阅话题。 - 点击web界面中
Publish发布话题。
ps:不明白此处的读者,可学习笔者【lzl学习笔记:MQTT.js 入门教程】弄明白原理及实现。
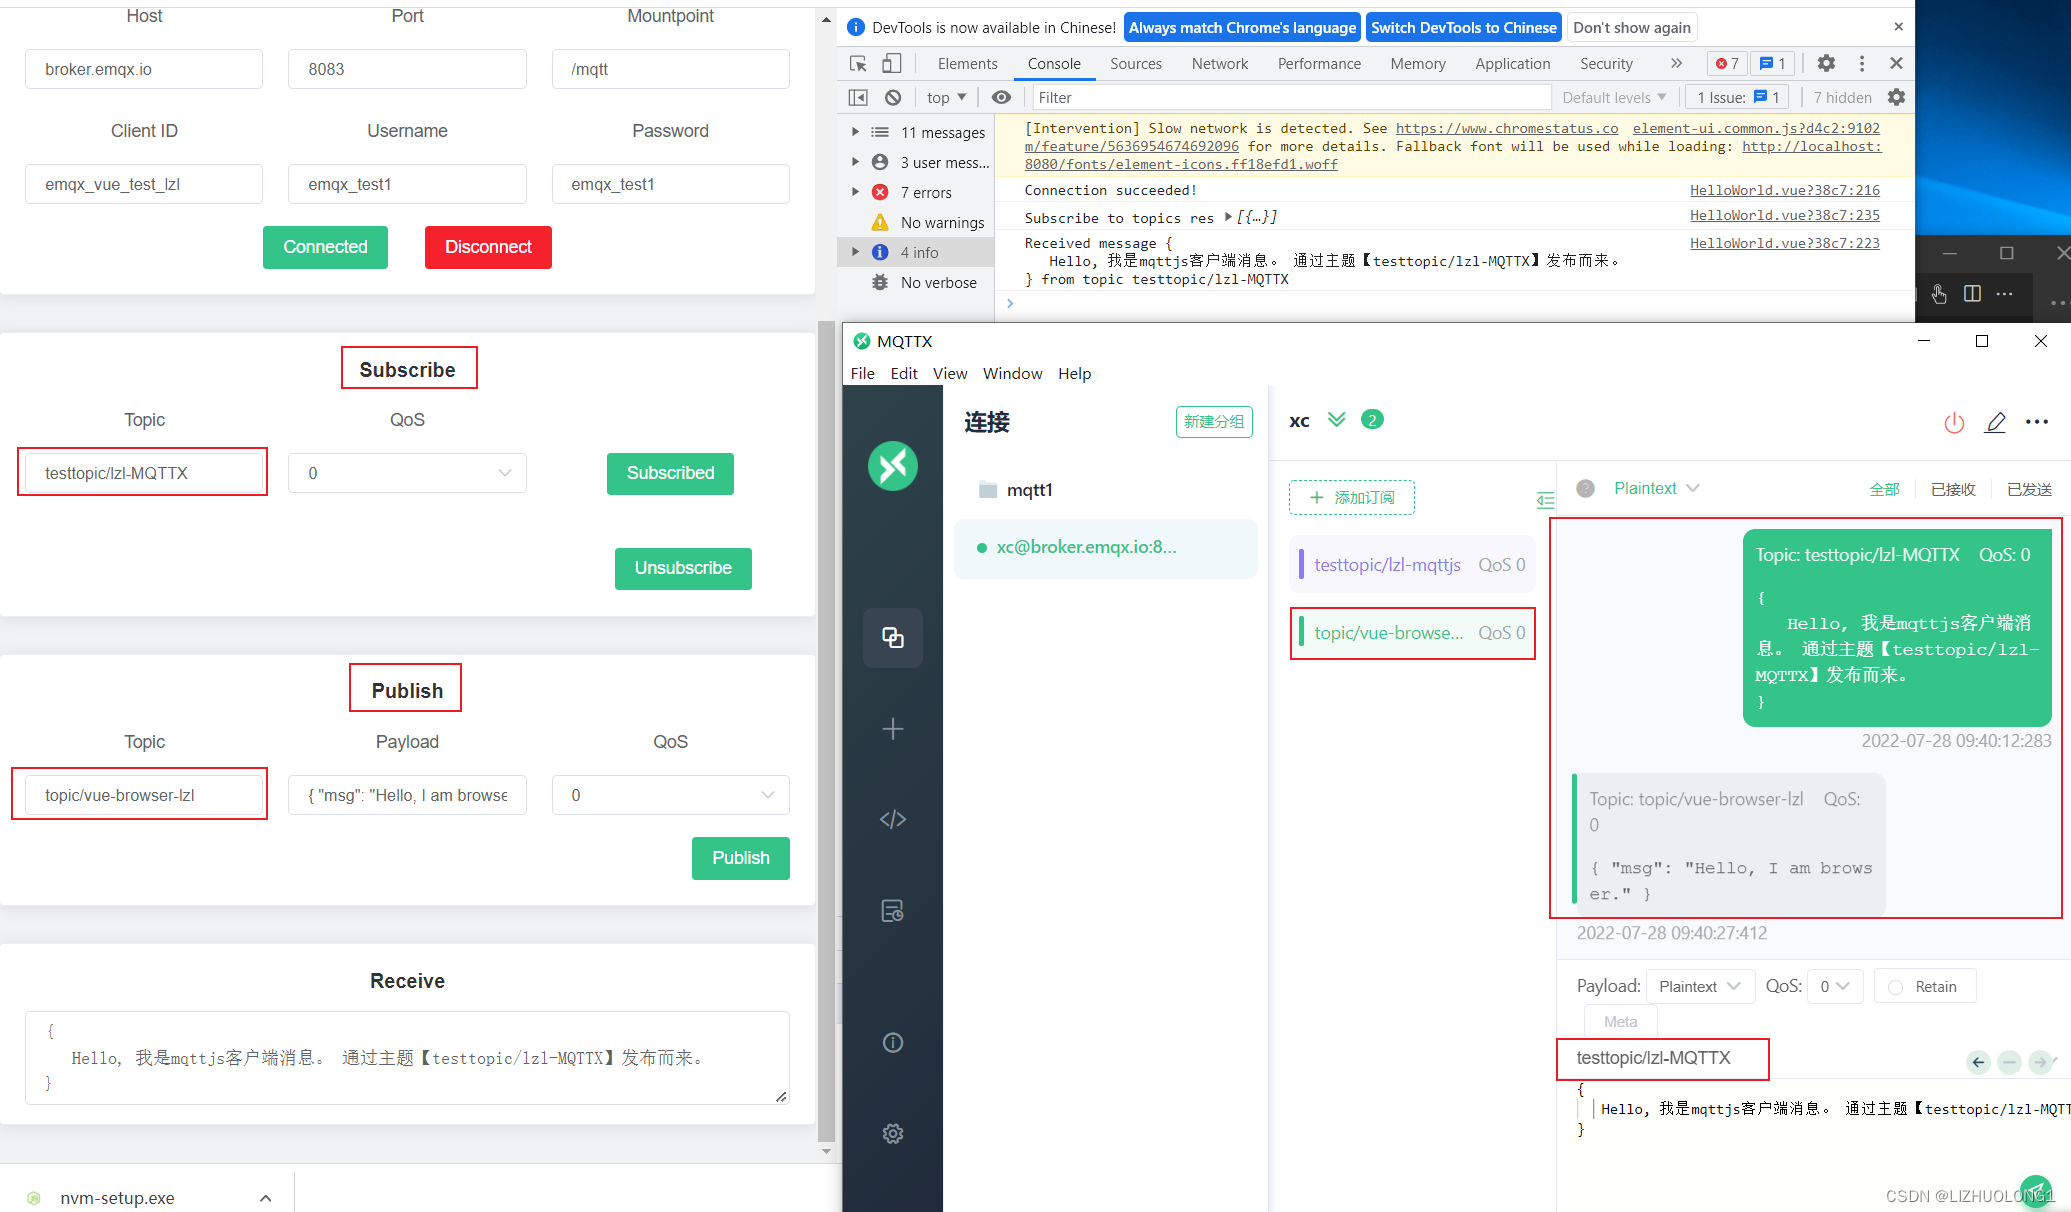
- 最后,成功实现【vue前端客户端】与【MQTTX客户端】之间的通信,撒花~
随笔:
(1)从最初接触到这一步搭建vue-MQTT项目,耗时2.5天
-
相关阅读:
【Python】深度讲解序列和字典,复习必备-太细啦
gorm操作sqlite3,高并发读写如何避免锁库?
前端生态系统:构建现代Web应用的完整指南
Web逆向-某网络学院学习的”偷懒“思路分析
MyBatis-Plus找不到Mapper.xml文件的解决方法
JPG文件头-笔记
汇率之谜:揭秘黄金折算与真实人民币汇率的神秘差距
shiro反序列化漏洞的原理和复现
蓝牙启动流程梳理
数据湖:数据同步工具NiFi
- 原文地址:https://blog.csdn.net/LIZHUOLONG1/article/details/126028106