-
基础二:Java进阶
🧑🎓 个人主页:花棉袄
📖 本章内容:【基础二:Java进阶】
✍🏻 版权: 本文由【花棉袄】原创💝在CSDN首发💝需要转载请联系博主
📺 学习视频推荐📢💨如果文章对你有帮助【关注👍点赞❤️收藏⭐】
🥌IO流
🌳 IO流介绍
- IO:输入/输出(Input/Output)
- 流:是一种抽象概念,是对数据传输的总称,数据在设备间的传输称为流
流的本质是数据传输- IO流就是用来处理设备间数据传输问题的
- 常见的应用:文件复制;文件上传;文件下载
🌳 IO流的分类
- 💮 按照数据的流向
输入流:读数据
输出流:写数据 - 💮 按照数据类型来分
字节流:字节输入流;字节输出流
字符流:字符输入流;字符输出流
🌳 IO流的使用场景
- 如果操作的是纯文本文件:优先使用字符流
- 如果操作的是图片、视频、音频等二进制文件:优先使用字节流
- 如果不确定文件类型,优先使用字节流:字节流是万能的流
1️⃣File类
🌳 File类介绍
- 它是文件和目录路径名的抽象表示
- 文件和目录是可以通过File封装成对象的
- 对于File而言,其封装的并不是一个真正存在的文件,仅仅是一个路径名而已
- 它可以是存在的,也可以是不存在的
- 将来是要通过具体的操作把这个路径的内容转换为具体存在的
🌳 File类的构造方法

public class FileDemo01 { public static void main(String[] args) { //File(String pathname):通过将给定的路径名字符串转换为抽象路径名来创建新的 File实例。 File f1 = new File("E:\\itcast\\java.txt"); System.out.println(f1); //File(String parent, String child):从父路径名字符串和子路径名字符串创建新的File实例。 File f2 = new File("E:\\itcast", "java.txt"); System.out.println(f2); //File(File parent, String child):从父抽象路径名和子路径名字符串创建新的 File实例。 File f3 = new File("E:\\itcast"); File f4 = new File(f3, "java.txt"); System.out.println(f4); } }- 1
- 2
- 3
- 4
- 5
- 6
- 7
- 8
- 9
- 10
- 11
- 12
- 13
- 14
- 15
- 16
- 17
🌳 File类创建功能

public class FileDemo02 { public static void main(String[] args) throws IOException { //需求1:我要在E:\\itcast目录下创建一个文件java.txt File f1 = new File("E:\\itcast\\java.txt"); System.out.println(f1.createNewFile()); System.out.println("--------"); //需求2:我要在E:\\itcast目录下创建一个目录JavaSE File f2 = new File("E:\\itcast\\JavaSE"); System.out.println(f2.mkdir()); System.out.println("--------"); //需求3:我要在E:\\itcast目录下创建一个多级目录JavaWEB\\HTML File f3 = new File("E:\\itcast\\JavaWEB\\HTML"); System.out.println(f3.mkdirs()); System.out.println("--------"); //需求4:我要在E:\\itcast目录下创建一个文件javase.txt File f4 = new File("E:\\itcast\\javase.txt"); System.out.println(f4.createNewFile()); } }- 1
- 2
- 3
- 4
- 5
- 6
- 7
- 8
- 9
- 10
- 11
- 12
- 13
- 14
- 15
- 16
- 17
- 18
- 19
- 20
- 21
- 22
- 23
🌳 File类判断功能

public class FileDemo03 { public static void main(String[] args) { //创建一个File对象 File f = new File("E:\\itcast\\java.txt"); // public boolean isDirectory():测试此抽象路径名表示的File是否为目录 // public boolean isFile():测试此抽象路径名表示的File是否为文件 // public boolean exists():测试此抽象路径名表示的File是否存在 System.out.println(f.isDirectory()); System.out.println(f.isFile()); System.out.println(f.exists()); } }- 1
- 2
- 3
- 4
- 5
- 6
- 7
- 8
- 9
- 10
- 11
- 12
🌳 File类获取功能

public class FileDemo04 { public static void main(String[] args) { //创建一个File对象 File f = new File("E:\\itcast\\java.txt"); // public String getAbsolutePath():返回此抽象路径名的绝对路径名字符串 System.out.println(f.getAbsolutePath()); // public String getPath():将此抽象路径名转换为路径名字符串 System.out.println(f.getPath()); // public String getName():返回由此抽象路径名表示的文件或目录的名称 System.out.println(f.getName()); System.out.println("--------"); // public String[] list():返回此抽象路径名表示的目录中的文件和目录的名称字符串数组 File f2 = new File("E:\\itcast"); String[] strArray = f2.list(); // public File[] listFiles():返回此抽象路径名表示的目录中的文件和目录的File对象数组 for (String str : strArray) { System.out.println(str); } System.out.println("--------"); File[] fileArray = f2.listFiles(); for (File file : fileArray) { if (file.isFile()) { System.out.println(file.getName()); } } System.out.println("--------"); } }- 1
- 2
- 3
- 4
- 5
- 6
- 7
- 8
- 9
- 10
- 11
- 12
- 13
- 14
- 15
- 16
- 17
- 18
- 19
- 20
- 21
- 22
- 23
- 24
- 25
- 26
- 27
- 28
- 29
- 30
- 31
- 32
- 33
🌳 File类删除功能

public class FileDemo03 { public static void main(String[] args) throws IOException { //需求1:在当前模块目录下创建java.txt文件 File f1 = new File("myFile\\java.txt"); //需求2:删除当前模块目录下的java.txt文件 System.out.println(f1.delete()); System.out.println("--------"); //需求3:在当前模块目录下创建itcast目录 File f2 = new File("myFile\\itcast"); //需求4:删除当前模块目录下的itcast目录 System.out.println(f2.delete()); System.out.println("--------"); //需求5:在当前模块下创建一个目录itcast,然后在该目录下创建一个文件java.txt File f3 = new File("myFile\\itcast"); File f4 = new File("myFile\\itcast\\java.txt"); //需求6:删除当前模块下的目录itcast System.out.println(f4.delete()); System.out.println(f3.delete()); } }- 1
- 2
- 3
- 4
- 5
- 6
- 7
- 8
- 9
- 10
- 11
- 12
- 13
- 14
- 15
- 16
- 17
- 18
- 19
- 20
- 21
- 22
- 23
- 24
- 25
- 26
🌳 绝对路径和相对路径的区别
绝对路径:完整的路径名,不需要任何其他信息就可以定位它所表示的文件–例如:E:\itcast\java.txt相对路径:必须使用取自其他路径名的信息进行解释–例如:myFile\java.txt
2️⃣字节流
🌳 字节流抽象基类
- InputStream:这个抽象类是表示字节输入流的所有类的超类
- OutputStream:这个抽象类是表示字节输出流的所有类的超类
- 子类名特点:子类名称都是以其父类名作为子类名的后缀
🌳 字节输出流
- FileOutputStream(String name):创建文件输出流以指定的名称写入文件
🌳 使用字节输出流写数据的步骤
创建字节输出流对象:(调用系统功能创建了文件,创建字节输出流对象,让字节输出流对象指向文件)- 调用字节输出流对象的
写数据方法 释放资源:(关闭此文件输出流并释放与此流相关联的任何系统资源)
public class FileOutputStreamDemo01 { public static void main(String[] args) throws IOException { FileOutputStream fileOutputStream = new FileOutputStream("E:\\Code\\springcloud\\itcast\\java.txt"); fileOutputStream.write(99); fileOutputStream.close(); } }- 1
- 2
- 3
- 4
- 5
- 6
- 7
🌳 字节流写数据的三种方式

public class FileOutputStreamDemo01 { public static void main(String[] args) throws IOException { FileOutputStream fileOutputStream = new FileOutputStream("E:\\Code\\springcloud\\itcast\\java.txt"); fileOutputStream.write(97); String str = " -Hello world "; // byte[] bys = {97, 98, 99, 100, 101}; //byte[] getBytes():返回字符串对应的字节数组 byte[] bys = "-abcde".getBytes(); byte[] bytes = str.getBytes(); fileOutputStream.write(bytes); //void write(byte[] b, int off, int len):将 len字节从指定的字节数组开始,从偏移量off开始写入此文件输出流 fileOutputStream.write(bys,1,3); fileOutputStream.close(); } }- 1
- 2
- 3
- 4
- 5
- 6
- 7
- 8
- 9
- 10
- 11
- 12
- 13
- 14
- 15
- 16
- 17
- 18
- 19
🌳 字节流写数据如何实现换行
- 🧡
windows:\r\n🧡linux:\n🧡mac:\r
🌳 字节流写数据如何实现追加写入
public FileOutputStream(String name,boolean append)- 创建文件输出流以指定的名称写入文件
- 如果第二个参数为true ,则字节将写入文件的末尾而不是开头
public class FileOutputStreamDemo02 { public static void main(String[] args) throws IOException { FileOutputStream fileOutputStream = new FileOutputStream("E:\\Code\\springcloud\\itcast\\java.txt", true); String str = " -Hello world "; // byte[] bys = {97, 98, 99, 100, 101}; //byte[] getBytes():返回字符串对应的字节数组 byte[] bys = "-abcde".getBytes(); byte[] bytes = str.getBytes(); fileOutputStream.write(bytes); //void write(byte[] b, int off, int len):将 len字节从指定的字节数组开始,从偏移量off开始写入此文件输出流 fileOutputStream.write(bys,1,3); fileOutputStream.close(); } }- 1
- 2
- 3
- 4
- 5
- 6
- 7
- 8
- 9
- 10
- 11
- 12
- 13
- 14
- 15
🌳 字节流写数据加异常处理
try{ 可能出现异常的代码; }catch(异常类名 变量名){ 异常的处理代码; }finally{ 执行所有清除操作; }- 1
- 2
- 3
- 4
- 5
- 6
- 7
public class FileOutputStreamDemo04 { public static void main(String[] args) { //加入finally来实现释放资源 FileOutputStream fos = null; try { fos = new FileOutputStream("myByteStream\\fos.txt"); fos.write("hello".getBytes()); } catch (IOException e) { e.printStackTrace(); } finally { if (fos != null) { try { fos.close(); } catch (IOException e) { e.printStackTrace(); } } } } }- 1
- 2
- 3
- 4
- 5
- 6
- 7
- 8
- 9
- 10
- 11
- 12
- 13
- 14
- 15
- 16
- 17
- 18
- 19
- 20
🌳 字节流读数据:
一次读一个字节数据- FileInputStream(String name):通过打开与实际文件的连接来创建一个FileInputStream
- 该文件由文件系统中的路径名name命名
🌳 字节输入流读取数据的步骤
- 创建字节输入流对象
- 调用字节输入流对象的读数据方法
- 释放资源
public class FileInputStreamDemo01 { public static void main(String[] args) throws IOException { FileInputStream fileInputStream = new FileInputStream("E:\\Code\\springcloud\\itcast\\java.txt");; int by; /* fis.read():读数据 by=fis.read():把读取到的数据赋值给by by != -1:判断读取到的数据是否是-1 */ while ((by=fileInputStream.read())!=-1) { System.out.print((char)by); } //释放资源 fileInputStream.close(); } }- 1
- 2
- 3
- 4
- 5
- 6
- 7
- 8
- 9
- 10
- 11
- 12
- 13
- 14
- 15
- 16
🌳 字节流读数据:
一次读一个字节数组数据public class FileInputStreamDemo02 { public static void main(String[] args) throws IOException { FileInputStream fileInputStream = new FileInputStream("E:\\Code\\springcloud\\itcast\\java.txt"); byte[] bytes = new byte[1024]; int len; while ((len = fileInputStream.read(bytes)) != -1) { System.out.println(new String(bytes, 0, len)); } }- 1
- 2
- 3
- 4
- 5
- 6
- 7
- 8
- 9
🌳 字节流复制图片
public class CopyJpgDemo { public static void main(String[] args) throws IOException { //根据数据源创建字节输入流对象 FileInputStream fis = new FileInputStream("C:\\Users\\miram\\Pictures\\IDEA\\1.png"); //根据目的地创建字节输出流对象 FileOutputStream fos = new FileOutputStream("E:\\Code\\springcloud\\itcast\\java\\cc\\aa.png"); //读写数据,复制图片(一次读取一个字节数组,一次写入一个字节数组) byte[] bys = new byte[1024]; int len; while ((len = fis.read(bys)) != -1) { fos.write(bys, 0, len); } //释放资源 fos.close(); fis.close(); } }- 1
- 2
- 3
- 4
- 5
- 6
- 7
- 8
- 9
- 10
- 11
- 12
- 13
- 14
- 15
- 16
- 17
3️⃣字节缓冲流
- BufferOutputStream:该类实现缓冲输出流
- 通过设置这样的输出流,应用程序可以向底层输出流写入字节
- 不必为写入的每个字节导致底层系统的调用
🌳 构造方法

public class BufferStreamDemo { public static void main(String[] args) throws IOException { //字节缓冲输出流:BufferedOutputStream(OutputStream out) BufferedOutputStream bos = new BufferedOutputStream(new FileOutputStream("E:\\Code\\springcloud\\itcast\\bos.txt")); //写数据 bos.write("hello\r\n".getBytes()); bos.write("world\r\n".getBytes()); //释放资源 bos.close(); //字节缓冲输入流:BufferedInputStream(InputStream in) BufferedInputStream bis = new BufferedInputStream(new FileInputStream("E:\\Code\\springcloud\\itcast\\bos.txt")); //一次读取一个字节数组数据 byte[] bys = new byte[1024]; int len; while ((len = bis.read(bys)) != -1) { System.out.print(new String(bys, 0, len)); } //释放资源 bis.close(); } }- 1
- 2
- 3
- 4
- 5
- 6
- 7
- 8
- 9
- 10
- 11
- 12
- 13
- 14
- 15
- 16
- 17
- 18
- 19
- 20
- 21
- 22
- 23
- 24
🌳 字节流复制视频
public class CopyAviDemo { public static void main(String[] args) throws IOException { //记录开始时间 long startTime = System.currentTimeMillis(); /* 复制视频 method1(); method2(); method3(); */ method4(); //记录结束时间 long endTime = System.currentTimeMillis(); System.out.println("共耗时:" + (endTime - startTime) + "毫秒"); } //字节缓冲流一次读写一个字节数组 public static void method4() throws IOException { BufferedInputStream bis = new BufferedInputStream(new FileInputStream("E:\\itcast\\字节流复制图片.avi")); BufferedOutputStream bos = new BufferedOutputStream(new FileOutputStream("myByteStream\\字节流复制图片.avi")); byte[] bys = new byte[1024]; int len; while ((len = bis.read(bys)) != -1) { bos.write(bys, 0, len); } bos.close(); bis.close(); } //字节缓冲流一次读写一个字节 public static void method3() throws IOException { BufferedInputStream bis = new BufferedInputStream(new FileInputStream("E:\\itcast\\字节流复制图片.avi")); BufferedOutputStream bos = new BufferedOutputStream(new FileOutputStream("myByteStream\\字节流复制图片.avi")); int by; while ((by = bis.read()) != -1) { bos.write(by); } bos.close(); bis.close(); } //基本字节流一次读写一个字节数组 public static void method2() throws IOException { //E:\\itcast\\字节流复制图片.avi //模块目录下的 字节流复制图片.avi FileInputStream fis = new FileInputStream("E:\\itcast\\字节流复制图片.avi"); FileOutputStream fos = new FileOutputStream("myByteStream\\字节流复制图 片.avi"); byte[] bys = new byte[1024]; int len; while ((len = fis.read(bys)) != -1) { fos.write(bys, 0, len); } fos.close(); fis.close(); } //基本字节流一次读写一个字节 public static void method1() throws IOException { //E:\\itcast\\字节流复制图片.avi //模块目录下的 字节流复制图片.avi FileInputStream fis = new FileInputStream("E:\\itcast\\字节流复制图片.avi"); FileOutputStream fos = new FileOutputStream("myByteStream\\字节流复制图 片.avi"); int by; while ((by = fis.read()) != -1) { fos.write(by); } fos.close(); fis.close(); } }- 1
- 2
- 3
- 4
- 5
- 6
- 7
- 8
- 9
- 10
- 11
- 12
- 13
- 14
- 15
- 16
- 17
- 18
- 19
- 20
- 21
- 22
- 23
- 24
- 25
- 26
- 27
- 28
- 29
- 30
- 31
- 32
- 33
- 34
- 35
- 36
- 37
- 38
- 39
- 40
- 41
- 42
- 43
- 44
- 45
- 46
- 47
- 48
- 49
- 50
- 51
- 52
- 53
- 54
- 55
- 56
- 57
- 58
- 59
- 60
- 61
- 62
- 63
- 64
- 65
- 66
- 67
- 68
- 69
- 70
- 71
- 72
- 73
- 74
4️⃣字符流
🌳 字符流的介绍
- 由于字节流操作中文不是特别的方便,所以Java就提供字符流
- 字符流 = 字节流 + 编码表
🌳 字符串中的编码解码

public class StringDemo { public static void main(String[] args) throws UnsupportedEncodingException { //定义一个字符串 String s = "中国"; //使用平台的默认字符集将该 String编码为一系列字节 byte[] bys = s.getBytes(); System.out.println("默认的字符集:" + Arrays.toString(bys)); byte[] bysUTF = s.getBytes("UTF-8"); System.out.println("UTF-8:" + Arrays.toString(bysUTF)); byte[] bysGBK = s.getBytes("GBK"); System.out.println("GBK:" + Arrays.toString(bysGBK)); String str = new String(bys); System.out.println(str); String strUTF = new String(bysUTF,"UTF-8"); System.out.println(strUTF); String strGBK= new String(bysGBK, "GBK"); System.out.println(strGBK); } }- 1
- 2
- 3
- 4
- 5
- 6
- 7
- 8
- 9
- 10
- 11
- 12
- 13
- 14
- 15
- 16
- 17
- 18
- 19
- 20
- 21
- 22
- 23
- 24
- 25
- 26
🌳 字符流中的编码解码
- InputStreamReader:是从字节流到字符流的桥梁
- OutputStreamWriter:是从字符流到字节流的桥梁
🌳 构造方法

public class ConversionStreamDemo { public static void main(String[] args) throws IOException { //OutputStreamWriter osw = new OutputStreamWriter(new FileOutputStream("myCharStream\\osw.txt")); OutputStreamWriter osw = new OutputStreamWriter(new FileOutputStream("E:\\Code\\springcloud\\itcast\\java.txt"), "UTF-8"); osw.write("中国"); osw.close(); //InputStreamReader isr = new InputStreamReader(new FileInputStream("myCharStream\\osw.txt")); InputStreamReader isr = new InputStreamReader(new FileInputStream("E:\\Code\\springcloud\\itcast\\java.txt"), "UTF-8"); //一次读取一个字符数据 int ch; while ((ch = isr.read()) != -1) { System.out.print((char) ch); } isr.close(); } }- 1
- 2
- 3
- 4
- 5
- 6
- 7
- 8
- 9
- 10
- 11
- 12
- 13
- 14
- 15
- 16
- 17
- 18
🌳 字符流写数据的5种方式

public class OutputStreamWriterDemo { public static void main(String[] args) throws IOException { OutputStreamWriter osw = new OutputStreamWriter(new FileOutputStream("E:\\Code\\springcloud\\itcast\\java\\osw.txt")); //void write ( int c):写一个字符 osw.write(97); osw.write(98); osw.write(99); //void writ ( char[] cbuf):写入一个字符数组 char[] chs = {'a', 'b', 'c', 'd', 'e'}; osw.write(chs); //void write ( char[] cbuf, int off, int len):写入字符数组的一部分 osw.write(chs, 0, chs.length); osw.write(chs, 1, 3); //void write (String str):写一个字符串 osw.write("abcde"); //void write (String str,int off, int len):写一个字符串的一部分 osw.write("abcde", 0, "abcde".length()); osw.write("abcde", 1, 3); //释放资源 osw.close(); } }- 1
- 2
- 3
- 4
- 5
- 6
- 7
- 8
- 9
- 10
- 11
- 12
- 13
- 14
- 15
- 16
- 17
- 18
- 19
- 20
- 21
- 22
- 23
- 24
- 25
- 26
- 27
🌳 刷新和关闭的方法

🌳 字符流读数据

public class InputStreamReaderDemo { public static void main(String[] args) throws IOException { InputStreamReader isr = new InputStreamReader(new FileInputStream("E:\\Code\\springcloud\\itcast\\java\\osw.txt")); //int read():一次读一个字符数据 int ch; while ((ch = isr.read()) != -1) { System.out.print((char) ch); } System.out.println("------------------"); //int read(char[] cbuf):一次读一个字符数组数据 char[] chs = new char[1024]; int len; while ((len = isr.read(chs)) != -1) { System.out.print(new String(chs, 0, len)); } //释放资源 isr.close(); } }- 1
- 2
- 3
- 4
- 5
- 6
- 7
- 8
- 9
- 10
- 11
- 12
- 13
- 14
- 15
- 16
- 17
- 18
- 19
- 20
- 21
- 22
- 23
🌳 字符流复制Java文件
public class CopyJavaDemo02 { public static void main(String[] args) throws IOException { //根据数据源创建字符输入流对象 FileReader fr = new FileReader("E:\\Code\\springcloud\\src\\main\\java\\com\\BufferStreamDemo.java"); //根据目的地创建字符输出流对象 FileWriter fw = new FileWriter("E:\\Code\\springcloud\\src\\main\\java\\com\\test.java"); char[] chs = new char[1024]; int len; while ((len = fr.read(chs)) != -1) { fw.write(chs, 0, len); } //释放资源 fw.close(); fr.close(); } }- 1
- 2
- 3
- 4
- 5
- 6
- 7
- 8
- 9
- 10
- 11
- 12
- 13
- 14
- 15
- 16
- 17
5️⃣字符缓冲流

public class BufferedStreamDemo01 { public static void main(String[] args) throws IOException { //BufferedWriter(Writer out) BufferedWriter bw = new BufferedWriter(new FileWriter("myCharStream\\bw.txt")); bw.write("hello\r\n"); bw.write("world\r\n"); bw.close(); //BufferedReader(Reader in) BufferedReader br = new BufferedReader(new FileReader("myCharStream\\bw.txt")); //一次读取一个字符数据 int ch; while ((ch = br.read()) != -1) { System.out.print((char) ch); } //一次读取一个字符数组数据 char[] chs = new char[1024]; int len; while ((len = br.read(chs)) != -1) { System.out.print(new String(chs, 0, len)); } br.close(); } }- 1
- 2
- 3
- 4
- 5
- 6
- 7
- 8
- 9
- 10
- 11
- 12
- 13
- 14
- 15
- 16
- 17
- 18
- 19
- 20
- 21
- 22
- 23
- 24
🌳 字符缓冲流特有功能

public class BufferedStreamDemo02 { public static void main(String[] args) throws IOException { //创建字符缓冲输出流 BufferedWriter bw = new BufferedWriter(new FileWriter("myCharStream\\bw.txt")); //写数据 for (int i = 0; i < 10; i++) { bw.write("hello" + i); //bw.write("\r\n"); bw.newLine(); bw.flush(); } //释放资源 bw.close(); //创建字符缓冲输入流 BufferedReader br = new BufferedReader(new FileReader("myCharStream\\bw.txt")); String line; while ((line = br.readLine()) != null) { System.out.println(line); } br.close(); } }- 1
- 2
- 3
- 4
- 5
- 6
- 7
- 8
- 9
- 10
- 11
- 12
- 13
- 14
- 15
- 16
- 17
- 18
- 19
- 20
- 21
- 22
- 23
- 24
🌳 字节流

🌳 字节流

🌳 点名器
public class CallNameDemo { public static void main(String[] args) throws IOException { //创建字符缓冲输入流对象 BufferedReader br = new BufferedReader(new FileReader("E:\\Code\\springcloud\\itcast\\java\\bw.txt")); //创建ArrayList集合对象 ArrayList<String> array = new ArrayList<String>(); //调用字符缓冲输入流对象的方法读数据 String line; while ((line = br.readLine()) != null) { //把读取到的字符串数据存储到集合中 array.add(line); } //释放资源 br.close(); //使用Random产生一个随机数,随机数的范围在:[0,集合的长度) Random r = new Random(); int index = r.nextInt(array.size()); //把第6步产生的随机数作为索引到ArrayList集合中获取值 String name = array.get(index); //把第7步得到的数据输出在控制台 System.out.println("幸运者是:" + name); } }- 1
- 2
- 3
- 4
- 5
- 6
- 7
- 8
- 9
- 10
- 11
- 12
- 13
- 14
- 15
- 16
- 17
- 18
- 19
- 20
- 21
- 22
- 23
🌳 集合到文件
@AllArgsConstructor @Data @NoArgsConstructor public class Student { private String sid; private String name; private int age; private String address; }- 1
- 2
- 3
- 4
- 5
- 6
- 7
- 8
- 9
public class ArrayListToFileDemo { public static void main(String[] args) throws IOException { //创建ArrayList集合 ArrayList<Student> array = new ArrayList<Student>(); //创建学生对象 Student s1 = new Student("itheima001", "林青霞", 30, "西安"); Student s2 = new Student("itheima002", "张曼玉", 35, "武汉"); Student s3 = new Student("itheima003", "王祖贤", 33, "郑州"); //把学生对象添加到集合中 array.add(s1); array.add(s2); array.add(s3); //创建字符缓冲输出流对象 BufferedWriter bw = new BufferedWriter(new FileWriter("E:\\Code\\springcloud\\itcast\\java\\students.txt")); //遍历集合,得到每一个学生对象 for (Student s : array) { //把学生对象的数据拼接成指定格式的字符串 StringBuilder sb = new StringBuilder(); sb.append(s.getSid()).append(",").append(s.getName()).append(",").append(s.getAge()).append(",").append(s.getAddress()); //调用字符缓冲输出流对象的方法写数据 bw.write(sb.toString()); bw.newLine(); bw.flush(); } //释放资源 bw.close(); } }- 1
- 2
- 3
- 4
- 5
- 6
- 7
- 8
- 9
- 10
- 11
- 12
- 13
- 14
- 15
- 16
- 17
- 18
- 19
- 20
- 21
- 22
- 23
- 24
- 25
- 26
- 27
- 28
- 29
🌳 文件到集合
public class FileToArrayListDemo { public static void main(String[] args) throws IOException { //创建字符缓冲输入流对象 BufferedReader br = new BufferedReader(new FileReader("E:\\Code\\springcloud\\itcast\\java\\students.txt")); //创建ArrayList集合对象 ArrayList<Student> array = new ArrayList<Student>(); //调用字符缓冲输入流对象的方法读数据 String line; while ((line = br.readLine()) != null) { //把读取到的字符串数据用split()进行分割,得到一个字符串数组 String[] strArray = line.split(","); //创建学生对象 Student s = new Student(); //把字符串数组中的每一个元素取出来对应的赋值给学生对象的成员变量值 //itheima001,林青霞,30,西安 s.setSid(strArray[0]); s.setName(strArray[1]); s.setAge(Integer.parseInt(strArray[2])); s.setAddress(strArray[3]); //把学生对象添加到集合 array.add(s); } //释放资源 br.close(); //遍历集合 for (Student s : array) { System.out.println(s.getSid() + "," + s.getName() + "," + s.getAge() + "," + s.getAddress()); } } }- 1
- 2
- 3
- 4
- 5
- 6
- 7
- 8
- 9
- 10
- 11
- 12
- 13
- 14
- 15
- 16
- 17
- 18
- 19
- 20
- 21
- 22
- 23
- 24
- 25
- 26
- 27
- 28
- 29
- 30
- 31
- 32
🥊递归
🌳 递归的介绍
- 以编程的角度来看,递归指的是方法定义中调用方法本身的现象
🌳 递归的注意事项
- 递归一定要有出口,否则内存溢出
- 递归虽然有出口,但是递归的次数也不宜过多,否则
内存溢出
🌳 不死神兔
public class DiGuiDemo1 { public static void main(String[] args) { int[] ints = new int[20]; ints[0] = 1; ints[1] = 1; for (int i = 2; i < ints.length; i++) { ints[i] = ints[i - 1] + ints[i - 2]; } System.out.println(ints[19]); System.out.println(f(20)); } public static int f(int n) { if (n == 1 || n == 2) { return 1; } else { return f(n - 1) + f(n - 2); } } }- 1
- 2
- 3
- 4
- 5
- 6
- 7
- 8
- 9
- 10
- 11
- 12
- 13
- 14
- 15
- 16
- 17
- 18
- 19
- 20
🌳 递归求阶乘
public class DiGuiDemo2 { public static void main(String[] args) { System.out.println(cheng(5)); } public static int cheng(int n) { if (n == 1) { return 1; } else { return n * cheng(n - 1); } } }- 1
- 2
- 3
- 4
- 5
- 6
- 7
- 8
- 9
- 10
- 11
- 12
- 13
🌳 递归遍历目录
public class DiGuiDemo3 { public static void main(String[] args) throws IOException { File file1 = new File("E:\\Code\\springcloud\\itcast"); file1.mkdirs(); File file2 = new File("E:\\Code\\springcloud\\itcast\\java.txt"); file2.createNewFile(); File file3 = new File("E:\\Code\\springcloud\\itcast\\java"); boolean mkdir = file3.mkdir(); show(new File("E:\\Code\\springcloud\\itcast")); } public static void show(File srcFile) { File[] fileArray = srcFile.listFiles(); if (fileArray != null) { for (File listFile : srcFile.listFiles()) { //判断该File对象是否是目录 if (listFile.isDirectory()) { //是:递归调用 show(listFile); } else { //不是:获取绝对路径输出在控制台 System.out.println(listFile.getAbsolutePath()); } } } } }- 1
- 2
- 3
- 4
- 5
- 6
- 7
- 8
- 9
- 10
- 11
- 12
- 13
- 14
- 15
- 16
- 17
- 18
- 19
- 20
- 21
- 22
- 23
- 24
- 25
- 26
- 27
- 28
🥼实现多线程
1️⃣进程和线程
🌳 进程:是正在运行的程序
- 进程:是系统进行
资源分配和调用的独立单位 - 每一个进程都有它自己的内存空间和系统资源
🌳 线程:是进程中的单个顺序控制流,是一条执行路径
单线程:一个进程如果只有一条执行路径,则称为单线程程序多线程:一个进程如果有多条执行路径,则称为多线程程序
2️⃣实现多线程
🌳 实现多线程-继承Thread类
- 定义一个类MyThread继承Thread类
- 在MyThread类中重写run()方法
- 创建MyThread类的对象
- 启动线程
🌳 run()方法和start()方法的区别

- run():封装线程执行的代码,直接调用,相当于普通方法的调用
- start():启动线程,然后由JVM调用此线程的run()方法
🌳 设置和获取线程名称

public class MyThread extends Thread { public MyThread() { } public MyThread(String name) { super(name); } @Override public void run() { for (int i = 0; i < 1000; i++) { System.out.println(getName() + ":" + i); } } }- 1
- 2
- 3
- 4
- 5
- 6
- 7
- 8
- 9
- 10
- 11
- 12
- 13
- 14
- 15
public class MyThreadDemo { public static void main(String[] args) { MyThread myThread = new MyThread(); MyThread myThread1 = new MyThread(); myThread.start(); myThread1.start(); System.out.println(myThread.currentThread()); } }- 1
- 2
- 3
- 4
- 5
- 6
- 7
- 8
- 9
- 10
- 11
public class MyThreadDemo { public static void main(String[] args) { MyThread myThread1 = new MyThread(); MyThread myThread2 = new MyThread(); myThread1.setName("高铁"); myThread2.setName("飞机"); myThread1.start(); myThread2.start(); System.out.println(Thread.currentThread().getName()); } }- 1
- 2
- 3
- 4
- 5
- 6
- 7
- 8
- 9
- 10
- 11
🌳 实现多线程-实现Runnable接口
- 定义一个类MyRunnable实现Runnable接口
- 在MyRunnable类中重写run()方法
- 创建MyRunnable类的对象
创建Thread类的对象,把MyRunnable对象作为构造方法的参数- 启动线程

public class MyRunnable implements Runnable { @Override public void run() { for(int i=0; i<100; i++) { System.out.println(Thread.currentThread().getName()+":"+i); } } }- 1
- 2
- 3
- 4
- 5
- 6
- 7
- 8
public class MyRunnableDemo { public static void main(String[] args) { //创建MyRunnable类的对象 MyRunnable my = new MyRunnable(); //创建Thread类的对象,把MyRunnable对象作为构造方法的参数 //Thread(Runnable target) // Thread t1 = new Thread(my); // Thread t2 = new Thread(my); //Thread(Runnable target, String name) Thread t1 = new Thread(my, "高铁"); Thread t2 = new Thread(my, "飞机"); //启动线程 t1.start(); t2.start(); } }- 1
- 2
- 3
- 4
- 5
- 6
- 7
- 8
- 9
- 10
- 11
- 12
- 13
- 14
- 15
- 16
🌳 多线程的实现方案
- 1️⃣ 继承Thread类
- 2️⃣ 实现Runnable接口
- 3️⃣ 实现Callable接口
- 4️⃣ 使用线程池
🌳 相比继承Thread类,实现Runnable接口的好处
- 避免了Java单继承的局限性
- 适合多个相同程序的代码去处理同一个资源的情况
- 把线程和程序的代码、数据有效分离,较好的体现了面向对象的设计思想
🌳实现多线程-实现Callable接口
🌳实现多线程-使用线程池3️⃣线程调度
🌳 两种调度方式
分时调度模型:所有线程轮流使用 CPU 的使用权,平均分配每个线程占用 CPU 的时间片抢占式调度模型:优先让优先级高的线程使用 CPU,如果线程的优先级相同,那么会随机选择一个,优先级高的线程获取的 CPU 时间片相对多一些
🌳 优先级相关方法

4️⃣线程控制

🌳 sleep演示
public class ThreadSleep extends Thread { @Override public void run() { for (int i = 0; i < 100; i++) { System.out.println(getName() + ":" + i); try { Thread.sleep(1000); } catch (InterruptedException e) { e.printStackTrace(); } } } }- 1
- 2
- 3
- 4
- 5
- 6
- 7
- 8
- 9
- 10
- 11
- 12
- 13
public class ThreadSleepDemo { public static void main(String[] args) { ThreadSleep ts1 = new ThreadSleep(); ThreadSleep ts2 = new ThreadSleep(); ThreadSleep ts3 = new ThreadSleep(); ts1.setName("曹操"); ts2.setName("刘备"); ts3.setName("孙权"); ts1.start(); ts2.start(); ts3.start(); } }- 1
- 2
- 3
- 4
- 5
- 6
- 7
- 8
- 9
- 10
- 11
- 12
- 13
🌳 Join演示
public class ThreadJoin extends Thread { @Override public void run() { for (int i = 0; i < 100; i++) { System.out.println(getName() + ":" + i); } } }- 1
- 2
- 3
- 4
- 5
- 6
- 7
- 8
public class ThreadJoinDemo { public static void main(String[] args) { ThreadJoin tj1 = new ThreadJoin(); ThreadJoin tj2 = new ThreadJoin(); ThreadJoin tj3 = new ThreadJoin(); tj1.setName("康熙"); tj2.setName("四阿哥"); tj3.setName("八阿哥"); tj1.start(); try { tj1.join(); } catch (InterruptedException e) { e.printStackTrace(); } tj2.start(); tj3.start(); } }- 1
- 2
- 3
- 4
- 5
- 6
- 7
- 8
- 9
- 10
- 11
- 12
- 13
- 14
- 15
- 16
- 17
- 18
🌳 Daemon演示
public class ThreadDaemon extends Thread { @Override public void run() { for (int i = 0; i < 100; i++) { System.out.println(getName() + ":" + i); } } }- 1
- 2
- 3
- 4
- 5
- 6
- 7
- 8
public class ThreadDaemonDemo { public static void main(String[] args) { ThreadDaemon td1 = new ThreadDaemon(); ThreadDaemon td2 = new ThreadDaemon(); td1.setName("关羽"); td2.setName("张飞"); //设置主线程为刘备 Thread.currentThread().setName("刘备"); //设置守护线程 td1.setDaemon(true); td2.setDaemon(true); td1.start(); td2.start(); for (int i = 0; i < 10; i++) { System.out.println(Thread.currentThread().getName() + ":" + i); } } }- 1
- 2
- 3
- 4
- 5
- 6
- 7
- 8
- 9
- 10
- 11
- 12
- 13
- 14
- 15
- 16
- 17
- 18
5️⃣线程状态
线程一共有五种状态,线程在各种状态之间转换

6️⃣线程安全
- 如果有多个线程在同时运行,而这些线程可能会同时运行这段代码
- 程序每次运行结果和单线程运行的结果是一样的,而且其他的变量的值也和预期的是一样的–
线程安全
🌳 安全问题出现的条件
- 是多线程环境
- 有共享数据
- 有多条语句操作共享数据
🌳 如何解决多线程安全问题呢?
- 基本思想:让程序没有安全问题的环境
🌳 怎么实现呢?
把多条语句操作共享数据的代码给锁起来,让任意时刻只能有一个线程执行即可- Java提供了同步代码块的方式来解决
public class SellTicket implements Runnable { private int tickets = 100; //在SellTicket类中重写run()方法实现卖票,代码步骤如下 @Override public void run() { while (true) { if (tickets > 0) { System.out.println(Thread.currentThread().getName() + "正在出售第" + tickets + "张票"); tickets--; } } } }- 1
- 2
- 3
- 4
- 5
- 6
- 7
- 8
- 9
- 10
- 11
- 12
- 13
- 14
- 15
public class SellTicketDemo { public static void main(String[] args) { //创建SellTicket类的对象 SellTicket st = new SellTicket(); //创建三个Thread类的对象,把SellTicket对象作为构造方法的参数,并给出对应的窗口名称 Thread t1 = new Thread(st, "窗口1"); Thread t2 = new Thread(st, "窗口2"); Thread t3 = new Thread(st, "窗口3"); //启动线程 t1.start(); t2.start(); t3.start(); } }- 1
- 2
- 3
- 4
- 5
- 6
- 7
- 8
- 9
- 10
- 11
- 12
- 13
- 14

卖票出现了问题 相同的票出现了多次 出现了负数的票 问题产生原因 线程执行的随机性导致的- 1
- 2
- 3
- 4
- 5
1️⃣ 同步代码块解决数据安全
🌳 同步代码块格式
synchronized(任意对象):就相当于给代码加锁了- 任意对象就可以看成是一把锁
好处:解决了多线程的数据安全问题弊端:当线程很多时,因为每个线程都会去判断同步上的锁,这是很耗费资源的,无形中会降低程序的运行效率
synchronized(任意对象) { 多条语句操作共享数据的代码 }- 1
- 2
- 3
public class SellTicket implements Runnable { private int tickets = 100; private Object obj = new Object(); @Override public void run() { while (true) { //tickets = 100; //t1,t2,t3 //假设t1抢到了CPU的执行权 //假设t2抢到了CPU的执行权 synchronized (obj) { //t1进来后,就会把这段代码给锁起来 if (tickets > 0) { try { //t1休息100毫秒 Thread.sleep(100); } catch (InterruptedException e) { e.printStackTrace(); } //窗口1正在出售第100张票 System.out.println(Thread.currentThread().getName() + "正在出售 第" + tickets + " 张票"); tickets--; //tickets = 99; } } //t1出来了,这段代码的锁就被释放了 } } }- 1
- 2
- 3
- 4
- 5
- 6
- 7
- 8
- 9
- 10
- 11
- 12
- 13
- 14
- 15
- 16
- 17
- 18
- 19
- 20
- 21
- 22
- 23
- 24
- 25
- 26
- 27
- 28
- 29
public class SellTicketDemo { public static void main(String[] args) { SellTicket st = new SellTicket(); Thread t1 = new Thread(st, "窗口1"); Thread t2 = new Thread(st, "窗口2"); Thread t3 = new Thread(st, "窗口3"); t1.start(); t2.start(); t3.start(); } }- 1
- 2
- 3
- 4
- 5
- 6
- 7
- 8
- 9
- 10
- 11
2️⃣ 同步方法解决数据安全
🌳 同步方法的格式
同步方法:就是把synchronized关键字加到方法上
修饰符 synchronized 返回值类型 方法名(方法参数) { 方法体; } 💮 同步方法的锁对象是什么呢? 💮 this- 1
- 2
- 3
- 4
- 5
- 6
同步静态方法:就是把synchronized关键字加到静态方法上
修饰符 static synchronized 返回值类型 方法名(方法参数) { 方法体; } 💮 同步静态方法的锁对象是什么呢? 💮 类名.class- 1
- 2
- 3
- 4
- 5
- 6
public class SellTicket implements Runnable { private static int tickets = 100; private int x = 0; @Override public void run() { while (true) { sellTicket(); } } // 同步方法 /* private synchronized void sellTicket() { if (tickets > 0) { try { Thread.sleep(100); } catch (InterruptedException e) { e.printStackTrace(); } System.out.println(Thread.currentThread().getName() + "正在出售第" + tickets + "张票"); tickets--; } }*/ // 静态同步方法 private static synchronized void sellTicket() { if (tickets > 0) { try { Thread.sleep(100); } catch (InterruptedException e) { e.printStackTrace(); } System.out.println(Thread.currentThread().getName() + "正在出售第" + tickets + "张票"); tickets--; } } }- 1
- 2
- 3
- 4
- 5
- 6
- 7
- 8
- 9
- 10
- 11
- 12
- 13
- 14
- 15
- 16
- 17
- 18
- 19
- 20
- 21
- 22
- 23
- 24
- 25
- 26
- 27
- 28
- 29
- 30
- 31
- 32
- 33
- 34
- 35
- 36
- 37
- 38
- 39
public class SellTicketDemo { public static void main(String[] args) { SellTicket st = new SellTicket(); Thread t1 = new Thread(st, "窗口1"); Thread t2 = new Thread(st, "窗口2"); Thread t3 = new Thread(st, "窗口3"); t1.start(); t2.start(); t3.start(); } }- 1
- 2
- 3
- 4
- 5
- 6
- 7
- 8
- 9
- 10
- 11
3️⃣ Look锁
🌳 ReentrantLock构造方法
- Lock是接口不能直接实例化
- 采用它的实现类ReentrantLock来实例化

🌳 加锁解锁方法

public class SellTicket implements Runnable { private int tickets = 100; private Lock lock = new ReentrantLock(); @Override public void run() { while (true) { try { lock.lock(); if (tickets > 0) { try { Thread.sleep(100); } catch (InterruptedException e) { e.printStackTrace(); } System.out.println(Thread.currentThread().getName() + "正在出售 第" + tickets + " 张票"); tickets--; } } finally { lock.unlock(); } } } }- 1
- 2
- 3
- 4
- 5
- 6
- 7
- 8
- 9
- 10
- 11
- 12
- 13
- 14
- 15
- 16
- 17
- 18
- 19
- 20
- 21
- 22
- 23
- 24
public class SellTicketDemo { public static void main(String[] args) { SellTicket st = new SellTicket(); Thread t1 = new Thread(st, "窗口1"); Thread t2 = new Thread(st, "窗口2"); Thread t3 = new Thread(st, "窗口3"); t1.start(); t2.start(); t3.start(); } }- 1
- 2
- 3
- 4
- 5
- 6
- 7
- 8
- 9
- 10
- 11
7️⃣线程安全的类
🌳 StringBuffer
- 线程安全,可变的字符序列
- 从版本JDK 5开始,被
StringBuilder替代 - 通常应该使用StringBuilder类,因为它支持所有相同的操
作,但它更快,因为它不执行同步
🌳 Vector
- 从Java 2平台v1.2开始,该类改进了List接口,使其成为Java Collections Framework的成员
- 与新的集合实现不同, Vector被同步
如果不需要线程安全的实现,建议使用ArrayList代替Vector
🌳 Hashtable
- 该类实现了一个哈希表,它将键映射到值。 任何非null对象都可以用作键或者值
- 从Java 2平台v1.2开始,该类进行了改进,实现了Map接口,使其成为Java Collections Framework的成员
- 与新的集合实现不同, Hashtable被同步
如果不需要线程安全的实现,建议使用HashMap代替Hashtable
8️⃣生产者消费者
🌳 生产者和消费者模式概述
- 生产者消费者模式是一个十分经典的多线程协作的模式
- 所谓生产者消费者问题,实际上主要是包含了两类线程:
一类是生产者线程用于生产数据
一类是消费者线程用于消费数据 - 为了解耦生产者和消费者的关系,通常会采用共享的数据区域,就像是一个仓库
- 生产者生产数据之后直接放置在共享数据区中,并不需要关心消费者的行为
- 消费者只需要从共享数据区中去获取数据,并不需要关心生产者的行为

🌳 Object类的等待和唤醒方法

🌳 生产者和消费者案例
- 奶箱类(Box):定义一个成员变量,表示第x瓶奶,提供存储牛奶和获取牛奶的操作
- 生产者类(Producer):实现Runnable接口,重写run()方法,调用存储牛奶的操作
- 消费者类(Customer):实现Runnable接口,重写run()方法,调用获取牛奶的操作
- 测试类(BoxDemo):里面有main方法,main方法中的代码步骤如下
①创建奶箱对象,这是共享数据区域
②创建生产者对象,把奶箱对象作为构造方法参数传递,因为在这个类中要调用存储牛奶的操作
③创建消费者,把奶箱对象作为构造方法参数传递,因为在这个类中要调用获取牛奶的操作
④创建2个线程对象,分别把生产者对象和消费者对象作为构造方法参数传递
⑤启动线程
public class Box { //定义一个成员变量,表示第x瓶奶 private int milk; //定义一个成员变量,表示奶箱的状态 private boolean state = false; public synchronized void put(int milk) { //如果有牛奶,等待消费 if(state) { try { wait(); } catch (InterruptedException e) { e.printStackTrace(); } } //如果没有牛奶,就生产牛奶 this.milk = milk; System.out.println("送奶工将第" + this.milk + "瓶奶放入奶箱"); //生产完毕之后,修改奶箱状态 state = true; //唤醒其他等待的线程 notifyAll(); } public synchronized void get() { //如果没有牛奶,等待生产 if (!state) { try { wait(); } catch (InterruptedException e) { e.printStackTrace(); } } //如果有牛奶,就消费牛奶 System.out.println("用户拿到第" + this.milk + "瓶奶"); //消费完毕之后,修改奶箱状态 state = false; //唤醒其他等待的线程 notifyAll(); } }- 1
- 2
- 3
- 4
- 5
- 6
- 7
- 8
- 9
- 10
- 11
- 12
- 13
- 14
- 15
- 16
- 17
- 18
- 19
- 20
- 21
- 22
- 23
- 24
- 25
- 26
- 27
- 28
- 29
- 30
- 31
- 32
- 33
- 34
- 35
- 36
- 37
- 38
- 39
- 40
- 41
- 42
public class Producer implements Runnable { private Box b; public Producer(Box b) { this.b = b; } @Override public void run() { for (int i = 1; i <= 30; i++) { b.put(i); } } }- 1
- 2
- 3
- 4
- 5
- 6
- 7
- 8
- 9
- 10
- 11
- 12
- 13
- 14
public class Customer implements Runnable { private Box b; public Customer(Box b) { this.b = b; } @Override public void run() { while (true) { b.get(); } } }- 1
- 2
- 3
- 4
- 5
- 6
- 7
- 8
- 9
- 10
- 11
- 12
- 13
- 14
public class Customer implements Runnable { private Box b; public Customer(Box b) { this.b = b; } @Override public void run() { while (true) { b.get(); } } }- 1
- 2
- 3
- 4
- 5
- 6
- 7
- 8
- 9
- 10
- 11
- 12
- 13
- 14
🍶网络编程
1️⃣网络编程入门
🌳 计算机网络
- 是指将地理位置不同的具有独立功能的多台计算机及其外部设备,通过通信线路连接起来
- 在网络操作系统,网络管理软件及网络通信协议的管理和协调下,实现资源共享和信息传递的计算机系统
🌳 网络编程
- 在网络通信协议下,实现网络互连的不同计算机上运行的程序间可以进行数据交换
🌳 网络编程三要素
IP地址:而IP地址就是这个标识号–设备的标识端口:端口号就可以唯一标识设备中的应用程序了–应用程序的标识协议:通信双方必须同时遵守才能完成数据交换–常见的协议有UDP协议和TCP协议
🌳 IP地址
IPv4:是给每个连接在网络上的主机分配一个32bit地址IPv6:为了扩大地址空间,通过IPv6重新定义地址空间,采用128位地址长度
🌳 InetAddress
- InetAddress:此类表示Internet协议(IP)地址

package com.itcast.thread; import java.net.InetAddress; import java.net.UnknownHostException; public class InetAddressDemo { public static void main(String[] args) throws UnknownHostException { //InetAddress address = InetAddress.getByName("itheima"); InetAddress address = InetAddress.getByName("192.168.1.6"); //public String getHostName():获取此IP地址的主机名 String name = address.getHostName(); //public String getHostAddress():返回文本显示中的IP地址字符串 String ip = address.getHostAddress(); System.out.println("主机名:" + name); System.out.println("IP地址:" + ip); } }- 1
- 2
- 3
- 4
- 5
- 6
- 7
- 8
- 9
- 10
- 11
- 12
- 13
- 14
- 15
- 16
- 17
- 18
- 19
- 20
2️⃣UDP通信程序
🌳 UDP协议:
用户数据报协议(User Datagram Protocol)- UDP是
无连接通信协议:即在数据传输时,数据的发送端和接收端不建立逻辑连接 - 简单来说:当一台计算机向另外一台计算机发送数据时,发送端不会确认接收端是否存在,就会发出数据,同样接收端在收到数据时,也不会向发送端反馈是否收到数据
- 由于使用UDP协议消耗资源小,通信效率高,所以通常都会用于音频、视频和普通数据的传输
🌳 UDP通信原理
- UDP协议是一种不可靠的网络协议
- 它在通信的两端各建立一个Socket对象,但是这两个Socket只是发送,接收数据的对象
- 因此对于基于UDP协议的通信双方而言,没有所谓的客户端和服务器的概念
- Java提供了DatagramSocket类作为基于UDP协议的Socket
🌳 UDP发送数据
- 创建发送端的Socket对象(DatagramSocket)
- 创建数据,并把数据打包
- 调用DatagramSocket对象的方法发送数据
- 关闭发送端
🌳 构造方法
🌳 相关方法

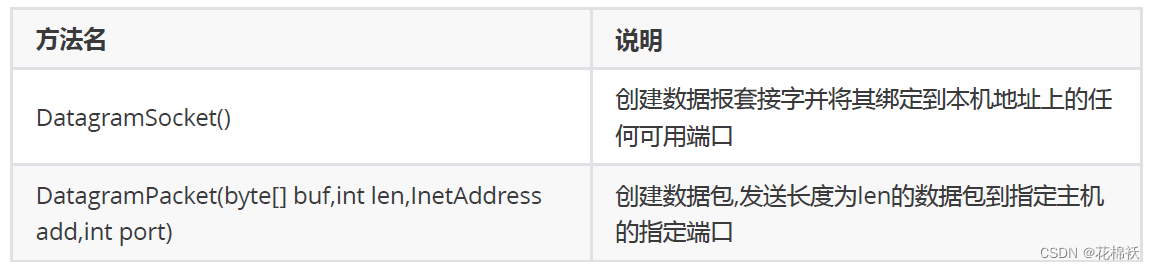
public class SendDemo { public static void main(String[] args) throws IOException { //创建发送端的Socket对象(DatagramSocket) // DatagramSocket() 构造数据报套接字并将其绑定到本地主机上的任何可用端口 DatagramSocket ds = new DatagramSocket(); //创建数据,并把数据打包 //DatagramPacket(byte[] buf, int length, InetAddress address, int port) //构造一个数据包,发送长度为 length的数据包到指定主机上的指定端口号。 byte[] bys = "hello,udp,我来了".getBytes(); DatagramPacket dp = new DatagramPacket(bys, bys.length, InetAddress.getByName("192.168.1.66"), 10086); //调用DatagramSocket对象的方法发送数据 //void send(DatagramPacket p) 从此套接字发送数据报包 ds.send(dp); //关闭发送端 //void close() 关闭此数据报套接字 ds.close(); } }- 1
- 2
- 3
- 4
- 5
- 6
- 7
- 8
- 9
- 10
- 11
- 12
- 13
- 14
- 15
- 16
- 17
- 18
- 19
🌳 UDP接收数据
- 创建接收端的Socket对象(DatagramSocket)
- 创建一个数据包,用于接收数据
- 调用DatagramSocket对象的方法接收数据
- 解析数据包,并把数据在控制台显示
- 关闭接收端
🌳 构造方法

🌳 相关方法

public class ReceiveDemo { public static void main(String[] args) throws IOException { //创建接收端的Socket对象(DatagramSocket) DatagramSocket datagramSocket = new DatagramSocket(10086); while (true) { //创建一个数据包,用于接收数据 byte[] bytes = new byte[1024]; DatagramPacket datagramPacket = new DatagramPacket(bytes, bytes.length); //调用DatagramSocket对象的方法接收数据 datagramSocket.receive(datagramPacket); //解析数据包,并把数据在控制台显示 System.out.println("数据是:" + new String(datagramPacket.getData(), 0, datagramPacket.getLength())); } } }- 1
- 2
- 3
- 4
- 5
- 6
- 7
- 8
- 9
- 10
- 11
- 12
- 13
- 14
- 15
- 16
- 17
3️⃣TCP通信程序
🌳 TCP协议:传输控制协议 (Transmission Control Protocol)
- TCP协议是
面向连接的通信协议:即传输数据之前,在发送端和接收端建立逻辑连接,然后再传输数据,它提供了两台计算机之间可靠无差错的数据传输 - 在TCP连接中必须要明确客户端与服务器端,由客户端向服务端发出连接请求,每次连接的创建都需要经过“三次握手”
- 三次握手:TCP协议中,在发送数据的准备阶段,客户端与服务器之间的三次交互,以保证连接的可靠
第一次握手,客户端向服务器端发出连接请求,等待服务器确认
第二次握手,服务器端向客户端回送一个响应,通知客户端收到了连接请求
第三次握手,客户端再次向服务器端发送确认信息,确认连接 - 完成三次握手,连接建立后,客户端和服务器就可以开始进行数据传输了
- 由于这种面向连接的特性,TCP协议可以保证传输数据的安全,所以应用十分广泛。例如上传文件、下载文件、浏览网页等
🌳 Java中的TCP通信
💮 Java对基于TCP协议的的网络提供了良好的封装,使用Socket对象来代表两端的通信端口,并通过Socket产生IO流来进行网络通信
💮 Java为客户端提供了Socket类,为服务器端提供了ServerSocket类🌳 TCP发送数据
- 创建客户端的Socket对象(soxket)
- 获取输出流,写数据
- 释放资源
🌳 构造方法

🌳 相关方法


public class ClientDemo { public static void main(String[] args) throws IOException { //创建客户端的Socket对象(Socket) //Socket(String host, int port) 创建流套接字并将其连接到指定主机上的指定端口号 Socket s = new Socket("192.168.1.6", 10000); //获取输出流,写数据 //OutputStream getOutputStream() 返回此套接字的输出流 OutputStream os = s.getOutputStream(); os.write("hello,tcp,我来了".getBytes()); //释放资源 s.close(); } }- 1
- 2
- 3
- 4
- 5
- 6
- 7
- 8
- 9
- 10
- 11
- 12
- 13
🌳 TCP接收数据
- 创建服务器端的Socket对象(ServerSocker)
- 获取输入流,读数据,并把数据显示在控制台上
- 释放资源
🌳 构造方法

🌳 相关方法

public class ServerDemo { public static void main(String[] args) throws IOException { //创建服务器端的Socket对象(ServerSocket) //ServerSocket(int port) 创建绑定到指定端口的服务器套接字 ServerSocket serverSocket = new ServerSocket(10000); //Socket accept() 监听要连接到此套接字并接收它 Socket socket = serverSocket.accept(); //获取输入流,读数据,并把数据显示在控制台 InputStream is = socket.getInputStream(); byte[] bys = new byte[1024]; int len = is.read(bys); String data = new String(bys, 0, len); System.out.println("数据是:" + data); //释放资源 socket.close(); serverSocket.close(); } }- 1
- 2
- 3
- 4
- 5
- 6
- 7
- 8
- 9
- 10
- 11
- 12
- 13
- 14
- 15
- 16
- 17
- 18
- 19
- 20
- 21
- 22
🌳 案例需求
💮 客户端:发送数据,接受服务器反馈
💮 服务器:收到消息后给出反馈public class ClientDemo { public static void main(String[] args) throws IOException { //创建客户端的Socket对象(Socket) Socket socket = new Socket("192.168.1.6", 10000); //获取输出流,写数据 OutputStream outputStream = socket.getOutputStream(); outputStream.write("hello,tcp,我来了".getBytes()); //接收服务器反馈 InputStream inputStream = socket.getInputStream(); byte[] bys = new byte[1024]; int len = inputStream.read(bys); String data = new String(bys, 0, len); System.out.println("服务器:" + data); //释放资源 socket.close(); } }- 1
- 2
- 3
- 4
- 5
- 6
- 7
- 8
- 9
- 10
- 11
- 12
- 13
- 14
- 15
- 16
- 17
- 18
- 19
- 20
- 21
public class ServerDemo { public static void main(String[] args) throws IOException { //创建服务器端的Socket对象(ServerSocket) ServerSocket serverSocket = new ServerSocket(10000); //监听客户端连接,返回一个Socket对象 Socket socket = serverSocket.accept(); //获取输入流,读数据,并把数据显示在控制台 InputStream inputStream = socket.getInputStream(); byte[] bys = new byte[1024]; int len = inputStream.read(bys); String data = new String(bys, 0, len); System.out.println("客户端:" + data); //给出反馈 OutputStream outputStream = socket.getOutputStream(); outputStream.write("数据我已经收到".getBytes()); //释放资源 serverSocket.close(); } }- 1
- 2
- 3
- 4
- 5
- 6
- 7
- 8
- 9
- 10
- 11
- 12
- 13
- 14
- 15
- 16
- 17
- 18
- 19
- 20
- 21
- 22
- 23
🌳 案例需求
💮 客户端:数据来自于键盘录入, 直到输入的数据是886,发送数据结束
💮 服务端:接收到数据在控制台输出public class ClientDemo { public static void main(String[] args) throws IOException { //创建客户端Socket对象 Socket socket = new Socket("192.168.1.6", 10000); //数据来自于键盘录入,直到输入的数据是886,发送数据结束 BufferedReader br = new BufferedReader(new InputStreamReader(System.in)); //封装输出流对象 BufferedWriter bw = new BufferedWriter(new OutputStreamWriter(socket.getOutputStream())); String line; while ((line = br.readLine()) != null) { if ("886".equals(line)) { break; } //获取输出流对象 bw.write(line); bw.newLine(); bw.flush(); } //释放资源 socket.close(); } }- 1
- 2
- 3
- 4
- 5
- 6
- 7
- 8
- 9
- 10
- 11
- 12
- 13
- 14
- 15
- 16
- 17
- 18
- 19
- 20
- 21
- 22
public class ServerDemo { public static void main(String[] args) throws IOException { //创建服务器Socket对象 ServerSocket ss = new ServerSocket(10000); //监听客户端的连接,返回一个对应的Socket对象 Socket socket = ss.accept(); //获取输入流 BufferedReader br = new BufferedReader(new InputStreamReader(socket.getInputStream())); String line; while ((line = br.readLine()) != null) { System.out.println(line); } //释放资源 ss.close(); } }- 1
- 2
- 3
- 4
- 5
- 6
- 7
- 8
- 9
- 10
- 11
- 12
- 13
- 14
- 15
- 16
🚔Lambda表达式
🌳 Lambda示例
public class LambdaDemo { public static void main(String[] args) { new Thread(() -> { System.out.println("多线程程序启动了"); }).start(); } }- 1
- 2
- 3
- 4
- 5
- 6
- 7
1️⃣标准格式
🌳 Lambda表达式的标准格式
- (形式参数) -> {代码块}
形式参数:如果有多个参数,参数之间用逗号隔开;如果没有参数,留空即可->:由英文中画线和大于符号组成,固定写法。代表指向动作代码块:是我们具体要做的事情,也就是以前我们写的方法体内容
2️⃣Lambda练习
🌳 Lambda表达式的使用前提
- 有一个接口
- 接口中有且仅有一个抽象方法
🌳 无参无返回值抽象方法的练习
public interface Eatable { void eat(); }- 1
- 2
- 3
public class EatableImpl implements Eatable{ @Override public void eat() { System.out.println("一天一苹果,医生远离我"); } }- 1
- 2
- 3
- 4
- 5
- 6
public class EatableDemo { public static void main(String[] args) { Eatable eatable = new EatableImpl(); useEatable(eatable); useEatable(new Eatable() { @Override public void eat() { System.out.println("一天两个果子"); } }); useEatable(()->{ System.out.println("一天一个果"); }); } public static void useEatable(Eatable eatable) { eatable.eat(); } }- 1
- 2
- 3
- 4
- 5
- 6
- 7
- 8
- 9
- 10
- 11
- 12
- 13
- 14
- 15
- 16
- 17
- 18
- 19
- 20
- 21
- 22
- 23
🌳 有参无返回值抽象方法的练习
public interface Flyable { void fly(String s); }- 1
- 2
- 3
public class FlyableDemo { public static void main(String[] args) { //匿名内部类 useFlyable(new Flyable() { @Override public void fly(String s) { System.out.println(s); System.out.println("飞机自驾游"); } }); System.out.println("--------"); //Lambda useFlyable((String s) -> { System.out.println(s); System.out.println("飞机自驾游"); }); } private static void useFlyable(Flyable f) { f.fly("风和日丽,晴空万里"); } }- 1
- 2
- 3
- 4
- 5
- 6
- 7
- 8
- 9
- 10
- 11
- 12
- 13
- 14
- 15
- 16
- 17
- 18
- 19
- 20
- 21
- 22
- 23
- 24
🌳 有参有返回值抽象方法的练习
public interface Addable { int add(int x, int y); }- 1
- 2
- 3
public class AddableDemo { public static void main(String[] args) { //在主方法中调用useAddable方法 useAddable((int x, int y) -> { return x + y; }); } private static void useAddable(Addable a) { int sum = a.add(10, 20); System.out.println(sum); } }- 1
- 2
- 3
- 4
- 5
- 6
- 7
- 8
- 9
- 10
- 11
- 12
- 13
3️⃣省略模式
🌳 省略的规则
💮 参数类型可以省略
💮 有多个参数的情况下,不能只省略一个
💮 如果参数有且仅有一个,那么小括号可以省略
💮如果代码块的语句只有一条,可以省略大括号和分号,和return关键字4️⃣注意事项
💮 使用Lambda必须要有接口,并且要求接口中有且仅有一个抽象方法
💮 必须有上下文环境,才能推导出Lambda对应的接口
💮 根据局部变量的赋值得知Lambda对应的接口
💮 根据调用方法的参数得知Lambda对应的接口5️⃣与匿名内部类的区别
🌳 所需类型不同
- 匿名内部类:可以是接口,也可以是抽象类,还可以是具体类
- Lambda表达式:只能是接口
🌳 使用限制不同
- 如果接口中有且仅有一个抽象方法,可以使用Lambda表达式,也可以使用匿名内部类
- 如果接口中多于一个抽象方法,只能使用匿名内部类,而不能使用Lambda表达式
🌳 实现原理不同
- 匿名内部类:编译之后,产生一个单独的.class字节码文件
- Lambda表达式:编译之后,没有一个单独的.class字节码文件:对应的字节码会在运行的时候动态生成
🚍方法引用
1️⃣方法引用符
🌳
::该符号为引用运算符,而它所在的表达式被称为方法引用- 可推导就是可省略”的原则
- 无需指定参数类型,也无需指定的重载形式,它们都将被自动推导
- 如果使用方法引用,也是同样可以根据上下文进行推导
public interface Printable { void printString(String s); }- 1
- 2
- 3
public class PrintableDemo { public static void main(String[] args) { //在主方法中调用usePrintable方法 usePrintable((String s) -> { System.out.println(s); }); //Lambda简化写法 usePrintable(s -> System.out.println(s)); //方法引用 usePrintable(System.out::println); } private static void usePrintable(Printable p) { p.printString("爱生活爱Java"); } }- 1
- 2
- 3
- 4
- 5
- 6
- 7
- 8
- 9
- 10
- 11
- 12
- 13
- 14
- 15
- 16
2️⃣引用类方法
🌳 引用类方法
💮 引用:类的静态方法
💮 格式:类名::静态方法public interface Converter { int convert(String s); }- 1
- 2
- 3
public class ConverterDemo { public static void main(String[] args) { //Lambda写法 useConverter(s -> Integer.parseInt(s)); //引用类方法 useConverter(Integer::parseInt); } private static void useConverter(Converter c) { int number = c.convert("123456"); System.out.println(number); } }- 1
- 2
- 3
- 4
- 5
- 6
- 7
- 8
- 9
- 10
- 11
- 12
- 13
- 💕
Lambda表达式被类方法替代的时候,它的形式参数全部传递给静态方法作为参数
3️⃣引用对象的实例方法
🌳 引用对象的实例方法
💮 引用:类中的成员方法
💮 格式:对象::成员方法public class PrintString { //把字符串参数变成大写的数据,然后在控制台输出 public void printUpper(String s) { String result = s.toUpperCase(); System.out.println(result); } }- 1
- 2
- 3
- 4
- 5
- 6
- 7
public interface Printer { void printUpperCase(String s); }- 1
- 2
- 3
public class PrinterDemo { public static void main(String[] args) { //Lambda简化写法 usePrinter(s -> System.out.println(s.toUpperCase())); //引用对象的实例方法 PrintString ps = new PrintString(); usePrinter(ps::printUpper); } private static void usePrinter(Printer p) { p.printUpperCase("HelloWorld"); } }- 1
- 2
- 3
- 4
- 5
- 6
- 7
- 8
- 9
- 10
- 11
- 12
- 13
- 💕
Lambda表达式被对象的实例方法替代的时候,它的形式参数全部传递给该方法作为参数
4️⃣引用类的实例方法
🌳 引用类的实例方法
💮 引用:类中的成员方法
💮 格式:类名::成员方法public interface MyString { String mySubString(String s,int x,int y); }- 1
- 2
- 3
public class MyStringDemo { public static void main(String[] args) { //Lambda简化写法 useMyString((s, x, y) -> s.substring(x, y)); //引用类的实例方法 useMyString(String::substring); } private static void useMyString(MyString my) { String s = my.mySubString("HelloWorld", 2, 5); System.out.println(s); } }- 1
- 2
- 3
- 4
- 5
- 6
- 7
- 8
- 9
- 10
- 11
- 12
- 13
- 💕
Lambda表达式被类的实例方法替代的时候,第一个参数作为调用者,后面的参数全部传递给该方法作为参数
6️⃣引用构造器
💟 引用构造器
💮 引用:引用构造方法
💮 格式:类名::newpublic class Student { private String name; private int age; public Student() { } public Student(String name, int age) { this.name = name; this.age = age; } public String getName() { return name; } public void setName(String name) { this.name = name; } public int getAge() { return age; } public void setAge(int age) { this.age = age; } }- 1
- 2
- 3
- 4
- 5
- 6
- 7
- 8
- 9
- 10
- 11
- 12
- 13
- 14
- 15
- 16
- 17
- 18
- 19
- 20
- 21
- 22
- 23
- 24
- 25
- 26
- 27
- 28
public interface StudentBuilder { Student build(String name,int age); }- 1
- 2
- 3
public class StudentDemo { public static void main(String[] args) { //Lambda简化写法 useStudentBuilder((name, age) -> new Student(name, age)); //引用构造器 useStudentBuilder(Student::new); } private static void useStudentBuilder(StudentBuilder sb) { Student s = sb.build("林青霞", 30); System.out.println(s.getName() + "," + s.getAge()); } }- 1
- 2
- 3
- 4
- 5
- 6
- 7
- 8
- 9
- 10
- 11
- 12
- 13
- 💕
Lambda表达式被构造器替代的时候,它的形式参数全部传递给构造器作为参数
🎍函数式接口
💟 函数式接口概念
💮 有且仅有一个抽象方法的接口
💮 @FunctionalInterface放在接口定义的上方检测一个接口是不是函数式接口
💮 如果接口是函数式接口,编译通过;如果不是,编译失败1️⃣函数式接口作为方法的参数
💟 定义一个类(RunnableDemo),在类中提供两个方法
💟 一个方法是:startThread(Runnable r) 方法参数Runnable是一个函数式接口
💟 一个方法是主方法,在主方法中调用startThread方法public class RunnableDemo { public static void main(String[] args) { //在主方法中调用startThread方法 //匿名内部类的方式 startThread(new Runnable() { @Override public void run() { System.out.println(Thread.currentThread().getName() + "线程启动了"); } }); //Lambda方式 startThread(() -> System.out.println(Thread.currentThread().getName() + "线 程启动了")); } private static void startThread(Runnable r) { new Thread(r).start(); } }- 1
- 2
- 3
- 4
- 5
- 6
- 7
- 8
- 9
- 10
- 11
- 12
- 13
- 14
- 15
- 16
- 17
- 18
2️⃣函数式接口作为方法的返回值
💟 定义一个类(ComparatorDemo),在类中提供两个方法
💟 一个方法是:Comparator getComparator() 方法返回值Comparator是一个函数式接口
💟 一个方法是主方法,在主方法中调用getComparator方法public class ComparatorDemo { public static void main(String[] args) { //定义集合,存储字符串元素 ArrayList<String> array = new ArrayList<String>(); array.add("cccc"); array.add("aa"); array.add("b"); array.add("ddd"); System.out.println("排序前:" + array); Collections.sort(array, getComparator()); System.out.println("排序后:" + array); } private static Comparator<String> getComparator() { //匿名内部类的方式实现 // return new Comparator() { // @Override // public int compare(String s1, String s2) { // return s1.length()-s2.length(); // } // }; //Lambda方式实现 return (s1, s2) -> s1.length() - s2.length(); } }- 1
- 2
- 3
- 4
- 5
- 6
- 7
- 8
- 9
- 10
- 11
- 12
- 13
- 14
- 15
- 16
- 17
- 18
- 19
- 20
- 21
- 22
- 23
- 24
- 25
3️⃣函数式接口-Supplier
💟 Supplier接口也被称为生产型接口
💟 如果我们指定了接口的泛型是什么类型,那么接口中的get方法就会生产什么类型的数据供我们使用

public class SupplierDemo { public static void main(String[] args) { String s = getString(() -> "林青霞"); System.out.println(s); Integer i = getInteger(() -> 30); System.out.println(i); } //定义一个方法,返回一个整数数据 private static Integer getInteger(Supplier<Integer> sup) { return sup.get(); } //定义一个方法,返回一个字符串数据 private static String getString(Supplier<String> sup) { return sup.get(); } }- 1
- 2
- 3
- 4
- 5
- 6
- 7
- 8
- 9
- 10
- 11
- 12
- 13
- 14
- 15
- 16
- 17
- 18
4️⃣用函数式接口-Consumer
💟 Consumer接口也被称为消费型接口,它消费的数据的数据类型由泛型指定

public class ConsumerDemo { public static void main(String[] args) { //操作一 operatorString("林青霞", s -> System.out.println(s)); //操作二 operatorString("林青霞", s -> System.out.println(new StringBuilder(s).reverse().toString())); System.out.println("--------"); //传入两个操作使用andThen完成 operatorString("林青霞", s -> System.out.println(s), s -> System.out.println(new StringBuilder(s).reverse().toString())); } //定义一个方法,用不同的方式消费同一个字符串数据两次 private static void operatorString(String name, Consumer<String> con1, Consumer<String> con2) { con1.andThen(con2).accept(name); } //定义一个方法,消费一个字符串数据 private static void operatorString(String name, Consumer<String> con) { con.accept(name); } }- 1
- 2
- 3
- 4
- 5
- 6
- 7
- 8
- 9
- 10
- 11
- 12
- 13
- 14
- 15
- 16
- 17
- 18
- 19
- 20
- 21
- 22
- 23
5️⃣函数式接口之-Predicate
💟 Predicate接口通常用于判断参数是否满足指定的条件

public class PredicateDemo02 { public static void main(String[] args) { boolean b1 = checkString("hello", s -> s.length() > 8); System.out.println(b1); boolean b2 = checkString("helloworld", s -> s.length() > 8); System.out.println(b2); boolean b3 = checkString("hello", s -> s.length() > 8, s -> s.length() < 15); System.out.println(b3); boolean b4 = checkString("helloworld", s -> s.length() > 8, s -> s.length() < 15); System.out.println(b4); } //同一个字符串给出两个不同的判断条件,最后把这两个判断的结果做逻辑与运算的结果作为最终的结果 private static boolean checkString(String s, Predicate<String> pre1, Predicate<String> pre2) { return pre1.or(pre2).test(s); } //判断给定的字符串是否满足要求 private static boolean checkString(String s, Predicate<String> pre) { return pre.test(s); } }- 1
- 2
- 3
- 4
- 5
- 6
- 7
- 8
- 9
- 10
- 11
- 12
- 13
- 14
- 15
- 16
- 17
- 18
- 19
- 20
- 21
- 22
public class PredicateTest { public static void main(String[] args) { String[] strArray = {"林青霞,30", "柳岩,34", "张曼玉,35", "貂蝉,33", "王祖贤,31"}; ArrayList<String> array = myFilter(strArray, s -> s.split(",")[0].length() > 2, s -> Integer.parseInt(s.split(",")[1]) > 30); for (String str : array) { System.out.println(str); } } //通过Predicate接口的拼装将符合要求的字符串筛选到集合ArrayList中 private static ArrayList<String> myFilter(String[] strArray, Predicate<String> pre1, Predicate<String> pre2) { //定义一个集合 ArrayList<String> array = new ArrayList<String>(); //遍历数组 for (String str : strArray) { if (pre1.and(pre2).test(str)) { array.add(str); } } return array; } }- 1
- 2
- 3
- 4
- 5
- 6
- 7
- 8
- 9
- 10
- 11
- 12
- 13
- 14
- 15
- 16
- 17
- 18
- 19
- 20
- 21
- 22
- 23
- 24
6️⃣函数式接口之-Function
💟 Function

public class FunctionDemo { public static void main(String[] args) { //操作一 convert("100", s -> Integer.parseInt(s)); //操作二 convert(100, i -> String.valueOf(i + 566)); //使用andThen的方式连续执行两个操作 convert("100", s -> Integer.parseInt(s), i -> String.valueOf(i + 566)); } //定义一个方法,把一个字符串转换int类型,在控制台输出 private static void convert(String s, Function<String, Integer> fun) { // Integer i = fun.apply(s); int i = fun.apply(s); System.out.println(i); } //定义一个方法,把一个int类型的数据加上一个整数之后,转为字符串在控制台输出 private static void convert(int i, Function<Integer, String> fun) { String s = fun.apply(i); System.out.println(s); } //定义一个方法,把一个字符串转换int类型,把int类型的数据加上一个整数之后,转为字符串在控制台输出 private static void convert(String s, Function<String, Integer> fun1, Function<Integer, String> fun2) { String ss = fun1.andThen(fun2).apply(s); System.out.println(ss); } }- 1
- 2
- 3
- 4
- 5
- 6
- 7
- 8
- 9
- 10
- 11
- 12
- 13
- 14
- 15
- 16
- 17
- 18
- 19
- 20
- 21
- 22
- 23
- 24
- 25
- 26
- 27
- 28
- 29
🎡Strem流
💟 Stream流的好处
💮 直接阅读代码的字面意思即可完美展示无关逻辑方式的语义:获取流、过滤姓张、过滤长度为3、逐一打印
💮Stream流把真正的函数式编程风格引入到Java中
public class StreamDemo { public static void main(String[] args) { //创建一个集合,存储多个字符串元素 ArrayList<String> list = new ArrayList<String>(); list.add("林青霞"); list.add("张曼玉"); list.add("王祖贤"); list.add("柳岩"); list.add("张敏"); list.add("张无忌"); //Stream流来改进 list.stream().filter(s -> s.startsWith("张")).filter(s -> s.length() == 3).forEach(System.out::println); } }- 1
- 2
- 3
- 4
- 5
- 6
- 7
- 8
- 9
- 10
- 11
- 12
- 13
- 14
1️⃣生成方式
💟 Collection体系集合
💮 使用默认方法stream()生成流, default Stream stream()
💟 Map体系集合
💮 把Map转成Set集合,间接的生成流
💟 数组
💮 通过Stream接口的静态方法of(T… values)生成流public class StreamDemo { public static void main(String[] args) { //Collection体系的集合可以使用默认方法stream()生成流 List<String> list = new ArrayList<String>(); Stream<String> listStream = list.stream(); Set<String> set = new HashSet<String>(); Stream<String> setStream = set.stream(); //Map体系的集合间接的生成流 Map<String, Integer> map = new HashMap<String, Integer>(); Stream<String> keyStream = map.keySet().stream(); Stream<Integer> valueStream = map.values().stream(); Stream<Map.Entry<String, Integer>> entryStream = map.entrySet().stream(); //数组可以通过Stream接口的静态方法of(T... values)生成流 String[] strArray = {"hello", "world", "java"}; Stream<String> strArrayStream = Stream.of(strArray); Stream<String> strArrayStream2 = Stream.of("hello", "world", "java"); Stream<Integer> intStream = Stream.of(10, 20, 30); } }- 1
- 2
- 3
- 4
- 5
- 6
- 7
- 8
- 9
- 10
- 11
- 12
- 13
- 14
- 15
- 16
- 17
- 18
- 19
- 20
- 21
2️⃣中间操作
💟 中间操作:执行完此方法之后,Stream流依然可以继续执行其他操作

💟 filter代码演示
💮filter:对元素进行过滤public class StreamDemo01 { public static void main(String[] args) { //创建一个集合,存储多个字符串元素 ArrayList<String> list = new ArrayList<String>(); list.add("林青霞"); list.add("张曼玉"); list.add("王祖贤"); list.add("柳岩"); list.add("张敏"); list.add("张无忌"); //需求1:把list集合中以张开头的元素在控制台输出 list.stream().filter(s -> s.startsWith("张")).forEach(System.out::println); System.out.println("------------"); //需求2:把list集合中长度为3的元素在控制台输出 list.stream().filter(s -> s.length() == 3).forEach(System.out::println); System.out.println("------------"); //需求3:把list集合中以张开头的,长度为3的元素在控制台输出 list.stream().filter(s -> s.length() == 3).filter(s -> s.startsWith("张")).forEach(System.out::println); } }- 1
- 2
- 3
- 4
- 5
- 6
- 7
- 8
- 9
- 10
- 11
- 12
- 13
- 14
- 15
- 16
- 17
- 18
- 19
- 20
- 21
- 22
- 23
💟 limit&skip代码演示
💮limit:返回此流中的元素组成的流,截取前指定参数个数的数据
💮skip:跳过指定参数个数的数据,返回由该流的剩余元素组成的流
💟public class StreamDemo02 { public static void main(String[] args) { //创建一个集合,存储多个字符串元素 ArrayList<String> list = new ArrayList<String>(); list.add("林青霞"); list.add("张曼玉"); list.add("王祖贤"); list.add("柳岩"); list.add("张敏"); list.add("张无忌"); //需求1:取前3个数据在控制台输出 list.stream().limit(3).forEach(System.out::println); System.out.println("--------"); //需求2:跳过3个元素,把剩下的元素在控制台输出 list.stream().skip(3).forEach(System.out::println); System.out.println("--------"); //需求3:跳过2个元素,把剩下的元素中前2个在控制台输出 list.stream().skip(2).limit(2).forEach(System.out::println); } }- 1
- 2
- 3
- 4
- 5
- 6
- 7
- 8
- 9
- 10
- 11
- 12
- 13
- 14
- 15
- 16
- 17
- 18
- 19
- 20
- 21
- 22
- 23
💟 concat&distinct代码演示
💮concat:合并a和b两个流为一个流
💮distinct:返回由该流的不同元素(根据Object.equals(Object) )组成的流public class StreamDemo03 { public static void main(String[] args) { //创建一个集合,存储多个字符串元素 ArrayList<String> list = new ArrayList<String>(); list.add("林青霞"); list.add("张曼玉"); list.add("王祖贤"); list.add("柳岩"); list.add("张敏"); list.add("张无忌"); //需求1:取前4个数据组成一个流 Stream<String> s1 = list.stream().limit(4); //需求2:跳过2个数据组成一个流 Stream<String> s2 = list.stream().skip(2); //需求3:合并需求1和需求2得到的流,并把结果在控制台输出 //Stream.concat(s1,s2).forEach(System.out::println); //需求4:合并需求1和需求2得到的流,并把结果在控制台输出,要求字符串元素不能重复 Stream.concat(s1,s2).distinct().forEach(System.out::println); } }- 1
- 2
- 3
- 4
- 5
- 6
- 7
- 8
- 9
- 10
- 11
- 12
- 13
- 14
- 15
- 16
- 17
- 18
- 19
- 20
- 21
- 22
- 23
- 24
💟 sorted代码演示
💮sorted():返回由此流的元素组成的流,根据自然顺序排序
💮sorted(Comparator comparator):返回由该流的元素组成的流,根据提供的Comparator进行排序public class StreamDemo04 { public static void main(String[] args) { //创建一个集合,存储多个字符串元素 ArrayList<String> list = new ArrayList<String>(); list.add("linqingxia"); list.add("zhangmanyu"); list.add("wangzuxian"); list.add("liuyan"); list.add("zhangmin"); list.add("zhangwuji"); //需求1:按照字母顺序把数据在控制台输出 list.stream().sorted().forEach(System.out::println); System.out.println("------------"); //需求2:按照字符串长度把数据在控制台输出 list.stream().sorted((s1, s2) -> { int num = s1.length() - s2.length(); int num2 = num == 0 ? s1.compareTo(s2) : num; return num2; }).forEach(System.out::println); } }- 1
- 2
- 3
- 4
- 5
- 6
- 7
- 8
- 9
- 10
- 11
- 12
- 13
- 14
- 15
- 16
- 17
- 18
- 19
- 20
- 21
- 22
- 23
💟 map&mapToInt代码演示
💮map:返回由给定函数应用于此流的元素的结果组成的流
💮mapToInt:返回一个IntStream其中包含将给定函数应用于此流的元素的结果public class StreamDemo05 { public static void main(String[] args) { //创建一个集合,存储多个字符串元素 ArrayList<String> list = new ArrayList<String>(); list.add("10"); list.add("20"); list.add("30"); list.add("40"); list.add("50"); //需求:将集合中的字符串数据转换为整数之后在控制台输出 list.stream().map(s -> Integer.parseInt(s)).forEach(System.out::println); list.stream().map(Integer::parseInt).forEach(System.out::println); list.stream().mapToInt(Integer::parseInt).forEach(System.out::println); System.out.println("------------"); //int sum() 返回此流中元素的总和 int result = list.stream().mapToInt(Integer::parseInt).sum(); System.out.println(result); } }- 1
- 2
- 3
- 4
- 5
- 6
- 7
- 8
- 9
- 10
- 11
- 12
- 13
- 14
- 15
- 16
- 17
- 18
- 19
- 20
3️⃣终结操作
💟 终结操作:执行完此方法之后,Stream流将不能再执行其他操作

public class StreamDemo { public static void main(String[] args) { //创建一个集合,存储多个字符串元素 ArrayList<String> list = new ArrayList<String>(); list.add("林青霞"); list.add("张曼玉"); list.add("王祖贤"); list.add("柳岩"); list.add("张敏"); list.add("张无忌"); //需求1:把集合中的元素在控制台输出 list.stream().forEach(System.out::println); //需求2:统计集合中有几个以张开头的元素,并把统计结果在控制台输出 long count = list.stream().filter(s -> s.startsWith("张")).count(); System.out.println(count); } }- 1
- 2
- 3
- 4
- 5
- 6
- 7
- 8
- 9
- 10
- 11
- 12
- 13
- 14
- 15
- 16
- 17
- 18
4️⃣收集操作
💟 对数据使用Stream流的方式操作完毕后,可以把流中的数据收集到集合中


public class StreamDemo { public static void main(String[] args) { //创建一个集合,存储多个字符串元素 ArrayList<String> list = new ArrayList<String>(); list.add("林青霞"); list.add("张曼玉"); list.add("王祖贤"); list.add("柳岩"); list.add("张敏"); list.add("张无忌"); //需求1:得到名字为3个字的流 Stream<String> listStream = list.stream().filter(s -> s.length() == 3); //需求2:把使用Stream流操作完毕的数据收集到List集合中并遍历 List<String> names = listStream.collect(Collectors.toList()); for (String name : names) { System.out.println(name); } //创建Set集合对象 Set<Integer> set = new HashSet<Integer>(); set.add(10); set.add(20); set.add(30); set.add(33); set.add(35); //需求3:得到年龄大于25的流 Stream<Integer> setStream = set.stream().filter(age -> age > 25); //需求4:把使用Stream流操作完毕的数据收集到Set集合中并遍历 Set<Integer> ages = setStream.collect(Collectors.toSet()); for (Integer age : ages) { System.out.println(age); } //定义一个字符串数组,每一个字符串数据由姓名数据和年龄数据组合而成 String[] strArray = {"林青霞,30", "张曼玉,35", "王祖贤,33", "柳岩,25"}; //需求5:得到字符串中年龄数据大于28的流 Stream<String> arrayStream = Stream.of(strArray).filter(s -> Integer.parseInt(s.split(",")[1]) > 28); //需求6:把使用Stream流操作完毕的数据收集到Map集合中并遍历,字符串中的姓名作键,年龄作值 Map<String, Integer> map = arrayStream.collect(Collectors.toMap(s -> s.split(",")[0], s -> Integer.parseInt(s.split(",")[1]))); Set<String> keySet = map.keySet(); for (String key : keySet) { Integer value = map.get(key); System.out.println(key + "," + value); } } }- 1
- 2
- 3
- 4
- 5
- 6
- 7
- 8
- 9
- 10
- 11
- 12
- 13
- 14
- 15
- 16
- 17
- 18
- 19
- 20
- 21
- 22
- 23
- 24
- 25
- 26
- 27
- 28
- 29
- 30
- 31
- 32
- 33
- 34
- 35
- 36
- 37
- 38
- 39
- 40
- 41
- 42
- 43
- 44
- 45
- 46
- 47
- 48
- 49
- 50
- 51
- 52
👝类加载器
1️⃣类加载
- 当程序要使用某个类时,如果该类还未被加载到内存中,则系统会通过类的加载,类的连接,类的初始化这三个步骤来对类进行初始化
🌳 类的加载
- 就是指将class文件读入内存,并为之创建一个 java.lang.Class 对象
- 任何类被使用时,系统都会为之建立一个 java.lang.Class 对象
🌳 类的连接
- 验证阶段:用于检验被加载的类是否有正确的内部结构,并和其他类协调一致
- 准备阶段:负责为类的类变量分配内存,并设置默认初始化值
- 解析阶段:将类的二进制数据中的符号引用替换为直接引用
🌳 类的初始化
- 在该阶段,主要就是对类变量进行初始化
🌳 类的初始化步骤
💮 假如类还未被加载和连接,则程序先加载并连接该类
💮 假如该类的直接父类还未被初始化,则先初始化其直接父类
💮 假如类中有初始化语句,则系统依次执行这些初始化语句
💮 注意:在执行第2个步骤的时候,系统对直接父类的初始化步骤也遵循初始化步骤1-3🌳 类的初始化时机
💮 创建类的实例
💮 调用类的类方法
💮 访问类或者接口的类变量,或者为该类变量赋值
💮 使用反射方式来强制创建某个类或接口对应的java.lang.Class对象
💮 初始化某个类的子类
💮 直接使用java.exe命令来运行某个主类2️⃣类加载器
🌳 类加载器的作用
- 负责将.class文件加载到内存中,并为之生成对应的 java.lang.Class 对象
- 虽然我们不用过分关心类加载机制,但是了解这个机制我们就能更好的理解程序的运行
🌳 JVM的类加载机制
- 全盘负责:就是当一个类加载器负责加载某个Class时,该Class所依赖的和引用的其他Class也将由该类加载器负责载入,除非显示使用另外一个类加载器来载入
- 父类委托:就是当一个类加载器负责加载某个Class时,先让父类加载器试图加载该Class,只有在父类加载器无法加载该类时才尝试从自己的类路径中加载该类
- 缓存机制:保证所有加载过的Class都会被缓存,当程序需要使用某个Class对象时,类加载器先从缓存区中搜索该Class,只有当缓存区中不存在该Class对象时,系统才会读取该类对应的二进制数据,并将其转换成Class对象,存储到缓存区
🌳 Java中的内置类加载器
- Bootstrap class loader:它是虚拟机的内置类加载器,通常表示为null ,并且没有父null
- Platform class loader:平台类加载器可以看到所有平台类 ,平台类包括由平台类加载器或其祖先定义的JavaSE平台API,其实现类和JDK特定的运行时类
- System class loader:它也被称为应用程序类加载器 ,与平台类加载器不同。 系统类加载器通常用于定义应用程序类路径,模块路径和JDK特定工具上的类
- 类加载器的继承关系:System的父加载器为Platform,而Platform的父加载器为Bootstrap
🌳 ClassLoader中的两个方法

public class ClassLoaderDemo { public static void main(String[] args) { //static ClassLoader getSystemClassLoader():返回用于委派的系统类加载器 ClassLoader c = ClassLoader.getSystemClassLoader(); System.out.println(c); //AppClassLoader //ClassLoader getParent():返回父类加载器进行委派 ClassLoader c2 = c.getParent(); System.out.println(c2); //PlatformClassLoader ClassLoader c3 = c2.getParent(); System.out.println(c3); //null } }- 1
- 2
- 3
- 4
- 5
- 6
- 7
- 8
- 9
- 10
- 11
- 12
🧢反射
- 是指在运行时去获取一个类的变量和方法信息。然后通过获取到的信息来创建对象,调用方法的一种机制
- 由于这种动态性,可以极大的增强程序的灵活性,程序不用在编译期就完成确定,在运行期仍然可以扩展

1️⃣获取Class类对象
1️⃣ 类名.class属性
2️⃣ 对象名.getClass()方法
3️⃣ Class.forName(全类名)方法public class ReflectDemo { public static void main(String[] args) throws ClassNotFoundException { Class<Student> studentClass1 = Student.class; System.out.println(studentClass1); //使用类的class属性来获取该类对应的Class对象 Class<Student> studentClass2 = Student.class; System.out.println(studentClass2); System.out.println(studentClass1 == studentClass2); System.out.println("--------"); //调用对象的getClass()方法,返回该对象所属类对应的Class对象 Student student = new Student(); Class<? extends Student> aClass = student.getClass(); System.out.println(aClass); System.out.println(aClass == studentClass1); System.out.println("--------"); //使用Class类中的静态方法forName(String className) Class<?> aClass1 = Class.forName("com.itcast.lambda.Student"); System.out.println(aClass1); System.out.println(aClass1 == studentClass1); } }- 1
- 2
- 3
- 4
- 5
- 6
- 7
- 8
- 9
- 10
- 11
- 12
- 13
- 14
- 15
- 16
- 17
- 18
- 19
- 20
- 21
- 22
- 23
- 24
2️⃣反射获取构造方法
🌳 反射获取构造方法

🌳 Constructor类用于创建对象的方法

public class Student { //成员变量:一个私有,一个默认,一个公共 private String name; int age; public String address; //构造方法:一个私有,一个默认,两个公共 public Student() { } private Student(String name) { this.name = name; } Student(String name, int age) { this.name = name; this.age = age; } public Student(String name, int age, String address) { this.name = name; this.age = age; this.address = address; } //成员方法:一个私有,四个公共 private void function() { System.out.println("function"); } public void method1() { System.out.println("method"); } public void method2(String s) { System.out.println("method:" + s); } public String method3(String s, int i) { return s + "," + i; } @Override public String toString() { return "Student{" + "name='" + name + '\'' + ", age=" + age + ", address='" + address + '\'' + '}'; } }- 1
- 2
- 3
- 4
- 5
- 6
- 7
- 8
- 9
- 10
- 11
- 12
- 13
- 14
- 15
- 16
- 17
- 18
- 19
- 20
- 21
- 22
- 23
- 24
- 25
- 26
- 27
- 28
- 29
- 30
- 31
- 32
- 33
- 34
- 35
- 36
- 37
- 38
- 39
- 40
- 41
- 42
- 43
- 44
- 45
- 46
- 47
- 48
- 49
- 50
- 51
public class ReflectDemo02 { public static void main(String[] args) throws Exception { Class<?> aClass = Class.forName("com.itcast.lambda.Student"); Constructor<?> con = aClass.getConstructor(String.class, int.class, String.class); System.out.println(con); //基本数据类型也可以通过.class得到对应的Class类型 //T newInstance(Object... initargs) Object obj = con.newInstance("林青霞", 30, "西安"); System.out.println(obj); } }- 1
- 2
- 3
- 4
- 5
- 6
- 7
- 8
- 9
- 10
- 11
- 12
- 13
public class ReflectDemo03 { public static void main(String[] args) throws Exception { //获取Class对象 Class<?> aClass = Class.forName("com.itcast.lambda.Student"); //private Student(String name) //ConstructorgetDeclaredConstructor(Class... parameterTypes) Constructor<?> con = aClass.getDeclaredConstructor(String.class); //暴力反射 //public void setAccessible(boolean flag):值为true,取消访问检查 con.setAccessible(true); Object obj = con.newInstance("林青霞"); System.out.println(obj); } }- 1
- 2
- 3
- 4
- 5
- 6
- 7
- 8
- 9
- 10
- 11
- 12
- 13
- 14
- 15
- 16
- 17
3️⃣反射获取成员变量
🌳 Class类获取成员变量对象的方法

public class ReflectDemo04 { public static void main(String[] args) throws Exception { //获取Class对象 Class<?> aClass = Class.forName("com.itcast.lambda.Student"); Field[] field = aClass.getDeclaredFields(); for (Field f : field) { System.out.println(f); } System.out.println("---------"); Field addressField = aClass.getField("address"); System.out.println(addressField); System.out.println("---------"); //获取无参构造方法创建对象 Constructor<?> con = aClass.getConstructor(); Object obj = con.newInstance(); //给obj的成员变量addressField赋值为西安 addressField.set(obj, "西安"); System.out.println(obj); } }- 1
- 2
- 3
- 4
- 5
- 6
- 7
- 8
- 9
- 10
- 11
- 12
- 13
- 14
- 15
- 16
- 17
- 18
- 19
- 20
- 21
- 22
- 23
🌳 Field类用于给成员变量赋值

public class ReflectDemo05 { public static void main(String[] args) throws Exception { Class<?> aClass = Class.forName("com.itcast.lambda.Student"); Constructor<?> constructor = aClass.getConstructor(); Object obj = constructor.newInstance(); //s.name = "林青霞"; Field nameField= aClass.getDeclaredField("name"); nameField.setAccessible(true); nameField.set(obj,"林青霞"); System.out.println(obj); //s.age = 30; Field ageField = aClass.getDeclaredField("age"); ageField.setAccessible(true); ageField.set(obj,30); System.out.println(obj); //s.address = "西安"; Field addressField = aClass.getDeclaredField("address"); addressField.setAccessible(true); addressField.set(obj,"西安"); System.out.println(obj); } }- 1
- 2
- 3
- 4
- 5
- 6
- 7
- 8
- 9
- 10
- 11
- 12
- 13
- 14
- 15
- 16
- 17
- 18
- 19
- 20
- 21
- 22
- 23
- 24
- 25
4️⃣反射获取成员方法
🌳 Class类获取成员方法对象的方法

public class ReflectDemo06 { public static void main(String[] args) throws Exception { Class<?> aClass = Class.forName("com.itcast.lambda.Student"); Method[] declaredMethods = aClass.getDeclaredMethods(); for (Method method : declaredMethods) { System.out.println(method); } System.out.println("--------"); Method m = aClass.getMethod("method1"); //获取无参构造方法创建对象 Constructor<?> con = aClass.getConstructor(); Object obj = con.newInstance(); //Object invoke(Object obj, Object... args) 在具有指定参数的指定对象上调用此方法对象表示的基础方法 //Object:返回值类型 //obj:调用方法的对象 //args:方法需要的参数 //执行obj的method1方法 m.invoke(obj); } }- 1
- 2
- 3
- 4
- 5
- 6
- 7
- 8
- 9
- 10
- 11
- 12
- 13
- 14
- 15
- 16
- 17
- 18
- 19
- 20
🌳 Method类用于执行方法的方法

public class ReflectDemo07 { public static void main(String[] args) throws Exception { Class<?> aClass = Class.forName("com.itcast.lambda.Student"); //Student s = new Student(); Constructor<?> con = aClass.getConstructor(); Object obj = con.newInstance(); //s.method1(); Method m1 = aClass.getMethod("method1"); m1.invoke(obj); //s.method2("林青霞"); Method m2 = aClass.getMethod("method2", String.class); m2.invoke(obj,"林青霞"); // String ss = s.method3("林青霞",30); Method m3 = aClass.getMethod("method3", String.class, int.class); Object o = m3.invoke(obj, "林青霞", 30); System.out.println(o); Method function = aClass.getDeclaredMethod("function"); function.setAccessible(true); function.invoke(obj); } }- 1
- 2
- 3
- 4
- 5
- 6
- 7
- 8
- 9
- 10
- 11
- 12
- 13
- 14
- 15
- 16
- 17
- 18
- 19
- 20
- 21
- 22
- 23
- 24
- 25
5️⃣反射的案例
- 💕
通过反射技术,向一个泛型为Integer的集合中添加一些字符串数据
public class ReflectTest01 { public static void main(String[] args) throws Exception { //创建集合 ArrayList<Integer> array = new ArrayList<Integer>(); // array.add(10); // array.add(20); // array.add("hello"); Class<? extends ArrayList> c = array.getClass(); Method add = c.getMethod("add", Object.class); add.invoke(array, "hello"); add.invoke(array, "world"); add.invoke(array, "java"); System.out.println(array); } }- 1
- 2
- 3
- 4
- 5
- 6
- 7
- 8
- 9
- 10
- 11
- 12
- 13
- 14
- 15
- 💕
通过反射运行配置文件中指定类的指定方法
在这里插入代码片- 1
🏅 全栈小狐狸的逆袭之路:📢💨 Java学习路线
🏅 基础:📢💨JAVA基础
🏅 基础:📢💨JAVA进阶
-
相关阅读:
【经验总结】Jupyter 配置内核
SAP message TK 248 solved
PPT文件不能编辑可以这样解决
关于git文档[远程分支]的一些学习
代数、图算法:图基础
微火课堂:共享WiFi项目怎么代理,如何挑选合适的服务商?
软考高级之系统架构设计师系列【2】考试说明及考点分析
【PyTorch深度学习项目实战100例】—— 基于MnasNet实现垃圾分类任务 | 第47例
Tomcat
xctf攻防世界 Web高手进阶区 mfw
- 原文地址:https://blog.csdn.net/m0_46914264/article/details/126006546
