-
使用MindStudio的X2MindSpore工具进行训练脚本转换
一、参考资料
二、相关介绍
X2MindSpore脚本转换工具可将PyTorch脚本和TensorFlow 2.x脚本转换成MindSpore代码。
2.1 重要说明
当前仅支持PyTorch和TensorFlow 2.x训练脚本转换。
三、关键步骤
本文以 TensorFlow版本的FCN模型为例。
3.1 下载源码
下载链接:FCN
博主的代码:https://gitee.com/lljyoyo1995/fcn
3.2 准备数据集
下载VOC数据集
$ wget http://host.robots.ox.ac.uk/pascal/VOC/voc2007/VOCtrainval_06-Nov-2007.tar $ wget http://host.robots.ox.ac.uk/pascal/VOC/voc2012/VOCtrainval_11-May-2012.tar $ wget http://host.robots.ox.ac.uk/pascal/VOC/voc2007/VOCtest_06-Nov-2007.tar- 1
- 2
- 3
解压并整理数据集
VOC # path: /home/yang/dataset/VOC ├── test | └──VOCdevkit | └──VOC2007 (from VOCtest_06-Nov-2007.tar) └── train └──VOCdevkit └──VOC2007 (from VOCtrainval_06-Nov-2007.tar) └──VOC2012 (from VOCtrainval_11-May-2012.tar)- 1
- 2
- 3
- 4
- 5
- 6
- 7
- 8
3.3 生成txt标注文件
python parser_voc.py --voc_path /PATH/TO/VOC- 1
3.4 修改源码
parser_voc.py中使用的scipy.misc.imread方法为scipy 1.2.0以前的旧版本API,mindspore最低兼容scipy 1.5.2,因此请使用scipy的官方弃用警告中推荐的imageio.imread。解决办法: 1. 安装imageio pip install imageio 2. 修改parser_voc.py源码 label_image = np.array(misc.imread(label_path)) 改为 label_image = np.array(imageio.imread(label_path))- 1
- 2
- 3
- 4
- 5
- 6
- 7
- 8
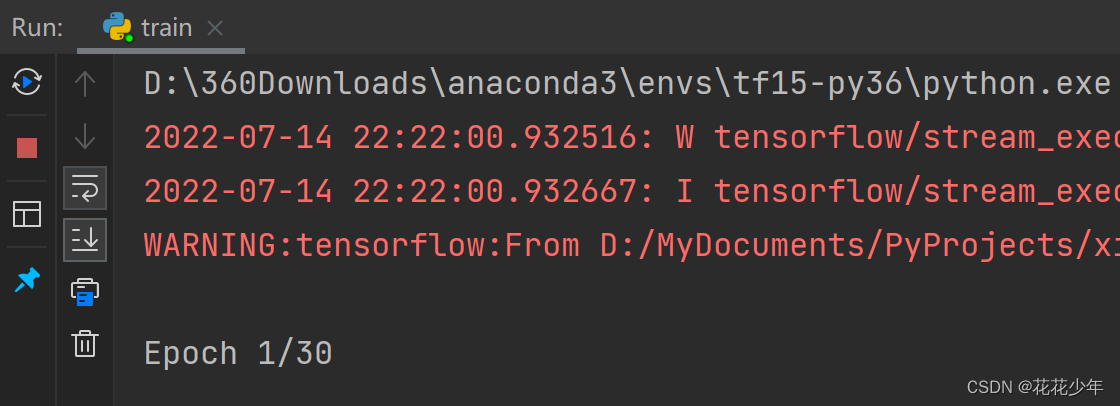
3.5 本地跑通代码
如果在TensorFlow 1.X版本下运行,请开启紧急执行:
import tensorflow as tf tf.enable_eager_execution()- 1
- 2
拉起训练
python train.py- 1
推理测试
python test.py- 1

3.6 Framework Trans
前提条件:跑通代码之后,才能进行
Framework Trans操作。安装依赖包
#pandas版本号需大于或等于1.2.4 pip3 install pandas pip3 install libcst- 1
- 2
- 3
执行转换
cd Ascend-cann-toolkit安装目录/ascend-toolkit/{version}/{arch}-linux/toolkit/tools/x2mindspore/ ./run_x2mindspore.sh -i 原始脚本路径 -o 脚本转换结果输出路径 -f 原始脚本的框架- 1
- 2
- 3
四、TensorFlow GPU2Ascend
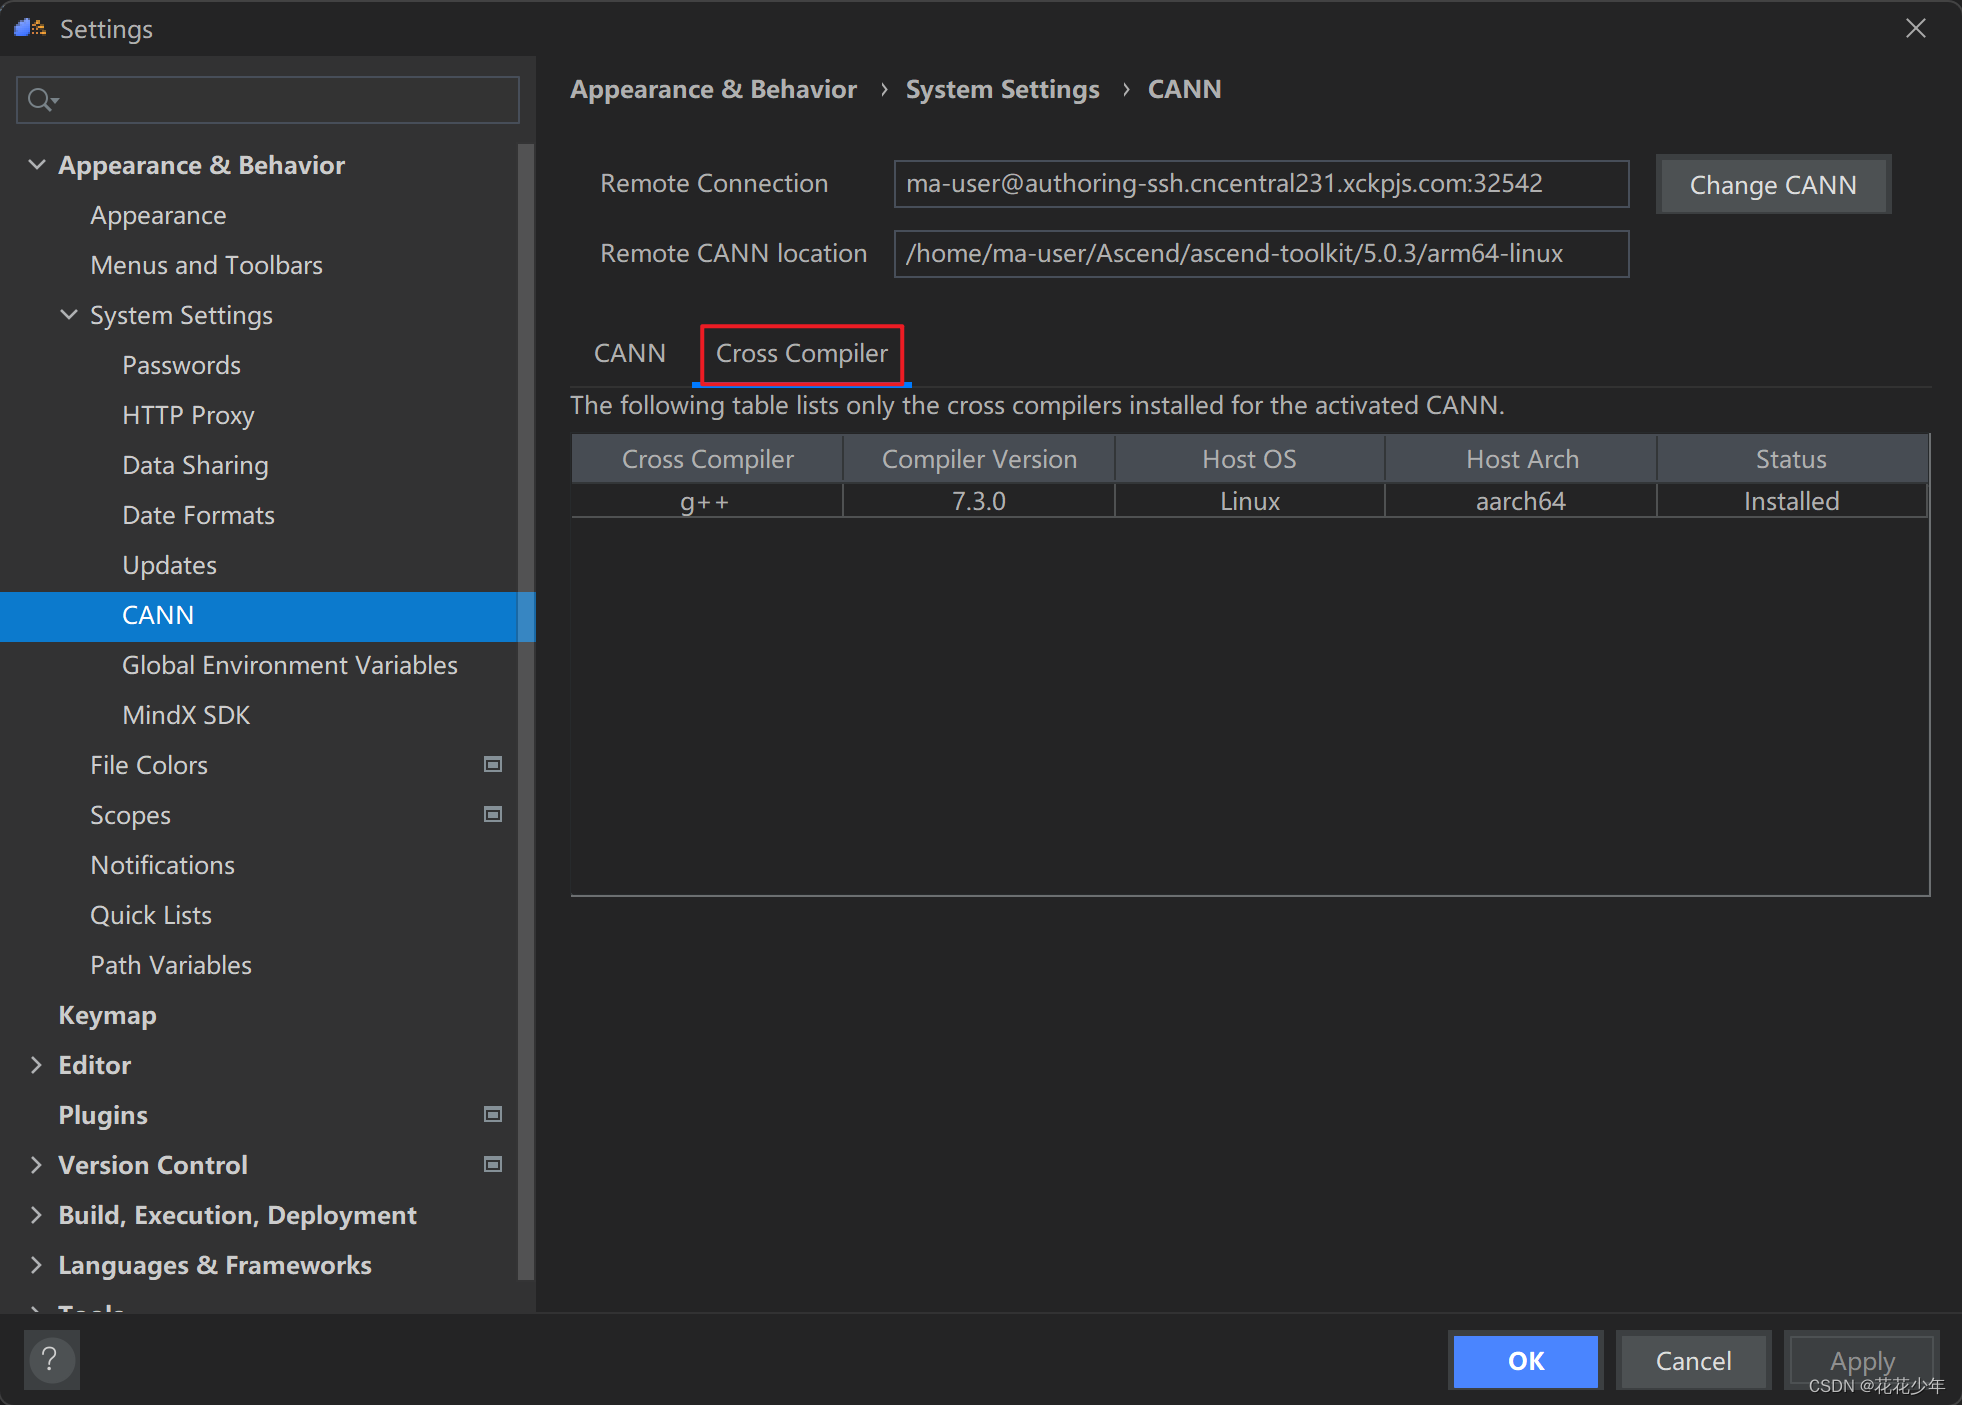
4.1 设置Remote CANN

重启MindStudio激活CANN
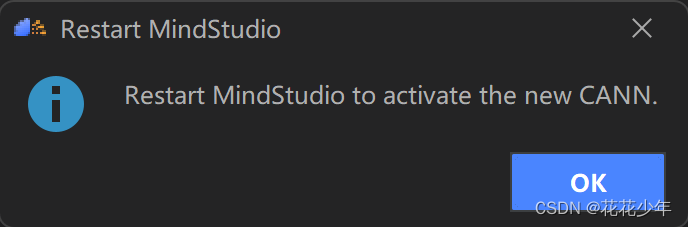
设置成功

4.2 设置TensorFlow GPU2Ascend
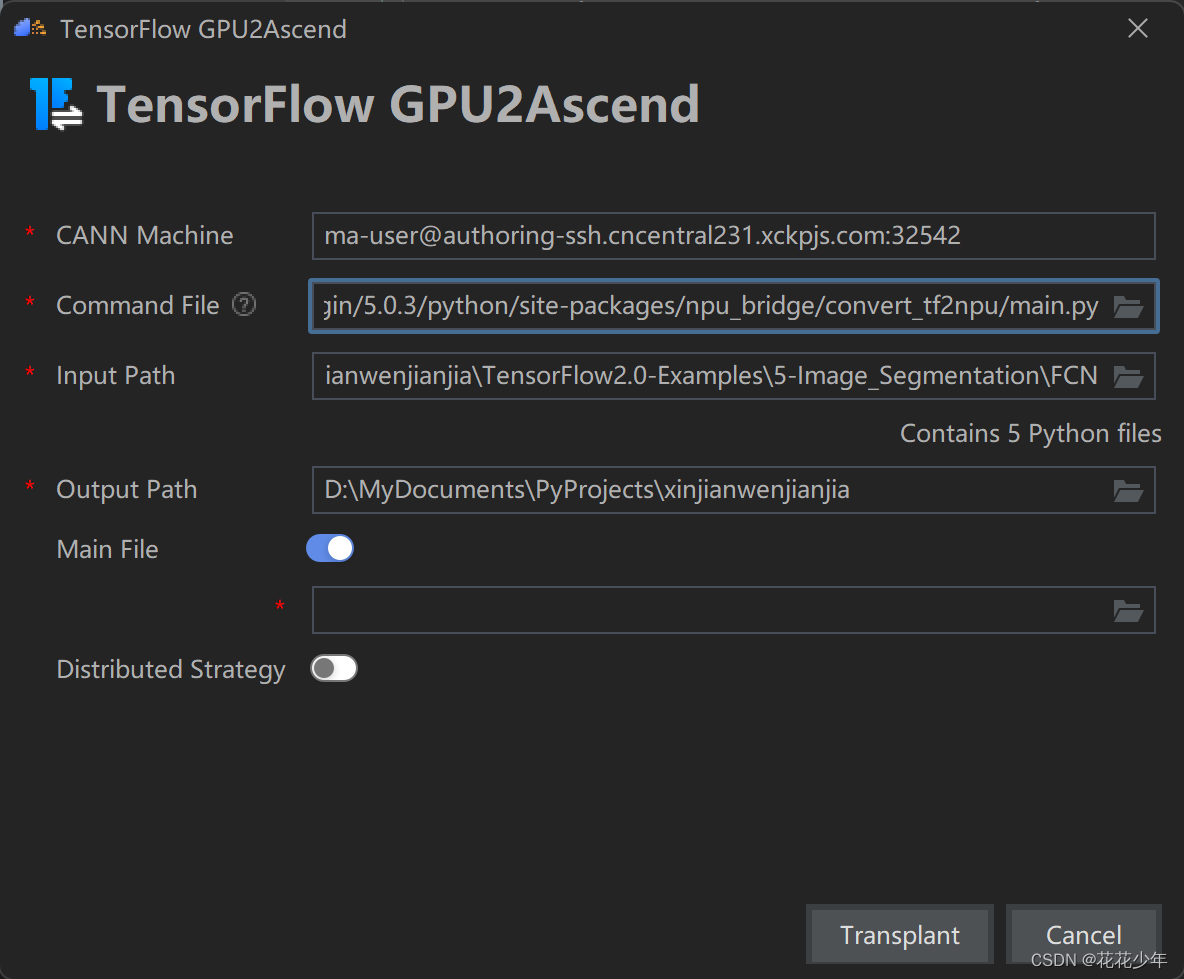
# CANN Machine ma-user@authoring-ssh.cncentral231.xckpjs.com:32542 # Command File /home/ma-user/Ascend/tfplugin/5.0.3/python/site-packages/npu_bridge/convert_tf2npu/main.py # Input Paht \PATH\TO\TensorFlow2.0-Examples\5-Image_Segmentation\FCN # Output Path \PATH\TO\TensorFlow2.0-Examples\5-Image_Segmentation- 1
- 2
- 3
- 4
- 5
- 6
- 7
- 8
- 9
- 10
- 11
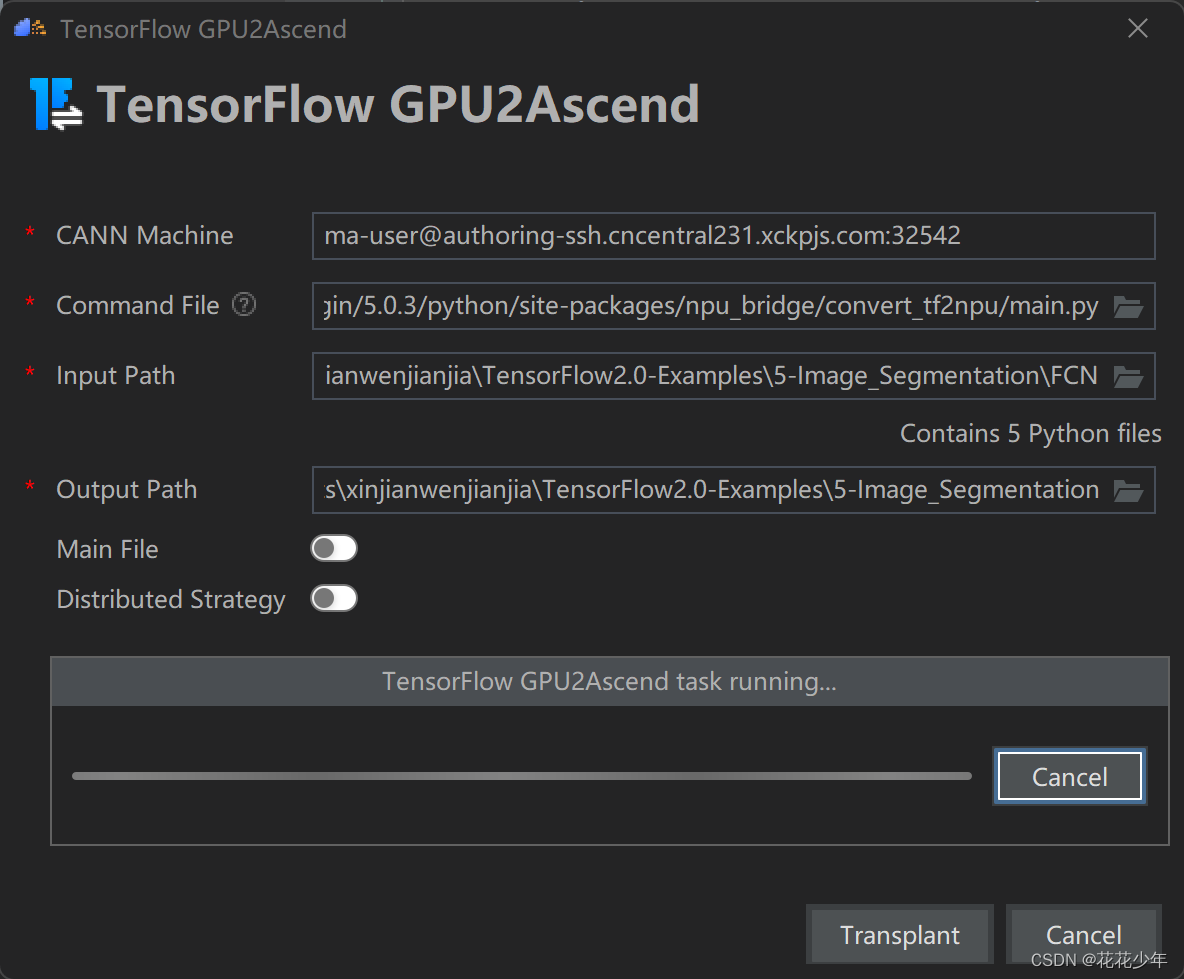
确定yes

五、FAQ
Q:设置Remote CANN失败

错误原因: 远程服务器中未安装ascend-toolkit开发工具 解决方法一: 安装ascend-toolkit开发工具 解决方法二: 找一台已安装ascend-toolkit的服务器- 1
- 2
- 3
- 4
- 5
- 6
- 7
- 8
- 9
Q:TensorFlow版本不一致导致训练错误
tensorflow.python.framework.errors_impl.InvalidArgumentError: Can not squeeze dim[2], expected a dimension of 1, got 224 [[{{node metrics/acc/Squeeze}}]]- 1
- 2
result = visual_result(x[0], pred_label[0].numpy()) AttributeError: 'Tensor' object has no attribute 'numpy'- 1
- 2
错误原因: 源代码支持TF2.X,但博主的环境是TF1.X 解决方法一: 在TF2.X环境中运行 解决方法二: 在TF1.X环境中运行,需要开启紧急执行 import tensorflow as tf tf.enable_eager_execution()- 1
- 2
- 3
- 4
- 5
- 6
- 7
- 8
- 9
- 10
Q:h5py版本不一致导致推理错误
报错:original_keras_version = f.attrs[‘keras_version‘].decode(‘utf8‘)及问题解决
original_keras_version = f.attrs['keras_version'].decode('utf8') AttributeError: 'str' object has no attribute 'decode'- 1
- 2
错误原因: 在安装tensorflow时,默认安装h5py为3.1.0,而报错是因为你安装的TF不支持过高版本的h5py。 解决办法: 卸载h5py3.1.0版本,安装h5py2.10.0版本 pip install h5py==2.10.0- 1
- 2
- 3
- 4
- 5
- 6
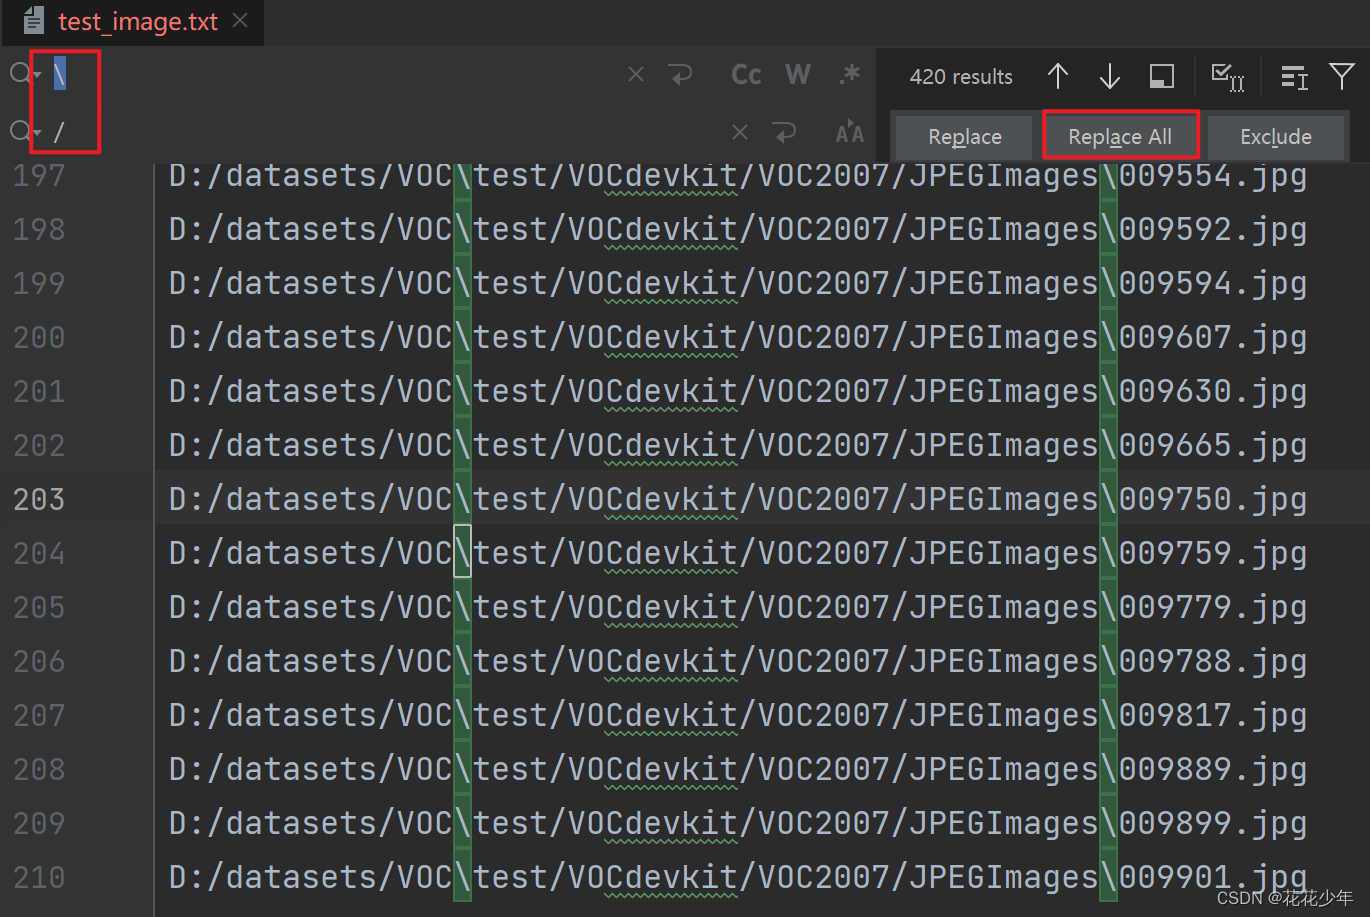
Q:训练卡住
错误原因: 用parser_voc.py生成的train_image.txt中的图片路径错误 解决办法: \反斜杠 改成 /斜杠- 1
- 2
- 3
- 4
- 5
- 6
- 7
Q:缺少libcst
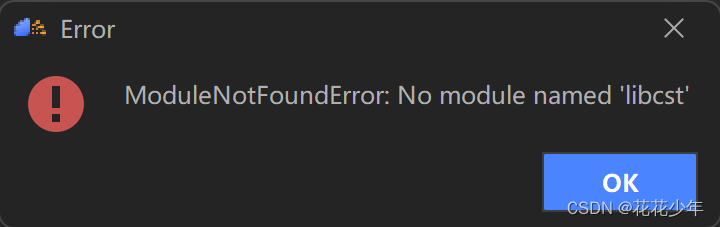
错误原因: 缺少libcst依赖 解决办法: 安装libcst pip3 install libcst- 1
- 2
- 3
- 4
- 5
- 6
Q:缺少X2MindSpore工具
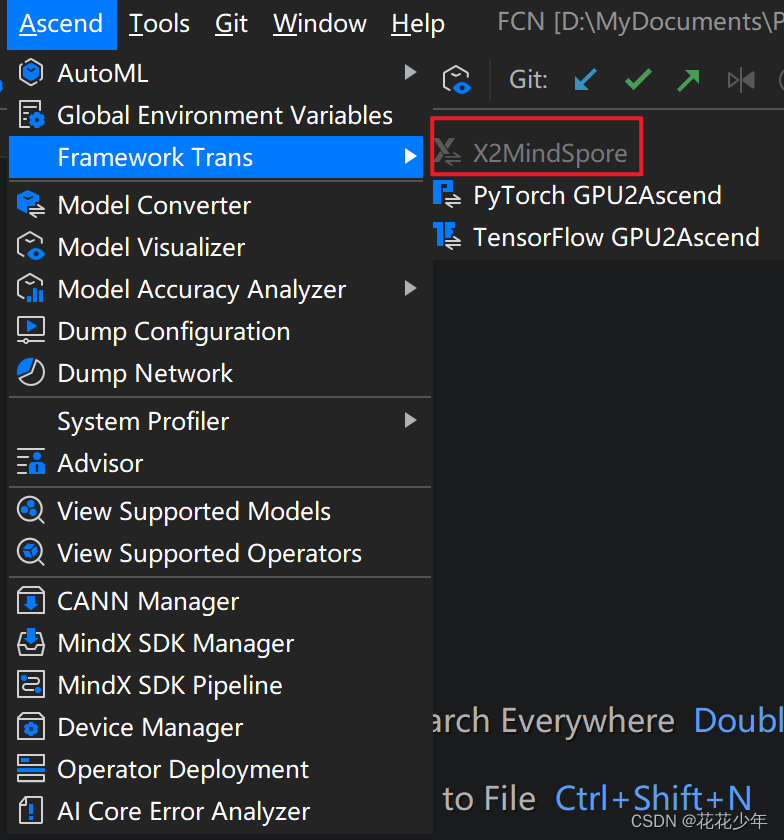
错误原因: 服务器中缺少X2MindSpore工具 解决办法: 安装X2MindSpore工具- 1
- 2
- 3
- 4
- 5
-
相关阅读:
50etf期权的隐含波动率是什么意思?最通俗易懂的解释!
jdk11新特性——JShell交互性工具
css PC端弹窗时禁止底部页面滚动
C++ 程序员入门之路——旅程的起点与挑战
消费券发放的方案设计与效益评估
Java IDEA controller导出CSV,excel
拉链表及常见问题
宜家IKEA EDI IFTMBF运输预定请求详解
认识异步复位寄存器同时学习timing_arc约束
ElasticSearch01_简介、详解倒排索引、安装es以及kibana、检索es基本信息、增删改查文档
- 原文地址:https://blog.csdn.net/m0_37605642/article/details/125862024