-
如何使用layui将数据库中的数据以表格的形式展现出来
layui自带的表格数据渲染
下面的所有操作的前提是你
必须引入layui!一,先写html
<body> <div class="layui-card"> <div class="layui-card-header"> <span class="layui-breadcrumb"> <a href="">导航管理</a> <a><cite>查看导航</cite></a> </span> </div> <div class="layui-card-body"> <form class="layui-form" action=""> <div class="layui-inline"> <button type="button" class="layui-btn layui-btn-danger" style="margin-right: 20px;"><i class="layui-icon layui-icon-delete" style="margin-right:5px;"></i>批量删除</button> <div class="layui-input-inline" style="width: 200px;"> <input type="text" placeholder="请输入搜索内容" autocomplete="off" class="layui-input"> </div> <button type="button" class="layui-btn"><i class="layui-icon layui-icon-search" style="margin-right:5px;"></i>搜索</button> </div> </form> <!-- 这里是表格标签 --> <table class="layui-table tableRender"></table> </div> </div> </body>- 1
- 2
- 3
- 4
- 5
- 6
- 7
- 8
- 9
- 10
- 11
- 12
- 13
- 14
- 15
- 16
- 17
- 18
- 19
- 20
- 21
- 22
- 23
- 24
- 25
注意:这里表格标签的内容是空的。
二,在页面中引入js文件,内容为:
layui.use(['element', 'table'], function () { var { element, table } = layui table.render({ elem: '.tableRender', url: "/admin/nav/query", //后端传数据的接口 cols: [[ //表头 { field: "nav_id", title: 'ID', width: 80, sort: true, fixed: 'left' }, { field: 'nav_name', title: '导航名称' }, { field: 'nav_alias', title: '导航别名' }, { field: 'nav_sort', title: '导航排序' }, { field: 'nav_is_show', title: '是否展示' }, { field: '', title: '操作' }, ]], page: true }); });- 1
- 2
- 3
- 4
- 5
- 6
- 7
- 8
- 9
- 10
- 11
- 12
- 13
- 14
- 15
- 16
- 17
- 18
- 19
- 20
引入
table模块,并解构赋值。三,写后端数据接口,通过查询数据库,来返回数据
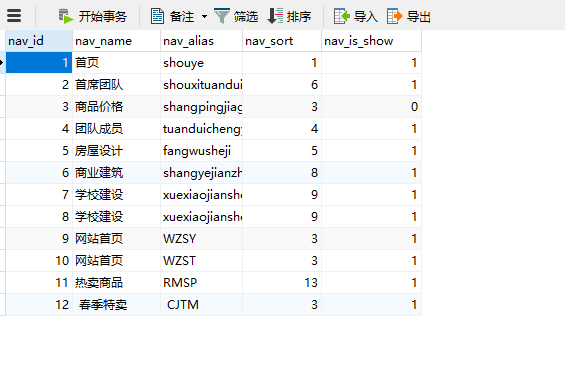
//查看导航页面数据 router.get("/query", (req, res) => { const sql = "SELECT * FROM nav;" db.query(sql, (err, results) => { if (err) { return res.send({ code: 1, msg: err.msg }) } if (results.length) { return res.send({ code: 0, msg: "数据查询成功", data: results, count: 12, // 这里是记录总条数 }) } else { return res.send({ code: 1, msg: "数据信息查询失败" }) } }) })- 1
- 2
- 3
- 4
- 5
- 6
- 7
- 8
- 9
- 10
- 11
- 12
- 13
- 14
- 15
- 16
- 17
- 18
- 19
- 20
- 21
- 22
- 23
- 24
- 25
- 26
- 27
在对应路由中写接口,返回数据要按照
layui的要求给,具体还的看官方文档。后端数据接口路由使用
express.js搭建。使用了
mysql2模块,实现数据库的交互。这里的db就是封装后的模块,通过引入来使用,就不在这里细说了。四,页面渲染成功

这里只是带大家入个门,想要更高级的用法,可以去官方文档查看。
-
相关阅读:
cetos7 Docker 安装 gitlab
日志报错 fork:Cannot allocate memory
自动控制原理9.3---线性定常系统的反馈结构及状态观测器
【计算机毕业设计】企业员工岗前培训管理系统
开箱即用,这些 Vue3 后台管理系统模板绝对让你爽歪歪!
【力扣】994.腐烂的橘子
GRU-深度学习循环神经网络情感分类模型搭建
基于Vue+SpringBoot的超市账单管理系统 开源项目
【Linux】管道命令split、awk、sed【二】
深入Python网络编程:从基础到实践
- 原文地址:https://blog.csdn.net/liyuchenii/article/details/125547354
