-
Spring框架学习(二)---- 我的第一个Spring程序
Spring框架学习(二)---- 我的第一个Spring程序
一、Spring IOC了解
学习Spring框架,同样也是跟着官方文档一块学。
我们先了解一下IOC容器
![[外链图片转存失败,源站可能有防盗链机制,建议将图片保存下来直接上传(img-YSLQy2MC-1655286058861)(4611DE9BF7394AC19F128B9CA912D5AB)]](https://1000bd.com/contentImg/2022/06/30/205715802.png)
使用ApplicationContext 接口代表IOC容器负责实例化配置组装Bean,配置可以使用xml、Java注解、Java代码来表示
通常使用创建ClassPathApplicationContext 实例来实现 ApplicationContext 接口
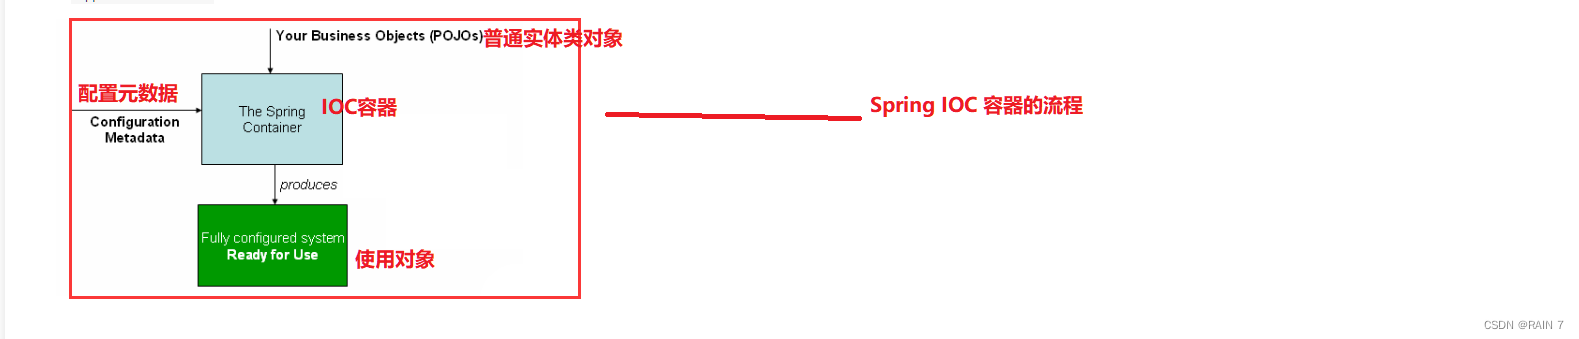
上图是Spring IOC 容器的流程
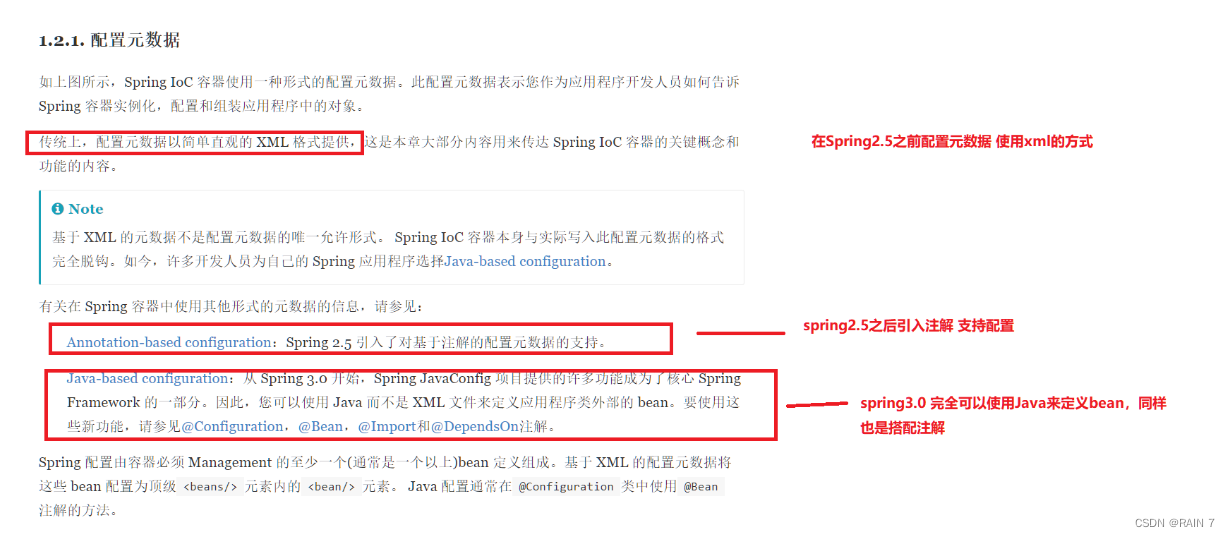
元数据的配置,在spring2.5之前传统的方式是使用简单直观的XML格式来实现的,在spring2.5引入了注解支持配置,spring3.0完全可以使用Java来定义bean,同样也是搭配各种注解。
配置文件ApplicationContext.xml的模板
<?xml version="1.0" encoding="UTF-8"?> <beans xmlns="http://www.springframework.org/schema/beans" xmlns:xsi="http://www.w3.org/2001/XMLSchema-instance" xsi:schemaLocation="http://www.springframework.org/schema/beans http://www.springframework.org/schema/beans/spring-beans.xsd"> <bean id="..." class="..."> (1) (2) <!-- collaborators and configuration for this bean go here --> </bean> <bean id="..." class="..."> <!-- collaborators and configuration for this bean go here --> </bean> <!-- more bean definitions go here --> </beans>- 1
- 2
- 3
- 4
- 5
- 6
- 7
- 8
- 9
- 10
- 11
- 12
- 13
- 14
- 15
- 16
- 17
id 代表每一个bean的唯一标识符
class 代表 bean 的类型并使用完全限定的类名。
好了,我们来自己写Spring的第一个程序——Hello Spring
二、我的第一个Spring程序
1.配置好各种spring依赖
<!-- https://mvnrepository.com/artifact/org.springframework/spring-webmvc --> <dependency> <groupId>org.springframework</groupId> <artifactId>spring-webmvc</artifactId> <version>5.3.18</version> </dependency>- 1
- 2
- 3
- 4
- 5
- 6
2.写一个实体类pojo
package com.kuang.pojo; public class Hello { private String str; public String getStr() { return str; } public void setStr(String str) { this.str = str; } @Override public String toString() { return "Hello{" + "str='" + str + '\'' + '}'; } }- 1
- 2
- 3
- 4
- 5
- 6
- 7
- 8
- 9
- 10
- 11
- 12
- 13
- 14
- 15
- 16
- 17
- 18
- 19
- 20
3.创建Spring的配置文件,并装配bean对象
<?xml version="1.0" encoding="UTF-8"?> <beans xmlns="http://www.springframework.org/schema/beans" xmlns:xsi="http://www.w3.org/2001/XMLSchema-instance" xsi:schemaLocation="http://www.springframework.org/schema/beans http://www.springframework.org/schema/beans/spring-beans.xsd"> <!-- 在配置文件中装配bean对象,相当于将hello这个对象交给spring来进行管理,程序员自己不需要new对象了--> <bean id="hello" class="com.kuang.pojo.Hello"> <!-- 在bean中通过property标签将对象的属性进行注入--> <property name="str" value="Hello Spring!"/> </bean> </beans>- 1
- 2
- 3
- 4
- 5
- 6
- 7
- 8
- 9
- 10
- 11
- 12
- 13
- 14
- 15
- 16
4.写一个业务类,拿到hello这个对象的属性和方法
package com.kuang.service; import com.kuang.pojo.Hello; import org.springframework.context.ApplicationContext; import org.springframework.context.support.ClassPathXmlApplicationContext; public class HelloService { public static void main(String[] args) { // 通过上下文 将配置文件中的bean 拿到 ApplicationContext context = new ClassPathXmlApplicationContext("ApplicationContext.xml"); // getBean的时候将 bean 实例化,默认是单例模式 Hello hello = context.getBean("hello", Hello.class); System.out.println(hello); } }- 1
- 2
- 3
- 4
- 5
- 6
- 7
- 8
- 9
- 10
- 11
- 12
- 13
- 14
- 15
- 16
- 17
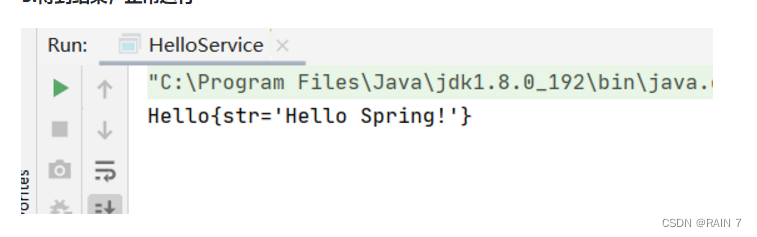
5.得到结果,正常运行
三、程序背后的思考
在这个过程中我们思考几个问题:
Hello 对象是谁创建的?
Hello 对象的属性是如何设置的?
Hello 对象是通过Spring进行创建的,中的str属性是通过bean中的property标签进行设置的,这个过程中就发生了控制反转,对象的管理全部交给spring。
控制: 传统应用程序的对象都是程序本身控制创建的,使用Spring之后,对象是由Spring来进行创建的
反转:程序本身不创建对象,而变成被动的接收对象。
依赖注入:利用set方法进行注入属性
学到这里,我们就可以彻底不用去程序中改动了,要实现不同需求,只需要在xml配置文件中进行修改,所谓的IOC就是对象交由Spring进行创建、管理、装配。
四、Bean 如何管理配置?
我们先简单的了解一下怎么配置一个bean,如何使用一些常用标签,后面会对各种属性进行详细介绍。
这是一个简单的实体类,里面有一个str属性,同时有set方法(必不可少)
package com.kuang.pojo; public class Hello { private String str; public String getStr() { return str; } public void setStr(String str) { this.str = str; } @Override public String toString() { return "Hello{" + "str='" + str + '\'' + '}'; } }- 1
- 2
- 3
- 4
- 5
- 6
- 7
- 8
- 9
- 10
- 11
- 12
- 13
- 14
- 15
- 16
- 17
- 18
- 19
- 20
来看一下下面的配置文件中的标签语句
<bean id="hello" class="com.kuang.pojo.Hello"/>- 1
首先这一段代码相当于
Hello hello = new Hello();- 1
-
id 就相当于变量名,是bean的唯一标识符
-
class 就是这个bean的类型,是全限定名
在配置文件中使用就不需要我们在去new对象了,只需要通过上下文直接获取对象即可
然后我们想要对Hello这个对象中的str属性进行设置,怎么设置呢?
<bean id="hello" class="com.kuang.pojo.Hello"> <property name="str" value="Hello Spring!"/> </bean>- 1
- 2
- 3
使用property标签就是给对象中的属性进行设置值
-
name —— 代表类中的属性名字
-
value —— 如果这个属性是基本数据类型,那么使用value进行设置
-
ref —— 如果这个属性是一个引用类型,这个引用首先在配置文件中装配成bean,ref使用这个bean的id名称
像之前的UserServiceImpl中的Userdao就是引用类型的属性
<bean id="userDaoImpl" class="com.kuang.dao.UserDaoImpl"/> <bean id="userServiceImpl" class="com.kuang.service.UserServiceImpl"> <property name="userDao" ref="userDaoImpl"/> </bean>- 1
- 2
- 3
- 4
- 5
如果用户需求进行修改的话,那么不需要在原代码上进行修改,只需要修改配置文件中的内容即可
1.用户需求改成Mysql获取用户数据
<bean id="userDaoImpl" class="com.kuang.dao.UserDaoImpl"/> <bean id="userDaoMySQLImpl" class="com.kuang.dao.UserDaoMySQLImpl"/> <bean id="userDaoOracleImpl" class="com.kuang.dao.UserDaoOrcaleImol"/> <bean id="userServiceImpl" class="com.kuang.service.UserServiceImpl"> <property name="userDao" ref="userDaoMySQLImpl"/> </bean>- 1
- 2
- 3
- 4
- 5
- 6
- 7
2.用户需求改成Orcale获取用户数据
<bean id="userDaoImpl" class="com.kuang.dao.UserDaoImpl"/> <bean id="userDaoMySQLImpl" class="com.kuang.dao.UserDaoMySQLImpl"/> <bean id="userDaoOracleImpl" class="com.kuang.dao.UserDaoOrcaleImol"/> <bean id="userServiceImpl" class="com.kuang.service.UserServiceImpl"> <property name="userDao" ref="userDaoOracleImpl"/> </bean>- 1
- 2
- 3
- 4
- 5
- 6
- 7
-
相关阅读:
Opengl绘制三角形
药品研发--原料储存管理制度
【OpenCV 例程200篇】208. Photoshop 对比度自动调整算法
前端 基础知识
继欧洲后再度进军日韩,Pico消费级VR全球化加速
iOS代码混淆和加固技术详解
Python装饰器进阶:深入理解与最佳实践
【STM32 中断】
JVM垃圾回收机制
Win32 COLORREF、RGB、获取颜色分量
- 原文地址:https://blog.csdn.net/rain67/article/details/125301621
