-
Flume配置3——拦截器过滤
案例需求
- 使用flume采集本地日志,按照日志类型不同(评论,点赞,收藏等)发往不同的分析系统
- flume根据event的某个key的值,将不同的event发往不同的channel
- 在该案例中,以是否包含“hello”模拟不同的key赋予不同的值
原理图

实现
1.新建项目Flume-MySQLSource
2.添加依赖
<dependency> <groupId>org.apache.flume</groupId> <artifactId>flume-ng-core</artifactId> <version>1.8.0</version> </dependency>- 1
- 2
- 3
- 4
- 5
3.TypeInterceptor
- 拦截器在Source接收数据,打包成event之后执行,在Channel前执行
- 实现连接器方法有两步
1.实现Interceptor接口 Interceptor实现类的方法 public void initialize()初始化方法 public Event intercept(Event event)处理单个事件,这个一定要有,因为不能总等着批量事件 public List<Event> intercept(List<Event> list)批处理事件 public void close() 2.编写静态内部类,实现Interceptor.Builder接口,用于构建拦截器 Interceptor.Builder实现类的方法 public Interceptor build() { return new TypeInterceptor(); } public void configure(Context context)- 1
- 2
- 3
- 4
- 5
- 6
- 7
- 8
- 9
- 10
- 11
- 12
- channel选择器官方配置说明

- 拦截器官方配置说明

- 代码
import org.apache.flume.Context; import org.apache.flume.Event; import org.apache.flume.interceptor.Interceptor; import java.util.ArrayList; import java.util.List; import java.util.Map; /** * @program: Flume-MyISS * @description: * @author: 作者 * @create: 2022-06-26 19:33 */ public class TypeInterceptor implements Interceptor { private List<Event> events;//批量拦截器 @Override//初始化 public void initialize() { events = new ArrayList<>(); } @Override//处理单个事件,这个一定要有,因为不能总等着批量事件 public Event intercept(Event event) { Map<String, String> header = event.getHeaders(); String body = new String(event.getBody()); //根据body中是否包含hello决定是否添加头信息 if (body.contains("hello")) { header.put("type", "hello!"); } else { header.put("type", "other"); } return event;//如果返回null表示这一条数据是不要的 } @Override//批处理事件 public List<Event> intercept(List<Event> list) { //1.清空全局的集合 events.clear(); //2.遍历处理 for (Event event : list) { events.add(event); } return events; } @Override//关闭 public void close() { } //这是内部类,帮助构建拦截器 public static class Builder implements Interceptor.Builder { @Override public Interceptor build() { return new TypeInterceptor(); } @Override public void configure(Context context) { } } }- 1
- 2
- 3
- 4
- 5
- 6
- 7
- 8
- 9
- 10
- 11
- 12
- 13
- 14
- 15
- 16
- 17
- 18
- 19
- 20
- 21
- 22
- 23
- 24
- 25
- 26
- 27
- 28
- 29
- 30
- 31
- 32
- 33
- 34
- 35
- 36
- 37
- 38
- 39
- 40
- 41
- 42
- 43
- 44
- 45
- 46
- 47
- 48
- 49
- 50
- 51
- 52
- 53
- 54
- 55
- 56
- 57
- 58
- 59
- 60
- 61
- 62
- 63
- 64
- 65
- 66
- 67
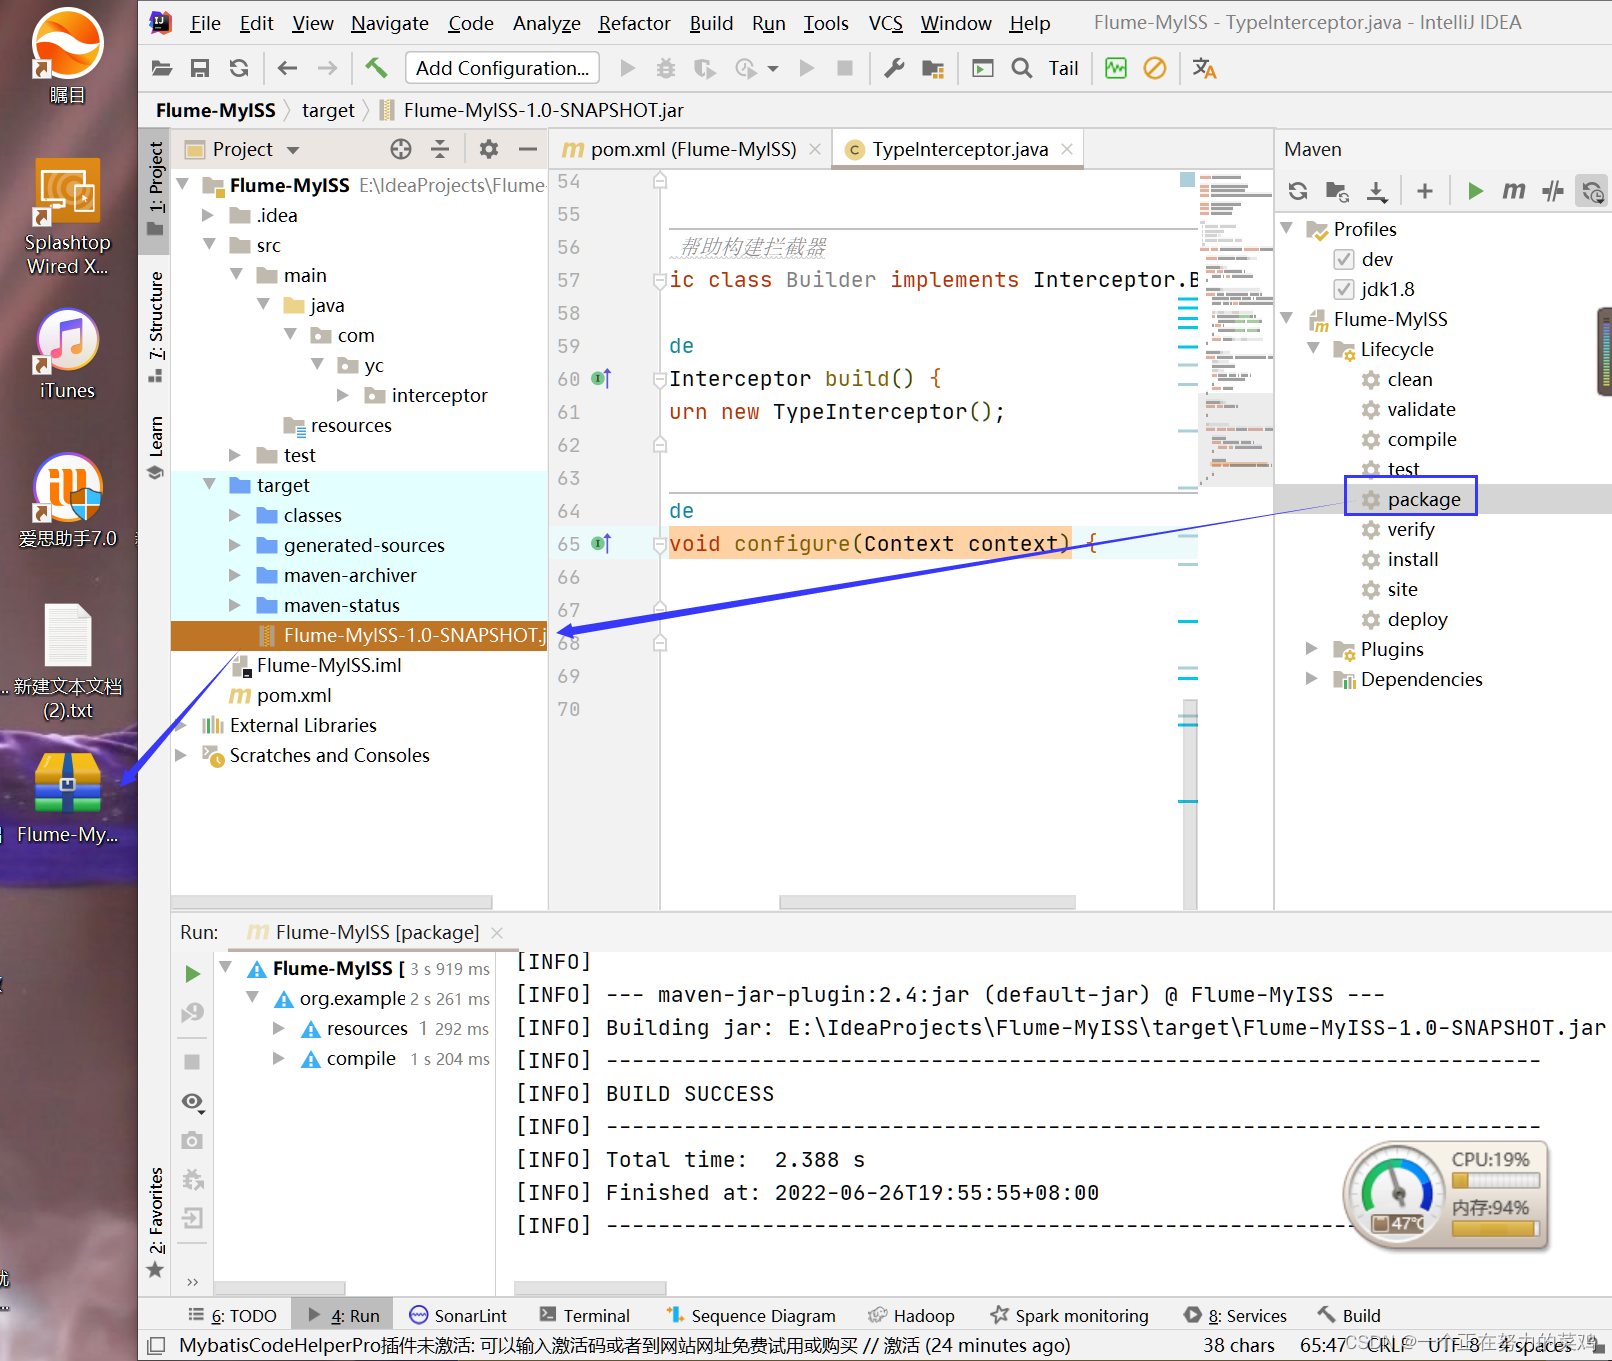
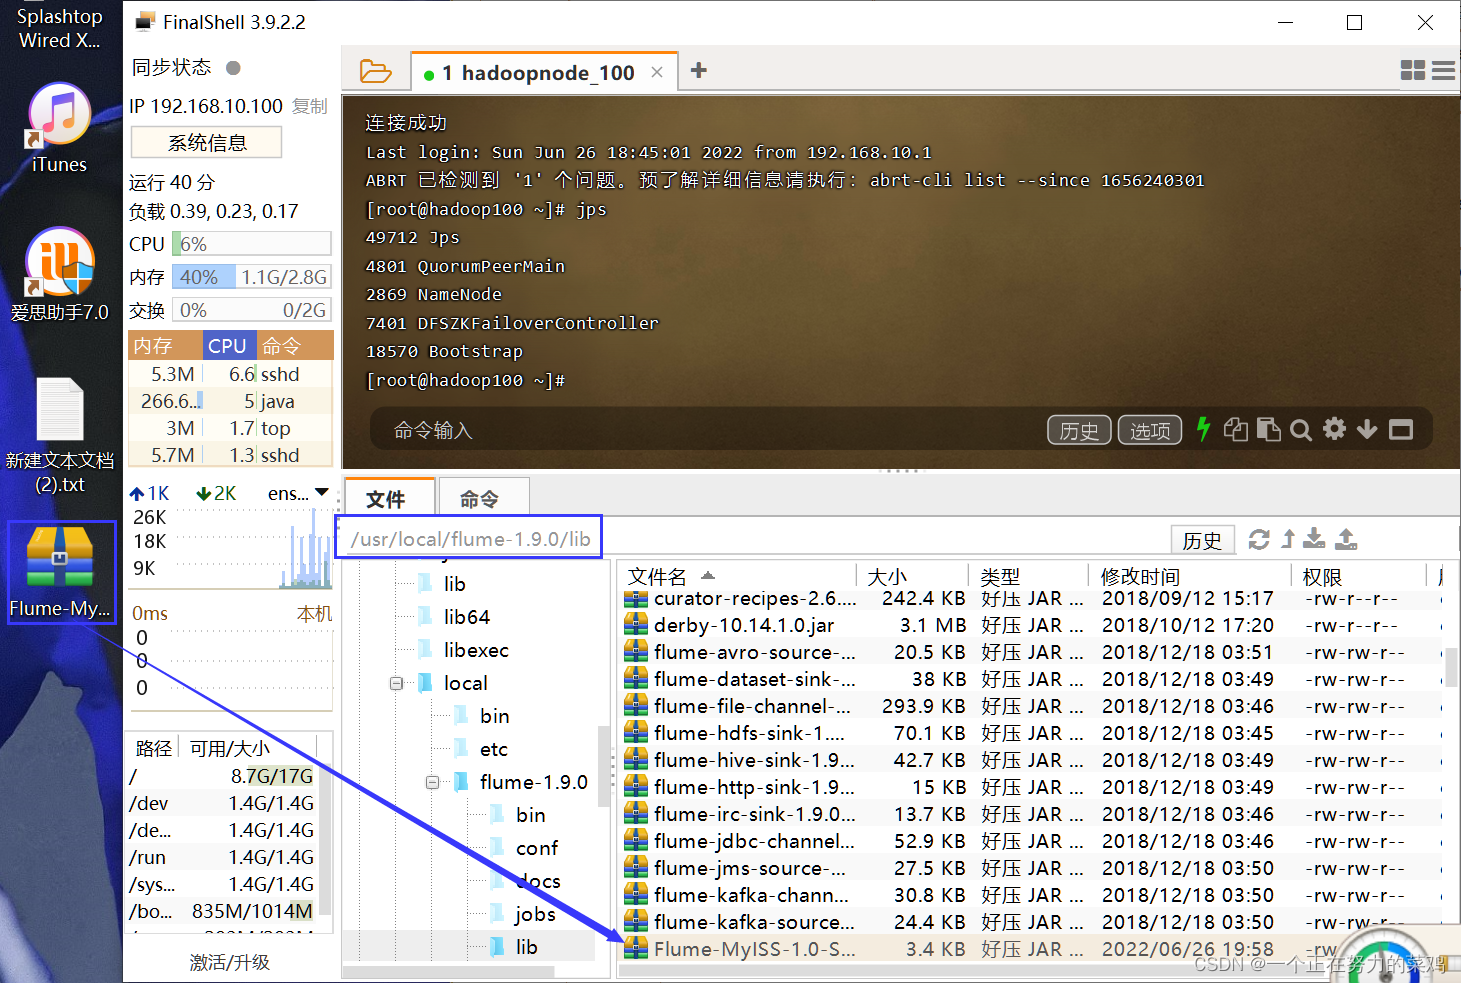
4.项目jar放入flume的lib目录下
5./jobs/t6下编写配置文件netcat-interceptor-avro.conf
- vim netcat-interceptor-avro.conf
# Name the components on this agent a1.sources = r1 a1.sinks = k1 k2 a1.channels = c1 c2 # Describe/configure the source a1.sources.r1.type = netcat a1.sources.r1.bind = localhost a1.sources.r1.port = 44444 a1.sources.r1.interceptors = i1 #拦截器 a1.sources.r1.interceptors.i1.type = com.yc.interceptor.TypeInterceptor$Builder #拦截器内部类 a1.sources.r1.selector.type = multiplexing #选择器 a1.sources.r1.selector.header = type #代码中编辑了header的map,会设置K-V a1.sources.r1.selector.mapping.hello! = c1 #若type=hello!,则发送到c1 a1.sources.r1.selector.mapping.other = c2 #若type=other,则发送到c2 # Describe the sink a1.sinks.k1.type = avro a1.sinks.k1.hostname = node1 a1.sinks.k1.port = 4141 a1.sinks.k2.type = avro a1.sinks.k2.hostname = node1 a1.sinks.k2.port = 4142 # Use a channel which buffers events in memory a1.channels.c1.type = memory a1.channels.c1.capacity = 1000 a1.channels.c1.transactionCapacity = 100 # Use a channel which buffers events in memory a1.channels.c2.type = memory a1.channels.c2.capacity = 1000 a1.channels.c2.transactionCapacity = 100 # Bind the source and sink to the channel a1.sources.r1.channels = c1 c2 a1.sinks.k1.channel = c1 a1.sinks.k2.channel = c2- 1
- 2
- 3
- 4
- 5
- 6
- 7
- 8
- 9
- 10
- 11
- 12
- 13
- 14
- 15
- 16
- 17
- 18
- 19
- 20
- 21
- 22
- 23
- 24
- 25
- 26
- 27
- 28
- 29
- 30
- 31
- 32
- 33
- 34
- 35
- 36
- 37
- 38
- 39
- 40
- 41
6./jobs/t6下编写配置文件avro-flume-logger1.conf
- vim avro-flume-logger1.conf
a1.sources = r1 a1.sinks = k1 a1.channels = c1 a1.sources.r1.type = avro a1.sources.r1.bind = node1 a1.sources.r1.port = 4141 a1.sinks.k1.type = logger a1.channels.c1.type = memory a1.channels.c1.capacity = 1000 a1.channels.c1.transactionCapacity = 100 a1.sinks.k1.channel = c1 a1.sources.r1.channels = c1- 1
- 2
- 3
- 4
- 5
- 6
- 7
- 8
- 9
- 10
- 11
- 12
- 13
- 14
- 15
- 16
7./jobs/t6下编写配置文件avro-flume-logger2.conf
- vim avro-flume-logger2.conf
a1.sources = r1 a1.sinks = k1 a1.channels = c1 a1.sources.r1.type = avro a1.sources.r1.bind = node1 a1.sources.r1.port = 4142 a1.sinks.k1.type = logger a1.channels.c1.type = memory a1.channels.c1.capacity = 1000 a1.channels.c1.transactionCapacity = 100 a1.sinks.k1.channel = c1 a1.sources.r1.channels = c1- 1
- 2
- 3
- 4
- 5
- 6
- 7
- 8
- 9
- 10
- 11
- 12
- 13
- 14
- 15
- 16
8.启动顺序flume321
- bin/flume-ng agent --conf conf --conf-file
jobs/t6/avro-flume-logger2.conf --name a1
-Dflume.root.logger==INFO,console - bin/flume-ng agent --conf conf --conf-file
jobs/t6/avro-flume-logger1.conf --name a1
-Dflume.root.logger==INFO,console - bin/flume-ng agent --conf conf --conf-file
jobs/t6/netcat-interceptor-avro.conf --name a1
-Dflume.root.logger==INFO,console
9.telnet向node1发送消息
- telnet localhost 44444
10.结果
- 包含hello的消息全部被拦截到


-
相关阅读:
ChatGPT 和 Midjourney 将改变我们的生活,日常工作流程将完全改变并与这些新型工具集成
【数据结构笔记09】数据结构之稀疏矩阵的三元组和十字链表法具体代码实现(C语言)
(19)Verilog实现信号延迟N拍【8拍】
c++运算符重载的几个例子记录
jar添加jre运行环境,即是电脑没有安装jdk也可以运行
基于springboot垃圾分类管理系统
Vue——动态组件、缓存组件keep-alive、异步组件
牛客网最新Java面试通关八股文手册,花点耐心每天刷上10道题,挑战一下年薪50W!
SpringBoot3.1.5对应新版本SpringCloud开发(1)-Eureka注册中心
项目管理:制定项目计划应该注意哪些问题?
- 原文地址:https://blog.csdn.net/weixin_51699336/article/details/125509462
