-
J2EE基础-自定义MVC(中)
目录
前言
上次我们认识了自定义MVC原理(http://t.csdn.cn/S5TWs),今天了解的内容是自定义mvc框架实现(基于上篇文章进行优化)
一、让中央控制器动态加载存储子控制器
通过建模我们可以知道,最终configModel对象会包含config.xml中所有子控制器信息,同时为了解决中央控制器能够动态加载保存子控制器的信息,那么我们只需要引入configModel对象即可
config.xml:
- <?xml version="1.0" encoding="UTF-8"?>
- <config>
- <action path="/book" type="com.oyang.servlet.BookAction">
- <forward name="failed" path="/demo2.jsp" redirect="false" />
- <forward name="success" path="/demo3.jsp" redirect="true" />
- </action>
- <action path="/order" type="com.oyang.servlet.OrderAction">
- <forward name="failed" path="/demo2.jsp" redirect="false" />
- <forward name="success" path="/demo3.jsp" redirect="true" />
- </action>
- </config>
优化DispatcherServlet:
- package com.oyang.framework;
- import java.io.IOException;
- import java.util.HashMap;
- import java.util.Map;
- import javax.servlet.ServletException;
- import javax.servlet.annotation.WebServlet;
- import javax.servlet.http.HttpServlet;
- import javax.servlet.http.HttpServletRequest;
- import javax.servlet.http.HttpServletResponse;
- import org.apache.commons.beanutils.BeanUtils;
- import org.apache.commons.beanutils.PropertyUtils;
- import com.oyang.servlet.BookAction;
- /**
- * 中央控制器:
- * 主要职能,接收浏览器请求,找到对应的处理人
- * @author yang
- *
- */
- //@WebServlet("*.action")
- public class DispatcherServlet extends HttpServlet{
- //private Map<String, Action> actions=new HashMap<String,Action>();
- /**
- * 通过建模我们可以知道,最终configModel对象会包含config.xml中的所有子控制器信息,
- * 同时为了解决中央控制器能够动态加载保存子控制器的信息,那么我们只需要引入configModel对象即可
- */
- private ConfigModel configModel;
- //程序启动时 ,只会加载一次
- @Override
- public void init() throws ServletException {
- //actions.put("/book",new BookAction());
- //actions.put("/order",new BookAction());
- try {
- //配置地址
- //getInitParameter的作用是拿到web.xml中的Servlet信息配置的参数
- String configLocation = this.getInitParameter("configLocation");
- if(configLocation==null || "".equals(configLocation))
- configModel=ConfigModelFactory.bulid();
- else
- configModel=ConfigModelFactory.bulid(configLocation);
- } catch (Exception e) {
- e.printStackTrace();
- }
- }
- @Override
- protected void doGet(HttpServletRequest req, HttpServletResponse resp) throws ServletException, IOException {
- doPost(req, resp);
- }
- //只要是以.action结尾的每次请求都会被doPost截取
- @Override
- protected void doPost(HttpServletRequest req, HttpServletResponse resp) throws ServletException, IOException {
- http://localhost:8080/mvc/book.action?methodName=list
- String uri = req.getRequestURI();
- // 要拿到/book,就是最后一个/到最后一个.为止
- uri= uri.substring(uri.lastIndexOf("/"),uri.lastIndexOf("."));
- /**
- * 思路:
- * 以前我们从map集合中获取,那样的话就行不通了。那么该怎么办呢?此时我们就需要修改xml配置文件了。
- * 通过配置文件拿到全路径名,再通过反射实例化
- */
- //Action action = actions.get(uri);
- //取到.action之后 Action action = actions.get(uri);里面定义了对应的方法
- //相比于上一种从map集合获取子控制器,当前需要获取config.xml中的全路径名,然后反射实例化
- ActionModel actionModel = configModel.pop(uri);
- if(actionModel==null) {
- throw new RuntimeException("action config eroer 配置错误");
- }
- String type = actionModel.getType();//拿到type值
- //拿到type值之后就能通过路径名反射实例化 ------type是Action子控制器的全路径名
- try {
- Action action = (Action) Class.forName(type).newInstance();
- //此时的action 是bookAction
- if(action instanceof ModelDriven) {
- ModelDriven md=(ModelDriven) action;
- //action指的是bookAction,而bookAction又实现了ModelDriven接口,然后把bookAction转换成ModelDriven接口
- Object model = md.getModel();//model指的是bookAction中的book实例
- //给model中的属性赋值,要接收前端jsp传递过来的参数
- //PropertyUtils.getProperty(bean, name);//从某一个对象里面取某一个值
- //将前端所有参数值封装进实体类
- BeanUtils.populate(model, req.getParameterMap());
- System.out.println(model);
- }
- //正式调用方法之前,book中的属性要被赋值
- // action.execute(req, resp);
- String retult = action.execute(req, resp);
- ForwardModel forwardModel = actionModel.pop(retult);
- if(forwardModel==null) {
- throw new RuntimeException("forward config error 配置错误");
- }
- // /bookList.jsp/index.jsp
- String path = forwardModel.getPath();
- //拿到是否需要转发的配置
- boolean redirect = forwardModel.getRedirect();
- if(redirect)
- resp.sendRedirect(req.getServletContext().getContextPath()+path);
- else
- req.getRequestDispatcher(path).forward(req, resp);
- } catch (Exception e) {
- // TODO Auto-generated catch block
- e.printStackTrace();
- } //Action的实例
- }
- //由原来的actions.get(uri)变成了从模型对象里取
- }
ConfigModel:
- package com.oyang.framework;
- import java.util.HashMap;
- import java.util.Map;
- /**
- * 根标签对应的对象
- * @author yang
- *
- * @date 2022年6月15日上午9:04:05
- */
- public class ConfigModel {
- private Map<String, ActionModel> aMap=new HashMap<String, ActionModel>();
- public void push(ActionModel actionModel) {
- aMap.put(actionModel.getPath(), actionModel);
- }
- public ActionModel pop(String path) {
- return aMap.get(path);
- }
- }
ConfigModelFactory :
- package com.oyang.framework;
- import java.io.InputStream;
- import java.util.List;
- import org.dom4j.Document;
- import org.dom4j.DocumentException;
- import org.dom4j.Element;
- import org.dom4j.io.SAXReader;
- /**
- * 23种设计模式之工厂模式
- * sessionFactory
- * ConfigModelFactory 就是用来生产configmodel对象的
- * 生产出来的Configmodel对象就包含了config.xml中的配置内容
- * @author yang
- *
- *此地生产configmodel有配置信息?
- *1.解析config.xml中的配置信息
- *2.将对应的配置信息分别加载进不同的模型对象中
- * @date 2022年6月15日上午9:55:56
- */
- public class ConfigModelFactory {
- public static ConfigModel bulid(String path) throws Exception {
- InputStream in = ConfigModelFactory.class.getResourceAsStream(path);
- SAXReader sr=new SAXReader();
- Document doc = sr.read(in);
- List<Element> actionEles = doc.selectNodes("/config/action");
- ConfigModel con=new ConfigModel();
- for (Element actionM : actionEles) {
- ActionModel actionModel = new ActionModel();
- actionModel.setPath(actionM.attributeValue("path"));
- actionModel.setType(actionM.attributeValue("type"));
- //将forwardmodel赋值并且添加到actionmodel中
- List<Element> forwardEles = actionM.selectNodes("forward");
- for (Element element : forwardEles) {
- ForwardModel forwardModel = new ForwardModel();
- forwardModel.setName(element.attributeValue("name"));
- forwardModel.setPath(element.attributeValue("path"));
- // redirect:只能是false|true,允许空,默认值为false
- forwardModel.setRedirect("true".equals(element.attributeValue("redirect")));
- actionModel.push(forwardModel);
- }
- con.push(actionModel);
- }
- return con;
- }
- public static ConfigModel bulid() throws Exception {
- String defaultPath="/config.xml";
- return bulid(defaultPath);
- }
- }
ForwardModel :
- package com.oyang.framework;
- /**
- * 对应forward标签
- * @author yang
- *
- * @date 2022年6月15日上午9:05:38
- */
- public class ForwardModel {
- private String name;
- private String path;
- private boolean redirect;
- public String getName() {
- return name;
- }
- public void setName(String name) {
- this.name = name;
- }
- public String getPath() {
- return path;
- }
- public void setPath(String path) {
- this.path = path;
- }
- public boolean getRedirect() {
- return redirect;
- }
- public void setRedirect(boolean b) {
- this.redirect = b;
- }
- }
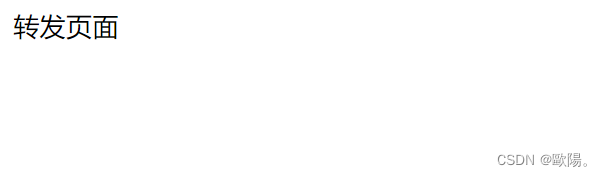
效果:

二、 参数传递封装优化

同常的Servlet:
- private void add(HttpServletRequest request, HttpServletResponse response) {
- String bid = request.getParameter("bid");
- String bname = request.getParameter("bname");
- String price = request.getParameter("price");
- Book b=new Book(Integer.valueOf(bid), bname, Float.valueOf(price));
- //BookDao.add(b);
- System.out.println(book);
- //上述问题:如果一张表有20乃至50行数据,那岂不是要写那么多行去接收?如果有10张20条数据以上的表,那一个增加方法就得写很多行,甚至还有可能写错。大大的限制了我们的开发速度和效率
- //为了避免上述问题,如果上述代码可以不写就好了,那就不会这么麻烦了。能否让它们默认就接收那么多值呢?那我们就去生产这样的一个框架
- System.out.println("在同一个Servlet中调用add新增方法");
- }
上述问题:如果一张表有20乃至50行数据,那岂不是要写那么多行去接收?如果有10张20条数据以上的表,那一个增加方法就得写很多行,甚至还有可能写错。大大的限制了我们的开发速度和效率
解决方案:
为了避免上述问题,如果上述代码可以不写就好了,那就不会这么麻烦了。能否让它们默认就接收那么多值呢?那我们就去生产这样的一个框架建立一个模型驱动接口,该接口目的是为了接受前台JSP传递的参数,并且封装到实体类中
ModelDriven<T> :
- package com.oyang.framework;
- /**
- * 模型驱动接口:接收前台JSP传递的参数,并且封装到实体类中
- * @author yang
- *
- * @date 2022年6月28日上午9:02:29
- */
- public interface ModelDriven<T> {
- //拿到将要封装的类实例 ModelDriven.getModel()//当你要调用这个方法的时候等价于-->new Book();
- //此时new 的book是没有值的,我们去封装一下值
- T getModel();
- }
此时new 的book是没有值的,我们去封装一下值
BooKAction实现模型驱动接口:
- package com.oyang.servlet;
- import javax.servlet.http.HttpServletRequest;
- import javax.servlet.http.HttpServletResponse;
- import com.oyang.entity.Book;
- import com.oyang.framework.Action;
- import com.oyang.framework.ActionSupport;
- import com.oyang.framework.ModelDriven;
- public class BookAction extends ActionSupport implements ModelDriven<Book>{
- private Book book=new Book();
- private void list(HttpServletRequest request, HttpServletResponse response) {
- System.out.println("在同一个Servlet中调用list查询方法");
- }
- private void load(HttpServletRequest request, HttpServletResponse response) {
- System.out.println("在同一个Servlet中调用load回显方法");
- }
- private void edit(HttpServletRequest request, HttpServletResponse response) {
- System.out.println("在同一个Servlet中调用edit修改方法");
- }
- private void del(HttpServletRequest request, HttpServletResponse response) {
- System.out.println("在同一个Servlet中调用del删除方法");
- }
- private void add(HttpServletRequest request, HttpServletResponse response) {
- System.out.println("在同一个Servlet中调用add新增方法");
- }
- @Override
- public Book getModel() {
- return book;
- }
- }
将DispatcherServlet进行近一步的优化:
- package com.oyang.framework;
- import java.io.IOException;
- import java.util.HashMap;
- import java.util.Map;
- import javax.servlet.ServletException;
- import javax.servlet.annotation.WebServlet;
- import javax.servlet.http.HttpServlet;
- import javax.servlet.http.HttpServletRequest;
- import javax.servlet.http.HttpServletResponse;
- import org.apache.commons.beanutils.BeanUtils;
- import org.apache.commons.beanutils.PropertyUtils;
- import com.oyang.servlet.BookAction;
- /**
- * 中央控制器:
- * 主要职能,接收浏览器请求,找到对应的处理人
- * @author yang
- *
- */
- //@WebServlet("*.action")
- public class DispatcherServlet extends HttpServlet{
- //private Map<String, Action> actions=new HashMap<String,Action>();
- /**
- * 通过建模我们可以知道,最终configModel对象会包含config.xml中的所有子控制器信息,
- * 同时为了解决中央控制器能够动态加载保存子控制器的信息,那么我们只需要引入configModel对象即可
- */
- private ConfigModel configModel;
- //程序启动时 ,只会加载一次
- @Override
- public void init() throws ServletException {
- //actions.put("/book",new BookAction());
- //actions.put("/order",new BookAction());
- try {
- //配置地址
- //getInitParameter的作用是拿到web.xml中的Servlet信息配置的参数
- String configLocation = this.getInitParameter("configLocation");
- if(configLocation==null || "".equals(configLocation))
- configModel=ConfigModelFactory.bulid();
- else
- configModel=ConfigModelFactory.bulid(configLocation);
- } catch (Exception e) {
- e.printStackTrace();
- }
- }
- @Override
- protected void doGet(HttpServletRequest req, HttpServletResponse resp) throws ServletException, IOException {
- doPost(req, resp);
- }
- //只要是以.action结尾的每次请求都会被doPost截取
- @Override
- protected void doPost(HttpServletRequest req, HttpServletResponse resp) throws ServletException, IOException {
- http://localhost:8080/mvc/book.action?methodName=list
- String uri = req.getRequestURI();
- // 要拿到/book,就是最后一个/到最后一个.为止
- uri= uri.substring(uri.lastIndexOf("/"),uri.lastIndexOf("."));
- /**
- * 思路:
- * 以前我们从map集合中获取,那样的话就行不通了。那么该怎么办呢?此时我们就需要修改xml配置文件了。
- * 通过配置文件拿到全路径名,再通过反射实例化
- */
- //Action action = actions.get(uri);
- //取到.action之后 Action action = actions.get(uri);里面定义了对应的方法
- //相比于上一种从map集合获取子控制器,当前需要获取config.xml中的全路径名,然后反射实例化
- ActionModel actionModel = configModel.pop(uri);
- if(actionModel==null) {
- throw new RuntimeException("action config eroer 配置错误");
- }
- String type = actionModel.getType();//拿到type值
- //拿到type值之后就能通过路径名反射实例化 ------type是Action子控制器的全路径名
- try {
- Action action = (Action) Class.forName(type).newInstance();
- //此时的action 是bookAction
- if(action instanceof ModelDriven) {
- ModelDriven md=(ModelDriven) action;
- //action指的是bookAction,而bookAction又实现了ModelDriven接口,然后把bookAction转换成ModelDriven接口
- Object model = md.getModel();//model指的是bookAction中的book实例
- //给model中的属性赋值,要接收前端jsp传递过来的参数
- //PropertyUtils.getProperty(bean, name);//从某一个对象里面取某一个值
- //将前端所有参数值封装进实体类
- BeanUtils.populate(model, req.getParameterMap());
- // System.out.println(model);
- }
- //正式调用方法之前,book中的属性要被赋值
- // action.execute(req, resp);
- String retult = action.execute(req, resp);
- ForwardModel forwardModel = actionModel.pop(retult);
- if(forwardModel==null) {
- throw new RuntimeException("forward config error 配置错误");
- }
- // /bookList.jsp/index.jsp
- String path = forwardModel.getPath();
- //拿到是否需要转发的配置
- boolean redirect = forwardModel.getRedirect();
- if(redirect)
- resp.sendRedirect(req.getServletContext().getContextPath()+path);
- else
- req.getRequestDispatcher(path).forward(req, resp);
- } catch (Exception e) {
- // TODO Auto-generated catch block
- e.printStackTrace();
- } //Action的实例
- }
- //由原来的actions.get(uri)变成了从模型对象里取
- }
效果:

我们可以看到原本Book没有值的当再一次点击的时候Book中又有值。 他大大减少了代码量,不管之后有多少属性,都可以接受属性值和封装
三、 对于方法执行结果转发重定向优化
对方法的执行结果进行优化,如果增加成功就用转发,失败就用重定向。
编辑.xml配置文件:
- <?xml version="1.0" encoding="UTF-8"?>
- <config>
- <action path="/book" type="com.oyang.servlet.BookAction">
- <forward name="failed" path="/demo2.jsp" redirect="false" />
- <forward name="success" path="/demo3.jsp" redirect="true" />
- </action>
- <action path="/order" type="com.oyang.servlet.OrderAction">
- <forward name="failed" path="/demo2.jsp" redirect="false" />
- <forward name="success" path="/demo3.jsp" redirect="true" />
- </action>
- </config>
对子控制器进行优化 Action :
- package com.oyang.framework;
- import javax.servlet.http.HttpServletRequest;
- import javax.servlet.http.HttpServletResponse;
- /**
- * 子控制器
- * 对应请求的处理人
- * @author yang
- *
- */
- public interface Action {
- String execute(HttpServletRequest request, HttpServletResponse response);
- }
ActionSupport类:
- package com.oyang.framework;
- import java.lang.reflect.Method;
- import javax.servlet.http.HttpServletRequest;
- import javax.servlet.http.HttpServletResponse;
- public class ActionSupport implements Action {
- @Override
- public String execute(HttpServletRequest request, HttpServletResponse response) {
- String methodName = request.getParameter("methodName");
- // methodName可能是add/del/edit/list/load/...
- // 前台传递什么方法,就调用当前类的对应方法
- try {
- Method m = this.getClass()// 当前类.class
- .getDeclaredMethod(methodName, HttpServletRequest.class, HttpServletResponse.class);
- // 打开权限
- m.setAccessible(true);
- // 调用当前类实例的methodName 方法
- return (String) m.invoke(this, request, response);
- } catch (Exception e) {
- // TODO Auto-generated catch block
- e.printStackTrace();
- }
- return null;
- }
- }
DispatcherServlet:

上述代码有,在此标记出来
BookAction:(更改返回值)
- package com.oyang.servlet;
- import javax.servlet.http.HttpServletRequest;
- import javax.servlet.http.HttpServletResponse;
- import com.oyang.entity.Book;
- import com.oyang.framework.Action;
- import com.oyang.framework.ActionSupport;
- import com.oyang.framework.ModelDriven;
- public class BookAction extends ActionSupport implements ModelDriven<Book>{
- private Book book=new Book();
- private String list(HttpServletRequest request, HttpServletResponse response) {
- System.out.println("在同一个Servlet中调用list查询方法");
- return "success";
- }
- private void load(HttpServletRequest request, HttpServletResponse response) {
- System.out.println("在同一个Servlet中调用load回显方法");
- }
- private void edit(HttpServletRequest request, HttpServletResponse response) {
- System.out.println("在同一个Servlet中调用edit修改方法");
- }
- private void del(HttpServletRequest request, HttpServletResponse response) {
- System.out.println("在同一个Servlet中调用del删除方法");
- }
- private String add(HttpServletRequest request, HttpServletResponse response) {
- // String bid = request.getParameter("bid");
- // String bname = request.getParameter("bname");
- // String price = request.getParameter("price");
- // Book b=new Book(Integer.valueOf(bid), bname, Float.valueOf(price));
- //BookDao.add(b);
- // System.out.println(book);
- //上述问题:如果一张表有20乃至50行数据,那岂不是要写那么多行去接收?如果有10张20条数据以上的表,那一个增加方法就得写很多行,甚至还有可能写错。大大的限制了我们的开发速度和效率
- //为了避免上述问题,如果上述代码可以不写就好了,那就不会这么麻烦了。能否让它们默认就接收那么多值呢?那我们就去生产这样的一个框架
- System.out.println("在同一个Servlet中调用add新增方法");
- return "failed";
- }
- @Override
- public Book getModel() {
- return book;
- }
- }
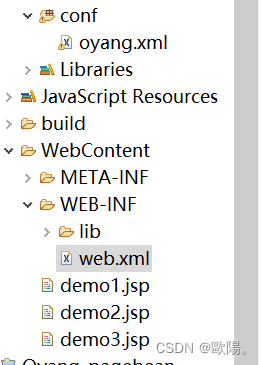
新建两个jsp界面,用于演示跳转转发&重定向

我们点击新增后的运行结果:
四、框架配置文本优化
以后我们使用的框架有很多,很有可能会重名,但是换了名字程序就跑不了了
对此问题我们只需要更改web.xml文件的配置就行了
- <?xml version="1.0" encoding="UTF-8"?>
- <web-app xmlns:xsi="http://www.w3.org/2001/XMLSchema-instance" xmlns="http://xmlns.jcp.org/xml/ns/javaee" xsi:schemaLocation="http://xmlns.jcp.org/xml/ns/javaee http://xmlns.jcp.org/xml/ns/javaee/web-app_3_1.xsd" id="WebApp_ID" version="3.1">
- <display-name>Oyang_mvc</display-name>
- <servlet>
- <servlet-name>mvc</servlet-name>
- <servlet-class>com.oyang.framework.DispatcherServlet</servlet-class>
- <init-param><!-- 可以把值传到 configLocation中-->
- <param-name>configLocation</param-name>
- <param-value>/oyang.xml</param-value>
- </init-param>
- </servlet>
- <servlet-mapping>
- <servlet-name>mvc</servlet-name>
- <url-pattern>*.action</url-pattern>
- </servlet-mapping>
- </web-app>
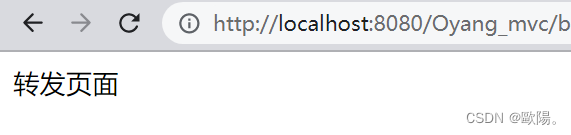
试试运行结果:
点击增加

跳转到转发界面
看一下控制台打印的值

敬请期待下篇J2EE基础-自定义MVC(下),下篇将会优化的更多
OK,今日的学习就到此结束啦,如果对个位看官有帮助的话可以留下免费的赞哦(收藏或关注也行),如果文章中有什么问题或不足以及需要改正的地方可以私信博主,博主会做出改正的。个位看官,小陽在此跟大家说拜拜啦
-
相关阅读:
flutte: 可滚动列表
[k8s] 常见yml配置和详细解释
Android 3D Launcher锁定IMU界面
Centos8安装CDH解决不兼容问题
ApiSix网关环境搭建及简单使用(Windows)
诊断DLL——Visual Studio安装与dll使用
Leetcode 第 372 场周赛题解
基于TCP的聊天系统
渗透测试学习day3
Java8新特性
- 原文地址:https://blog.csdn.net/weixin_65211978/article/details/125499671
