-
Vue3+node.js网易云音乐实战项目(六)
其他页面可以看我页面专栏 Vue3实战项目-网易云APP 。
如果文章对你有帮助请点一个赞或收藏1、收藏、评论和分享图标

接下来,我们实现这个位置,首先给新建一个子组件listviewIcon.vue,并且在listview.vue注册一下,并把参数传递给子组件

然后,我们在子组件中把我们用的图标弄好
<template> <div class="listviewIcon"> <div class="collectIcon"> <svg class="icon" aria-hidden="true"> <use xlink:href="#icon-shoucangjia"></use> </svg> </div> <div class="commentIcon"> <svg class="icon" aria-hidden="true"> <use xlink:href="#icon-pinglun-"></use> </svg> </div> <div class="shareIcon"> <svg class="icon" aria-hidden="true"> <use xlink:href="#icon-fenxiang"></use> </svg> </div> </div> </template>- 1
- 2
- 3
- 4
- 5
- 6
- 7
- 8
- 9
- 10
- 11
- 12
- 13
- 14
- 15
- 16
- 17
- 18
- 19

然后我们给这个大的div盒子一个边框然后利用flex横排列,并且使盒子居中
.listviewIcon{ width: 5rem; display: flex; justify-content: space-around; border: 1px solid red; border-radius: 20px; padding: 10px; margin: 0.7rem auto; background: #fff; }- 1
- 2
- 3
- 4
- 5
- 6
- 7
- 8
- 9
- 10
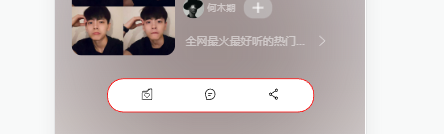
然后我们把评论数这些接收一下,放在页面上。
<div class="listviewIcon"> <div class="collectIcon"> <svg class="icon" aria-hidden="true"> <use xlink:href="#icon-shoucangjia"></use> </svg> <p>{{playlist.subscribedCount}}</p> </div> <div class="commentIcon"> <svg class="icon" aria-hidden="true"> <use xlink:href="#icon-pinglun-"></use> </svg> <p>{{playlist.commentCount}}</p> </div> <div class="shareIcon"> <svg class="icon" aria-hidden="true"> <use xlink:href="#icon-fenxiang"></use> </svg> <p>{{playlist.shareCount}}</p> </div> </div>- 1
- 2
- 3
- 4
- 5
- 6
- 7
- 8
- 9
- 10
- 11
- 12
- 13
- 14
- 15
- 16
- 17
- 18
- 19
- 20

左右很排列居中一下。
.listviewIcon div:nth-child(n){ display: flex; justify-content: center; align-items: center; }- 1
- 2
- 3
- 4
- 5

然后给出了第一个,其他两个加一个左竖线
.listviewIcon div:nth-child(n + 2) { //n+2就是从第二个元素开始往后所有的元素 border-left: 1px solid rgba(77, 77, 77, 0.5); padding-left: 20px; }- 1
- 2
- 3
- 4

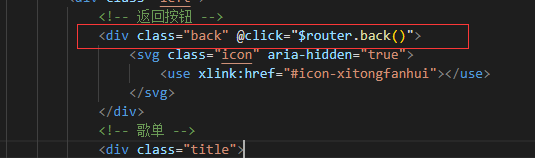
然后这个就做好了。我们把页面的返回做一下,点击返回图标返回到主页

这里很简单,只需要设置一下路由的返回就可以了,我们找到这个图标在listviewTop.vue下,添加点击命令
<!-- 返回按钮 --> <div class="back" @click="$router.back()"> </div>- 1
- 2
- 3

2、播放列表
然后,我们来做播放列表

然后这里我稍微调整了一下,图标列表和播放列表一个在上面一个在下面,跟头像的原理一样,然后我做了一下调整,在listviewIcon.vue下,新增下面这几个
position: absolute; z-index: 1; left: 0.7rem; top: 4.5rem;- 1
- 2
- 3
- 4
删除了自动居中,阴影调小了一点


然后调整一下playlistView.vue的顶部距离
.playlistView{ width: 7.5rem; background-color: rgb(255, 255, 255); margin-top:1rem; }- 1
- 2
- 3
- 4
- 5

然后这个弧线,由于我始终都没有实现就没有写.那么我们先把图标填上,
<!-- 图标栏 --> <div class="playlistIcon"> <div class="leftIcon"> <svg class="icon" aria-hidden="true"> <use xlink:href="#icon-bofang"></use> </svg> <p class="words">播放全部</p> <p class="count">({{playlist.tracks.length}})</p> </div> <div class="rightIcon"> <svg class="icon" aria-hidden="true"> <use xlink:href="#icon-xiazai"></use> </svg> <svg class="icon" aria-hidden="true"> <use xlink:href="#icon-quanxuan"></use> </svg> </div> </div> <!-- 播放列表栏 --> <div class="playlists"></div>- 1
- 2
- 3
- 4
- 5
- 6
- 7
- 8
- 9
- 10
- 11
- 12
- 13
- 14
- 15
- 16
- 17
- 18
- 19
- 20
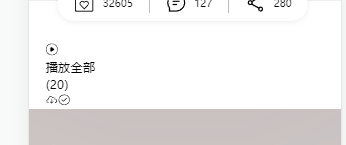
注意这里的20是请求歌单的数量,还是需要在listview.vue上设置

然后子组件接收一下,父组件传过来的数据,然后我们调整一下样式
.icon{ width: 0.5rem; height: 0.5rem; } .words{ margin-right: 5px; line-height: 0.5rem; } .count{ font-size: 10px; line-height: 0.5rem; } .playlistIcon{ display: flex; justify-content: space-between; align-items: center; } .playlistIcon div:nth-child(n){ display: flex; justify-content: space-between; align-items: center; } .rightIcon svg:nth-child(1){ margin-right: 15px; } .leftIcon svg:nth-child(1){ margin-right: 15px; fill: red; }- 1
- 2
- 3
- 4
- 5
- 6
- 7
- 8
- 9
- 10
- 11
- 12
- 13
- 14
- 15
- 16
- 17
- 18
- 19
- 20
- 21
- 22
- 23
- 24
- 25
- 26
- 27
- 28
- 29

这上面的图标部分,我们就完成了,接下来我们做列表的部分,里面的数据是接口tracks部分的,al代表的是专辑,ar代表的是作者

<!-- 播放列表栏 --> <div class="playlists"> <div class="playItem" v-for="(item,i) in playlist.tracks" :key="i"> <!-- 列表左边区域 --> <div class="left"> <!-- 编号 --> <div class="index">{{i+1}}</div> <div class="content"> <!-- 音乐名 --> <div class="title">{{item.name}}</div> <!-- 作者名和专辑名 --> <div class="anthor">{{item.ar[0].name}}-{{item.al.name}}</div> </div> </div> <!-- 列表右边区域 --> <div class="right"> <!-- 图标部分 --> <svg class="icon" aria-hidden="true"> <use xlink:href="#icon-bofang"></use> </svg> <svg class="icon" aria-hidden="true"> <use xlink:href="#icon-gengduo-shuxiang"></use> </svg> </div> </div> </div>- 1
- 2
- 3
- 4
- 5
- 6
- 7
- 8
- 9
- 10
- 11
- 12
- 13
- 14
- 15
- 16
- 17
- 18
- 19
- 20
- 21
- 22
- 23
- 24
- 25
- 26

然后都是左右分布的形式,我们把它弄成一个左右分布利用flex
.playlists{ .playItem{ display: flex; justify-content: space-between; .left{ display: flex; justify-content: space-between; .content{ } } } }- 1
- 2
- 3
- 4
- 5
- 6
- 7
- 8
- 9
- 10
- 11
- 12
- 13

然后再来调整字体大小颜色,先从左边开始,调整编号
.index{ width: 0.5rem; font-size: 20px; opacity: 0.5; display: flex; justify-content:center; align-items:center; }- 1
- 2
- 3
- 4
- 5
- 6
- 7
- 8

然后,在调整一下,音乐名和专辑
.content{ margin-left: 0.4rem; .anthor{ font-size: 10px; opacity: 0.5; } }- 1
- 2
- 3
- 4
- 5
- 6
- 7

现在调整右边的按钮,给它透明度调低,边距调整一下
.right{ .icon{ width: 0.5rem; height: 0.5rem; opacity: 0.5; margin-left: 15px; } }- 1
- 2
- 3
- 4
- 5
- 6
- 7
- 8

-
相关阅读:
2023-09-12力扣每日一题
深度解析:用Python爬虫逆向破解dappradar的URL加密参数(最详细逆向实战教程,小白进阶高手之路)
Hive性能调优实战
【USB设备设计】-- MSC 设备开发(U 盘设备)
slambook2(ch2)—— Ubuntu20.04 使用cmake + make自动化编译过程
Python实现猎人猎物优化算法(HPO)优化Catboost回归模型(CatBoostRegressor算法)项目实战
在MAC电脑上将NTFS格式移动硬盘转换为ExFAT格式
Halide 配置 visual studio
Matplotlib面向对象接口
程序员周末都干些什么?
- 原文地址:https://blog.csdn.net/NITIQ/article/details/125487664