-
QT基本对话框(基本对话框、工具盒类、进度条、调色板与电子钟、可扩展对话框、程序启动画面)
此篇文章通过实例介绍基本对话框的用法。首先介绍标准文件对话框(QFileDialog)、标准颜色对话框(QColorDialog)、标准字体对话框(QFontDialog)、标准输入对话框(QInputDialog)以及标准消息对话框(QMessageBox)。
文章后面将介绍QToolBox类的使用、进度条的用法、QPalette类的用法、QTime类的用法、mousePressEvent/mouseMoveEvent类的用法、可扩展对话框的基本实现方法、不规则窗体的实现及程序启动画面(QSplashScreen)的使用。基本对话框
创建一个DialogExample工程,在工程项目种实现基本对话框功能。界面UI布局效果如下图:
 界面布局代码如下:
Dialog::Dialog(QWidget *parent)
    : QDialog(parent)
{
    setWindowTitle(QStringLiteral("各种标准对话框的实例"));
    fileBtn=new QPushButton;                                    //各个控件对象的初始化
    fileBtn->setText(QStringLiteral("文件标准对话框实例"));
    fileLineEdit=new QLineEdit;                                 //用来显示选择的文件名
    mainLayout=new QGridLayout(this);                           //布局设计
    mainLayout->addWidget(fileBtn,0,0);
    mainLayout->addWidget(fileLineEdit,0,1);
    connect(fileBtn,SIGNAL(clicked()),this,SLOT(showFile()));   //事件关联

    colorBtn=new QPushButton;                                   //创建各个控件的对象
    colorBtn->setText(QStringLiteral("颜色标准对话框实例"));
    colorFrame=new QFrame;
    colorFrame->setFrameShape(QFrame::Box);
    colorFrame->setAutoFillBackground(true);
    mainLayout->addWidget(colorBtn,1,0);                        //布局设计
    mainLayout->addWidget(colorFrame,1,1);
    connect(colorBtn,SIGNAL(clicked()),this,SLOT(showColor())); //事件关联

    fontBtn=new QPushButton;                                    //创建控件的对象
    fontBtn->setText(QStringLiteral("字体标准对话框实例"));
    fontLineEdit=new QLineEdit;                                 //显示更改的字符串
    fontLineEdit->setText(tr("Welcome!"));
    mainLayout->addWidget(fontBtn,2,0);                         //布局设计
    mainLayout->addWidget(fontLineEdit,2,1);
    connect(fontBtn,SIGNAL(clicked()),this,SLOT(showFont()));	//事件关联

    inputBtn=new QPushButton;                                   //创建控件的对象
    inputBtn->setText(QStringLiteral("标准输入对话框实例"));
    mainLayout->addWidget(inputBtn,3,0);                        //布局设计
    connect(inputBtn,SIGNAL(clicked()),this,SLOT(showInputDlg()));//事件关联

    MsgBtn =new QPushButton;                                    //创建控件对象
    MsgBtn->setText(QStringLiteral("标准消息对话框实例"));
    mainLayout->addWidget(MsgBtn,3,1);
    connect(MsgBtn,SIGNAL(clicked()),this,SLOT(showMsgDlg()));

    CustomBtn =new QPushButton;
    CustomBtn->setText(QStringLiteral("用户自定义消息对话框实例"));
    label =new QLabel;
    label->setFrameStyle(QFrame::Panel|QFrame::Sunken);
    mainLayout->addWidget(CustomBtn,4,0);
    mainLayout->addWidget(label,4,1);
    connect(CustomBtn,SIGNAL(clicked()),this,SLOT(showCustomDlg()));
}
文件标准对话框
点击“文件标准对话框实例”按钮,弹出“文件选择”对话框如下图所示。

界面功能实现代码如下:void Dialog::showFile() { QString s = QFileDialog::getOpenFileName(this,"open file dialog","/","C++ files(*.cpp);;C files(*.c);;Head files(*.h)"); fileLineEdit->setText(s); }QFileDialog::getOpenFileName函数说明如下:
QString QFileDialog::getOpenFileName
(
	QWidget *parent = nullptr, 					// 标准文件对话框的父窗口
	const QString &caption = QString(), 		// 标准文件对话框的标题名
	const QString &dir = QString(), 			// 指定默认的目录,若此参数带有文件名,则文件将是默认选中的文件
	const QString &filter = QString(), 			// 此参数对文件类型进行过滤,只有与之过滤器匹配的的文件类型才显示,可以同时指定多种过滤方式供用户选择,多种过滤器之间用“;;”隔开。
	QString *selectedFilter = nullptr, 			// 用户选择的过滤器通过此参数返回
	QFileDialog::Options options = Options()	// 选择显示文件名的格式,默认是同时显示目录与文件名
)
颜色标准对话框
点击“颜色标准对话框实例”按钮,弹出“颜色选择”对话框,如下图所示。

界面功能实现代码如下:void Dialog::showColor() { QColor c = QColorDialog::getColor(Qt::blue); if(c.isValid()) { colorFrame->setPalette(QPalette(c)); } }QColorDialog::getColor函数说明如下:
QColor QColorDialog::getColor
(
	const QColor &initial = Qt::white, 	// 指定默认选中的颜色,默认白色。通过QColor::isValid()函数可以判断用户选择的颜色是否有效,如果用户选择颜色时点击“取消”,则QColor::isValid()函数将返回false。
	QWidget *parent = nullptr, 			// 标准颜色对话框的父窗口
	const QString &title = QString(),
	QColorDialog::ColorDialogOptions options = ColorDialogOptions()
)
字体标准对话框
点击“字体标准对话框实例”按钮,弹出“字体选择”对话框,如下图所示。

界面功能实现代码如下:void Dialog::showFont() { bool ok; QFont f = QFontDialog::getFont(&ok); if (ok) { fontLineEdit->setFont(f); } }QFontDialog::getFont函数说明如下:
QFont QFontDialog::getFont(
	bool *ok, 					// 若用户点“OK”按钮,则该参数*ok将设为true,函数返回用户所选择的字体;否则,将设为false,此时函数返回默认字体
	QWidget *parent = nullptr	// 标准字体对话框的父窗口
)
标准输入对话框
标准输入对话框包括:标准字符串输入对话框、标准条目选择对话框、标准int类型输入对话框和标准double类型输入对话框。
点击“标准输入对话框实例”按钮,,弹出“标准输入对话框实例”页面,如下图所示。

界面功能实现代码如下:void Dialog::showInputDlg() { inputDlg =new InputDlg(this); inputDlg->show(); }InputDlg类界面布局如下:
InputDlg::InputDlg(QWidget* parent):QDialog(parent)
{
    setWindowTitle(QStringLiteral("标准输入对话框实例"));
    nameLabel1 =new QLabel;
    nameLabel1->setText(QStringLiteral("姓名:"));
    nameLabel2 =new QLabel;
    nameLabel2->setText(QStringLiteral("周何骏"));              		//姓名的初始值
    nameLabel2->setFrameStyle(QFrame::Panel|QFrame::Sunken);
    nameBtn =new QPushButton;
    nameBtn->setText(QStringLiteral("修改姓名"));
    sexLabel1 =new QLabel;
    sexLabel1->setText(QStringLiteral("性别:"));
    sexLabel2 =new QLabel;
    sexLabel2->setText(QStringLiteral("男"));                		//性别的初始值
    sexLabel2->setFrameStyle(QFrame::Panel|QFrame::Sunken);
    sexBtn =new QPushButton;
    sexBtn->setText(QStringLiteral("修改性别"));
    ageLabel1 =new QLabel;
    ageLabel1->setText(QStringLiteral("年龄:"));
    ageLabel2 =new QLabel;
    ageLabel2->setText(QStringLiteral("21"));           			//年龄的初始值
    ageLabel2->setFrameStyle(QFrame::Panel|QFrame::Sunken);
    ageBtn =new QPushButton;
    ageBtn->setText(QStringLiteral("修改年龄"));
    scoreLabel1 =new QLabel;
    scoreLabel1->setText(QStringLiteral("成绩:"));
    scoreLabel2 =new QLabel;
    scoreLabel2->setText(QStringLiteral("80"));         			//成绩的初始值
    scoreLabel2->setFrameStyle(QFrame::Panel|QFrame::Sunken);
    scoreBtn =new QPushButton;
    scoreBtn->setText(QStringLiteral("修改成绩"));
    mainLayout =new QGridLayout(this);
    mainLayout->addWidget(nameLabel1,0,0);
    mainLayout->addWidget(nameLabel2,0,1);
    mainLayout->addWidget(nameBtn,0,2);
    mainLayout->addWidget(sexLabel1,1,0);
    mainLayout->addWidget(sexLabel2,1,1);
    mainLayout->addWidget(sexBtn,1,2);
    mainLayout->addWidget(ageLabel1,2,0);
    mainLayout->addWidget(ageLabel2,2,1);
    mainLayout->addWidget(ageBtn,2,2);
    mainLayout->addWidget(scoreLabel1,3,0);
    mainLayout->addWidget(scoreLabel2,3,1);
    mainLayout->addWidget(scoreBtn,3,2);
    mainLayout->setMargin(15);
    mainLayout->setSpacing(10);
    connect(nameBtn,SIGNAL(clicked()),this,SLOT(ChangeName()));
    connect(sexBtn,SIGNAL(clicked()),this,SLOT(ChangeSex()));
    connect(ageBtn,SIGNAL(clicked()),this,SLOT(ChangeAge()));
    connect(scoreBtn,SIGNAL(clicked()),this,SLOT(ChangeScore()));
}
标准消息对话框
点击“标准消息对话框实例”按钮,弹出“标准消息对话框实例”页面,如下图所示。

界面功能实现代码如下:void Dialog::showMsgDlg() { msgDlg =new MsgBoxDlg(); msgDlg->show(); }MsgBoxDlg类界面布局如下:
MsgBoxDlg::MsgBoxDlg(QWidget *parent):QDialog(parent)
{
    setWindowTitle(QStringLiteral("标准消息对话框实例"));    	//设置对话框的标题
    label = new QLabel;
    label->setText(QStringLiteral("请选择一种消息框"));
    questionBtn =new QPushButton;
    questionBtn->setText(QStringLiteral("QuestionMsg"));
    informationBtn =new QPushButton;
    informationBtn->setText(QStringLiteral("InformationMsg"));
    warningBtn =new QPushButton;
    warningBtn->setText(QStringLiteral("WarningMsg"));
    criticalBtn =new QPushButton;
    criticalBtn->setText(QStringLiteral("CriticalMsg"));
    aboutBtn =new QPushButton;
    aboutBtn->setText(QStringLiteral("AboutMsg"));
    aboutQtBtn =new QPushButton;
    aboutQtBtn->setText(QStringLiteral("AboutQtMsg"));
    //布局
    mainLayout =new QGridLayout(this);
    mainLayout->addWidget(label,0,0,1,2);
    mainLayout->addWidget(questionBtn,1,0);
    mainLayout->addWidget(informationBtn,1,1);
    mainLayout->addWidget(warningBtn,2,0);
    mainLayout->addWidget(criticalBtn,2,1);
    mainLayout->addWidget(aboutBtn,3,0);
    mainLayout->addWidget(aboutQtBtn,3,1);
    //事件关联
    connect(questionBtn,SIGNAL(clicked()),this,SLOT(showQuestionMsg()));
    connect(informationBtn,SIGNAL(clicked()),this,SLOT(showInformationMsg()));
    connect(warningBtn,SIGNAL(clicked()),this,SLOT(showWarningMsg()));
    connect(criticalBtn,SIGNAL(clicked()),this,SLOT(showCriticalMsg()));
    connect(aboutBtn,SIGNAL(clicked()),this,SLOT(showAboutMsg()));
    connect(aboutQtBtn,SIGNAL(clicked()),this,SLOT(showAboutQtMsg()));
}
question消息框
question消息框效果如下。

界面功能代码如下:void MsgBoxDlg::showQuestionMsg() { label->setText(QStringLiteral("Question Message Box")); switch(QMessageBox::question(this, QStringLiteral("Question消息框"), QStringLiteral("您现在已经修改完成,是否要结束程序?"), QMessageBox::Ok|QMessageBox::Cancel,QMessageBox::Ok)) { case QMessageBox::Ok: label->setText("Question button/Ok"); break; case QMessageBox::Cancel: label->setText("Question button/Cancel"); break; default: break; } return; }QMessageBox::question函数说明如下:
QMessageBox::StandardButton QMessageBox::question
(
	QWidget *parent, 		// 消息框的父窗口指针
	const QString &title, 	// 消息框的标题框
	const QString &text, 	// 消息框的文字提示信息
	QMessageBox::StandardButtons buttons = StandardButtons(Yes | No), // 填写希望在消息框中出现的的按钮,如QMessageBox::Ok、QMessageBox::Close、QMessageBox::Discard等。在实际使用中应该注意按常规成对出现。例如,通常Save与Discard成对出现,而Abort、Retry、Ignore则一起出现。
	QMessageBox::StandardButton defaultButton = NoButton			  // 默认按钮,即消息框出现时,焦点默认处于哪个按钮上。
)
information消息框
information消息框效果如下。

界面功能代码如下:void MsgBoxDlg::showInformationMsg() { label->setText(tr("Information Message Box")); QMessageBox::information(this, QStringLiteral("Information消息框"), QStringLiteral("这是Information消息框测试,欢迎您!")); return; }QMessageBox::information函数说明如下:
QMessageBox::StandardButton QMessageBox::information
(
	QWidget *parent, 		// 消息框的父窗口指针
	const QString &title, 	// 消息框的标题栏
	const QString &text, 	// 消息框的文字提示信息
	QMessageBox::StandardButtons buttons = Ok, 				// 填写希望在消息框中出现的的按钮,如QMessageBox::Ok、QMessageBox::Close、QMessageBox::Discard等。在实际使用中应该注意按常规成对出现。例如,通常Save与Discard成对出现,而Abort、Retry、Ignore则一起出现。
	QMessageBox::StandardButton defaultButton = NoButton	// 默认按钮,即消息框出现时,焦点默认处于哪个按钮上。
)
warning消息框
warning消息框效果如下。

界面功能代码如下:void MsgBoxDlg::showWarningMsg() { label->setText(tr("Warning Message Box")); switch(QMessageBox::warning(this, QStringLiteral("Warning消息框"), QStringLiteral("您修改的内容还未保存,是否要保存对文档的修改?"), QMessageBox::Save|QMessageBox::Discard|QMessageBox::Cancel, QMessageBox::Save)) { case QMessageBox::Save: label->setText(tr("Warning button/Save")); break; case QMessageBox::Discard: label->setText(tr("Warning button/Discard")); break; case QMessageBox::Cancel: label->setText(tr("Warning button/Cancel")); break; default: break; } return; }QMessageBox::warning函数说明如下:
QMessageBox::StandardButton QMessageBox::warning
(
	QWidget *parent, 		// 消息框的父窗口指针
	const QString &title, 	// 消息框的标题栏
	const QString &text, 	// 消息框的文字提示信息
	QMessageBox::StandardButtons buttons = Ok, 				// 填写希望在消息框中出现的的按钮,如QMessageBox::Ok、QMessageBox::Close、QMessageBox::Discard等。在实际使用中应该注意按常规成对出现。例如,通常Save与Discard成对出现,而Abort、Retry、Ignore则一起出现。
	QMessageBox::StandardButton defaultButton = NoButton	// 默认按钮,即消息框出现时,焦点默认处于哪个按钮上。
)
critical消息框
critical消息框效果如下。
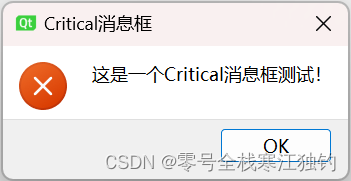
界面功能代码如下:void MsgBoxDlg::showCriticalMsg() { label->setText(tr("Critical Message Box")); QMessageBox::critical(this, QStringLiteral("Critical消息框"), QStringLiteral("这是一个Critical消息框测试!")); return; }QMessageBox::critical函数说明如下:
QMessageBox::StandardButton QMessageBox::critical
(
	QWidget *parent, 		// 消息框的父窗口指针
	const QString &title, 	// 消息框的标题栏
	const QString &text, 	// 消息框的文字提示信息
	QMessageBox::StandardButtons buttons = Ok, 				// 填写希望在消息框中出现的的按钮,如QMessageBox::Ok、QMessageBox::Close、QMessageBox::Discard等。在实际使用中应该注意按常规成对出现。例如,通常Save与Discard成对出现,而Abort、Retry、Ignore则一起出现。
	QMessageBox::StandardButton defaultButton = NoButton	// 默认按钮,即消息框出现时,焦点默认处于哪个按钮上。
)
about消息框
about消息框效果如下。

界面功能代码如下:void MsgBoxDlg::showAboutMsg() { label->setText(tr("About Message Box")); QMessageBox::about(this, QStringLiteral("About消息框"), QStringLiteral("这是一个About消息框测试!")); return; }QMessageBox::about函数说明如下:
void QMessageBox::about
(
	QWidget *parent, 		// 消息框的父窗口指针
	const QString &title, 	// 消息框的标题栏
	const QString &text		// 消息框的文字提示信息
)
aboutQt消息框
aboutQt消息框效果如下。

界面功能代码如下:void MsgBoxDlg::showAboutQtMsg() { label->setText(tr("About Qt Message Box")); QMessageBox::aboutQt(this, QStringLiteral("About Qt消息框")); return; }QMessageBox::aboutQt函数说明如下:
void QMessageBox::aboutQt
(
	QWidget *parent, 					// 消息框的父窗口指针
	const QString &title = QString()	// 消息框的标题栏
)
自定义消息框
当标准对话框不能满足我们的使用需求时,Qt可以自定义消息框。自定义消息框可以对消息框的图标、按钮和内容等根据需要进行设定。下面是自定义消息框的效果图。

界面功能代码如下:void Dialog::showCustomDlg() { label->setText(tr("Custom Message Box")); QMessageBox customMsgBox; customMsgBox.setWindowTitle(QStringLiteral("用户自定义消息框")); //设置消息框的标题 QPushButton *yesBtn=customMsgBox.addButton(tr("Yes"),QMessageBox:: ActionRole); QPushButton *noBtn=customMsgBox.addButton(tr("No"),QMessageBox::ActionRole); QPushButton *cancelBtn=customMsgBox.addButton(QMessageBox::Cancel); customMsgBox.setText(QStringLiteral("这是一个用户自定义消息框!")); customMsgBox.setIconPixmap(QPixmap("DialogExample.ico")); customMsgBox.exec(); //显示此自定义消息框 if(customMsgBox.clickedButton()==yesBtn) label->setText("Custom Message Box/Yes"); if(customMsgBox.clickedButton()==noBtn) label->setText("Custom Message Box/No"); if(customMsgBox.clickedButton()==cancelBtn) label->setText("Custom Message Box/Cancel"); return; }关键代码说明如下:
- QPushButton *yesBtn=customMsgBox.addButton(tr(“Yes”),QMessageBox:: ActionRole):定义消息框所需的按钮,由于QMessageBox::StandardButton只提供一些常用按钮,并不能满足所有应用的需求,故QMessageBox类提供了一个addButton函数来为消息框增加自定义的按钮,addButton函数第一个参数为按钮显示的文字,第二个参数为按钮类型的描述。
- QPushButton *cancelBtn=customMsgBox.addButton(QMessageBox::Cancel):使用addButton函数加入一个标准按钮。消息框将会按调用addButton函数的先后顺序在消息框中由左至右依次插入按钮。
- customMsgBox.setText(QStringLiteral(“这是一个用户自定义消息框!”)):设置自定义消息框中显示的提示信息内容。
- customMsgBox.setIconPixmap(QPixmap(“DialogExample.ico”)):设置自定义消息框的图标。
工具盒类QToolBox
工具盒类QToolBox提供了一种列状的层叠窗体,而QToolButton提供了一种快速访问命令或选择项的按钮在工具条中使用。
下面通过一个MyQQExample项目实现类似QQ抽屉效果的实例介绍QToolBox类的使用,运行效果如下图所示。
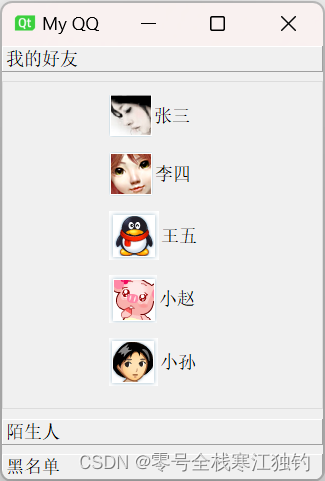
页面布局代码如下:Drawer::Drawer(QWidget *parent, Qt::WindowFlags f):QToolBox(parent,f) { setWindowTitle(QStringLiteral("My QQ")); //设置主窗体的标题 toolBtn1_1 = new QToolButton; toolBtn1_1->setText(QStringLiteral("张三")); toolBtn1_1->setIcon(QPixmap("11.png")); toolBtn1_1->setIconSize(QPixmap("11.png").size()); toolBtn1_1->setAutoRaise(true); toolBtn1_1->setToolButtonStyle(Qt::ToolButtonTextBesideIcon); toolBtn1_2 = new QToolButton; toolBtn1_2->setText(QStringLiteral("李四")); toolBtn1_2->setIcon(QPixmap("12.png")); toolBtn1_2->setIconSize(QPixmap("12.png").size()); toolBtn1_2->setAutoRaise(true); toolBtn1_2->setToolButtonStyle(Qt::ToolButtonTextBesideIcon); toolBtn1_3 = new QToolButton; toolBtn1_3->setText(QStringLiteral("王五")); toolBtn1_3->setIcon(QPixmap("13.png")); toolBtn1_3->setIconSize(QPixmap("13.png").size()); toolBtn1_3->setAutoRaise(true); toolBtn1_3->setToolButtonStyle(Qt::ToolButtonTextBesideIcon); toolBtn1_4 = new QToolButton; toolBtn1_4->setText(QStringLiteral("小赵")); toolBtn1_4->setIcon(QPixmap("14.png")); toolBtn1_4->setIconSize(QPixmap("14.png").size()); toolBtn1_4->setAutoRaise(true); toolBtn1_4->setToolButtonStyle(Qt::ToolButtonTextBesideIcon); toolBtn1_5 = new QToolButton; toolBtn1_5->setText(QStringLiteral("小孙")); toolBtn1_5->setIcon(QPixmap("155.png")); toolBtn1_5->setIconSize(QPixmap("155.png").size()); toolBtn1_5->setAutoRaise(true); toolBtn1_5->setToolButtonStyle(Qt::ToolButtonTextBesideIcon); QGroupBox *groupBox1 = new QGroupBox; QVBoxLayout *layout1 = new QVBoxLayout(groupBox1); layout1->setMargin(10); //布局中各窗体的显示间距 layout1->setAlignment(Qt::AlignHCenter); //布局中各窗体的显示位置 //加入抽屉内的各个按钮 layout1->addWidget(toolBtn1_1); layout1->addWidget(toolBtn1_2); layout1->addWidget(toolBtn1_3); layout1->addWidget(toolBtn1_4); layout1->addWidget(toolBtn1_5); //插入一个占位符 layout1->addStretch(); toolBtn2_1 = new QToolButton; toolBtn2_1->setText(QStringLiteral("小王")); toolBtn2_1->setIcon(QPixmap("21.png")); toolBtn2_1->setIconSize(QPixmap("21.png").size()); toolBtn2_1->setAutoRaise(true); toolBtn2_1->setToolButtonStyle(Qt::ToolButtonTextBesideIcon); toolBtn2_2 = new QToolButton; toolBtn2_2->setText(QStringLiteral("小张")); toolBtn2_2->setIcon(QPixmap("22.png")); toolBtn2_2->setIconSize(QPixmap("22.png").size()); toolBtn2_2->setAutoRaise(true); toolBtn2_2->setToolButtonStyle(Qt::ToolButtonTextBesideIcon); QGroupBox *groupBox2 = new QGroupBox; QVBoxLayout *layout2 = new QVBoxLayout(groupBox2); layout2->setMargin(10); layout2->setAlignment(Qt::AlignHCenter); layout2->addWidget(toolBtn2_1); layout2->addWidget(toolBtn2_2); toolBtn3_1 = new QToolButton; toolBtn3_1->setText(QStringLiteral("小陈")); toolBtn3_1->setIcon(QPixmap("31.png")); toolBtn3_1->setIconSize(QPixmap("31.png").size()); toolBtn3_1->setAutoRaise(true); toolBtn3_1->setToolButtonStyle(Qt::ToolButtonTextBesideIcon); toolBtn3_2 = new QToolButton; toolBtn3_2->setText(QStringLiteral("小李")); toolBtn3_2->setIcon(QPixmap("32.png")); toolBtn3_2->setIconSize(QPixmap("32.png").size()); toolBtn3_2->setAutoRaise(true); toolBtn3_2->setToolButtonStyle(Qt::ToolButtonTextBesideIcon); QGroupBox *groupBox3 = new QGroupBox; QVBoxLayout *layout3 = new QVBoxLayout(groupBox3); layout3->setMargin(10); layout3->setAlignment(Qt::AlignHCenter); layout3->addWidget(toolBtn3_1); layout3->addWidget(toolBtn3_2); //将准备好的抽屉插入ToolBox中 this->addItem((QWidget*)groupBox1,QStringLiteral("我的好友")); this->addItem((QWidget*)groupBox2,QStringLiteral("陌生人")); this->addItem((QWidget*)groupBox3,QStringLiteral("黑名单")); }- toolBtn1_1 = new QToolButton:创建一个QToolButton类实例,分别对应于抽屉中的每个按钮。
- toolBtn1_1->setText(QStringLiteral(“张三”)):设置按钮文字。
- toolBtn1_1->setIcon(QPixmap(“11.png”)):设置按钮图标。
- toolBtn1_1->setIconSize(QPixmap(“11.png”).size()):设置按钮的大小,本例将其设置与图标的大小相同。
- toolBtn1_1->setAutoRaise(true):当鼠标离开时,按钮自动恢复为弹起状态。
- toolBtn1_1->setToolButtonStyle(Qt::ToolButtonTextBesideIcon):设置按钮的ToolButtonStyle属性。ToolButtonStyle属性主要用于描述按钮的文字和图标的显示方式。Qt定义了五种ToolButtonStyle类型,可以根据需要选择显示的方式。
- Qt::ToolButtonIconOnly:只显示图标。
- Qt::ToolButtonTextOnly:只显示文字。
- Qt::ToolButtonTextBesideIcon:文字显示在图标旁边。
- Qt::ToolButtonTextUnderIcon:文字显示在图标下面。
- Qt::ToolButtonFollowStyle:遵循Style标准。
- QGroupBox *groupBox1 = new QGroupBox:创建一个QGroupBox类实例,在本例中对应每一个抽屉。
- QVBoxLayout *layout1 = new QVBoxLayout(groupBox1):创建一个QVBoxLayout类实例,用来设置抽屉内各个按钮的布局。
- layout1->addStretch():在按钮之后插入一个占位符,使得所有按钮能够靠上对齐,并且在整个抽屉大小发生变化时保证按钮的大小不发生变化。
进度条QProgressBar
Qt提供了两种显示进度条的方式:一种是嵌入到界面中的QProgressBar,这种进度条提供了一种横向或纵向显示进度的控件表达方式,用来描述任务的完成情况;另一种是QProgressDialog,提供了一种针对慢速过程的进度对话框表示方式,用于描述任务完成的进度情况。标准的进度条对话框包括一个进度显示条、一个“取消”按钮以及一个标签。
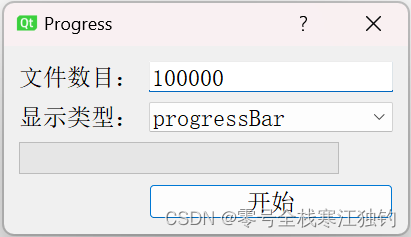
下面以一个Progress项目对控件功能进行说明,项目界面QProgressBar效果如下。
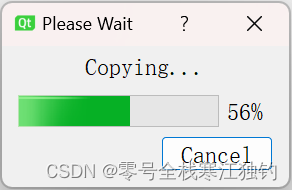
项目界面QProgressDialog效果如下。
界面效果布局代码如下:
ProgressDlg::ProgressDlg(QWidget *parent)
    : QDialog(parent)
{
    QFont font("ZYSong18030",12);
    setFont(font);
    setWindowTitle(QStringLiteral("Progress"));
    FileNum =new QLabel;
    FileNum->setText(QStringLiteral("文件数目:"));
    FileNumLineEdit =new QLineEdit;
    FileNumLineEdit->setText(QStringLiteral("100000"));
    ProgressType =new QLabel;
    ProgressType->setText(QStringLiteral("显示类型:"));
    comboBox =new QComboBox;
    comboBox->addItem(QStringLiteral("progressBar"));
    comboBox->addItem(QStringLiteral("progressDialog"));
    progressBar =new QProgressBar;
    starBtn =new QPushButton();
    starBtn->setText(QStringLiteral("开始"));
    mainLayout =new QGridLayout(this);
    mainLayout->addWidget(FileNum,0,0);
    mainLayout->addWidget(FileNumLineEdit,0,1);
    mainLayout->addWidget(ProgressType,1,0);
    mainLayout->addWidget(comboBox,1,1);
    mainLayout->addWidget(progressBar,2,0,1,2);
    mainLayout->addWidget(starBtn,3,1);
    mainLayout->setMargin(15);
    mainLayout->setSpacing(10);
    connect(starBtn,SIGNAL(clicked()),this,SLOT(startProgress()));
}
功能代码如下:
void ProgressDlg::startProgress()
{
    bool ok;
    int num =FileNumLineEdit->text().toInt(&ok);
    if(comboBox->currentIndex()==0)     	//采用进度条的方式显示进度
    {
        progressBar->setRange(0,num);
        for(int i=1;i<num+1;i++)
        {
            progressBar->setValue(i);
        }
    }
    else if(comboBox->currentIndex()==1)	//采用进度对话框显示进度
    {
        //创建一个进度对话框
        QProgressDialog *progressDialog=new QProgressDialog(this);
        QFont font("ZYSong18030",12);
        progressDialog->setFont(font);
        progressDialog->setWindowModality(Qt::WindowModal);
        progressDialog->setMinimumDuration(5);
        progressDialog->setWindowTitle(QStringLiteral("Please Wait"));
        progressDialog->setLabelText(QStringLiteral("Copying..."));
        progressDialog->setCancelButtonText(QStringLiteral("Cancel"));
        progressDialog->setRange(0,num);	  //设置进度对话框的步进范围
        for(int i=1;i<num+1;i++)
        {
            progressDialog->setValue(i);
            if(progressDialog->wasCanceled())
                return;
        }
    }
}
以下是对一些关键代码的说明:
- int num =FileNumLineEdit->text().toInt(&ok):获取当前需要复制的文件数目,这里对应进度条的总步进值。
- progressBar->setRange(0,num):设置进度条范围从0到需要复制的文件数目。
- progressBar->setValue(i):模拟每一个文件的复制过程,进度条总的步进值为需要复制的文件数目。当复制完一个文件后,步进值增加1。
- progressDialog->setWindowModality(Qt::WindowModal):设置进度对话框采用模态方式进行显示,即在显示进度的同时,其他窗口不响应输入信号。
- progressDialog->setMinimumDuration(5):设置进度对话框出现需要等待的时间,此处设置为5秒,默认4秒。
- progressDialog->setWindowTitle(QStringLiteral(“Please Wait”)):设置进度对话框的窗体标题。
- progressDialog->setLabelText(QStringLiteral(“Copying…”)):设置进度对话框的显示文字信息。
- progressDialog->setCancelButtonText(QStringLiteral(“Cancel”)):设置进度对话框的“取消”按钮显示的文字。
- progressDialog->setValue(i):模拟每个文件的复制过程,进度条总的步进值为需要复制的文件数目。当复制完一个文件后,步进增加1。
- if(progressDialog->wasCanceled()):检测“取消”按钮是否被触发,若触发则退出循环并关闭进度对话框。
QProgressBar有以下几个需要关注的属性:
- minimum、maximum:决定进度条指示的最小值和最大值。
- format:决定进度条显示文字的格式,可以有三种显示格式,即%p%、%v和%m。其中,%p%显示完成百分比,这是默认显示方式;%v显示当前的进度之;%m显示总的步进值。
- invertedAppearance:可以使进度条以反方向显示进度。
QProgressDialog类也有几个属性需要关注:
- minimum、maximum:表示进度条的最小值和最大值,决定了进度条的变化范围。
- minimumDuration:表示进度条对话框出现前的等待时间。系统根据所需完成时间的工作量估算一个预计花费的时间内,若大于设定的等待时间,则出现进度条对话框;若小于设定的等待时间,则不出现进度条对话框。
调色板与电子钟
在应用中需要改变某个控件的颜色外观,如背景、文字颜色等。Qt提供了调色板类QPalette专门用于管理对话框的外观显示。QPalette类相当于对话框或控件的调色板,它管理着控件或窗口的所有颜色信息。每个窗体或控件都包含一个QPalette对象,在显示时,按照它的QPalette对象中对各部分状态下的颜色的描述进行绘制。
此外,Qt还提供了QTime类用于获取和 显示系统时间。QPalette类
这个小节详细介绍QPalette类的使用方法,该类有两个基本概念:一个是QPalette::ColorGroup,另一个是QPalette::ColorRole。其中,QPalette::ColorGroup指的是以下三种不同的状态。
- QPalette::Active:获得焦点的状态。
- QPalette::Inactive:未获得焦点的状态。
- QPalette::Disabled:不可用状态。
其中,Active状态与Inactive状态在通常情况下,颜色显示是一致的,也可以根据需要设置为不一样的颜色。
QPalette::ColorRole指的是颜色主题,即对窗体中不同部位颜色的分类。例如,QPalette::Window是指背景色,QPalette::WindowText是指前景色,等等。
QPalette类使用频度最高的函数是setColor,其函数原型如下:void QPalette::setColor(QPalette::ColorGroup group, QPalette::ColorRole role, const QColor &color)在对主题颜色进行设置的同时,还区分了状态,即对某个主题在某个状态下的颜色进行了设置:
void QPalette::setColor(QPalette::ColorRole role, const QColor &color)只对某个主题的颜色进行设置,并不区分状态。
QPalette类同时还提供setBrush函数,通过画刷的设置对显示进行更改,这样就可能使用图片而不仅是单一的颜色来对主题进行填充。Qt之前的版本中有关背景色设置的函数如使用图片而不仅是单一的颜色来对主题进行填充。Qt之前的版本中有关背景色设置的函数如setBackgroundColor或前景色设置的函数如setForegroundColor在Qt5中都被废止,统一由QPalette进行管理。例如,setBackgroundColor函数可由以下语句代替:xxx->setAutoFillBackground(true); QPalette p = xxx->palette(); // 如果不是使用单一的颜色填充背景,则也可以将setColor函数换为setBrush函数对背景主题进行设置。 p.setColor(QPalette::Window,color); // p.setBrush(QPalette::Window,brush); //把修改后的调色板信息应用到contentFrame窗体中,更新显示 xxx->setPalette(p);以上代码段要首先调用
setAutoFillBackground(true)设置窗体自动填充背景。
创建一个Palette项目,利用QPalette改变控件颜色的方法。项目实现的窗体分为两部分:左半部分用于不同主题颜色的选择,右半部分用于显示选择的颜色对窗体外观的改变。运行效果如下图所示。
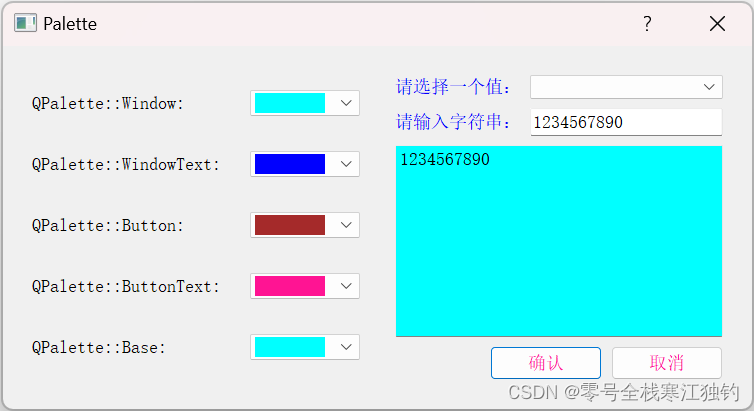
创建颜色选择区代码如下:void Palette::createCtrlFrame() { ctrlFrame =new QFrame; //颜色选择面板 windowLabel =new QLabel(QStringLiteral("QPalette::Window: ")); windowComboBox =new QComboBox; //创建一个QComboBox对象 fillColorList(windowComboBox); connect(windowComboBox,SIGNAL(activated(int)),this,SLOT(ShowWindow()));//(b) windowTextLabel =new QLabel(QStringLiteral("QPalette::WindowText: ")); windowTextComboBox =new QComboBox; fillColorList(windowTextComboBox); connect(windowTextComboBox,SIGNAL(activated(int)),this,SLOT(ShowWindowText())); buttonLabel =new QLabel(QStringLiteral("QPalette::Button: ")); buttonComboBox =new QComboBox; fillColorList(buttonComboBox); connect(buttonComboBox,SIGNAL(activated(int)),this,SLOT(ShowButton())); buttonTextLabel =new QLabel(QStringLiteral("QPalette::ButtonText: ")); buttonTextComboBox =new QComboBox; fillColorList(buttonTextComboBox); connect(buttonTextComboBox,SIGNAL(activated(int)),this,SLOT(ShowButtonText())); baseLabel =new QLabel(QStringLiteral("QPalette::Base: ")); baseComboBox =new QComboBox; fillColorList(baseComboBox); connect(baseComboBox,SIGNAL(activated(int)),this,SLOT(ShowBase())); QGridLayout *mainLayout=new QGridLayout(ctrlFrame); mainLayout->setSpacing(20); mainLayout->addWidget(windowLabel,0,0); mainLayout->addWidget(windowComboBox,0,1); mainLayout->addWidget(windowTextLabel,1,0); mainLayout->addWidget(windowTextComboBox,1,1); mainLayout->addWidget(buttonLabel,2,0); mainLayout->addWidget(buttonComboBox,2,1); mainLayout->addWidget(buttonTextLabel,3,0); mainLayout->addWidget(buttonTextComboBox,3,1); mainLayout->addWidget(baseLabel,4,0); mainLayout->addWidget(baseComboBox,4,1); }void Palette::fillColorList(QComboBox *comboBox) { QStringList colorList = QColor::colorNames(); QString color; foreach(color,colorList) //对颜色名列表进行遍历 { QPixmap pix(QSize(70,20)); pix.fill(QColor(color)); //为pix填充当前遍历的颜色 comboBox->addItem(QIcon(pix),NULL); comboBox->setIconSize(QSize(70,20)); comboBox->setSizeAdjustPolicy(QComboBox::AdjustToContents); } }void Palette::ShowWindow() { //获得当前选择的颜色值 QStringList colorList = QColor::colorNames(); QColor color = QColor(colorList[windowComboBox->currentIndex()]); QPalette p = contentFrame->palette(); p.setColor(QPalette::Window,color); //把修改后的调色板信息应用到contentFrame窗体中,更新显示 contentFrame->setPalette(p); contentFrame->update(); }- fillColorList(windowTextComboBox):向下拉列表框中插入各种不同的颜色选项。
- connect(windowComboBox,SIGNAL(activated(int)),this,SLOT(ShowWindow())):连接下拉列表框的activity信号与改变背景色的槽函数ShowWindow。
- QPalette p = contentFrame->palette():获得右部窗体contentFrame的调色板信息。
- p.setColor(QPalette::Window,color):设置contentFrame窗体的Window类颜色,即背景色,setColor的第一个参数为设置的颜色主题,第二个参数为具体的颜色值。
- QStringList colorList = QColor::colorNames():获得Qt所有内置名称的颜色列表,返回的是一个字符串列表colorList。
- QColor color:新建一个QString对象,为循环遍历做准备。
- QPixmap pix(QSize(70,20)):新建一个QPixmap对象pix作为显示颜色的图标。
- comboBox->addItem(QIcon(pix),NULL):调用QComboBox的addItem函数为下拉列表框插入一个条目,并以准备好的pix作为插入条目的图标,名称设为NULL,即不显示颜色的名称。
- comboBox->setIconSize(QSize(70,20)):设置图标的尺寸,图标默认尺寸是一个正方形,将它设置为与pix尺寸相同的长方形。
- comboBox->setSizeAdjustPolicy(QComboBox::AdjustToContents):设置下拉列表框的尺寸调整策略为AdjustToContents(符合内容的大小)。
QTime类
QTime的currentTime函数用于获取当前的系统时间;QTime的toString函数的参数需要指定转换后的显示格式。
- H/h:小时(若使用H表示小时,则无论何时都以24小时制显示小时;若使用h表示小时,则当同时指定AM/PM时,采用12小时制显示小时,其他情况下仍采用24小时制进行显示。)
- m:分。
- s:秒
- AP/A:显示AM或PM。
- Ap/a:显示am或pm。
可根据实际显示需要进行格式设置,例如:
hh:mm:ss A 22:30:08 PM
H:mm:s a 10:30:8 pmQTime的toString函数也可直接利用Qt::DateFormat作为参数指定时间显示的格式,如Qt::TextDate、Qt::ISODate、Qt::ISODateWithMs等。
创建一个Clock项目,通过实现显示于桌面上并可随意拖拽至桌面任意位置的电子时钟,实践QPalette类和mousePressEvent/mouseMoveEvent类的用法。页面ui效果如下图所示。

界面布局代码如下:DigiClock::DigiClock(QWidget *parent):QLCDNumber(parent) { /* 设置时钟背景 */ QPalette p=palette(); p.setColor(QPalette::Window,Qt::blue); setPalette(p); setWindowFlags(Qt::FramelessWindowHint); setWindowOpacity(0.5); QTimer *timer=new QTimer(this); //新建一个定时器对象 connect(timer,SIGNAL(timeout()),this,SLOT(showTime())); timer->start(1000); showTime(); //初始时间显示 resize(150,60); //设置电子时钟显示的尺寸 showColon=true; //初始化 }- QPalette p=palette()、p.setColor(QPalette::Window,Qt::blue)、setPalette§:将电子时钟窗体背景色设置为蓝色。
- setWindowFlags(Qt::FramelessWindowHint):设置窗体标识,此处设置为一个没有面板边框和标题栏的窗体。
- setWindowOpacity(0.5):设置窗体的透明度为0.5,即半透明。
- timer->start(1000):以1000毫秒为周期启动定时器。
显示电子钟的显示时间功能槽函数showTime具体代码如下:
void DigiClock::showTime() { QTime time=QTime::currentTime(); QString text=time.toString("hh:mm"); if(showColon) { text[2]=':'; showColon=false; } else { text[2]=' '; showColon=true; } display(text); //显示转换好的字符串时间 }- QTime time=QTime::currentTime():获取当前的系统时间,保存在一个QTime对象中。
- QString text=time.toString(“hh:mm”):把获取的当前时间转换为字符串你类型。
通过执行鼠标按下的事件响应函数
mousePressEvent(QMouseEvent *event)和鼠标移动事件响应函数mouseMoveEvent(QMouseEvent *event)的重定义,可以实现用鼠标在桌面上随意拖拽电子时钟。
在鼠标按下响应函数mousePressEvent(QMouseEvent *event)中,首先判断按下的按键是否为鼠标左键。若按下的键是鼠标左键,则保存当前鼠标点所在的位置相对于窗体左上角的偏移值dragPosition;若按下的键是鼠标右键,则退出窗体。
在鼠标移动响应函数mouseMoveEvent(QMouseEvent *event)中,首先判断当前鼠标状态,调用event->buttons()返回鼠标的状态,若为左侧按键,则调用QWidget的move函数将窗体移动至鼠标当前点。由于move函数的参数指定的是窗体的左上角位置,所以要使用鼠标当前点的位置减去相对窗体左上角的偏移值dragPosition。
具体功能函数代码如下:void DigiClock::mousePressEvent(QMouseEvent *event) { if(event->button()==Qt::LeftButton) { dragPosition=event->globalPos()-frameGeometry().topLeft(); event->accept(); } if(event->button()==Qt::RightButton) { close(); } } void DigiClock::mouseMoveEvent(QMouseEvent *event) { if(event->buttons()&Qt::LeftButton) { move(event->globalPos()-dragPosition); event->accept(); } }可扩展对话框
可扩展对话框通常用于用户对界面有不同要求的场合。通常情况下,只出现基本对话框窗体;当供高级用户使用或需要更多信息时,可通过某种方式的切换显示完整对话框窗体(扩展窗体),切换工作通常一个按钮来实现。
可扩展对话框的基本实现方法是利用setSizeConstraint(QLayout::SetFixedSize)方法使对话框尺寸保持相对固定。其中,最关键的部分有以下两点。- 在整个对话框的构造函数中调用。
layout->setSizeConstraint(QLayout::SetFixedSize)这个设置保证了对话框的尺寸保持相对固定,始终保持各个控件组合的默认尺寸。在扩展部分显示时,对话框尺寸根据需要显示的控件被扩展;而在扩展部分隐藏时,对话框尺寸又恢复至初始状态。
- 切换按钮的实现。整个窗体可扩展的工作都是在此按钮所连接的槽函数中完成的。
创建一个ExtensionDlg项目,设置一个简单地填写资料窗口。通常情况下,只需要填写姓名、性别。若有特殊需要,还需要填写更多信息,则切换至完整对话框窗体,运行效果如下图所示。


窗口构造函数如下:ExtensionDlg::ExtensionDlg(QWidget *parent) : QDialog(parent) { setWindowTitle(QStringLiteral("Extension Dialog")); //设置对话框的标题栏信息 createBaseInfo(); createDetailInfo(); QVBoxLayout *layout =new QVBoxLayout(this); //布局 layout->addWidget(baseWidget); layout->addWidget(detailWidget); layout->setSizeConstraint(QLayout::SetFixedSize); layout->setSpacing(10); }- layout->setSizeConstraint(QLayout::SetFixedSize):设置窗体的大小固定,不能利用拖拽改变大小,否则当在此单击“详细”按钮时,对话框不能恢复到初始状态。
createBaseInfo函数完成基本窗口的布局,代码如下:
void ExtensionDlg::createBaseInfo()
{
    baseWidget =new QWidget;
    QLabel *nameLabel =new QLabel(QStringLiteral("姓名:"));
    QLineEdit *nameLineEdit =new QLineEdit;
    QLabel *sexLabel =new QLabel(QStringLiteral("性别:"));
    QComboBox *sexComboBox =new  QComboBox;
    sexComboBox->insertItem(0,QStringLiteral("女"));
    sexComboBox->insertItem(1,QStringLiteral("男"));
    QGridLayout *LeftLayout =new QGridLayout;
    LeftLayout->addWidget(nameLabel,0,0);
    LeftLayout->addWidget(nameLineEdit,0,1);
    LeftLayout->addWidget(sexLabel);
    LeftLayout->addWidget(sexComboBox);
    QPushButton *OKBtn =new QPushButton(QStringLiteral("确定"));
    QPushButton *DetailBtn =new QPushButton(QStringLiteral("详细"));
    QDialogButtonBox *btnBox =new QDialogButtonBox(Qt::Vertical);
    btnBox->addButton(OKBtn,QDialogButtonBox::ActionRole);
    btnBox->addButton(DetailBtn,QDialogButtonBox::ActionRole);
    QHBoxLayout *mainLayout =new QHBoxLayout(baseWidget);
    mainLayout->addLayout(LeftLayout);
    mainLayout->addWidget(btnBox);
    connect(DetailBtn, &QPushButton::clicked, this, &ExtensionDlg::showDetailInfo);
    //connect(DetailBtn, SIGNAL(clicked()), this, SLOT(showDetailInfo()));
}
createDetailInfo函数实现详细窗体部分窗口布局,代码如下:
void ExtensionDlg::createDetailInfo()
{
    detailWidget =new QWidget;
    QLabel *ageLabel =new QLabel(QStringLiteral("年龄:"));
    QLineEdit *ageLineEdit =new QLineEdit;
    ageLineEdit->setText(QStringLiteral("30"));
    QLabel *departmentLabel =new QLabel(QStringLiteral("部门:"));
    QComboBox *departmentComBox =new QComboBox;
    departmentComBox->addItem(QStringLiteral("部门1"));
    departmentComBox->addItem(QStringLiteral("部门2"));
    departmentComBox->addItem(QStringLiteral("部门3"));
    departmentComBox->addItem(QStringLiteral("部门4"));
    QLabel *emailLabel =new QLabel(QStringLiteral("email:"));
    QLineEdit *emailLineEdit =new QLineEdit;
    QGridLayout *mainLayout =new QGridLayout(detailWidget);
    mainLayout->addWidget(ageLabel,0,0);
    mainLayout->addWidget(ageLineEdit,0,1);
    mainLayout->addWidget(departmentLabel,1,0);
    mainLayout->addWidget(departmentComBox,1,1);
    mainLayout->addWidget(emailLabel,2,0);
    mainLayout->addWidget(emailLineEdit,2,1);
    detailWidget->hide();
}
单击“详细”按钮时,调用showDetailInfo函数,函数功能代码如下:
void ExtensionDlg::showDetailInfo()
{
    if(detailWidget->isHidden())
       detailWidget->show();
    else detailWidget->hide();
}
不规则窗体
常见的窗体通常是各种方形的对话框,但有时也需要使用非方形的窗体,如圆形、椭圆形,甚至是不规则形状的对话框。
利用setMask函数为窗体设置遮罩,实现不规则窗体,设置遮罩后的窗体尺寸仍是原窗体大小,只是被遮罩的地方不可见。
创建一个ShapeWidget项目,实现一个蝴蝶图形外延形状的不规则形状对话框,也可以在不规则窗体上放置按钮等控件,可以通过鼠标左键拖拽窗体,单击鼠标右键关闭窗体。界面显示效果如下图所示。

界面布局代码如下:ShapeWidget::ShapeWidget(QWidget *parent) : QWidget(parent) { QPixmap pix; //新建一个QPixmap对象 pix.load("16.png",0,Qt::AvoidDither|Qt::ThresholdDither|Qt::ThresholdAlphaDither); resize(pix.size()); setMask(QBitmap(pix.mask())); }- pix.load(“16.png”,0,Qt::AvoidDither|Qt::ThresholdDither|Qt::ThresholdAlphaDither):调用QPixmap的load函数为QPixmap对象填入图象值。
load函数的原型如下:
bool QPixmap::load(const QString &fileName, const char *format = nullptr, Qt::ImageConversionFlags flags = Qt::AutoColor)其中,参数fileName为图片文件名;参数format表示读取图片文件采用的格式,此处为0表示采用默认的格式;参数flags表示读取图片的方式,由Qt::ImageConversionFlags定义,此处设置的标识为避免图片的抖动方式。
- resize(pix.size()):重设主窗体的尺寸为所读取的图片的大小。
- setMask(QBitmap(pix.mask())):为调用它的控件增加一个遮罩,遮住所选区域以外的部分使其看起来是透明的,它的参数可为一个QPixmap对象或一个QRegion对象,实例中使用的是PNG格式的图片,它的透明部分实际上是一个遮罩。
程序启动画面(QSplashScreen)
创建一个SplashSreen项目,通过Qt提供的QSplashScreen类实现一个在程序启动过程中显示启动画面的功能。
下面是启动时的界面效果图。

启动完成后的正常界面如下。

页面启动显示启动画面功能代码如下:int main(int argc, char *argv[]) { QApplication a(argc, argv); QPixmap pixmap("qt.webp"); QSplashScreen splash(pixmap); splash.show(); //显示此启动图片 a.processEvents(); MainWindow w; w.show(); splash.finish(&w); return a.exec(); }- QPixmap pixmap(“qt.webp”):创建一个QPixmap对象,设置启动图片(这里设置为"qt.webp")。
- QSplashScreen splash(pixmap):利用QPixmap对象创建一个QSplashScreen对象。
- a.processEvents():使程序在显示启动画面的同时仍能响应鼠标等其他事件。
- MainWindow w、w.show():正常创建主窗体对象,并调用show函数显示。
- splash.finish(&w):表示在主窗体对象初始化完成后,结束启动画面。
工程代码
文章涉及的所有代码可点击工程源码下载。
-
相关阅读:
vue select联动 设置filterable坑
mysql基本语句学习(基本)
javaee springMVC绑定复杂对象
【升级版学生信息管理系统&员工工资信息管理系统】+文件操作+更多细节
机器学习介绍(上)
PLC梯形图(置位与复位)的使用方法
Docker容器
JMeter之Websocket测试
gnss rtcm rtklib Ntrip...
Redis 非关系型数据库 配置与优化
- 原文地址:https://blog.csdn.net/weixin_42369301/article/details/139957507