-
源码编译安装LNMP
目录
配置Nginx支持php解析(7 8 9 的操作是在配置完后面的mysql和php才开始的)
LNMP包含:
linux、Nginx、Mysql、php
LNMP的工作原理 :

由客户端发送页面请求给Nginx,Nginx会根据location匹配用户访问请求的URL路径判断是静态还是动态,静态的一般是以 .html .htm .css .shtml结尾,动态的一般是以 .php .jsp .py结尾。
如果是静态,由Nginx直接处理和响应。如果是动态,Nginx会通过fastcgi接口转发给php-fpm进程接受,
然后再由php解析器处理解释动态页面后响应返回给Nginx,Nginx再返回给客户端。如果动态页面涉及到数据库的读写,php会通过程序代码访问,mysql的api接口,并使用sql语句进行数据库的速写操作
编译安装:
三台虚拟机,Nginx服务器,Mysql服务器,php服务器。
三台虚拟机系统初始化 :
- [root@l1 ~]# systemctl stop firewalld
- [root@l1 ~]# setenforce 0
- [root@l1 ~]#
- [root@l2 ~]# systemctl stop firewalld
- [root@l2 ~]# setenforce 0
- [root@l2 ~]#
- [root@l3 ~]# systemctl stop firewalld
- [root@l3 ~]# setenforce 0
- [root@l3 ~]#
nginx服务器配置
安装依赖包
- [root@l1 ~]# df
- 文件系统 1K-块 已用 可用 已用% 挂载点
- devtmpfs 480736 0 480736 0% /dev
- tmpfs 497816 0 497816 0% /dev/shm
- tmpfs 497816 14912 482904 3% /run
- tmpfs 497816 0 497816 0% /sys/fs/cgroup
- /dev/mapper/centos-root 38770180 5435772 33334408 15% /
- /dev/sda1 1038336 177472 860864 18% /boot
- tmpfs 99564 32 99532 1% /run/user/0
- /dev/sr0 4635056 4635056 0 100% /mnt
- [root@l1 ~]# yum -y install pcre-devel zlib-devel openssl-devel gcc gcc-c++ make
- //安装依赖包
创建用户
- [root@l1 ~]# useradd -M -s /sbin/nologin nginx //创建用户
- [root@l1 ~]# cat /etc/passwd | grep nginx:
- nginx:x:1001:1001::/home/nginx:/sbin/nologin
- [root@l1 ~]#
上传软件包至/opt目录下并解压

- [root@l1 opt]# ls
- nginx-1.26.0.tar.gz rh
- [root@l1 opt]# tar xf nginx-1.26.0.tar.gz //解压
- [root@l1 opt]# ls
- nginx-1.26.0 nginx-1.26.0.tar.gz rh
- [root@l1 opt]# cd nginx-1.26.0/
- [root@l1 nginx-1.26.0]#
编译安装
- ./configure \
- --prefix=/usr/local/nginx \
- --user=nginx \
- --group=nginx \
- --with-http_stub_status_module
[root@l1 nginx-1.26.0]# ./configure --prefix=/usr/local/nginx --user=nginx --group=nginx --with-http_stub_status_module --with-http_ssl_module[root@l1 nginx-1.26.0]# make -j4 && make install设置软链接,可以直接调用nginx命令来进行管理
- [root@l1 nginx-1.26.0]# cd /usr/local/nginx/
- [root@l1 nginx]# ls sbin/
- nginx
- [root@l1 nginx]# ln -s /usr/local/nginx/sbin/nginx /usr/local/sbin/ //软连接
- [root@l1 nginx]# nginx -t
- nginx: the configuration file /usr/local/nginx/conf/nginx.conf syntax is ok
- nginx: configuration file /usr/local/nginx/conf/nginx.conf test is successful
- [root@l1 nginx]#
添加Nginx系统服务
- [root@l1 nginx]# cd /usr/lib/systemd/system
- [root@l1 system]# vim nginx.service

- [Unit]
- Description=nginx
- After=network.target
- [Service]
- Type=forking
- PIDFile=/usr/local/nginx/logs/nginx.pid
- ExecStart=/usr/local/nginx/sbin/nginx
- ExecReload=/bin/kill -s HUP $MAINPID
- ExecStop=/bin/kill -s QUIT $MAINPID
- PrivateTmp=true
- [Install]
- WantedBy=multi-user.target
- [root@l1 system]# systemctl daemon-reload
- [root@l1 system]# systemctl start nginx
- [root@l1 system]# systemctl enable nginx
- Created symlink from /etc/systemd/system/multi-user.target.wants/nginx.service to /usr/lib/systemd/system/nginx.service.
- [root@l1 system]# netstat -lntp | grep nginx
- tcp 0 0 0.0.0.0:80 0.0.0.0:* LISTEN 10947/nginx: master
- [root@l1 system]#
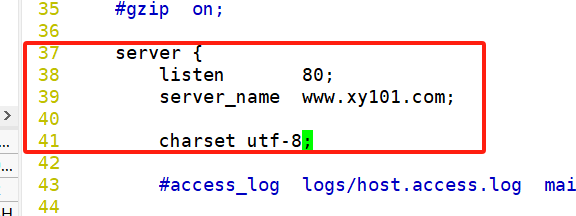
配置Nginx支持php解析(7 8 9 的操作是在配置完后面的mysql和php才开始的)
- [root@l1 nginx]# cd /usr/local/nginx/
- [root@l1 nginx]# cd conf/
- [root@l1 conf]# ls
- fastcgi.conf koi-win scgi_params
- fastcgi.conf.default mime.types scgi_params.default
- fastcgi_params mime.types.default uwsgi_params
- fastcgi_params.default nginx.conf uwsgi_params.default
- koi-utf nginx.conf.default win-utf
- [root@l1 conf]# vim nginx.conf
- [root@l1 conf]#


- [root@l1 conf]# nginx -t
- nginx: the configuration file /usr/local/nginx/conf/nginx.conf syntax is ok
- nginx: configuration file /usr/local/nginx/conf/nginx.conf test is successful
- [root@l1 conf]#
验证php测试页
动态页面
- [root@l1 conf]# mkdir -p /var/www/html
- [root@l1 conf]# cd /var/www/html/
- [root@l1 html]# vim test.php
- [root@l1 html]#

静态页面
- [root@l1 html]# cd /usr/local/nginx/html/
- [root@l1 html]# ls
- 50x.html index.html
- [root@l1 html]# rz -E
- rz waiting to receive.
- [root@l1 html]# vim m.html
- [root@l1 html]# ls
- 50x.html index.html m.html w.jpg
- [root@l1 html]#


此时动态页面现在是查不到的,静态页面是由Nginx直接处理和响应的,而动态页面是Nginx通过fastcgi接口转发给php-fpm进程接受,然后再由php解析器处理解释动态页面后响应返回给Nginx,Nginx再返回给客户端的,所以我们要在将动态页面位置也放入到php服务器中
在本服务器中安装NFS
yum安装rbcbind和nfs-utils

[root@l1 html]# vim /etc/exports
- [root@l1 html]# systemctl --now enable rpcbind nfs
- Created symlink from /etc/systemd/system/multi-user.target.wants/nfs-server.service to /usr/lib/systemd/system/nfs-server.service.
- [root@l1 html]# showmount -e
- Export list for l1:
- /var/www/html 192.168.18.0/24
- [root@l1 html]#
挂载目录
[root@localhost opt]# vim /etc/fstab
php服务器进行操作
能查到我们Nginx服务器共享的目录
- [root@localhost ~]# showmount -e 192.168.18.10
- Export list for 192.168.18.10:
- /var/www/html 192.168.18.0/24
- [root@localhost ~]#
挂载目录

- [root@localhost ~]# vim /etc/fstab
- [root@localhost ~]# mkdir -p /var/www/html
- [root@localhost ~]# mount -a
- [root@localhost ~]# df -h
- 文件系统 容量 已用 可用 已用% 挂载点
- devtmpfs 470M 0 470M 0% /dev
- tmpfs 487M 0 487M 0% /dev/shm
- tmpfs 487M 8.5M 478M 2% /run
- tmpfs 487M 0 487M 0% /sys/fs/cgroup
- /dev/mapper/centos-root 37G 5.1G 32G 14% /
- /dev/sda1 1014M 174M 841M 18% /boot
- tmpfs 98M 60K 98M 1% /run/user/0
- /dev/sr0 4.5G 4.5G 0 100% /mnt
- 192.168.18.10:/var/www/html 37G 5.3G 32G 15% /var/www/html
- [root@localhost ~]#
- [root@localhost ~]# ls /var/www/html/ //查看目录,显示成功
- test.php
- [root@localhost ~]#


验证mysql测试页
随便在nginx还是php服务器的/var/www/html目录下创建一个mysql.php文件
我这是在php服务器创建的,文件里面的IP地址是mysql服务器的IP地址
- [root@localhost php-7.1.10]# cd /var/www/html/
- [root@localhost html]# ls
- test.php
- [root@localhost html]# vim mysql.php
- [root@localhost html]#

- $link=mysqli_connect('192.168.18.20','root','abc123');
- if($link) echo "
mysql connect successful
"; - else echo "
mysql connect failed
"; - ?>


Mysql服务器配置
上传压缩包至/opt目录中并解压
- [root@l2 ~]# cd /opt
- [root@l2 opt]# ls
- abc.txt cywl cywl.txt rh
- [root@l2 opt]# rz -E
- rz waiting to receive.
- [root@l2 opt]# ls
- abc.txt cywl cywl.txt mysql-boost-5.7.44.tar.gz rh

- [root@l2 opt]# tar xf mysql-boost-5.7.44.tar.gz //解压
- [root@l2 opt]# ls
- abc.txt cywl cywl.txt mysql-5.7.44 mysql-boost-5.7.44.tar.gz rh
- [root@l2 opt]# cd mysql-5.7.44/
安装环境依赖包
- [root@l2 mysql-5.7.44]# mount /dev/sr0 /mnt/
- mount: /dev/sr0 写保护,将以只读方式挂载
- [root@l2 mysql-5.7.44]# df
- 文件系统 1K-块 已用 可用 已用% 挂载点
- devtmpfs 1913548 0 1913548 0% /dev
- tmpfs 1930628 0 1930628 0% /dev/shm
- tmpfs 1930628 12528 1918100 1% /run
- tmpfs 1930628 0 1930628 0% /sys/fs/cgroup
- /dev/mapper/centos-root 38770180 6265016 32505164 17% /
- /dev/sda1 1038336 191100 847236 19% /boot
- tmpfs 386128 12 386116 1% /run/user/42
- tmpfs 386128 0 386128 0% /run/user/0
- /dev/sr0 4635056 4635056 0 100% /mnt
- [root@l2 mysql-5.7.44]# yum -y install gcc gcc-c++ ncurses ncurses-devel bison cmake openssl-devel
创建用户
- [root@zx3 mysql-5.7.44]# useradd -M -s /sbin/nologin mysql
- [root@zx3 mysql-5.7.44]# cat /etc/passwd | grep mysql:
- mysql:x:1001:1001::/home/mysql:/sbin/nologin
- [root@zx3 mysql-5.7.44]#
配置软件模块
- [root@l2 mysql-5.7.44]# cmake \
- > -DCMAKE_INSTALL_PREFIX=/usr/local/mysql \
- > -DMYSQL_UNIX_ADDR=/usr/local/mysql/mysql.sock \
- > -DSYSCONFDIR=/etc \
- > -DSYSTEMD_PID_DIR=/usr/local/mysql \
- > -DDEFAULT_CHARSET=utf8 \
- > -DDEFAULT_COLLATION=utf8_general_ci \
- > -DWITH_EXTRA_CHARSETS=all \
- > -DWITH_INNOBASE_STORAGE_ENGINE=1 \
- > -DMYSQL_DATADIR=/usr/local/mysql/data \
- > -DWITH_BOOST=boost \
- > -DWITH_SYSTEMD=1
- cmake \
- -DCMAKE_INSTALL_PREFIX=/usr/local/mysql \
- -DMYSQL_UNIX_ADDR=/usr/local/mysql/mysql.sock \
- -DSYSCONFDIR=/etc \
- -DSYSTEMD_PID_DIR=/usr/local/mysql \
- -DDEFAULT_CHARSET=utf8 \
- -DDEFAULT_COLLATION=utf8_general_ci \
- -DWITH_EXTRA_CHARSETS=all \
- -DWITH_INNOBASE_STORAGE_ENGINE=1 \
- -DMYSQL_DATADIR=/usr/local/mysql/data \
- -DWITH_BOOST=boost \
- -DWITH_SYSTEMD=1
编译安装
[root@l2 mysql-5.7.44]# make -j 4 && make install清除mariadb缓存
[root@l2 mysql-5.7.44]# yum remove -y mariadb*修改mysql配置文件
[root@l2 mysql-5.7.44]# vim /etc/my.cnf- [client]
- port = 3306
- socket=/usr/local/mysql/mysql.sock
- [mysqld]
- user = mysql
- basedir=/usr/local/mysql
- datadir=/usr/local/mysql/data
- port = 3306
- character-set-server=utf8
- pid-file = /usr/local/mysql/mysqld.pid
- socket=/usr/local/mysql/mysql.sock
- bind-address = 0.0.0.0
- skip-name-resolve
- max_connections=2048
- default-storage-engine=INNODB
- max_allowed_packet=16M
- server-id = 1
- sql_mode=NO_ENGINE_SUBSTITUTION,STRICT_TRANS_TABLES,NO_AUTO_CREATE_USER,NO_AUTO_VALUE_ON_ZERO,NO_ZERO_IN_DATE,NO_ZERO_DATE,ERROR_FOR_DIVISION_BY_ZERO,PIPES_AS_CONCAT,ANSI_QUOTES
更换mysql配置文件和安装目录的属主属组
- [root@l2 mysql-5.7.44]# chown mysql:mysql /etc/my.cnf
- [root@l2 mysql-5.7.44]# ll /etc/my.cnf
- -rw-r--r--. 1 mysql mysql 555 6月 2 13:20 /etc/my.cnf
- [root@l2 mysql-5.7.44]# cd /usr/local/
- [root@l2 local]# ll
- 总用量 0
- drwxr-xr-x. 2 root root 6 4月 11 2018 bin
- drwxr-xr-x. 2 root root 6 4月 11 2018 etc
- drwxr-xr-x. 2 root root 6 4月 11 2018 games
- drwxr-xr-x. 2 root root 6 4月 11 2018 include
- drwxr-xr-x. 2 root root 6 4月 11 2018 lib
- drwxr-xr-x. 2 root root 6 4月 11 2018 lib64
- drwxr-xr-x. 2 root root 6 4月 11 2018 libexec
- drwxr-xr-x. 11 root root 177 6月 2 12:57 mysql
- drwxr-xr-x. 2 root root 6 4月 11 2018 sbin
- drwxr-xr-x. 5 root root 49 4月 30 23:03 share
- drwxr-xr-x. 2 root root 6 4月 11 2018 src
- [root@l2 local]# chown -R mysql:mysql mysql/
- [root@l2 local]# ll
- 总用量 0
- drwxr-xr-x. 2 root root 6 4月 11 2018 bin
- drwxr-xr-x. 2 root root 6 4月 11 2018 etc
- drwxr-xr-x. 2 root root 6 4月 11 2018 games
- drwxr-xr-x. 2 root root 6 4月 11 2018 include
- drwxr-xr-x. 2 root root 6 4月 11 2018 lib
- drwxr-xr-x. 2 root root 6 4月 11 2018 lib64
- drwxr-xr-x. 2 root root 6 4月 11 2018 libexec
- drwxr-xr-x. 11 mysql mysql 177 6月 2 12:57 mysql
- drwxr-xr-x. 2 root root 6 4月 11 2018 sbin
- drwxr-xr-x. 5 root root 49 4月 30 23:03 share
- drwxr-xr-x. 2 root root 6 4月 11 2018 src
- [root@l2 local]#
在环境变量中添加mysql的bin和lib目录
- [root@l2 local]# cd mysql/bin/
- [root@l2 bin]# pwd
- /usr/local/mysql/bin
- [root@l2 bin]# ls
- innochecksum mysql_config mysqlslap
- lz4_decompress mysql_config_editor mysql_ssl_rsa_setup
- myisamchk mysqld mysqltest
- myisam_ftdump mysqld_pre_systemd mysqltest_embedded
- myisamlog mysqldump mysql_tzinfo_to_sql
- myisampack mysqldumpslow mysql_upgrade
- my_print_defaults mysql_embedded mysqlxtest
- mysql mysqlimport perror
- mysqladmin mysql_install_db replace
- mysqlbinlog mysql_plugin resolveip
- mysqlcheck mysqlpump resolve_stack_dump
- mysql_client_test mysql_secure_installation zlib_decompress
- mysql_client_test_embedded mysqlshow
- [root@l2 bin]# vim /etc/profile

- [root@l2 bin]# source /etc/profile
- [root@l2 bin]# echo $PATH
- /usr/local/sbin:/usr/local/bin:/usr/sbin:/usr/bin:/root/bin:/usr/local/mysql/bin:/usr/local/mysql/lib
- [root@l2 bin]#
mysql初始化操作
- ./mysqld \
- --initialize-insecure \
- --user=mysql \
- --basedir=/usr/local/mysql \
- --datadir=/usr/local/mysql/data
- [root@l2 bin]# ./mysqld \
- > --initialize-insecure \
- > --user=mysql \
- > --basedir=/usr/local/mysql \
- > --datadir=/usr/local/mysql/data
添加mysqld系统服务
- [root@l2 bin]# cd /usr/local/mysql/usr/lib/systemd/system/
- [root@l2 system]# ls
- mysqld.service mysqld@.service
- [root@l2 system]# cp mysqld.service /usr/lib/systemd/system
- [root@l2 system]# systemctl daemon-reload
- [root@l2 system]# systemctl enable mysqld
- Created symlink from /etc/systemd/system/multi-user.target.wants/mysqld.service to /usr/lib/systemd/system/mysqld.service.
- [root@l2 system]# systemctl start mysqld
- [root@l2 system]# netstat -lntp | grep mysqld
- tcp 0 0 0.0.0.0:3306 0.0.0.0:* LISTEN 33819/mysqld
- [root@l2 system]#
修改mysql密码
- [root@l2 system]# mysqladmin -u root -p password "abc123"
- Enter password: //直接回车,因为原先是没有密码的
- mysqladmin: [Warning] Using a password on the command line interface can be insecure.
- Warning: Since password will be sent to server in plain text, use ssl connection to ensure password safety.
- [root@l2 system]# mysql -u root -pabc123
- mysql: [Warning] Using a password on the command line interface can be insecure.
- Welcome to the MySQL monitor. Commands end with ; or \g.
- Your MySQL connection id is 3
- Server version: 5.7.44 Source distribution
- Copyright (c) 2000, 2023, Oracle and/or its affiliates.
- Oracle is a registered trademark of Oracle Corporation and/or its
- affiliates. Other names may be trademarks of their respective
- owners.
- Type 'help;' or '\h' for help. Type '\c' to clear the current input statement.
- mysql> show databases;
- +--------------------+
- | Database |
- +--------------------+
- | information_schema |
- | mysql |
- | performance_schema |
- | sys |
- +--------------------+
- 4 rows in set (0.00 sec)
- mysql> quit
- Bye
- [root@l2 system]#
授权并刷新
- [root@l2 system]# mysql -u root -pabc123
- mysql: [Warning] Using a password on the command line interface can be insecure.
- Welcome to the MySQL monitor. Commands end with ; or \g.
- Your MySQL connection id is 4
- Server version: 5.7.44 Source distribution
- Copyright (c) 2000, 2023, Oracle and/or its affiliates.
- Oracle is a registered trademark of Oracle Corporation and/or its
- affiliates. Other names may be trademarks of their respective
- owners.
- Type 'help;' or '\h' for help. Type '\c' to clear the current input statement.
- mysql> grant all on *.* to 'root'@'%' identified by 'abc123';
- Query OK, 0 rows affected, 1 warning (0.00 sec)
- mysql> flush privileges;
- Query OK, 0 rows affected (0.00 sec)
- mysql>
php服务器配置
上传压缩包至/opt目录中并解压
- [root@l3 ~]# cd /opt/
- [root@l3 opt]# ls
- rh

- [root@l3 opt]# ls
- php-7.1.10.tar.bz2 rh
- [root@l3 opt]# tar xf php-7.1.10.tar.bz2
- [root@l3 opt]#
安装环境依赖包
- [root@l3 opt]# cd php-7.1.10/
- [root@l3 php-7.1.10]# df
- 文件系统 1K-块 已用 可用 已用% 挂载点
- devtmpfs 1913544 0 1913544 0% /dev
- tmpfs 1930624 0 1930624 0% /dev/shm
- tmpfs 1930624 12528 1918096 1% /run
- tmpfs 1930624 0 1930624 0% /sys/fs/cgroup
- /dev/mapper/centos-root 38770180 5624548 33145632 15% /
- /dev/sda1 1038336 191100 847236 19% /boot
- tmpfs 386128 8 386120 1% /run/user/42
- tmpfs 386128 0 386128 0% /run/user/0
- [root@l3 php-7.1.10]# mount /dev/sr0 /mnt
- mount: /dev/sr0 写保护,将以只读方式挂载
- [root@l3 php-7.1.10]#yum -y install gd \
- libjpeg libjpeg-devel \
- libpng libpng-devel \
- freetype freetype-devel \
- libxml2 libxml2-devel \
- zlib zlib-devel \
- curl curl-devel \
- openssl openssl-devel
- yum -y install gd \
- libjpeg libjpeg-devel \
- libpng libpng-devel \
- freetype freetype-devel \
- libxml2 libxml2-devel \
- zlib zlib-devel \
- curl curl-devel \
- openssl openssl-devel
配置软件模块
- [root@l3 php-7.1.10]# ./configure \
- > --prefix=/usr/local/php \
- > --with-mysql-sock=/usr/local/mysql/mysql.sock \
- > --with-mysqli \
- > --with-zlib \
- > --with-curl \
- > --with-gd \
- > --with-jpeg-dir \
- > --with-png-dir \
- > --with-freetype-dir \
- > --with-openssl \
- > --enable-fpm \
- > --enable-mbstring \
- > --enable-xml \
- > --enable-session \
- > --enable-ftp \
- > --enable-pdo \
- > --enable-tokenizer \
- > --enable-zip
- ./configure \
- --prefix=/usr/local/php \
- --with-mysql-sock=/usr/local/mysql/mysql.sock \
- --with-mysqli \
- --with-zlib \
- --with-curl \
- --with-gd \
- --with-jpeg-dir \
- --with-png-dir \
- --with-freetype-dir \
- --with-openssl \
- --enable-fpm \
- --enable-mbstring \
- --enable-xml \
- --enable-session \
- --enable-ftp \
- --enable-pdo \
- --enable-tokenizer \
- --enable-zip
编译安装
make && make install路径优化
- [root@localhost php-7.1.10]# cd /usr/local/php/
- [root@localhost php]# ls
- bin etc include lib php sbin var
- [root@localhost php]# ln -s /usr/local/php/bin/* /usr/local/bin/
- [root@localhost php]# ln -s /usr/local/php/sbin/* /usr/local/sbin/
- [root@localhost php]#
修改php配置文件(共三个)
修改主配置文件
- [root@localhost php]# php --ini
- Configuration File (php.ini) Path: /usr/local/php/lib
- Loaded Configuration File: (none)
- Scan for additional .ini files in: (none)
- Additional .ini files parsed: (none)
- [root@localhost php]# cd /opt/php-7.1.10/
- [root@localhost php-7.1.10]# ls
- acinclude.m4 ltmain.sh README.PARAMETER_PARSING_API
- aclocal.m4 main README.REDIST.BINS
- appveyor makedist README.RELEASE_PROCESS
- build Makefile README.SELF-CONTAINED-EXTENSIONS
- buildconf Makefile.frag README.STREAMS
- buildconf.bat Makefile.fragments README.SUBMITTING_PATCH
- CODING_STANDARDS Makefile.gcov README.TESTING
- config.guess Makefile.global README.TESTING2
- config.log Makefile.objects README.UNIX-BUILD-SYSTEM
- config.nice makerpm README.WIN32-BUILD-SYSTEM
- config.status missing run-tests.php
- config.sub mkinstalldirs sapi
- configure modules scripts
- configure.in netware server-tests-config.php
- CONTRIBUTING.md NEWS server-tests.php
- CREDITS pear snapshot
- ext php7.spec stamp-h.in
- EXTENSIONS php7.spec.in stub.c
- footer php.gif tests
- generated_lists php.ini-development travis
- genfiles php.ini-production TSRM
- header README.EXT_SKEL UPGRADING
- include README.GIT-RULES UPGRADING.INTERNALS
- INSTALL README.input_filter vcsclean
- install-sh README.MAILINGLIST_RULES win32
- libs README.md Zend
- libtool README.namespaces
- LICENSE README.NEW-OUTPUT-API
- [root@localhost php-7.1.10]#
- [root@localhost php-7.1.10]# cp php.ini-production /usr/local/php/lib/php.ini
- [root@localhost php-7.1.10]# cd /usr/local/php/lib/
- [root@localhost lib]# ls
- php php.ini
- [root@localhost lib]#
- [root@localhost lib]# vim php.ini
- [root@localhost lib]#

修改进程服务配置文件
- [root@localhost php]# cd /usr/local/php/etc/
- [root@localhost etc]# ls
- pear.conf php-fpm.conf.default php-fpm.d
- [root@localhost etc]#
- [root@localhost etc]# cp php-fpm.conf.default php-fpm.conf
- [root@localhost etc]# ls
- pear.conf php-fpm.conf php-fpm.conf.default php-fpm.d
- [root@localhost etc]#
- [root@localhost etc]# vim php-fpm.conf
- [root@localhost etc]#

修改扩展配置文件
- [root@localhost etc]# cd php-fpm.d/
- [root@localhost php-fpm.d]# ls
- www.conf.default
- [root@localhost php-fpm.d]#
- [root@localhost php-fpm.d]# cp www.conf.default www.conf
- [root@localhost php-fpm.d]# vim www.conf
- [root@localhost php-fpm.d]#


 创建用户
创建用户- [root@localhost php-fpm.d]# useradd -M -s /sbin/nologin php
- [root@localhost php-fpm.d]# cat /etc/passwd | grep php:
- php:x:1001:1001::/home/php:/sbin/nologin
- [root@localhost php-fpm.d]#
启动php-fpm
- [root@localhost php-fpm.d]# cd /opt/php-7.1.10/
- [root@localhost php-7.1.10]# ls
- acinclude.m4 ltmain.sh README.PARAMETER_PARSING_API
- aclocal.m4 main README.REDIST.BINS
- appveyor makedist README.RELEASE_PROCESS
- build Makefile README.SELF-CONTAINED-EXTENSIONS
- buildconf Makefile.frag README.STREAMS
- buildconf.bat Makefile.fragments README.SUBMITTING_PATCH
- CODING_STANDARDS Makefile.gcov README.TESTING
- config.guess Makefile.global README.TESTING2
- config.log Makefile.objects README.UNIX-BUILD-SYSTEM
- config.nice makerpm README.WIN32-BUILD-SYSTEM
- config.status missing run-tests.php
- config.sub mkinstalldirs sapi
- configure modules scripts
- configure.in netware server-tests-config.php
- CONTRIBUTING.md NEWS server-tests.php
- CREDITS pear snapshot
- ext php7.spec stamp-h.in
- EXTENSIONS php7.spec.in stub.c
- footer php.gif tests
- generated_lists php.ini-development travis
- genfiles php.ini-production TSRM
- header README.EXT_SKEL UPGRADING
- include README.GIT-RULES UPGRADING.INTERNALS
- INSTALL README.input_filter vcsclean
- install-sh README.MAILINGLIST_RULES win32
- libs README.md Zend
- libtool README.namespaces
- LICENSE README.NEW-OUTPUT-API
- [root@localhost php-7.1.10]# cd sapi/
- [root@localhost sapi]# ls
- apache2handler cgi cli embed fpm litespeed phpdbg tests
- [root@localhost sapi]# cd fpm/
- [root@localhost fpm]# ls
- config.m4 LICENSE php-fpm.conf status.html.in
- CREDITS Makefile.frag php-fpm.conf.in tests
- fpm php-fpm php-fpm.service www.conf
- init.d.php-fpm php-fpm.8 php-fpm.service.in www.conf.in
- init.d.php-fpm.in php-fpm.8.in status.html
- [root@localhost fpm]# cp php-fpm.service /usr/lib/systemd/system
- [root@localhost fpm]# systemctl daemon-reload
- [root@localhost fpm]# systemctl start php-fpm.service
- [root@localhost fpm]# systemctl enable php-fpm.service
- Created symlink from /etc/systemd/system/multi-user.target.wants/php-fpm.service to /usr/lib/systemd/system/php-fpm.service.
- [root@localhost fpm]# netstat -lntp | grep php
- tcp 0 0 192.168.18.40:9000 0.0.0.0:* LISTEN 86042/php-fpm: mast
- [root@localhost fpm]#
安装论坛
上传压缩包到Nginx服务器的/opt目录下并解压
- [root@l1 system]# cd /opt/
- [root@l1 opt]# ls
- nginx-1.26.0 nginx-1.26.0.tar.gz rh

- [root@l1 opt]# ls
- Discuz_X3.4_SC_UTF8.zip nginx-1.26.0 nginx-1.26.0.tar.gz rh
- [root@l1 opt]# unzip Discuz_X3.4_SC_UTF8.zip
- [root@l1 opt]# cd dir_SC_UTF8/
- [root@l1 dir_SC_UTF8]# cp -r upload/ /var/www/html/discuz
- [root@l1 dir_SC_UTF8]# cd /var/www/html/
- [root@l1 html]#
设置属主属组
php服务器
- [root@localhost html]# cd /usr/local/php/etc/php-fpm.d/
- [root@localhost php-fpm.d]# vim www.conf
- [root@localhost php-fpm.d]#

- [root@localhost php-fpm.d]# useradd -M -s /sbin/nologin nginx
- [root@localhost php-fpm.d]# cat /etc/passwd | grep nginx:
- nginx:x:1002:1002::/home/nginx:/sbin/nologin
- [root@localhost php-fpm.d]# systemctl restart php-fpm.service
- [root@localhost php-fpm.d]# ps aux | grep php
- root 88567 0.2 0.7 216796 7656 ? Ss 20:00 0:00 php-fpm: master process (/usr/local/php/etc/php-fpm.conf)
- nginx 88568 0.0 0.3 218880 3932 ? S 20:00 0:00 php-fpm: pool www
- nginx 88569 0.0 0.3 218880 3932 ? S 20:00 0:00 php-fpm: pool www
- root 88571 0.0 0.0 112824 972 pts/2 S+ 20:00 0:00 grep --color=auto php
- [root@localhost php-fpm.d]# cd /var/www/html/
- [root@localhost html]# chown -R nginx:nginx discuz/
- [root@localhost html]# ll
- 总用量 12
- drwxr-xr-x. 13 nginx nginx 4096 6月 2 19:55 discuz
- -rw-r--r--. 1 root root 163 6月 2 19:50 mysql.php
- -rw-r--r--. 1 root root 20 6月 2 19:25 test.php
- [root@localhost html]#
Nginx服务器
- [root@l1 html]# chown -R nginx:nginx discuz/
- [root@l1 html]# ll
- 总用量 12
- drwxr-xr-x. 13 nginx nginx 4096 6月 2 19:55 discuz
- -rw-r--r--. 1 root root 163 6月 2 19:50 mysql.php
- -rw-r--r--. 1 root root 20 6月 2 19:25 test.php
- [root@l1 html]#
修改文件
- [root@l1 html]# cd /usr/local/nginx/conf/
- [root@l1 conf]# vim nginx.conf
- [root@l1 conf]#
 创建数据库
创建数据库 mysql服务器
- [root@l2 system]# mysql -u root -pabc123
- mysql: [Warning] Using a password on the command line interface can be insecure.
- Welcome to the MySQL monitor. Commands end with ; or \g.
- Your MySQL connection id is 6
- Server version: 5.7.44 Source distribution
- Copyright (c) 2000, 2023, Oracle and/or its affiliates.
- Oracle is a registered trademark of Oracle Corporation and/or its
- affiliates. Other names may be trademarks of their respective
- owners.
- Type 'help;' or '\h' for help. Type '\c' to clear the current input statement.
- mysql> create database discuz;
- Query OK, 1 row affected (0.00 sec)
- mysql>
- mysql> show databases;
- +--------------------+
- | Database |
- +--------------------+
- | information_schema |
- | discuz |
- | mysql |
- | performance_schema |
- | sys |
- +--------------------+
- 5 rows in set (0.00 sec)
- mysql>
- mysql> grant all on discuz. * to 'zy'@'%' identified by 'zy1234';
- Query OK, 0 rows affected, 1 warning (0.00 sec)
- mysql>
- mysql> flush privileges;
- Query OK, 0 rows affected (0.00 sec)
- mysql>
nginx服务器
[root@l1 conf]# nginx -s reload //刷新


-
相关阅读:
Codeforces 1535F 字符串 + 倍增 + BIT
我为博客园生商业化运营献计
Ubuntu18.04LTS安装配置VScode及下载C++相应第三方库
学生环境网页设计模板下载 保护环境大学生HTML网页制作作品 简单环境网页设计成品 dreamweaver学生网站模板
Day45 MySQL
SpringBoot中使用Spring integration加Eclipse Paho Java Client 实现MQTT客户端
Vue2整合图片
觉哥java网站搭建笔记——后端开发环境搭建
【docker】容器跟宿主机、其他容器通信
超市结算系统|Springboot+Vue通用超市结算收银系统
- 原文地址:https://blog.csdn.net/2301_82109773/article/details/139388689