-
政安晨:【Keras机器学习示例演绎】(十七)—— 用于图像分类的 RandAugment 可提高鲁棒性
目录
政安晨的个人主页:政安晨
欢迎 👍点赞✍评论⭐收藏
收录专栏: TensorFlow与Keras机器学习实战
希望政安晨的博客能够对您有所裨益,如有不足之处,欢迎在评论区提出指正!
本文目标:用于训练图像分类模型的 RandAugment,具有更强的鲁棒性。
数据增强是一种非常有用的技术,有助于提高卷积神经网络(CNN)的平移不变性。RandAugment 是一种用于视觉数据的随机数据增强程序,在 RandAugment 中提出:RandAugment: Practical automated data augmentation with a reduced search space》一书中提出的。它由色彩抖动、高斯模糊、饱和度等强增强变换和随机作物等更传统的增强变换组成。
这些参数可根据给定的数据集和网络结构进行调整。
最近,它已成为 "噪声学生训练 "和 "一致性训练的无监督数据增强 "等工作的关键组成部分。它也是 EfficientNets 取得成功的关键。
pip install keras-cv导入与设置
- import os
- os.environ["KERAS_BACKEND"] = "tensorflow"
- import keras
- import keras_cv
- from keras import ops
- from keras import layers
- import tensorflow as tf
- import numpy as np
- import matplotlib.pyplot as plt
- import tensorflow_datasets as tfds
- tfds.disable_progress_bar()
- keras.utils.set_random_seed(42)
加载 CIFAR10 数据集
在本例中,我们将使用 CIFAR10 数据集。- (x_train, y_train), (x_test, y_test) = keras.datasets.cifar10.load_data()
- print(f"Total training examples: {len(x_train)}")
- print(f"Total test examples: {len(x_test)}")
演绎展示:
- Total training examples: 50000
- Total test examples: 10000
定义超参数
- AUTO = tf.data.AUTOTUNE
- BATCH_SIZE = 128
- EPOCHS = 1
- IMAGE_SIZE = 72
初始化 RandAugment 对象
现在,我们将使用 RandAugment 作者建议的参数,从 imgaug.augmenters 模块中初始化一个 RandAugment 对象。
- rand_augment = keras_cv.layers.RandAugment(
- value_range=(0, 255), augmentations_per_image=3, magnitude=0.8
- )
创建 TensorFlow 数据集对象
- train_ds_rand = (
- tf.data.Dataset.from_tensor_slices((x_train, y_train))
- .shuffle(BATCH_SIZE * 100)
- .batch(BATCH_SIZE)
- .map(
- lambda x, y: (tf.image.resize(x, (IMAGE_SIZE, IMAGE_SIZE)), y),
- num_parallel_calls=AUTO,
- )
- .map(
- lambda x, y: (rand_augment(tf.cast(x, tf.uint8)), y),
- num_parallel_calls=AUTO,
- )
- .prefetch(AUTO)
- )
- test_ds = (
- tf.data.Dataset.from_tensor_slices((x_test, y_test))
- .batch(BATCH_SIZE)
- .map(
- lambda x, y: (tf.image.resize(x, (IMAGE_SIZE, IMAGE_SIZE)), y),
- num_parallel_calls=AUTO,
- )
- .prefetch(AUTO)
- )
为了便于比较,我们还可以定义一个简单的增强管道,其中包括随机翻转、随机旋转和随机缩放。
- simple_aug = keras.Sequential(
- [
- layers.Resizing(IMAGE_SIZE, IMAGE_SIZE),
- layers.RandomFlip("horizontal"),
- layers.RandomRotation(factor=0.02),
- layers.RandomZoom(height_factor=0.2, width_factor=0.2),
- ]
- )
- # Now, map the augmentation pipeline to our training dataset
- train_ds_simple = (
- tf.data.Dataset.from_tensor_slices((x_train, y_train))
- .shuffle(BATCH_SIZE * 100)
- .batch(BATCH_SIZE)
- .map(lambda x, y: (simple_aug(x), y), num_parallel_calls=AUTO)
- .prefetch(AUTO)
- )
可视化使用 RandAugment 增强的数据集
- sample_images, _ = next(iter(train_ds_rand))
- plt.figure(figsize=(10, 10))
- for i, image in enumerate(sample_images[:9]):
- ax = plt.subplot(3, 3, i + 1)
- plt.imshow(image.numpy().astype("int"))
- plt.axis("off")
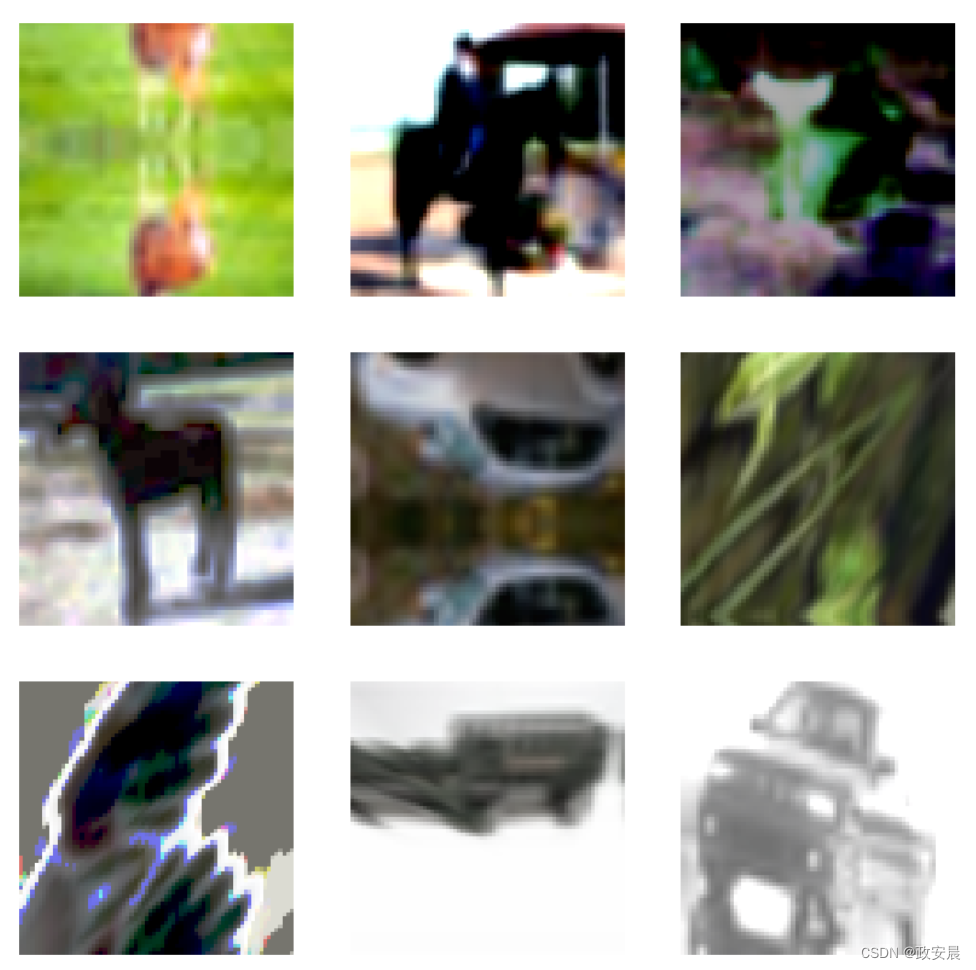
建议您多运行几次上述代码块,以了解不同的变化。
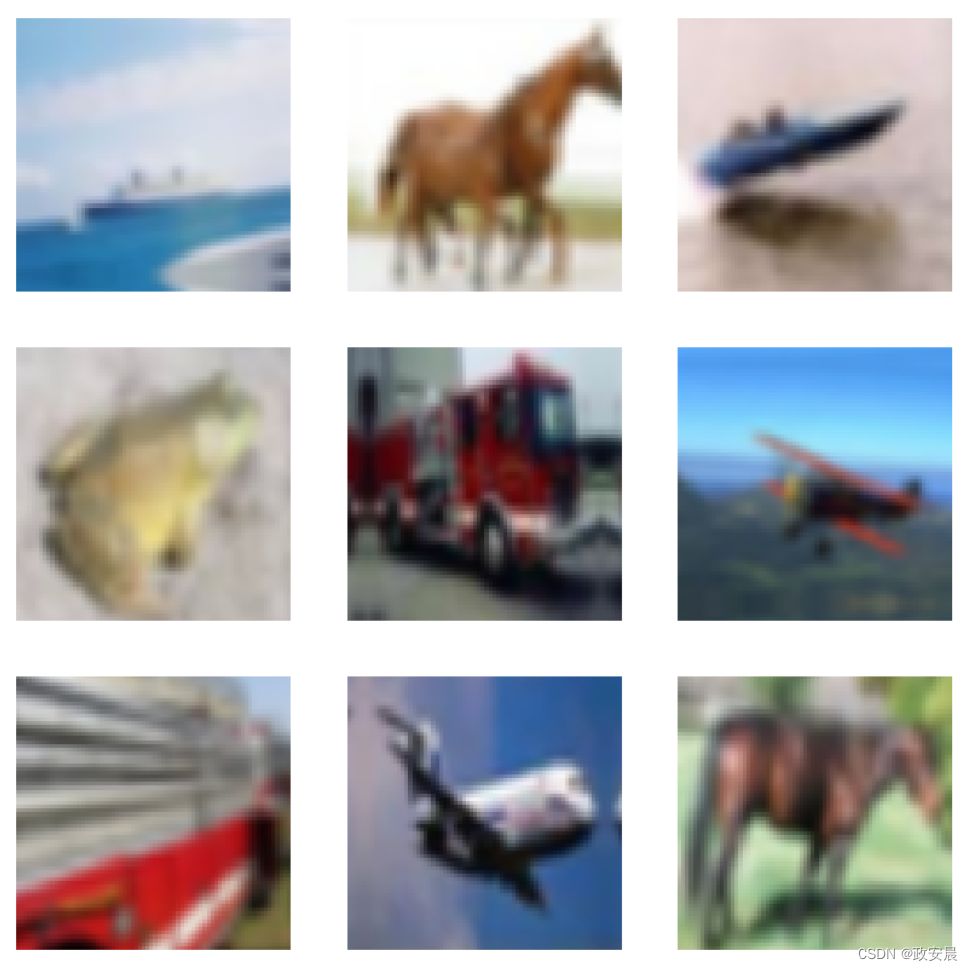
可视化使用 simple_aug 增强的数据集
- sample_images, _ = next(iter(train_ds_simple))
- plt.figure(figsize=(10, 10))
- for i, image in enumerate(sample_images[:9]):
- ax = plt.subplot(3, 3, i + 1)
- plt.imshow(image.numpy().astype("int"))
- plt.axis("off")
定义模型构建实用功能
现在,我们定义一个基于 ResNet50V2 架构的 CNN 模型。此外,请注意该网络内部已经有一个重缩放层。这样,我们就无需对数据集进行任何单独的预处理,特别是在部署时非常有用。- def get_training_model():
- resnet50_v2 = keras.applications.ResNet50V2(
- weights=None,
- include_top=True,
- input_shape=(IMAGE_SIZE, IMAGE_SIZE, 3),
- classes=10,
- )
- model = keras.Sequential(
- [
- layers.Input((IMAGE_SIZE, IMAGE_SIZE, 3)),
- layers.Rescaling(scale=1.0 / 127.5, offset=-1),
- resnet50_v2,
- ]
- )
- return model
- get_training_model().summary()
演绎展示:
Model: "sequential_1"
┏━━━━━━━━━━━━━━━━━━━━━━━━━━━━━━━━━┳━━━━━━━━━━━━━━━━━━━━━━━━━━━┳━━━━━━━━━━━━┓
┃ Layer (type)                    ┃ Output Shape              ┃    Param # ┃
┡━━━━━━━━━━━━━━━━━━━━━━━━━━━━━━━━━╇━━━━━━━━━━━━━━━━━━━━━━━━━━━╇━━━━━━━━━━━━┩
│ rescaling (Rescaling)           │ (None, 72, 72, 3)         │          0 │
├─────────────────────────────────┼───────────────────────────┼────────────┤
│ resnet50v2 (Functional)         │ (None, 10)                │ 23,585,290 │
└─────────────────────────────────┴───────────────────────────┴────────────┘
Total params: 23,585,290 (89.97 MB)
Trainable params: 23,539,850 (89.80 MB)
Non-trainable params: 45,440 (177.50 KB)
我们将在两个不同版本的数据集上对该网络进行训练:
一个使用 RandAugment 增强。
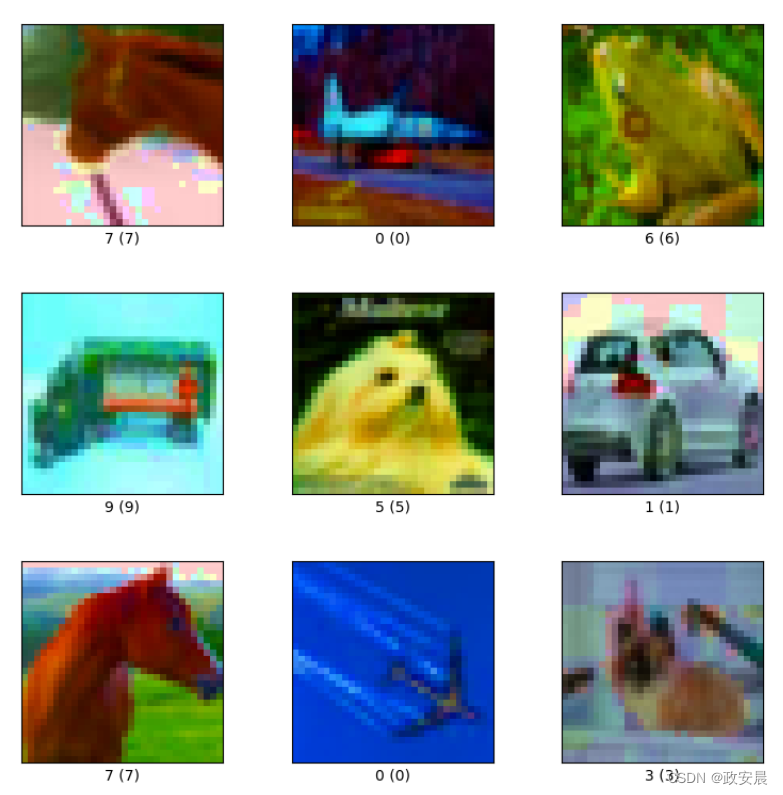
另一个使用 simple_aug 增强。众所周知,RandAugment 可以增强模型对常见扰动和损坏的鲁棒性,因此我们还将在 CIFAR-10-C 数据集上评估我们的模型,该数据集是 Hendrycks 等人在《神经网络对常见损坏和扰动的鲁棒性基准测试》(Benchmarking Neural Network Robustness to Common Corruptions and Perturbations)一文中提出的。
在本示例中,我们将使用以下配置:cifar10_corrupted/saturate_5。该配置下的图像如下。
为了提高可重复性,我们将浅层网络的初始随机权重序列化。
- initial_model = get_training_model()
- initial_model.save_weights("initial.weights.h5")
使用 RandAugment 训练模型
- rand_aug_model = get_training_model()
- rand_aug_model.load_weights("initial.weights.h5")
- rand_aug_model.compile(
- loss="sparse_categorical_crossentropy", optimizer="adam", metrics=["accuracy"]
- )
- rand_aug_model.fit(train_ds_rand, validation_data=test_ds, epochs=EPOCHS)
- _, test_acc = rand_aug_model.evaluate(test_ds)
- print("Test accuracy: {:.2f}%".format(test_acc * 100))
演绎展示:
- 391/391 ━━━━━━━━━━━━━━━━━━━━ 1146s 3s/step - accuracy: 0.1677 - loss: 2.3232 - val_accuracy: 0.2818 - val_loss: 1.9966
- 79/79 ━━━━━━━━━━━━━━━━━━━━ 39s 489ms/step - accuracy: 0.2803 - loss: 2.0073
- Test accuracy: 28.18%
用 simple_aug 训练模型
- simple_aug_model = get_training_model()
- simple_aug_model.load_weights("initial.weights.h5")
- simple_aug_model.compile(
- loss="sparse_categorical_crossentropy", optimizer="adam", metrics=["accuracy"]
- )
- simple_aug_model.fit(train_ds_simple, validation_data=test_ds, epochs=EPOCHS)
- _, test_acc = simple_aug_model.evaluate(test_ds)
- print("Test accuracy: {:.2f}%".format(test_acc * 100))
演绎展示:
- 391/391 ━━━━━━━━━━━━━━━━━━━━ 1132s 3s/step - accuracy: 0.3673 - loss: 1.7929 - val_accuracy: 0.4789 - val_loss: 1.4296
- 79/79 ━━━━━━━━━━━━━━━━━━━━ 39s 494ms/step - accuracy: 0.4762 - loss: 1.4368
- Test accuracy: 47.89%
加载 CIFAR-10-C 数据集并评估性能
- # Load and prepare the CIFAR-10-C dataset
- # (If it's not already downloaded, it takes ~10 minutes of time to download)
- cifar_10_c = tfds.load("cifar10_corrupted/saturate_5", split="test", as_supervised=True)
- cifar_10_c = cifar_10_c.batch(BATCH_SIZE).map(
- lambda x, y: (tf.image.resize(x, (IMAGE_SIZE, IMAGE_SIZE)), y),
- num_parallel_calls=AUTO,
- )
- # Evaluate `rand_aug_model`
- _, test_acc = rand_aug_model.evaluate(cifar_10_c, verbose=0)
- print(
- "Accuracy with RandAugment on CIFAR-10-C (saturate_5): {:.2f}%".format(
- test_acc * 100
- )
- )
- # Evaluate `simple_aug_model`
- _, test_acc = simple_aug_model.evaluate(cifar_10_c, verbose=0)
- print(
- "Accuracy with simple_aug on CIFAR-10-C (saturate_5): {:.2f}%".format(
- test_acc * 100
- )
- )
演绎展示:
- Downloading and preparing dataset 2.72 GiB (download: 2.72 GiB, generated: Unknown size, total: 2.72 GiB) to /home/sachinprasad/tensorflow_datasets/cifar10_corrupted/saturate_5/1.0.0...
- Dataset cifar10_corrupted downloaded and prepared to /home/sachinprasad/tensorflow_datasets/cifar10_corrupted/saturate_5/1.0.0. Subsequent calls will reuse this data.
- Accuracy with RandAugment on CIFAR-10-C (saturate_5): 30.36%
- Accuracy with simple_aug on CIFAR-10-C (saturate_5): 37.18%
在本例中,我们只对模型进行了单次训练。
在 CIFAR-10-C 数据集上,与使用 simple_aug 训练的模型(例如,64.80%)相比,使用 RandAugment 的模型表现更好,准确率更高(例如,在一次实验中为 76.64%)。RandAugment 还有助于稳定训练。
您可能会注意到,虽然使用 RandAugment 增加了训练时间,但我们在 CIFAR-10-C 数据集上的表现却要好得多。您可以在运行相同的 CIFAR-10-C 数据集时,尝试使用其他损坏和扰动设置,看看 RandAugment 是否有帮助。
您还可以尝试使用 RandAugment 对象中不同的 n 和 m 值。
-
相关阅读:
关于GIT配置安装及使用
chrome实用插件分享
力扣561. 数组拆分
Springboot实现Web组件注册
Opencv_4_图像像素的读写操作
后台启动tomcat
MyBatis - 开启驼峰命名,防止出现查询为Null
VsCode连接远程服务器并修改文件代码
实时音视频方案汇总
【云原生监控系列第一篇】一文详解Prometheus普罗米修斯监控系统(山前前后各有风景,有风无风都很自由)
- 原文地址:https://blog.csdn.net/snowdenkeke/article/details/138170331
