-
Verdaccio部署及基础使用
1. Verdaccio 简介
Verdaccio,是一个轻量级的 npm 私有仓库的开源解决方案。npm是一个基于http的协议,用来存放软件包并且维护版本和依赖,利用 http 提供的 url路径 来对软件包进行增删改查。所以 Verdaccio 这款软件的核心就是实现 npm协议。
Verdaccio 有一个内置的数据库来存放所有的 npm 包,除此之外它还有一套默认的鉴权机制:htpasswd。htpasswd鉴权是通过htpasswd文件来存放所有的 npm用户,鉴权、添加/删除的时候通过对文件的读写来实现。
Verdaccio 提供了上行链路功能, 安装 Verdaccio 仓库中不存在的包时,可以配置向上游仓库下载。
Verdaccio 还提供了强大的身份认证系统。
名词解释:
Npm:基于 http的应用协议,用来存取 JavaScript 软件包,并提供周边服务。
Htpasswd:一套鉴权机制,通过文本文件存储用户名和密码。
1.1 使用场景&特点
- 基于 Node.js 的网页应用程序
- 私有 npm registry
- 本地网络 proxy
- 可插入式应用程序
- 易安装和使用(免费、零配置,开箱即用)
- 提供 docker 和 kubernetes 支持
- 与 yarn,npm 100%兼容
1.2 为什么要搭建 npm 私有仓库
安全性:把公用组件放到私有npm库中,只有内网可以访问,这样可以避免敏感代码泄漏;
下载速度:使用内部的地址,能够在开发下载 npm 包的同时,将包和其他依赖包缓存到 npm 私有仓库服务器中,从而使后续的下载速度更快。
2. Verdaccio 部署
2.1 docker-compose部署
2.1.1 创建需要的目录
在 /opt/目录下创建 verdaccio/ 目录,并在其中创建 conf/、plugins/、storage/目录和 docker-compose.yml 文件。
在 conf/下创建配置文件 config.yaml,并编辑storage: /verdaccio/storage/ #默认使用内置本地文件模式存储,包存储地址,publish时仓库保存包的目录 plugins: /verdaccio/plugins #插件目录的位置。 对Docker/Kubernetes 基础上的配置非常有用 # UI信息 web: enable: true #开启 Web 页面 title: Sinux-Npm-Register #Web页面标题 # logo: #这里可以给定一个远程连接的图片,注释掉就采用默认的 # comment out to disable gravatar support gravatar: true # by default packages are ordercer ascendant (asc|desc) # sort_packages: asc #包的排序 # darkMode: true #黑暗模式 # scope: "@scope" # 身份认证设置 auth: htpasswd: #默认情况下使用的 htpasswd 插件作为身份认证 file: /verdaccio/storage/htpasswd #用户信息-账号密码的文件地址存储目录,初始化时不存在,可指定需要手工创建 max_users: -1 #默认1000,为允许用户注册的数量。此配置项为-1时不允许用户通过npm adduser注册,但是,当为-1时,可以通过直接编写htpasswd file内容的方式添加用户(最大用户数量,-1 表示禁用新用户注册) i18n: # list of the available translations https://github.com/verdaccio/ui/tree/master/i18n/translations web: zh-CN #默认是en-US,我们改为默认中文,这个支持多语言 # 上行链路 uplinks: #上行链路:配置上游的npm服务器,主要用于请求的包仓库不存在时到上游服务器去拉取。 npmjs: #上行名称,随便定义 url: https://registry.npmjs.org/ #上行地址 yarn: url: https://registry.yarnpkg.com/ timeout: 10s #超时时间 taobao: url: https://registry.npm.taobao.org/ timeout: 10s # 包访问设置,可以根据名称对包做不同权限的设置 packages: #配置模块。access访问下载权限,publish包的发布权限。 "@*/*": #@/ 表示某下属的某项目,* 匹配项目名称(名称在package.json中有定义) #三种身份:所有人,匿名用户,认证(登陆)用户 #"$all", "$anonymous", "$authenticated" access: $authenticated #access: 访问下载 publish: $authenticated #publish: 发布 unpublish: $authenticated #取消发布 proxy: npmjs #代理上行链路地址 #proxy: 这里的值是对应于uplinks的名称,如果本地不存在,允许去对应的uplinks去取。 #$all 表示所有人(已注册、未注册)都可以执行对应的操作 #$authenticated 已注册账户可操作 #$anonymous 匿名用户可操作(通常无用) #或者也可以指定对应于之前我们配置的用户表 htpasswd 中的一个或多个用户,这样就明确地指定哪些用户可以执行匹配的操作。 "**": access: $authenticated #登录用户才允许访问 publish: $authenticated #登录用户才允许访问 unpublish: $authenticated #登录用户才允许访问 proxy: npmjs yarn taobao #代理上行链路地址 server: keepAliveTimeout: 60 #服务器保持活动链接的时间,较大的包可能会消耗一定时间,此属性就是设置活动链接时间 middlewares: audit: enabled: true #listen:localhost:4873 #默认,只能本机访问。 listen: 0.0.0.0:4873 #监听的端口:允许所有外网监听。 # 日志设定 logs: { type: stdout, format: pretty, level: http } #type: stdout --- 控制台输出; file --- 输出到文件 #path: 如果输出到文件类型,需要制定输出路径 #format: 输出格式 [pretty, pretty-timestamped] #level: 日志级别 [fatal, error, warn, http, info, debug, trace]- 1
- 2
- 3
- 4
- 5
- 6
- 7
- 8
- 9
- 10
- 11
- 12
- 13
- 14
- 15
- 16
- 17
- 18
- 19
- 20
- 21
- 22
- 23
- 24
- 25
- 26
- 27
- 28
- 29
- 30
- 31
- 32
- 33
- 34
- 35
- 36
- 37
- 38
- 39
- 40
- 41
- 42
- 43
- 44
- 45
- 46
- 47
- 48
- 49
- 50
- 51
- 52
- 53
- 54
- 55
- 56
- 57
- 58
- 59
- 60
- 61
- 62
- 63
- 64
- 65
- 66
- 67
- 68
- 69
- 70
- 71
- 72
- 73
- 74
- 75
- 76
- 77
- 78
- 79
- 80
- 81
- 82
- 83
- 84
- 85
- 86
- 87
- 88
- 89
- 90
- 91
- 92
- 93
- 94
- 95
参考文档:
https://blog.csdn.net/YYZZHC999/article/details/80100388;
https://cloud.tencent.com/developer/article/1952975;文件目录分级如下:
/verdaccio ├── docker-compose.yml ├── config │ └── config.yaml ├── plugins └── storage- 1
- 2
- 3
- 4
- 5
- 6
**注意:**需要给目录授权,否则会出现权限错误。
chmod 755 conf/chmod 755 plugins/chmod 755 storage/
2.1.2 编辑 docker-compose.yml
version: '3' services: verdaccio: image: verdaccio/verdaccio #镜像 container_name: verdaccio #容器名称 environment: #环境变量 - VERDACCIO_PORT=4873 restart: always #重启策略 ports: #端口 - '4873:4873' volumes: #挂载 - /opt/verdaccio/conf:/verdaccio/conf #conf:verdaccio 配置文件目录 - /opt/verdaccio/storage:/verdaccio/storage #storage:包存放目录 - /opt/verdaccio/plugins:/verdaccio/plugins #plugins:插件目录- 1
- 2
- 3
- 4
- 5
- 6
- 7
- 8
- 9
- 10
- 11
- 12
- 13
- 14
2.1.3 启动运行容器
docker-compose up -d
启动成功
2.1.4 在浏览器登录查看
在浏览器输入 ip+4873端口

2.2 软件包部署
安装之前,需要确保系统环境已满足以下条件:
- Node.js v12 or higher
- npm >=4.x 或 yarn > 我们强烈建议使用最新的 Node 包管理客户端 > npm@5.x | yarn@1.x | pnpm@2.x
2.2.1 安装 nodejs(版本12.0.0以上)
安装 nodejs:
curl -sL https://deb.nodesource.com/setup_16.x | sudo -E bash -
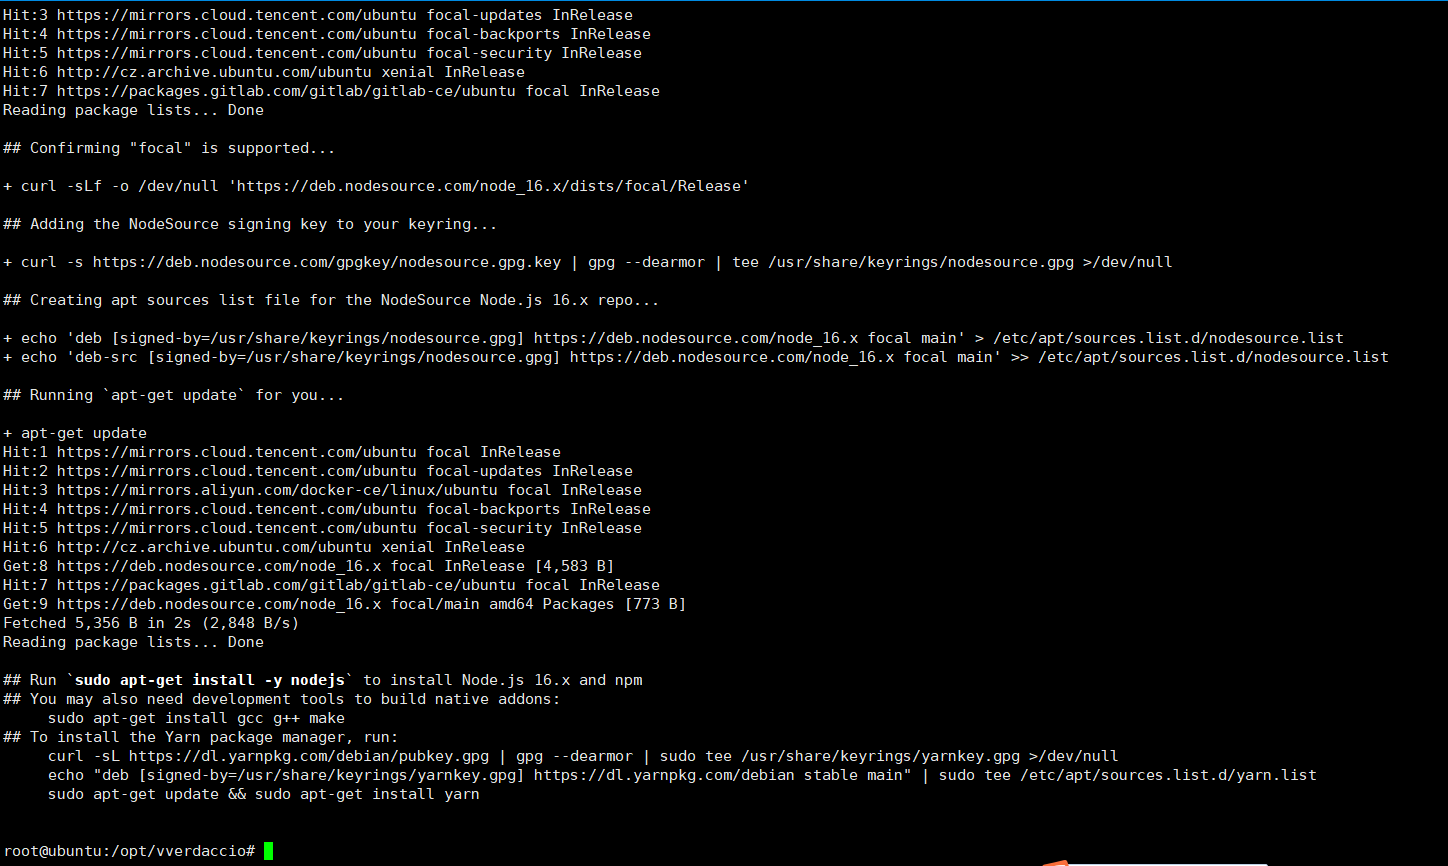
根据提示,继续安装:
sudo apt-get install -y nodejs
2.2.2 安装 verdaccio
安装 verdaccio:
npm i -g verdaccio
2.2.3 启动 verdaccio
启动:
verdaccio
输出它的配置文件位置、启动的服务地址等信息
2.2.4 配置 verdaccio
verdaccio 的配置文件为
~/.config/verdaccio/config.yaml
这里主要修改服务启动 ipsudo vim ~/.config/verdaccio/config.yaml# 本地仓库的目录,用于存放我们上传的包和从npm服务器同步下来的包 storage: ./storage # 插件目录的位置。对Docker/Kubernetes 基础上的配置非常有用。 plugins: ./plugins # verdaccio启用的web应用相关配置,更多web-ui配置参考https://verdaccio.org/docs/zh-CN/webui web: # web页title title: Verdaccio # 注释掉以禁用gravatar支持 # gravatar: false # 包的排序,正序/倒序 (asc|desc) # sort_packages: asc # 深色模式 # darkMode: true # 权限认证相关 auth: # 用户密码管理 htpasswd: file: ./htpasswd # 用户密码存放位置 # 允许注册用户的最大值,默认1000,如果设置为-1不允许通过adduser添加用户,但是可以手动向htpasswd中添加用户 # max_users: 1000 # 上游链路,缓存中找不到用户下载包时向上游链路请求资源 uplinks: npmjs: # 这里最好修改位淘宝镜像 url: https://registry.npm.taobao.org/ # 本地仓库的目录,用于存放我们上传的包和从npm服务器同步下来的包 storage: ./storage # 插件目录的位置。对Docker/Kubernetes 基础上的配置非常有用。 plugins: ./plugins # verdaccio启用的web应用相关配置,更多web-ui配置参考https://verdaccio.org/docs/zh-CN/webui web: # web页title title: Verdaccio # 注释掉以禁用gravatar支持 # gravatar: false # 包的排序,正序/倒序 (asc|desc) # sort_packages: asc # 深色模式 # darkMode: true # 权限认证相关 auth: # 用户密码管理 htpasswd: file: ./htpasswd # 用户密码存放位置 # 允许注册用户的最大值,默认1000,如果设置为-1不允许通过adduser添加用户,但是可以手动向htpasswd中添加用户 # max_users: 1000 # 上游链路,缓存中找不到用户下载包时向上游链路请求资源 uplinks: # 本地仓库的目录,用于存放我们上传的包和从npm服务器同步下来的包 storage: ./storage # 插件目录的位置。对Docker/Kubernetes 基础上的配置非常有用。 plugins: ./plugins # verdaccio启用的web应用相关配置,更多web-ui配置参考https://verdaccio.org/docs/zh-CN/webui web: # web页title title: Verdaccio # 注释掉以禁用gravatar支持 # 本地仓库的目录,用于存放我们上传的包和从npm服务器同步下来的包 storage: ./storage # 插件目录的位置。对Docker/Kubernetes 基础上的配置非常有用。 plugins: ./plugins # verdaccio启用的web应用相关配置,更多web-ui配置参考https://verdaccio.org/docs/zh-CN/webui web: # web页title title: Verdaccio # 注释掉以禁用gravatar支持 # gravatar: false # 包的排序,正序/倒序 (asc|desc) # sort_packages: asc # 深色模式 # darkMode: true # 权限认证相关 auth: # 用户密码管理 htpasswd: file: ./htpasswd # 用户密码存放位置 # 允许注册用户的最大值,默认1000,如果设置为-1不允许通过adduser添加用户,但是可以手动向htpasswd中添加用户 # max_users: 1000 # 上游链路,缓存中找不到用户下载包时向上游链路请求资源 uplinks: npmjs: uplinks: npmjs: # 这里最好修改位淘宝镜像 url: https://registry.npm.taobao.org/ # 包权限配置,@*/*scope包和**普通包的配置 packages: # 1. $all 所有用户 # 2. $authenticated 表示只有通过验证的人(已注册)可以执行对应操作,注意,任何人都可以去注册账户。 # 3. 或者也可以指定对应于之前我们配置的用户表 htpasswd 中的一个或多个用户,用空格分开即可 # 4. $anonymous 表示只有匿名者可以进行对应操作(通常无用) # scoped包 '@*/*': access: $all # 访问权限, publish: $authenticated # 发布权限 unpublish: $authenticated # 取消发布权限 proxy: npmjs # 如果请求的包不在服务器中,向配置的上游npmjs请求包 # 普通包 '**': access: $all publish: $authenticated unpublish: $authenticated proxy: npmjs # 服务器相关配置 server: keepAliveTimeout: 60 # 超时时间 # https://verdaccio.org/docs/configuration#listen-port listen: http://10.66.55.132:4873 # - localhost:4873 # 默认值 # - http://localhost:4873 # 一样 # - 0.0.0.0:4873 # 监听所有地址 (INADDR_ANY) # - https://example.org:4873 # 如果你想使用 https # - "[::1]:4873" # ipv6 # - unix:/tmp/verdaccio.sock # Unix套接字 # 中间件配置 middlewares: # npm 审核认证 audit: enabled: true # 输出日志配置 logs: # type: stdout --- 控制台输出; file --- 输出到文件 # path: 如果输出到文件类型,需要制定输出路径 # format: 输出格式 [pretty, pretty-timestamped] # level: 日志级别 [fatal, error, warn, http, info, debug, trace] - { type: stdout, format: pretty, level: http } # - {type: file, path: verdaccio.log, level: info}- 1
- 2
- 3
- 4
- 5
- 6
- 7
- 8
- 9
- 10
- 11
- 12
- 13
- 14
- 15
- 16
- 17
- 18
- 19
- 20
- 21
- 22
- 23
- 24
- 25
- 26
- 27
- 28
- 29
- 30
- 31
- 32
- 33
- 34
- 35
- 36
- 37
- 38
- 39
- 40
- 41
- 42
- 43
- 44
- 45
- 46
- 47
- 48
- 49
- 50
- 51
- 52
- 53
- 54
- 55
- 56
- 57
- 58
- 59
- 60
- 61
- 62
- 63
- 64
- 65
- 66
- 67
- 68
- 69
- 70
- 71
- 72
- 73
- 74
- 75
- 76
- 77
- 78
- 79
- 80
- 81
- 82
- 83
- 84
- 85
- 86
- 87
- 88
- 89
- 90
- 91
- 92
- 93
- 94
- 95
- 96
- 97
- 98
- 99
- 100
- 101
- 102
- 103
- 104
- 105
- 106
- 107
- 108
- 109
- 110
- 111
- 112
- 113
- 114
- 115
- 116
- 117
- 118
- 119
- 120
- 121
- 122
- 123
- 124
- 125
- 126
- 127
- 128
- 129
- 130
- 131
- 132
- 133
- 134
- 135
- 136
- 137
- 138
- 139
- 140
- 141
- 142
- 143
- 144
- 145
- 146
- 147
- 148
- 149
- 150
2.2.5 使用 pm2 进程管理启动 verdaccio
安装pm2:
sudo npm install -g pm2
启动 verdaccio:
pm2 startwhich verdaccio`` 或pm2 start verdaccio--watch:监听应用目录的变化,一旦发生变化,自动重启。如果要精确监听、不监听的目录,最好通过配置文件。 -i --instances:启用多少个实例,可用于负载均衡。如果-i 0或者-i max,则根据当前机器核数确定实例数目。 --ignore-watch:排除监听的目录/文件,可以是特定的文件名,也可以是正则。比如–ignore-watch=“test node_modules “some scripts”” -n --name:应用的名称。查看应用信息的时候可以用到。 -o --output <path>:标准输出日志文件的路径。 -e --error <path>:错误输出日志文件的路径。 --interpreter <interpreter>:the interpreter pm2 should use for executing app (bash, python…)。比如你用的coffee script来编写应用。- 1
- 2
- 3
- 4
- 5
- 6
- 7
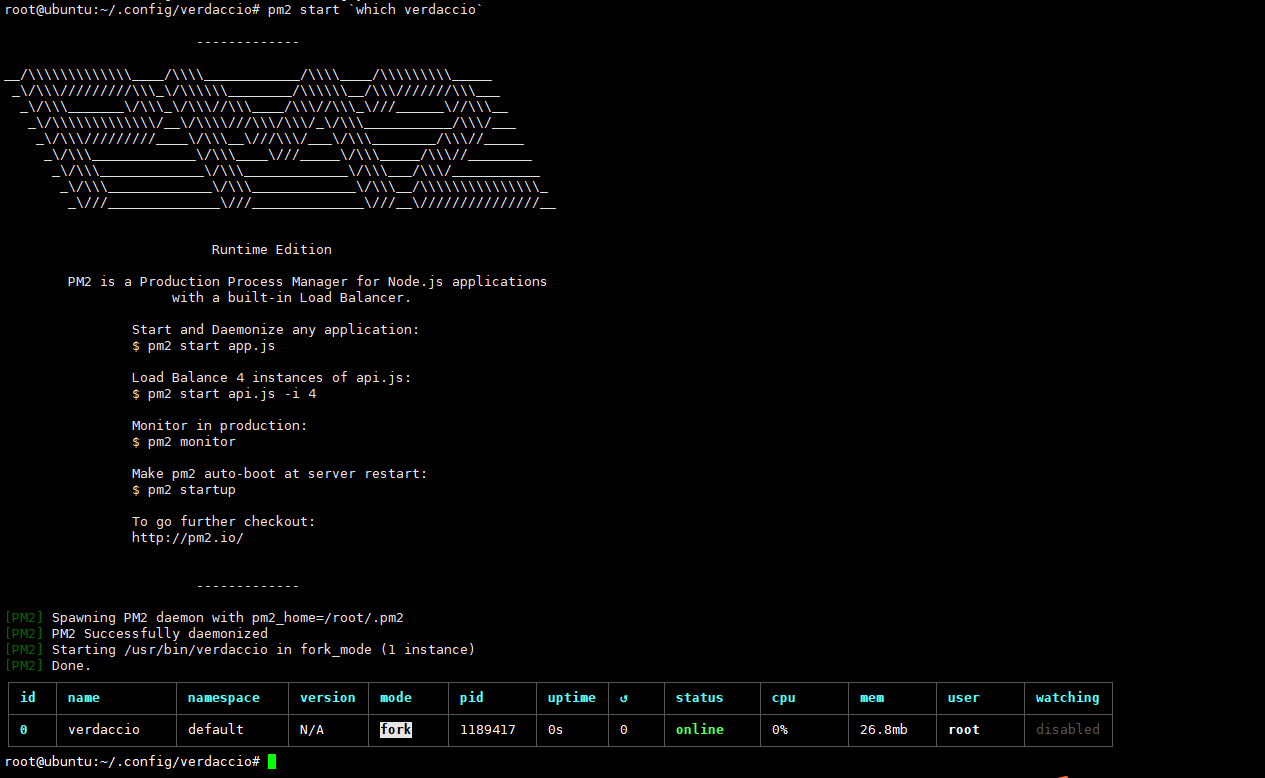
浏览器也可以成功访问。

pm2(Process Manager 2):pm2 是node进程管理工具,它可以提供node.js应用管理,可以用它来管理你的node进程,并查看node进程的状态,保证服务不会中断一直在线。当然也支持性能监控,进程守护,负载均衡等功能。
参考文档:
https://blog.csdn.net/qq_35861227/article/details/125936819
官方文档:
https://verdaccio.org/zh-CN/docs/what-is-verdaccio
3. Verdaccio 使用
3.1 设置npm源
查看当前npm源
npm config get registry
将npm源设置为服务器 ip+端口,默认启动端口是4873npm config set registry http://10.66.55.132:4873
3.2 注册用户并登录
根据提示输入用户名、密码、邮箱,进行注册。
npm adduse
用刚刚注册的用户名密码进行登录npm login
查看当前登录的账号npm whoami
3.3 创建一个包
创建包文件目录
mkdir npm-publish-test
进入到目录中cd npm-publish-test
npm初始化npm init
依次填入:包名、版本、描述说明、入口点(index.js)、测试命令、git仓库、关键字、作者、许可
除了必填项,其他可以直接按 Enter回车。
3.4 发布包
npm publish
3.5 查看发布的包
在浏览器中输入 ip+端口 4873 即可查看

3.6 使用者下载包并使用
- 使用者同样需要设置npm源为我们的私服地址
- 如果verdaccio设置的权限不对所有人开放,那么使用者也需要注册并登录才能进行下载
- 下载包,跟正常从npm仓库下载一样,也可以使用@指定版本号
下载最新版本
npm install --save npm-publish-test或npm i npm-test
指定版本号下载npm install --save npm-publish-test@1.0.1或npm i npm-test@0.0.2
3.7 删除包
npm unpublish --force xiaolayunpm unpublish --force xiaolayu@1.0.0
4. 基础使用命令
nrm 命令
nrm 是一个 npm 源管理器,允许你快速地在 npm源间切换
npm install -g nrm # 安装 nrm ls # 查看可选择源 nrm current # 查看当前 nrm use <registry> # 切换源 nrm add <registry> <url> # 添加源,registry为源名,url为源地址 nrm del <registry> # 删除源 nrm test npm # 测试源的速度- 1
- 2
- 3
- 4
- 5
- 6
- 7
pm2 基本操作
# pm2基本操作 pm2 start `which verdaccio` # 使用pm2启动应用 pm2 list # 查看pm2列表项,即应用状态 pm2 logs # 查看应用输入的日志 pm2 monit # 查看当前通过pm2运行的进程的状态 pm2 describe verdaccio # 查看应用的进程状态 pm2 restart verdaccio # 重启引用,用于修改配置以后重启项目 pm2 stop verdaccio | pid # 停止应用(以应用名或者pid都可以) pm2 stop all # 停止所有应用 pm2 delete verdaccio | pid # 将应用从pm2列表中删除- 1
- 2
- 3
- 4
- 5
- 6
- 7
- 8
- 9
- 10
发布&下载
# 客户端设置npm源 npm config get registry # 查看当前npm源 npm config set registry http://192.168.0.118:4873 # 将npm源设置为服务器ip+端口 # 注册用户并登录 npm adduser # 根据提示输入用户名、密码、邮箱,进行注册 npm login # 用刚刚注册的用户名密码进行登录 npm whoami # 查看当前登录的账号 # 创建一个包 mkdir npm-publish-test # 包文件夹 cd npm-publish-test npm init # npm初始化 # 发布包(在某个需要发布包的项目的根目录下运行) npm publish- 1
- 2
- 3
- 4
- 5
- 6
- 7
- 8
- 9
- 10
- 11
- 12
- 13
npm install verdaccio-ldap -g npm install --global verdaccio-theme-dark yarn global add verdaccio-theme-dark verdaccio -h verdaccio -l 8080 -c "/etc/verdaccio/config.yaml"- 1
- 2
- 3
- 4
- 5
-
相关阅读:
Node.js 入门教程 7 从命令行运行 Node.js 脚本 & 8 如何退出 Node.js 程序
20天深度复习JavaSE的详细笔记(十二)——集合(Collection、数据结构、List、泛型深入)
android应用间相互调用
2.15 OrCAD中怎么创建带图片的Title Block?【OrCAD原理图封装库50问解析】
关于RabbitMQ的小总结
vue 页面监听vuex state值的变化
【数据分享】成渝城市群规划范围数据(市县两级/shp格式)
[C语言]对一段连续内存,多个结构体赋值的一种手段
JAVA三道编程题
NOIP2011-2018提高组解题报告
- 原文地址:https://blog.csdn.net/weixin_60197334/article/details/136735079
