-
开源大数据集群部署(十三)Ranger 集成Trino
作者:櫰木
1、安装ranger trino插件
在trino的coordinator节点部署
- 解压ranger-2.3.0-trino-plugin.tar.gz
[root@hd2.dtstack.com ]#tar -zxvf ranger-2.3.0-trino-plugin.tar.gz -C /opt- 1
- 配置ranger trino插件文件install.properties,内容如下 :
# Licensed to the Apache Software Foundation (ASF) under one or more # contributor license agreements. See the NOTICE file distributed with # this work for additional information regarding copyright ownership. # The ASF licenses this file to You under the Apache License, Version 2.0 # (the "License"); you may not use this file except in compliance with # the License. You may obtain a copy of the License at # # http://www.apache.org/licenses/LICENSE-2.0 # # Unless required by applicable law or agreed to in writing, software # distributed under the License is distributed on an "AS IS" BASIS, # WITHOUT WARRANTIES OR CONDITIONS OF ANY KIND, either express or implied. # See the License for the specific language governing permissions and # limitations under the License. # # Location of Policy Manager URL # # Example: # POLICY_MGR_URL=http://policymanager.xasecure.net:6080 # POLICY_MGR_URL=http://hd1.dtstack.com:6080/ # # This is the repository name created within policy manager # # Example: # REPOSITORY_NAME=trinodev # REPOSITORY_NAME=trinodev # Configure INSTALL_ENV=docker if running trino in docker environment #INSTALL_ENV=docker # # Name of the directory where the component's lib and conf directory exist. # This location should be relative to the parent of the directory containing # the plugin installation files. # COMPONENT_INSTALL_DIR_NAME=/opt/trino # Enable audit logs to Solr XAAUDIT.SUMMARY.ENABLE=false #Example #XAAUDIT.SOLR.ENABLE=true #XAAUDIT.SOLR.URL=http://localhost:6083/solr/ranger_audits #XAAUDIT.SOLR.ZOOKEEPER= #XAAUDIT.SOLR.FILE_SPOOL_DIR=/var/log/trino/audit/solr/spool XAAUDIT.SOLR.ENABLE=false XAAUDIT.SOLR.URL=http://hd1.dtstack.com:8983/solr/ranger_audits XAAUDIT.SOLR.USER=NONE XAAUDIT.SOLR.PASSWORD=NONE XAAUDIT.SOLR.ZOOKEEPER=hd1:2181,hd2:2181,hd3:2181/ranger_audits XAAUDIT.SOLR.FILE_SPOOL_DIR=/var/log/trino/audit/solr/spool # Enable audit logs to ElasticSearch #Example #XAAUDIT.ELASTICSEARCH.ENABLE=true #XAAUDIT.ELASTICSEARCH.URL=localhost #XAAUDIT.ELASTICSEARCH.INDEX=audit XAAUDIT.ELASTICSEARCH.ENABLE=false XAAUDIT.ELASTICSEARCH.URL=NONE XAAUDIT.ELASTICSEARCH.USER=NONE XAAUDIT.ELASTICSEARCH.PASSWORD=NONE XAAUDIT.ELASTICSEARCH.INDEX=NONE XAAUDIT.ELASTICSEARCH.PORT=NONE XAAUDIT.ELASTICSEARCH.PROTOCOL=NONE # Enable audit logs to HDFS #Example #XAAUDIT.HDFS.ENABLE=true #XAAUDIT.HDFS.HDFS_DIR=hdfs://node-1.example.com:8020/ranger/audit # If using Azure Blob Storage #XAAUDIT.HDFS.HDFS_DIR=wasb[s]://@ #XAAUDIT.HDFS.HDFS_DIR=wasb://ranger_audit_container@my-azure-account.blob.core.windows.net/ranger/audit #XAAUDIT.HDFS.FILE_SPOOL_DIR=/var/log/trino/audit/hdfs/spool XAAUDIT.HDFS.ENABLE=false XAAUDIT.HDFS.HDFS_DIR=hdfs://__REPLACE__NAME_NODE_HOST:8020/ranger/audit XAAUDIT.HDFS.FILE_SPOOL_DIR=/var/log/trino/audit/hdfs/spool # Following additional propertis are needed When auditing to Azure Blob Storage via HDFS # Get these values from your /etc/hadoop/conf/core-site.xml #XAAUDIT.HDFS.HDFS_DIR=wasb[s]://.blob.core.windows.net/ @ XAAUDIT.HDFS.AZURE_ACCOUNTNAME=__REPLACE_AZURE_ACCOUNT_NAME XAAUDIT.HDFS.AZURE_ACCOUNTKEY=__REPLACE_AZURE_ACCOUNT_KEY XAAUDIT.HDFS.AZURE_SHELL_KEY_PROVIDER=__REPLACE_AZURE_SHELL_KEY_PROVIDER XAAUDIT.HDFS.AZURE_ACCOUNTKEY_PROVIDER=__REPLACE_AZURE_ACCOUNT_KEY_PROVIDER #Log4j Audit Provider XAAUDIT.LOG4J.ENABLE=false XAAUDIT.LOG4J.IS_ASYNC=false XAAUDIT.LOG4J.ASYNC.MAX.QUEUE.SIZE=10240 XAAUDIT.LOG4J.ASYNC.MAX.FLUSH.INTERVAL.MS=30000 XAAUDIT.LOG4J.DESTINATION.LOG4J=true XAAUDIT.LOG4J.DESTINATION.LOG4J.LOGGER=xaaudit # Enable audit logs to Amazon CloudWatch Logs #Example #XAAUDIT.AMAZON_CLOUDWATCH.ENABLE=true #XAAUDIT.AMAZON_CLOUDWATCH.LOG_GROUP=ranger_audits #XAAUDIT.AMAZON_CLOUDWATCH.LOG_STREAM={instance_id} #XAAUDIT.AMAZON_CLOUDWATCH.FILE_SPOOL_DIR=/var/log/hive/audit/amazon_cloudwatch/spool XAAUDIT.AMAZON_CLOUDWATCH.ENABLE=false XAAUDIT.AMAZON_CLOUDWATCH.LOG_GROUP=NONE XAAUDIT.AMAZON_CLOUDWATCH.LOG_STREAM_PREFIX=NONE XAAUDIT.AMAZON_CLOUDWATCH.FILE_SPOOL_DIR=NONE XAAUDIT.AMAZON_CLOUDWATCH.REGION=NONE # End of V3 properties # # Audit to HDFS Configuration # # If XAAUDIT.HDFS.IS_ENABLED is set to true, please replace tokens # that start with __REPLACE__ with appropriate values # XAAUDIT.HDFS.IS_ENABLED=true # XAAUDIT.HDFS.DESTINATION_DIRECTORY=hdfs://__REPLACE__NAME_NODE_HOST:8020/ranger/audit/%app-type%/%time:yyyyMMdd% # XAAUDIT.HDFS.LOCAL_BUFFER_DIRECTORY=__REPLACE__LOG_DIR/trino/audit # XAAUDIT.HDFS.LOCAL_ARCHIVE_DIRECTORY=__REPLACE__LOG_DIR/trino/audit/archive # # Example: # XAAUDIT.HDFS.IS_ENABLED=true # XAAUDIT.HDFS.DESTINATION_DIRECTORY=hdfs://namenode.example.com:8020/ranger/audit/%app-type%/%time:yyyyMMdd% # XAAUDIT.HDFS.LOCAL_BUFFER_DIRECTORY=/var/log/trino/audit # XAAUDIT.HDFS.LOCAL_ARCHIVE_DIRECTORY=/var/log/trino/audit/archive # XAAUDIT.HDFS.IS_ENABLED=false XAAUDIT.HDFS.DESTINATION_DIRECTORY=hdfs://__REPLACE__NAME_NODE_HOST:8020/ranger/audit/%app-type%/%time:yyyyMMdd% XAAUDIT.HDFS.LOCAL_BUFFER_DIRECTORY=__REPLACE__LOG_DIR/trino/audit XAAUDIT.HDFS.LOCAL_ARCHIVE_DIRECTORY=__REPLACE__LOG_DIR/trino/audit/archive XAAUDIT.HDFS.DESTINTATION_FILE=%hostname%-audit.log XAAUDIT.HDFS.DESTINTATION_FLUSH_INTERVAL_SECONDS=900 XAAUDIT.HDFS.DESTINTATION_ROLLOVER_INTERVAL_SECONDS=86400 XAAUDIT.HDFS.DESTINTATION_OPEN_RETRY_INTERVAL_SECONDS=60 XAAUDIT.HDFS.LOCAL_BUFFER_FILE=%time:yyyyMMdd-HHmm.ss%.log XAAUDIT.HDFS.LOCAL_BUFFER_FLUSH_INTERVAL_SECONDS=60 XAAUDIT.HDFS.LOCAL_BUFFER_ROLLOVER_INTERVAL_SECONDS=600 XAAUDIT.HDFS.LOCAL_ARCHIVE_MAX_FILE_COUNT=10 #Solr Audit Provider XAAUDIT.SOLR.IS_ENABLED=false XAAUDIT.SOLR.MAX_QUEUE_SIZE=1 XAAUDIT.SOLR.MAX_FLUSH_INTERVAL_MS=1000 XAAUDIT.SOLR.SOLR_URL=http://localhost:6083/solr/ranger_audits # End of V2 properties # # SSL Client Certificate Information # # Example: # SSL_KEYSTORE_FILE_PATH=/etc/hadoop/conf/ranger-plugin-keystore.jks # SSL_KEYSTORE_PASSWORD=none # SSL_TRUSTSTORE_FILE_PATH=/etc/hadoop/conf/ranger-plugin-truststore.jks # SSL_TRUSTSTORE_PASSWORD=none # # You do not need use SSL between agent and security admin tool, please leave these sample value as it is. # SSL_KEYSTORE_FILE_PATH=/etc/hadoop/conf/ranger-plugin-keystore.jks SSL_KEYSTORE_PASSWORD=myKeyFilePassword SSL_TRUSTSTORE_FILE_PATH=/etc/hadoop/conf/ranger-plugin-truststore.jks SSL_TRUSTSTORE_PASSWORD=changeit # # Custom component user # CUSTOM_COMPONENT_USER=.blob.core.windows.net/ # keep blank if component user is default CUSTOM_USER=trino # # Custom component group # CUSTOM_COMPONENT_GROUP= # keep blank if component group is default CUSTOM_GROUP=hadoop - 1
- 2
- 3
- 4
- 5
- 6
- 7
- 8
- 9
- 10
- 11
- 12
- 13
- 14
- 15
- 16
- 17
- 18
- 19
- 20
- 21
- 22
- 23
- 24
- 25
- 26
- 27
- 28
- 29
- 30
- 31
- 32
- 33
- 34
- 35
- 36
- 37
- 38
- 39
- 40
- 41
- 42
- 43
- 44
- 45
- 46
- 47
- 48
- 49
- 50
- 51
- 52
- 53
- 54
- 55
- 56
- 57
- 58
- 59
- 60
- 61
- 62
- 63
- 64
- 65
- 66
- 67
- 68
- 69
- 70
- 71
- 72
- 73
- 74
- 75
- 76
- 77
- 78
- 79
- 80
- 81
- 82
- 83
- 84
- 85
- 86
- 87
- 88
- 89
- 90
- 91
- 92
- 93
- 94
- 95
- 96
- 97
- 98
- 99
- 100
- 101
- 102
- 103
- 104
- 105
- 106
- 107
- 108
- 109
- 110
- 111
- 112
- 113
- 114
- 115
- 116
- 117
- 118
- 119
- 120
- 121
- 122
- 123
- 124
- 125
- 126
- 127
- 128
- 129
- 130
- 131
- 132
- 133
- 134
- 135
- 136
- 137
- 138
- 139
- 140
- 141
- 142
- 143
- 144
- 145
- 146
- 147
- 148
- 149
- 150
- 151
- 152
- 153
- 154
- 155
- 156
- 157
- 158
- 159
- 160
- 161
- 162
- 163
- 164
- 165
- 166
- 167
- 168
- 169
- 170
- 171
- 172
- 173
- 174
- 175
- 176
- 177
- 178
- 179
- 180
2、初始化插件
[root@hd1.dtstack.com ranger-2.3.0-trno-plugin]# ./enable-trnio-plugin.sh- 1

4、验证插件是否生效
通过查看/opt/trino/etc/access-control.properties。
添加access-control.name=ranger ranger.principal=trino/hd1.dtstack.com@DTSTACK.COM ranger.keytab=/etc/security/keytab/trino.keytab- 1
- 2
- 3
软链core-site.xml到trino的etc目录下
ln -s /opt/hadoop/etc/hadoop/core-site.xml core-site.xml- 1

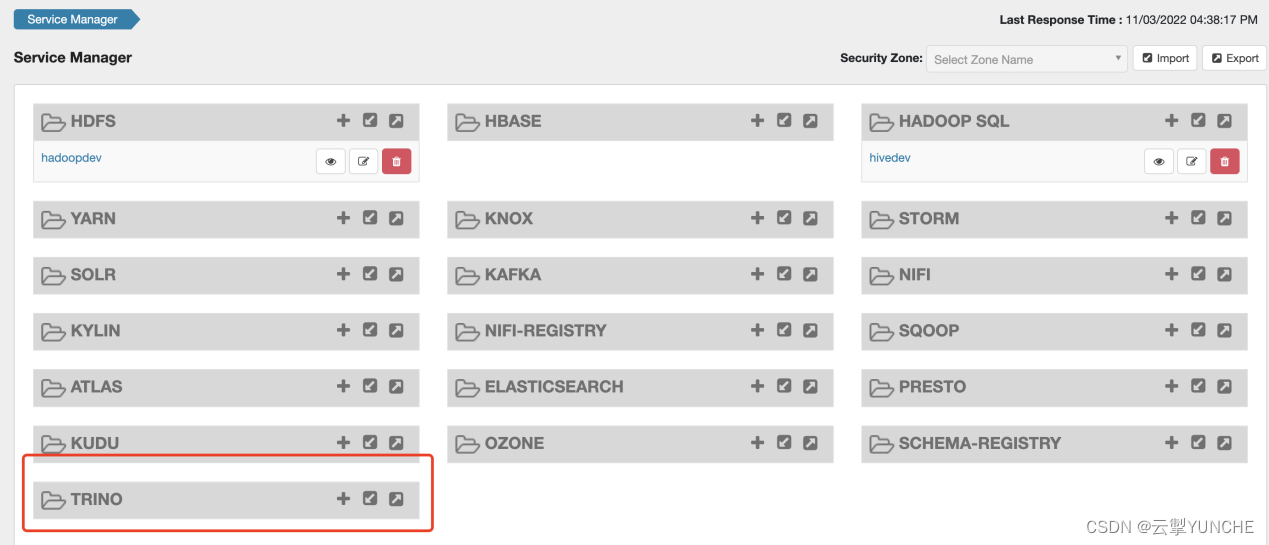
5、Ranger web界面配置trino
访问地址:http://hd2.dtstack.com:6080/
用户密码:admin/rangerAdmin123
username 对应值:trino
jdbc.driverClassName对应值:io.trino.jdbc.TrinoDriver
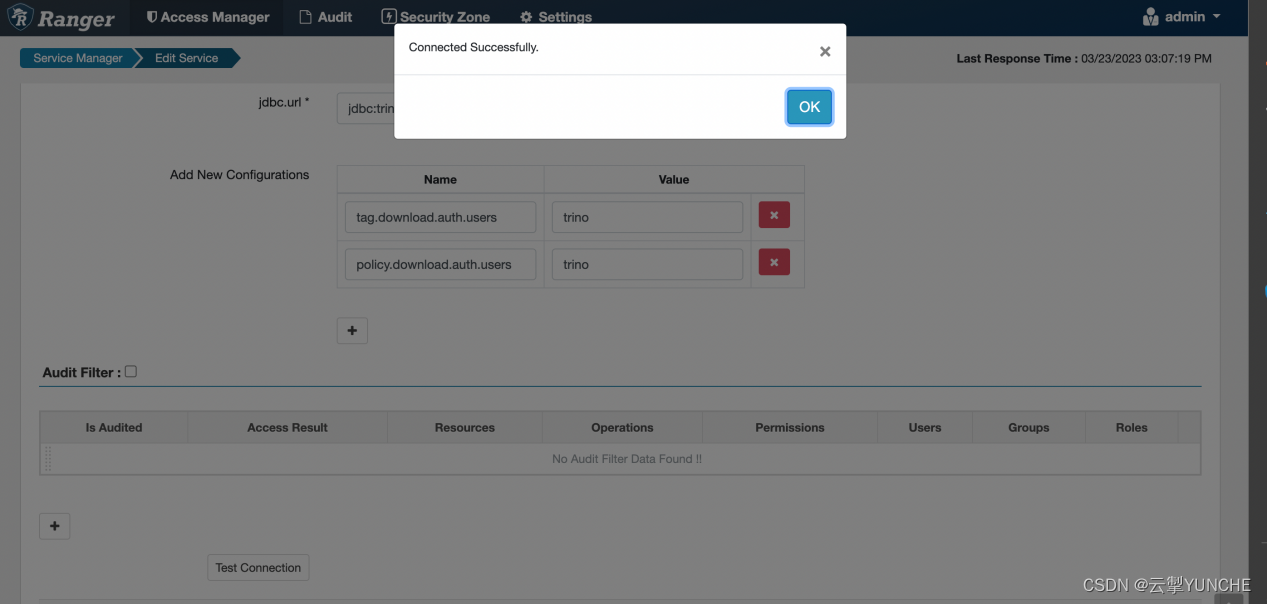
jdbc.url对应值:jdbc:trino://hd1.dtstack.com:18080/catalog
tag.download.auth.users:trino
policy.download.auth.users:trino

点解测试连接

显示连接成功,配置正确,保存退出。
点击主页刚添加的trino

至此,ranger集成trino完成
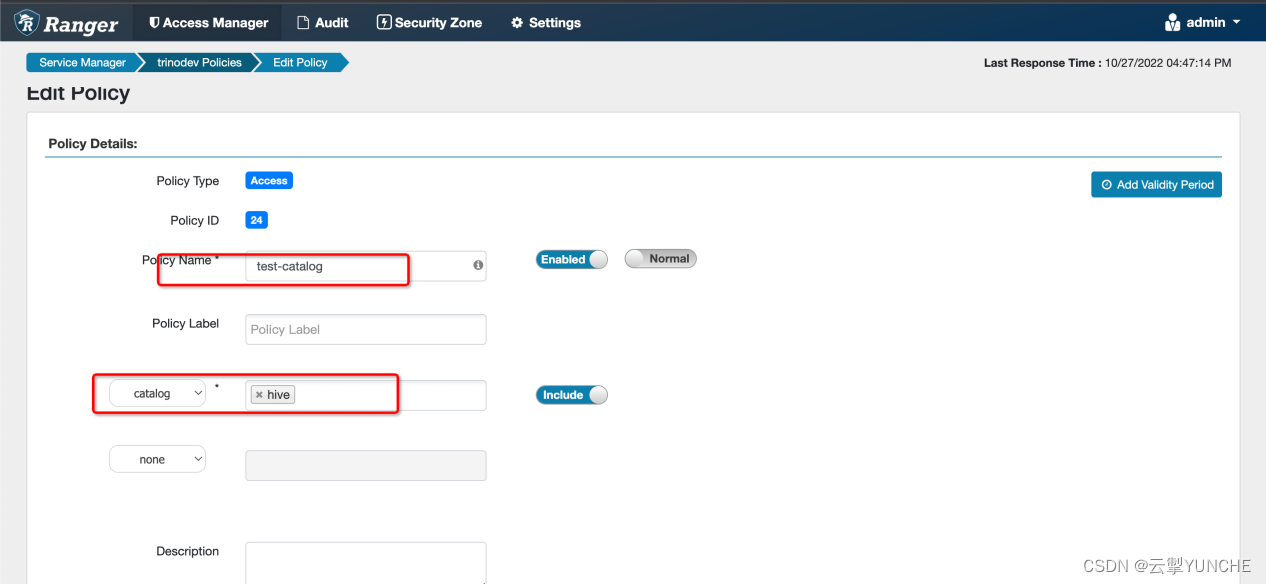
Trino 用户策略授权。以test用户为例
首先需要添加对应的catalog权限

添加tableschema权限
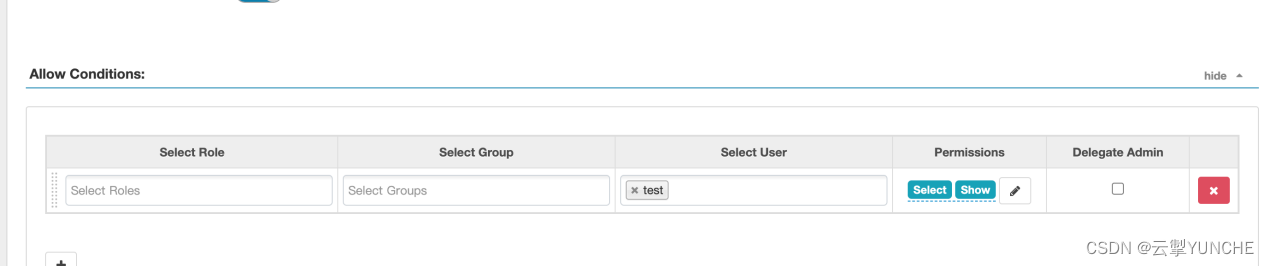

添加用户表的权限

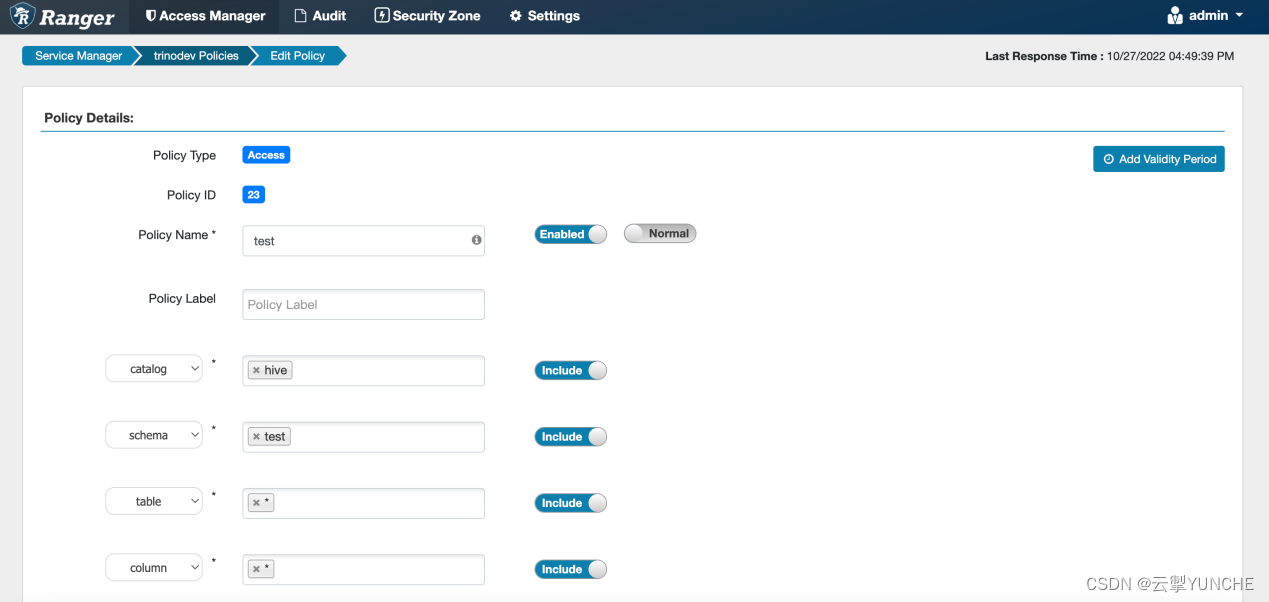
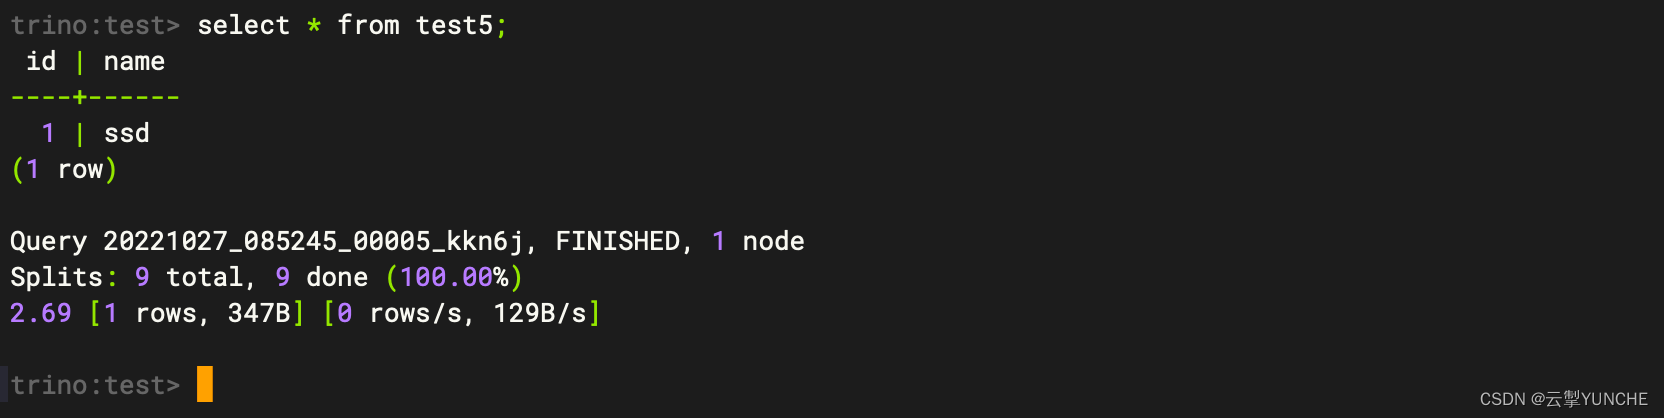
进行验证
trino-cli --server hd1.dtstack.com:18080 --catalog=hive --schema=test --user test
更多技术信息请查看云掣官网https://yunche.pro/?t=yrgw -
相关阅读:
JNPF3.4.5大版本正式上线啦!
DeFi 前景展望:概览主流 DeFi 协议二季度进展
Elasticsearch 入门
Cglib
双轴晶体中的锥形折射
迪士尼FAMA认证作用及取得FAMA注意事项
最短路径——通过Dynamo批量创建行进路线
【笔记】文献阅读[YOLOV3]-An Incremental Improvement
pre标签变成可以编辑的状态
three.js 纹理
- 原文地址:https://blog.csdn.net/weixin_43756308/article/details/136364842
